PETG first layer woes with satin sheet
Hello. I've been trying to dial in PETG for the last few weeks and I'm very frustrated working with the satin sheet.
## Problem
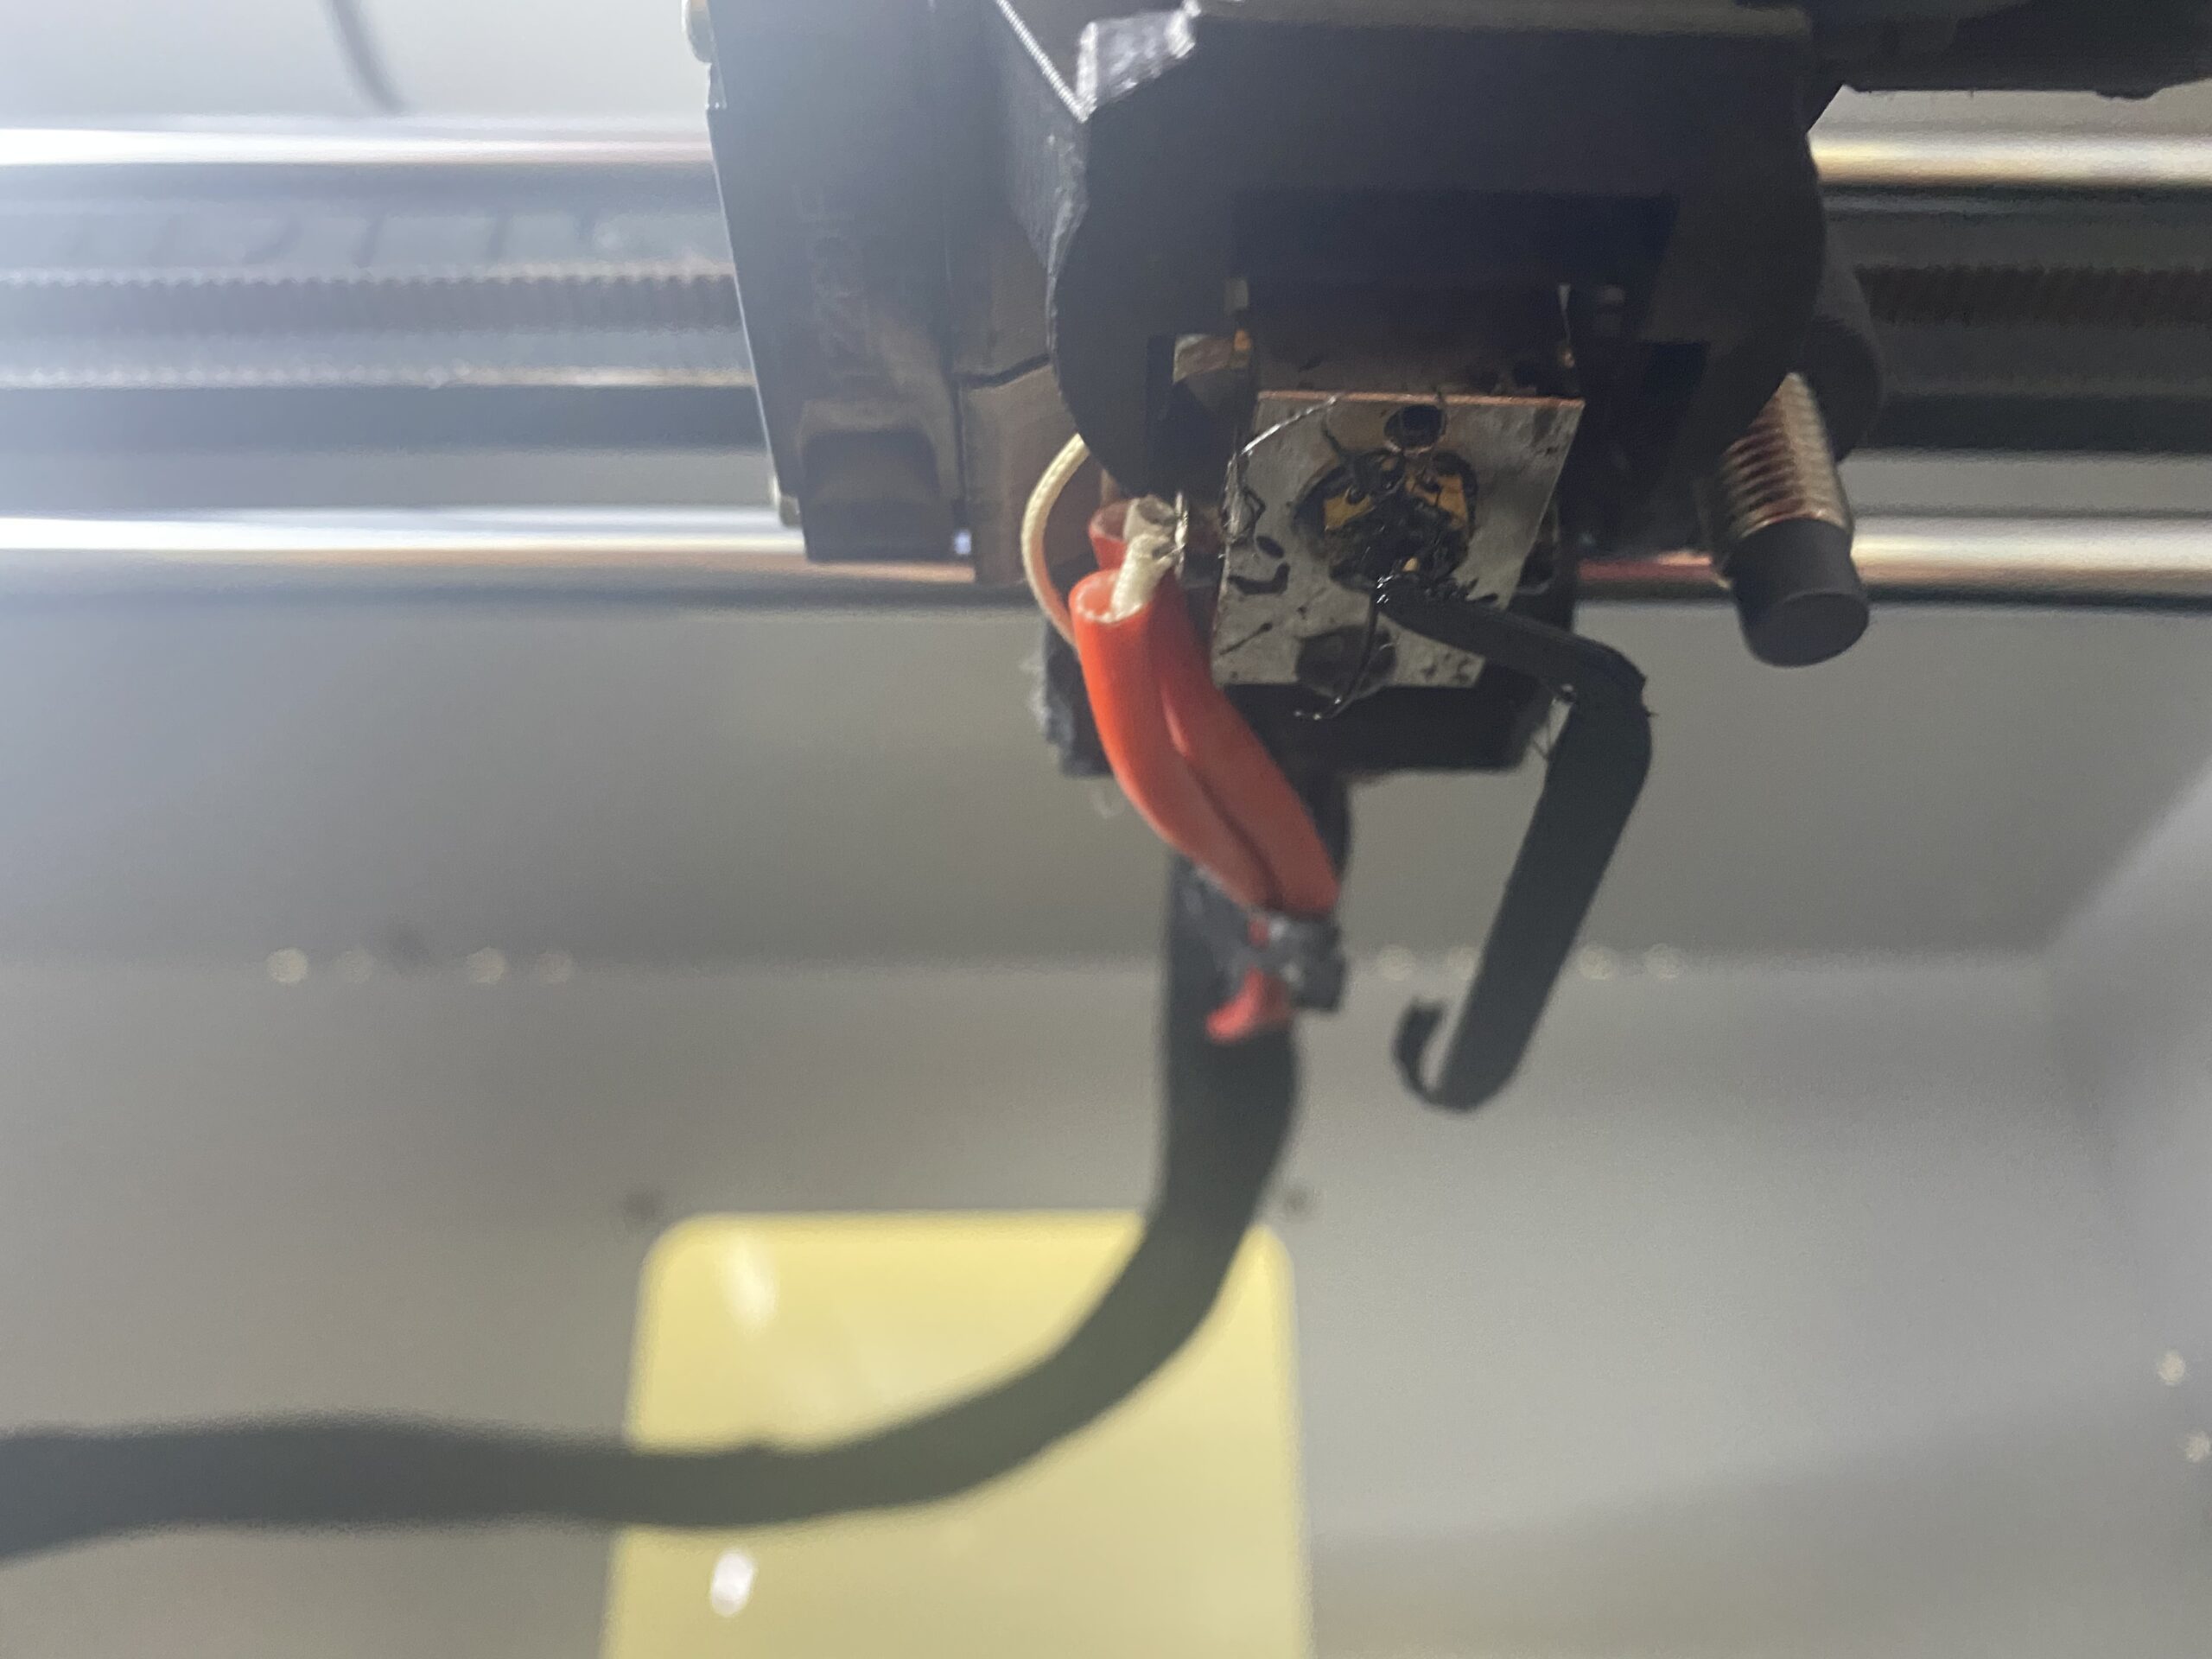
If I put the nozzle so low that it really adheres to the first layer then it actually drags on other filament a little which picks up a glob of PETG and that either causes major ugly stringing or in the worst case scenario picks up a part of my first layer causing a runaway failure.
If I put the nozzle higher so it doesn't drag, then it seems adhesion is so weak that any extra filament ooze that I don't catch will adhere to the a piece and end up sticking to a line that was just laid down and picking it up, also causing a runaway failure. Even moving it up by 0.25 or 0.50 can cause my initial skirt to not stick to the bed.
## Things I've tried
I've calibrated my Z multiple times, bought a torque wrench to ensure my nozzle is tightened correctly after replacement. I did the nylock mod to go from 0.4mm variance to 0.12mm variance on the bed but still have the same core issue.
I've cleaned the satin sheet with soap and water. I spray with IP alcohol and wipe before every print. I've played with adjusting bed temp higher on first layer. After every print I raise my Z axis and clean my nozzle and heater block with brass brush and qtips dipped in IPA.
It just seems like unless I have the Z absolutely perfect (can't be wrong one direction or the other) and I catch any nozzle leakage during warmup then my print will fail on the first layer.
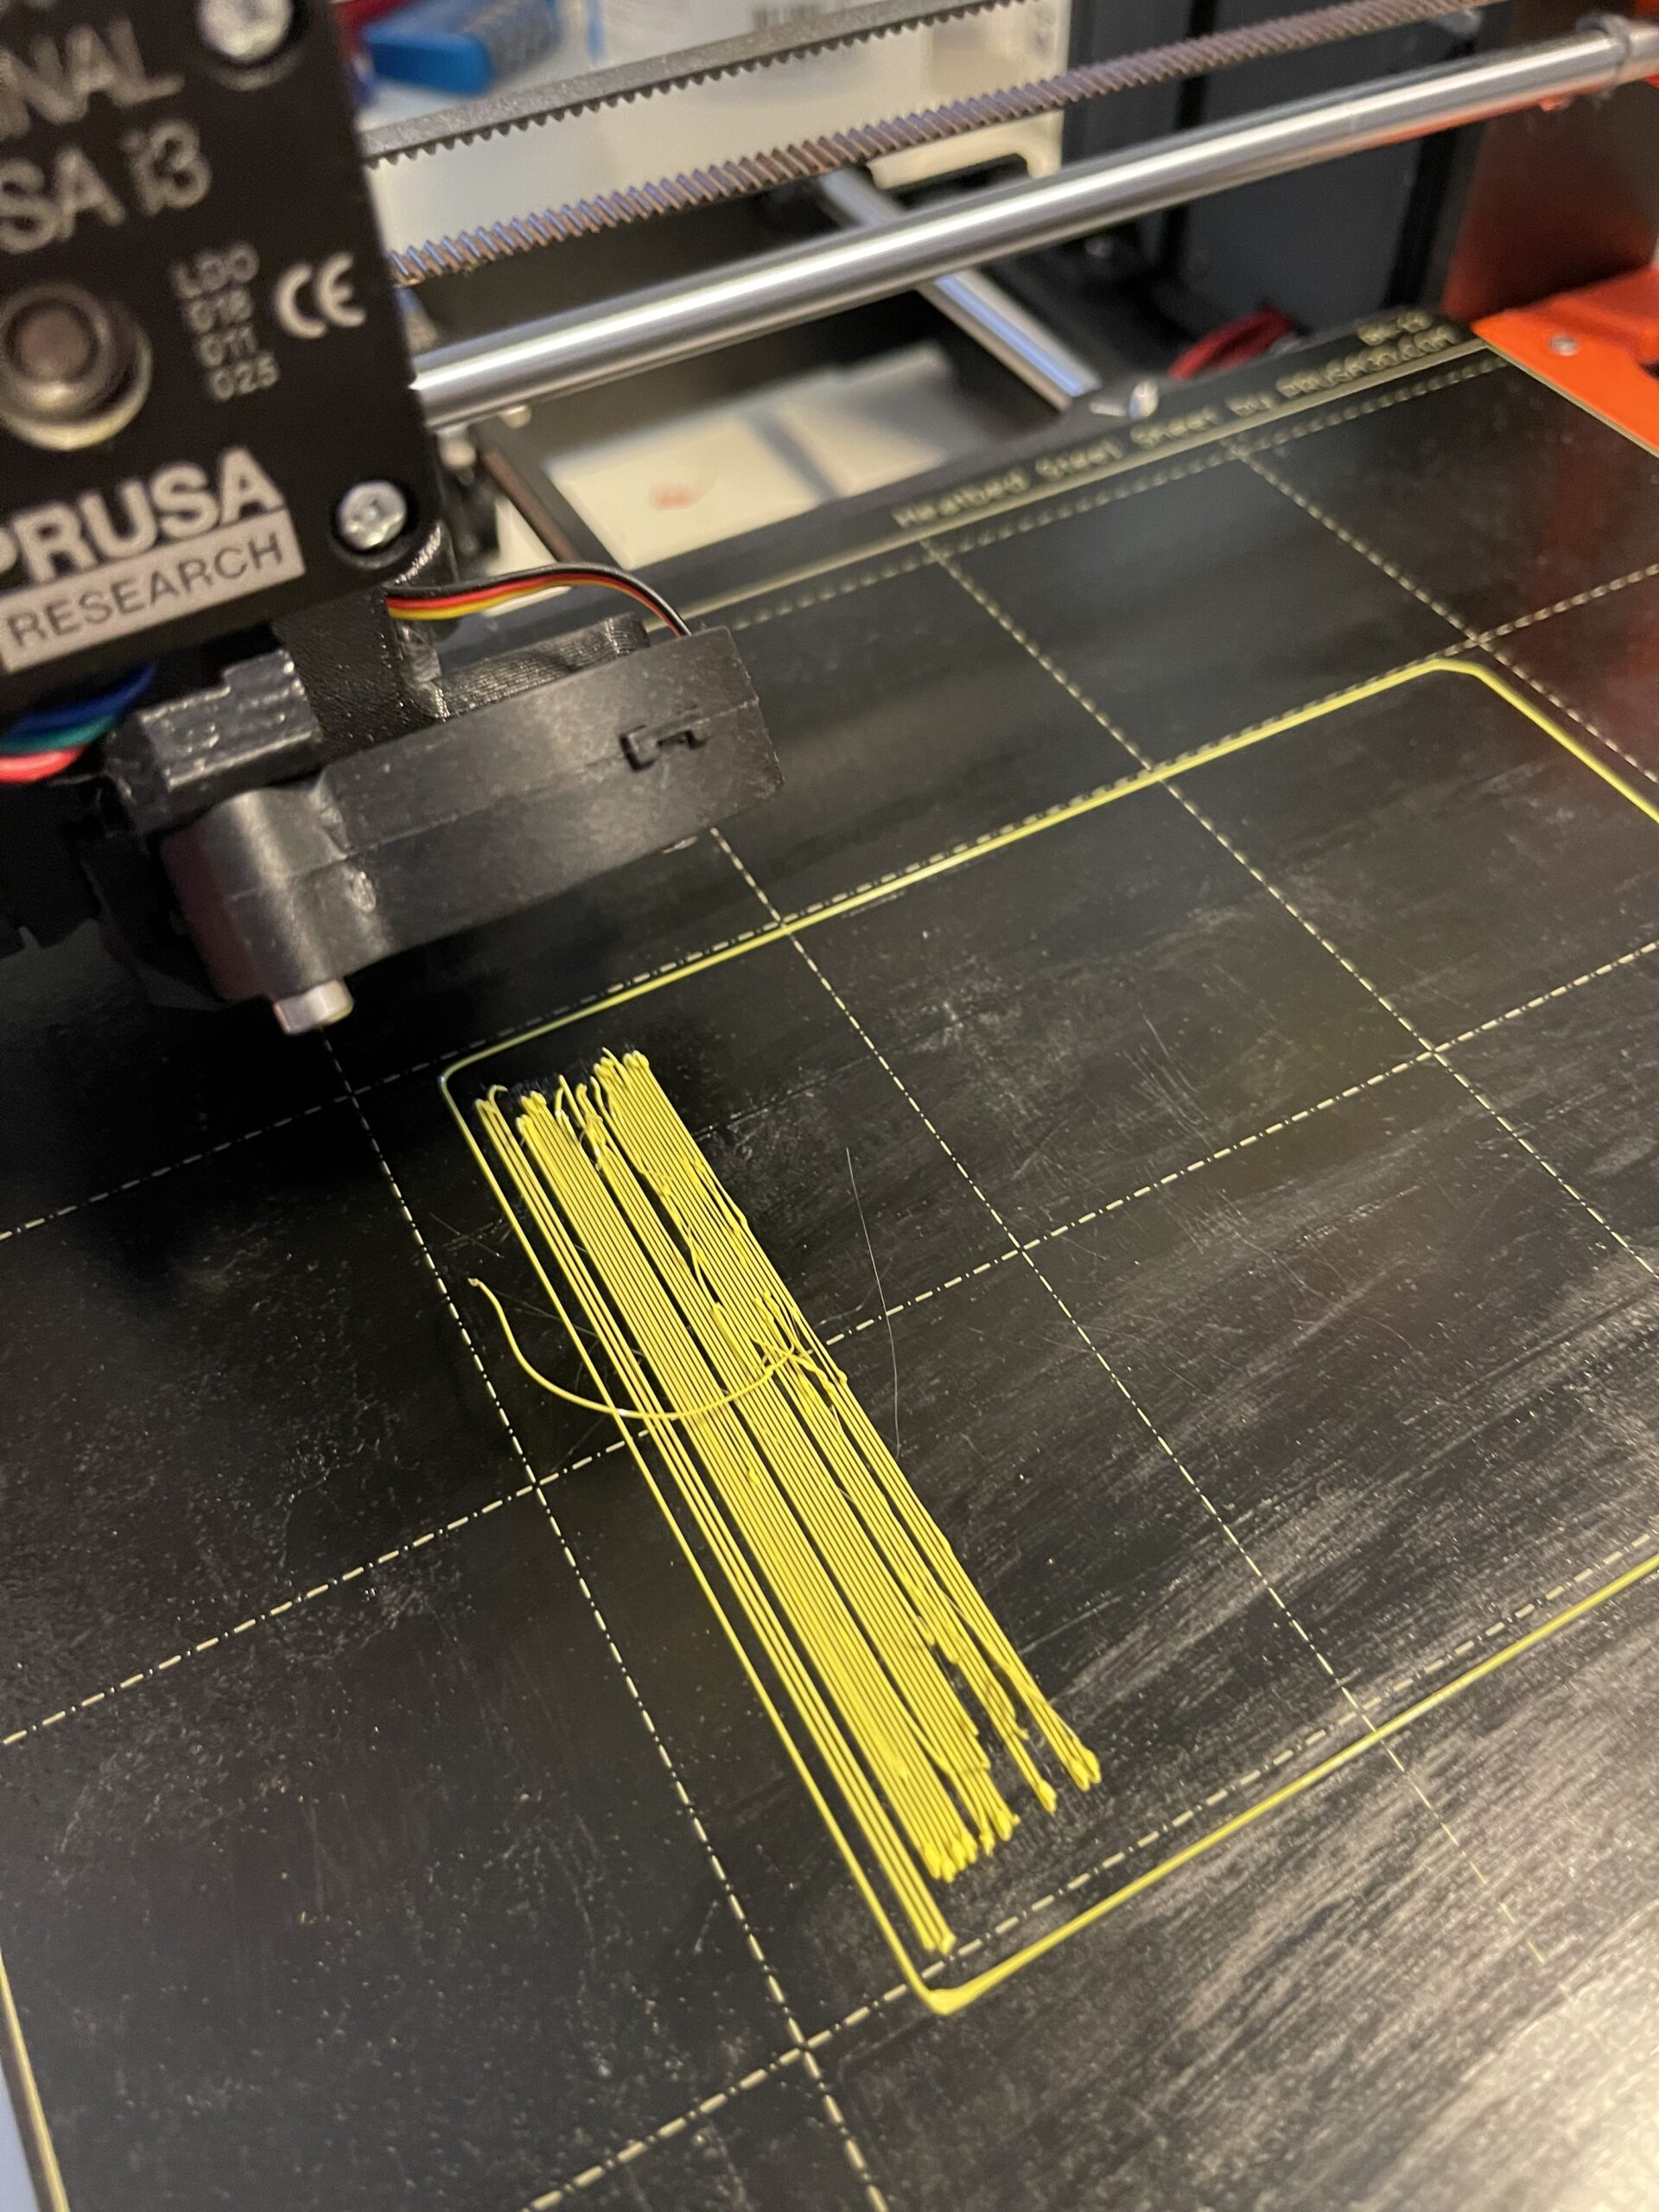
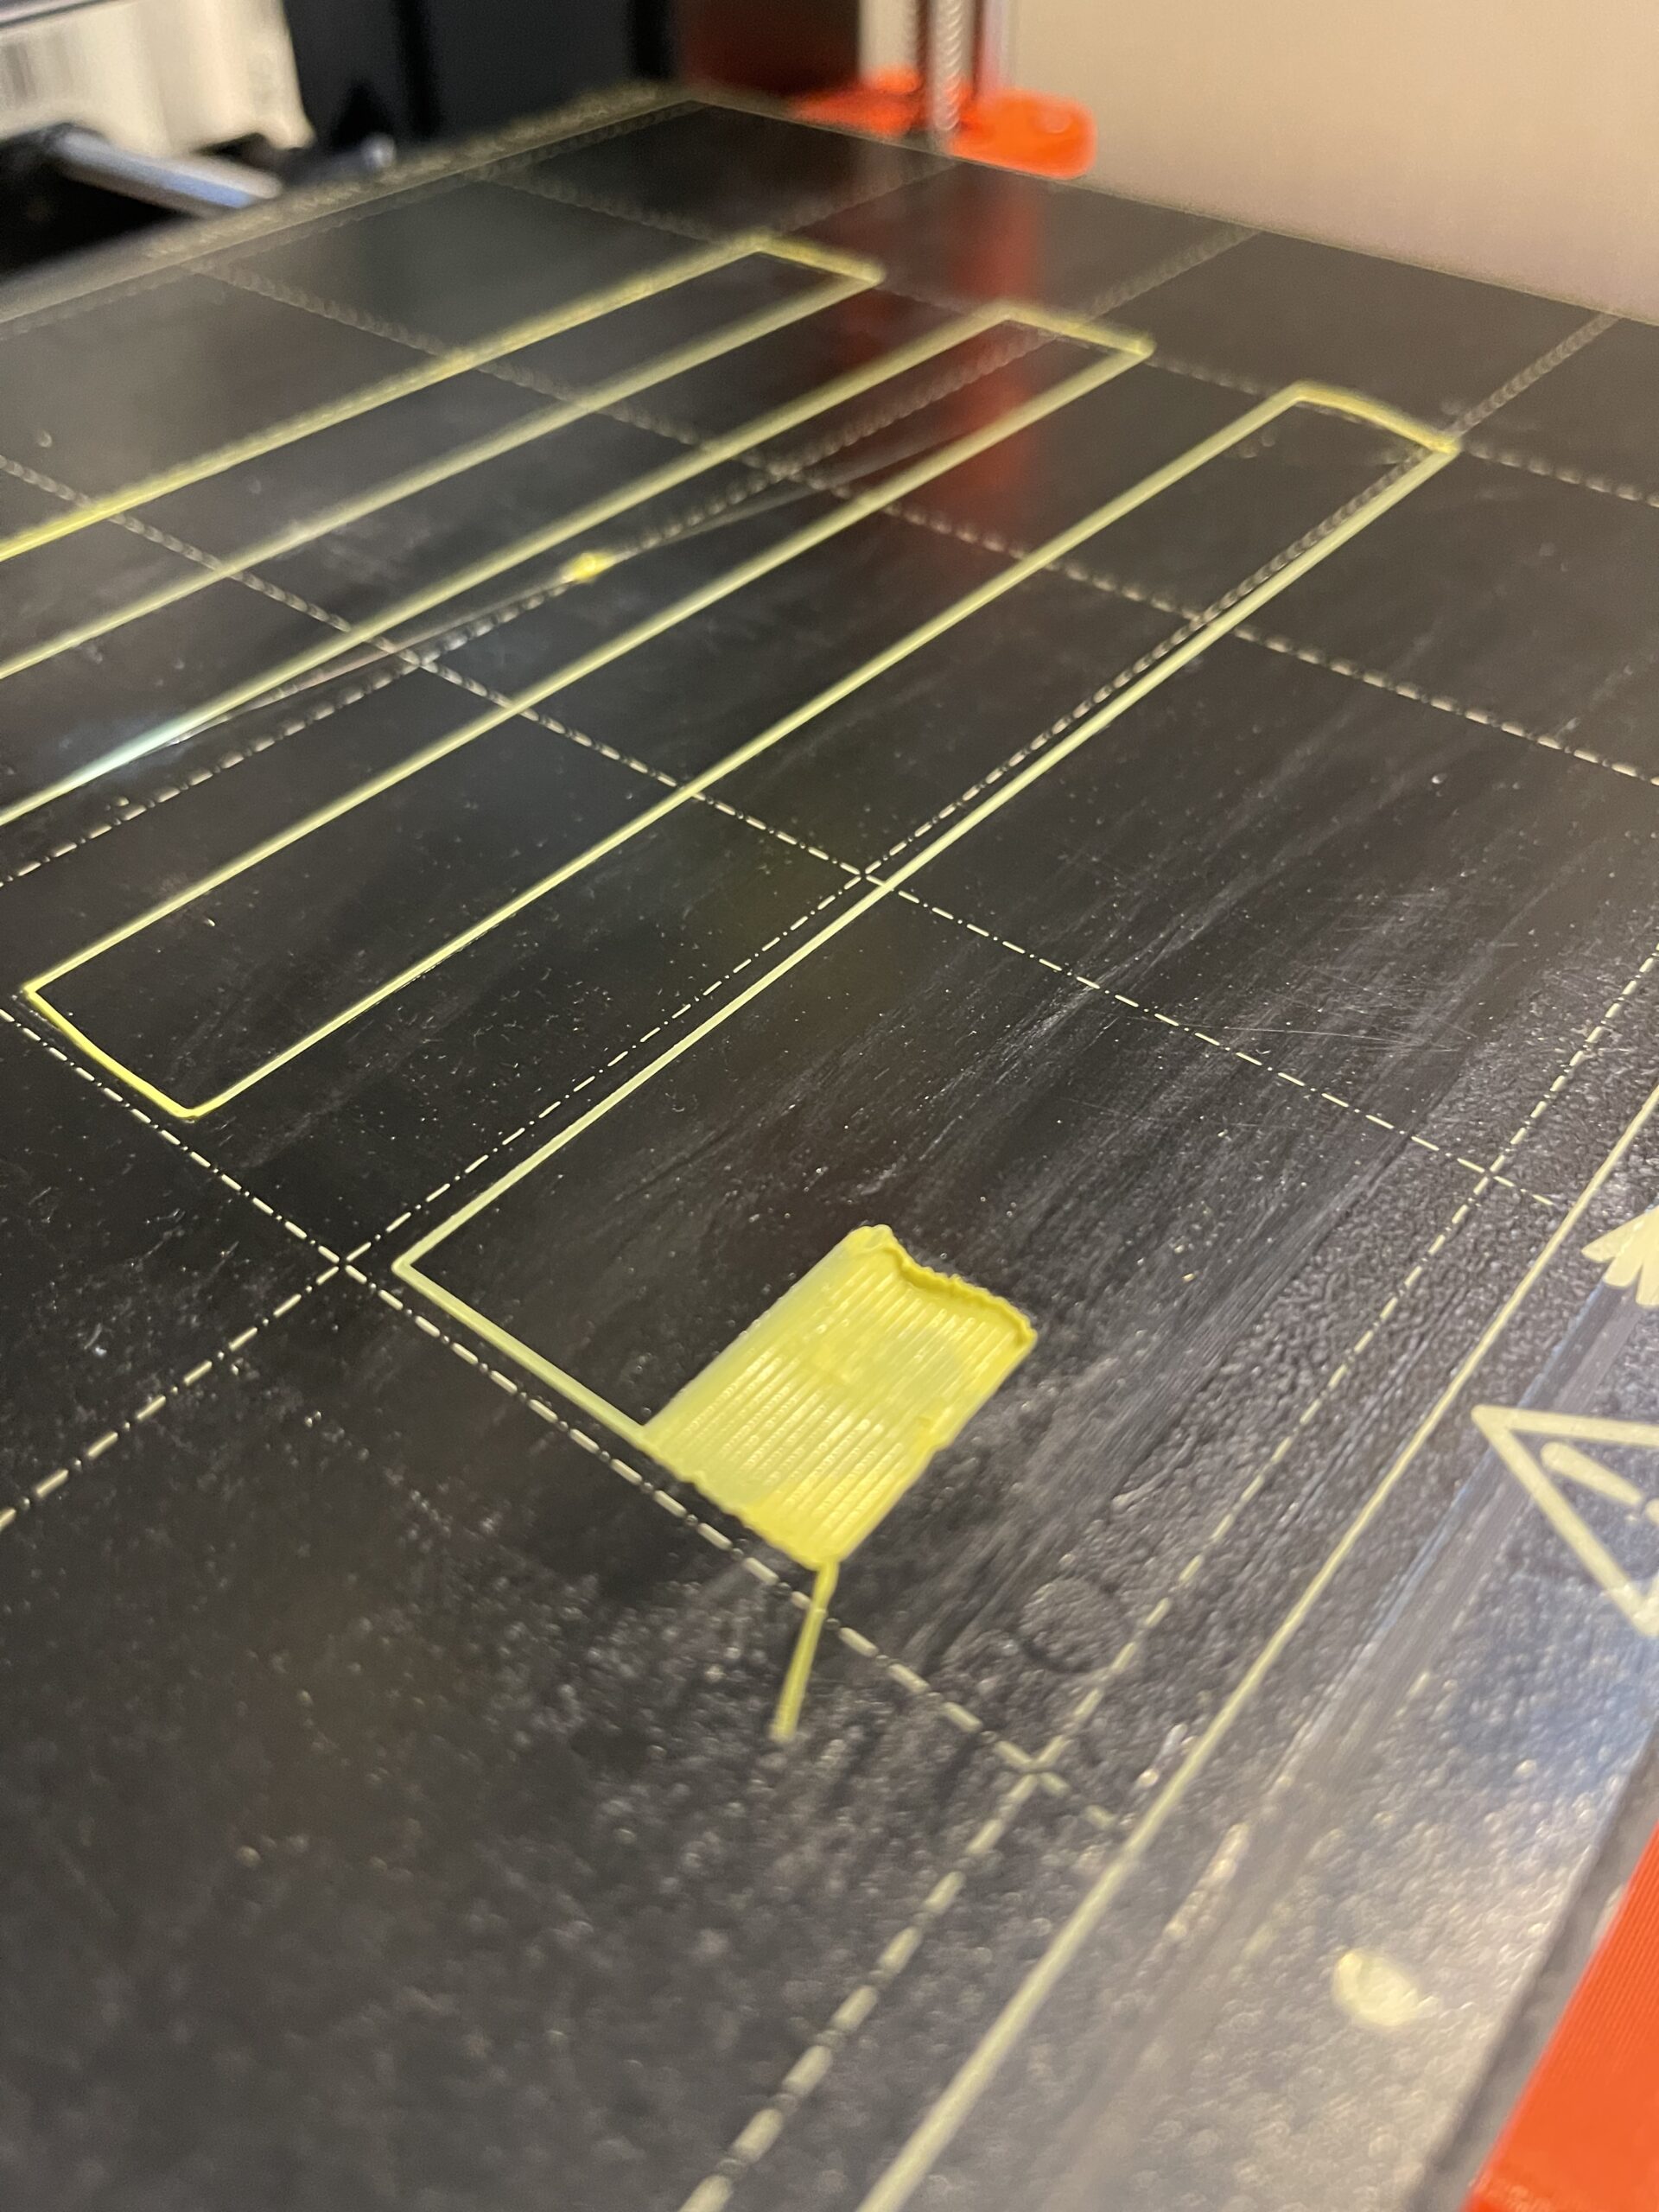
I've attached a recent print failure picture, trying to print this cord wrap on its side with no brim https://www.printables.com/model/178219-cord-wrap-for-kitchenaid-stand-mixer/files. It went fine for a bit but I didn't catch all the nozzle warmup leakage. Eventually the strand detached from the nozzle, but was later picked back up in a different position, it then raked across part of the first layer and picked the whole thing up. Thankfully I was watching it and canceled before the blob got too bad:
## Questions
Is it supposed to be this hard to print PETG first layer? Is anyone having success with the satin sheet and PETG first layers? Any tips? Is there something else to try?
RE: PETG first layer woes with satin sheet
I use the 'Life Adjust 'Z' My Way process
https://forum.prusa3d.com/forum/original-prusa-i3-mk3s-mk3-assembly-and-first-prints-troubleshooting/life-adjust-z-my-way/
there are test file in a zipfile at the bottom of the first post on page 1 of the thread
and I make sure that my build plate is nice and clean.
I mostly use no name filament, so I use the Generic PETG Filament profile and about the only thing I change, is to reduce the retraction to 0.4mm from the default 0.8mm as I feel this reduces the prospect of heat creep.
To clean the heatbed I use hot water and dish soap to wash the build plate really well, in the sink then I rinse well and dry immediately with plain paper towels.
I always use a dedicated dish sponge that has never been used for anything else, and I never use cloth towels, especially not towels that have been washed and treated with conditioner. because the conditioner can act as a release agent.
Keep your fingers off the build plate surface, as finger prints can lead to poor adhesion. 
If you consider printing PETG on the smooth PEI sheet, please be aware that It may bond too well, and be difficult to remove.
Prusa recommend using a barrier agent to reduce adhesion on Smooth PEI,
Options include
Gluestick (Some folk apply the gluestick and smooth it across the build plate with an Isopropyl Alcohol soaked paper towel) or
Windex (Window cleaner) Wiped across the build plate and allowed to dry. or
Talcum powder, dusted on the build plate and wiped across with a paper towel, with all loose powder wiped off the build plate, or wiping across the build plate with skin grease finger prints act as a release agent, if you run out of finger grease, you can wipe your hands on other body parts and transfer the grease tot he build plate... It sounds a bit Gross... but you always have access to skin grease, whilst the other materials may not be easily to hand...
IF you get a print stuck too well to the build plate, dribble a little IPA, around the base of the model, on the build plate, let it sit for a while, then gently try flexing the build plate again... this usually causes prints to pop off. if this doesn't work, try popping the build plate and model, in the freezer for a couple of minutes
regards Joan
Or
I try to make safe suggestions,You should understand the context and ensure you are happy that they are safe before attempting to apply my suggestions, what you do, is YOUR responsibility.Location Halifax UK
RE:
I had issues when I first started using my Rough sheet for PETG.. but now PETG is my favourite and most consistent filament. As stated by a previous poster, at least on my rough sheet, there is some type of packing film that covered it. I had to wash with water and a sponge. I resisted using the more abrasive side (dark green) but eventually I used a very mild scouring of this side with lots of soap. This cured my bed adhesion problems. My "newbie" problems were all Z height. So that is the first thing to nail. But I also found that varying the bed temp and nozzle temp on the first layer can help bed adhesion as well. I've used Prusa, EryOne and Polymaker PETG and all work amazing on my rough sheet, so I'd expect them to work really well on the satin sheet. Truly, once the sheet cools my parts just fall off. I have all kinds of dings on my smooth sheet.. but my rough is pristine after a month of pretty regular PETG printing. If you are using the smooth sheet, I found that glue stick (one very thin coating.. resist using too much) was the best solution. I never found windex worked for me. And I'm sure you are aware that all beds have different thicknesses so you need different Z's for every type of sheet.. which is selectable in the LCD menu.
RE: PETG first layer woes with satin sheet
Well, the OP said he's cleaning the sheet with soap and hot water, is using IPA, and has done repeated Live Z calibration. Assuming that's good, looks like he's covered the basics. Like others, I usually don't see any issues with PETG on satin sheets (which are used for 99% of what I print these days), and the Generic PETG profile works for most brands I use.
However, I found PETG to be much less forgiving with certain shapes. For example, straight lines and corners no problem, but getting small holes or tiny features to print nicely in the first layer can be a real challenge. Sometimes I need to slow prints down quite a bit beyond the default first later speed for the first layer, and—yes, heresy—I use Layerneer bed weld if needed to get that extra bit of adhesion.
Formerly known on this forum as @fuchsr -- https://foxrun3d.com/
RE: PETG first layer woes with satin sheet
I had also washed lightly and used ipa. Only when I washed a bit more vigorously did the sheet work. However I caution using the abrasive side of the dish sponge. Use that side quite delicately.
RE: PETG first layer woes with satin sheet
Thanks all for the replies! I posted this early yesterday and it got delayed in moderation and I wasn't able to get back until now.
Thanks. That's similar to what I do. Maybe it's helpful if I pick a bright color and attach a picture next time if I'm still having layer adhesion issues. With PLA it was very forgiving. With PETG I put down a model that just about takes up the whole bed and tweak for awhile 10-20 min at least. Never had these issues with PLA.
> I always use a dedicated dish sponge
Do you know if that applies to satin sheets as well? I've been using this one for a good number of hours already. One side of my sheet isn't great so maybe I could try on that side to see if there's a noticeable impact. It's something I've not tried so it's worth giving it a shot.
> However I caution using the abrasive side of the dish sponge. Use that side quite delicately.
Maybe wash vigorously first and then if it doesn't help try the green side with caution (and only on one side).
> I found PETG to be much less forgiving with certain shapes.
I did have the realization that a lot of the models I've been trying to print recently I've been using fine detail 0.1mm or so layer height. Maybe that's a factor as I read the thicker the line the more adhesion there is between layers so it would be reasonable to assume the same for first layer as well. Variable layer height might allow me to do a thicker first layer and thinner subsequent ones as something else to try
## Different nozzle?
I was also wondering if anyone has tried the nickle-coated copper nozzle (or any different nozzle). If part of the problem is that stuff globs to the nozzle, having a more "slippery" nozzle could help possibly? Also maybe a silicone sock might help keep some off? I've not tried either yet.
## PETG stringing
Off-topic from my original focused question, but since several have said they prefer printing with PETG. I get stringing and clumping pretty bad even on models with no overhang. I'm hoping this might partially be due to my first layer issues (if it's pulling in globs it might cause knock-on effects).
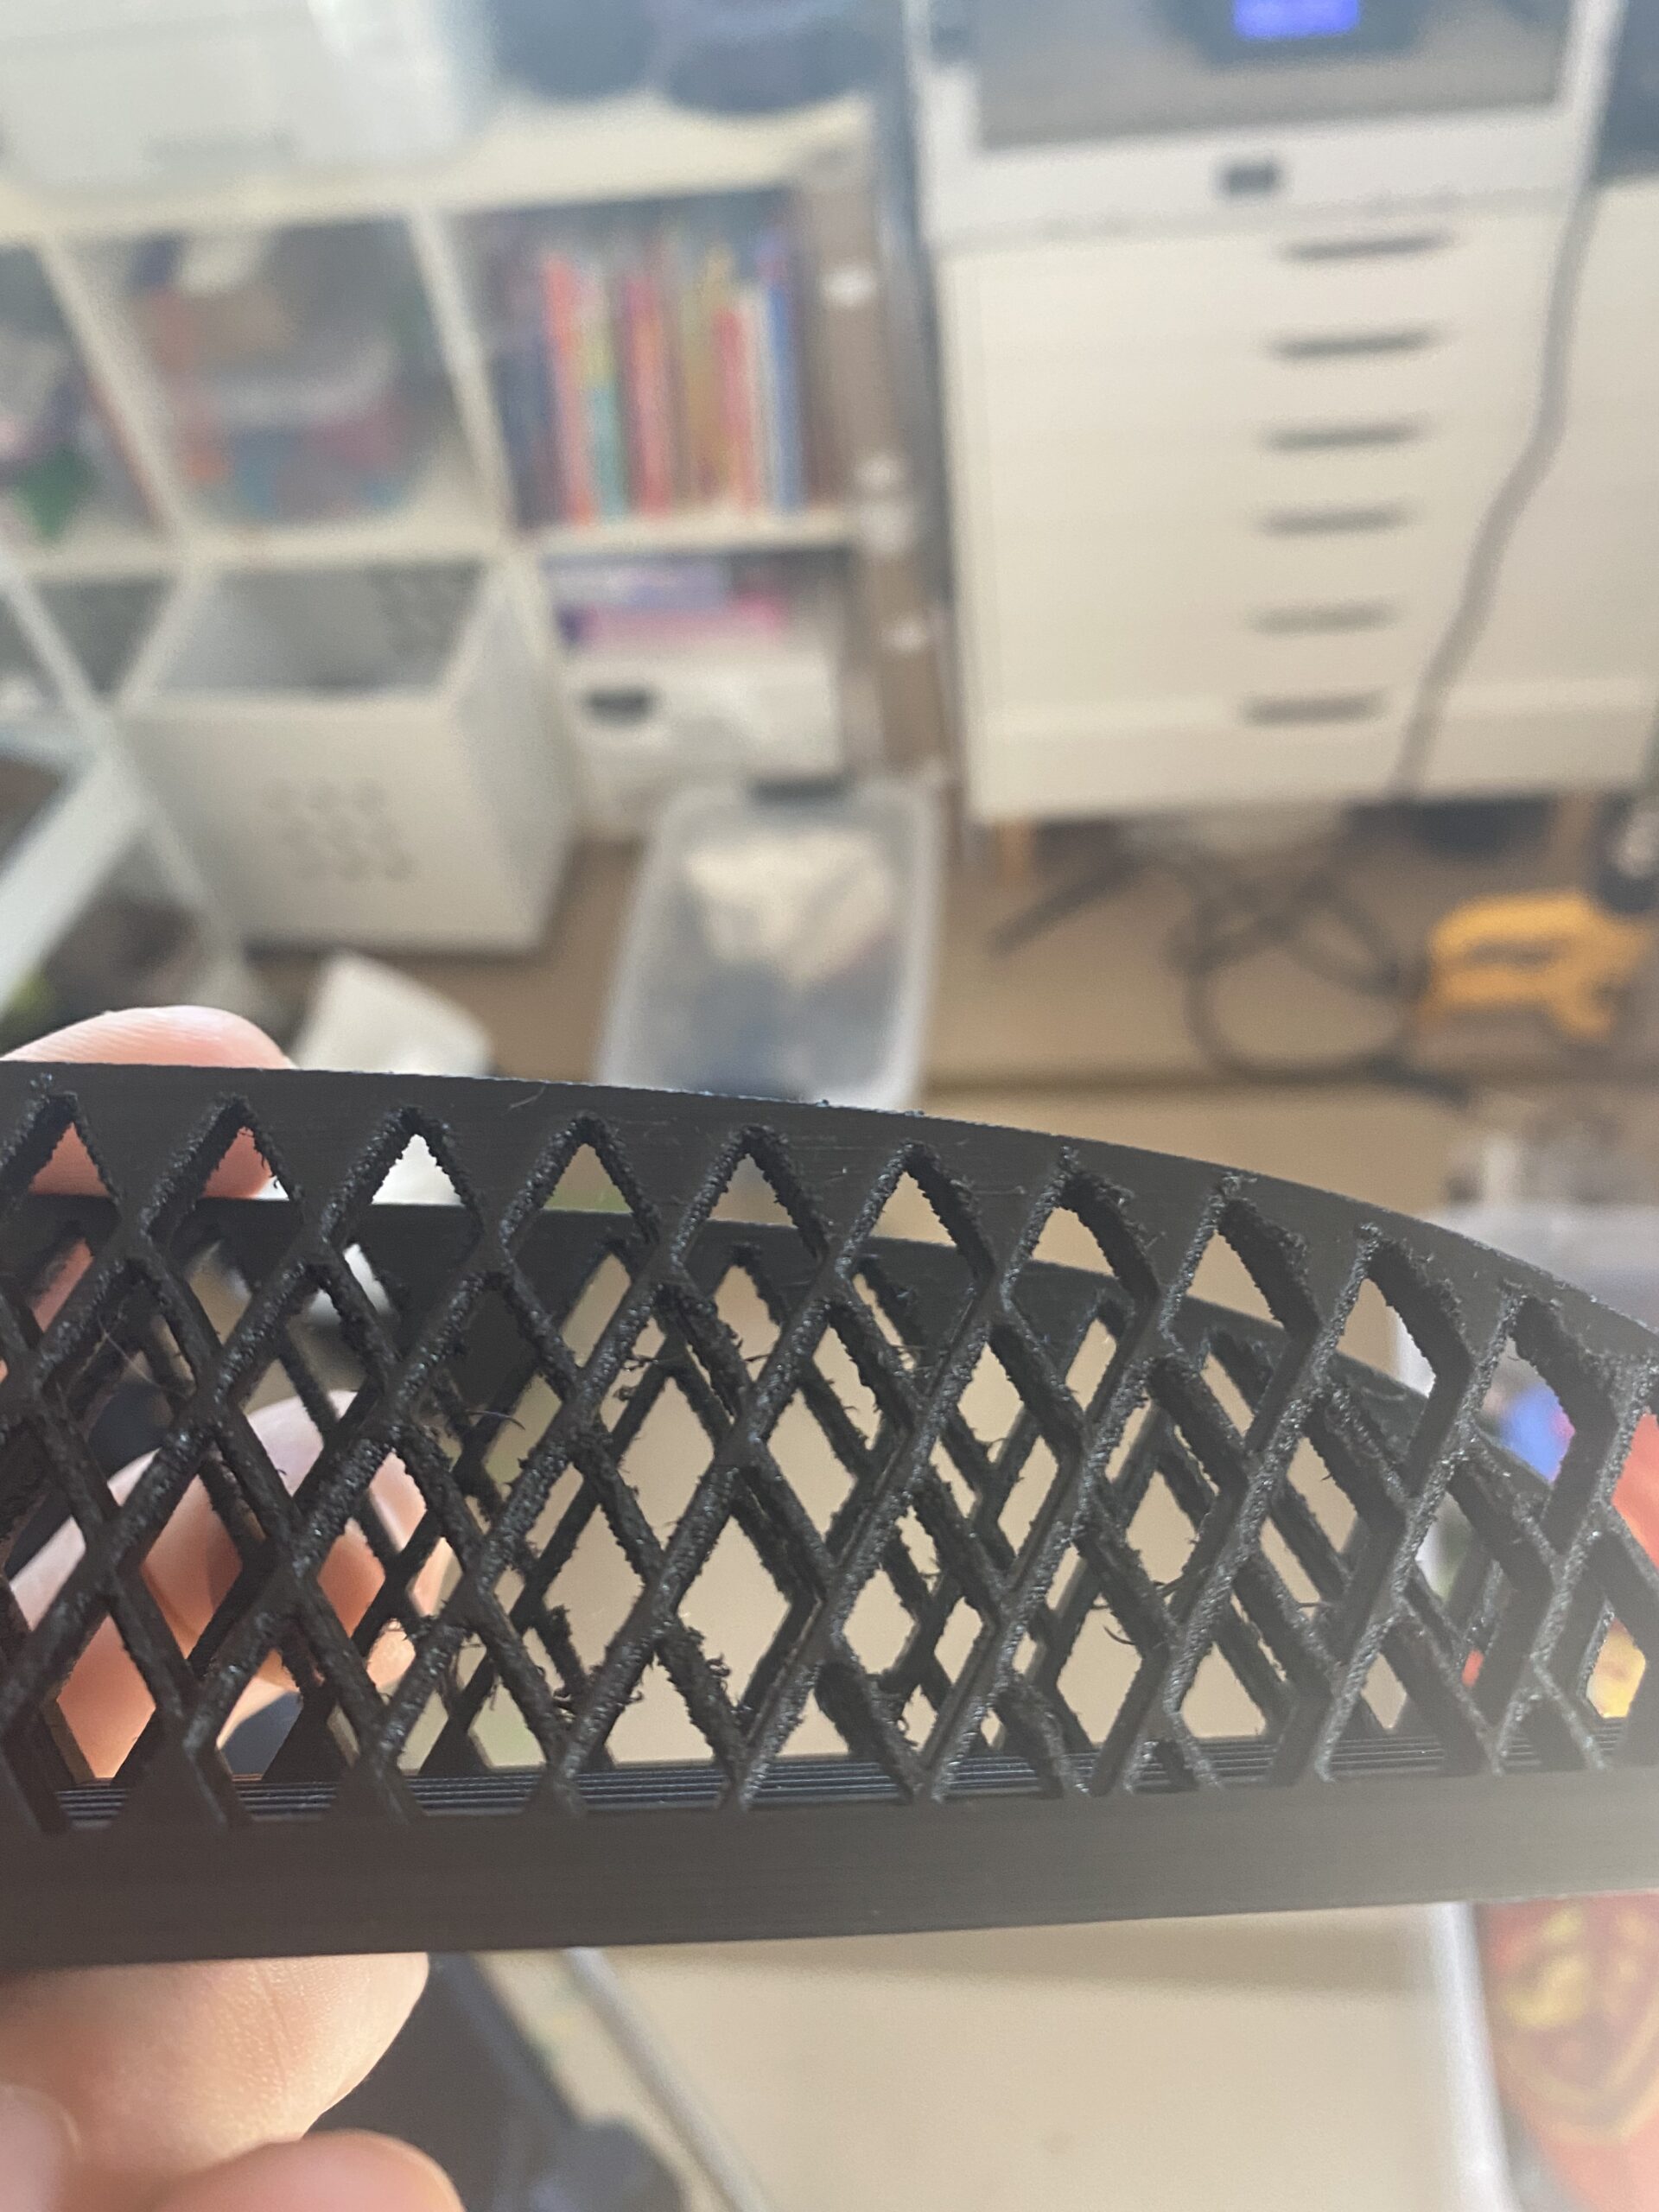
Do you find PETG performs okay for you or similar to PLA? Or were there tweaks or adjustments? I've done temp towers and changed my defaults for my specific filament, but still end up with some train wrecks like this one (note this photo is AFTER cleaning with some flush cuts). I can also make a new post if that's preferable.
RE: PETG first layer woes with satin sheet
Quite a bit to unpack!
With PETG I put down a model that just about takes up the whole bed and tweak for awhile 10-20 min at least. Never had these issues with PLA.
Maybe I'm misreading this but you shouldn't have to print a model that takes up the whole bed to do Live Z calibration. I usually use this https://www.prusaprinters.org/prints/105404 , which takes about 8 minutes and lets me check 8 different settings. Of course, one can do a larger model to check for overall skew in the bed, I for one just never had a reason to do so.
> I always use a dedicated dish sponge
Do you know if that applies to satin sheets as well?
Type of sheet makes no difference. A dedicated sponge free of grease is a good thing. I do reuse the sponge though many times.
Maybe wash vigorously first and then if it doesn't help try the green side with caution (and only on one side).
I guess different sponge brands use different materials for the "abrasive" side. I have never seen any adverse effects of using that side but I can easily accept that some brands may use materials that are not good for the PEI sheet.
I've been using fine detail 0.1mm or so layer height. Maybe that's a factor as I read the thicker the line the more adhesion there is between layers so it would be reasonable to assume the same for first layer as well. Variable layer height might allow me to do a thicker first layer and thinner subsequent ones as something else to try
With a 0.4mm nozzle I use the same first layer height (0.2mm) for any layer height. You don't need the Variable Layer Height function to set a different first lay height, you can do that from Print Settings>Layers and perimeters.
## Different nozzle?
I was also wondering if anyone has tried the nickle-coated copper nozzle (or any different nozzle). If part of the problem is that stuff globs to the nozzle, having a more "slippery" nozzle could help possibly? Also maybe a silicone sock might help keep some off? I've not tried either yet.
Before I switched to tungsten carbide nozzles, I used nickel-coated copper nozzles (in fact, I still do, for nozzles sizes I don't have in tungsten carbide). They work great and I do believe they work a bit better with PETG but the difference is not earth-shattering. Nothing beats keeping a clean nozzle and heater block by copious use of a brass brush and by picking of oozing filament with tweezers or needle-nose pliers.
PETG stringing
Generalizing grossly, I do find PETG to be much more likely to string than PLA (or ASA). For one, it's more likely to absorb moisture from the air than PLA, so if you see excessive stringing, try drying the filament first. But then again, different brands—or even materials from the same manufacturer— may perform quite differently. I keep pointing to my experience with Prusament. Prusament Orange PETG I found to be one of the easiest filaments to print. Prusament Neon Green PETG on the other hand has been a nightmare in my hands. I printed a lot of it last summer. Air-conditioned home, but not in the basement where my mini print farm is. Fresh out of the dryer it printed great; by the end of the day, it was all strings and globs.
I just accept that PETG is more likely than not to leave some wisps of filament. Nothing the trusted heat gun can't take care of.
Formerly known on this forum as @fuchsr -- https://foxrun3d.com/
That black PET model (bridge?) is showing typical symptoms of damp filament.
Cheerio,
RE: PETG first layer woes with satin sheet
Thanks all. It’s pretty fresh out of the package. Just got it about a week ago and I live in Texas. My humidity gauge shows 50% right now. So I hadn’t considered damp filament. But given you can tell a difference after a day it could certainly be a factor. Thanks for the detailed response!
You use that sunlu box I see everywhere or have a different way to dry?
RE: PETG first layer woes with satin sheet
I use the PrintDry dryer. There was a thread here in the forums a couple of days ago in which @swiss_cheese shared his less than enthusiastic opinion about the Sunlu boxes. I haven't used them myself but I trust my esteemed colleague's opinion, plus I am very happy with the PrintDry boxes, so the PrintDry would be my recommendation. And the Neon Green example I mentioned, it didn't print properly without drying fresh out of the plastic bag (I used three spools in total, and they all behaved that way).
Formerly known on this forum as @fuchsr -- https://foxrun3d.com/
RE:
Funny thing, I have not printed PETG in 2 years as I prefer ASA. Couple weeks back I tried to print a printer part with some old Prusa orange PETG and it would not stick to the darn satin sheet I use since six months for most of my prints. Nothing helped, no glue stick, no 3DLac, nothing, and I am one of those known to be scrubbing the sheets vigurously with soap.... I keep my filament in ziploc bags with a silica pack, no dryer or other advanced hyped stuff, never with any problem. Finally I took out my 3 year old, heavily worn smooth sheet and everything worked out great on first run. Mental note made to myself - no satin sheet for PETG
Just my 2 cents,
Chris
I try to give answers to the best of my ability, but I am not a 3D printing pro by any means, and anything you do you do at your own risk. BTW: I have no food for…
RE: PETG first layer woes with satin sheet
no satin sheet for PETG
Sigh… Great example of why 3D printing has not — and IMHO will not anytime soon — become a technology ready for the broad consumer market. For that it's grounded in engineering, it's still just too fickle to work equally well in everyone's hands. This sheet vs PETG discussion is Exhibit A: What works great for some (e.g., me), doesn't work for others (e.g., Chris). Why? No idea. Maybe some special incantations 🙂? And the Prusa line is on the upper end of product quality and sophistication. I can only image what it must feel like for someone reading about the wonders of 3D printing and then buying a $200 machine to find out that it only works on Tuesdays, with the wind blowing from the East…
Formerly known on this forum as @fuchsr -- https://foxrun3d.com/
RE:
Yes.. I’m a retired electrical engineer who just recently purchased the Prusa MK3+ in kit form and I agree that 3D printing is not “plug and play”. I was most surprised in learning that to get the most quality from prints you really need to know most of the slicer settings, and therefore, some of the physics of the setup. From infil bleeding through, to preventing stringing by traveling inside the model (which PSlicer doesn’t really do), to tweaking the Z and temp settings of the bed and nozzle.. there is a lot for a new user to take in. The best move I made was to take a friends advice who said.. “don’t think about it.. order a Prusa MK3”.. To get this mainstream, you really don’t want to have to mod your setup. My only real criticism about the Prusa is that they really need a better board running the system; capable of wireless printing and monitoring.. a mini-OctoPrint with just the basic functions.. Because printing wirelessly from the slicer is what you want.. you don’t want to always shuttle SD cards. The only and best mod I made was adding a PI4 with OctoPI. Even at the high cost of the PI4, it is well, well worth the cost. It is just not integrated so power fail and print statistics don’t work when you work with both SD card and OctoPrint.
But there should be a way to get your satin sheet to work well for PETG, I would think, cause they’ve sold a ton of them, and they have worked fine for others.. Likely there is something in your process that is not working. If you can find a local expert and bring them in, you likely could find it fast. I almost wonder if your Z is off for PETG.. I know it works for PLA, but maybe the PLA is just ‘stickier’ for some reason. (My Rough is 0.3mm thinner than the smooth.. so dialing that in took some time).
My rough sheet is unbelieveably good with PETG.. Far better than the smooth PEI on PLA. My variables that I played with were: Z height (the most crucial), bed temp, nozzle temp (for 1st layer) and then ensuring I got the packing film off the sheet.
RE:
Also if your PETG has been out into the air for a while… it might have absorbed quite a bit of moisture.. I don’t think that is a huge contributor to that first layer.. mostly it causes excessive stringing in my short experience. Grin.. I won’t recommend a dryer box.. but find some good reviews and get at least one for drying rolls.. then get some dry boxes to print from. A 6 hr print that is out in a humid environment will show some degradation from humidity. For the dry box, find a cereal container that is air tight.. you really want it as air tight as possible, then you can use desiccant for a few months to keep dry before needing to dry out the desiccant.
RE: PETG first layer woes with satin sheet
Hi
English isn´t my first language so bear with me.
I have sort of the same problem with the calibration except the sheet is the original one.
When it prints that first thin stringy layer that are the support layer it tends to loose from the sheet and also at the ends it sticks up a little which causes the nozzle to stick to it and drag the string with it (se picture)
I use an adhesive called Primafix from Prima (Prima)
So now I thought that I should do a first layer calibration and looking at the Prusa video (Prusa cal.)I started the procedure.
According to the video Z should be around -1, so when it started to print I adjusted the Z down (with live adjust) towards -1 but I noticed that it almost hit the sheet at around -0,700 so I stopped and let it finish the print and that square at the end was very shredded so according to the handbook and video it means that itś to low.
So it tried again with Z at around -0,600 and it looks ok except for that the ends have some sort of blobs or globs (see picture)
Now I tried -0,502 and I was satified, the blobs/globs were almost gone.
So now it was time to print something but as you can see in the first picture it didn´t go so well.
The question now is, what more settings can I do to mainly get rid of those blobs/globs that will get stuck in the nozzle and ruin the print.
Itś specially that first support layer that is the problem, so if it just get through that itś often no problem with the rest of the print.
I realize that I basically ask the same question as the person that started this thread but Ím really lost and annoyed over this problem so Íll take all the help I can get.
I read in another thread that silicone socks can prevent blobbing an oozing but I really don´t know how it works
Also I agree that itś very difficult for an average Joe like myself to understand all the millions of settings so Ím grateful for this forum there people that know what they´re taking about can help you 👍
Thanks for your help in advance,
Krister
RE:
Likely you should start a new thread..
Are you using PLA or PETG?
The Z distance really takes some fine tweaking.. So -.5 and -.6 could be a big difference.. You need to tweak the Z distance during the Z calibration. You can do this by pressing and holding the LCD button while it prints the square and you can fine tune it. There are some models with just one layer squares you can print. But tweaking while printing is best.
If you are using PETG, it should be sticking TOO MUCH on a smooth sheet.. If it isn't, you have bad PETG or your sheet has a film on it. I found that if I DON"T use a glue stick, I'll ruin my smooth sheet with PETG.
Are you hearing any hissing or popping during print? If so, your filament is damp and you need to dry.
Clean your sheet with dish soap and a sponge.. really well.. hot water.. dry well.. try another Z calibration. Learn to tweak while it is printing. If using PETG, use glue stick, but a very thin coat.. So you clean the bed, then just use one swipe over an area and then you MUST let the glue dry to a dull finish.. Don't print when the glue is wet. If you are using PLA, ignore the glue stick.. just clean soap/water.
I can't tell what you are trying to print on that first pic.
Hi
English isn´t my first language so bear with me.
I have sort of the same problem with the calibration except the sheet is the original one.
When it prints that first thin stringy layer that are the support layer it tends to loose from the sheet and also at the ends it sticks up a little which causes the nozzle to stick to it and drag the string with it (se picture)
I use an adhesive called Primafix from Prima (Prima)
So now I thought that I should do a first layer calibration and looking at the Prusa video (Prusa cal.)I started the procedure.
According to the video Z should be around -1, so when it started to print I adjusted the Z down (with live adjust) towards -1 but I noticed that it almost hit the sheet at around -0,700 so I stopped and let it finish the print and that square at the end was very shredded so according to the handbook and video it means that itś to low.
So it tried again with Z at around -0,600 and it looks ok except for that the ends have some sort of blobs or globs (see picture)
Now I tried -0,502 and I was satified, the blobs/globs were almost gone.
So now it was time to print something but as you can see in the first picture it didn´t go so well.
The question now is, what more settings can I do to mainly get rid of those blobs/globs that will get stuck in the nozzle and ruin the print.
Itś specially that first support layer that is the problem, so if it just get through that itś often no problem with the rest of the print.
I realize that I basically ask the same question as the person that started this thread but Ím really lost and annoyed over this problem so Íll take all the help I can get.
I read in another thread that silicone socks can prevent blobbing an oozing but I really don´t know how it works
Also I agree that itś very difficult for an average Joe like myself to understand all the millions of settings so Ím grateful for this forum there people that know what they´re taking about can help you 👍
Thanks for your help in advance,
Krister
RE: PETG first layer woes with satin sheet
your z offset looks like it needs work. Check out that first link that was posted.
I use a giant square like this one https://www.printables.com/model/69907-first-layer-calibration-test-layer then scale it down and print. you can adjust Z values while live while it prints. It’s actually required to do it this way for larger nozzles which is when I started not using the built in calibration.
for my process: I adjust Z closer to the bed until the nozzle starts smushing filament and giving a bad result, then adjust it further from the bed until it starts leaving gaps between lines and gives a bad result. Then I move back towards the middle and dial in until the nozzle is just barely dragging on prior filament and then back it up a bit.
numbers don’t really mean anything between printers as it’s relative to your PINDA. For mine I’m at 1.3 something right now. At 1 for me it’s basically printing in the air. I start of adjusting in increments of 50 then 25 then 10 then 5.
spend the time to get this dialed in. It’s not easy but it’s worth it. Just sit and watch the square print while adjusting live z. Use a flashlight to get a really good look.
For my original thread: I just ordered a filament dryer. I got the Sunlu S2 as the printdry looks nice it’s also out of my cashflow situation right now. I’m hoping that maybe the higher temp is better than the S1 performance. But if it’s not great I can always return it.
I did a temp tower before and my best results were at 225 which seemed low so maybe it is a moisture problem. After drying I’ll do another tower and then maybe try my diamond pattern print I posted above.
RE: PETG first layer woes with satin sheet
Thanks for your help Íll will try your advices
FYI ím using PETG and I was trying to print a lid to a magic box
Thanks again
RE: PETG first layer woes with satin sheet
I also got the S2. I don't have any long term comments on the SunLu, but it did dry a PLA spool I had and stopped it from stringing.
For my original thread: I just ordered a filament dryer. I got the Sunlu S2 as the printdry looks nice it’s also out of my cashflow situation right now. I’m hoping that maybe the higher temp is better than the S1 performance. But if it’s not great I can always return it.
RE:
Yes, I have been constantly using one of those "wowlites" you can get off amazon. Any brand with the super bright LEDs really helps to scrutinize that first layer. I got it for walking my dog.. but it has now found a permanent home next to my printer.
spend the time to get this dialed in. It’s not easy but it’s worth it. Just sit and watch the square print while adjusting live z. Use a flashlight to get a really good look.