ASA Layer Seperation
First time printing ASA and I'm running into a number of issues:
Prusa Mini +, using standard ASA print parameters, 25% infil, 0.15mm, and am printing it in an IKEA table enclosure to keep the temperature up.
I'm using a smooth PEI sheet with a glue stick and bed adhesion is very good; no lifting corners.
Meterial material has been dried.
Below are the results.
Layer cracking, some stringing, and material is also quite brittle.
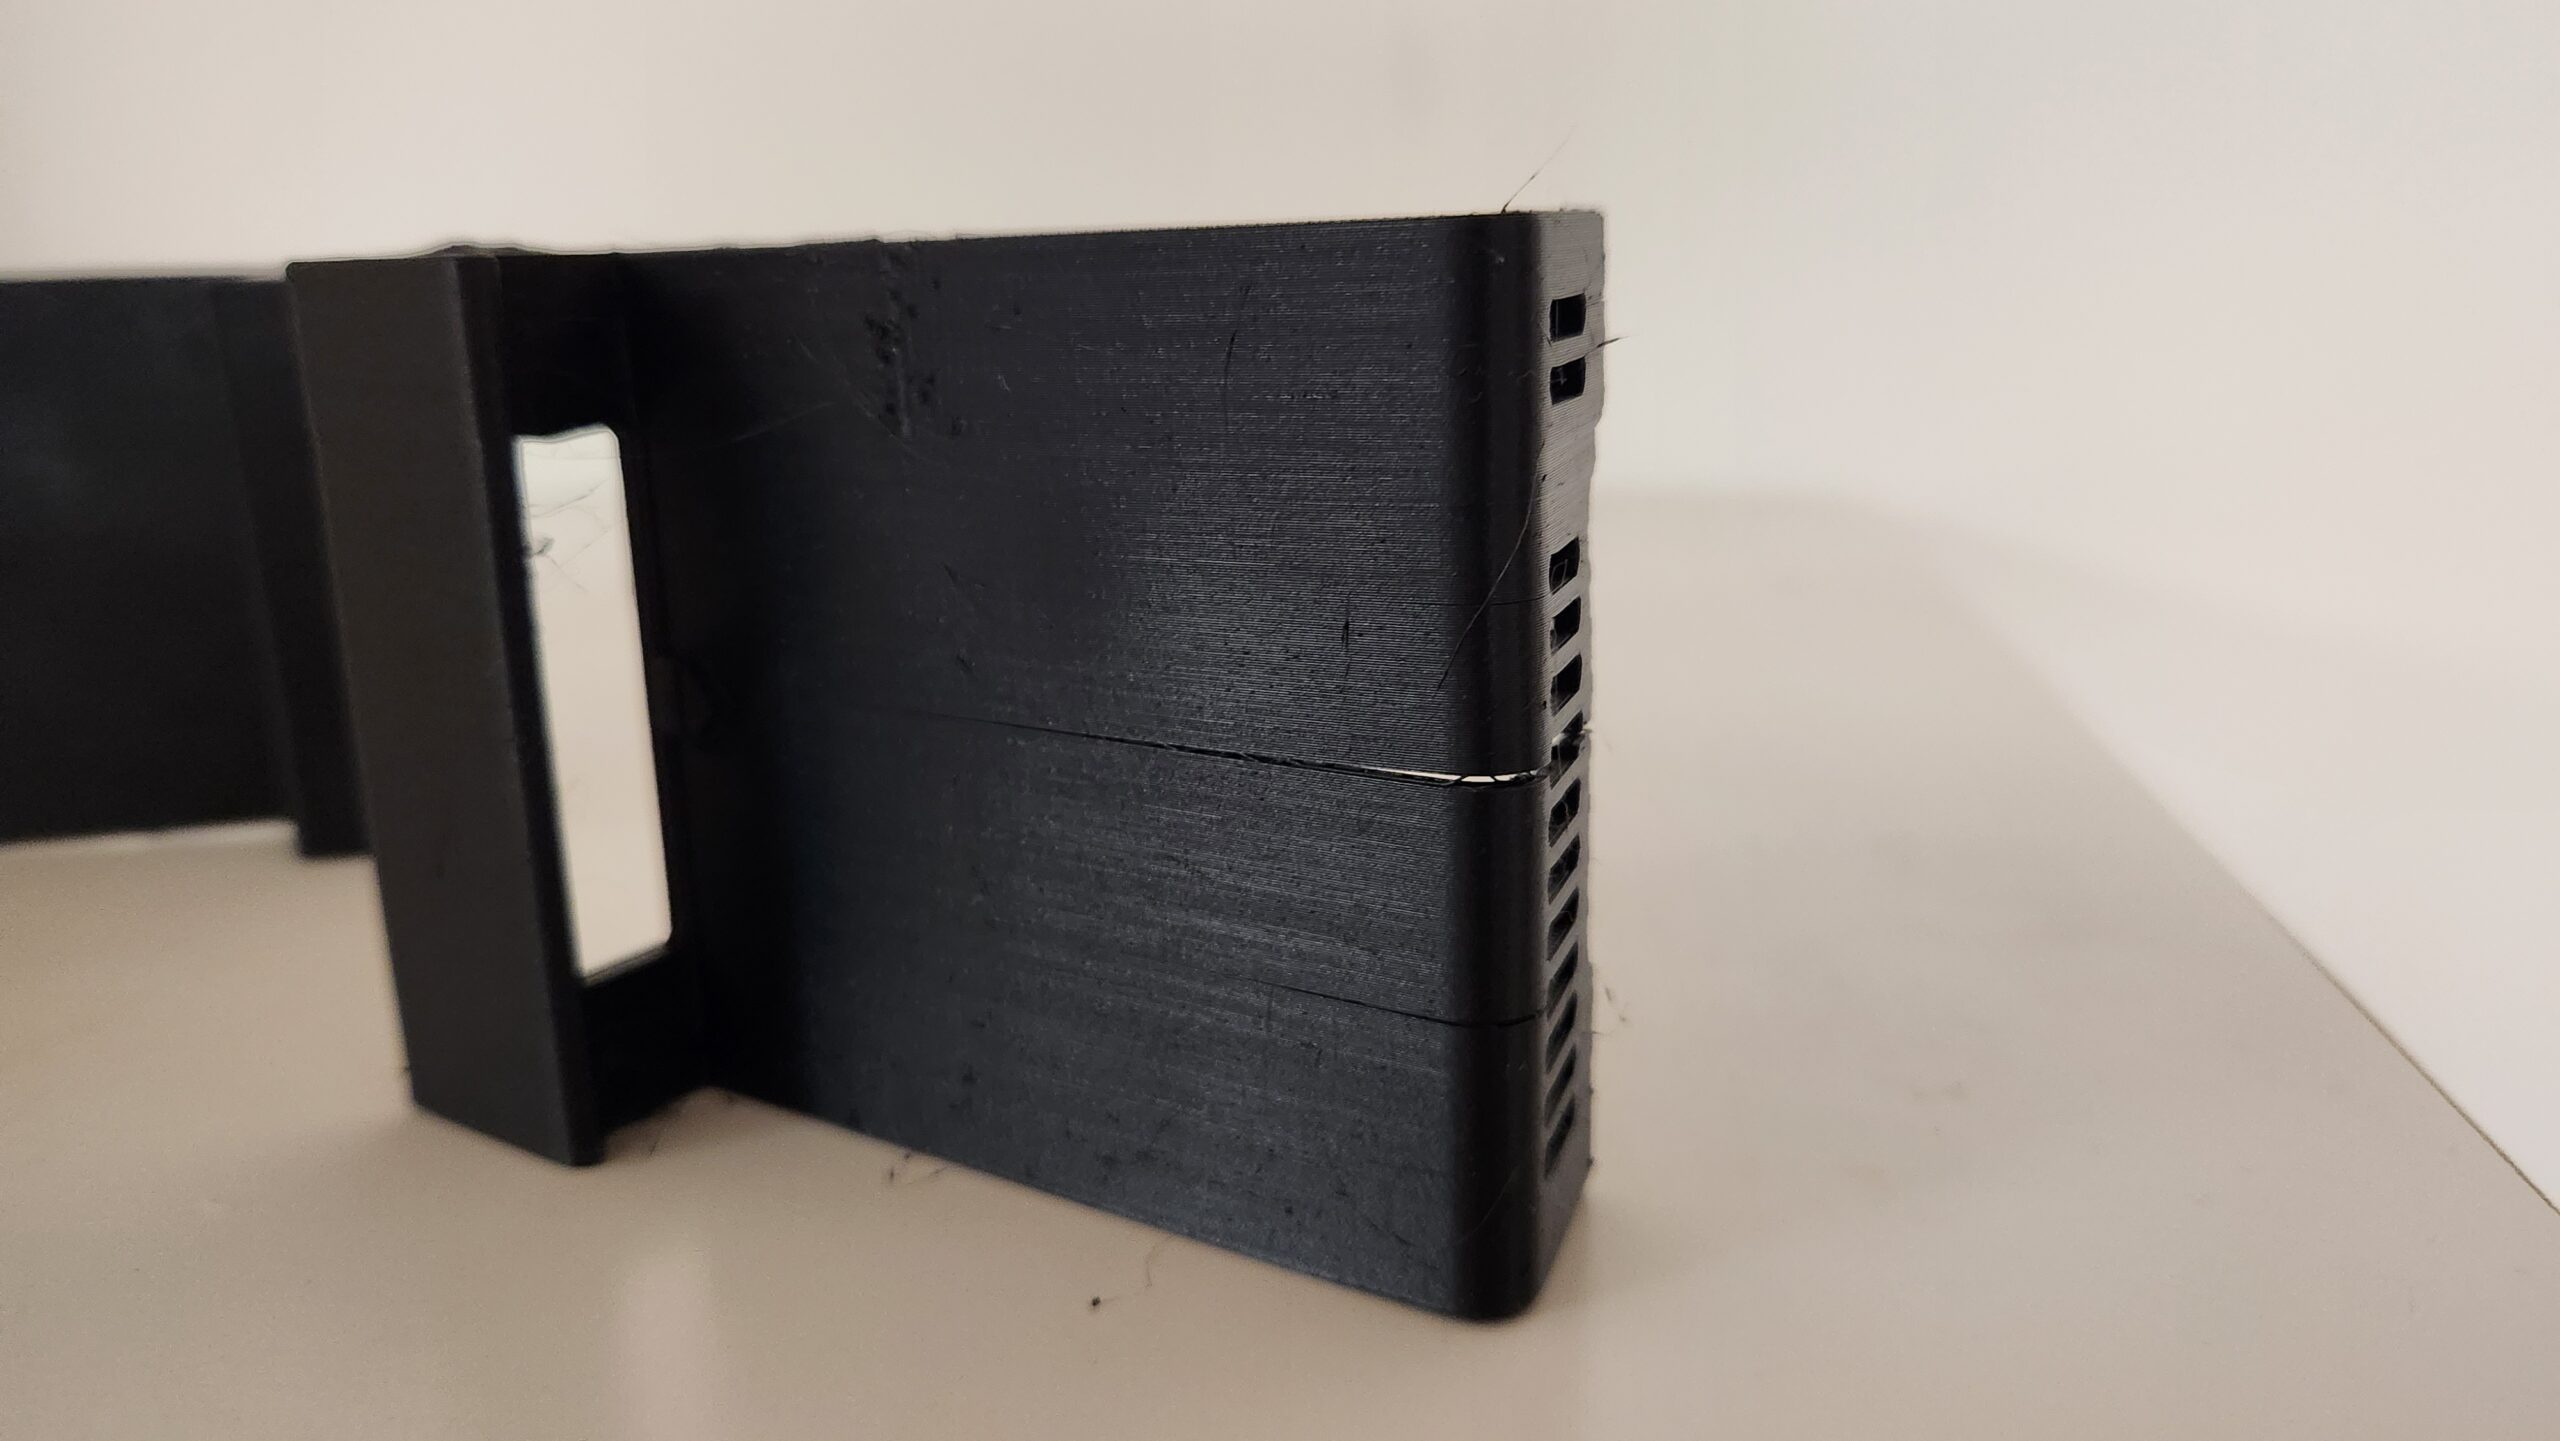
In addtion to this, I've tried printing the Precision Method Cube, and experimented with a number of different extrusion multipliers.
https://help.prusa3d.com/article/extrusion-multiplier-calibration_2257
For some reason, have 2 of the 4 verical walls are showing delamination near the top.
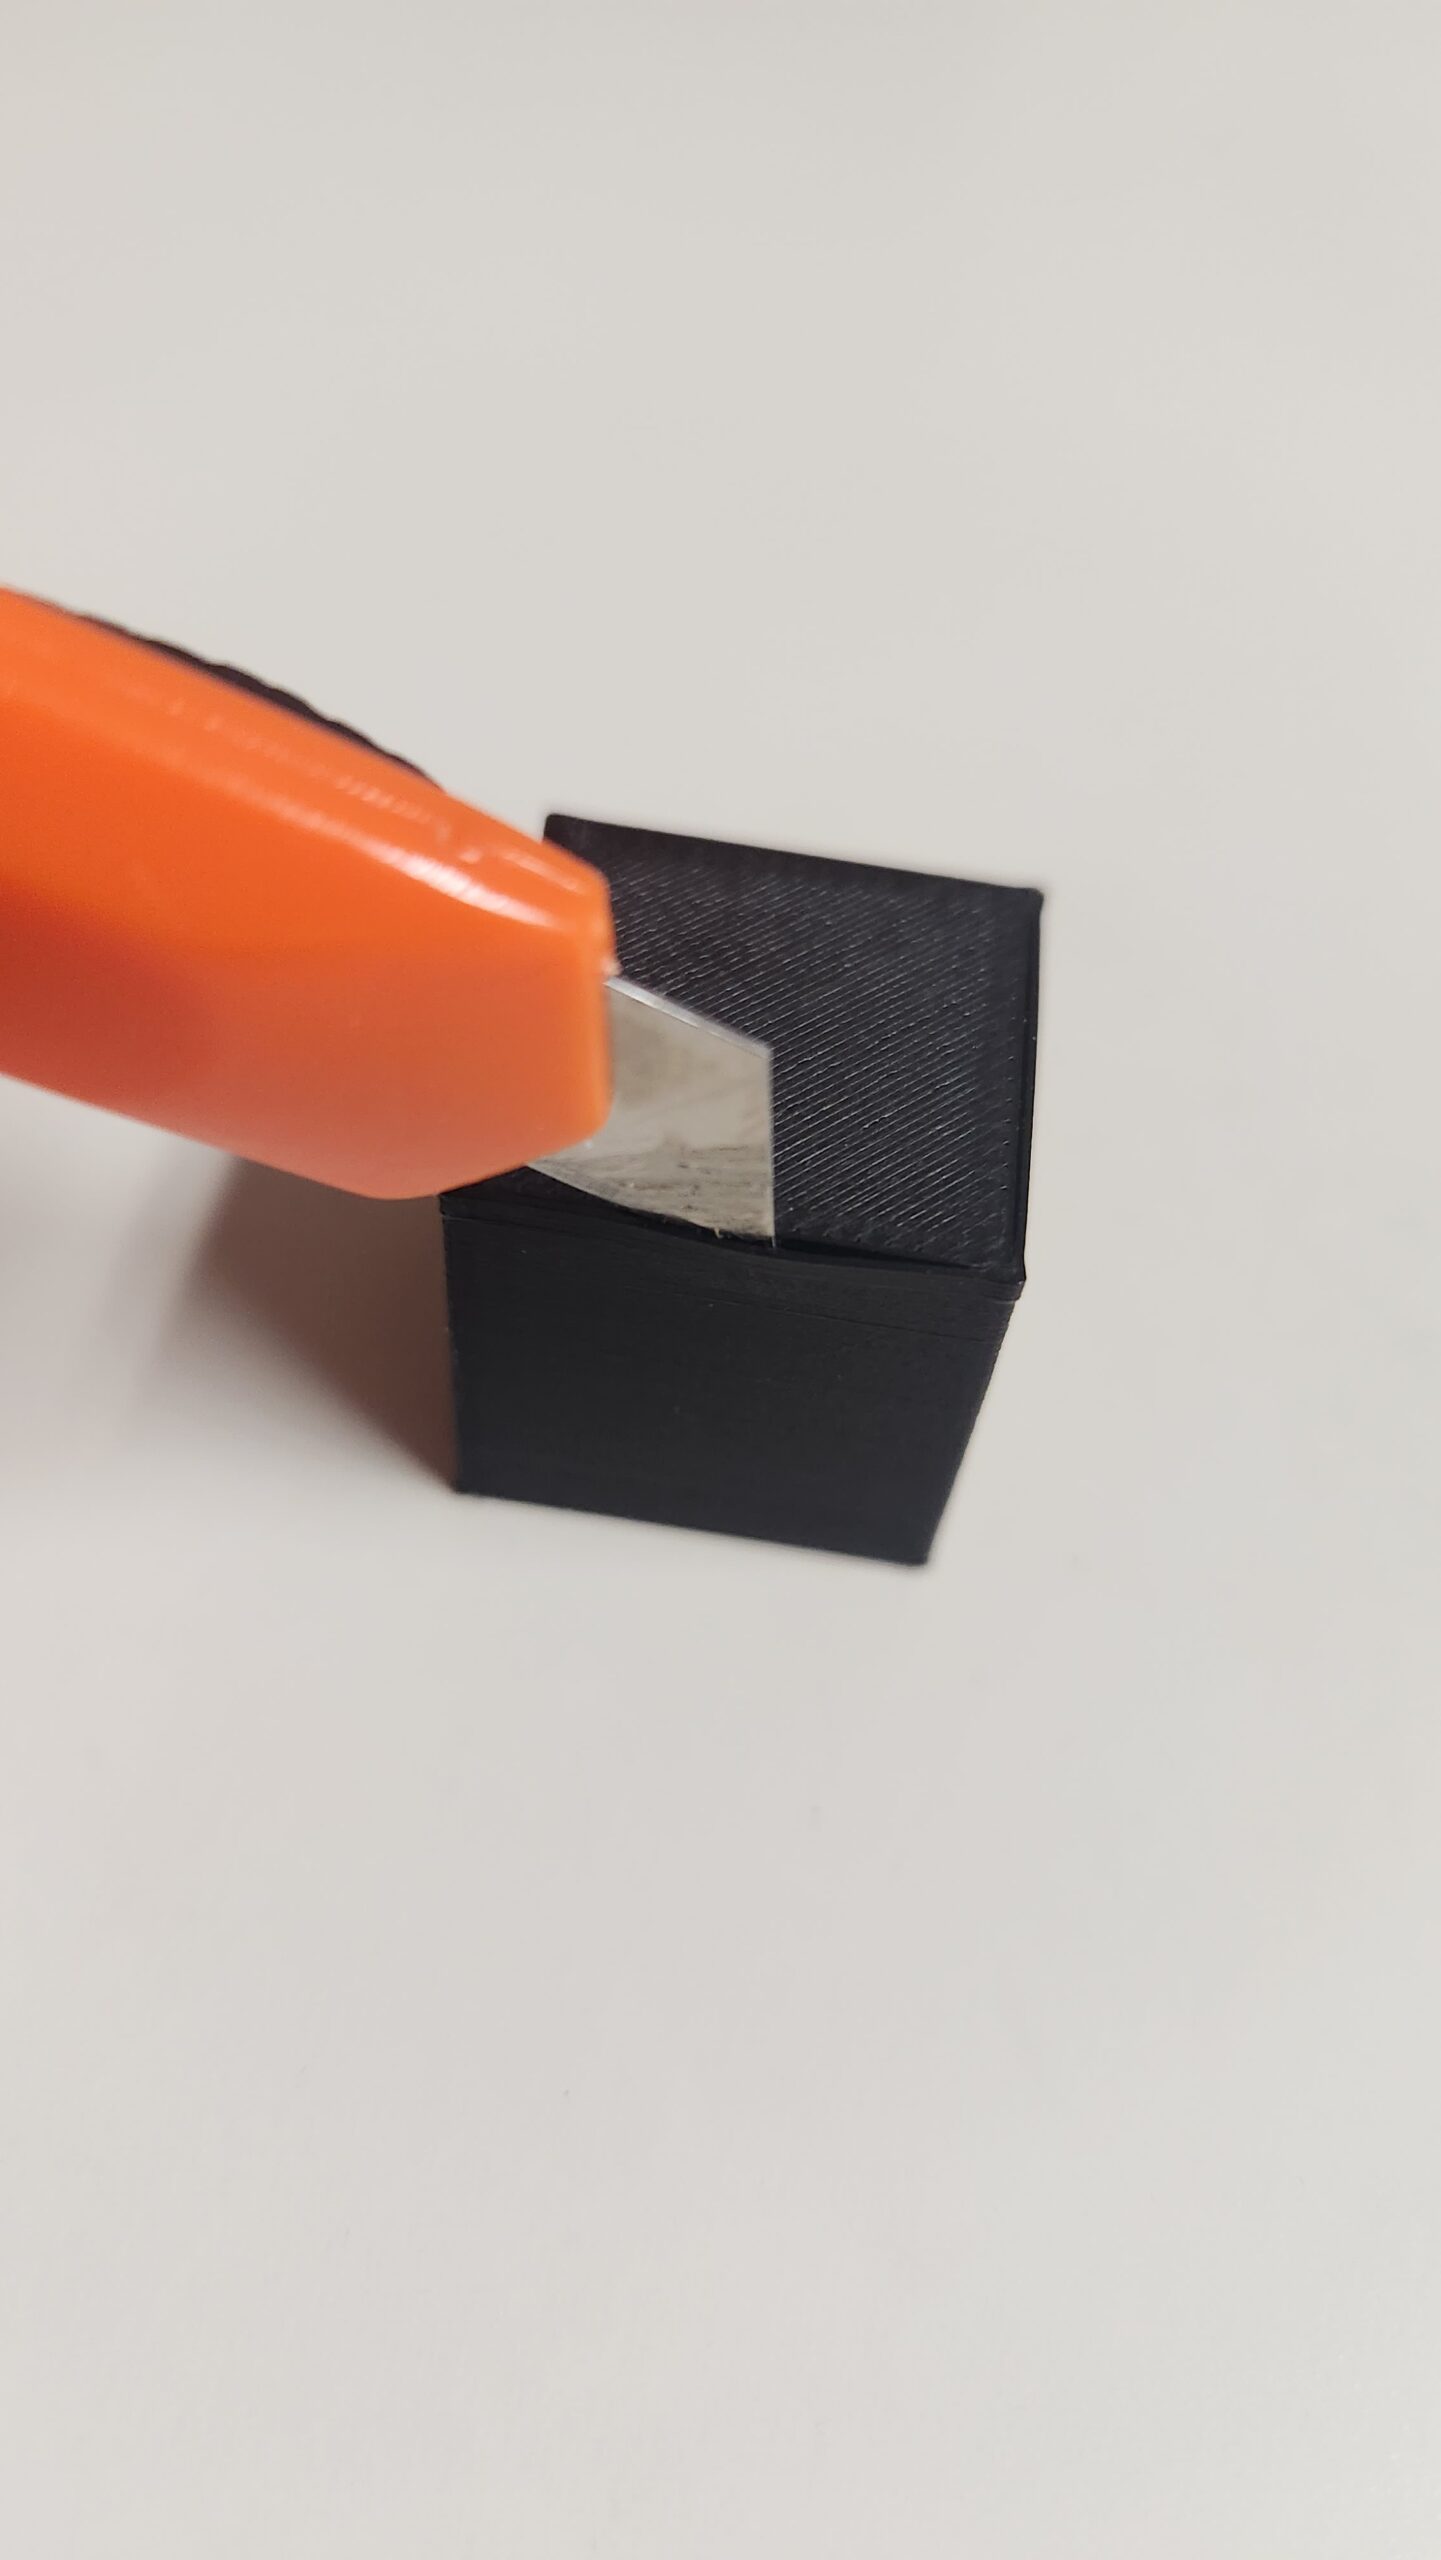
Something tells me that the two issues are related.
Has anyone else run into these issues?
RE: ASA Layer Seperation
This is common with some brands of ASA. It is especially common with larger prints.
--------------------
Chuck H
3D Printer Review Blog
RE: ASA Layer Seperation
Thank you for the response..
The prints are actually quite small.
Top object is about 12cm x 9cm x 4cm.
The cube is 2cm x 2cm x 2cm
This is the filament that was used; https://filaments.ca/collections/all/products/asa-filament-black-1-75mm?variant=1370473332744
RE: ASA Layer Seperation
Even though I'm printing with an enclosure, I decied to add a skirt around the object, and increase infill to 30%.
The object came out better than prior prints, however it was stringy in places and some areas were a bit brittle.
That being said, the oval skirt had some notalbe gaps on one end.
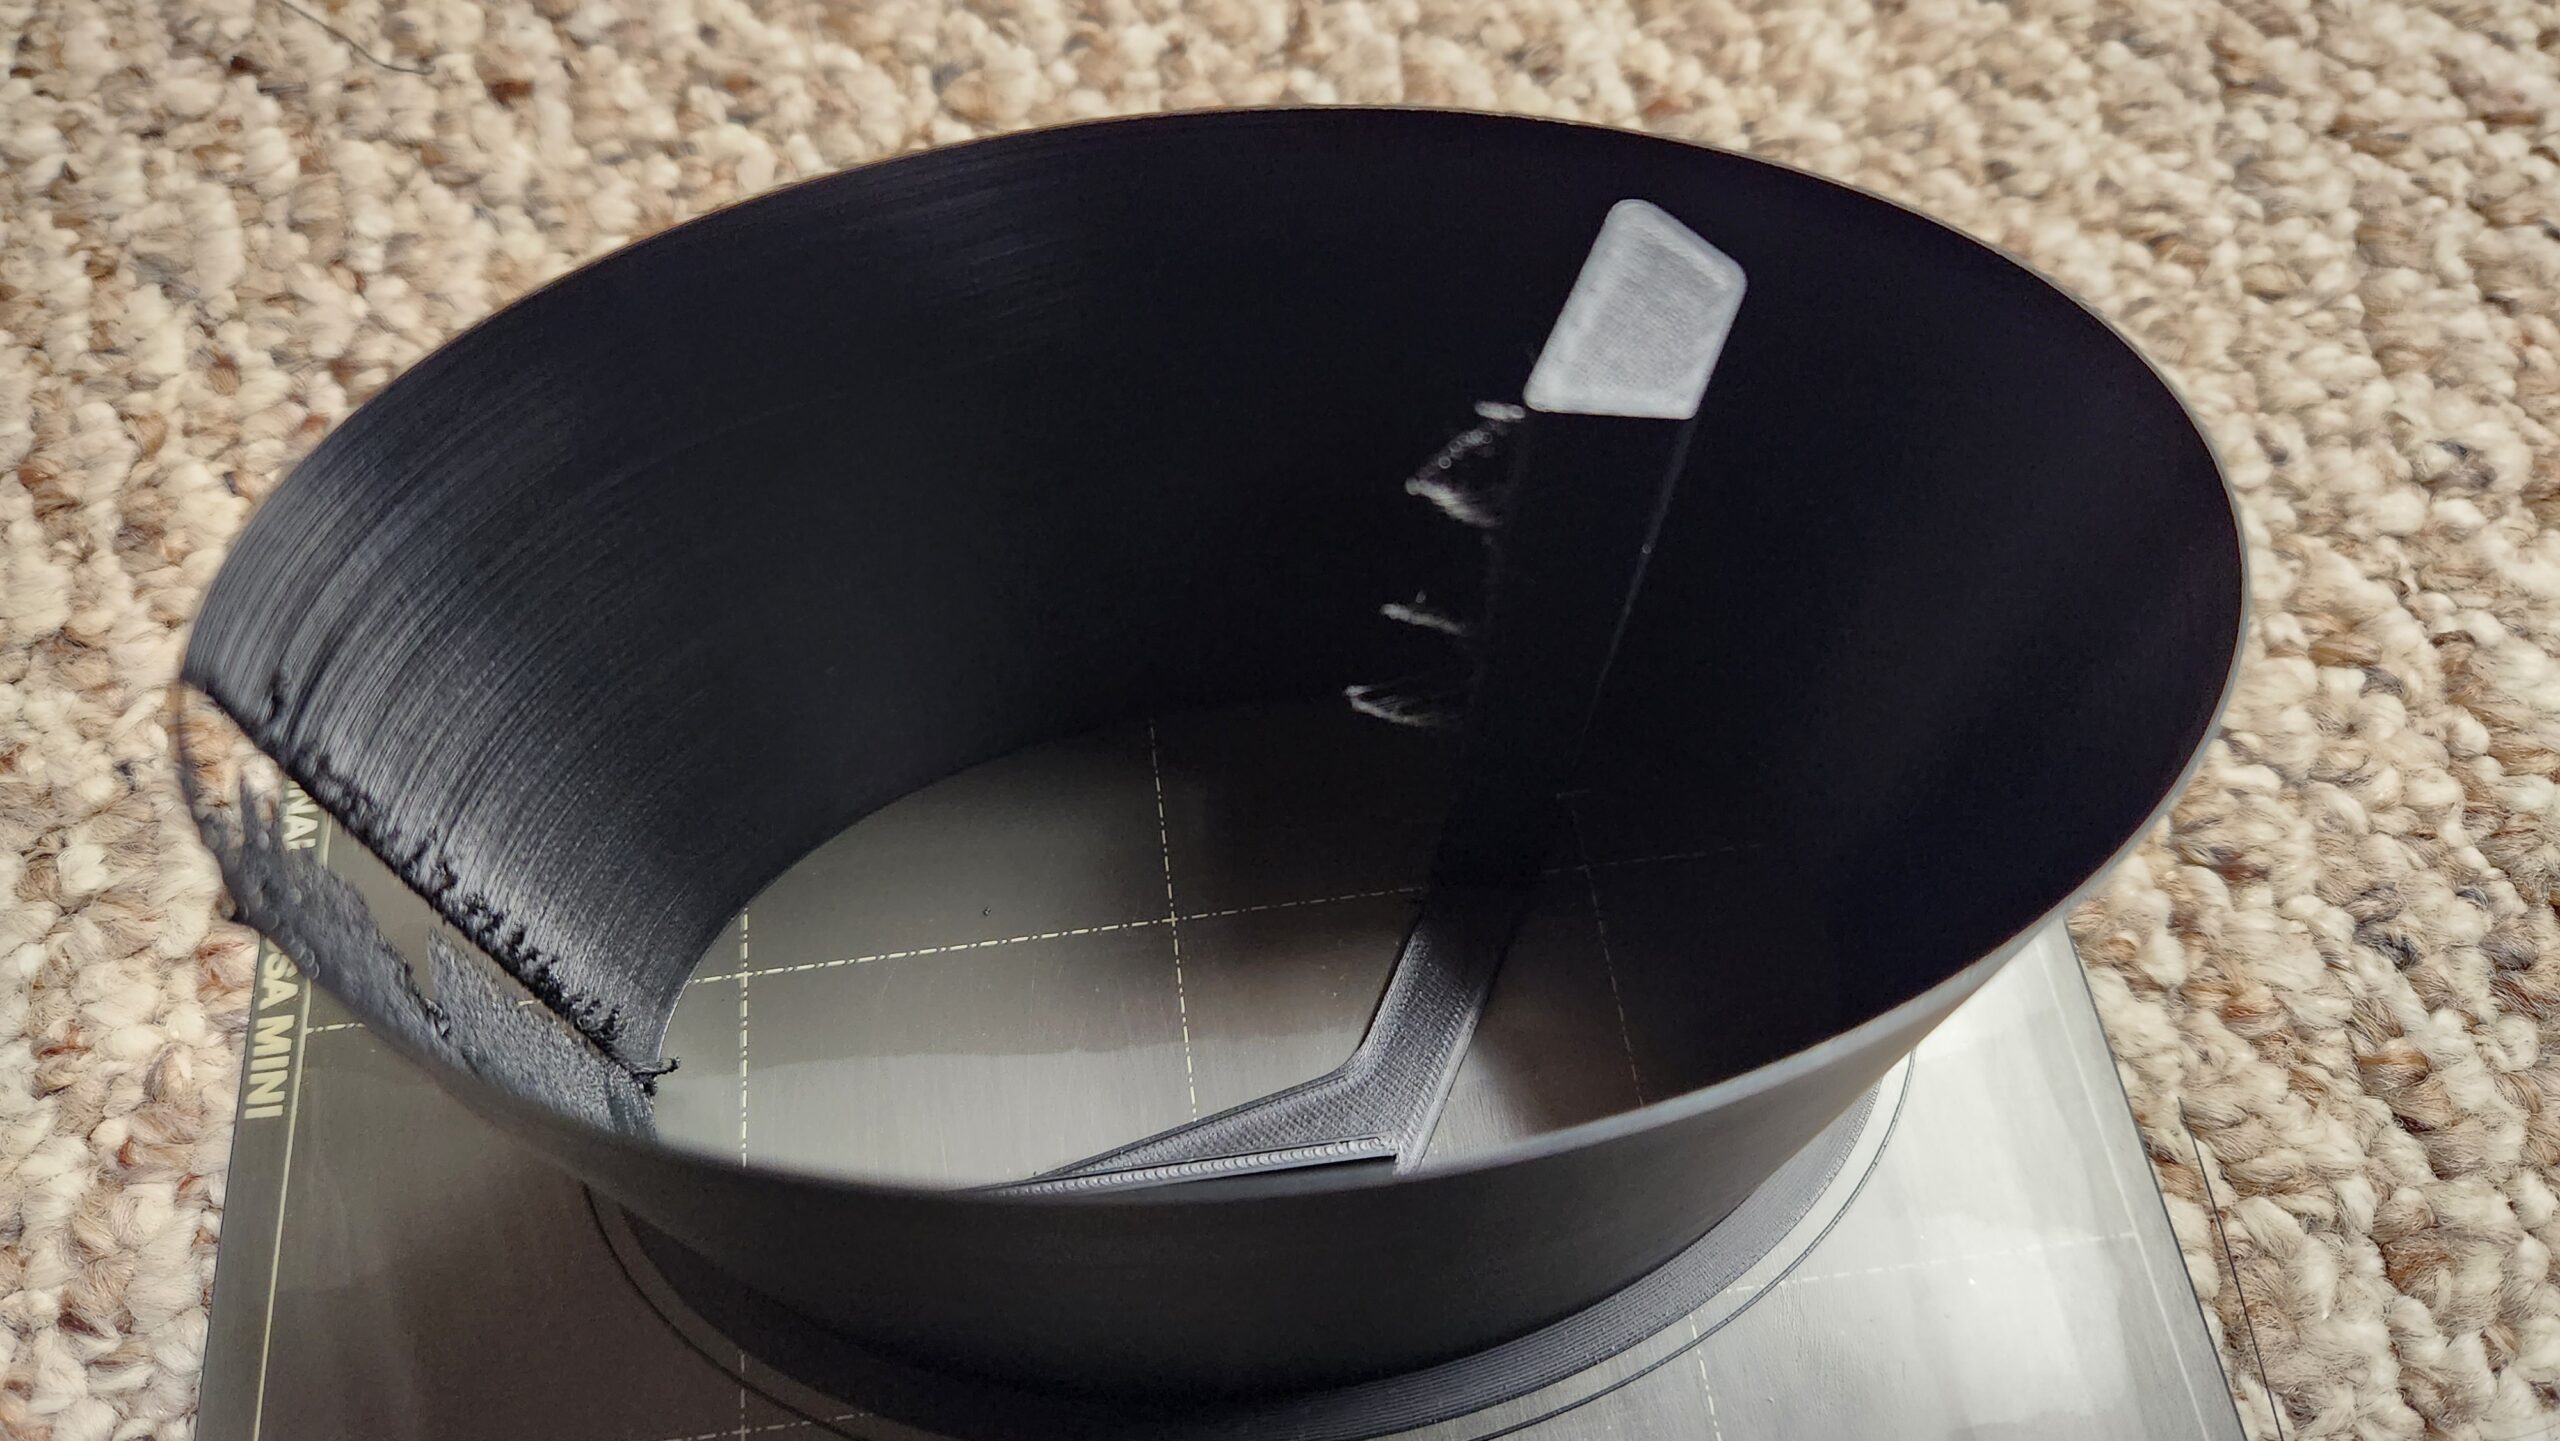
Still looking for suggestions.
RE:
95% of my prints have been printed from Prusament ASA on a Prusa i3 mk3+. In the beginning without an enclosure but later in a Prusa Enclosure. I have never seen de-lamination but I have had some warping before I got the enclosure. I try to keep the temperature in my enclosure about 35 - 4o deg C. It has almost eliminated warping.
Most of my parts have been 110 x 85 x 35 mm like an open box.
Maybe you could try Prusament ASA and see if it is better.
RE: ASA Layer Seperation
95% of my prints have been printed from Prusament ASA on a Prusa i3 mk3+. In the beginning without an enclosure but later in a Prusa Enclosure. I have never seen de-lamination but I have had some warping before I got the enclosure. I try to keep the temperature in my enclosure about 35 - 4o deg C. It has almost eliminated warping.
Most of my parts have been 110 x 85 x 35 mm like an open box.
Maybe you could try Prusament ASA and see if it is better.
I don't really have a means of controlling the temperature inside my enclosure, but it may be worthwhile putting a thermometer in there.
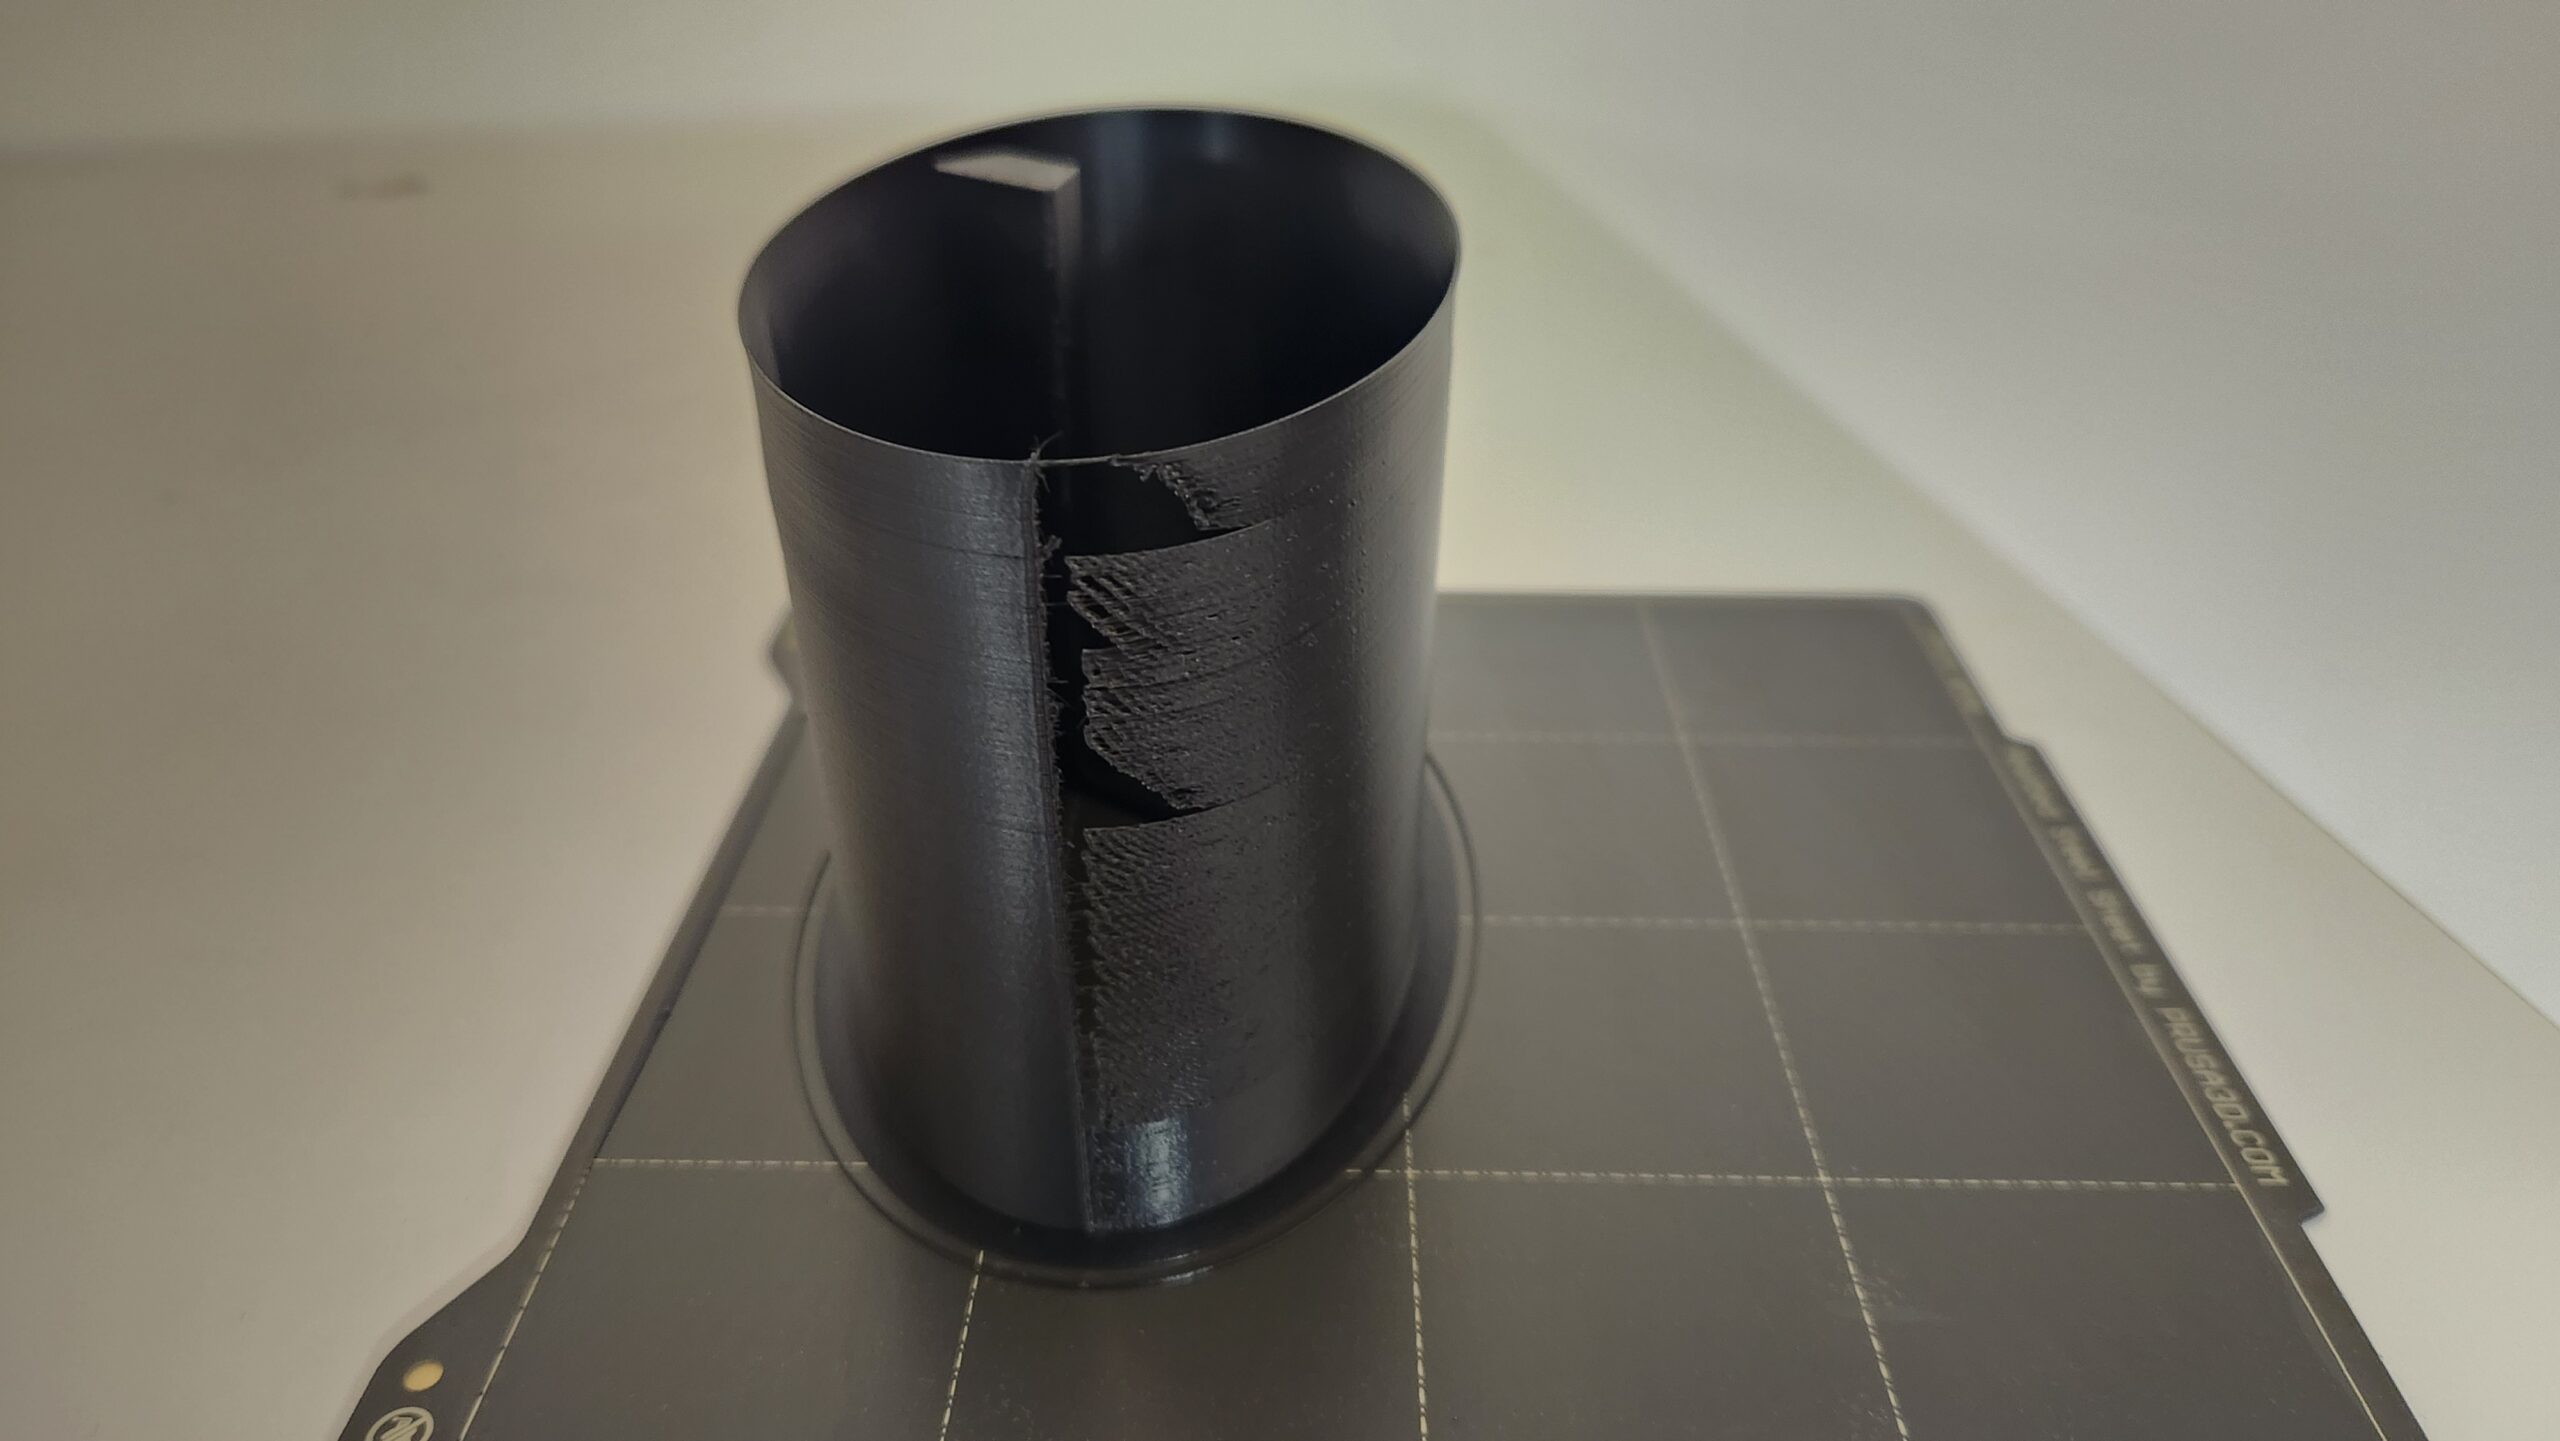
That being said, I did use a skirt with some of my recent prints which kept the temperature higher around the part, in comparission to the ambient air temperature inside the enclosure.
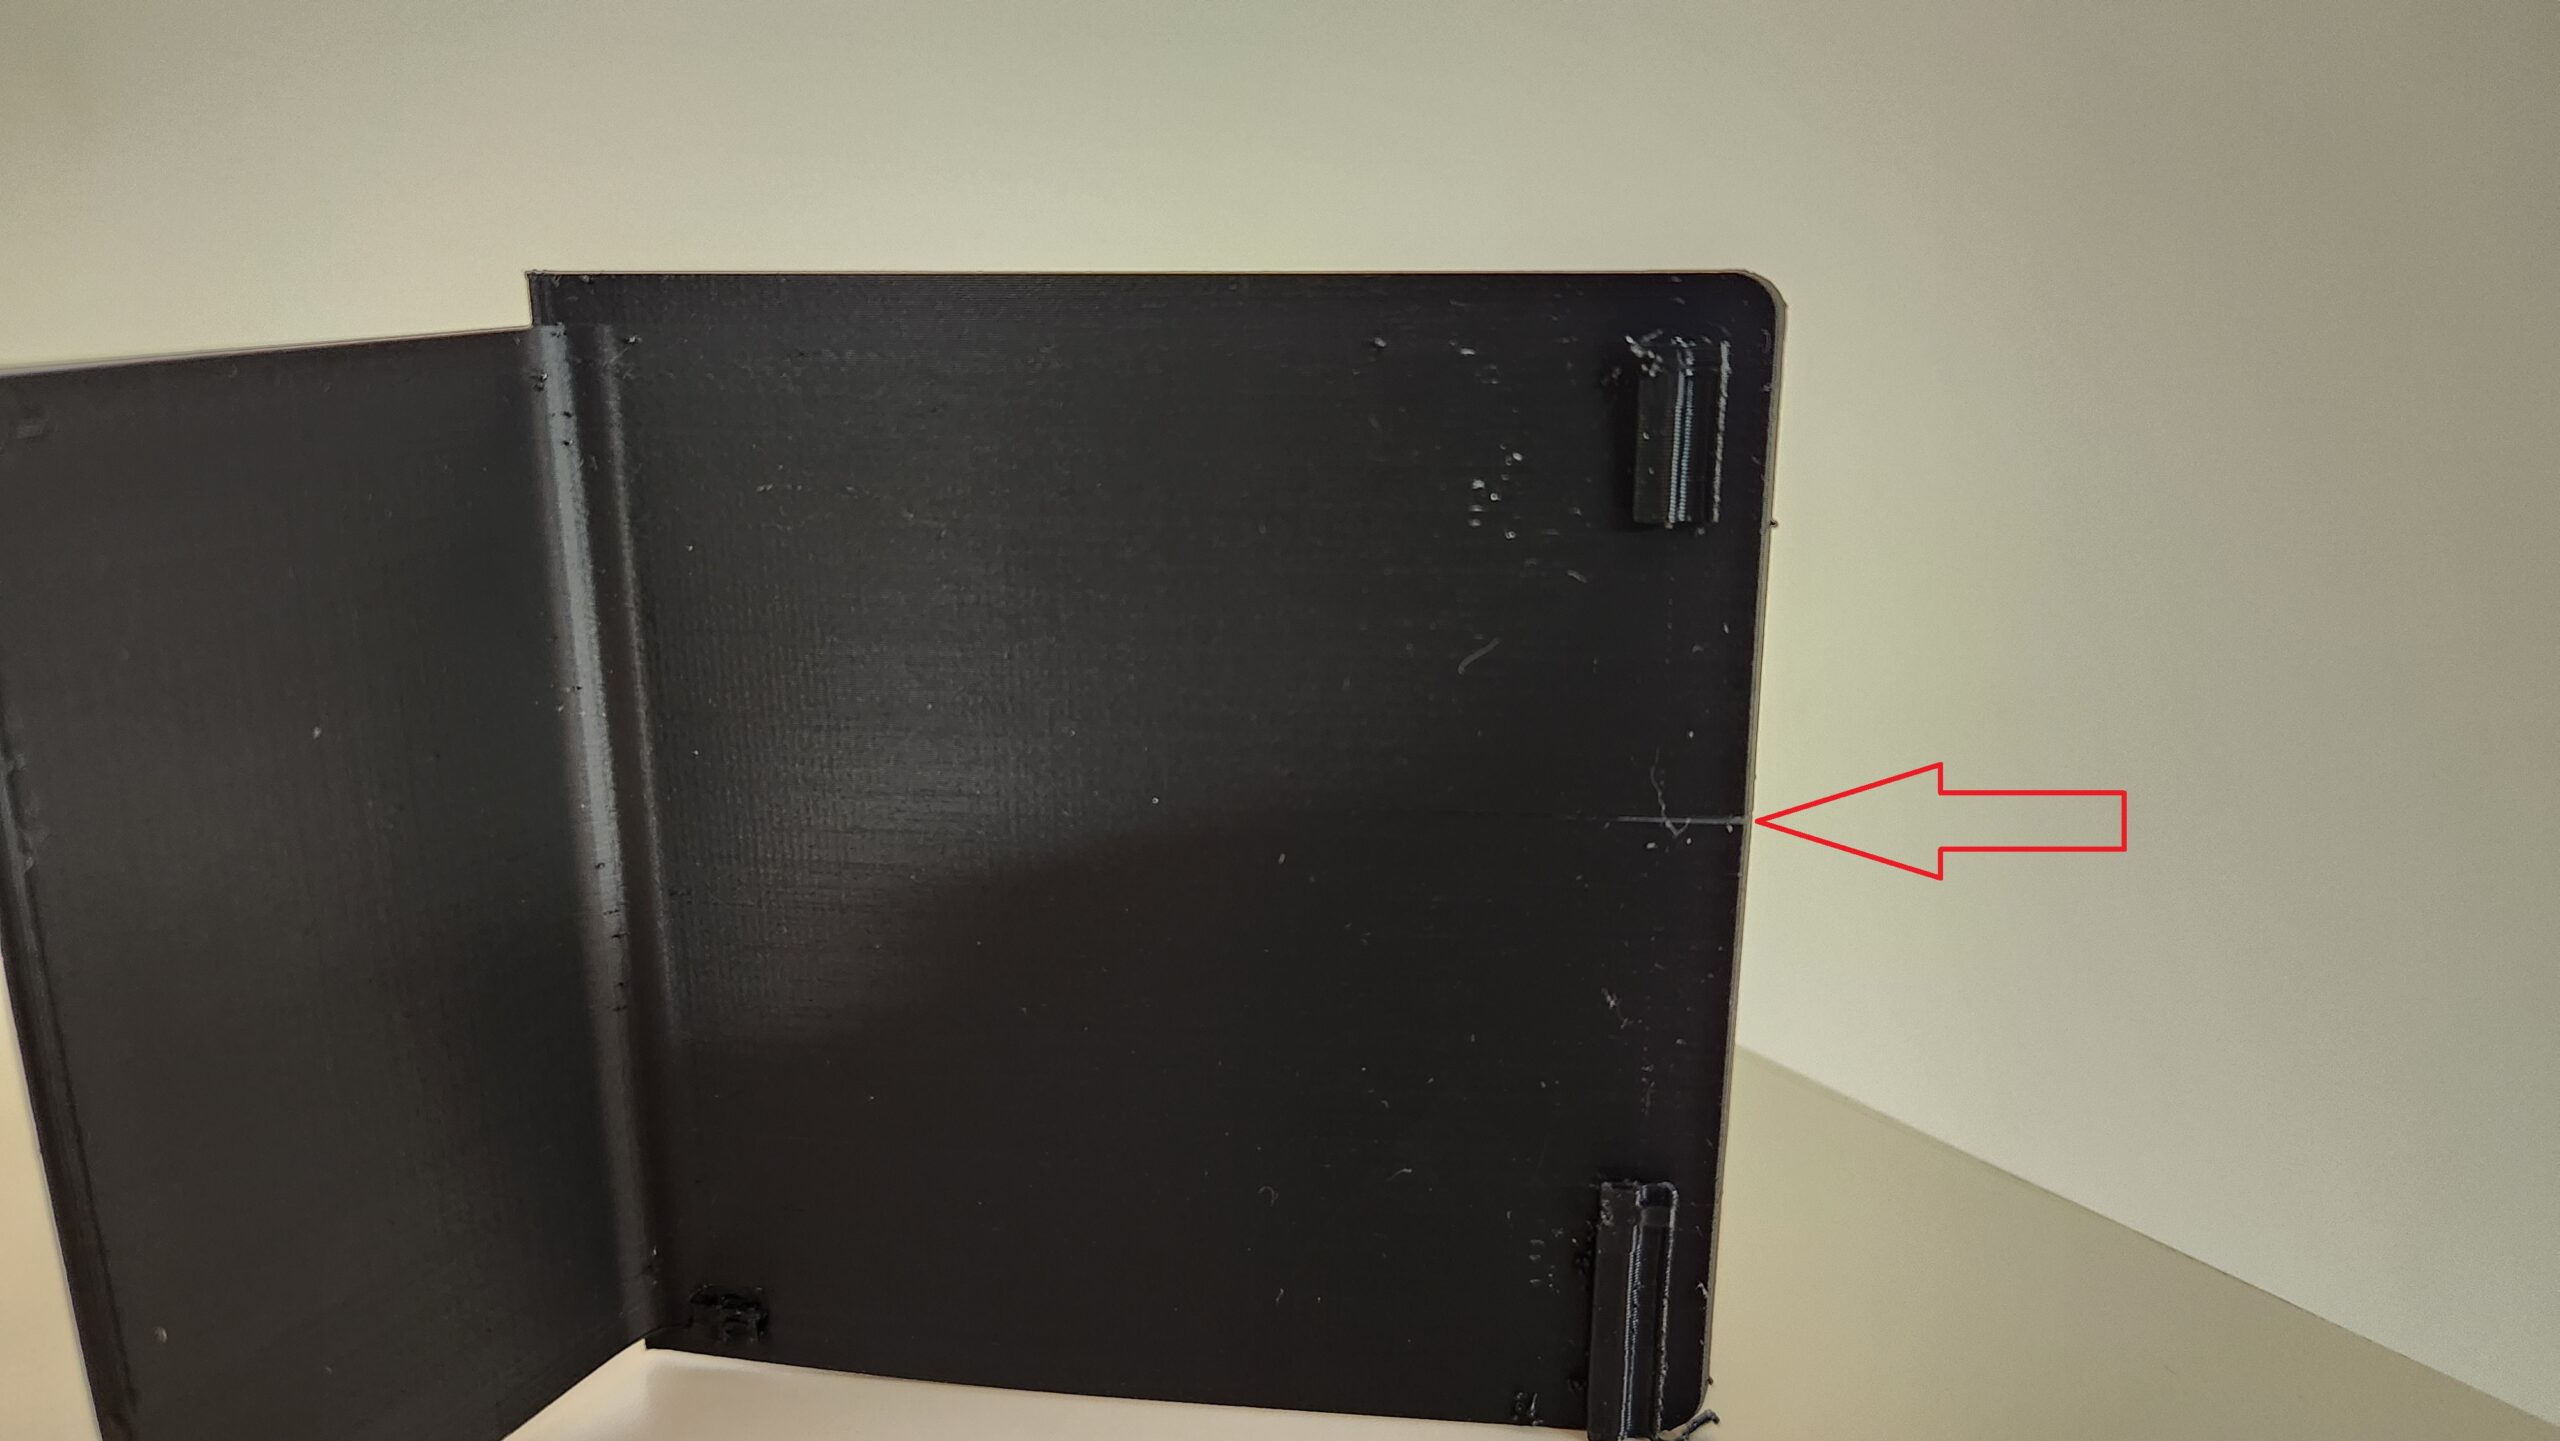
Picture of my latest trial is found below. It appears that there are a lot of stresses which are forcing the layers to seperate, while also making the part quite frail.
RE: ASA Layer Seperation
I have printed a lot with Prusament ASA. I use a wide brim and a full height draft shield in an enclosure with a slow exhaust fan. I have had good results and very strong parts.
Regards,
Mark
RE: ASA Layer Seperation
What wall thickness does your parts have?
Having a thermometer in the enclosure would be good. If I cannot get the temperature up to where I want (35 - 40 deg. C), I cover the enclosure with foam or similar till I get the temperature I want.
My largest prints 110 x 85 x 35 have a wall thickness of 3 mm and 40 - 50% infill.
I usually print with 0.2 - 0.25 mm layer height.
RE: ASA Layer Seperation
Very good information - thanks for sharing.
Can you define slow exhaust fan, by sharing parameters?
@kirkeby - the parts have wall thickness of 2mm, but even thicker parts such as the cube, show seperation. I will try putting a thermometer inside the enclosure to see what my temperatures look like.
RE:
First time printing ASA and I'm running into a number of issues:
Prusa Mini +, using standard ASA print parameters, 25% infil, 0.15mm, and am printing it in an IKEA table enclosure to keep the temperature up.
I'm using a smooth PEI sheet with a glue stick and bed adhesion is very good; no lifting corners.
Meterial material has been dried.
Below are the results.
Layer cracking, some stringing, and material is also quite brittle.
In addtion to this, I've tried printing the Precision Method Cube, and experimented with a number of different extrusion multipliers.
https://help.prusa3d.com/article/extrusion-multiplier-calibration_2257
For some reason, have 2 of the 4 verical walls are showing delamination near the top.
Something tells me that the two issues are related.
Has anyone else run into these issues?
OK, I am also experimenting with ASA using a Prusa i3Mk3S+ and Prusa Enclosure. I am using standard ASA profile in Prusa Slicer 2.5.2.
I have conducted (several) Cold Pulls and Wizard geometry calibration along with Live Z calibration which comes out perfectly.
I have also run standard X Y Z calibration cube and the 40x40x40 extrusion multiplier test cube (same as yours, and mine comes out near perfect - some inconsistent extrusion on the very top layer (smooth in some places, rough in other places).
I printed a temperature tower which was no use because it just indicated any temp between 230 and 260 would work, but which failed at 265 due to the nozzle catching the top layer and ripping the tower from the bed, despite having a brim and added retraction and lift.
I have experimented with different nozzle temps at 245, 255 and 260 C using the Benchy and basically all of them are no good because the layers between 4 mm and 11 mm are degraded, with the rest of the benchy looking OK. But 260 (firmware default) proved to produce the best looking print.
The benchy also failed, with raised points near the top whilst printing the roof also causing the print to be ripped off the bed and forming a birds nest. The latest attempt was most interesting because the print was rotated 180 degrees on the bed and the printer produced the chimney on top of the birds nest. Bizzarre.
I am still chasing down how I can minimise those raised points that seem to cause the same issue on almost every print.
Despite those issues, I have not run into the problem you describe and depict in the photos- no layer separation occurring at all.
Looking at your print seems like there is unreleased stress on layers above the bed that is causing warpage, and poor layer adhesion is contributing. I note that Poor layer adhesion is rooted in incorrect temp for that filament - its too low.
You are using the Ikea Lack enclosure which I had before purchasing the Prusa Enclosure. The Lack I found was basically leaky like a sieve - still allowing air flow thru the door crack and it was very flimsy. The Prusa enclosure also has some small holes (unused screw holes) but the temperature inside (I have the temp gauge) does not reduce during the print. It increases from ambient (20C) to about 45 C and remains there for the duration of the print so long as the doors remain closed. I also have a room heater set to 25C which helps a little. I received advice to heat the nozzle and bed for 10 minutes prior to starting the print, which is my next experiment. I'll also look at blocking up the remaining small holes in the enclosure.
My suggestion to you for improvement:
1. Get a temp gauge going inside the enclosure and keep the doors of the enclosure shut throughout the print. Eliminate guesswork....
2. get a new nozzle thermistor, I suggest yours may be off-specification, perhaps not giving you the actual temp requested in the slicer.
In the process of course take the opportunity to conduct a couple of cold pulls and clean up around the nozzle and check the PTFE tube.
3. make sure that you have the latest firmware 3.12.2 installed in the printer, which has revised thermal model giving more consistent temps. I found this improved my benchy print, (but not enough to have it complete properly with good quality throughout).
4. Look at changing the infill pattern to one that has less unbalanced stress. In my own case switching from gyroid to rectilinear made a positive improvement. Hilbert Curve is said to be better (by Stefan from CNC Kitchen), so I will try that next.
5. If you have a Satin PEI powder coated hot bed plate, try it out instead of the smooth PEI plate. It is what Prusa recommend for ASA, not needing glue stick.
RE: ASA Layer Seperation
Hello bryn51
Thank you so much for the comprehensive response.
I've gone through it in details and agree with your points and suggestions.
As far as the LACK inclosure it concerned I also have the option to tape any sort of openings that exiting between the plexiglass and the frame to minimize heat loss.
Since I've posted this issue, I was concurrently communicating wiht Prusa and elected to return the MINI printer in exchange for a MK3. This was very long and drawn out ordeal, but that is a story for another day.
I found that bed leveleling funciton on the MINI had very limited capabilites and after several attempts, and suggestions from Prusa I was never able to nail it down.
With the new MK3 in place, I have yet to try printing the cube using ASA material, as I've been busy with other projects.
Once I get to it, I'll be happy to share my results.
RE: ASA Layer Seperation
Hello bryn51
Thank you so much for the comprehensive response.
Since I've posted this issue, I was concurrently communicating wiht Prusa and elected to return the MINI printer in exchange for a MK3. ….
With the new MK3 in place, I have yet to try printing the cube using ASA material, as I've been busy with other projects.
Once I get to it, I'll be happy to share my results.
My suggestion if prusa will go for it…. instead of a mk3S+ go for a mk4 instead. its the same price that a Mk3S+ used to go for, and by the way, mk3 printers are presently on back order anyway.
The mk4 has many improvements over the mk3 with the all metal nextruder top of the list. This extruder is designed for high temp filaments,,including ASA and PC.
Cheers…