Prusament PET-G = blobs, every time
Okay, so I've had my i3MK3s for over a year. I only use Prusament filaments that I order directly from Prusa (no 3rd party supplier). I have made only 1 modification, I changed the nozzle to a 0.25mm diameter Stainless Steel nozzle so that I can print fine detailed lettering but the issue described below happens with any diameter nozzle I install. The humidity within my office (thanks to a dehumidifier) hovers around 35%-40%... maybe 45% on a super rainy week. I can print Prusament PLA all day long with little to no issues (99% of the time). However, once I install PET-G.... I get blobs on top of blobs, next to blobs with blobs inside. It's crazy! I've ran every calibration I can find... I've adjusted my Z-elevation dozens of times with no change. I use the recommended temperatures that are printed on the filament spool... but I've also tried adjusting those temps up and down to see if affects the behavior.... I cannot tell a difference. Filaments stay sealed in the container with the dry packs until I'm ready to use them... when done, they go back in the bag with the dry packs. I've even tried the dehydrator on a roll to see if it helped.... it did not. I still got blobs, just as many and just as often as before. I have to baby-sit any PET-G prints and PAUSE the printer multiple times in order to cut off the blobs and lightly brush the excess from the nozzle tip. I have a silicon sock on the extruder head which tremendously helps out with PLA sticking but with the PET-G blobbing, the tip still gets caked on blobs. What am I missing... or doing wrong or not doing? I am at a complete loss at the moment. See pics of the issue.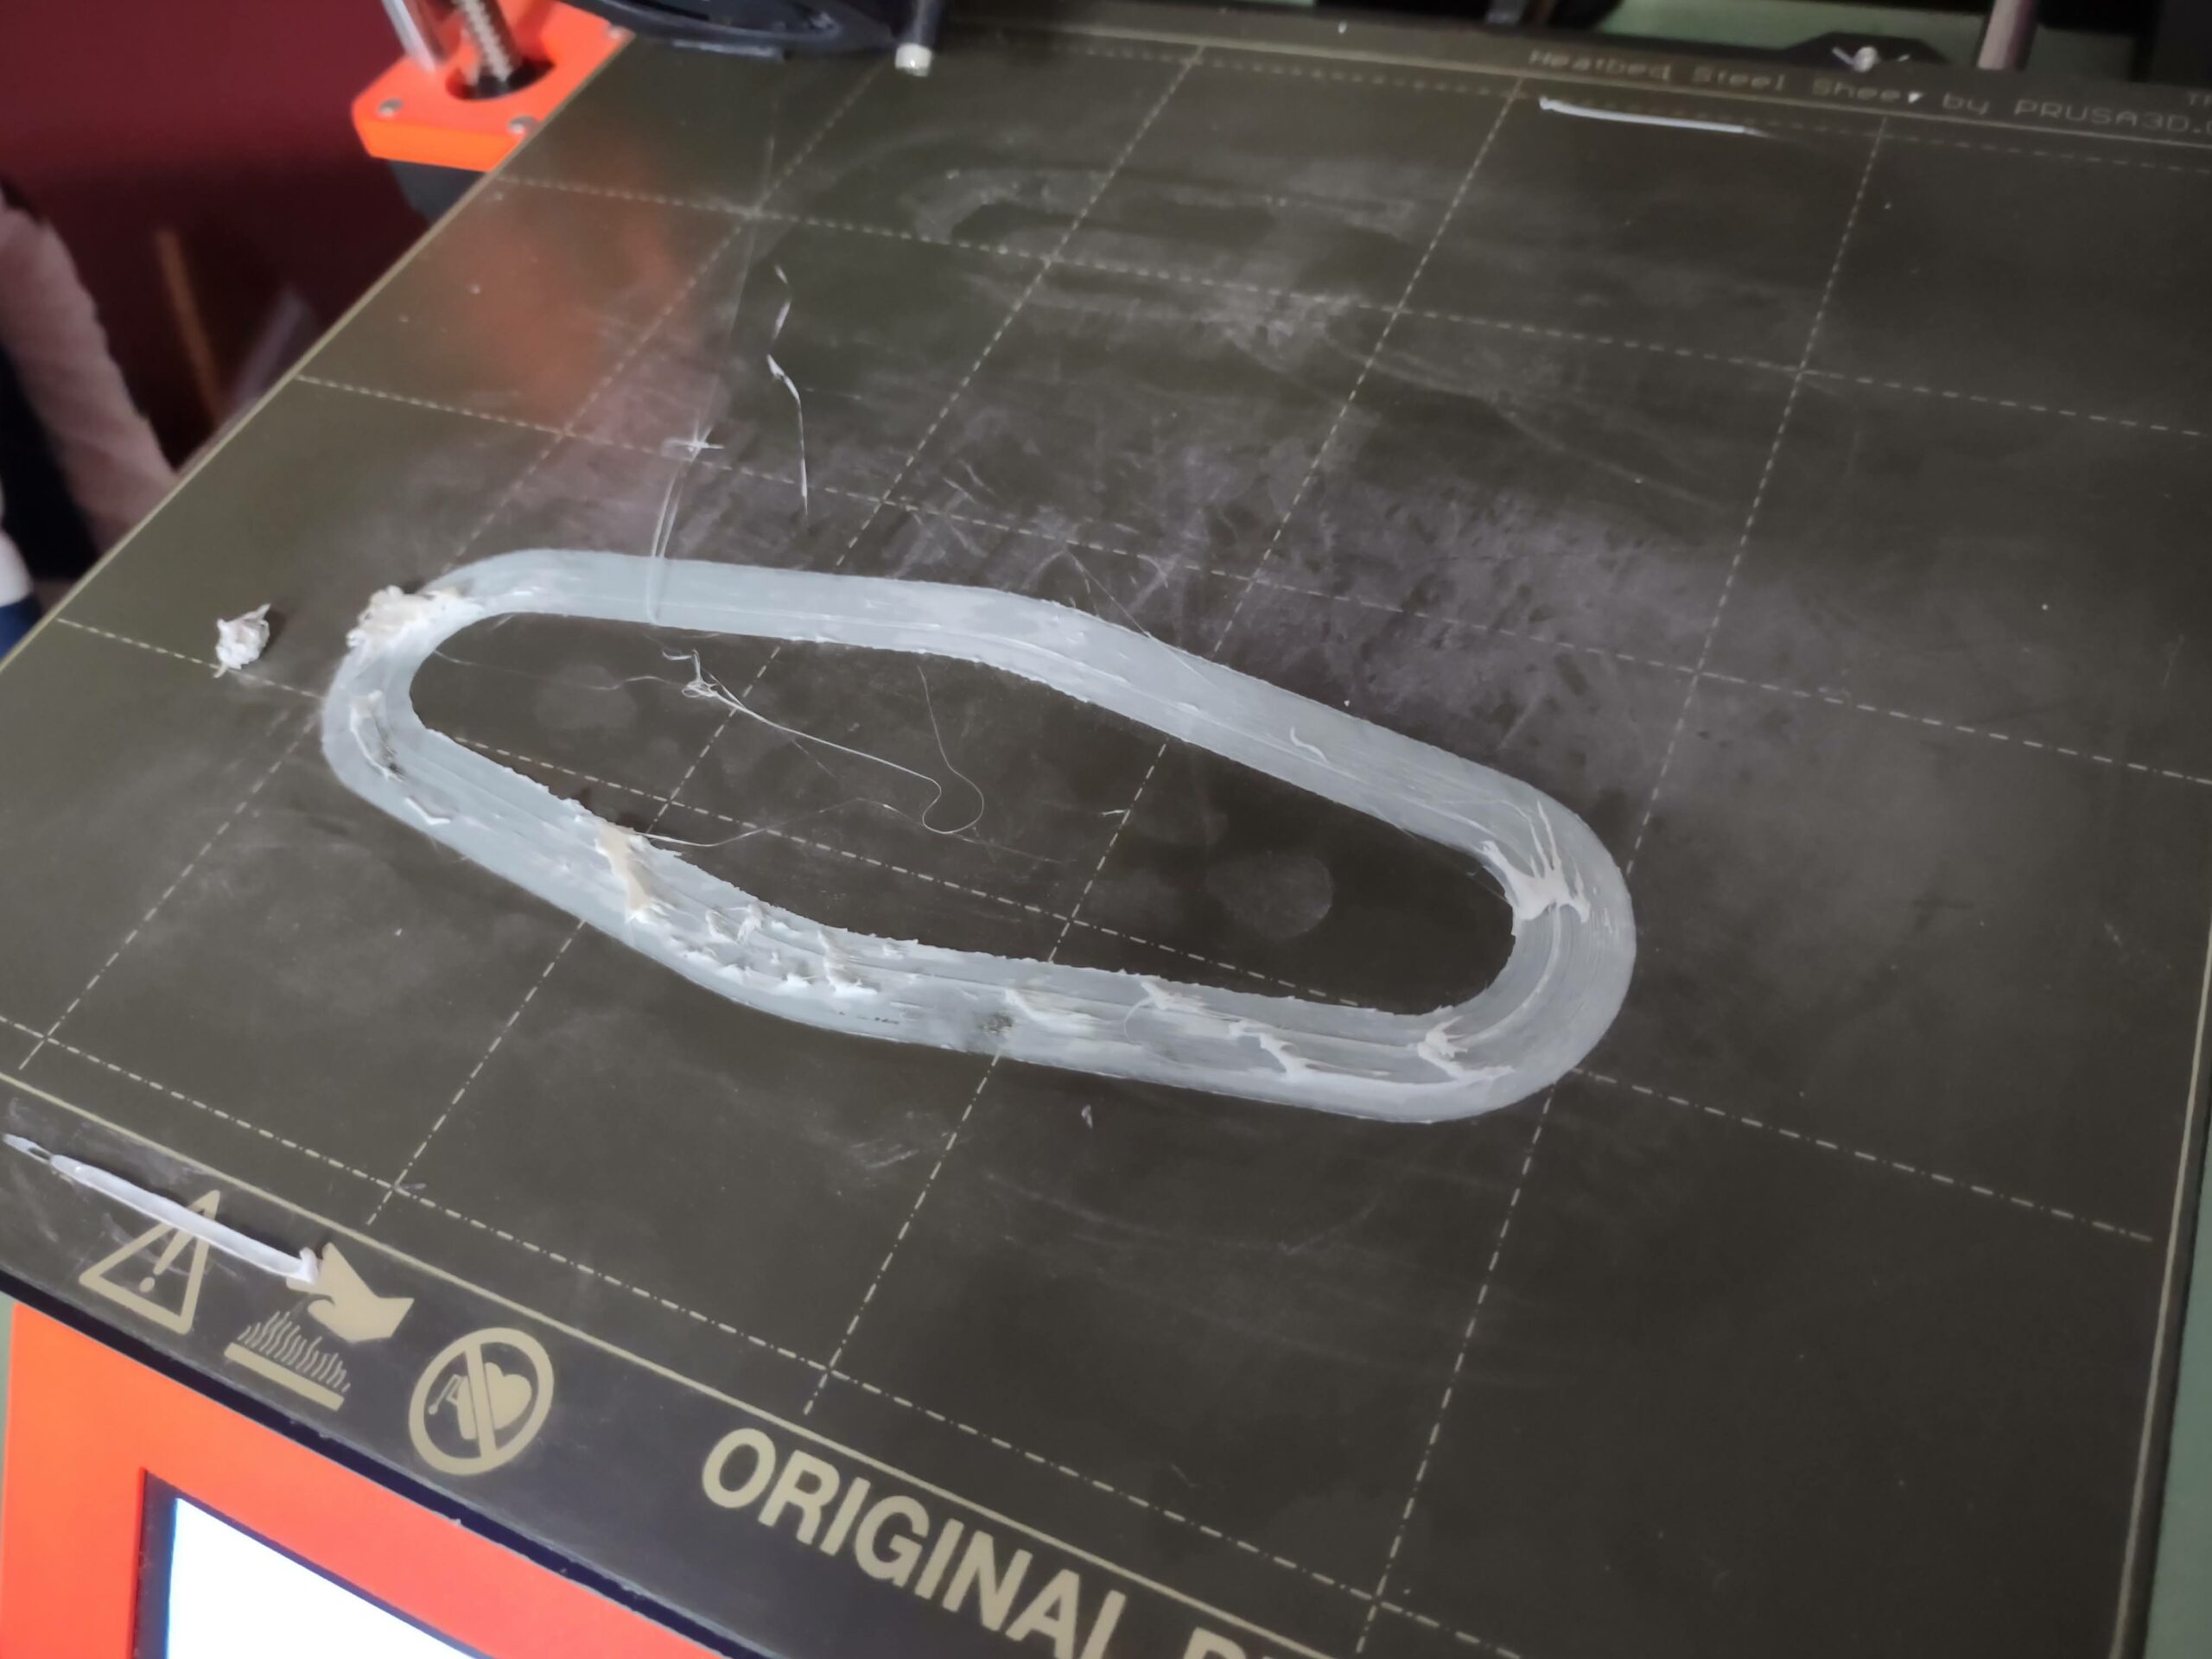

Moving beyond the observation that your steel sheet needs some serious scrubbing with hot water and soap.…. Some zits with PETG I'd consider almost inevitable but this picture certainly looks worse than that. My initial guess is bad first layer but you said you checked that. Can you post a picture of the first layer. preferably as square as in https://forum.prusa3d.com/forum/original-prusa-i3-mk3s-mk3-assembly-and-first-prints-troubleshooting/life-adjust-z-my-way/?
Formerly known on this forum as @fuchsr -- https://foxrun3d.com/
PETG can require a bit of Live-Z adjustment
Looking at your picture, two things are immediately apparent:
- As @fuchsr notes, your PEI sheet is ... less than optimally clean. This can seriously affect adhesion, which can affect lifting, which can affect top surface quality.
- Your Live-Z adjustment appears to be very low (too negative) for PETG. Looking at your prime line, the nozzle is digging into the extruded filament. This will reduce in the nozzle scraping filament as it moves along the top of each layer which is what appears to be happening in your main print. When printing with PETG, this will create little blobs that either stick to the nozzle and heater block or fall into the print at random times. It can also result in extrusions being lifted off the build plate, compounding the problems.
PETG doesn't require as much 1st layer "squish" as PLA. Many people raise (make less negative) Live-Z from 0.02 to 0.2mm when printing PETG.
Prusament PET-G = blobs, every time
I clean the bed with soap & warm water after 4-5 successful prints. The "stuff" you see, all of that is glue stick residue. I will try the Live-Z adjustments (again). I'll also get a pic of my 1st layer and post that for review. I've always struggled to get any material to stick thoroughly without the use of a glue stick... this has been since day 1 of getting the printer. I do expect a "zit" (I like that... good term for them) every now and then but these are full blown explosions of material. With the white PET-G, some of it even looks charred/burnt/black'ish in the blobs. None of that coloring appears within the layering of the print so I'm guessing that discoloration is from the material blobs getting stuck to the nozzle and getting burnt before dislodging from the nozzle.
Reduce extrusion multiplier?
After you get your Live-Z set for PETG, if you get extra build up, you can try reducing your extrusion multiplier a bit (1-3%). That can help with fine stringing. I know you've dried your spools but moisture and PETG almost always cause problems.
You are using too much gluestick. Starting from a clean sheet wipe a line of gluestick across the plate then spread it with a wet paper towel, or spray with water then wipe, so that you have an even, thin coating.
But for PETG a a quick spray of window cleaner, again spread over all, is enough.
Cheerio,
Now that you've mentioned the burnt material... is your nozzle correctly screwed in? But then again it looks like you're getting good prints with PLA.
Have you tried a different nozzle?
Formerly known on this forum as @fuchsr -- https://foxrun3d.com/
Wavy like water
From a hundred feet away I can see two problems. Your Z is too low for what you are doing, and there is some kind of gunk all over the bed (interspersed with finger prints).
Full stop. Do not pass go. No benchys for you. Take care of that shizzle.
I would tend to agree
That the z is too low. For me the z for PLA, PETG and TPU is different. Once you have the numbers that work for you I'd recommend setting up steel sheet profiles so you can easily switch between them when you switch between filaments.
Agreed with a good scrub with some dawn and hot water. As others have said, some original formula windex works great for PETG on the smooth plate.
After good first layer
If you get blobs later in the print, as bob mentioned above, reducing the extrusion multiplier is a good strategy. Going from 1 to .like .97 should get you some improvement.