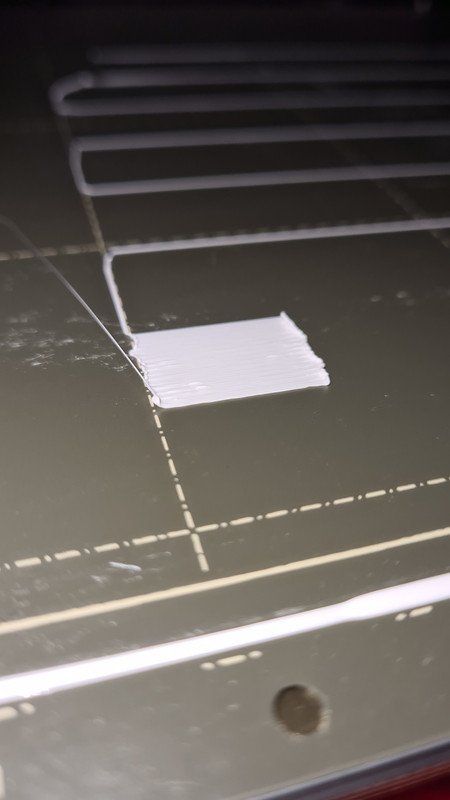
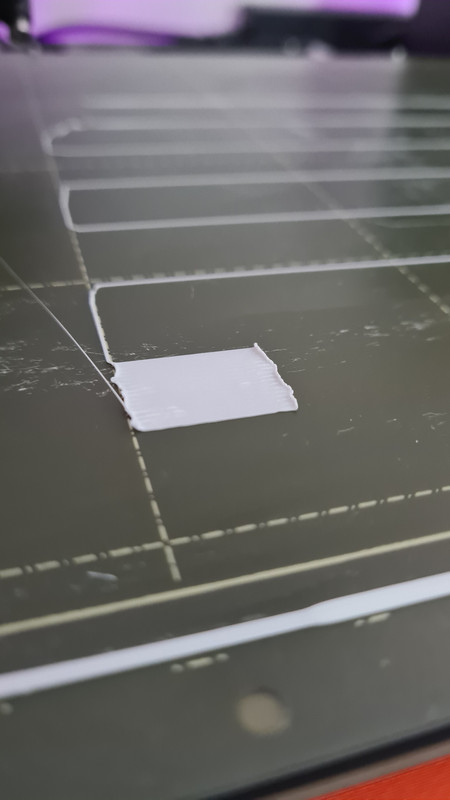
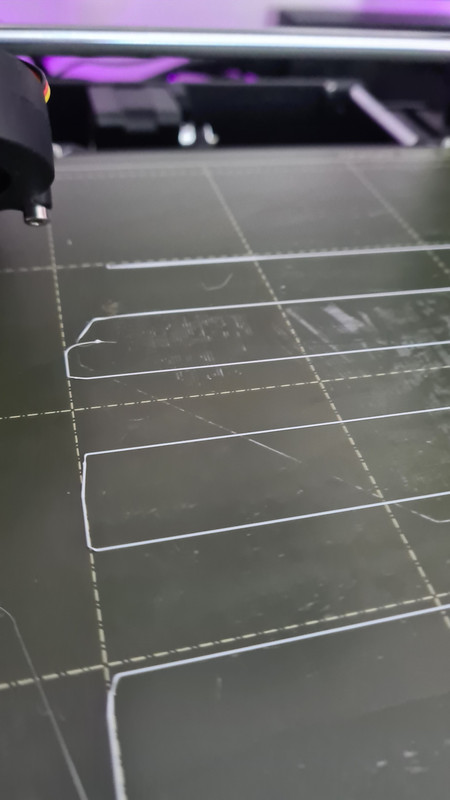
At the end of the lines it stands out
Hello Community,
I have a MK3S + and have done some great printing. As of today, however, it has started to stick out slightly at the end of lines. For the test, I also made the calibration print. This one is also terrible, although I haven't changed anything on the device.
I used PLA..
What can that be? How can I fix that?
Thanks in advance and best regards
RE: At the end of the lines it stands out
You've likely got issues with bed cleaning and/or Live-Z adjustment. Here's an info dump that should get you going...
-
A dirty PEI print surface. Even if you don't think this is the cause, it's always a good idea to make sure your PEI surface is clean before trying any other fixes. If it's a smooth PEI sheet, take it to the kitchen sink and give it a good dunk with Dawn (original formula, no vinegar or hand softener variants) dishwashing soap or your local equivalent (e.g. Fairy in UK). Use a clean paper towel to clean it off, and another to dry it. Avoid using any sponge or cloth that has been in contact with grease. Above all else, avoid touching the PEI print surface. Once it's good and clean, you should be able to use 91%+ isopropyl alcohol between prints, 100% acetone when that fails , and another dunk when acetone fails. Worst-case, use a 3M 7445 ScotchBrite (1200-1500 grit) pad or equivalent on smooth PEI to give it a very light buff, but only infrequently. If you've got a textured powder-coated PEI print surface, the official instructions are to use 91%+ isopropyl alcohol on it only. Rumors persist that some have had good luck getting started with these sheets by giving them a wipe with 100% acetone and a dunk with Dawn. Either way, there's no real warranty on these sheets. YMMV.
-
If you have not already done so, try using Jeff Jordan's "Life Adjust" procedure for calibrating your Live-Z setting. It is much easier to use and understand than the onboard routine and much easier to make mid-print adjustments accurately with. In general, start high (less negative) and work lower (more negative) in large increments (e.g. 0.1mm) until the filament starts to stick on its own. When you've got your Live-Z setting adjusted properly, you should be able to gently rub the extruded lines on the PEI surface without dislodging them. Then start lowering (more negative) the level until there are no gaps between layers. You should not be able to peel the lines apart after printing, but the top should be regular.
RE: At the end of the lines it stands out
Perhaps that's the problem, maybe you need to change something,
1, is the build plate perfectly clean>
2, Are you using 7x7 Mesh bed levelling?
3, I suggest you use a different first layer configuration tool, the prusa one is not very good
as you use a printer the nozzle is likely to wear, the bearings are likely to settle in, and the print surface is likely to pick up contaminants.
I use hot water and dish soap, wash really well, rinse well and dry immediately, then I use the build plate with no other Surface preparation

regards Joan
I try to make safe suggestions,You should understand the context and ensure you are happy that they are safe before attempting to apply my suggestions, what you do, is YOUR responsibility.Location Halifax UK
RE: At the end of the lines it stands out
I have now cleaned the bed again properly with water and it probably actually helped ...
really strange, I had cleaned it beforehand with window cleaner and then with disinfectant ... nevertheless the errors came ...
now i had rinsed it and then only treated it with window cleaner .. works as if nothing had happened ... without calibration ..
Thank you very much for the quick help
RE: At the end of the lines it stands out
Try using ONLY dish soap/washing-up liquid and water. Use a lot of hot water. Do NOTHING ELSE and avoid touching the print area. Any disinfectant or window cleaner is likely to leave residue that will REDUCE adhesion. This can be handy when printing overly-sticky filament like PETG, but you don't want it for PLA.
RE: At the end of the lines it stands out
Window cleaner will leave a residue behind , and pla will stick not as good.
Window cleaner you should use with the pei sheet and with petg printing, The windows cleaner layer will let petg not stick to hard.
For pla use dish soap, every few prints, between use alcohol(use a lot). For prints with small foot print or big flat models, always clean with dish soap, and if needed use glue stick.
first layer calibration, is important, look on youtube how deep you need to go, to low is not good, model can come loose higher up in the print.