General advice on adding supports
I am trying to learn about adding supports and also how to avoid them. I see that if the surface angle is less than 45 degree from the horizontal then supports are advised, as I understood. But in the Prusa Mini package there was boat model which has a roof where the angle is 0 degree and no supports are used and it prints out just perfect. The size of the roof is about 2cm x 1.5cm.
So what other things should be considered to best determine where to put in supports?
RE: General advice on adding supports
If a gap can be spanned by a single extrusion, it can be bridged. A single, continuous strand of molten filament can be pulled across surpringly wide gaps so long as the nozzle can maintain that delicate tension to keep it intact. Once a few strands of bridging is built up, additional layers can be added on top. Think of it as tossing a rope across a chasm, but the flight path must be perfectly flat.
The problem with angled overhangs is that they are not flat. There is no other side to pull to. The printer attempts to print an extrusion out literally into thin air, then just leave it there hanging. Because of the angle, additional layers must build stop the preceding layers before there a bridge foundation to build on. We are tossing our rope horizontally into space and hoping it will hang there. Surprisingly, it can work in some cases.
The downside to both bridges and extreme overhangs is that, because they are printed on air, there is no layer beneath to squish against. The extrusions are round in cross section which yields poor adhesion due to less contact surface. They tend to dangle and be stringy in appearance.
RE: General advice on adding supports
I find that I can print out angling walls at quite a bit steeper than 45deg - generally up to 60, so long as the wall they are a part of is reasonably thick. Essentially for that case the outermost strand on each layer is partially on the previous outermost layer strand and partially over air. (The 45 number comes from the safe assumption that you can certainly do that if half the new strand is over the previous one but you can actually do better.) As to avoiding support (always a good thing) also think about designing in support like features that allow avoiding slicer supports. For example, if you have a vertical wall that has a block sticking out from it, sometimes you can make the bottom of the block actually an angle that is printable. This often works for protrusions that are there to support something on top of them later but where the lower part of the protrusion is not seen (think a tab to support a circuit board off the bottom of a case). Another example of a well known trick to avoid supports happens for shapes like counter bores that need to be printed upside down. (A screw hole for a a screw inserted from the bottom.) The slicer will want to create supports to handle the "floating" ledge that the screw top will sit on. However, you can add a 1 layer "hymen" that closes the hole because it can be a bridge (what bobstro describes above). After printing it is trivial to cut out the single layer of plastic to open the hole and that is a lot less waste, particularly if the actual shape to are dealing with is large. Lots of tricks like these that you'll pick up as you go to significantly reduce "dumb" slicer supports.
RE: General advice on adding supports
Thank you Bobstro and Kevin. This is really helpful. Is there a setting in Prusa Slicer that can help adjust the bridging distance between supports?
RE: General advice on adding supports
@milind-gupta
It sure is, Print settings -> Support material. Make sure you switch to Advanced view mode to unlock all knobs and levers. You are probably looking for Pattern Spacing to set distance between support columns. Also pay attention to pattern angle - top most layers are interface layers that are at the right angle to support structure. It is good practice to have those not running in parallel to first solid layer above them. Change pattern angle if necessary.
RE: General advice on adding supports
Hi,
I'm a total newbie WRT 3D printing and would need some enlightenment about support material.
The "Generate support material" in unchecked by default in the print settings. Am I supposed to decide by myself when supports are required, or is the slicer able to detect this and activate their generation without manual intervention?
I have to print 1/100 scale schematic buildings with sloped or flat roofs. Their dimensions are in the range of 10 to 20 cm:
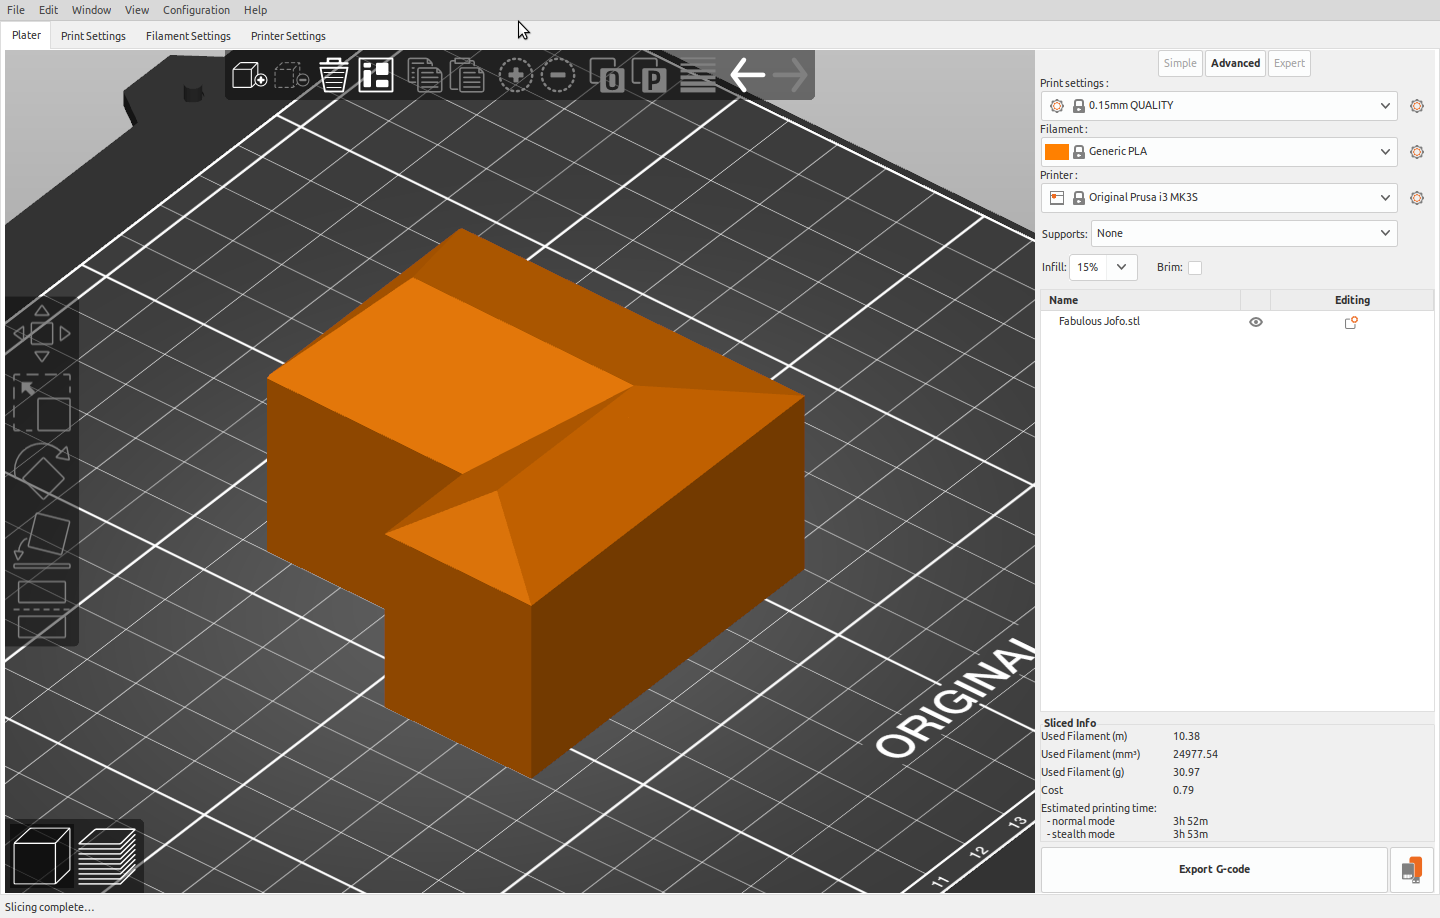
To spare some material (and hopefully printing time), the buildings are designed as hollowed volumes. By default the slicer produces this kind of result:
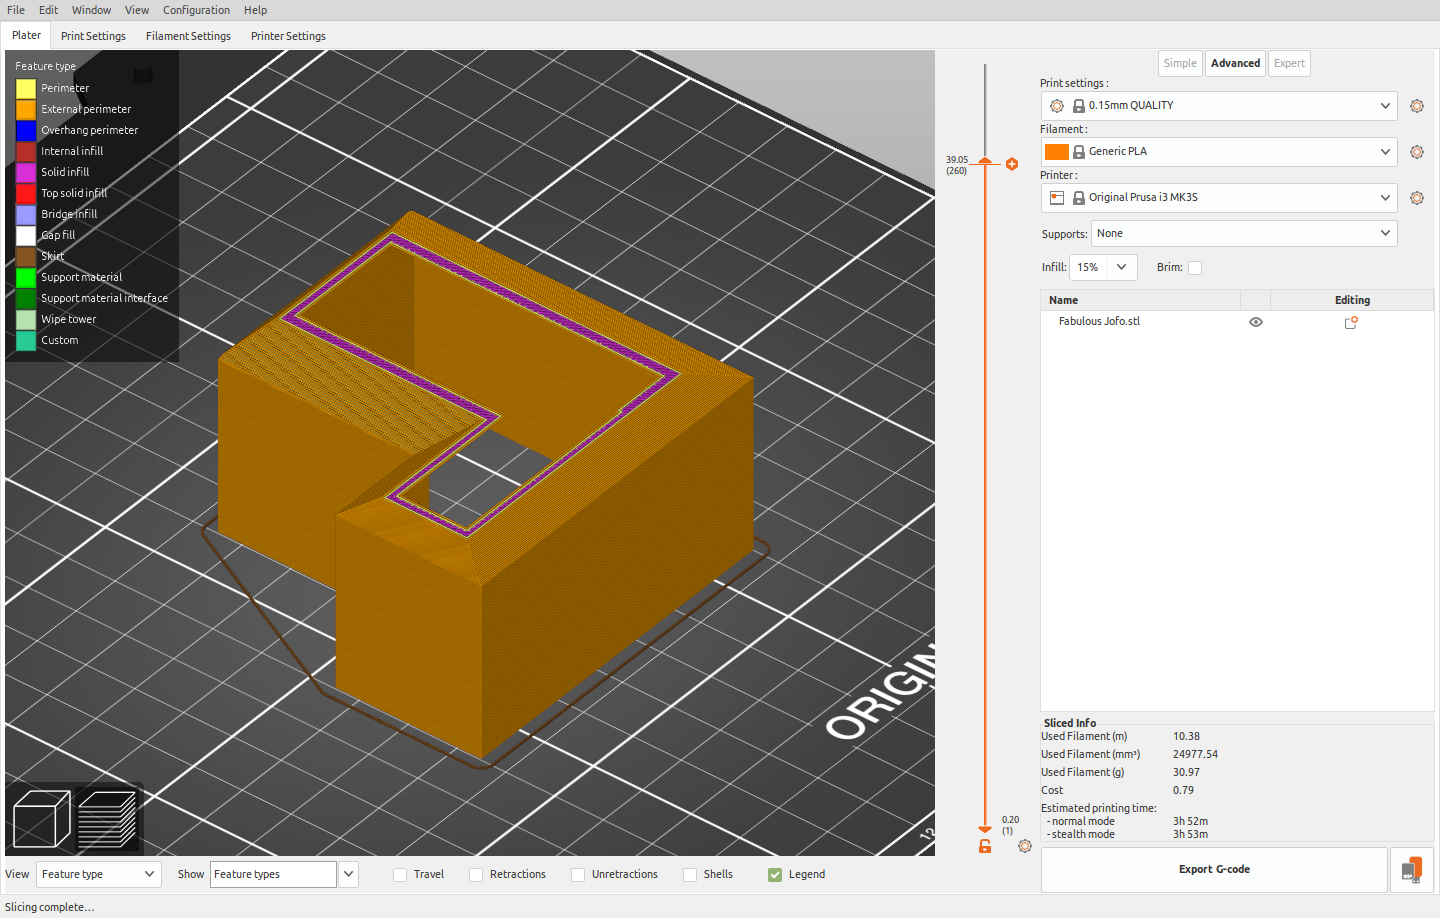
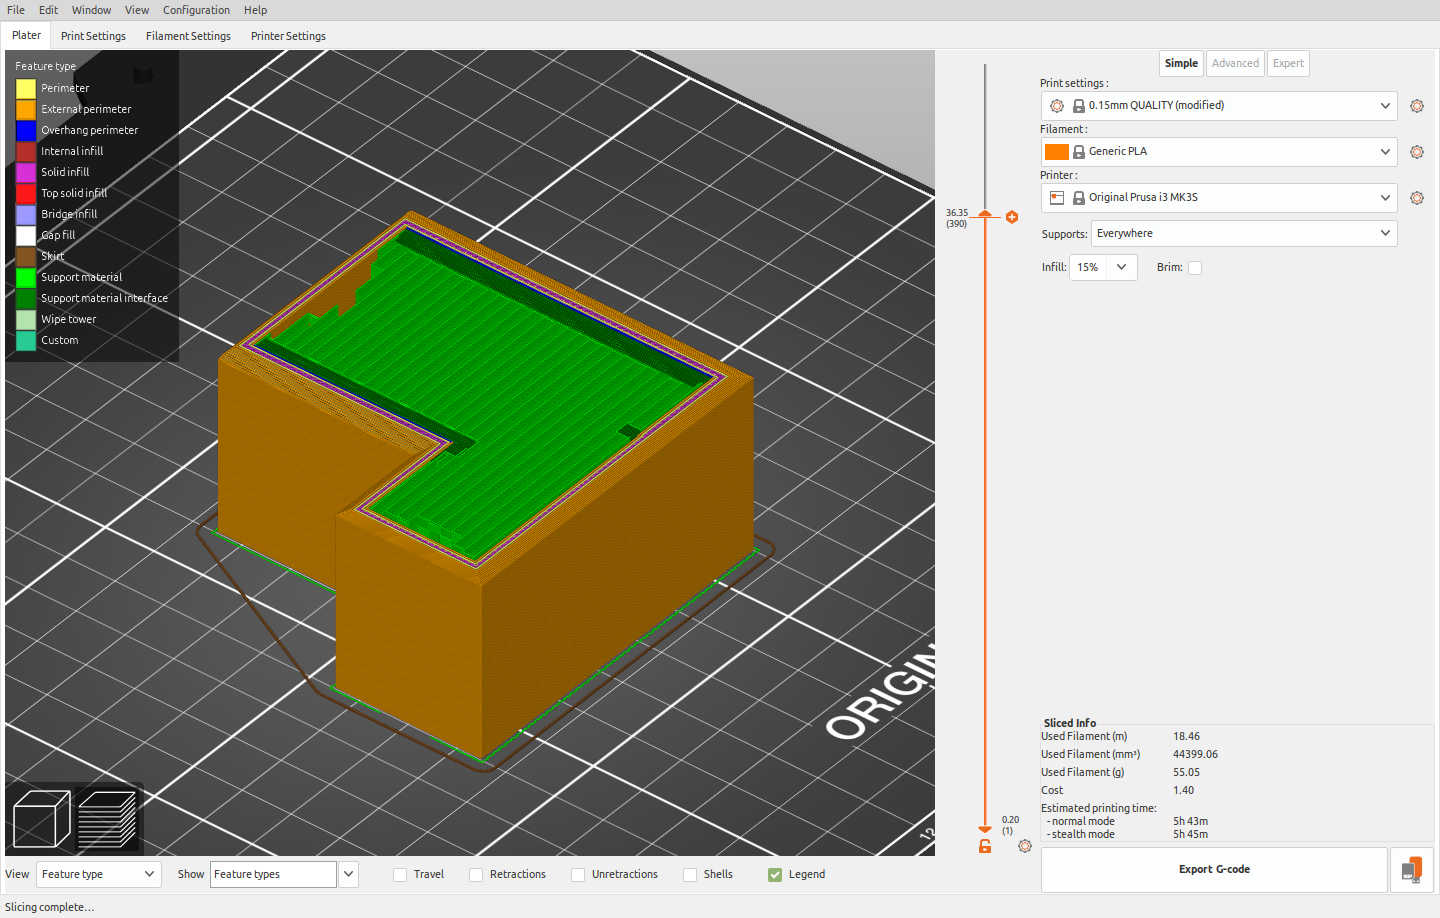
Can such a model be printed as is or do I have to manually activate the supports generation, which results into this when done:
I've read here and there that the printer is able to do without by "drawing ropes" in the air, a bit like spiders do, and then print the subsequent layers on top of them. But there are surely limits for this being possible and I have not yet found indications about them.
I could of course run a test print, but since the estimated duration is 5 hours, I'd prefer not having to wait for 4 hours before observing that it cannot be done this way. Scaling the model down is not possible though since it would change the physical constraints, and the result could not be extrapolated safely.
The other option is to add support by safety, but this adds 2 more hours to the print duration. If supports are not required, being able to shorten the overall duration to such an extent would be very useful since there are several dozens of various buildings to be printed.
And what about flat roofs?
Many thanks in advance for any advice and inputs.
MK3S, OpenSCAD, Blender, SolveSpace, Linux, electronics, robotics, software
RE: General advice on adding supports
Hollowed out volumes with a closed top and open bottom are not good for these type of printers. Why not make them solid volumes and use 10% infill? That will fill the insides with a pattern of 10% plastic to support the top? The outside and roof will be exactly what you want. The slicer will make several layers of solid plastic there.
Regards,
Mark
RE: General advice on adding supports
@eric-g-pascual
Welcome to the forum! Let's try answering your questions.
First of all, if there's any possibility to avoid using supports, try that first. There are few tricks you can use:
1. Overhangs. General rule is that overhangs around 45 degrees angle are doable by any printer, but usually printers are capable of doing more - MINI or MK3S can push up to 55 degrees from Y axis, more degrees can produce ugly undersides which may or may not be a problem (if it's hidden or functional part where you do not care about looks, with more layers above it). You can search Prusaprinters or Thingiverse for plethora of overhang tests and confirm what your printer is capable of. One little note - with some printers, depending on how part cooling fan shroud is built, overhangs may perform better on one side ws. another. For example MINI has fan blowing from the back, and potentially overhangs on the back may look better because of better cooling. You can keep that in mind when orienting models on plate.
In your case if there's possibility to use building model which has at least those 55 degree roof overhang inside, instead of it being shallow, it will be easier to print without any supports.
Which leads to:
2. Model orientation. You may want to free yourself from conventional "feet down, head up" with models a.k.a. how you see them in real world. If it's easier to print model upside down, or on a side, or other weird angle, orient it that way. For example respecting what's in point 1., it may be easier placing model on one of roof slopes and see if other surfaces respect that 45 (55) degree angle and print it like that. Models of houses with flat roof can be printed upside down providing they don't have chest-high walls or railings there. Fun fact: models for SLA printing are usually printed at 45 degree angle, to have supports in not obviously visible places.
You can use Rotate tool in Prusa Slicer to rotate freely, or even faster if you use "Place on face" button and select which face should be at the bottom.
3. Slicing. It's what slicers do 😀 You can cut model at any layer and print 2 parts separately, then glue them together. This is useful when you are printing models which are more for looks than durability (if you worry bonds or joints will compromise strength). In many cases you will post-process such model anyway (sanding, painting, ...) and one more step of glueing is not a big deal. For example your house could potentially be printed as a block and then roof with solid bottom separately, then roof glued on top of house. If you are worried about not wasting material, choose lower infill density i.e. 10%.
This also answers your concern about waiting 4 hours before you get to the critical part - just cut the model few layers below critical part, throw away the bottom, change print settings as needed, and print only the top to see how it behaves. It's much easier to experiment this way, you do not waste time and material. You don't even have to print whole top part, again, just a slice of few cm to see if it's feasible. You can also rotate model and cut away one whole portion of the house and leave only one wing, it should be enough to see what you are testing.
4. The "rope between gaps" is called bridging. Depending on the material, bridges can span surprisingly large distances. PLA bridges nicely, PETG ... ehhh not so much (heavier more fluid material). You can help bridging by turning up cooling in Filament Settings -> Bridges fan speed. Again, there are plethora of bridging test models available on websites.
As for supports themselves: in Prusa Slicer, you can select to have suppots either from build-plate only which places them automagically from build plate; or everywhere which is a bit heavy-handed because it places them in model itself, i.e. inside holes in the model. If it's large flat part and you worry bridging will not suffice, uncheck "Don't support bridges". You can use support enforcers if you need to support only one specific part and leave rest of the model up to printer's capabilities, or block supports at places you do not want to have them.
Few things worth experimenting with:
Contact Z Distance - is the distance between top support layer and model layer. The higher it is, the easier it will be to remove supports, but if you put it too high, model layer above supports won't attach to it and will sag and look ugly.
Pattern spacing - how dense those support columns need to be.
Pattern angle - there's a good rule of thumb that last support layer (interface layer) should not run in parallel with first model layer above it, but rather perpendicular.
Few test model examples I mentioned:
All in one test to torture your printer a bit - https://www.thingiverse.com/thing:2656594
Overhang uniformity test - https://www.thingiverse.com/thing:3739990
Bridging test - https://www.prusaprinters.org/prints/32697-quick-bridging-test
Some video on this topic, a bit older but FDM technology hasn't changed since.
RE: General advice on adding supports
@marklgoldberg Thanks for your suggestion WRT infills. If I understood correctly it's what the slicer seems to do by default when processing a solid shape. I was looking for other options because it estimated the printing time to 7 hours.
@crawlerin Waow !! Thanks a lot for taking the time to write such a detailed and informative reply. I'm sure it'll help me make a giant leap in 3D printing 😉
I understand now better the possible usages of the cut tool in the slicer. Orienting the model differently than the intuitive way has been one of my intuitions, but I had no thought about orientations other than 90 degrees rotations. By the way upside down for the flat roof buildings will not that easy since there is a kind of low wall along the edges. But this is a detail.
The strategy based on cutting the model in parts to be assembled afterward sounds the most promising. Seams should not be a problem since people will look at the model from not closer than 50cm or more, and in addition, the whole model (terrain + buildings) will be used as a projection screen for animations created by several video beamers hanging from the ceiling.
Thanks a lot to both of you for your support.
MK3S, OpenSCAD, Blender, SolveSpace, Linux, electronics, robotics, software
RE: General advice on adding supports
@eric-g-pascual
Did you try low infill numbers like 5%? I just looked at a 80 mm x 80 mm x 25 mm box and 50% infill is 10h 44m. 5% infill is 1h 57m. You should not need more infill than 5% as these are not structural.
I often cut models so there is a flat side on each piece and glue them together.
Regards,
Mark
RE: General advice on adding supports
Thanks Mark for the advice. I'll try your suggestion ASAP.
Best,
Eric
MK3S, OpenSCAD, Blender, SolveSpace, Linux, electronics, robotics, software
RE: General advice on adding supports
Hi,
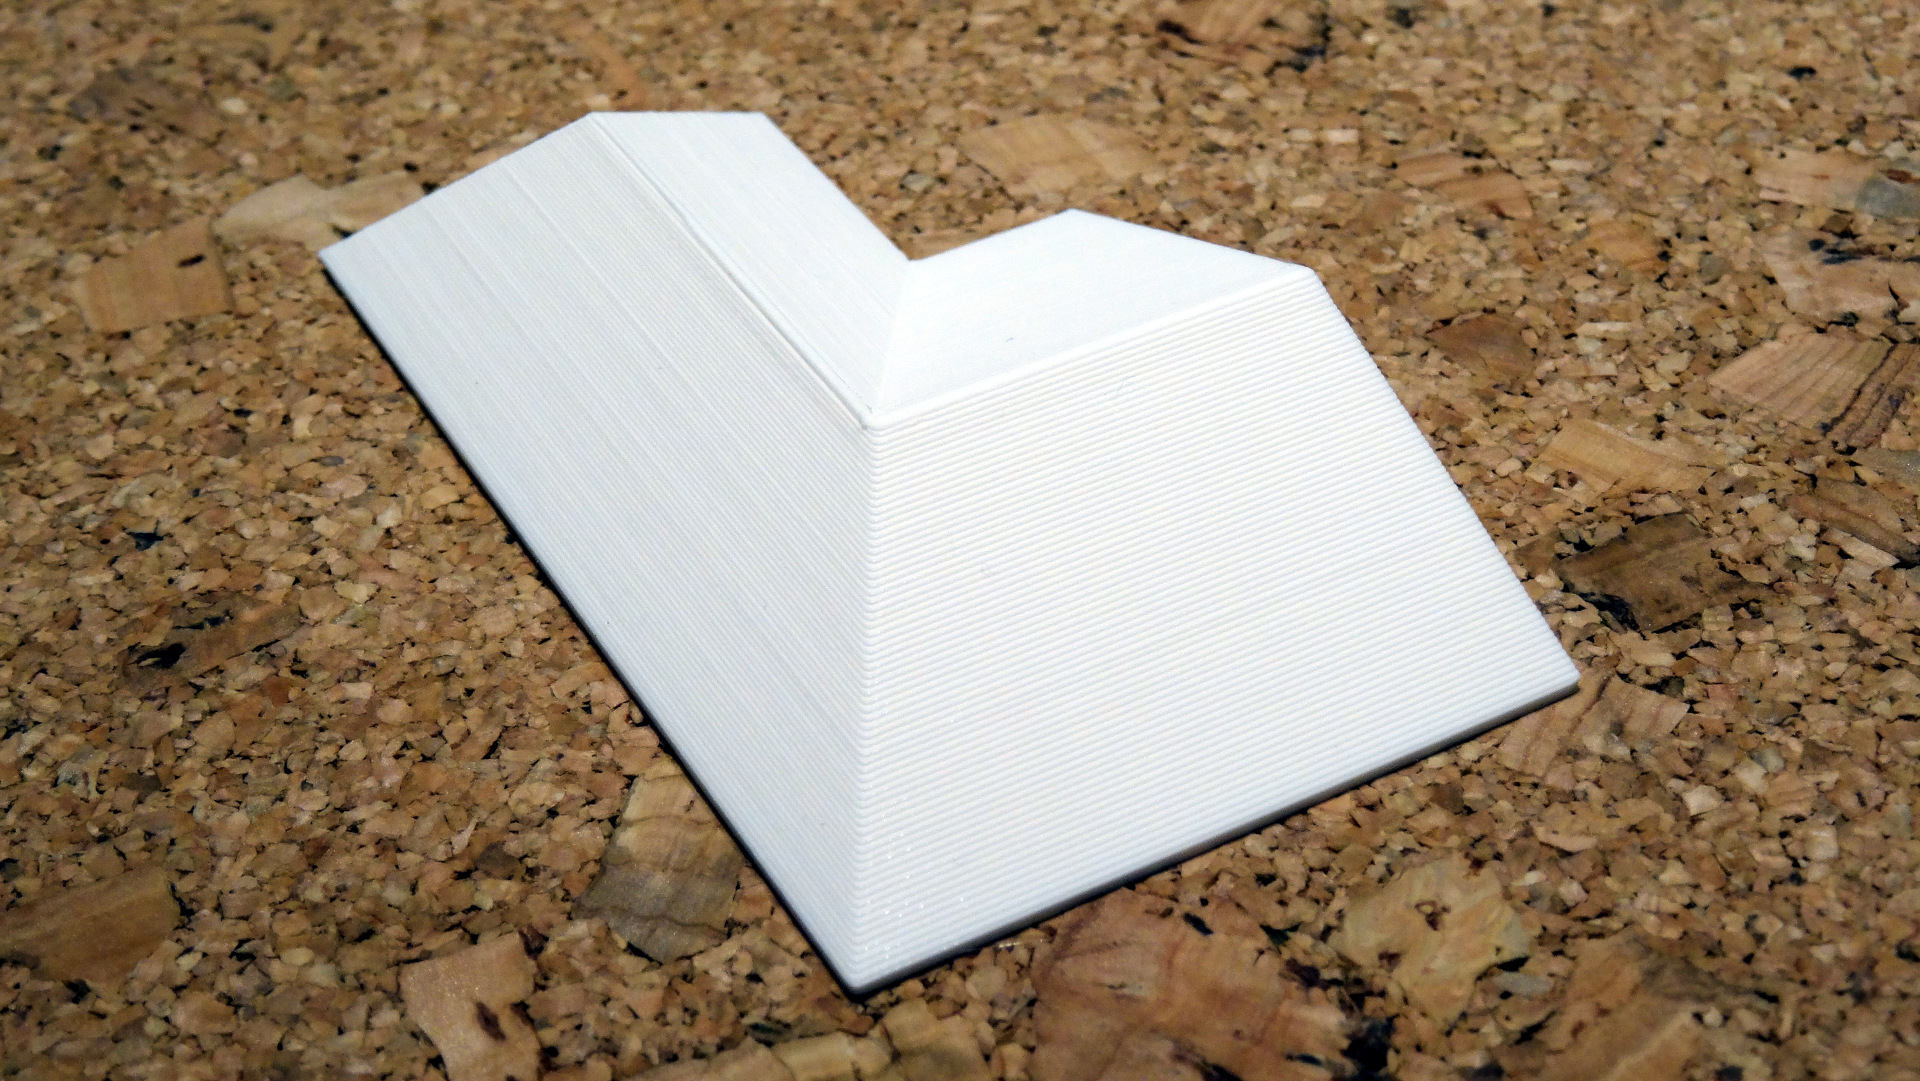
Thanks to your suggestions my first roof print gave a pretty decent result:
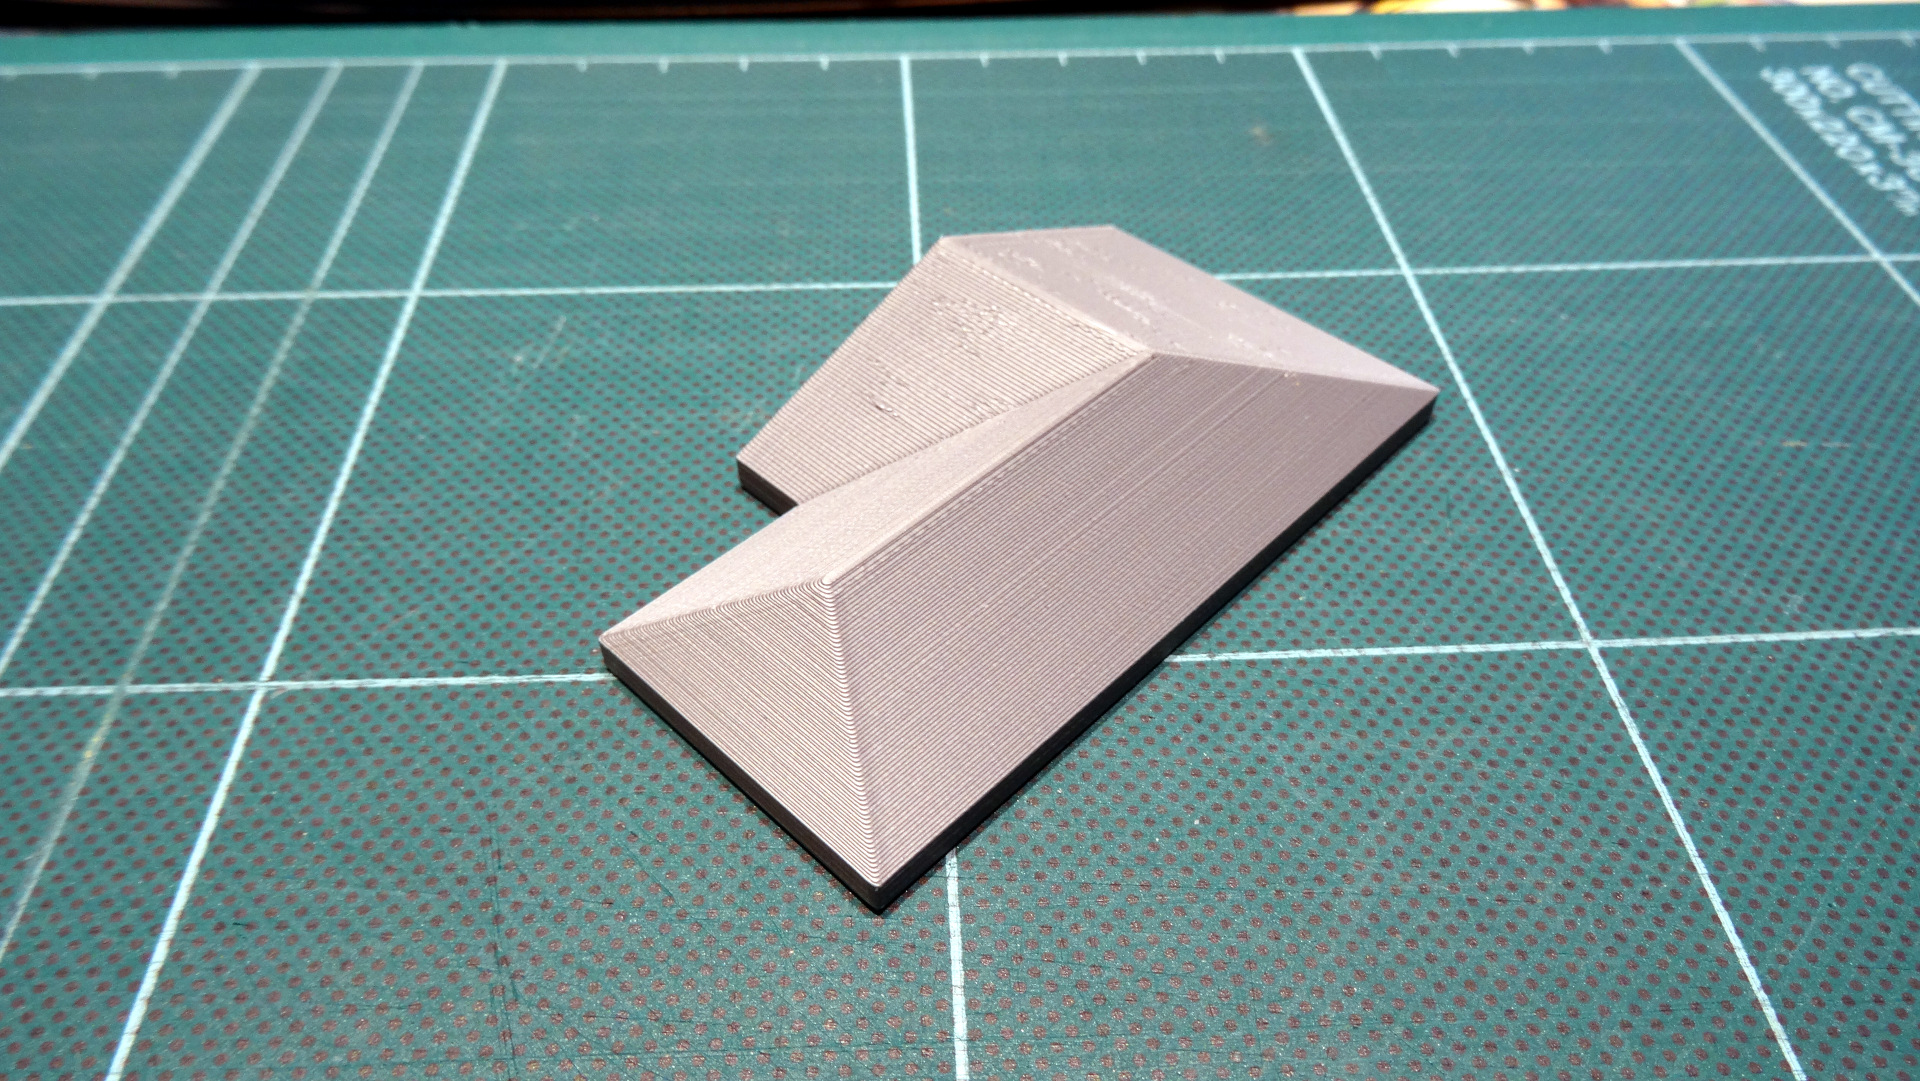
The slopes on the back are more or less 70° from the vertical. Small defects can be seen on them :
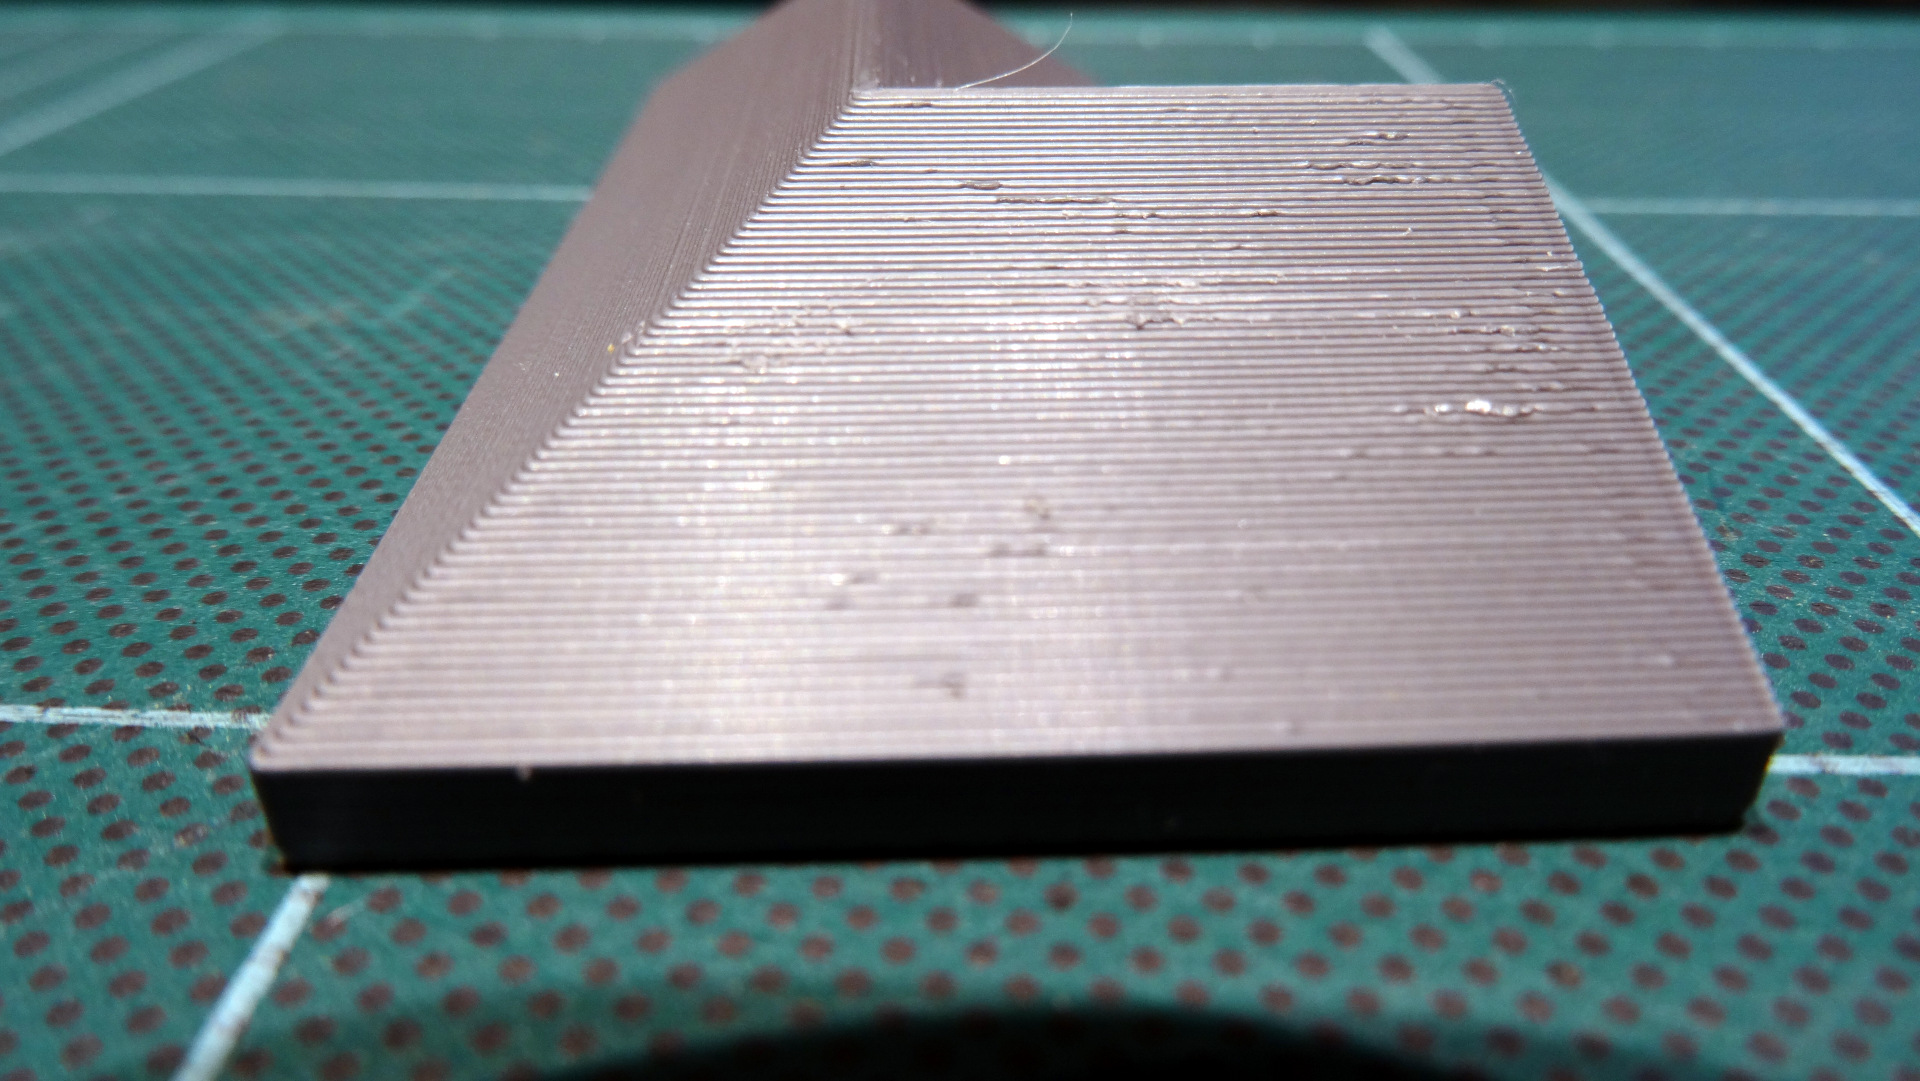
In order to check if it could be related to some problem on the involved axis, I ran the same print, rotated 90°. The defects are on the same slopes, now printed along the other axis. This is good news: the printer assembly and settings seem not to be the culprits 🙂
They are not so much annoying anyway since they should disappear with a light sanding or Gesso based coating. Even without this "post-processing", they should be barely noticeable from the distance the model will be looked at by the public. But for my curiosity's sake, what can be the cause?
As suggested, the infill has been set to 5%:
I'm wondering if it could not work without any infill by the way 😉 I think I'll give it a try to experiment.
Thanks again for your support. This, added to the quality of the printer, made me more confident in 3D printing. I was a bit intimidated by all the very technical and sometimes hermetic discussions I could read while documenting myself about the topic.
Best regards.
Eric
MK3S, OpenSCAD, Blender, SolveSpace, Linux, electronics, robotics, software
RE: General advice on adding supports
Drying your filament will almost always help with defects and quality.
Regards,
Mark
RE: General advice on adding supports
@marklgoldberg
Thank you Mark for the advice.
I was suspecting this, but the defects are always located on the same part of the model, whatever is its orientation WRT axis. If a problem of moisture would be the cause, the defects should be randomly distributed on the faces. However, the other slopes are perfect in both prints I did. Could the angle of the slope have an influence? I'll experiment as soon as enough time with a model created with various angled slopes to check if there is a relation.
Regards
Eric
MK3S, OpenSCAD, Blender, SolveSpace, Linux, electronics, robotics, software
RE: General advice on adding supports
Hi,
I solved the problem of defects located on the most horizontal slopes (at least 70° from the vertical).
Based on Mark's suggestion WRT lowering the print time, my first experiments with the infill used the lowest possible value (5%). Having a look at the print while in progress, I noticed that it sometimes leads to quite long gaps. Maybe this makes the filament not stick well to the layer above, which by the way is shifted because of the slope, and bend a bit, creating the tiny defects.
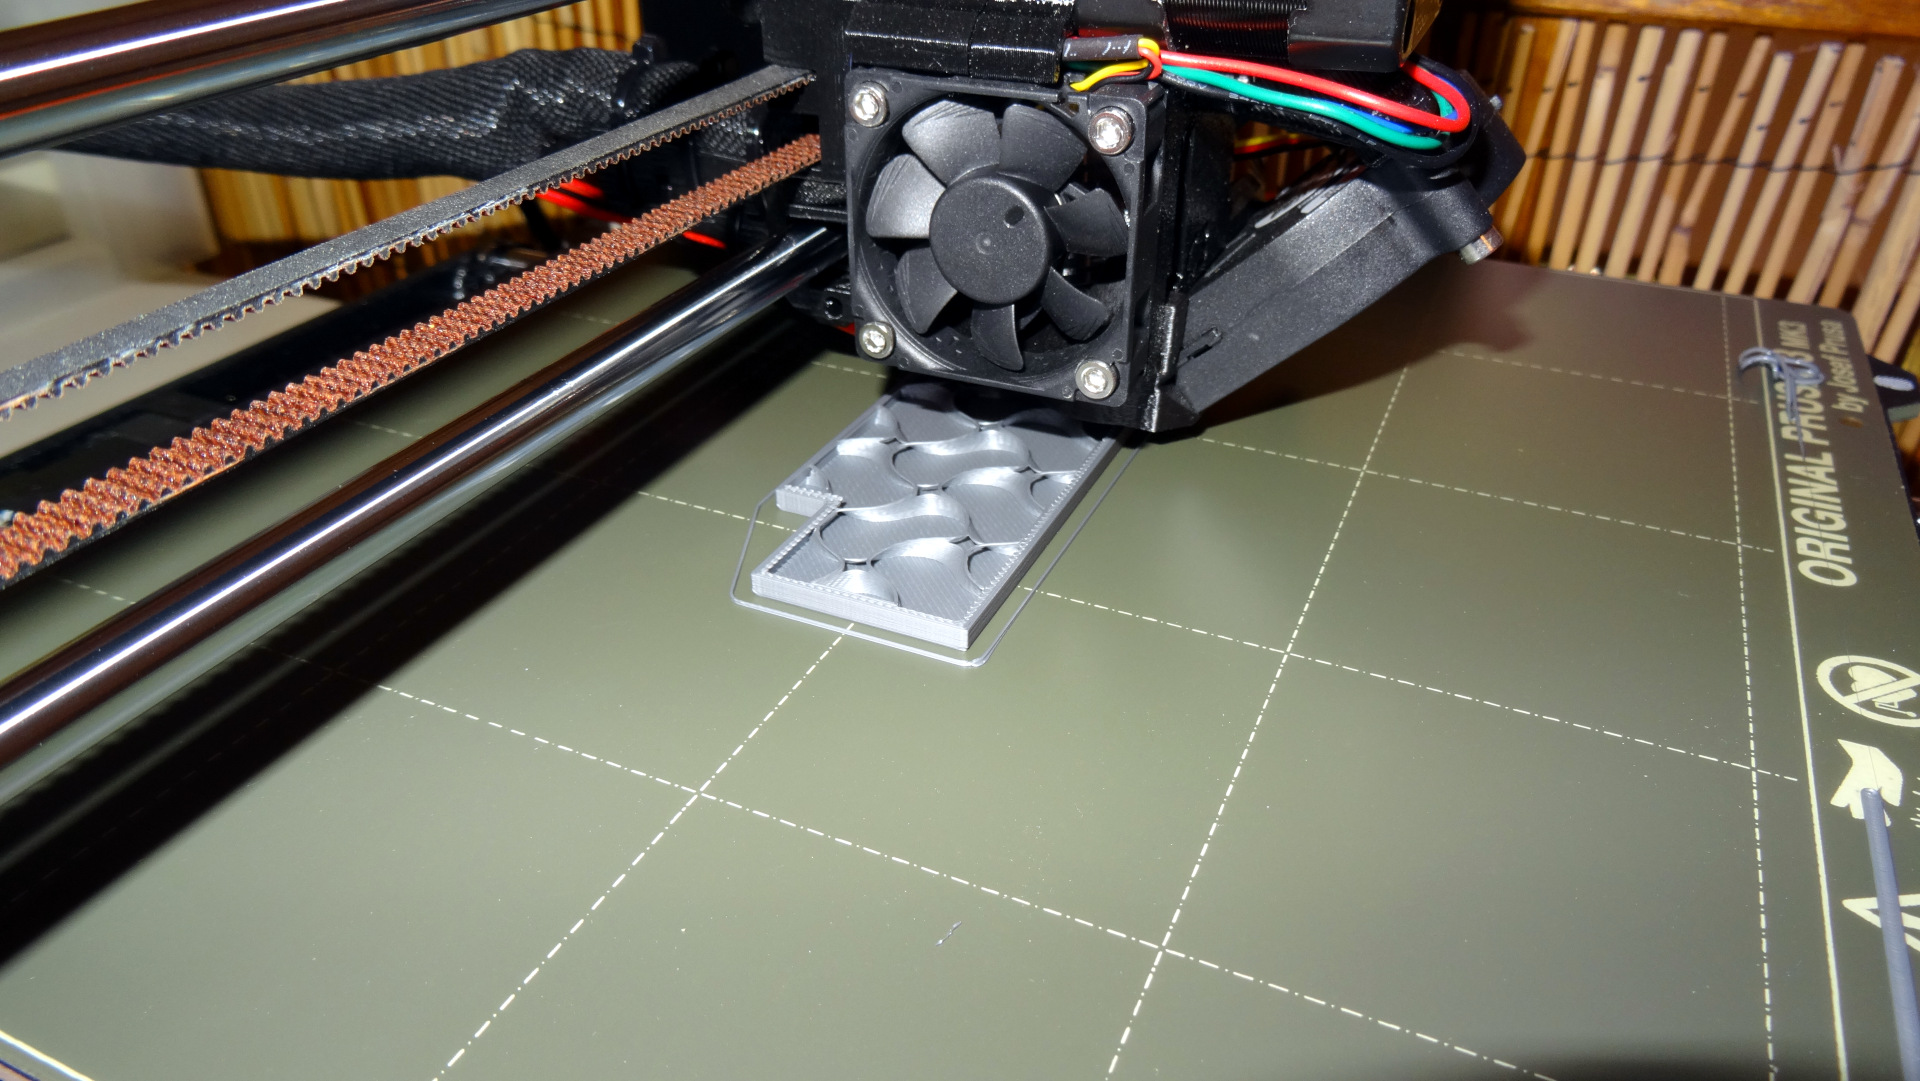
Setting the infill back to the default value (15%) made them disappear, as one can see in the picture below:
The printing time raised to 1h15mn (instead of 1h04mn) but the part is perfect. I'll try with 10% for experimentation's sake.
I must admit that I was not so much convinced by 3D printing until now. I'm more a milling guy and the 3D printed parts I've had in hands until now were not very good looking and broke quickly. I tried to break the few ones I've printed and couldn't succeed, although they use standard PLA (not even ABS or PET). I'm now realizing the world of possibilities it gives access to. Milling and 3D printing seem to be very complementary, each one having its own strenght.
Chances are that the quality of the MK3S helped me reconcile with 3D printing 😉
MK3S, OpenSCAD, Blender, SolveSpace, Linux, electronics, robotics, software
RE: General advice on adding supports
@eric-g-pascual
You will find you have to adjust settings for different combinations of particular models and different filaments. 3D printing is not yet plug and play, but I have found I'm able to get good results with everything so far, using a big enough bag of tricks.
Regards,
Mark