Question on Distance Between Support and Overhang
So I've been playing with the support material options. I wanted to reduce my print time and increase the ease of removing supports in areas where finish is not important. In doing so I believe I created an issue with the distance between the top of the support layer and the overhang layer.
If I'm understanding my (lithophane box) slice correctly, in the slot area I see a 6 layer gap between the two features, measuring approximately 1.2mm. With a layer height of .3 I don't understand how or why that is possible. My top and bottom support contact distance is set to .2.
My thought is if I print this using this slice, I'm going to have a failure here. Isn't that too much of a gap? If it is then what am I doing wrong, or what do I have wrong in the settings? The math just isn't making sense to me. Thanks in advance!
Best Answer by Crab:
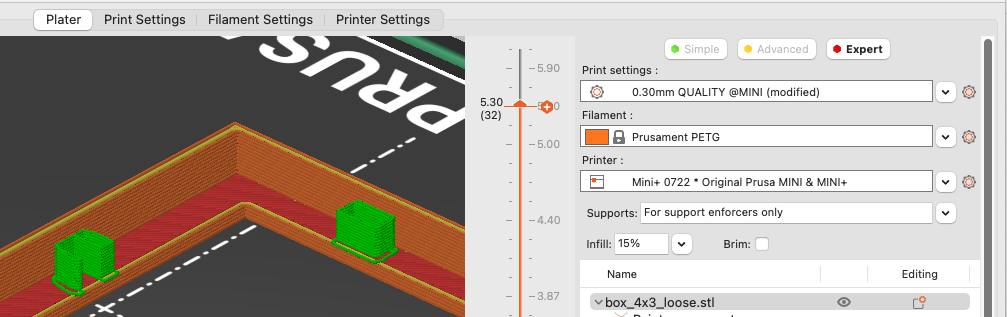
When I pull your model into my version of PrusaSlicer 2.5.0 I don't see that.. at 17.70 is the top layer of support, followed by a blank support layer and then the bridge for that 'roof' section, in blue.. at 18.2. You also have a lot of supports there that might be hard to remove from the back wall. Play around with painted on supports to see how they work.. You don't often need supports the entire length.. your printer will bridge fine for 20-50mm.. I only use those now. You need to paint on blue areas on the top shelf where you want the support to end.. That is easy in the end without a back.. on the sides, you can actually paint on the back wall and just a bit up and it will fill in that roof support. Use a "Snug" style and have 100% distance from your model. Play around with settings here for support distance from top/bottom and you'll find something that will be easier to remove. PETG and PLA use slightly different settings. When your painted on supports fail, analyze each layer using the layer tool and the slider underneath which shows a single layer travel. Doing this you'll learn much more about how and when models need support.
Rotating the model and cutting top/bottom sections you can get a slice of one of the walls and print it as a test to see how it prints and how the supports work.. Sometimes PrusaSlicer needs a reboot to show stuff properly.
Mini+MK3S+XL 5 Tool
RE:
When I pull your model into my version of PrusaSlicer 2.5.0 I don't see that.. at 17.70 is the top layer of support, followed by a blank support layer and then the bridge for that 'roof' section, in blue.. at 18.2. You also have a lot of supports there that might be hard to remove from the back wall. Play around with painted on supports to see how they work.. You don't often need supports the entire length.. your printer will bridge fine for 20-50mm.. I only use those now. You need to paint on blue areas on the top shelf where you want the support to end.. That is easy in the end without a back.. on the sides, you can actually paint on the back wall and just a bit up and it will fill in that roof support. Use a "Snug" style and have 100% distance from your model. Play around with settings here for support distance from top/bottom and you'll find something that will be easier to remove. PETG and PLA use slightly different settings. When your painted on supports fail, analyze each layer using the layer tool and the slider underneath which shows a single layer travel. Doing this you'll learn much more about how and when models need support.
Rotating the model and cutting top/bottom sections you can get a slice of one of the walls and print it as a test to see how it prints and how the supports work.. Sometimes PrusaSlicer needs a reboot to show stuff properly.
RE: Question on Distance Between Support and Overhang
Thank you @crab! Those are some awesome ideas! Never thought of using the cut tool for that purpose. I'm doing some experimenting now.
Just to make sure I understand you correctly, you aren't seeing the same gap? This is the layer just before the overhang layer. I am also on 2.5, using the Mac version. Shouldn't make a difference, but I know that "should's" and reality are sometimes two different things.

Mini+MK3S+XL 5 Tool
RE: Question on Distance Between Support and Overhang
Yeah.. I don't know why you see what you see.. I'm on Mac Monterey with 2.5 PS. I get no multiple layers without support from your model. There is either some weird setting set or maybe you need a complete reboot to see if it still occurs. Print a section of the wall to see what happens.
Dave
RE: Question on Distance Between Support and Overhang
I agree with Crab. The top of the support layer is at 17.70mm, the next layer which is back to being your object is 17.90 (at the top) and then the layer on top of that which is the part of your object that has the bottom layer of the slot is 18.20mm which is 0.3 matching your layer height. So the bottom edge is at 17.9, which is 0.2mm above the support at 17.7mm. That's precisely your configured top contact z distance. So its doing exactly what you have it configured for.
If you want to make those supports easier to remove then I would suggest upping the top interface layers from 2 to 4. Having more means the interface is more cohesive, that usually results in it peeling off in larger sections rather than breaking up. That means easier removal and less fiddling. Just break the hex pattern out with some needle nose pliers and then apply pressure away from the contact surface on the interface and it comes away cleaner and easier.
RE: Question on Distance Between Support and Overhang
Thanks @crab and @neophyl. I’ll reboot and play around with it a little bit more this evening.
@Crab, thanks for taking the time to post how to work through something like this. A simple as it seems, that’s some valuable information.
Mini+MK3S+XL 5 Tool