Sequential printing error
I must be missing something when I try this project, PrusaSlicer gives the error that some objects may be too tall for clearance.
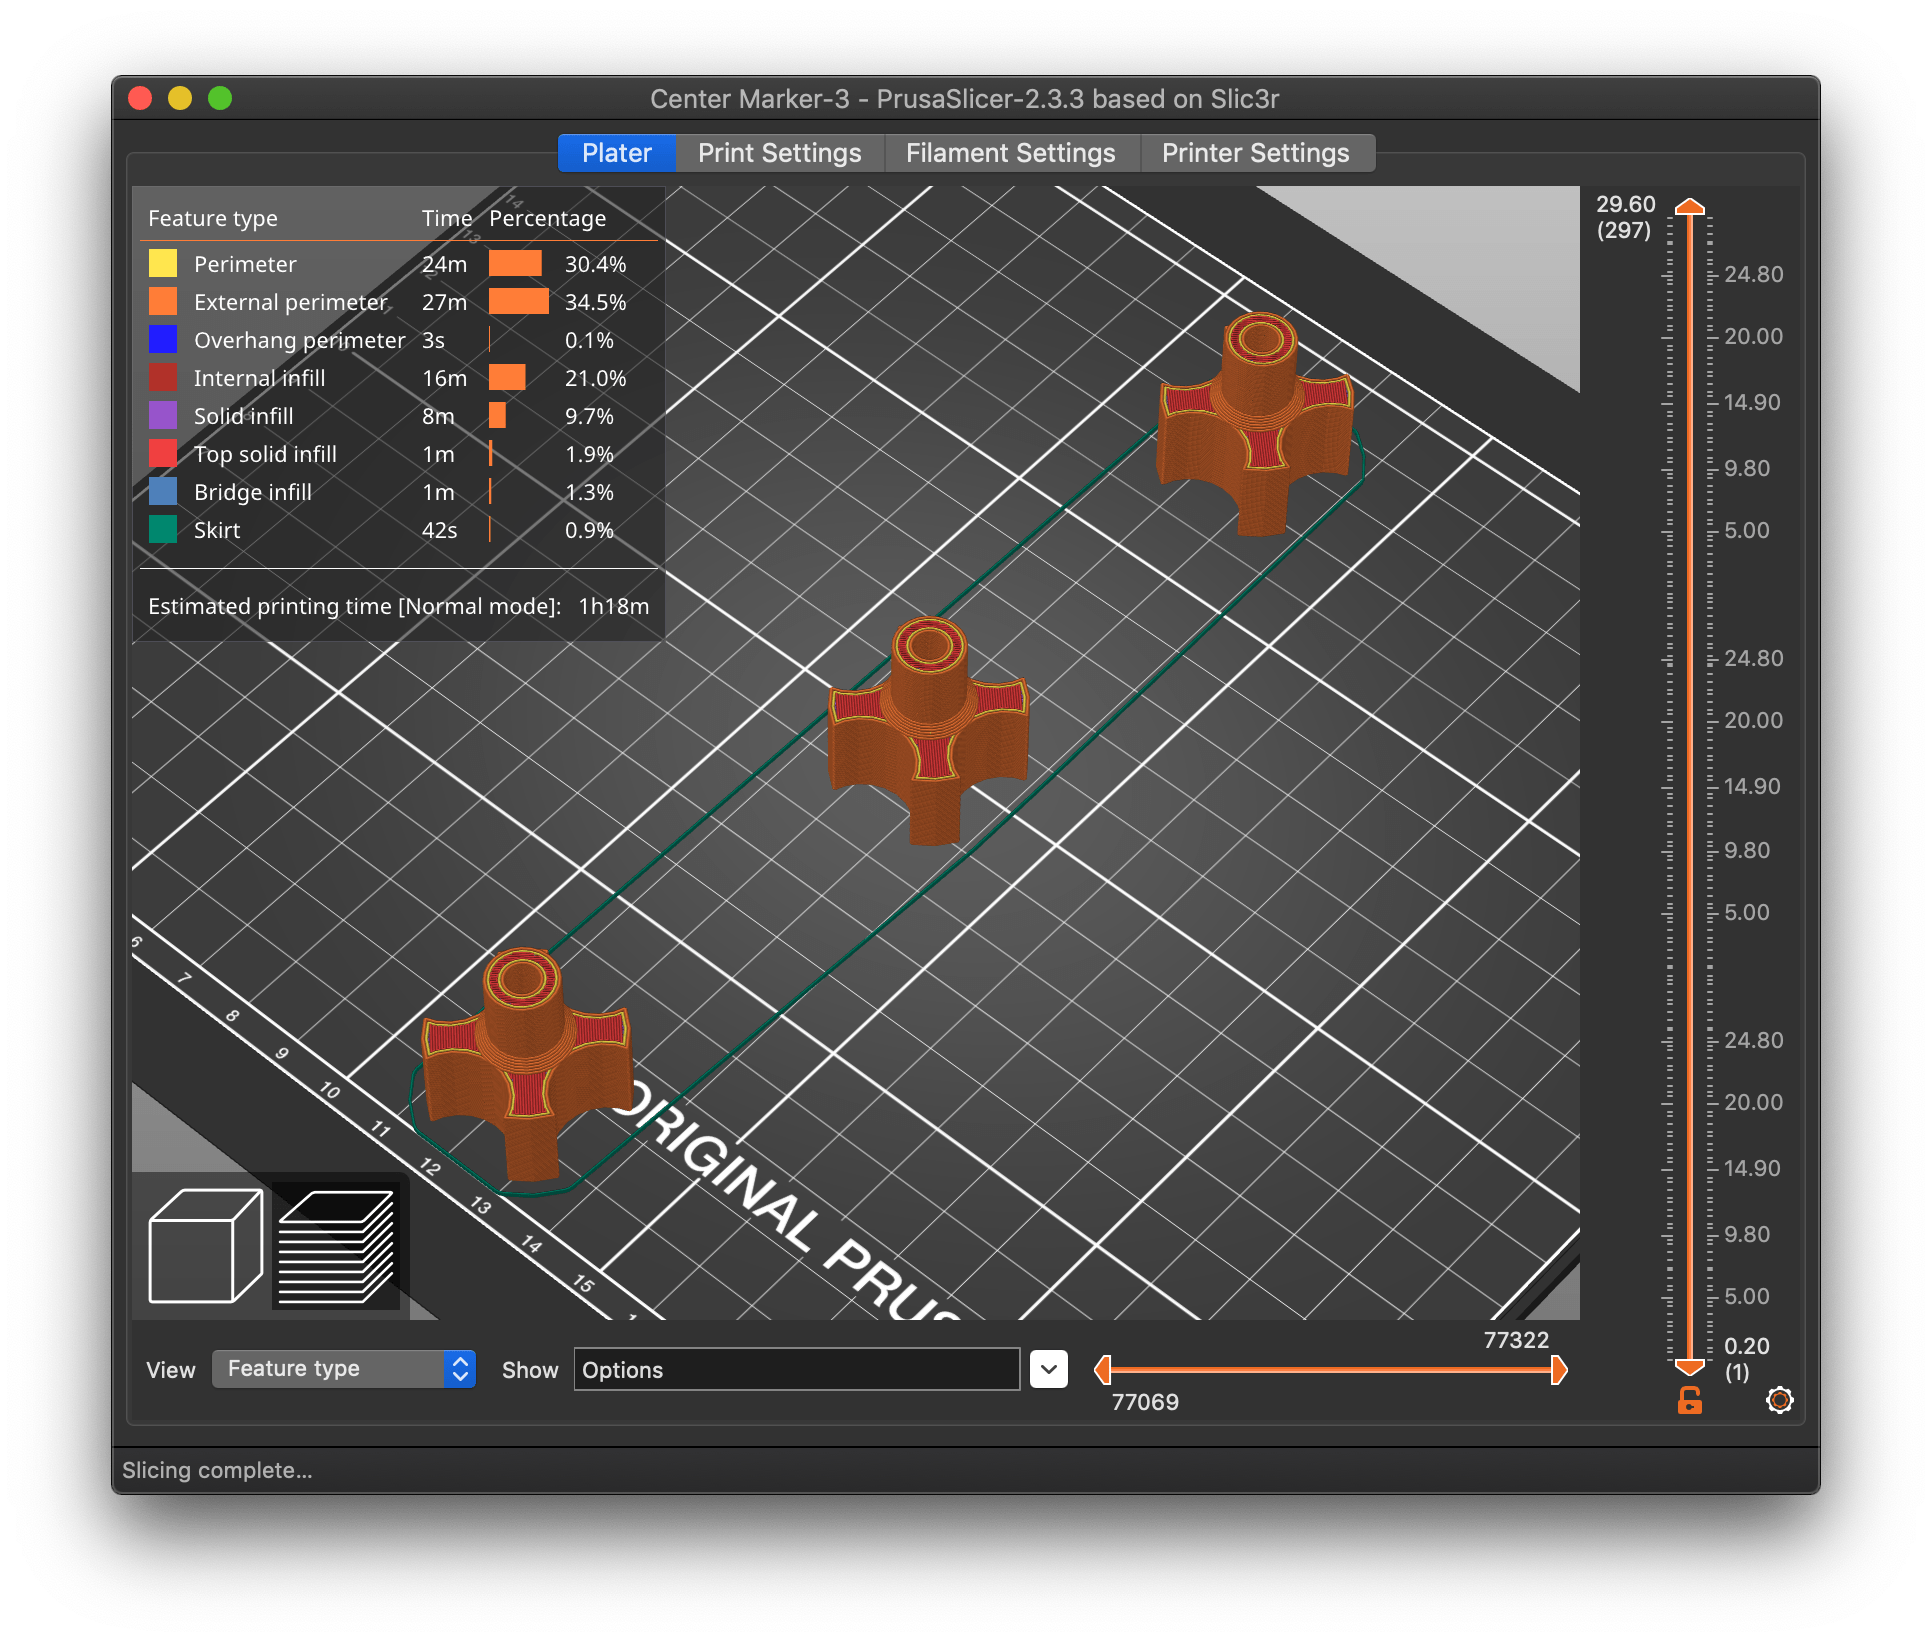
Gantry height and part arrangement
Your individual parts are 29.61mm tall. Under Print Settings->Output options Sequential printing->Extruder clearance, you have height set to 20mm (which is correct for the Mk3). If you increase that to 30mm, you can slice the part. However, the printer still has that physical 20mm gantry height limitation.
Someone (I need to find the original reference) noted that you can print a smaller number of parts sequentially if you arrange them with one part per row so the gantry doesn't crash into the previously printed parts. Something like this:
Arrange one part per row and be sure to arrange them so it prints back-to-front or front-to-bak and you can get away with taller individual parts.
Thanks
Thanks, I guess I'll have to give that some thought as I still can't get the reason for that 20mm limit.
The limit is based on printer dimensions
Thanks, I guess I'll have to give that some thought as I still can't get the reason for that 20mm limit.
If you measure from the tip of the nozzle to the rods on the X axis, it's a bit over 20mm. If you have 2 parts aligned side-by-side across the bed, print one to above 20mm, then move to the next and attempt to move the nozzle down to layer 1, the X gantry is going to crash into the top of the completed part.
If you arrange parts so there is only 1 on each row from front-to-back, you can get away with higher heights, though it's not officially recommended. You still have to worry about the XY dimensions of the extruder at its fullest extent while printing so 3 rows each of one small parts is probably about the most you can plan on.
Thanks, I finally figured that out.
Thanks again, I figured that out a little bit ago, but now I question why when you are printing sequentially and have the slicer arrange the parts automatically, doesn't the slicer take this into consideration and arrange them front to back if some are over 20mm high? Maybe someday in a new version...
It works, but it is very likely to cause problems
Thanks again, I figured that out a little bit ago, but now I question why when you are printing sequentially and have the slicer arrange the parts automatically, doesn't the slicer take this into consideration and arrange them front to back if some are over 20mm high? Maybe someday in a new version...
It's a very error-prone procedure, so I suspect Prusa would rather not officially support doing prints that way. It depends on the user positioning things in ways that can cause things to go very very wrong if there is any misunderstanding. The whole thing is based on you giving the slicer incorrect information on the gantry height, so the slicer has to take your word for it.
All the defaults are set up in Prusa slicer for the laymen, as you learn you can advance beyond the defaults, this is the reason we have so many choices in Prusa slicer, the defaults limit us to the degree that they save those without advanced understanding from using the software in a way that could cause failure during a print, as you learn more about the machine the software and printing, it offers the ability to move beyond them, as you advance you will most likely find yourself wanting more features then are currently offered even at the expert level, and possibly even developing work around's to achieve results that are not currently implemented in the software.
enjoy the journey,
Swiss_Cheese
The Filament Whisperer
@dik-harrison
While printing from the front to the back will work, there is a sight risk. If you complete 1 or 2 objects and then have and X/Y crash printing the third, you may have inadvertently created an "auto-eject" event where the carriage or rods collide with an already printed object, as discovered by my ever present partner "experience". As well, "experience" found out that if you are doing a colour change, you have to make sure you give the M600 a Z value to get over the first object(s), like M600 Z50 in this case. Easier to stick with back to front printing.
Kenn
Quality is the Journey, not the Destination. My limited prints->
Seq on mini
On the Mini, the fan is behind the carrage, and i have done sequential printing starting front-right (near the LCD) and staggered them Front-Right to Middle-Middle to Back-Left
Or if you have many objects but low, you can print Front-ROW right-to-left, then Middle-ROW right-to-left etc. The fan does not bump the print.
The preview in slicer to make sure the print order is correct is, i cant stres it, INCREDIBLY important.
I've printed knobs and knapes for sunshade-tarps etc this way.
Prusa Mini+ kit. BondTech extruder. FW 5.1.2
Prusa MK3S+ kit. Stock. FW 3.11.0
Prusa MK3S+, used. Stock. FW 3.13.3
Arrange the parts
Arrange the parts so the extruder weaves it's way through the parts toward the back. It will end up in the corner and raise up to end. Works fine. Still have to trick it with the gantry setting.
