First layer as ironing?
Hello,
I am curios if the first layer can be ironed? Was looking at this https://www.thingiverse.com/thing:3167565 . Thank you.
RE: First layer as ironing?
I don't think that ironing is the correct tool for the job here.
It looks like the object is printed with the face down to the print bed and ironing is really irrelevant here. The bottom layer will assume the texture of the print bed. Normally that surface is smoother than you would get with ironing, assuming the normal smooth sheet, of course. If you want a finer finish, there's sanding or acetone vapor smoothing if you want more of a shine.
Now you **COULD** try printing it with the surface facing upward, turn on supports, and then iron the top surface. My hunch is, however, is that the ironed surface would not be as smooth as that facing the build sheet, and the supports may be messy.
RE: First layer as ironing?
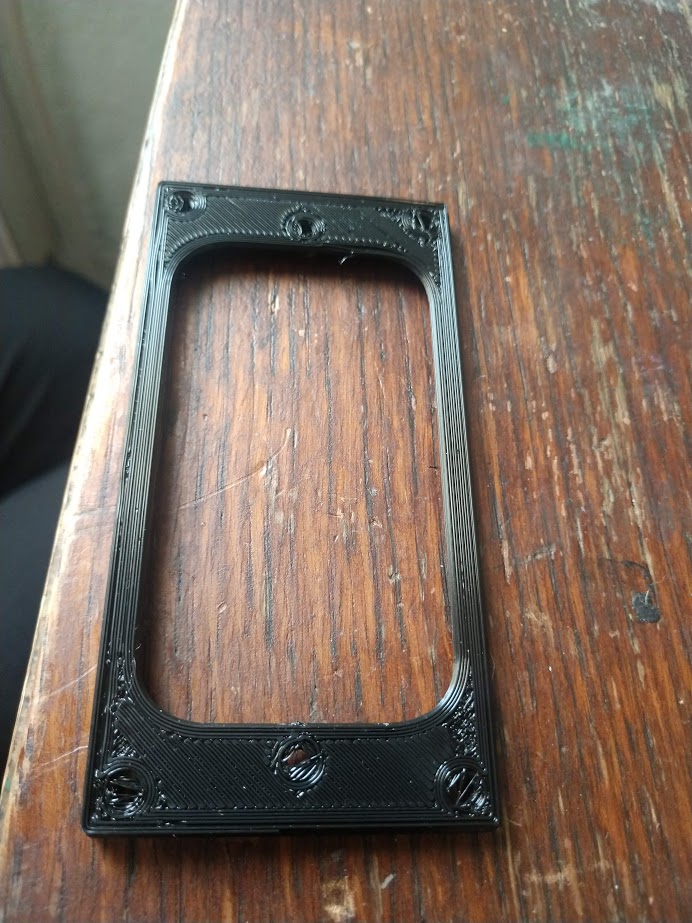
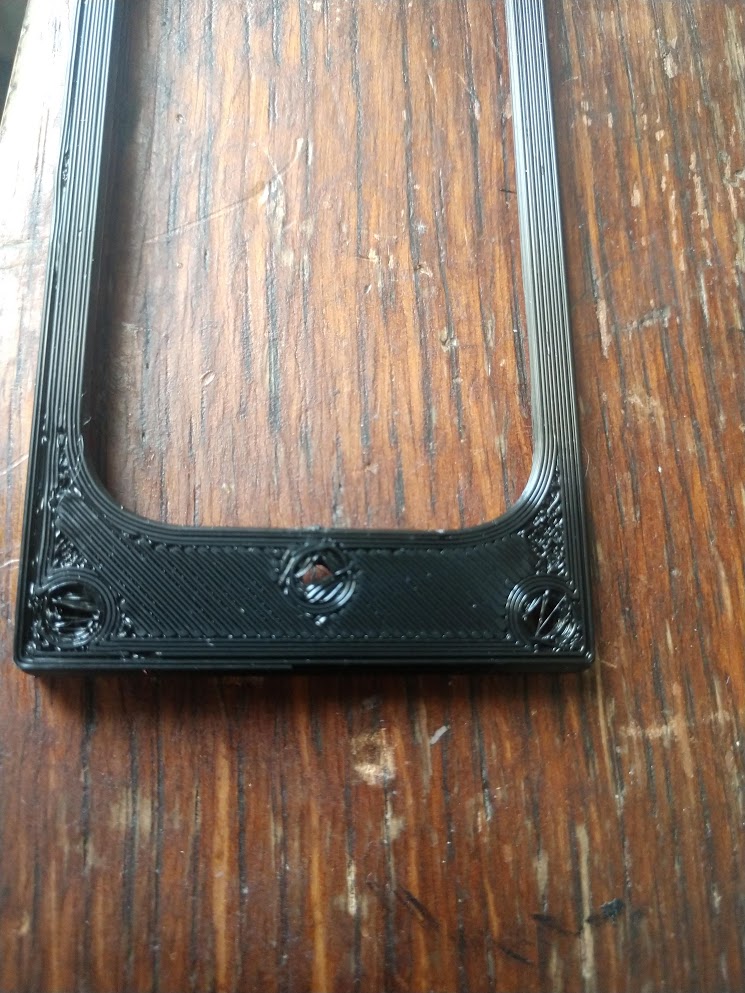
Thank you for your response. Indeed ironing is not the proper tool for this (uses no extrusion for what I read). The problem for me is that I want to mask the layer lines. An idea would be to add a Slab in Prusa Slicer, but to do that I also need to add the holes (which for other parts can be problematic). I attached the finished print and I see some problems and I do not know where to begin to hide them.
RE: First layer as ironing?
Thats your first layer ? The one printed against the print bed ? What printer are you using ? You really really need to dial in your first layer height properly. It should NOT look like that. Even on my non prusa printer with no mesh leveling and a 0.6 nozzle that I use for large draft prints the surface is still smooth with almost no gaps in the lines. Here's a couple of pieces I was using to test different bridging settings but you can see how a first layer is supposed to look (the pic was already in my prusa media collection so available).

The outside edges of those parts you downloaded will be rough as the designer used a bevel which is the same as printing a complete overhang at the first few layers until the angle goes closer to vertical. They even mention having to sane the edges on the thing. However the moddle and where the infill connects to the perimeters should be solid.
If you are using a prusa printer then go try the z height adjustment method from this thread https://forum.prusa3d.com/forum/original-prusa-i3-mk3s-mk3-assembly-and-first-prints-troubleshooting/life-adjust-z-my-way/ to gert a perfect first layer height. If you are using a different printer then print one of the many first layer calibration prints available and adjust the bed leveling screws carefully.
RE: First layer as ironing?
Thank you, that is the first layer, I will try the calibration. I have a prusa mini with super pinda probe.
RE: First layer as ironing?
For reference, these two are printed on my MINI. The first picture shows the bottom layer, and the second shows the top layer with ironing. As you can see, bottom layer should be pretty smooth. Mine still has some tiny gaps between lines but that’s fine in general.

RE: First layer as ironing?
I don't see any photos. (Never mind, now they are showing up.)
RE: First layer as ironing?
It's often hard to tell with web photos, but it looks like your bottom layer is approaching the maximum level of smoothness you can get from this type of printer. I would say that it might be worth dialing down the Z just a bit more if you want to get rid of those 'brush strokes' a bit more.
However, that's not what I see as the issue with getting an attractive print. That 'bevel' or fillet will not print as intended unless you do a very careful support, and that may or may not end up looking nicer than what you have. If I were doing this one, I would change those fillets to 45 degree chamfers, which should then print much better. Doing this is trivial if you have the original 'source' model file, or easy to difficult if you do not, depending on your skill, patience, and how many issues the .stl file has.
RE: First layer as ironing?
@jsw
I am not the OP, I was posting my pictures to show the OP what’s possible 😀.
You’re right that I can get slightly better bottom layer with lower z level, which I’ve done since then.
RE: First layer as ironing?
Ok, now I (think I) have posters straight. We're mainly talking about the guitar pickup cover here.
I would agree that the Z needs to be better calibrated.