Support Collisions and Support Overhang Thresholds
Hi all,
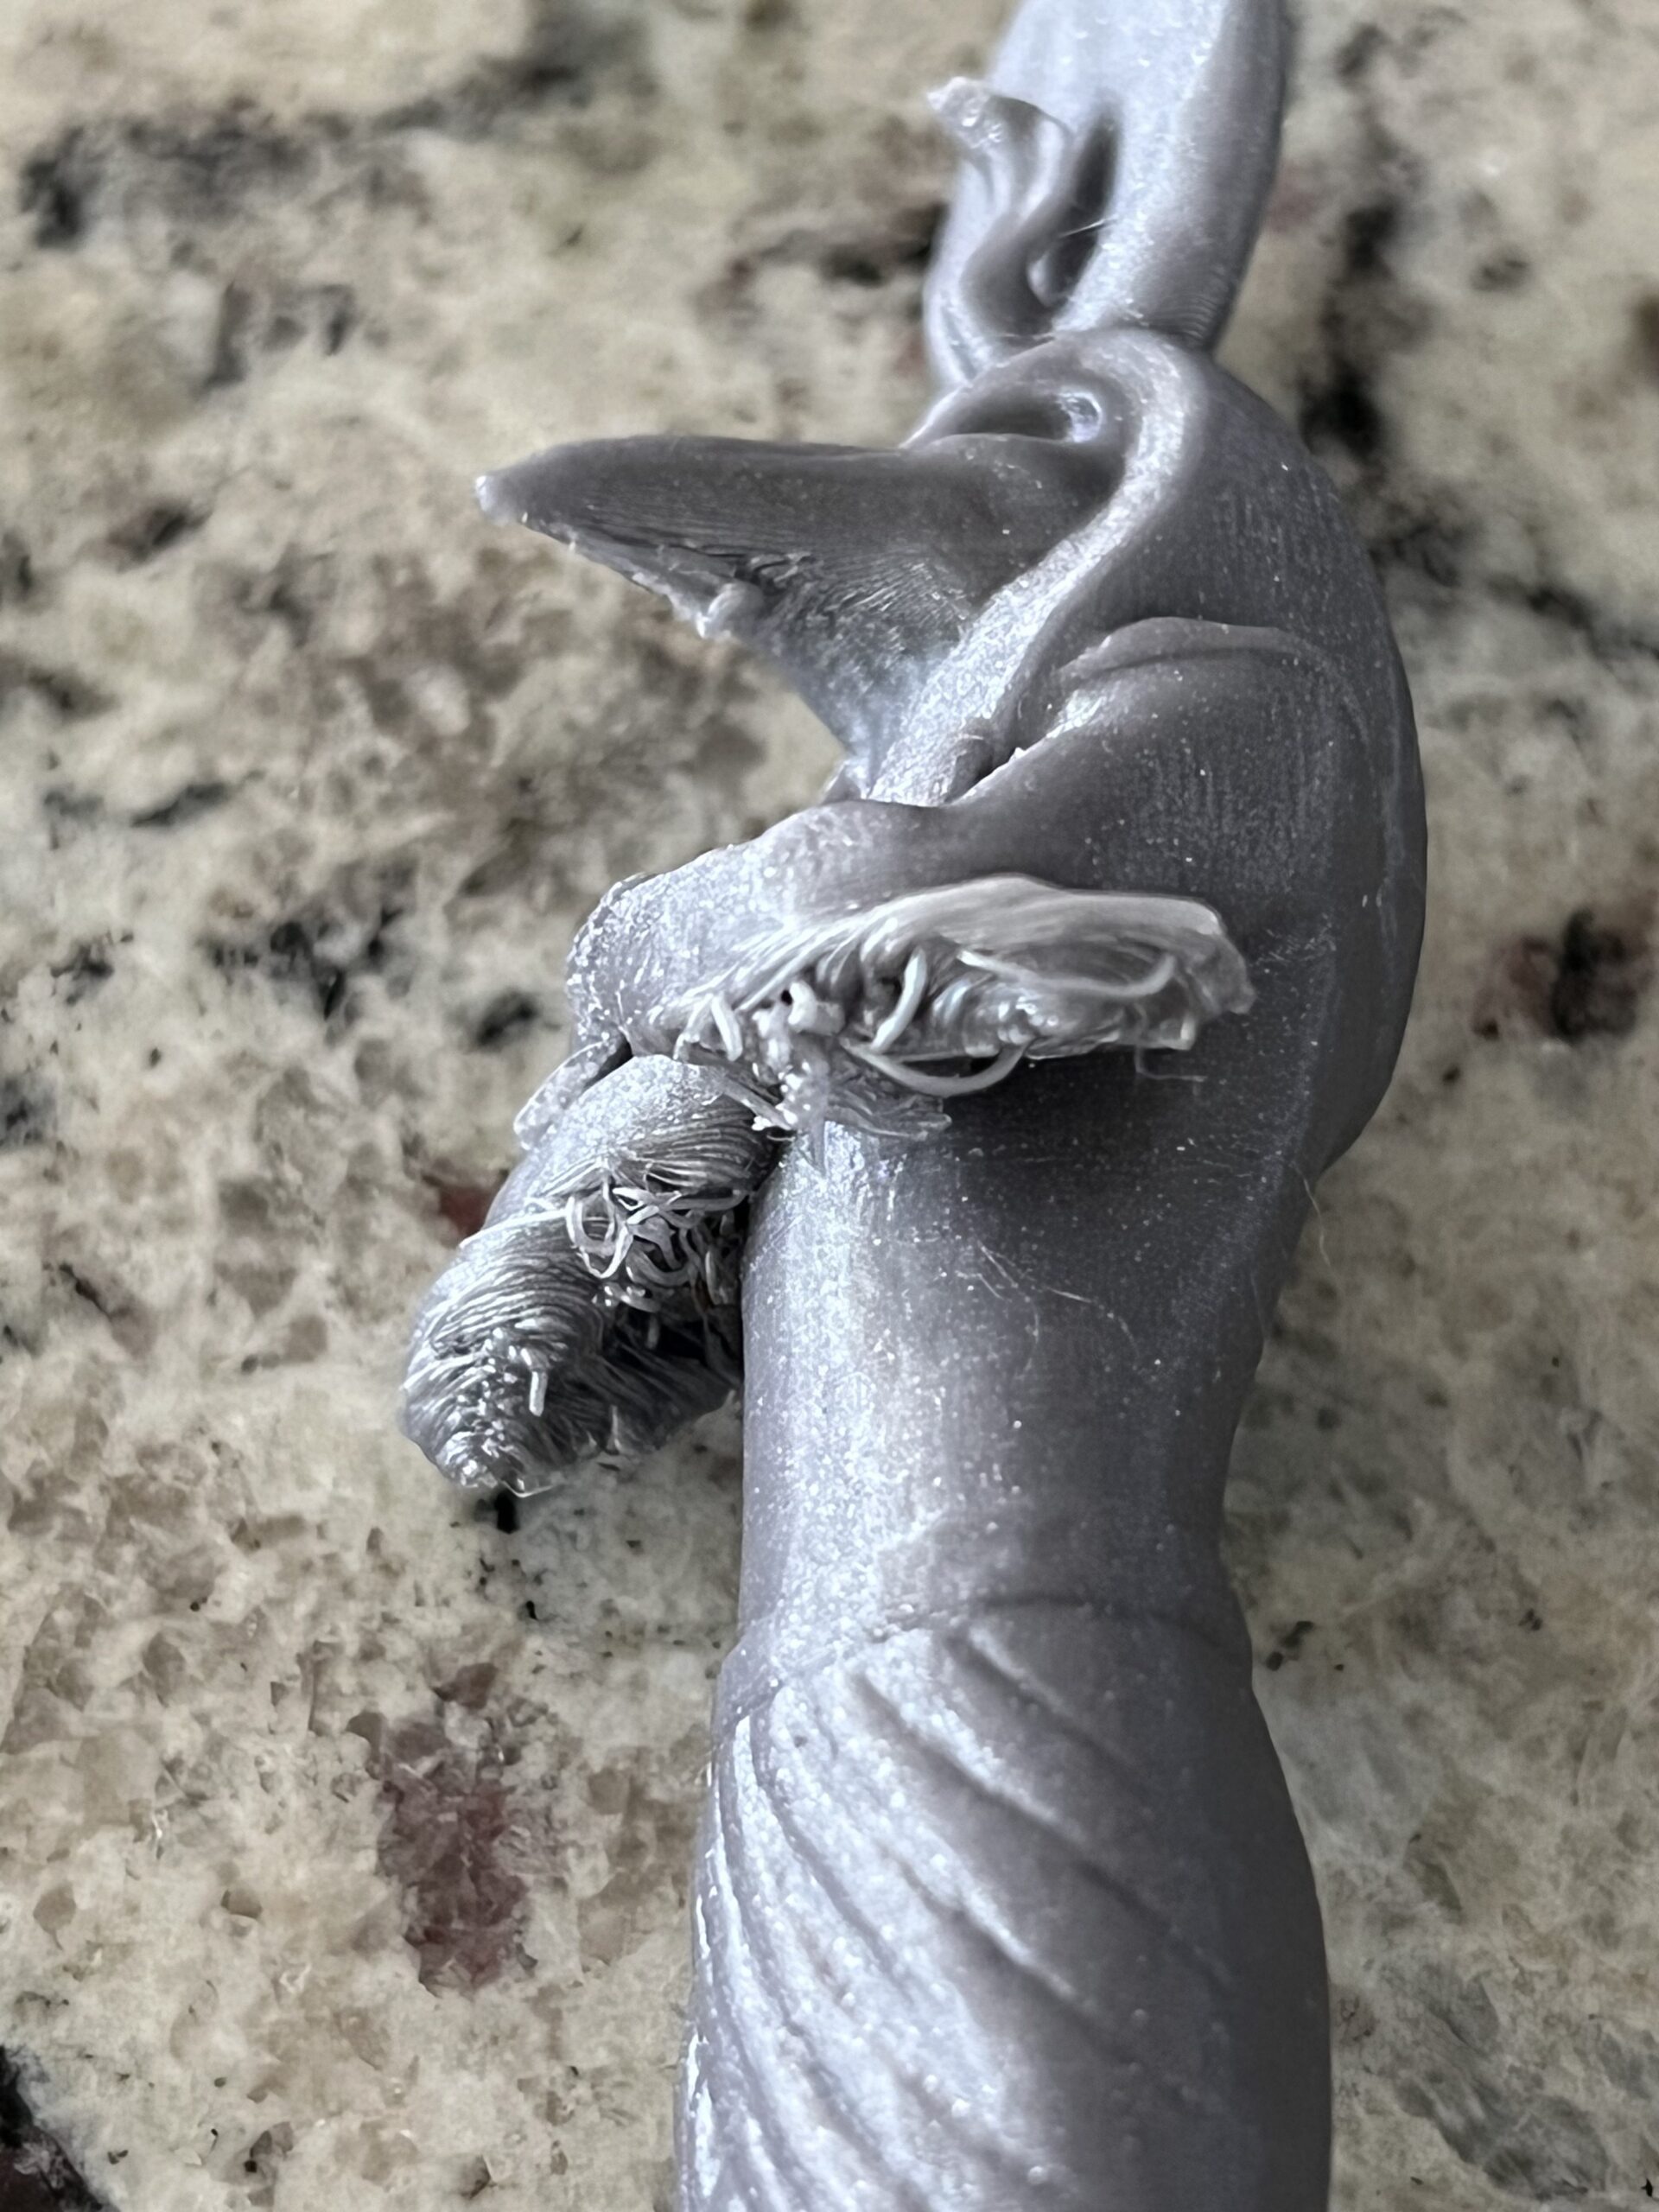
I am new to 3D printing and this is my first printer. I want to print a statue of Konshu from Moon Knight and had alright success with my first print using auto supports everywhere with a custom setting of overhang threshold at 8. The arms still had some "spaghettification".
I updated my settings in Prusa slicer to overhang threshold of 16 and tried again, but this caused the nozzle to collide with the print around 65% of the way through the print.
I think that the collision was due to the supports not having the same z layer height as the model. This is how it looks in prusa slicer under the models right arm:

Does anyone have suggestions for how to print this? I adjusted my overhang threshold again to 12 degrees and I am slicing again and also using paint on supports to try to get supports setup just right.
Thanks!
Best Answer by Neophyl:
Supports are always different layer heights to the model. This is normal and by design. Personally I'd call that print a failed one. The Mk3 is capable of much better.
Use paint on supports and set to snug for a start. Also you need less support than you think. I recently printed the same model so I know what you can get away with support wise. I printed mine out of PLA (a khaki filament from Spectrum that I've had for a couple of years). Good base colour for this project. The supports popped right off and the only bits I had to chase out were between the hands where they cross over, there's some thin gaps that need support there but it comes out easy with a dental pick. Which are a great set of tools for support removal if you don't have a set.
Heres a pic of the slice

Heres my raw print with the supports removed. These have had minimal sanding (just under the chin) and has been glued together.
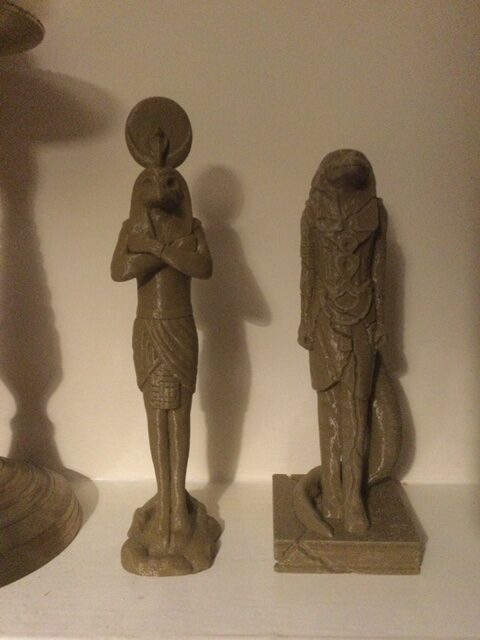
and here are the painted versions. I used a textured paint from Rustoleum called Desert Bisque which gives a nice sand stone effect.
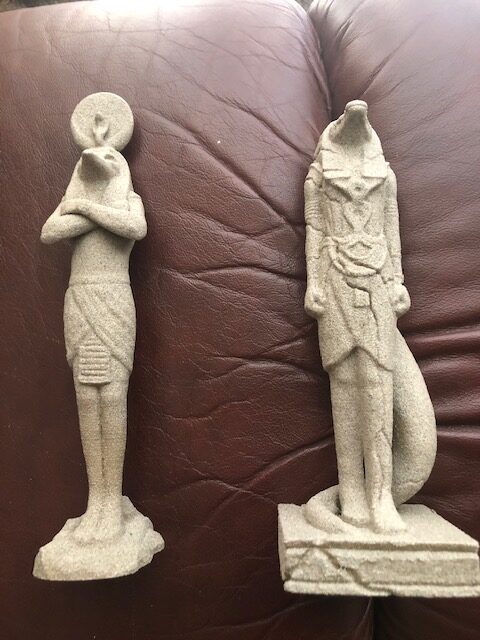
I might weather them further or leave as is. Haven't decided yet. The textured paint also does a great job hiding layer lines.
I have also attached the saved project file. Its for a MK3 (non S) so you might need to change the printer profile after loading. The important bit is that the model is already painted for support and its configured
RE: Support Collisions and Support Overhang Thresholds
Supports are always different layer heights to the model. This is normal and by design. Personally I'd call that print a failed one. The Mk3 is capable of much better.
Use paint on supports and set to snug for a start. Also you need less support than you think. I recently printed the same model so I know what you can get away with support wise. I printed mine out of PLA (a khaki filament from Spectrum that I've had for a couple of years). Good base colour for this project. The supports popped right off and the only bits I had to chase out were between the hands where they cross over, there's some thin gaps that need support there but it comes out easy with a dental pick. Which are a great set of tools for support removal if you don't have a set.
Heres a pic of the slice
Heres my raw print with the supports removed. These have had minimal sanding (just under the chin) and has been glued together.
and here are the painted versions. I used a textured paint from Rustoleum called Desert Bisque which gives a nice sand stone effect.
I might weather them further or leave as is. Haven't decided yet. The textured paint also does a great job hiding layer lines.
I have also attached the saved project file. Its for a MK3 (non S) so you might need to change the printer profile after loading. The important bit is that the model is already painted for support and its configured
RE: Support Collisions and Support Overhang Thresholds
Thank you! I'll try out your project file and see how it goes. I'm worried that I might have more of a problem than I originally thought, as I am having print collisions with an overhang test print.
Seems something may be off with my printer, even though the calibration completes successfully and my original test prints - all the prints included on the SD card from Prusa - came out fine.
I'll update this post with my results.
RE: Support Collisions and Support Overhang Thresholds
Also, what kind of glue do you use to get the two pieces together? Will any super glue do?
RE: Support Collisions and Support Overhang Thresholds
I used a superglue, it’s not a full on gel but it’s not water thin either so has a very slight gap fill properties and does run too much. I bought it for gluing point inserts into arrows and it does a great job on pretty much everything.
The Ammit is printed in one piece as that fit on the mk3 but the Konshu is just a slight bit too high isn’t it. I’ve got that project saved too like everything I print if you want it.
It’s well worth getting used to painted on supports. I pretty much exclusively use paint on supports with support for enforcers only now, that in conjunction with snug supports with zero expansion gives way more control.
RE: Support Collisions and Support Overhang Thresholds
@Neophyl ...
On some TIC puzzles I'm doing, I'd prefer not to glue them together. Even with pegs, larger pieces can get misaligned enough so the parts don't move smoothly thru them. Printing them with supports as one piece and then removing supports would be more accurate. I like to use PETG as it is much nicer than the PLA I have (PolyTerra). The PETG is glossy and parts just seem to slide over each other better.
I tried painting on supports, but I don't have the settings close enough.. and PETG tends to fuse to the support material. Even when I paint a line, the support generated seems much wider. I've been using about .2 top and .3 bottom contact, 100% separation and .4 pattern spacing.. Works better for PLA but I haven't found the magic for PETG yet.
So when you say 'snug'.. is the support generated very much closer to the line you 'paint' on?
RE: Support Collisions and Support Overhang Thresholds
ahhh.. just found the 'snug' option.. under "style".. That generates a much nicer support.. Am about to try it with some puzzle pieces in PETG.
RE: Support Collisions and Support Overhang Thresholds
Just an update, I'm printing based on how you cut the model in half, and I reduced my nozzle temp from 215 to 190, my bed temp from 60 to 50, and my print speed to 75%.
I was using the defaults from Prusa for the spool of Prusament they sent me and I think it was causing my PLA to curl on the thin overhang layers where the crossed arms elbows start. I also don't have an enclosure for my printer and I think the AC cutting on and off in my home may be causing ambient temp issue that are contributing to the PLA curling upwards and colliding with the nozzle.
It looks like it may be a good print this time. I will post pictures once complete. Thanks @Neophyl for the suggestions regarding glue and painting. While this is finishing up I will make a trip to the hardware store for some paint and glue.
RE:
Here is an example of the curling that I was seeing:

Decreasing temps/speed got me past this though and now the layers are going down flat again. I'm hopeful this print will complete successfully.
RE: Support Collisions and Support Overhang Thresholds
@neophyl, if you have the Ammit file, please feel free to share it. I would like to get that printed also.
I stopped by the hardware store and managed to get some superglue and stone textured spraypaint also, now just have to wait for these prints to get done.
RE: Support Collisions and Support Overhang Thresholds
Here is the Ammit project. It only needs a single area supporting.
Btw I didn't split the model, the originals come in either 1 piece or 2 part splits done by the original creator HickoryHill.
RE:
Thanks!
Here are some pictures of the completed print. A lot better on the arms! The smaller one is my first attempt. I found a stl of the full statue that I just scaled down to fit within the z limits. The larger one is the combined print from the file you shared. There is a seam on the back that runs up the length of the model from the bottom of the skirt to the top. Any tips on getting rid of that if I reprint again?
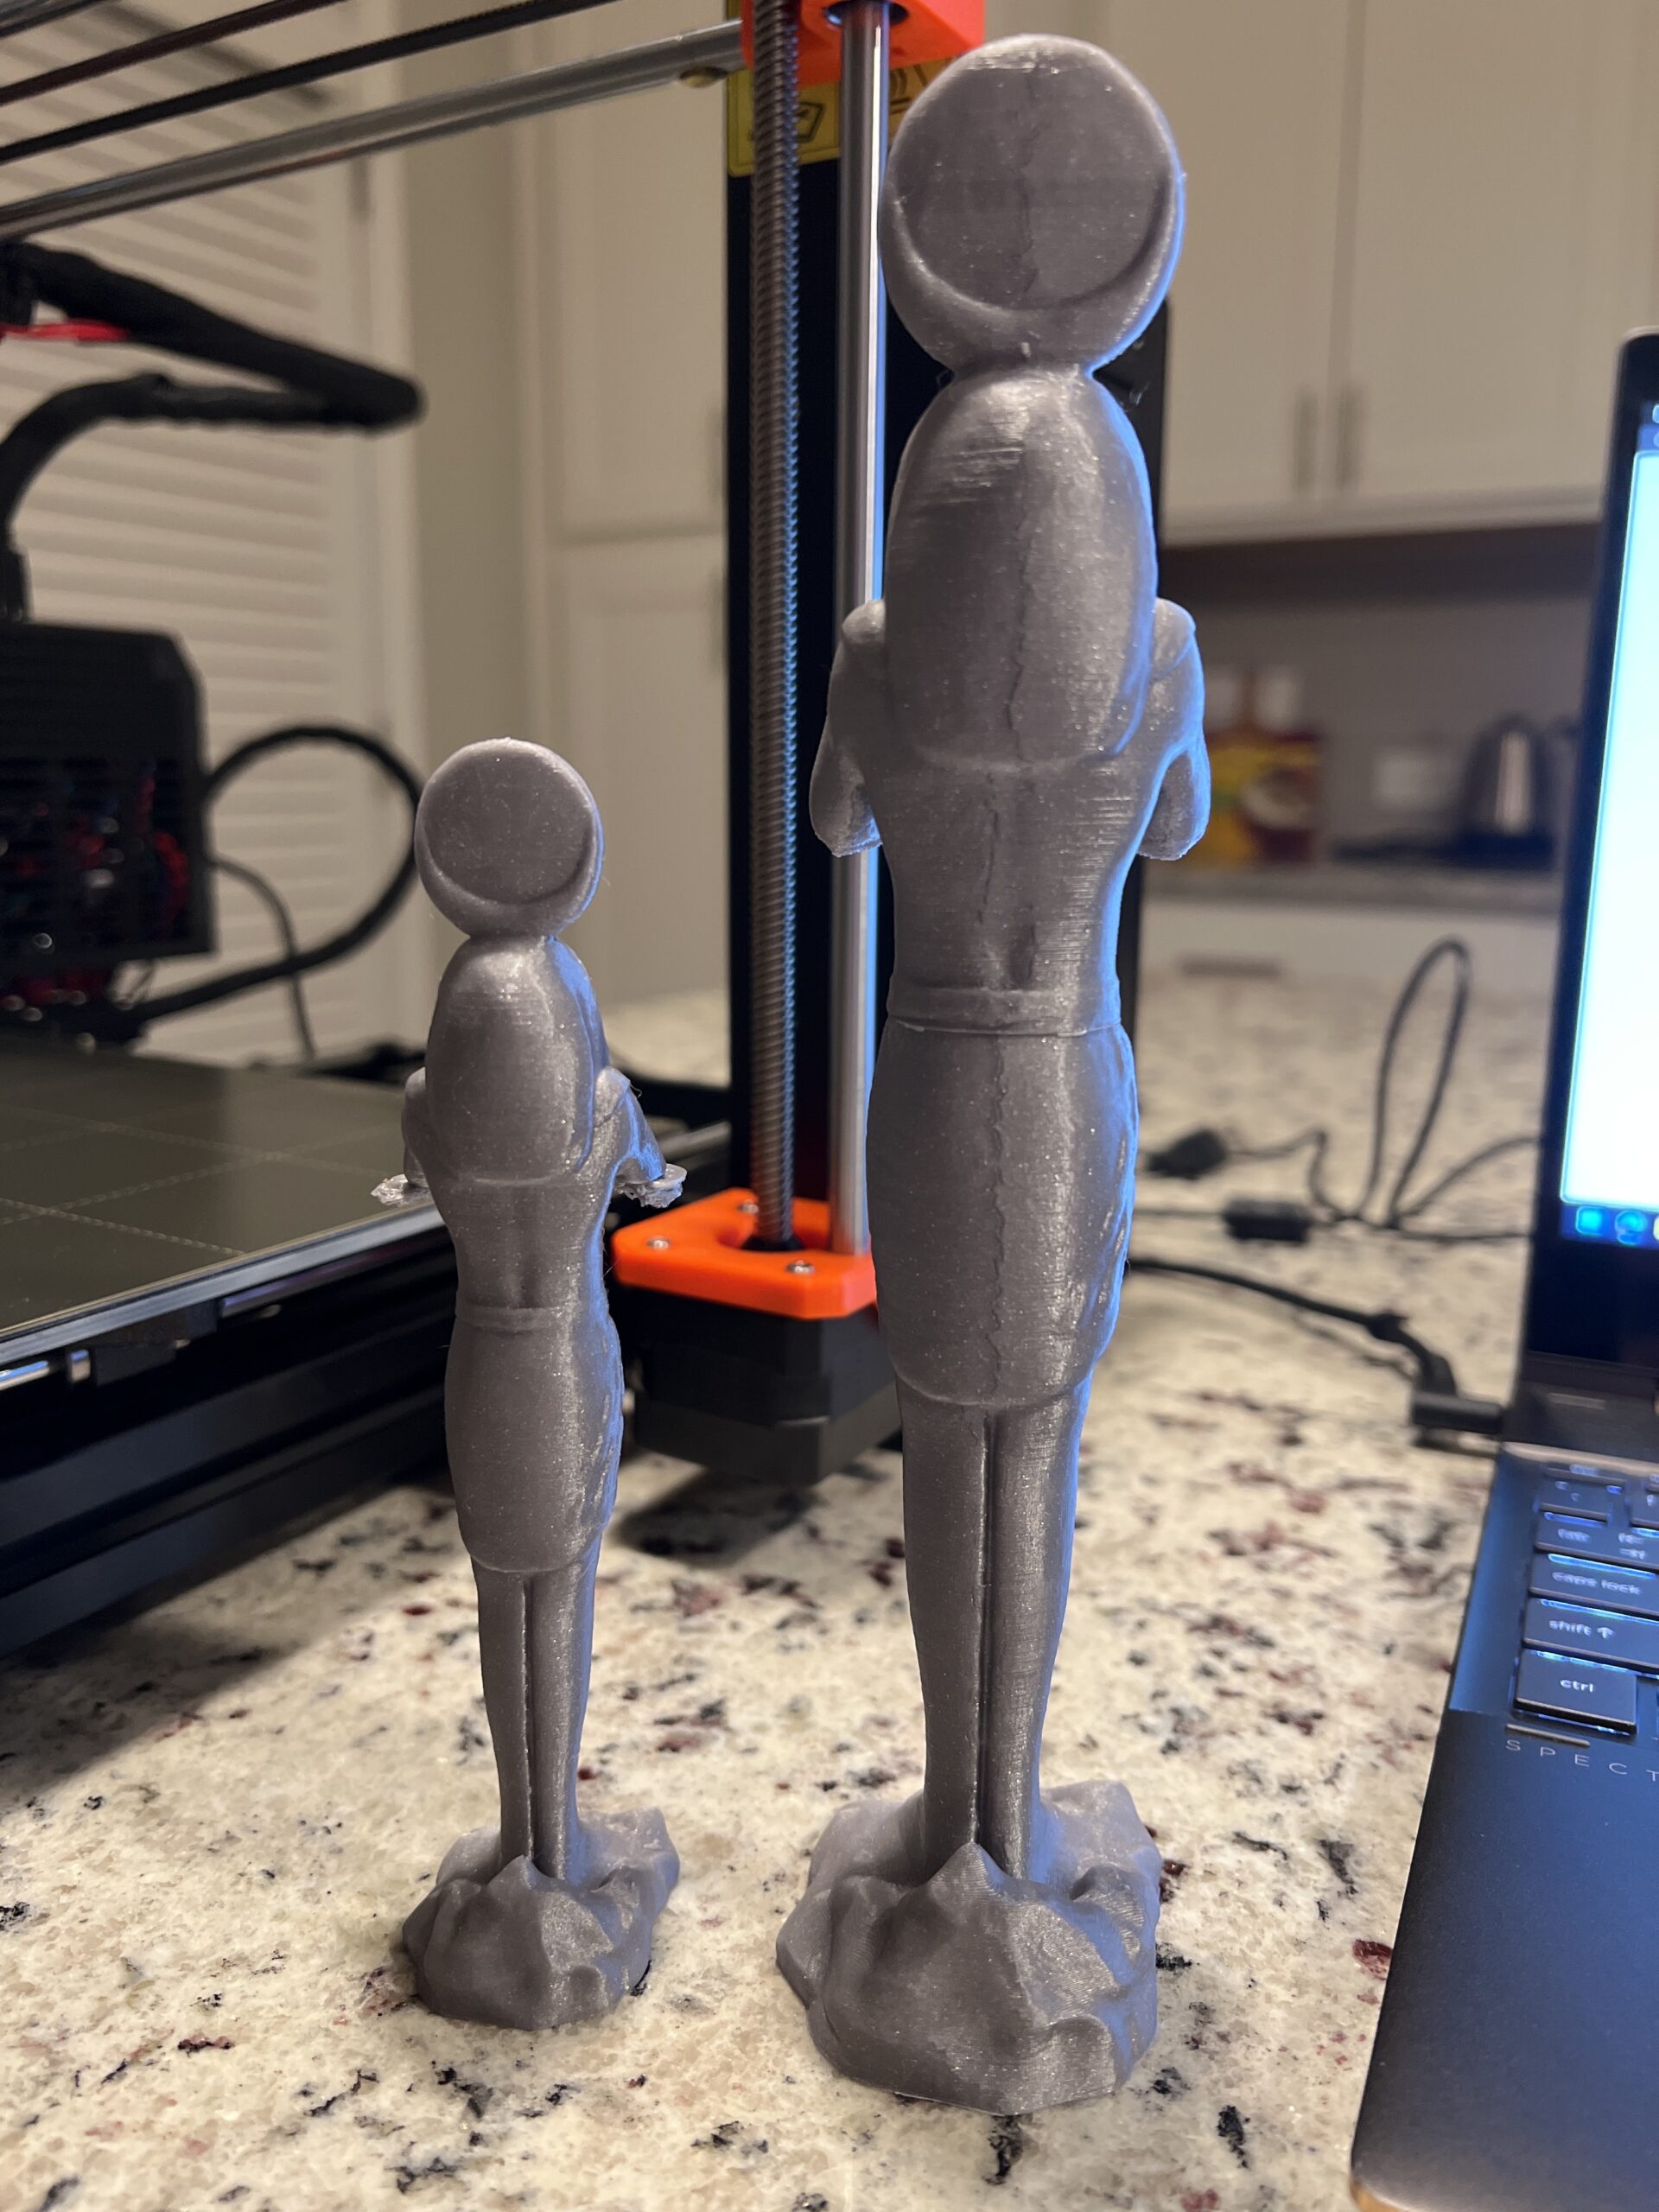
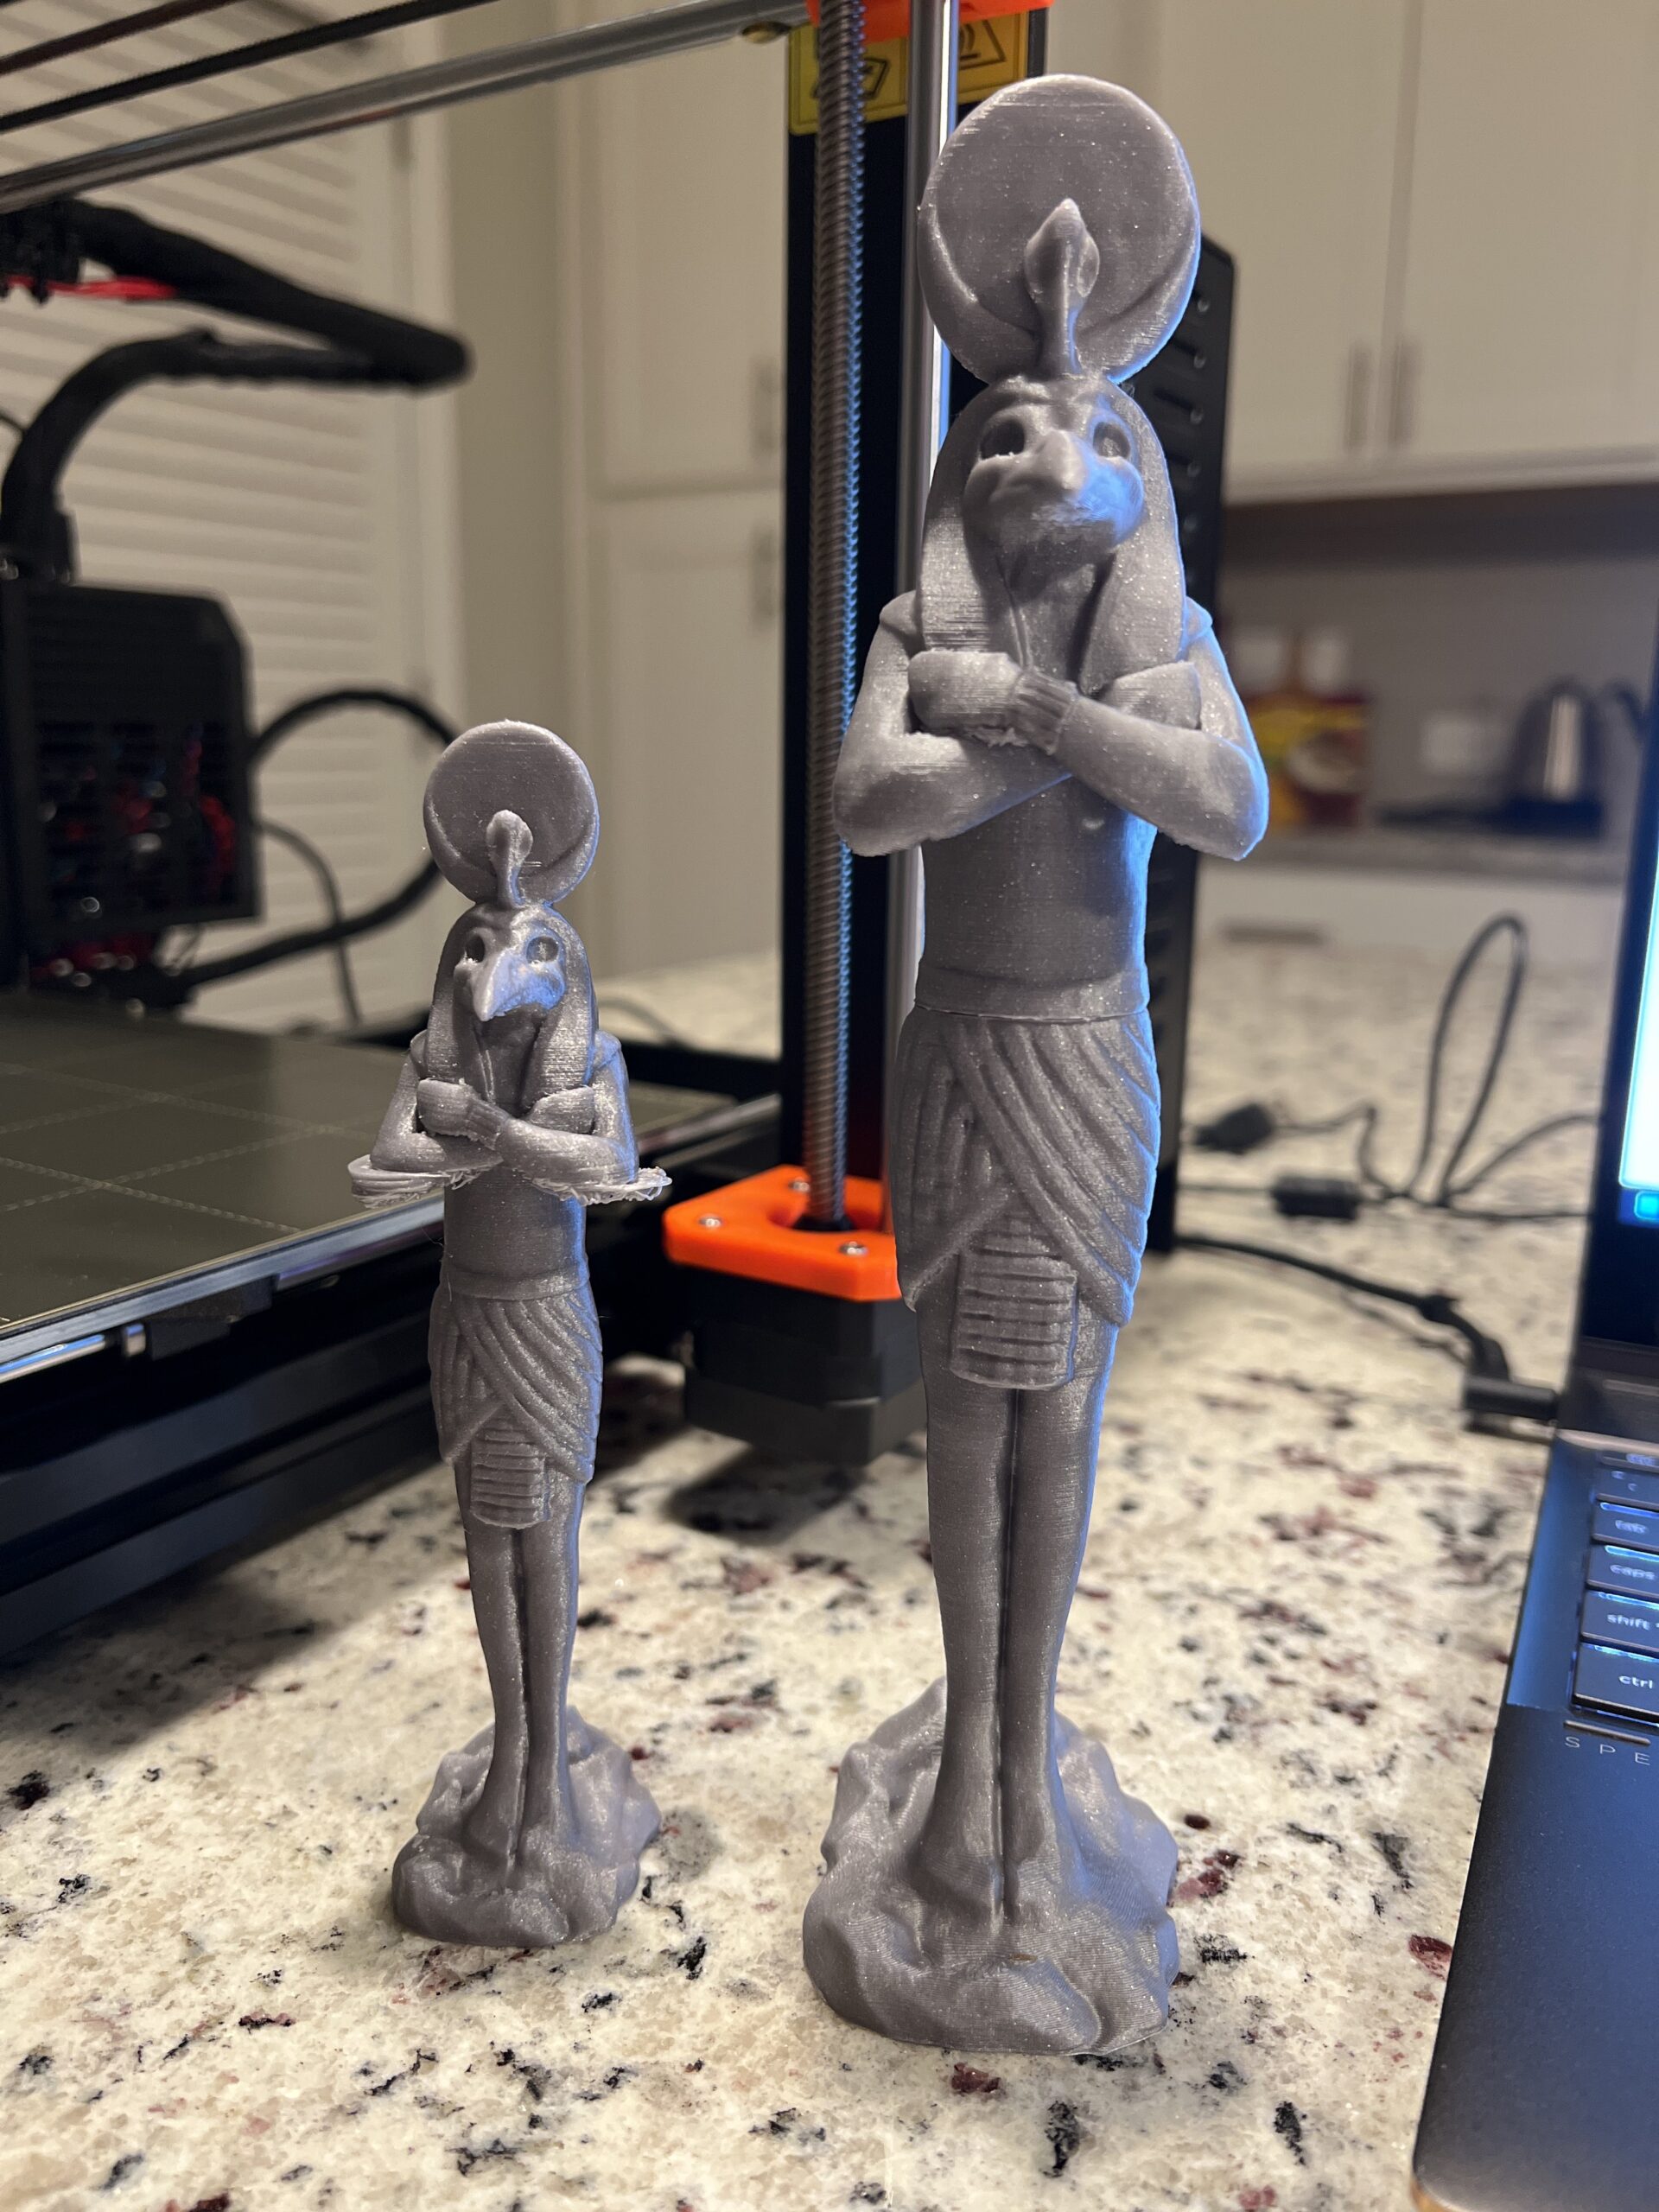
I'm going to try to file down some of the imperfections and then prime/paint it tomorrow.
RE: Support Collisions and Support Overhang Thresholds
That's looking way better.
You will always get a seam. On default settings the slicer tries to hide it in corners. On curved items with no corners it cant do that and scatters them all over. While Konshu has a few corners its still mostly curves so it will scatter them on this object.
On my project the seam was set to rear, which is my normal position on my profiles. That is why it runs down the back. I find it easier to post process the seam when its all in a line and moving it to the rear where its less likely to be seen on a object like this works for me. It only takes a bit of work to remove it /fill in the pits and its not visible after painting.
One other tip I found very useful on another forum for seams is using a cabinet scraper instead of sand paper, at least initially. Takes them right down easily and cleanly. Once its gone then you can use sandpaper.
With the textured paint though I found that I didn't really have to use sandpaper much at all. Scape the seam, tiny bit of filler over the seam to catch a few low spots, used a nail board (Emory type 'stick' as used for filing finger nails) under the chin and elbows/underarm and to take down the filler a tiny bit and then the paint. Took longer for the paint to dry then the rest of the post processing did.
RE: Support Collisions and Support Overhang Thresholds
Here are the final products! Finally got it printing correctly. I definitely know that I need an enclosure to ensure that I get consistent prints now.

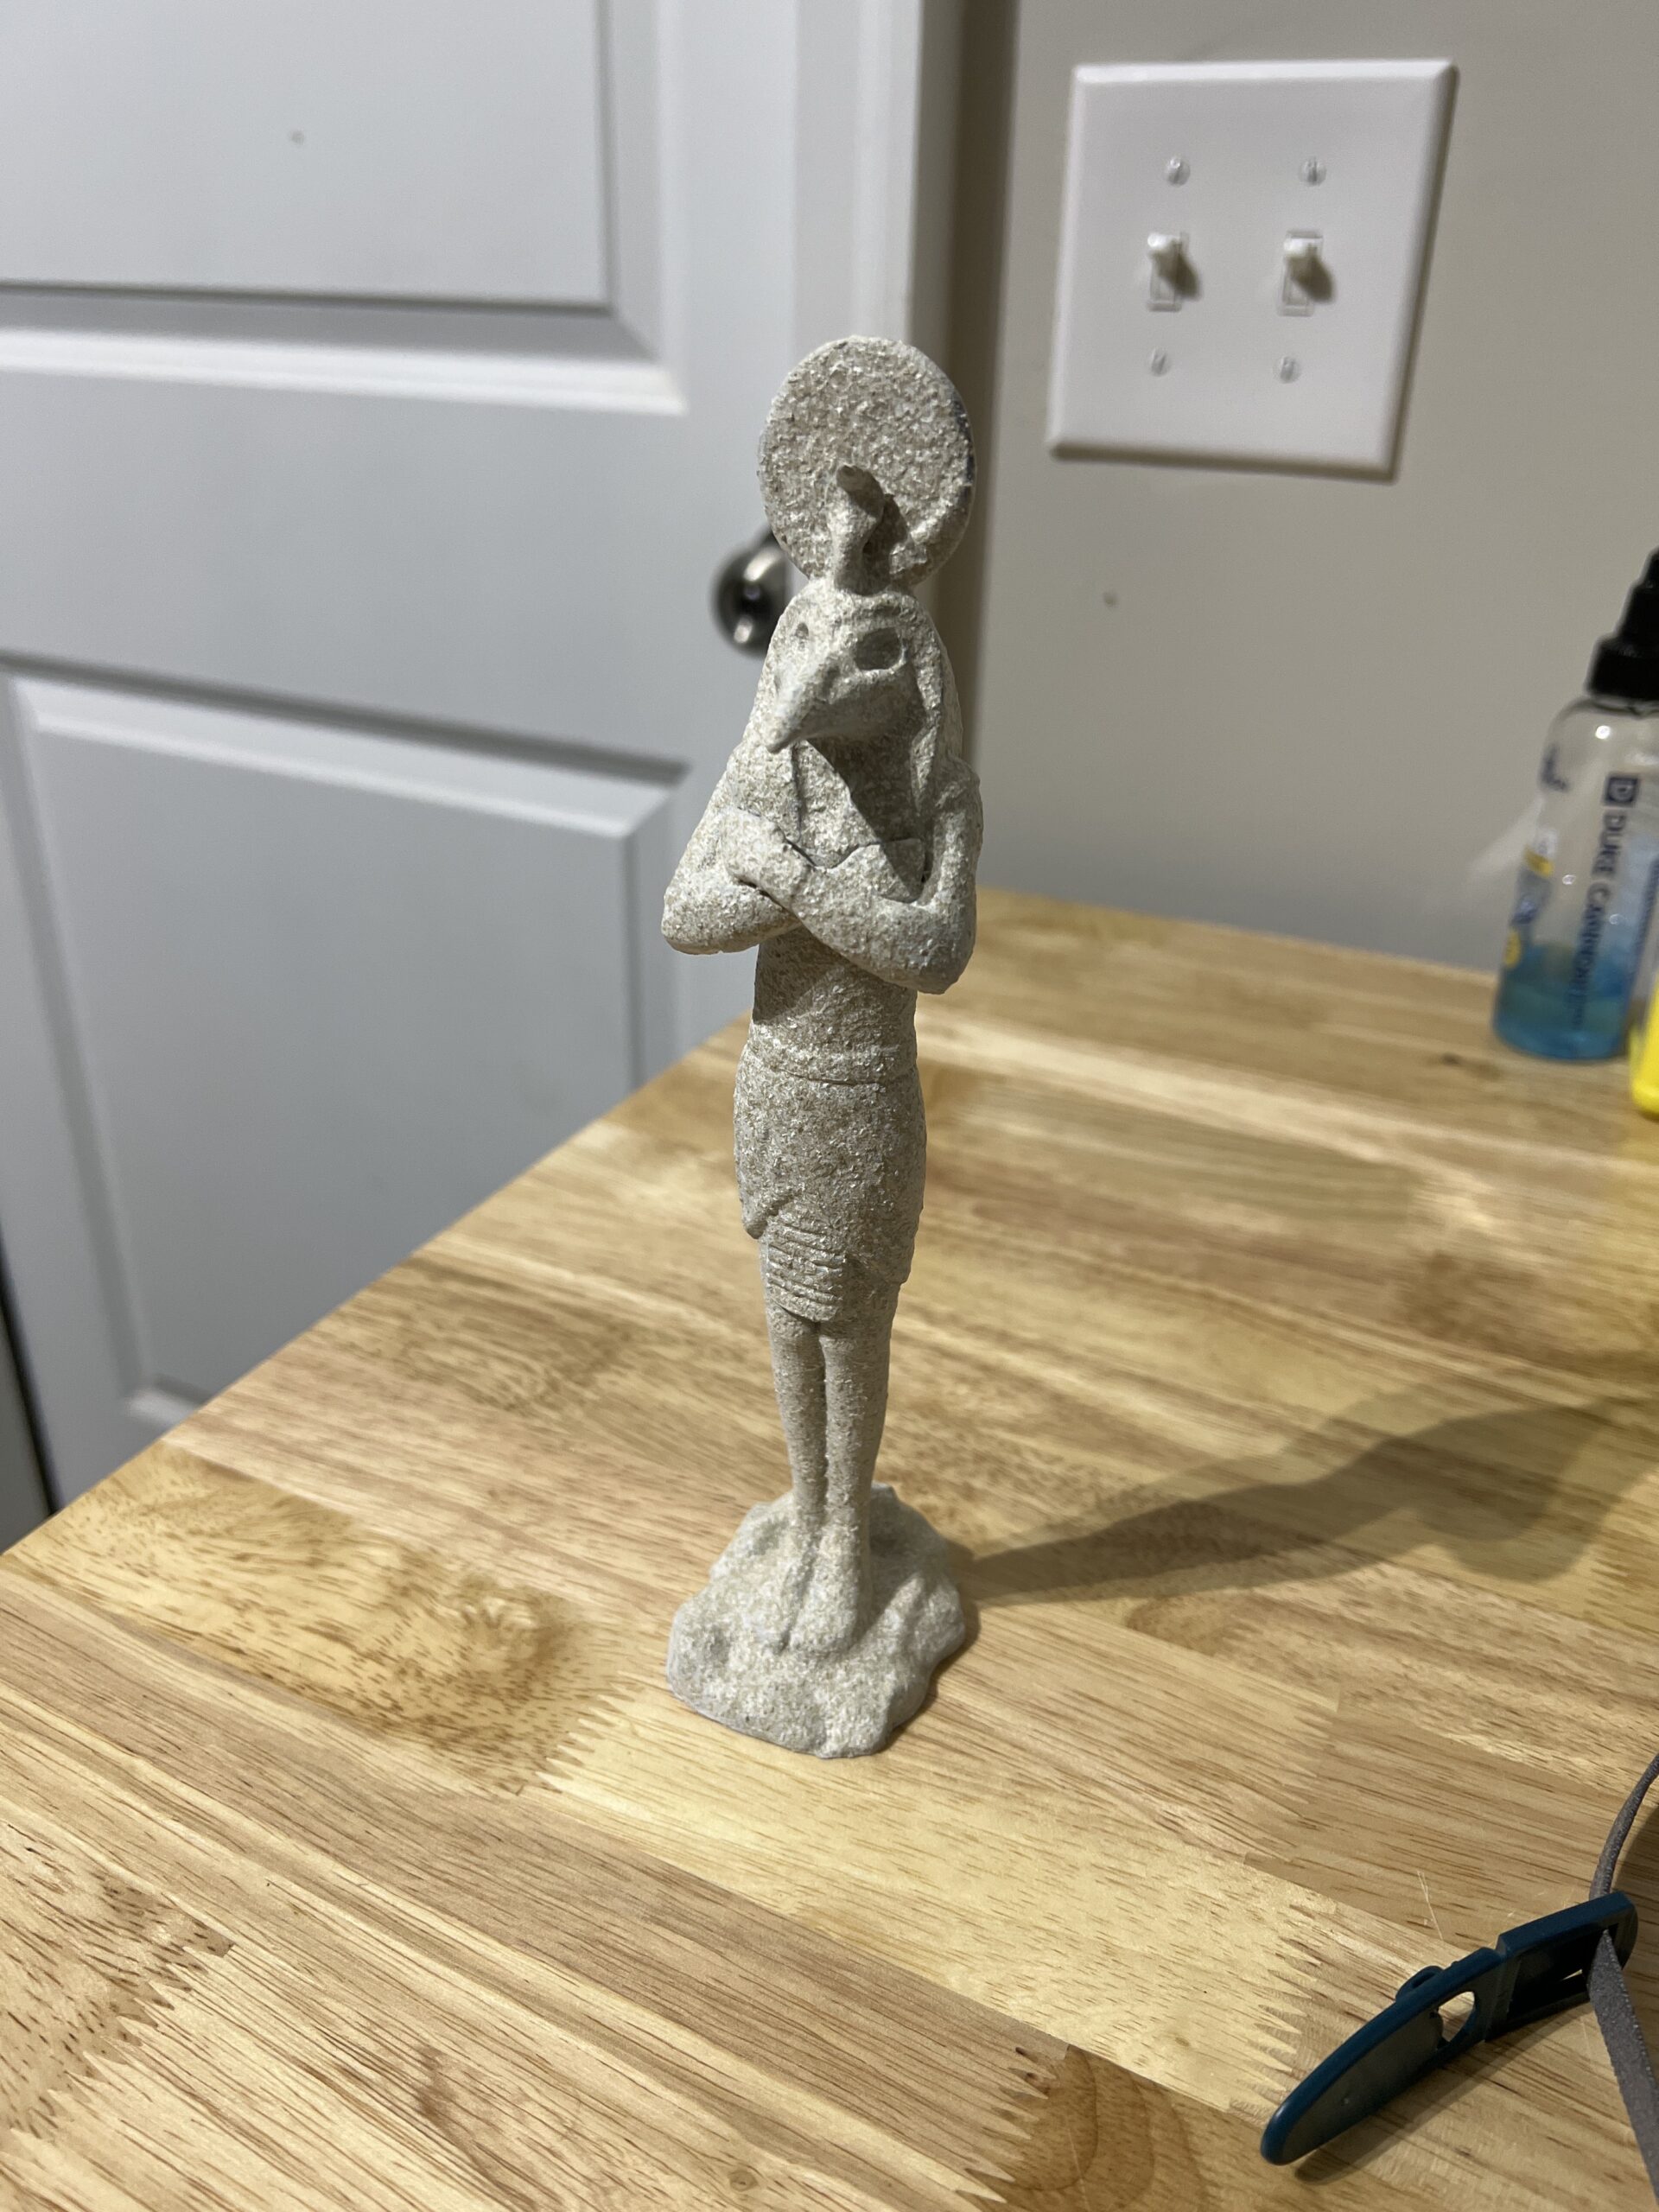
Thanks @neophyl for the help!
RE: Support Collisions and Support Overhang Thresholds
One last question if you get the time @neophyl, why do you use variable layer height on the prints you are sharing? Or is that just how they came to you?
RE: Support Collisions and Support Overhang Thresholds
@dirtysoc
Variable layer height has several uses, e.g. adding detail, allowing for proper spacing of manually modeled supports, print time savings, and more. It's effects allow you to adjust your layer height with a very fine touch to meet your needs.
In the case of the Ammit project it was used to give more detail to the face/top of the head, to help the top layers not look so tiered.
Regards
Swiss_Cheese
The Filament Whisperer
RE: Support Collisions and Support Overhang Thresholds
Its exactly as Swiss says. On those shallow slopes the stair step effect can be a lot more noticeable so I applied just a bit of VLH to that area. Limited it to a minimum of 0.1 though as I don't think anything below that really gains anything. Most of the model is up/down so I could probably have made some of the layer heights thicker to reduce print time but I also didn't need a minimum time print so didn't bother.
Those projects were basic, bare minimum, just making use of the standard tools available as part of Prusa Slicer. Tools that I think all users should learn and at least be familiar with.
There are a bunch of advanced special techniques/tweaks/workarounds that Swiss is the master of, but these models don't really call for them. Could they have been better if they were used ? Possibly, but I really didn't have the time to spend to do a full job on it. They were for me a 'quick and easy' print project. I'm quite happy with how mine turned out so far.