Poor surface artefacts on flat prints
Hi All,
I am currently seeing an issue with flat layers on prints.
Stats are :
0.4mm nozzle
Real PETG filament, recommended nozzle temp 240deg, actual nozzle temp 240deg
Bed temp recommended 55deg, actual 85deg (forgot to change it in slicer settings prior to print)
First layer goes down fine.
0.2mm layers
Stock Mk3S
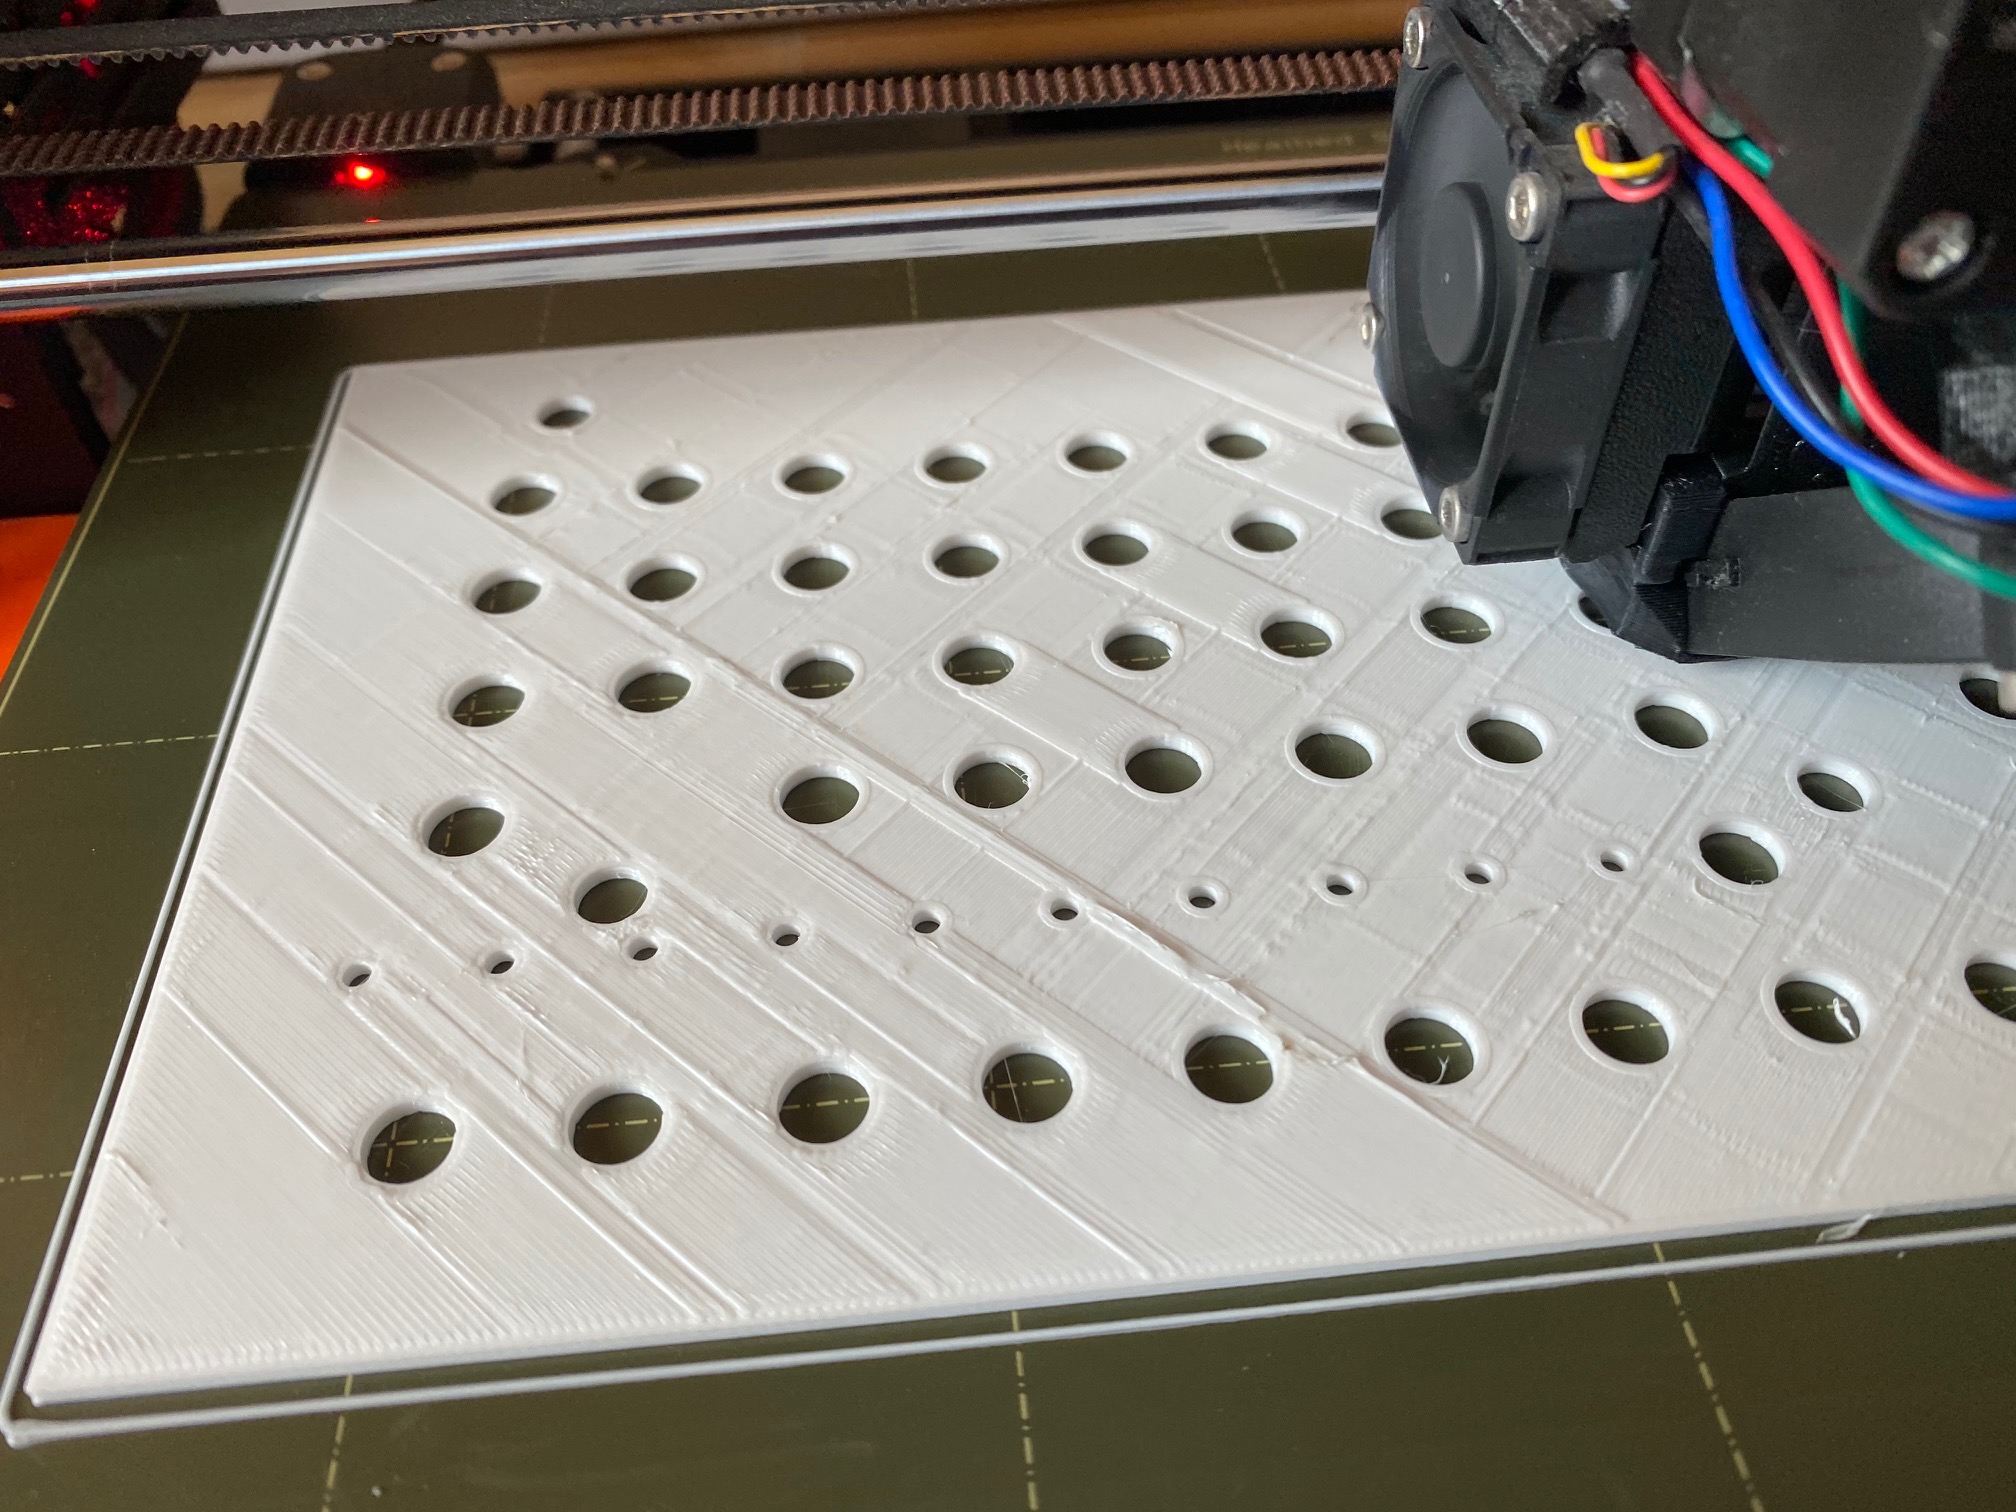
I get issues with blobs every now and then, which if they accumulate, I have to try and trim with flush cuttters as the print progresses to avoid crashes / issues. But the main issue is the surface quality of the layers. It looks like the below picture.
Is this nozzle temp / flow rate related? As mentioned previously, the z-height at start appears to be spot on. It's mainly an aesthetic issue, but I would like to resolve it.
Many thanks for any suggestions.
RE: Poor surface artefacts on flat prints
Try saving a project (3MF) file off in PrusaSlicer, zipping it and uploading it here. That will allow us to look at both your settings and the model you're working with.
PETG is prone to stringing and creating little crumbs and blobs. There are a few tips for PETG:
- You don’t want too much cooling or you’ll get poor inter-layer adhesion, but too little and it can produce very stringy prints. I’ve gone with 30% cooling for appearance. Keep your eyes open for new versions of PrusaSlicer as they’re adding a feature that will allow you to enable cooling only on external perimeters which should help a lot with this situation.
- PETG is prone to snagging onto the nozzle if it’s too close. Some Some Live-Z adjustment for PETG is recommended. is recommended. I raise mine (make less negative) by 0.02mm, though others swear by 0.2mm. See what works best for you.
- PETG is attracted to heat, so try to keep your bed as hot as possible and the extruder as cold as possible at the start of your prints. After the first layer the extruder temperature can be raised and the bed temperature lowered.
- Consider a coated nozzle and/or silicone sock for the heater block to reduce tendency of PETG to stick to the nozzle and heater block.
- When switching from PETG to PLA, heat the nozzle above PETG temps and use some cleaning filament to clear the hotend and nozzle of any residual PETG. This is not 100% mandatory, but the cleaning filament does a good job of pulling out all the PETG, and will also melt out at PLA temps, so any stuck won’t screw up lower temp PLA prints.
- Keep PETG in sealed freezer bags with fresh desiccant when not in use.
- You don’t need an enclosure for PETG. It’s pleasant to work with at normal room temperatures.
- Most PETG will print fine on the PEI sheet with a spritz of Windex and/or wipes with your fingers. However, hotter stuff (>250C on 80C+ bed) may stick too well. Consider gluestick or some other release agent for hotter temps.
- Reserve one PEI surface for PETG and other hot sticky materials and a separate surface for PLA.
You're fighting both learning PETG and print characteristics. Consider switching to PLA while figuring things out since it's a bit easier to print with.
For the surface inconsistencies, the "lawnmower" effect of inconsistencies happens when there is an uneven number of lines to be printed and the direction of the nozzle changes when printing adjacent layers. If the are to be filled is also not an exact multiple of the extrusion width, you'll get the odd uneven line where the slicer must extrude a line with either a bit higher or lower width.
Be sure you've calibrated your extrusion multiplier. Any over-extrusion can emphasize inconsistencies between adjacent layers. You can also try adjusting the extrusion width for top infill (Print Settings->Advanced->Extrusion width->Top solid infill) to your exact nozzle size (0.4mm) which produces slightly finer lines which may fill in move evenly. You might also try different top infill patterns (Print Settings->Infill->Infill->Top fill pattern) to try a pattern that is more pleasing.
RE: Poor surface artefacts on flat prints
@bobstro
Many thanks, you've given me a lot to work with there. I've been printing a considerable while, both with PETG, PLA, Flex and ABS, but have only recently encountered this issue. I'm not entirely convinced it's not filament related, as Prusa PETG doesn't have this problem.
Regardless of that, that's some great information, and I greatly appreciate your input.
Many thanks,
Andy
RE: Poor surface artefacts on flat prints
[...] Many thanks, you've given me a lot to work with there. I've been printing a considerable while, both with PETG, PLA, Flex and ABS, but have only recently encountered this issue. I'm not entirely convinced it's not filament related, as Prusa PETG doesn't have this problem.
In that case, I'd start with doing a filament extruder multiplier calibration. If this filament varies significantly in diameter from Prusa's, a bit of over-extrusion could easily cause much of the inconsistency you're seeing.