[Guide] Multicolor prints without MMU / with single extruder using virtual extruders in Simplify3D
I was unable to find all necessary information, so I decided to make a guide.
The majority of FDM printers have a single extruder. What makes a multicolor prints possible is an option to pause, change filament and resume printing. This guide will show you how you can use Simplify3D to create multiple virtual extruders, assign a different color to each extruder and print multicolor model on single extruder 3D printer.
First, you need a multicolor 3D model. Because you are going to change colors (filaments) manually, it is best to use model with few color changes, such as flat signs or similar models. You can print more complex and larger 3D models, but you will also need to make more filament changes manually.
I have used Fusion360 to create a model. You want to create standalone bodies for each individual color. If you have multiple areas of same color - group these bodies together into one component. E.g. one component for each color:
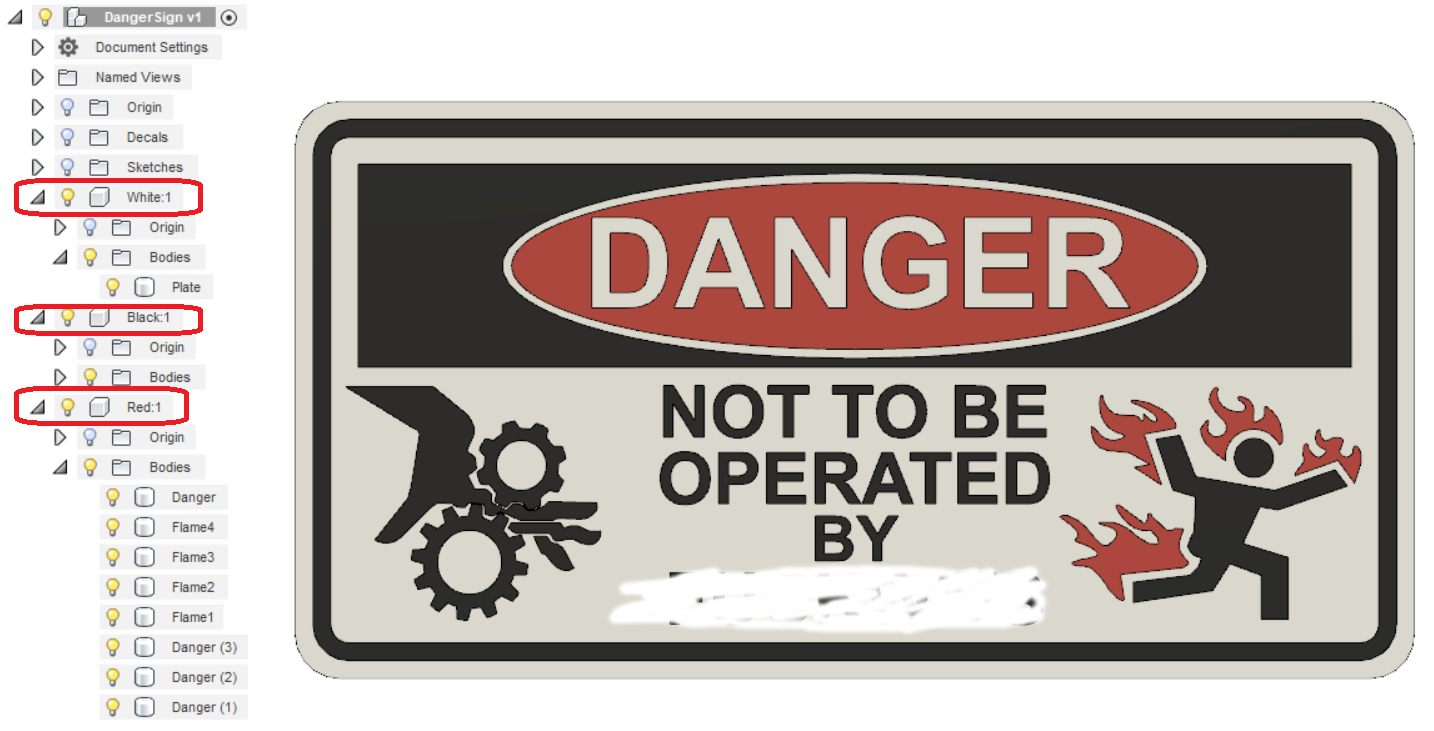
I made 1 mm thick base plate assigning it a white color. Then I made 0.2 mm extrusions on top of it with black and red colors. You can use more colors. You can also embed overlay colors inside the base plate.
Once model is ready - you need to export it as .stl file, or send directly to the slicer (which is Simplify3D in my case). Start with base plate. Right click on component and select "Save as STL" command:

Since you are exporting the whole component, and each component has bodies of the same color - this operation will export multiple bodies (of the same color) together into a single STL file.
Make sure refinement level is "High", check "Send to 3D Print Utility" checkbox to export directly to slicer, or uncheck it to save bodies as .stl file:

Once you exported everything, and imported in slicer (Simplify3D) - you need to arrange models. Simplify3D will drop all imported models on table. This is not what we want, because our colors should be printed on top of base plate, not on build platform.
To fix this issue - double click on base plate model (the one which should be printed directly on print bed), and take note of its coordinates:
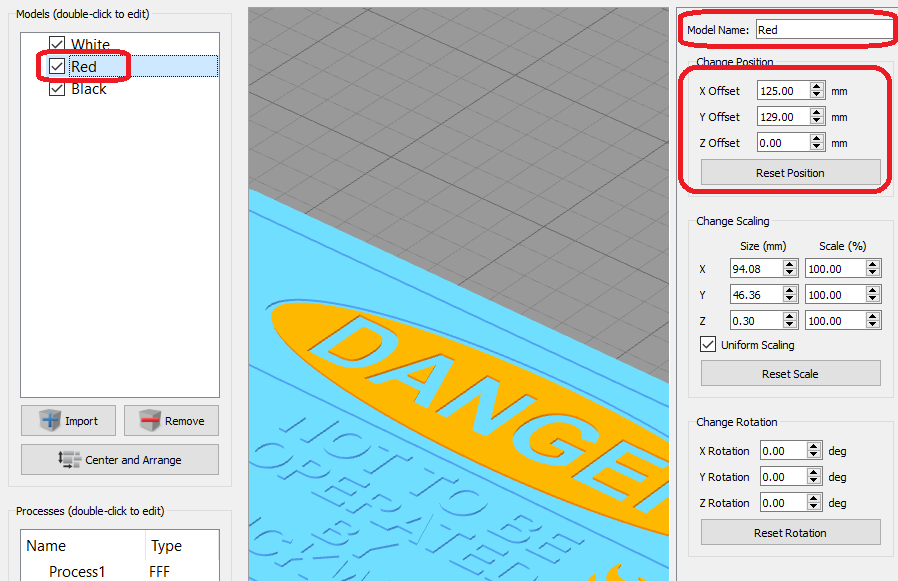
P.S. Also, while you are here - use "Model Name" field to rename model to represent the color for this model. This will make assignments easier in the future.
Write down offsets, then double click on each other model in the list and enter same offsets. Don't forget to click "Done" to save new position. This should align all models in same position, ready to be printed.
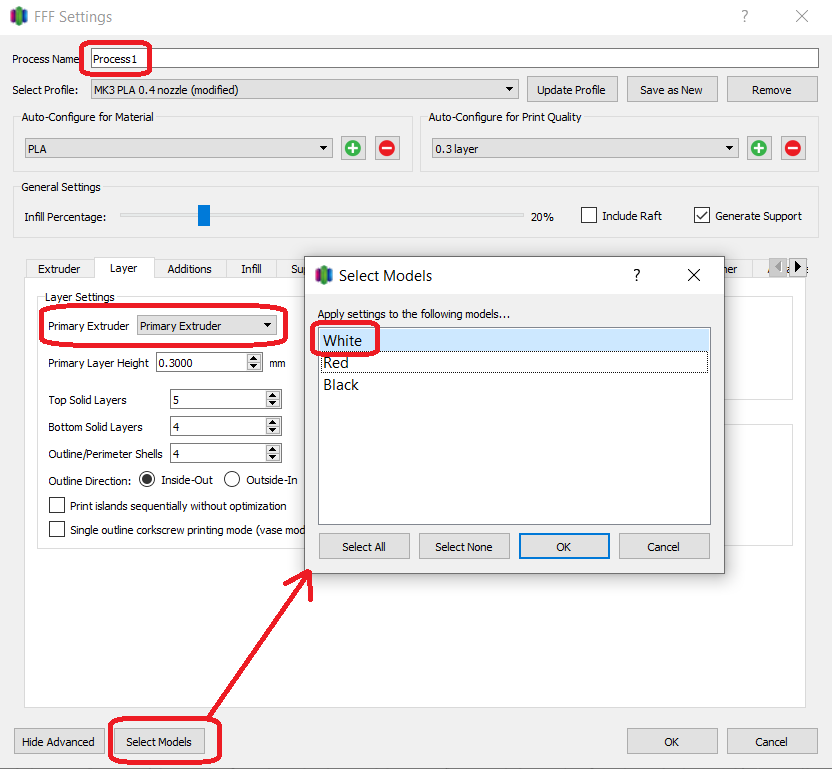
Now we need to prepare multicolor slicing. First, open default "Process1" process and set it up as usual - to be ready to print your filament. You want to make all settings correct before you advance any further.
Once ready - open process properties and assign this process for your base plate model only (the model sitting on build plate - which is white in my case):
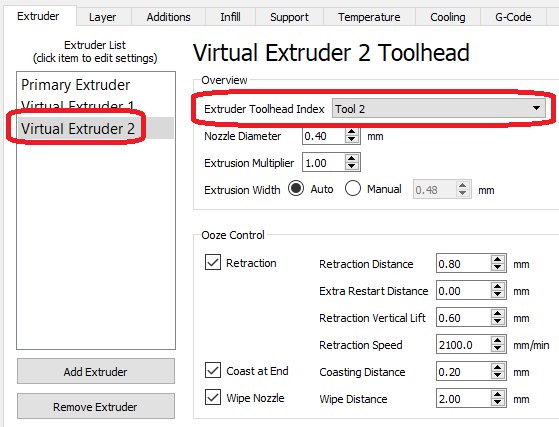
Now we can create additional extruders. Create a new extruder and call it "Virtual Extruder 1":
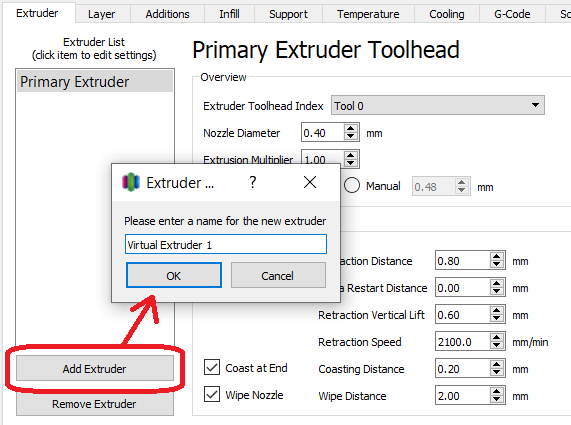
Important: change tool head index from "Tool 0" to "Tool 1".
Also, change all extruder settings to match settings of primary extruder. Default values may be different.

You can repeat this to create up to 5 virtual extruders. Just make sure to assign unique tool head to each virtual extruder:
Since our 3D printer has only single extruder, we need to virtualize newly created extruders. To do so - go to "Scripts" and look at the "Post Processing" section at the bottom. Scroll down and add the following code:
{REPLACE "T1" "T0"}
{REPLACE "T2" "T0"}
{REPLACE "T3" "T0"}
{REPLACE "T4" "T0"}
{REPLACE "T5" "T0"}
like this:

Basically, this script will replace accessing non-existing extruders (T1-T5) to accessing primary extruder (T0).
Finally, since we do not have multiple extruders with different filaments ready to be used - we need to change filaments each time slicer wants to change extruder. Go to "Scripts" / "Tool Change Script" and insert such code:
{IF NEWTOOL>0}; prepare for filament change
{IF NEWTOOL>0}M300 S800 P500 ; beep
{IF NEWTOOL>0}M117 Change filament to tool [new_tool] ; show message
{IF NEWTOOL>0}M106 S0 ; turn off fan
{IF NEWTOOL>0}G91 ; relative positioning
{IF NEWTOOL>0}G1 Z1 F1000 ; nozzle up
{IF NEWTOOL>0}G90 ; absolute positioning
{IF NEWTOOL>0}G1 X250 Y0 F6000 ; move away to home position

{IF NEWTOOL>0}; filament change
{IF NEWTOOL>0}M117 Change filament to tool [new_tool] ; show message
{IF NEWTOOL>0}M600 Q ; change filament could be replaced with M0 if problems occur

{IF NEWTOOL>0}; just in case: ensure proper temps and nozzle position
{IF NEWTOOL>0}M117 Warming up ; show message
{IF NEWTOOL>0}M104 S[extruder0_temperature] T0 ; warm extruder
{IF NEWTOOL>0}M140 S65 ; warm bed
{IF NEWTOOL>0}G90 ; absolute positioning
{IF NEWTOOL>0}G1 Z[current_position_z] F3000 ; restore nozzle position
{IF NEWTOOL>0}G91 ; relative positioning
{IF NEWTOOL>0}G1 Z1 F1000 ; nozzle up
{IF NEWTOOL>0}M109 S[extruder0_temperature] T0 ; wait extruder to reach temp
{IF NEWTOOL>0}M190 S65 ; wait bed to reach temp

{IF NEWTOOL>0}; restore position for printing
{IF NEWTOOL>0}M117 Printing ; show message
{IF NEWTOOL>0}G90 ; absolute positioning
{IF NEWTOOL>0}G92 E0 ; reset filament position
{IF NEWTOOL>0}G1 X[current_position_x] Y[current_position_y] F7000 ; move to previous position (nozzle is still up)
{IF NEWTOOL>0}G1 Z[current_position_z] F800 ; nozzle down
{IF NEWTOOL>0}M106 S[fan_speed_pwm] ; turn on fan

Note: Simplify3D will also insert tool change script at the very beginning of the printing process. Since you should already have the correct filament loaded - you do not need to change filament right away. Therefore, we need to remove tool change script from beginning of the print. That is why each command is prefixed with {IF NEWTOOL>0} condition. The correct way to do this would be to use something like {IF [current_position_z]>0.2} or {IF [current_layer]>1}. Unfortunately, Simplify3D (as of 4.1 version) does not evaluate variables inside conditions in tool change script. That is why I was forced to use tool head index. This means that primary extruder (T0) is reserved to print base plate only. If you have to use the same color again later - you need to assign it to a new (virtual) extruder. Alternatively, you may remove this condition and either clean up the generated .gcode file manually (remove tool change script from the first layer) or cope with (unnecessary) filament change at the start of the print.
Important Note: [bed0_temperature] variable does not work (as of Simplify3D 4.1), that is why I have used explicit temperature of 65. Replace "65" value in "M140 S65" and "M190 S65" commands with your desired value.
Now, we have everything prepared to assign colors to models. Create a new process for each color in your print (don't forget that "Process1" is already assigned for base plate model):
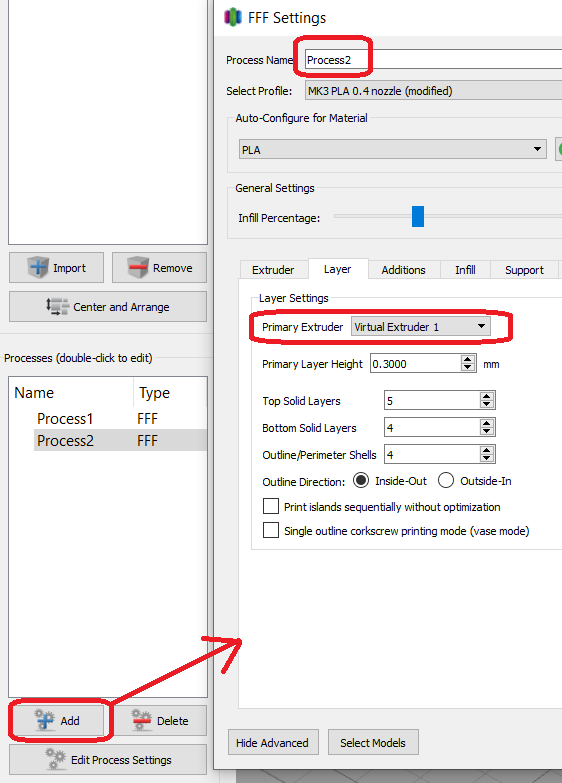
Important: Make sure that new process uses the corresponding (virtual) extruder.
Use "Select Models" to pick models for this process / color.
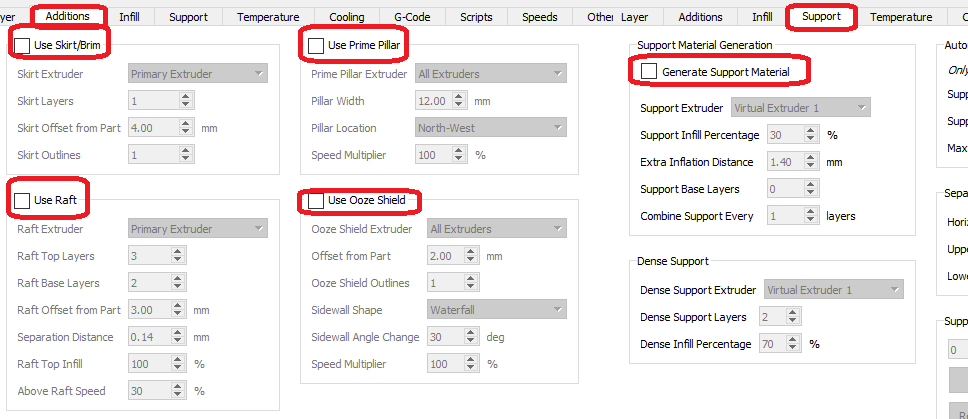
Remove additional features from the process:
Repeat these steps for each color.
Finally, we are ready to print. Click on "Prepare to print" button and be sure to select all processes and layer-by-layer mode:

Switch "Coloring" in preview window to "Processes" to ensure that everything is sliced properly:
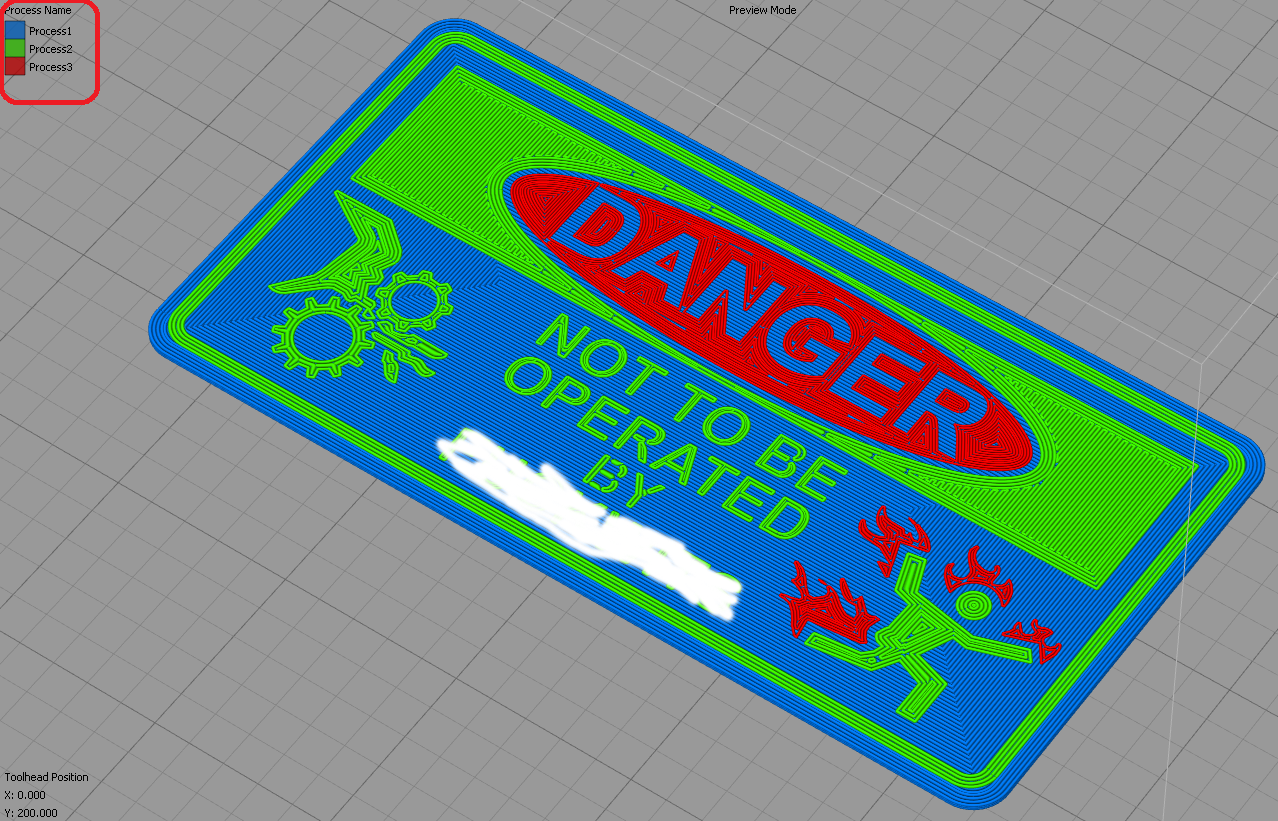
Note: Simplify3D will paint each process in the predefined color, which is usually different from what you intend to print. This is normal. You should not be alarmed.
If anything is wrong - return to previous steps and make sure you followed them correctly. Ensure that each process is assigned to models. Each model is assigned to only one process. Each process assigned to its own extruder. Etc.
Save slicing results to .gcode file and send it to your printer. Load filament for your base plate (white PLA in my example) and start printing from .gcode file. You will need to babysit your printer. Once it finishes with base plate and start to print overlay colors - the print head will move to the side and will ask you to change (unload and load) filament. Once filament is changed - the printing will continue. If you are printing with multiple colors and/or multiple layers - you will be asked to change filament multiple times.
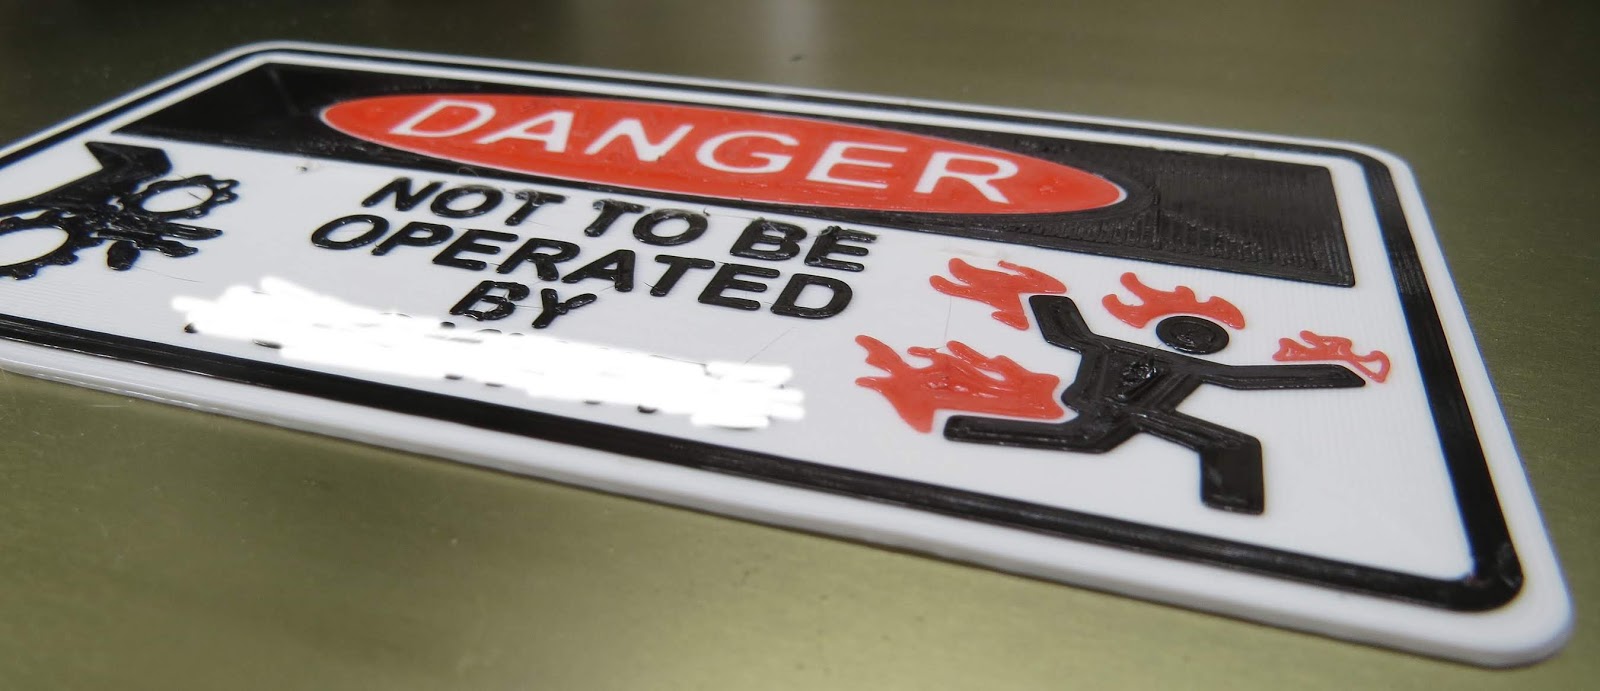
The end result looks like this:
How to properly change filament
Prusa will wait for you to change (unload) filament. If you do not babysit your printer, the wait will probably be too long, so extruder will coll down. When you are ready: the screen tells you to push the button. If the extruder has already cooled, it is heated first. And then filament is ejected. Pull out the filament immediately and press the button to continue.
Feed new filament (color) in. If you have auto-load disabled - you will need to press a button to load. The extruder will load your filament into a wastepile. Do not remove this wastepile.
Prusa will ask you to confirm whether the load was successful (e.g. color is clean). You usually need to select "Filament not loaded" option to purge some more filament until color is totally clean. Once satisfied with the result - grab the wastepile with your long nose pliers and hold it, but do not pull it off.
Select "Yes" to confirm that filement was loaded. The extruder will extrude some extra squirt of filament, then go back to the print - leaving all of the wastepile attached to your pliers. If you have pulled the waste earlier, that extra squirt will end up on your print somewhere.
How to select which color to load
It is best to work on colors in the same order. For example, I exported white base plate first, then all black details, then all red. I imported white model in Simplify3D first, then black, then red. I assigned primary extruder / T0 to process1 aka white, virtual extruder 1 / T1 to process2 aka black, virtual extruder 2 / T2 to process3 aka red. Simplify3D will print layer by layer, process by process, which means printing white first, then black, then red. So when I asked to change filament - I change white to black, then black to red.
I was tried to use M117 command to show message indicating which color should be loaded, but it did not help much.
If you are unsure about proper color order - use preview as lines (instead of layers) and write down in which sequence your colors are used.
RE: [Guide] Multicolor prints without MMU / with single extruder using virtual extruders in Simplify3D
This great, do you think it will work with PrusaSlicer 2.2.0?
RE: [Guide] Multicolor prints without MMU / with single extruder using virtual extruders in Simplify3D
I changed the printer selection from a modified configuration 'Original Prusa MK3S Airscape' to 'Original Prusa MK3S PETG' and the phantom part went away. So, maybe it is hidden somewhere in the printer configuration?