Help with gaps after moving
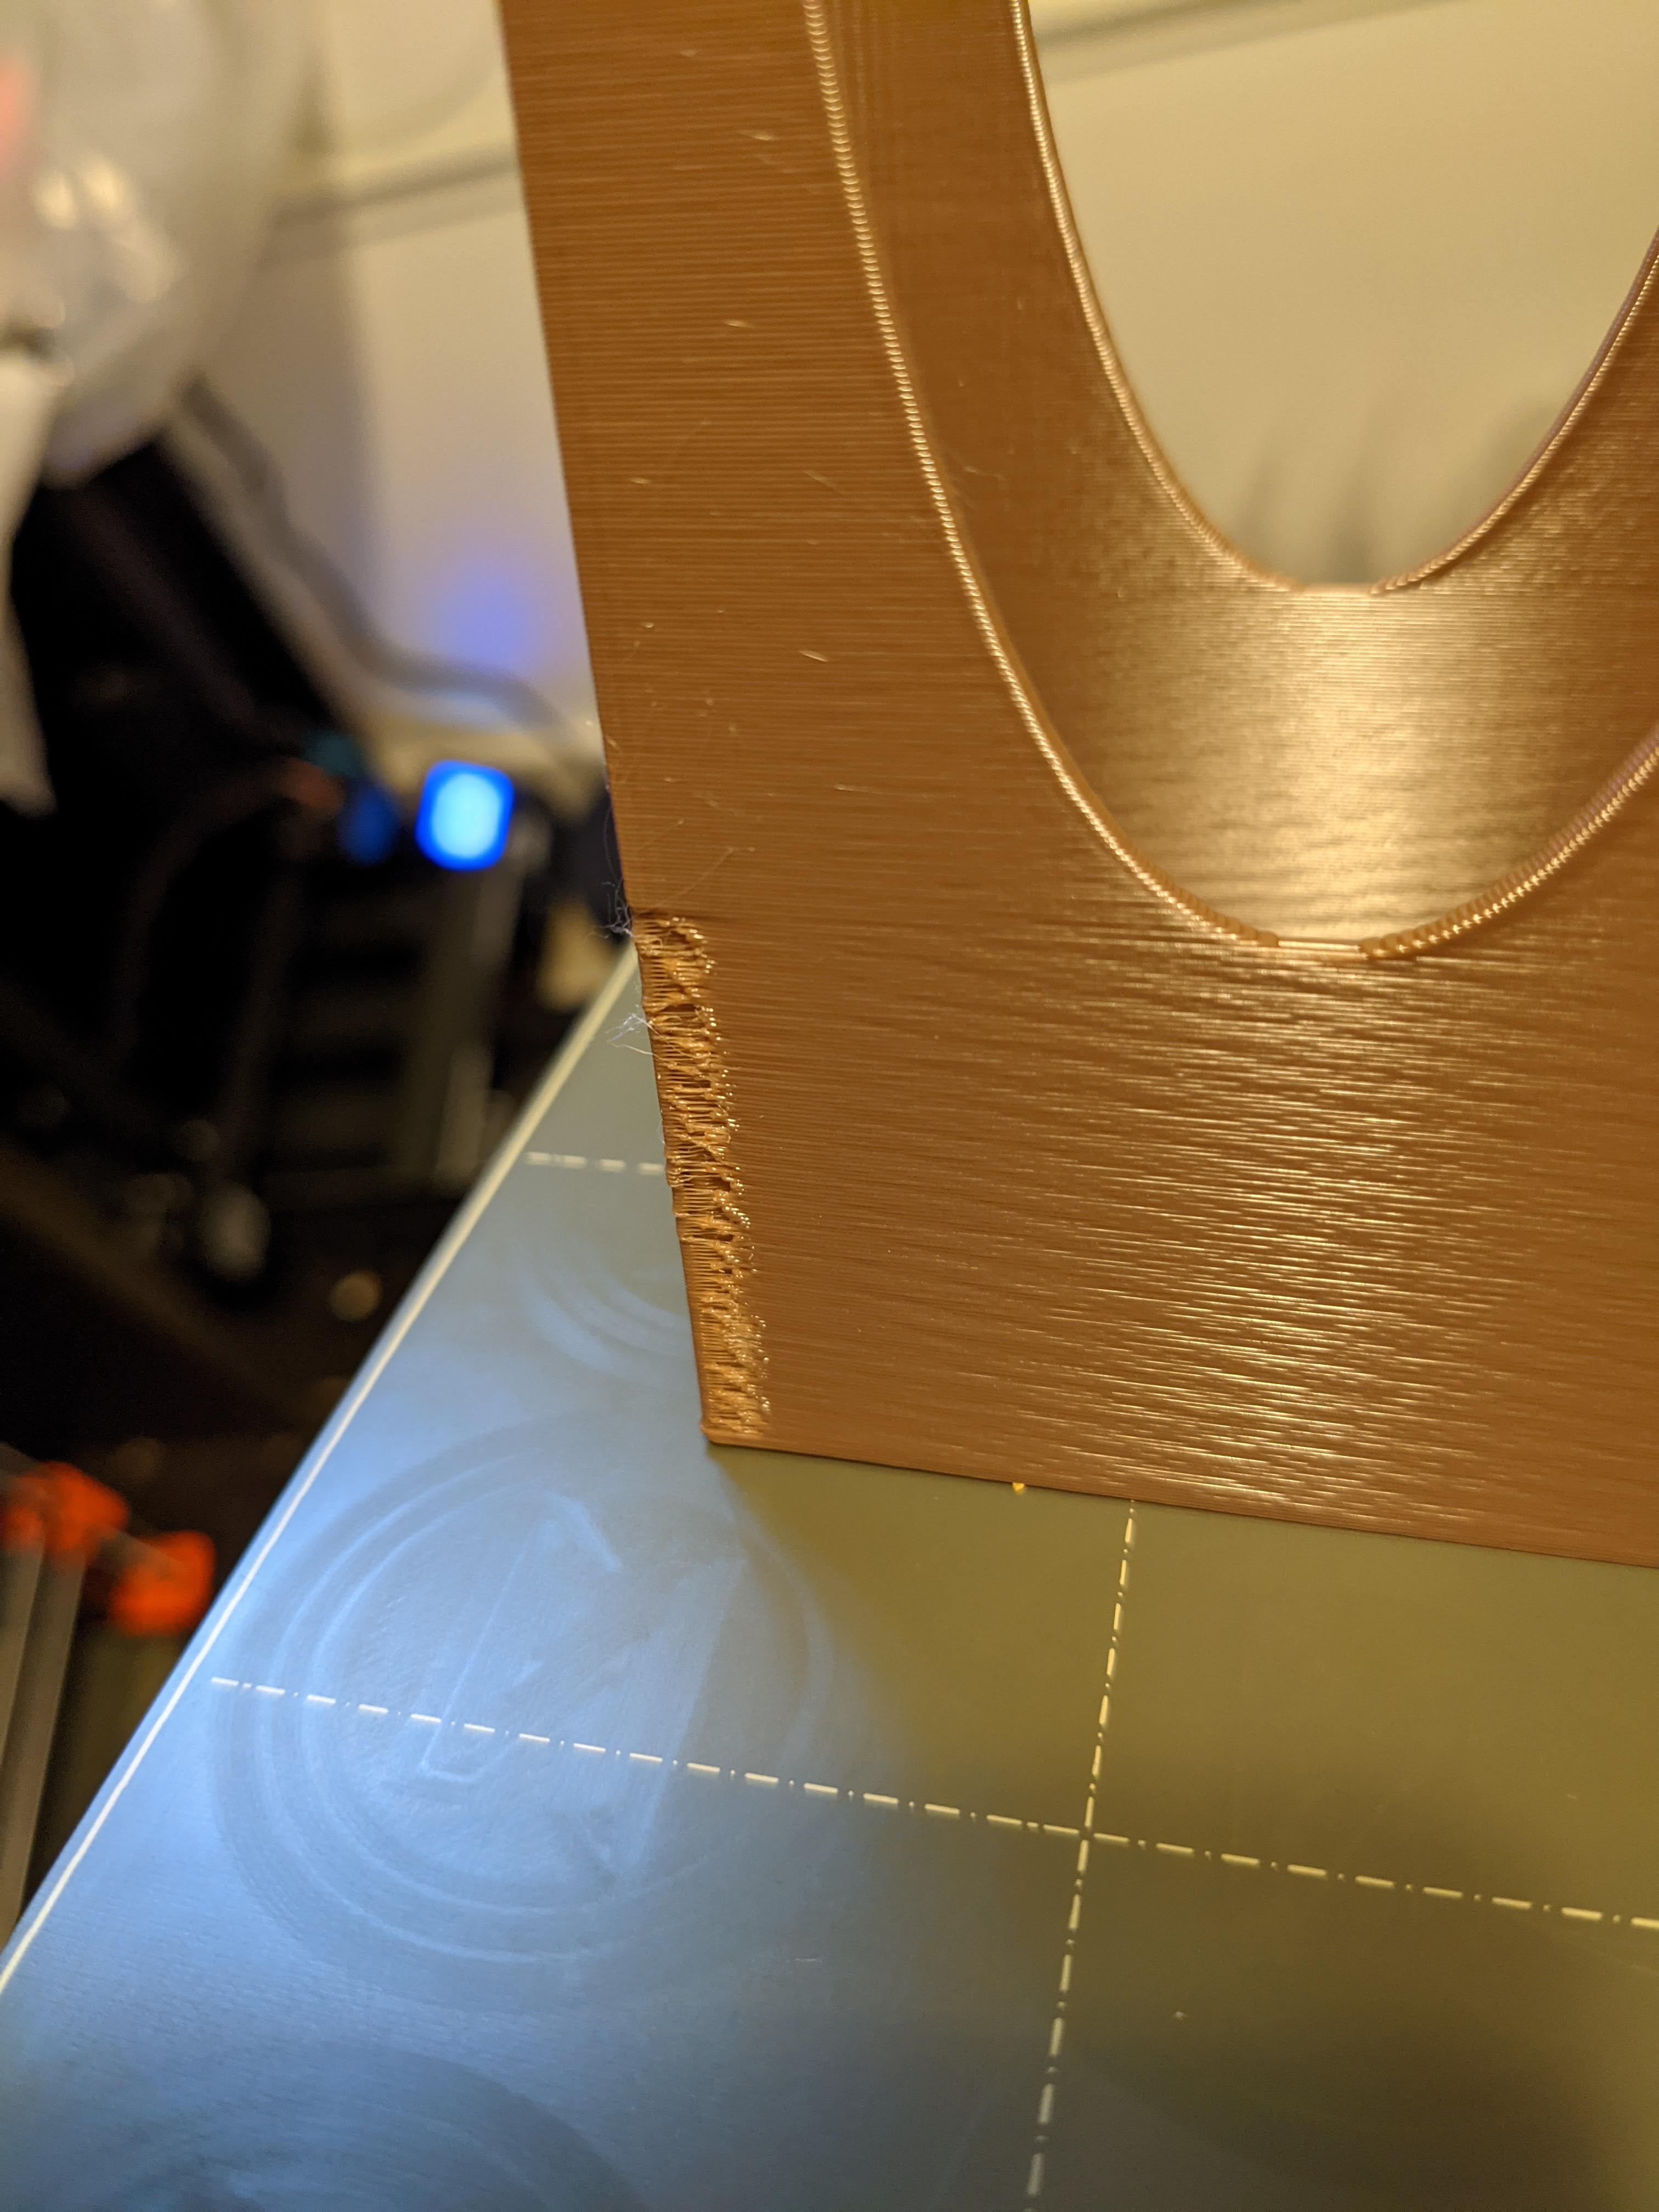
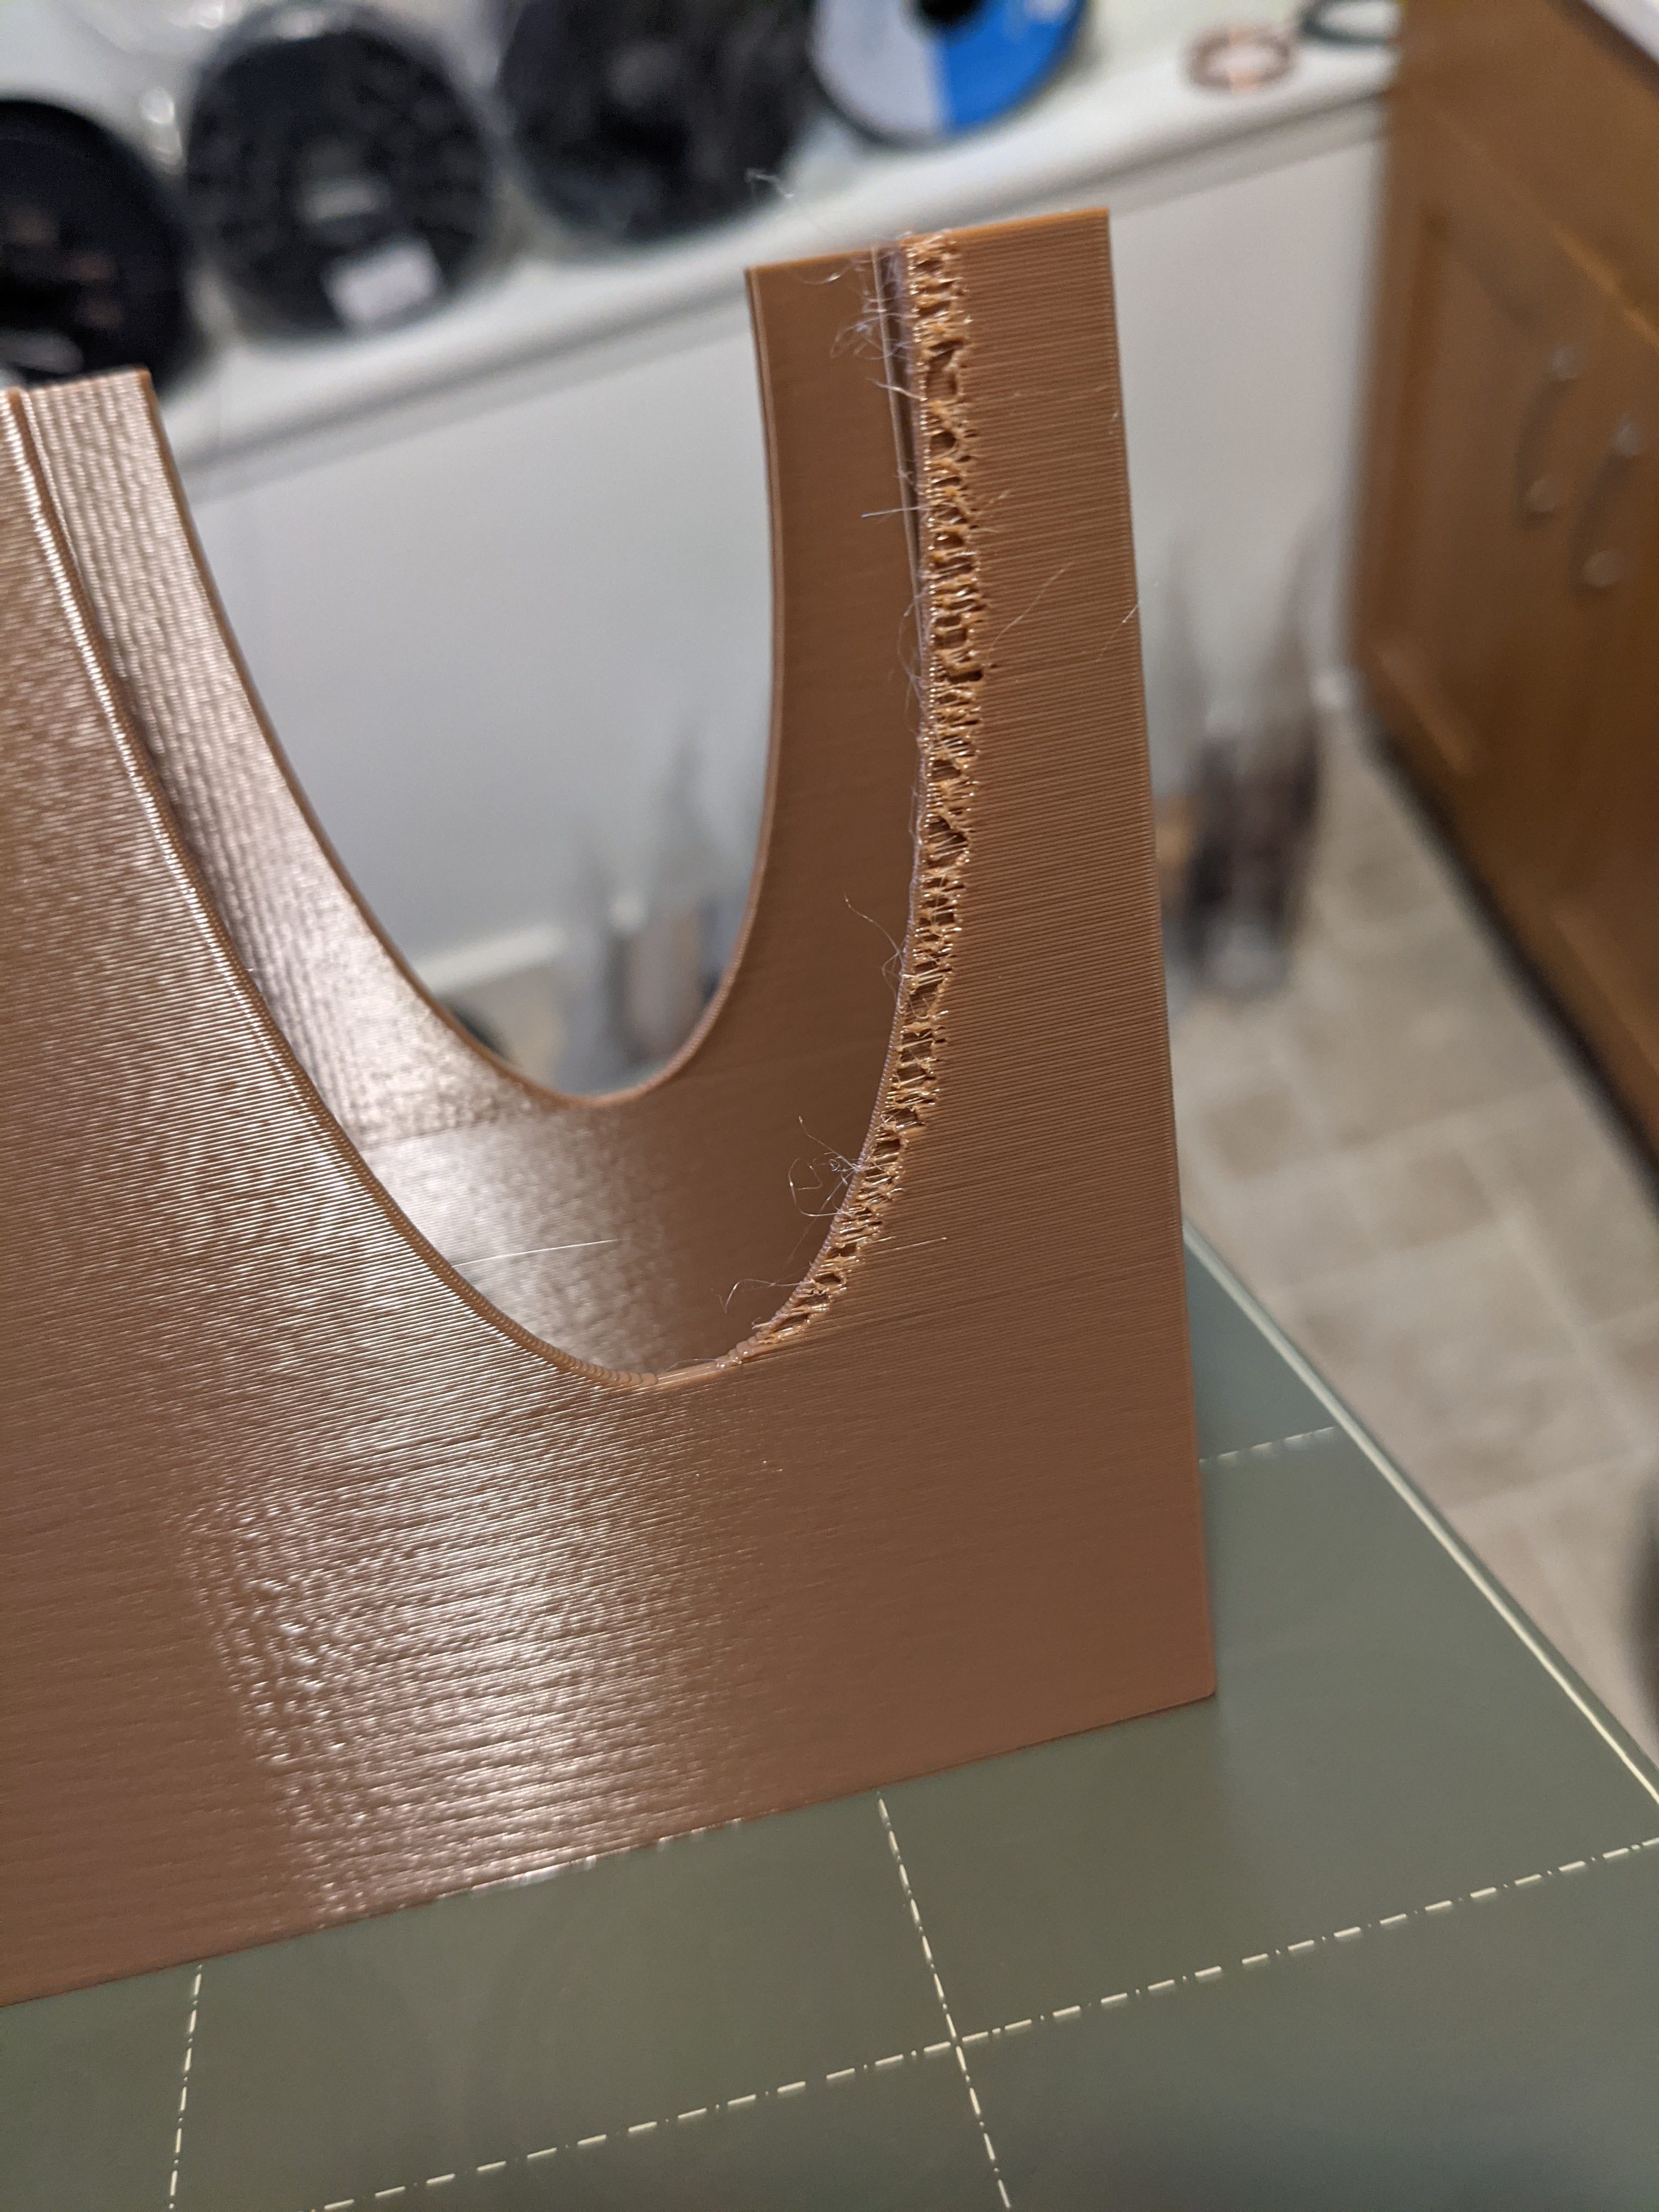
This is a problem that has plagued me on and off for a while, but now that I've switched one of my MK3S+ machines to a 0.6mm CHT nozzle, it's becoming more problematic. It seems to be, when the hot end makes a move from one object to another (or even from one side of a object to another side), there will either be a gap, or a very rough surface finish. It's as if the filament isn't extruding correctly right when it starts, whether it's the start of a new layer, or the start of a new area.
This would happen from time to time with my other prusas (mini and mk3s+), and with my ender3s, but it was not the norm. Now, with a 0.6mm CHT nozzle, it is happening consistently.
I've tried bumping up the travel speed a bit, but it didn't help. It doesn't look like it's moving that fast (it is set to 170mm/s), but I don't know how fast I can go before I start to get potential problems (I always run in stealth mode). I've also messed around with retraction distance and speed a bit, but haven't seen any noticeable difference.
These photos are all of one object in different places. You can see that as the travel path changes due to the cutouts (this is a card holder), the problem areas move.
This is PLA, printing at 210 at about 65mm/s
I'd appreciate any suggestions for how to get rid of this. I really wanted to be able to print faster by using a bigger nozzle (still at a reasonable speed, but with wider lines, so reduced print times), but I've had no luck dialing this problem out, and need some help.


RE: Help with gaps after moving
@mark-blasco
Can you post a Zipped up .3mf project file exported from PrusaSlicer? so we can see the settings your using as they pertain to the model in question.
Regards
Swiss_Cheese
The Filament Whisperer
RE: Help with gaps after moving
Hopefully this is what you're asking for:
https://podcastthemes.com/Images/prusa/
@mark-blasco
Can you post a Zipped up .3mf project file exported from PrusaSlicer? so we can see the settings your using as they pertain to the model in question.
Regards
Swiss_Cheese
When sliced your vertical walls are only two layers thick, this always makes print problems more likely. Thicker walls, or a narrower nozzle, might be enough to fix things.
Cheerio,
RE: Help with gaps after moving
I completely understand this. The reason I switched to a 0.6mm nozzle was because I wanted to be able to print objects that normally had 3 layer thick walls with only 2 layers, to reduce print time without having to increase printer speed. I'm wondering if there is a way to address the specific issue I have in the pictures, which also occurs from time to time with the 0.4mm nozzle.
When sliced your vertical walls are only two layers thick, this always makes print problems more likely. Thicker walls, or a narrower nozzle, might be enough to fix things.
Cheerio,
For truly reliable, easy to print, vertical walls the minimum is 5 thicknesses. Any less and you have to take note of extrusion width and calculate accordingly. Also, you are relying on very exact placement of the filament as if it is not laid exactly on the layer below there is nothing to catch it. Slowing the print would increase the precision - but you don't want that.
The only suggestion I can make if you must go this way is to narrow the walls even more until the two perimeters are squishing against each other thus forming a better foundation for the subsequent layers.
Cheerio,
RE: Help with gaps after moving
@mark-blasco
Your main problem here is the retractions and detraction's of your seams, if you select them in slicer in the show options window you will see the correlational.
I don't currently have a 0.6 nozzle installed in my printers to test, however I would set under Printer Settings/Extruder 1 [Retractions] Length: 0.8
Detraction Speed:0
Extra lenght on Restart: 0
these are the defaults and frankly should give you better results.
Aside from this you can use the "Seam painting" tool to move the Seams if necessary and this also will help since we tend to see these kinds of blemishes when using retractions on corners of thin walls. <-- (do not confuse this with "detect thin walls" bad choice to make in this case)
I would normally rework the .3mf and send it to you after printing and confirming the information, however I can't install a 0.6 right now because of other obligations with my printers.
Once again you can confirm by selecting the Detractions and Retractions in the show options drop down after slicing at the bottom of slicer.
your perimeter thicknesses are sound.
Regards
Swiss_Cheese
The Filament Whisperer
RE: Help with gaps after moving
Thanks for that. I switched from the defaults because I was having this problem with the defaults, and I was trying to figure out a way to fix it. It really seems like it's just not pushing out filament initially after it moves.
Regardless, I've taken the nozzle out and put back in a 0.4, and I'm not having any issues. I'll come back to this at another time when I can spare having a printer down for a while. I was just hoping that someone had seen this problem, and knew what the fix would be. I've tinkered with retraction settings, and can't seem to fix it. Oh well, I really appreciate all of the suggestions!
@mark-blasco
Your main problem here is the retractions and detraction's of your seams, if you select them in slicer in the show options window you will see the correlational.
I don't currently have a 0.6 nozzle installed in my printers to test, however I would set under Printer Settings/Extruder 1 [Retractions] Length: 0.8
Detraction Speed:0
Extra lenght on Restart: 0
these are the defaults and frankly should give you better results.
Aside from this you can use the "Seam painting" tool to move the Seams if necessary and this also will help since we tend to see these kinds of blemishes when using retractions on corners of thin walls. <-- (do not confuse this with "detect thin walls" bad choice to make in this case)
I would normally rework the .3mf and send it to you after printing and confirming the information, however I can't install a 0.6 right now because of other obligations with my printers.
Once again you can confirm by selecting the Detractions and Retractions in the show options drop down after slicing at the bottom of slicer.
your perimeter thicknesses are sound.
Regards
Swiss_Cheese