What is this
I think I’ve gotten my xyz calibrated for the first time and now the instructions are mentioning the “first layer” steps
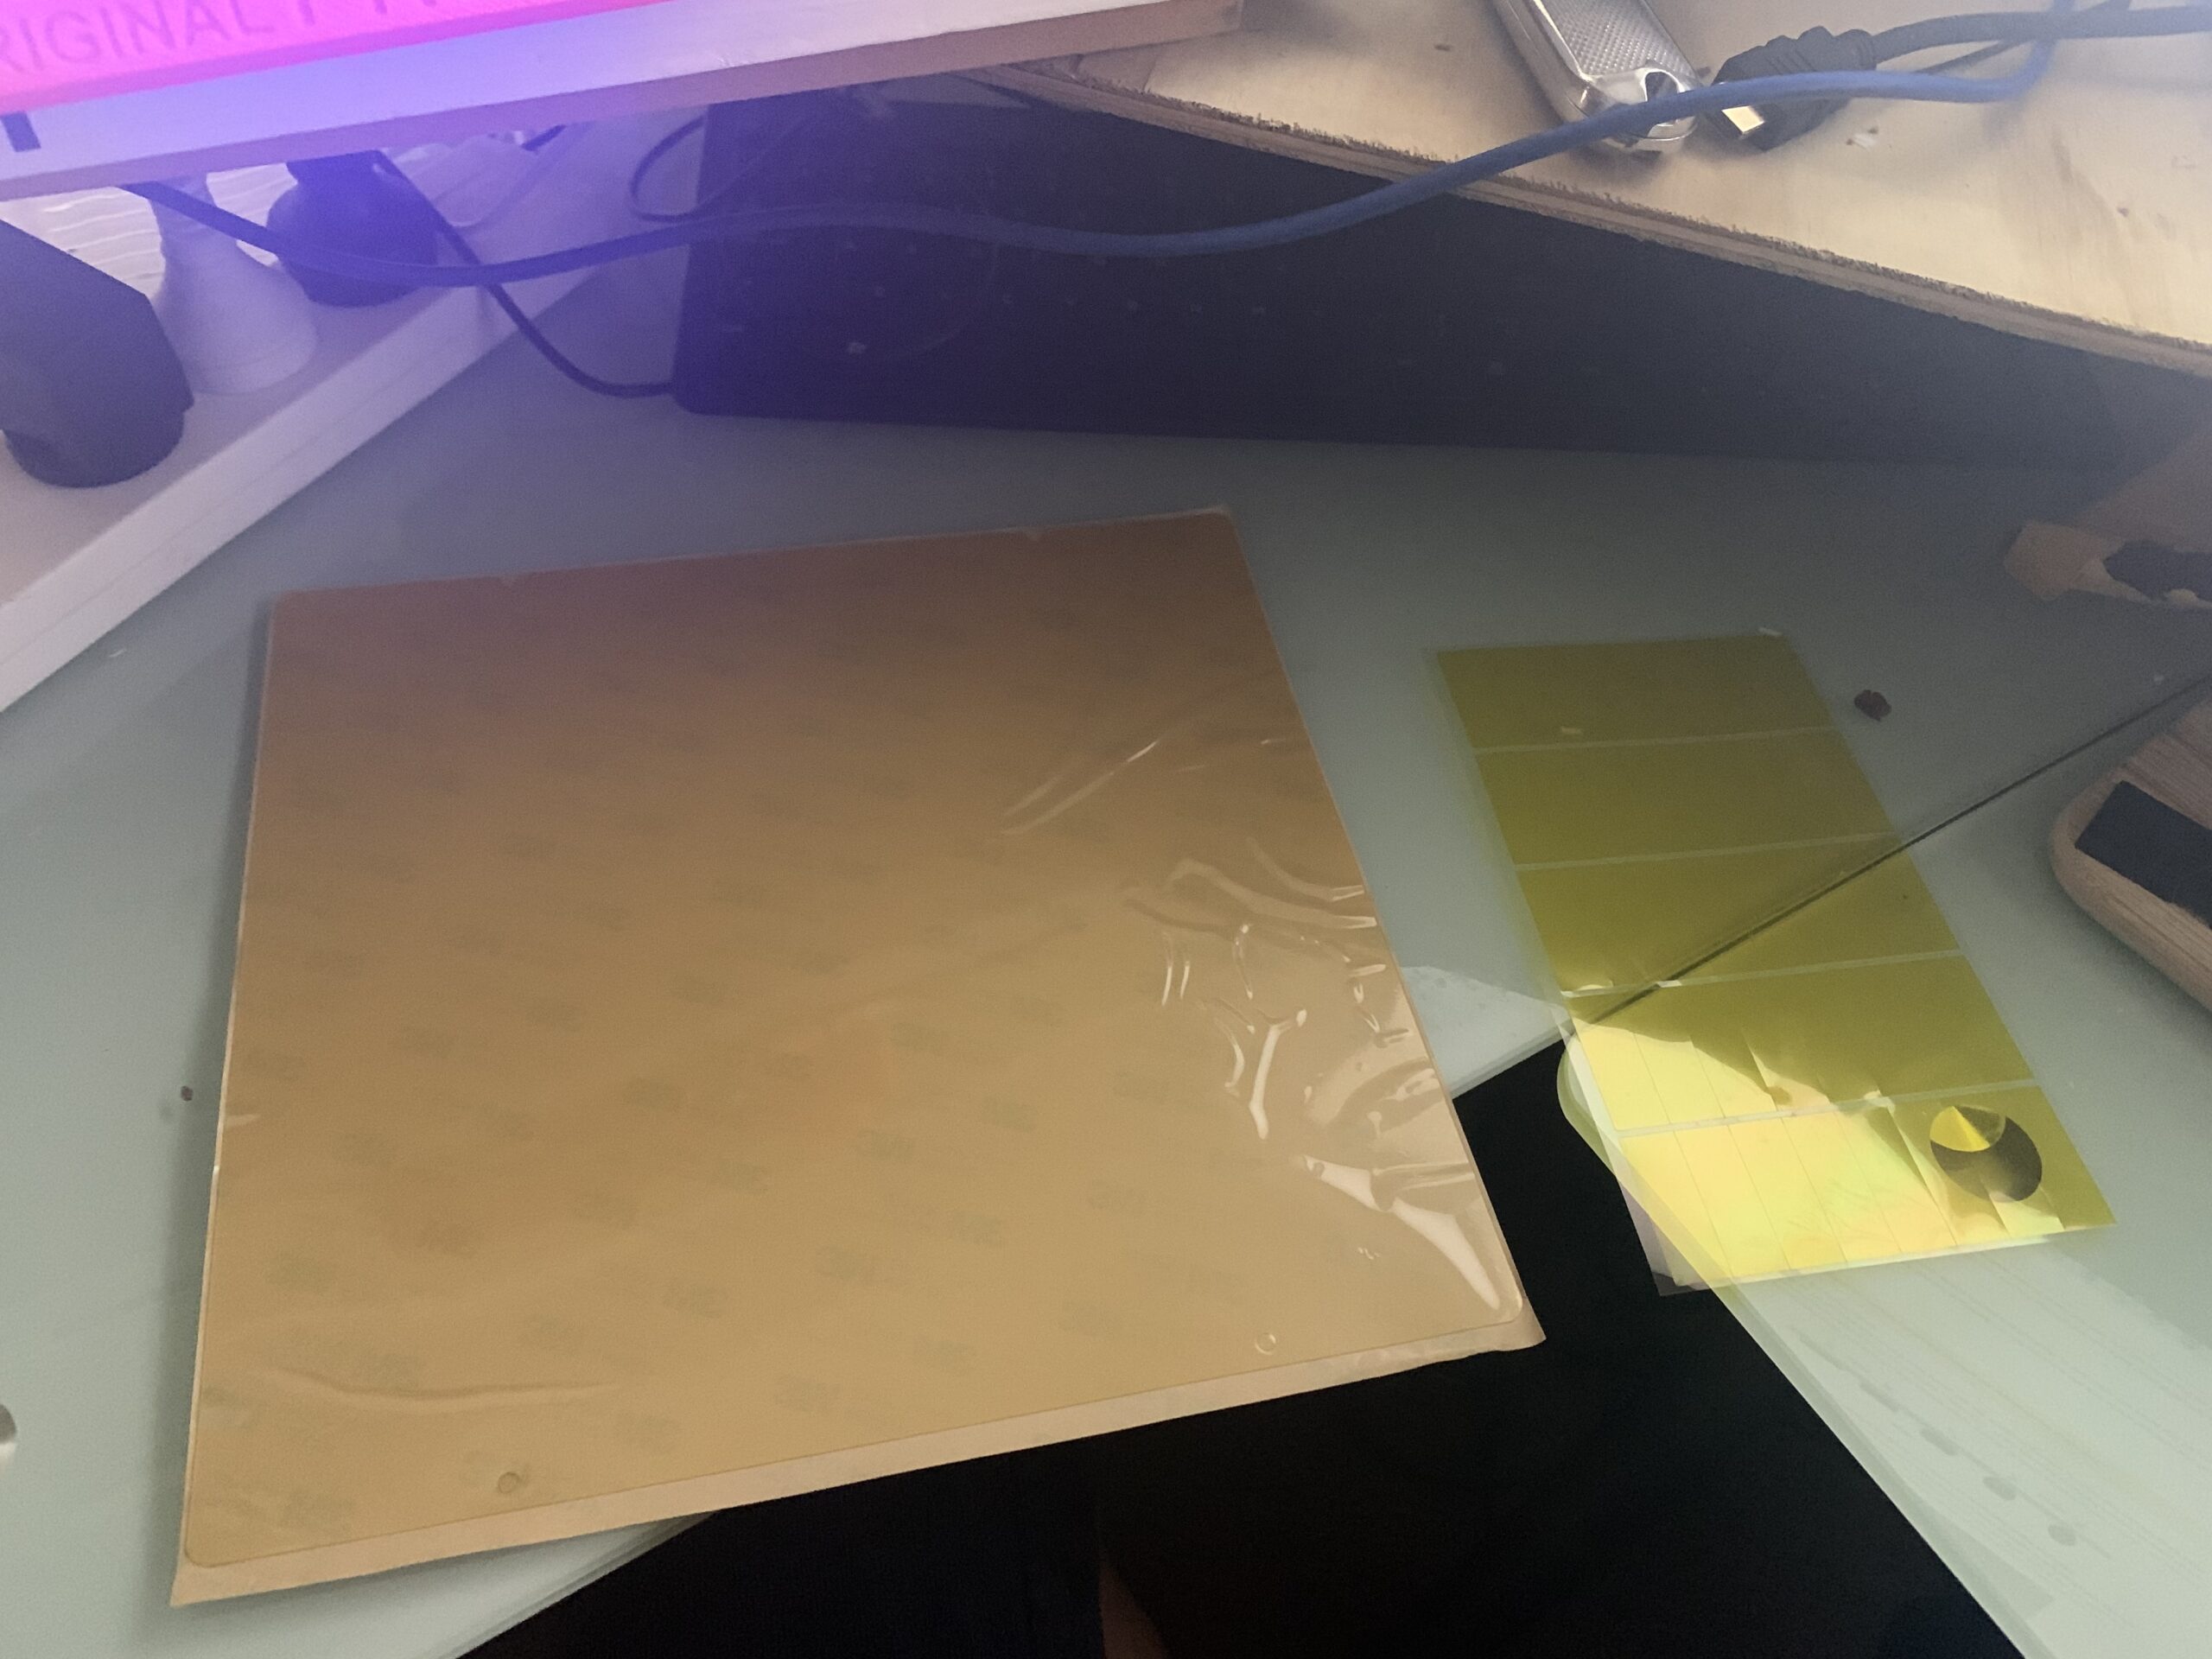
i looked it up and the guide talks about print surfaces and I’m not sure what I have - is this sheet with a sticky back related? Or should I be printing on the shiny steel bed?
RE: What is this
Are your sure you are in the right forum here? That does not look like anything that comes withe the Prusa MK3S.
If at first you don't succeed, skydiving is not for you.
Find out why this is pinned in the general section!
RE: What is this
Yes, specifically what printer (brand, model, original or clone) do you have?
RE: What is this
Given the OP's other thread in a next door forum I'd be laying odds that its part of the Bear 'upgrade'.
RE: What is this

If at first you don't succeed, skydiving is not for you.
Find out why this is pinned in the general section!
RE: What is this
I have:
- MK3
- plus a MK3S upgrade kit,
- plus MMU2 option (not yet installed)
- plus the bear frame upgrade
I believe the MK3 part was stock but not sure how to positively be sure of that
Yes, specifically what printer (brand, model, original or clone) do you have?
I bought the entire set in an online auction so not the original buyer, no idea where exactly it came from
The part i'm not sure about is the same size I think as the MK bed, has holes that seem to line up and a sticky back. you could be right that perhaps its a bear but not sure about that. will ask in a bear forum to confirm - thanks
RE: What is this
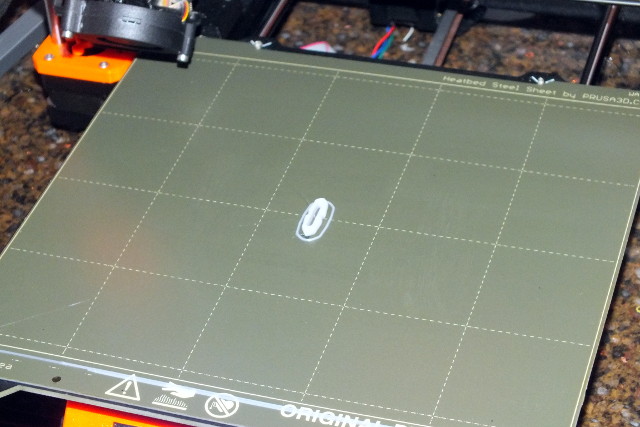
The stock MK3 series build plate is shown below. It's a double-sided PEI coated steel sheet.
The holes are (supposedly) for the manufacturing process, in use it's positioned on the machine by aligning the rear cut-out onto two bolts which extend out of the heat bed.
I have no clue what a build plate with a sticky back is, at least I've never used anything like that. I know there are some oddball aftermarket build plates out there.
The only thing sticky I'm aware of is that I've heard of some people using those free sticky build surfaces on the I3 series by tweaking the Z level.
RE: What is this
It sounds like you may have a bunch of clone parts, including a bare steel sheet to which you are supposed to apply the sticky backed build surface. Highly recommend getting one of the genuine factory steel sheets. The build sheet has nothing to do with the Bear frame upgrade, which is designed to re-use as much of the factory Prusa hardware as possibly.
RE: What is this
ok I'm only taking a guess from the image you shown, but the big sticky piece looks like a replacement PEI sheet and the clear yellow translucent looking stuff looks like Kapton tape. I couldn't guess why you have it or what the original owners intent was.
Good luck
Swiss_Cheese
The Filament Whisperer
RE: What is this
It sounds like you may have a bunch of clone parts, including a bare steel sheet to which you are supposed to apply the sticky backed build surface. Highly recommend getting one of the genuine factory steel sheets. The build sheet has nothing to do with the Bear frame upgrade, which is designed to re-use as much of the factory Prusa hardware as possibly.
Yes, now I remember from a previous thread that some aftermarket build plates come with 'some assembly required', meaning that the end user needs to apply the sticky PEI coating to the steel sheet.
The process is straightforward, and I recently had the experience of doing it as one of the final steps in re-skinning a damaged Prusa build plate (the removal of the old damaged PEI surface can best be described as an exercise in masochism).
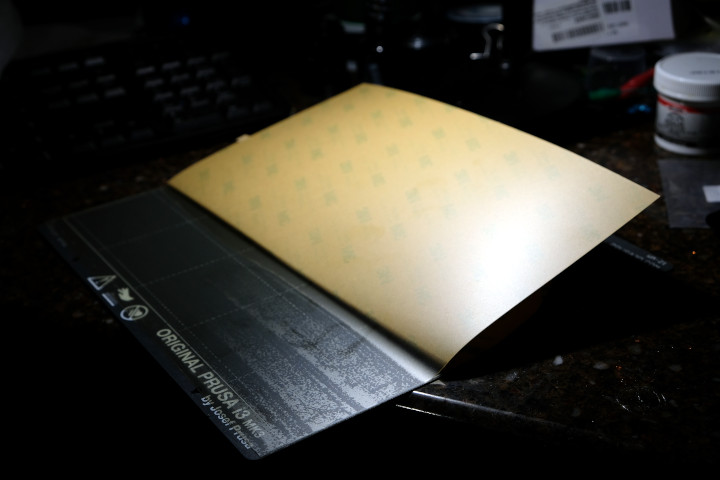
The actual application of the PEI sheet to the steel plate is easy and it's basically peeling back one side of the backing paper, carefully aligning the edge of the PEI sheet to the steel plate, and then kind of rolling on the PEI backing, while pressing out as many of the bubbles as possible with a flat surface. (The rest of the bubbles will dissipate with pressure and with time, as shown in the second/third images below.)
Just remember to get the alignment spot on, as you get one chance and one chance only to get it right!
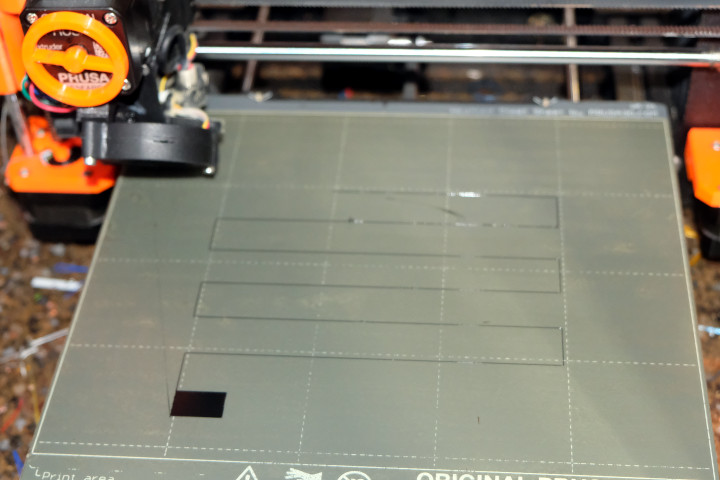
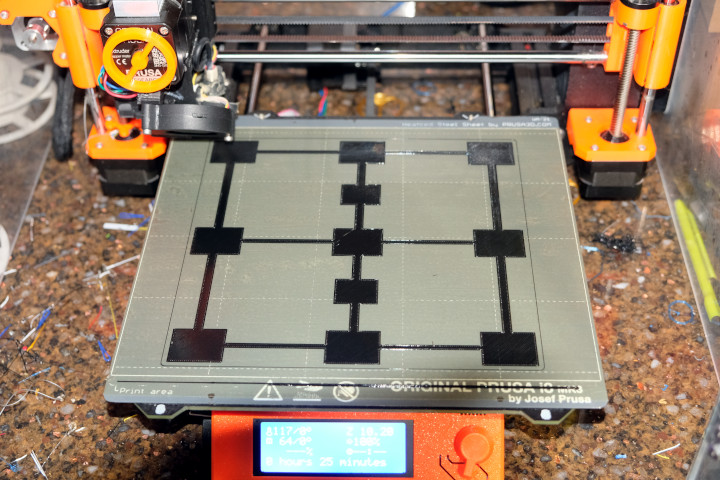
When the surface is applied and pressed into place, you can then first do the internal 'zig zag' Z calibration followed by a more rigorous Z calibration using one of those 3x3 single-layer calibration prints to get it further dialed in, plus any left/right and/or front/rear tweaks that it may need.
(If you want to see the very tedious process of removing and replacing the PEI coating on a steel build plate, it's here: https://forum.prusa3d.com/forum/original-prusa-i3-mk3s-mk3-hardware-firmware-and-software-help/re-skinning-a-prusa-steel-build-plate/)
RE:
You may be right -
this is what my steel sheet looks like

vs the base plate
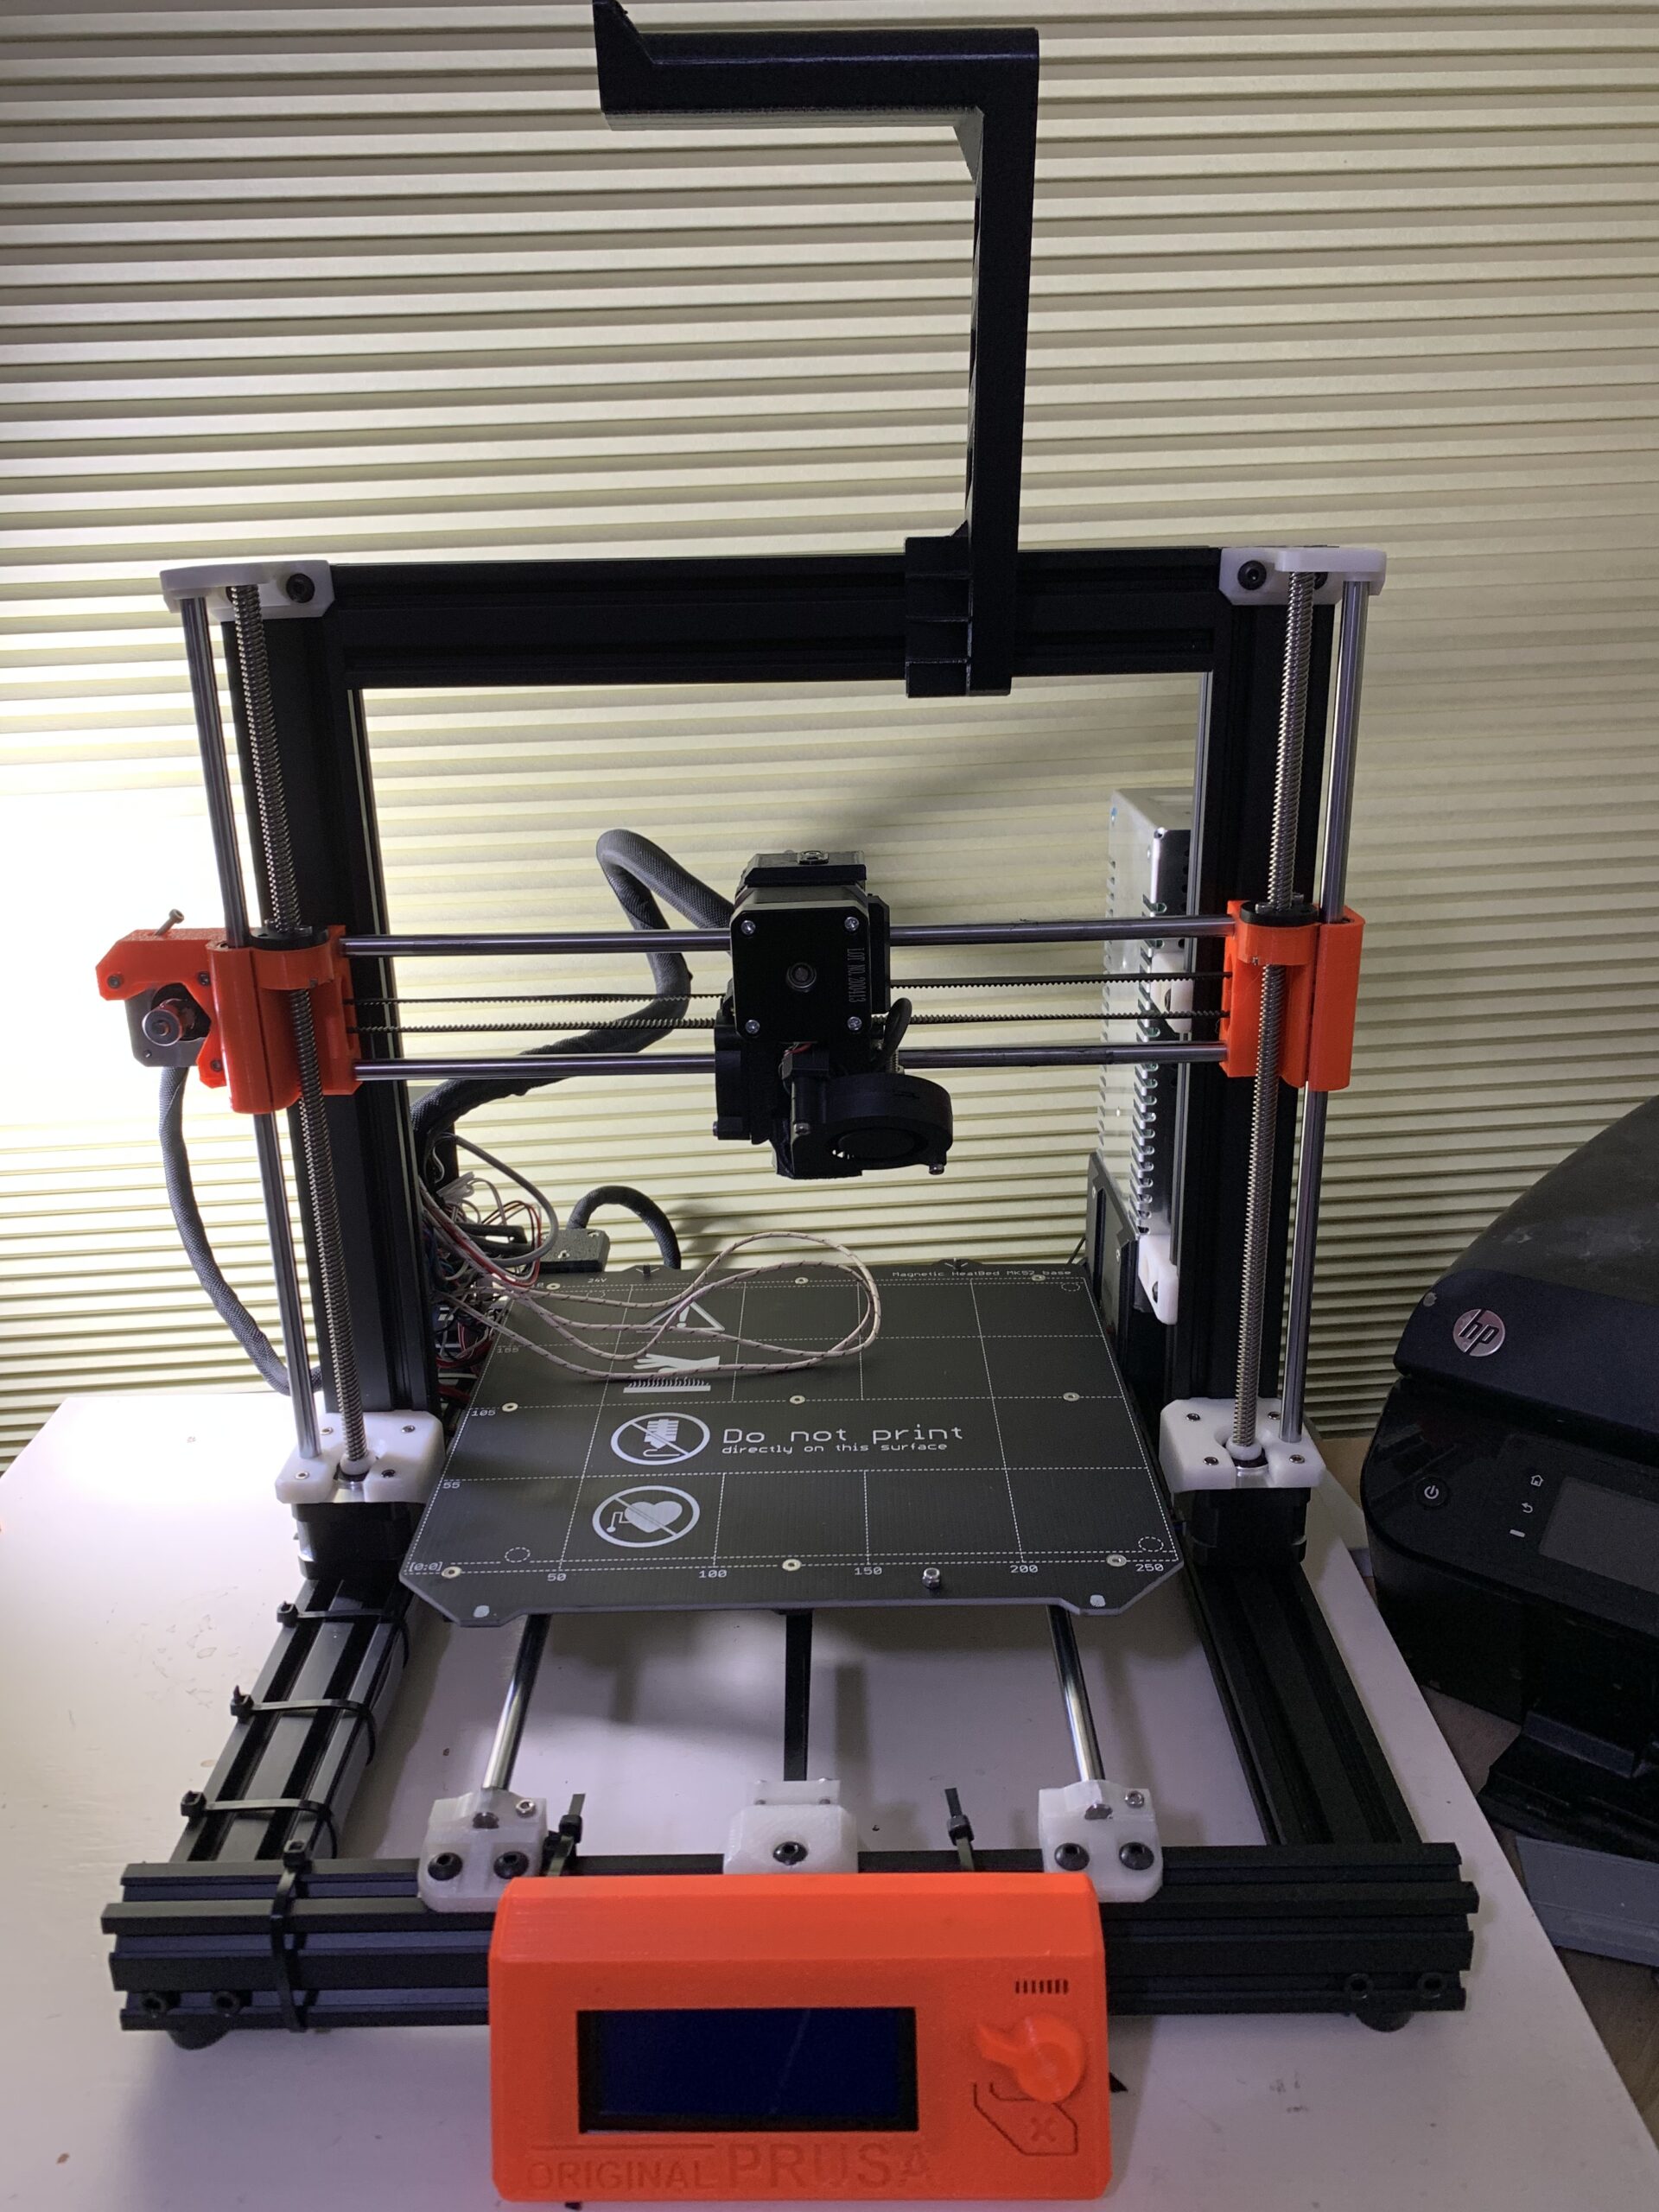
the steel sheet says: Heatbed Steel Sheet by FYSETC.com
RE: What is this
Yes, and please obey the admonition not to print directly on the heat bed! People have fallen into a pit by ignoring that and it can be ugly to fix.
I can't tell from the photo if your steel build plate has a PEI coating on it or not. It looks like it's bare metal, but I can't be 100% sure.
Printing on the bare metal plate probably will not work very well. (Although I do know that at least one individual has successfully printed on a ferrotype plate for a shiny lower surface on the print.)
You said there is a sticky item, that's probably a PEI sheet. If it's the same size as the build plate, it's most definitely that.
I would first give the metal build plate a good wipe-off with alcohol, let it dry, and then carefully apply the PEI sheet.
I think I’ve gotten my xyz calibrated for the first time
I assume by this that you mean the initial procedure using a sheet of paper and a zip tie as a feeler gauge. You probably do not have to repeat this step.
Once you get the PEI sheet in place, you're most likely ready to try the first layer calibration using the internal routine. Just a note, the process with the feeler gauge usually (intentionally) sets the nozzle high, so it may have to be lowered in order to get any adhesion on the plate at all.
I would start with a name brand PLA filament for the initial calibration.
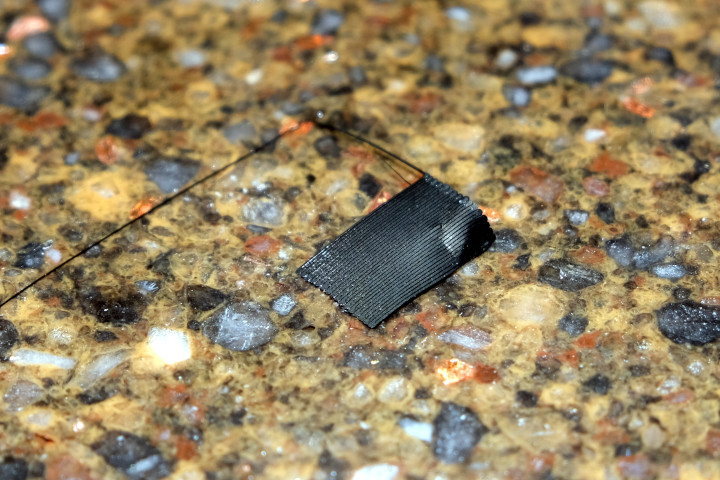
You will want to 'tune' the Z for kind of an oval shaped bead on the zig-zag portion of the test shown above. The corners should be square and sharp when the machine changes from horizontal to vertical strokes. If it pulls off of the build plate, it's most likely too high.
If you get the bottom of the 'flag' part looking like the photo below, you're getting close.
RE: What is this
That's kind of an interesting mix of printed parts. Those do indeed look like the stock Prusa X ends, which is good since you are using the stock Prusa design extruder. As I understand it, the Prusa extruder will physically fit with the Bear Exxa X ends, but since the belt geometry is different the X motion won't be accurate. So no issue there.
Your Y rod holders are not the standard Bear frame items; they are a modified part that eliminates the use of zip ties to secure the rods. When I built my Bear I also used a modified part for the same reason (to eliminate the zip ties) but I used a different part than what is on your printer. Like I said in my earlier post, there's lots of opportunity to select different parts to tweak your build how you want it. Having built one, I concluded that there's really nothing wrong with the zip tie method, although I find the 2 piece units I used to be aesthetically superior.
Something that you appear to be missing entirely, are the special cable clips that are part of the Bear printed parts set; hence the cables being zip tied directly to the frame. Once you get your printer up and running, and get comfortable printing with PETG (you'll want to get one of the textured build sheets for this), I would recommend downloading the complete STL set from Gregoire's Github and printing the cable clips and anything else you might be missing. This will allow you to clean up the routing of your cabling considerably.
https://github.com/gregsaun/prusa_i3_bear_upgrade
Actually now that I am really looking at it, other differences stand out. Your frame is through bolted instead of being assembled using the corner braces and M5 hardware like the actual Bear design uses. This is a common characteristic of clone kits made by the Chinese because it allows them to reduce the parts count and therefore their unit cost. Which means that the rest of the printer is almost certainly clone parts as well. The problem with the clone kits from what research I did is that they tend to cut corners in places where quality matters, i.e. hot ends, electronics, etc. So be prepared to deal with a steeper learning curve than normal, and the likelihood that you'll need to do more troubleshooting just to get it up and running.
The FYSETC heat bed.... This is one of the only clone parts I bought for my Bear build, and if I had it to do over again I would at least buy the LDO unit instead, if not the genuine Prusa factory heat bed. The clone heat bed seems to work fine, but it's definitely not as flat as it should be, although it's not so bad that the Prusa mesh bed leveling system can't deal with it. I will likely do either the silicon or nyloc bed leveling mod at some point, but the first real trouble the clone heatbed gives me I think I will remove it and buy a better one.
RE: What is this
Another indication for a clone is the E stepper motor. The original motors have "original Prusa i3 - PRUSA research" printed on the front.
If at first you don't succeed, skydiving is not for you.
Find out why this is pinned in the general section!
RE: What is this
The one thing I noticed, at least in the one photo, is that the filament sensor is hanging out, as in not screwed into its proper place in the extruder. It looks like the top piece to the extruder may be missing as well.
I thought that FYSETC build plates came with PEI sheets installed in place, but I could be wrong. Is the build plate definitely bare metal on both sides?
RE: What is this
you are right. i disconnected the filament sensor as I was getting an error - I had another post about that
The one thing I noticed, at least in the one photo, is that the filament sensor is hanging out, as in not screwed into its proper place in the extruder. It looks like the top piece to the extruder may be missing as well.
I thought that FYSETC build plates came with PEI sheets installed in place, but I could be wrong. Is the build plate definitely bare metal on both sides?
RE: What is this
Another indication for a clone is the E stepper motor. The original motors have "original Prusa i3 - PRUSA research" printed on the front.
I believe you are correct that the motors may be clones
RE: What is this
That's kind of an interesting mix of printed parts. Those do indeed look like the stock Prusa X ends, which is good since you are using the stock Prusa design extruder. As I understand it, the Prusa extruder will physically fit with the Bear Exxa X ends, but since the belt geometry is different the X motion won't be accurate. So no issue there.
yes its a strange mix. what I got I think was the upgrade kit for MK3 to MK3S but was missing some of the basic MK3 parts, so I've printed those (in white) except a couple like the y-clips I tried "improved" versions, hopefully they are indeed improvements.
Something that you appear to be missing entirely, are the special cable clips that are part of the Bear printed parts set;
yes good spotting - the clips were not included so I just got those printed and had the cable ties on temporarily, i'll swap those out soon.
so yes a bit of a Frankenstein assembly 😂
Thanks all for the advice
RE: What is this
With the stock Prusa firmware, it is possible to disable the filament sensor if you need to. The disadvantages to doing this should be obvious, but if you need to do it to test or to get things running, it's simple to do.