Left Z-axis is loosing steps
Hey everybody,
I received my new Mk3S+ Kit just some weeks ago but I still have a little issue with the left Z-axis, so I hope you might have a hint for me how to deal with it.
It all started when I printed the first big model which came out having some seams on its surface. As I took a closer look, I saw that the x-axis was a bit tilted. I decided to print a tower with the same height of the big model, so see if the seams occur regularly at the same heights. This seemed to be true for the first tower, but when i printed more of them the seams occured at different heights.
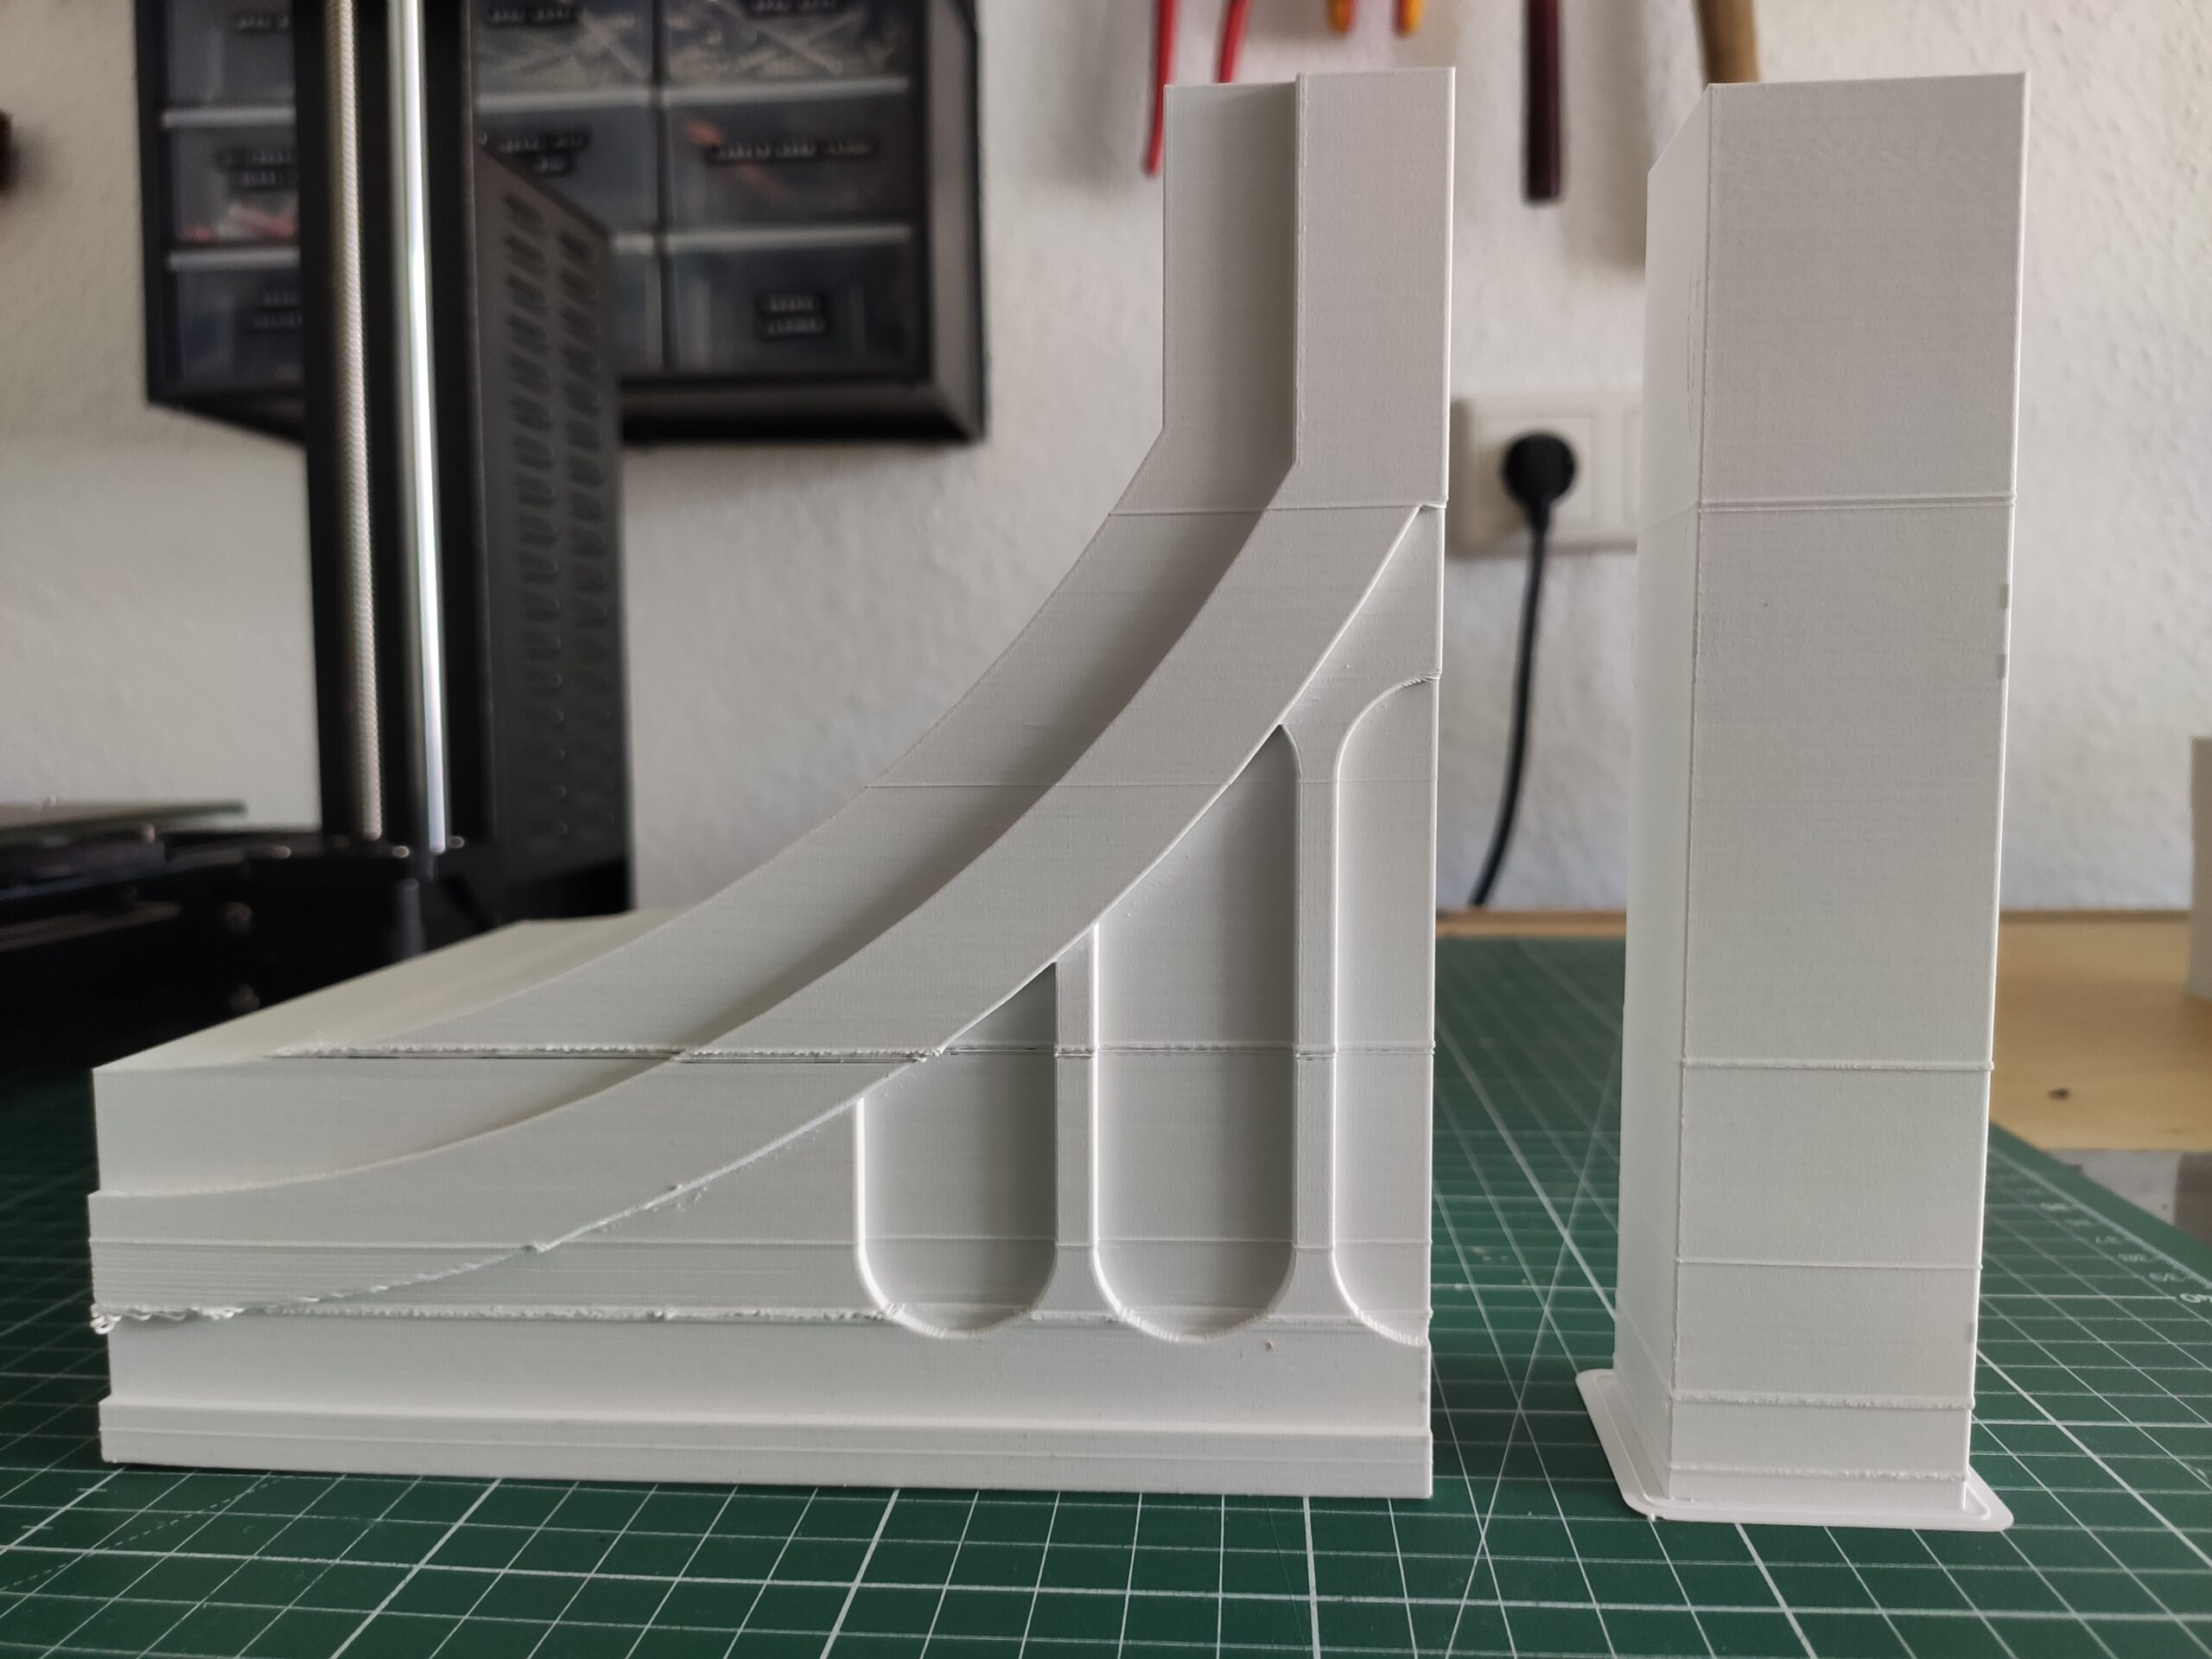
Big Model & 1st Tower - on both the seams occured mostly at the same heights
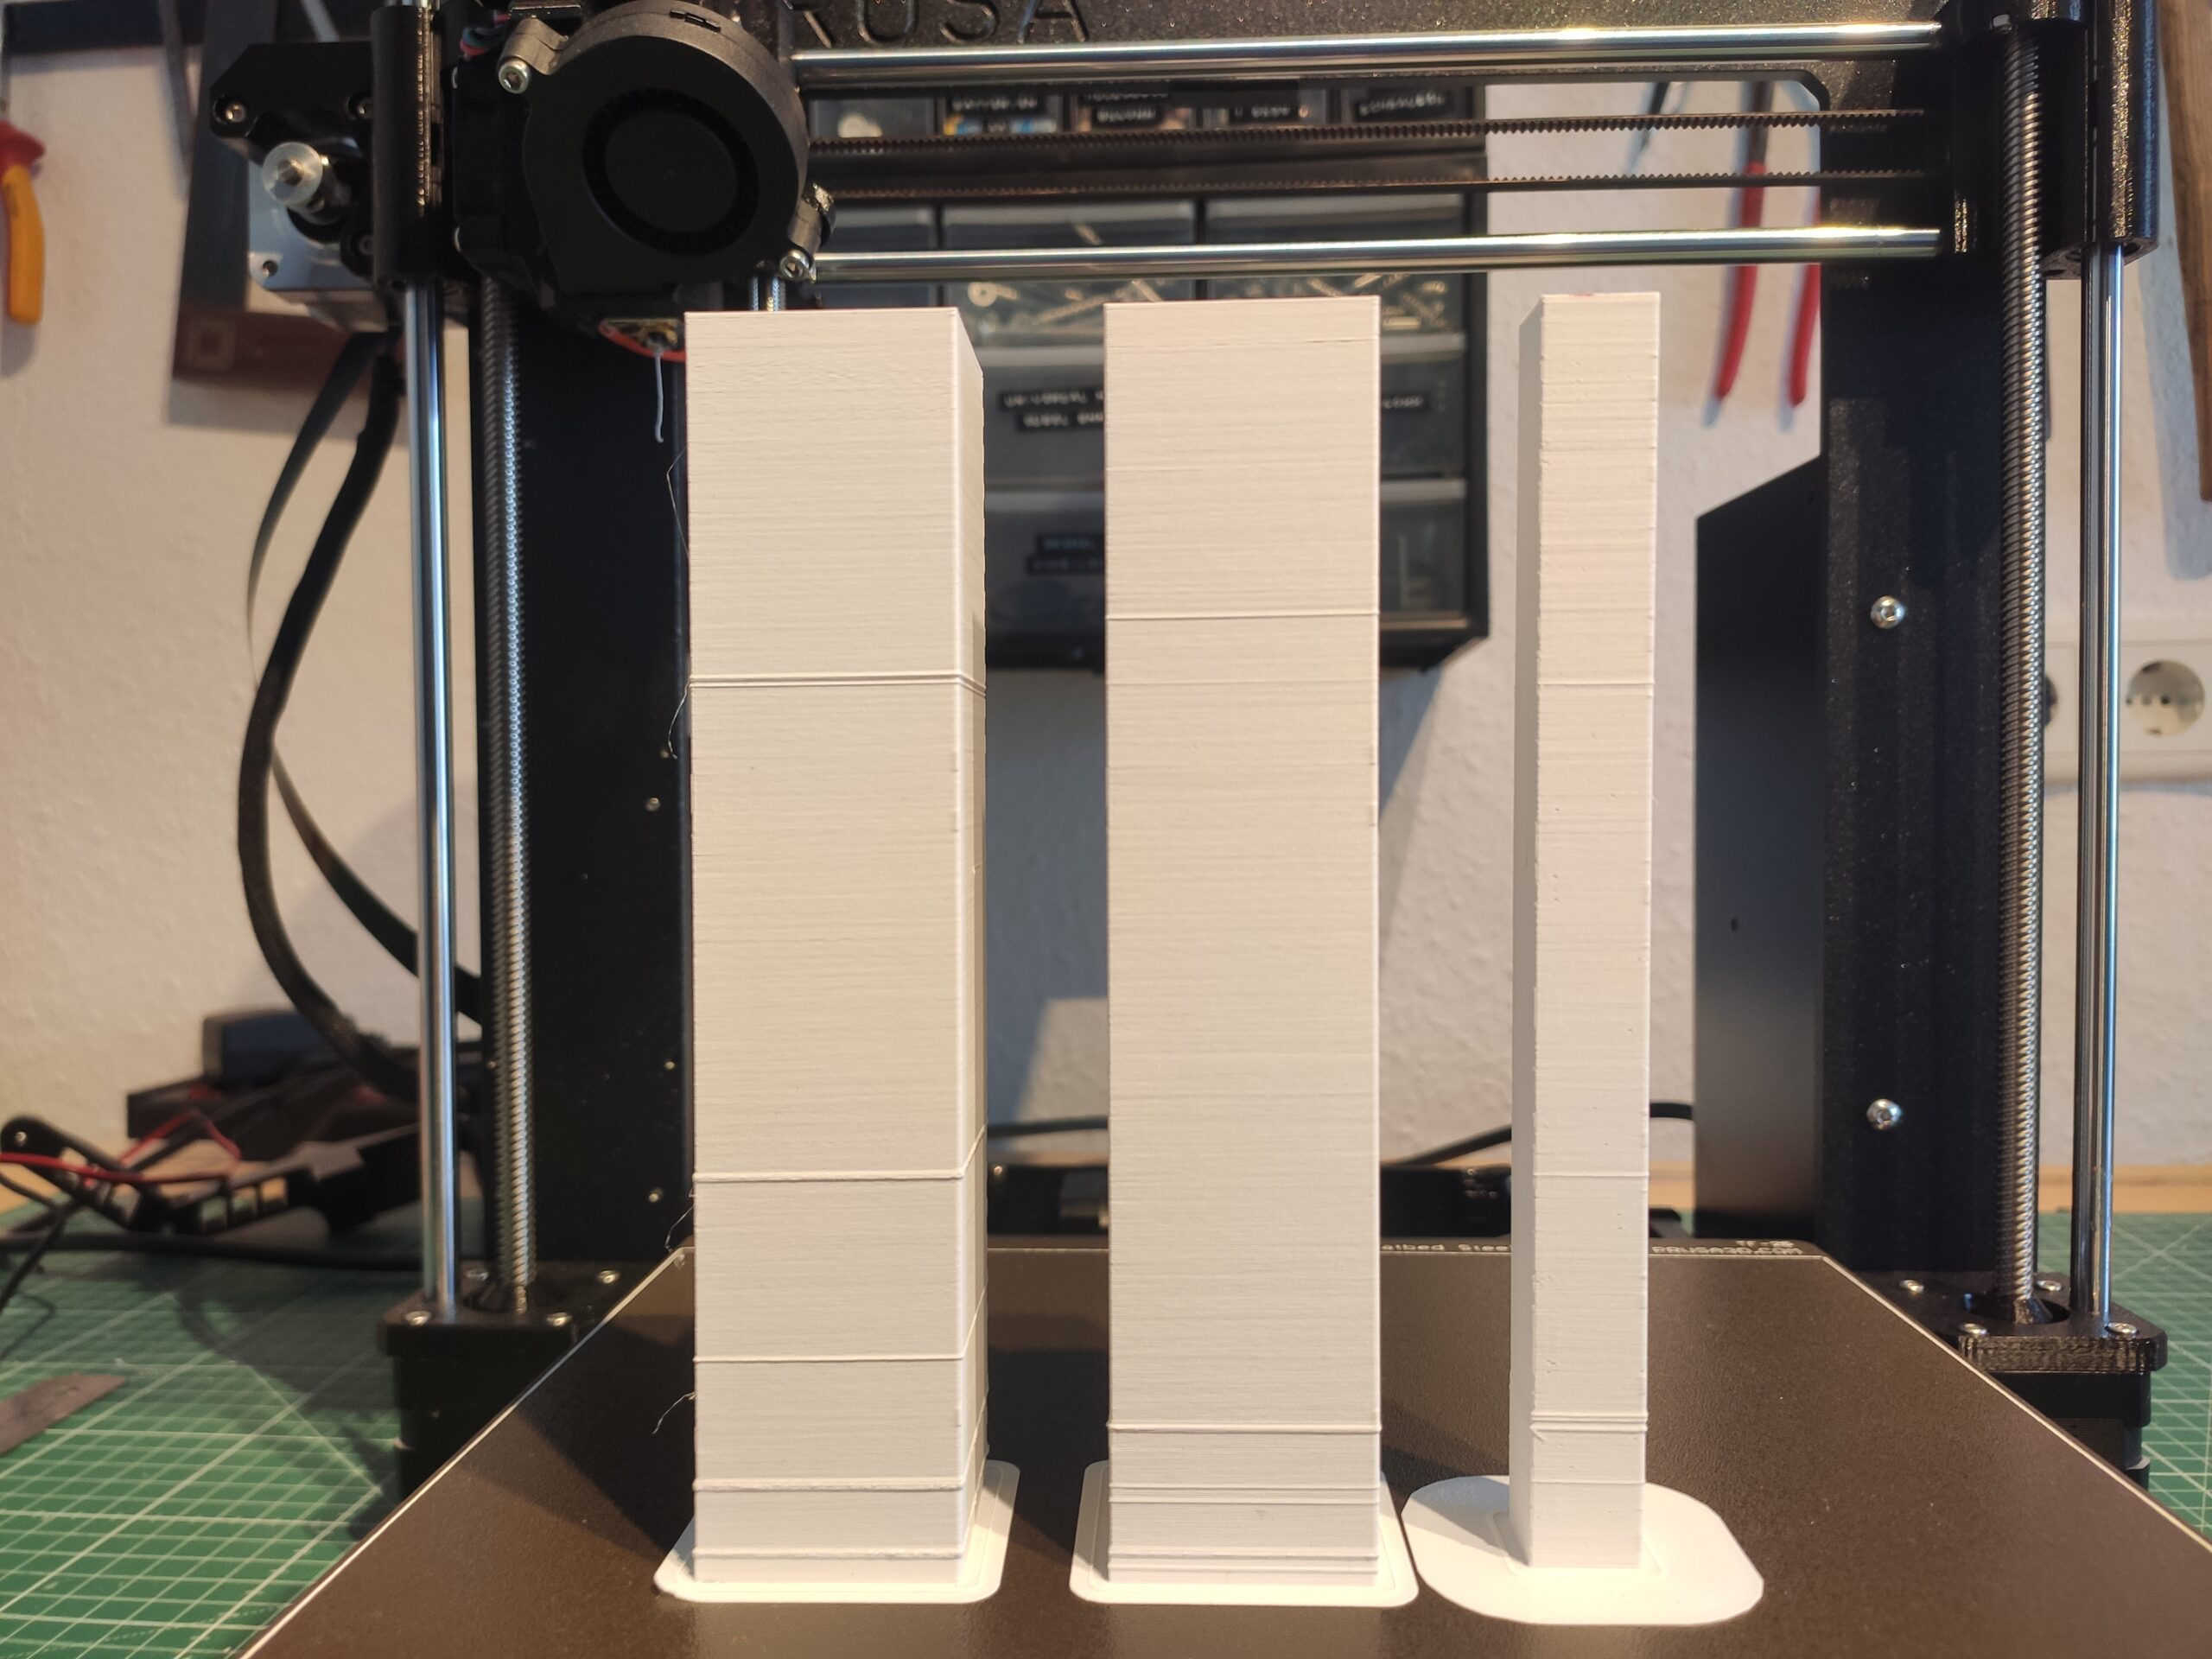
1st, 2nd & 3rd Tower - some seams occur at the same heights, but not necessarily
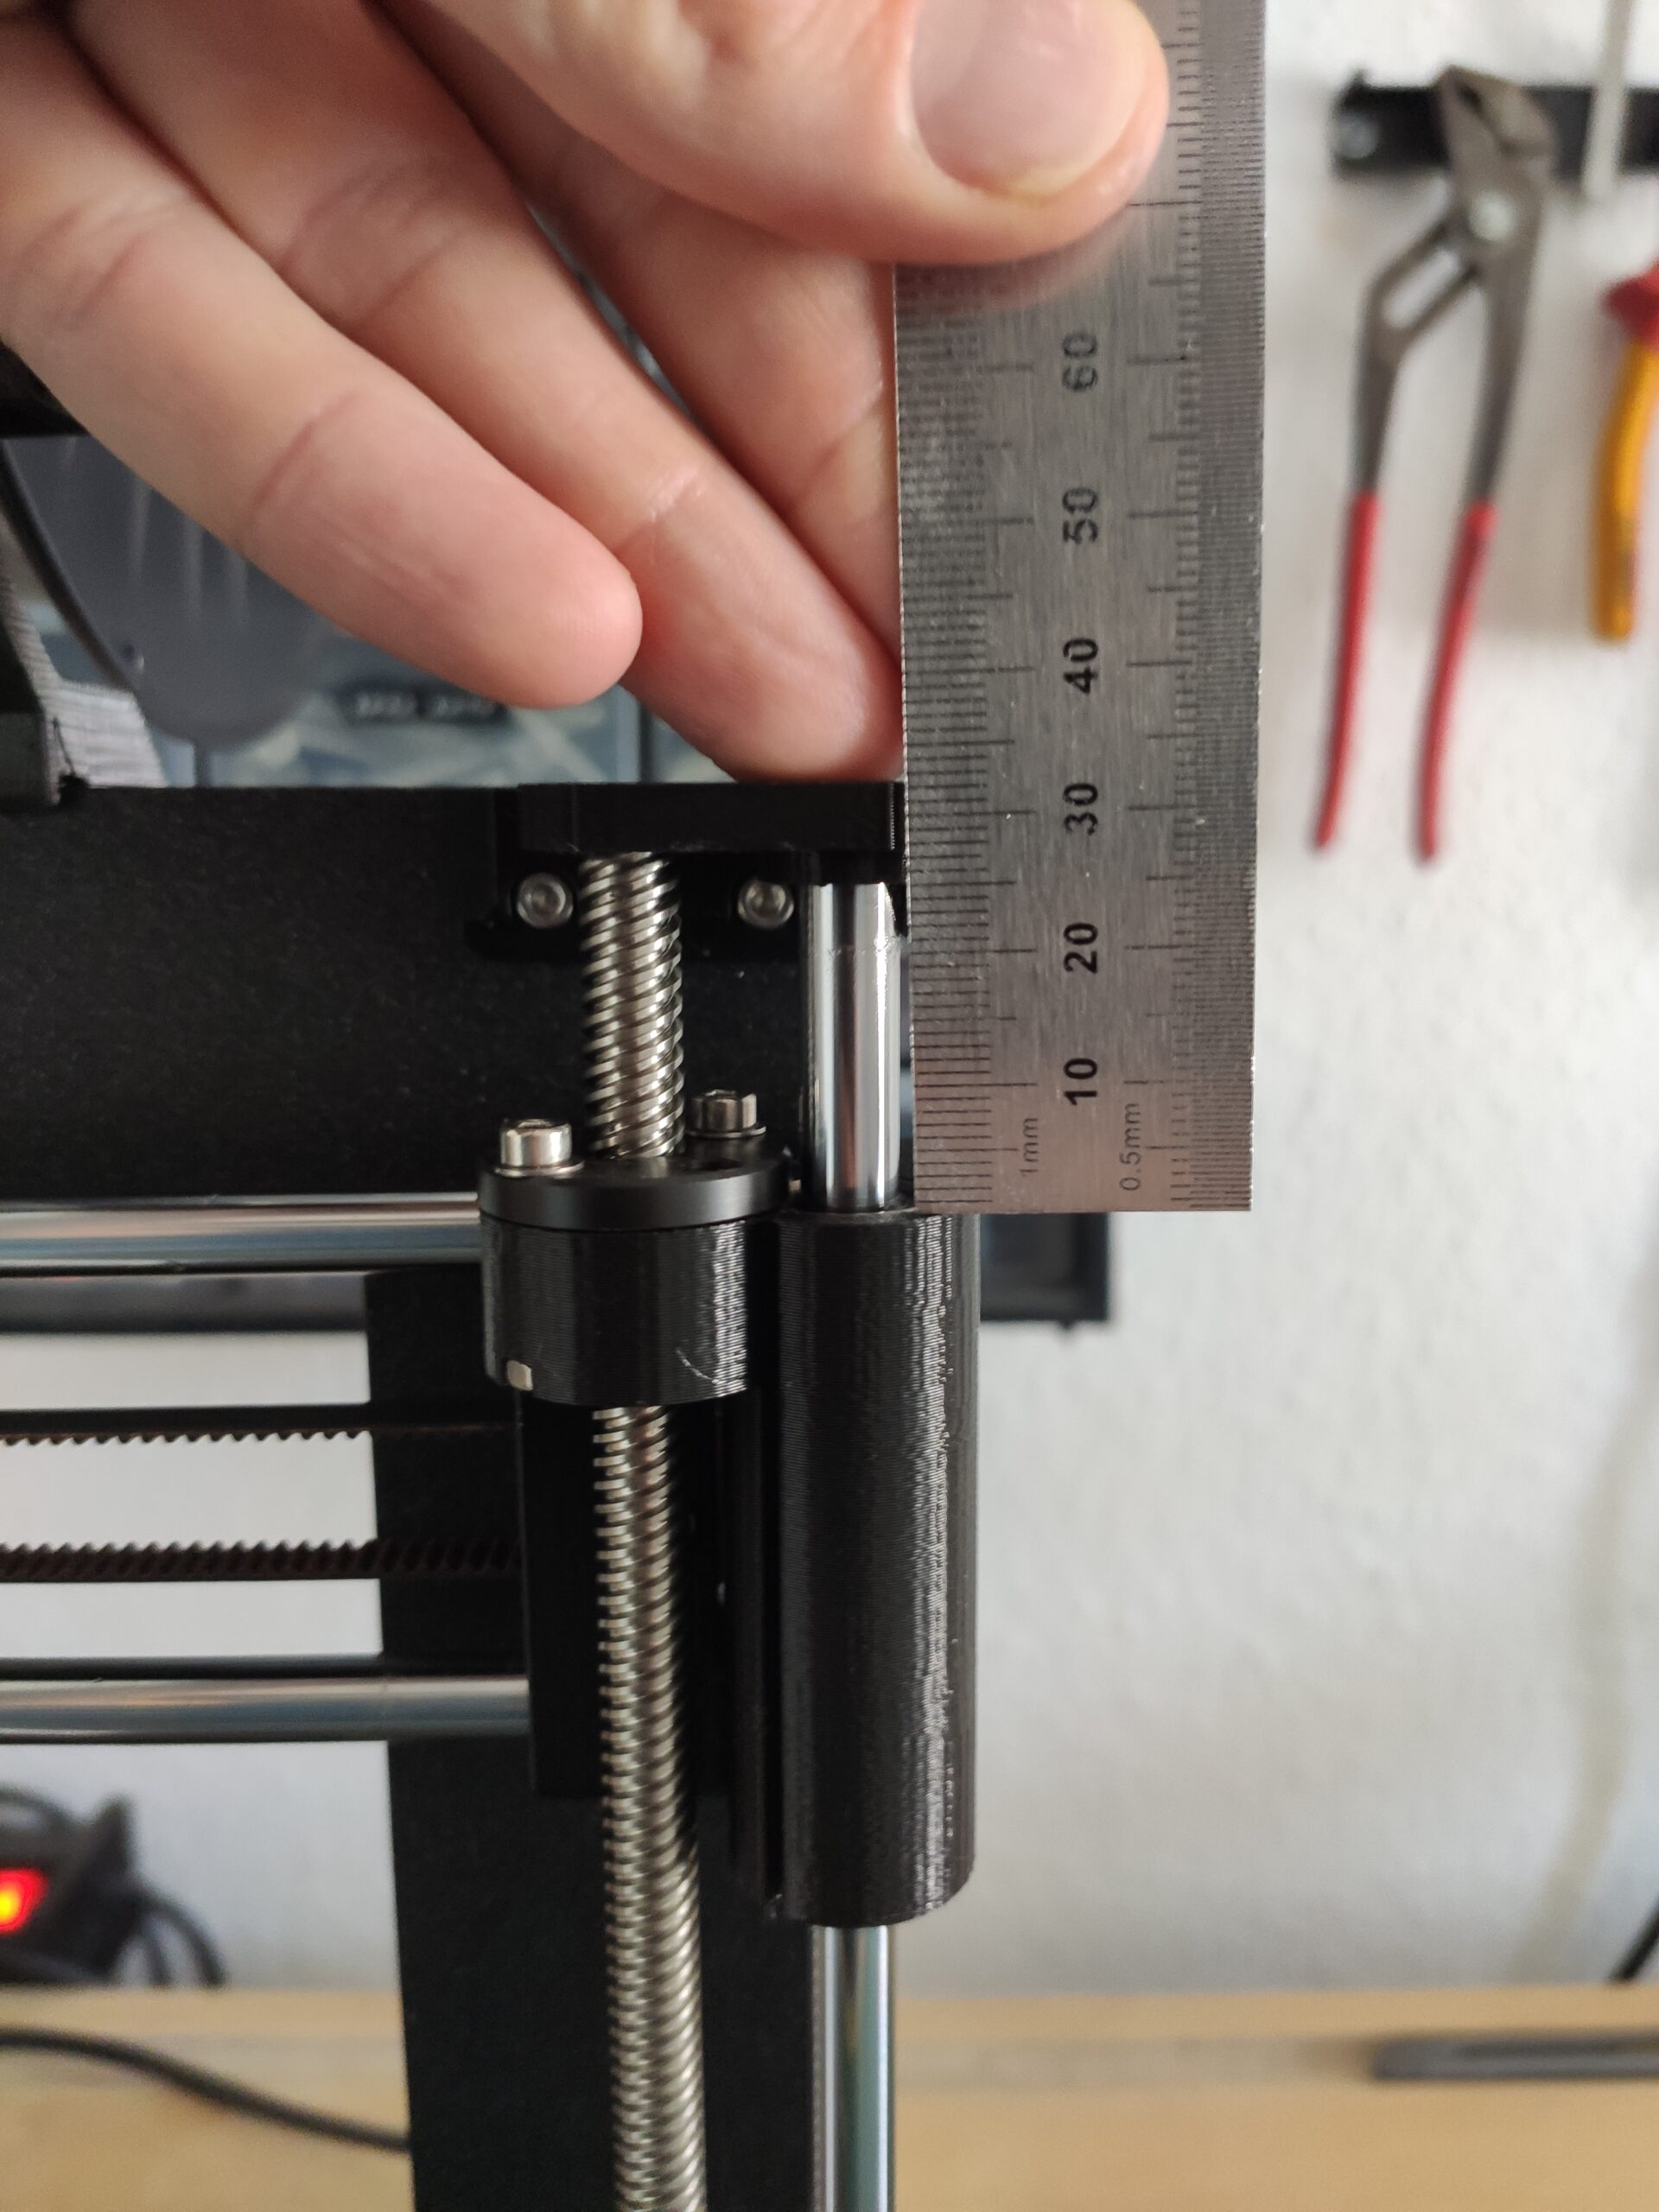
After each of these prints the X-axis is more or less tilted, depending on how much seams occured. The following pictures were taken after the 1st tower. There is a difference on the distances of about 5mm between left and right Z-axis.


What I know/assume so far:
- The left Z-axis is somehow getting stuck from time to time and therefore loosing steps.
- As its not moving up, the printer is going over the same layer again, which is causing the seam.
- At prints with height of 165mm the difference between left&right Z-axis cumulate to 5mm (+-1).
- The problem was there from the beginning, when I made the initial z-calibration, it took about 5 attempts, until it worked out
- Right now I think its either a mechanical (maybe some mistake I made during assembly, but I didn't notice) or an electrical problem (maybe the motor was damaged from the beginning on)
What I tried so far, but didn't help (I dont really know in which order I did it, I just wrote down what i remembered):
- loosened the X-belt, because I thought a too-tight belt was skewing the threaded rod of the Z-axis and by this jamming the upward movement
- re-read the assembly-instructions of X- and Z-axis and checked if everything looks right, but I didn't do an actual dis- or reassemby.
- made sure, i didnt use the silent mode, as its a bit weaker in motor-torque
- lubricated all Z-axes, rods and everything
- switched the Z-plugs on the Einsy-Board, so check if the error occurs then on the other side
- tried to remove all modifications:
- I installed a raspi, but it doesn't make any difference if I print from octoprint or from SD
- The raspis camera was installed at the left side of the x axis, so i thought its "weight" caused the tilting/jamming, but removing it didnt change anything
- There was a LED-Bar on top, but I removed it
- sat in front of the printer for an hour, to see if there is something obvious when it produces one of this seams. I just saw, that one, maybe two layers started sticking out of the smooth surface - but no sound, no visible jamming, just nothing...
- uploaded the most recent firmware, went through the whole calibration process. Actually that was even tougher than at the initial calibration, because this time it got stuck during Z-calibration like 30 times - but we somehow made it through
Has anyone of you had a similar problem? Does anyone have an Idea what (else) might be causing this problem?
Thank you very much in advance, im keen on reading tips&hints to get this solved 😊
(PS: If a problem like this had occured on my self-built china-trash-printers, I would have just raised the current on the stepper driver and checked which current/torque would be enough to let the motor just go past this jamming... But for a good reason I bought a well tuned and 1000-time tested printer this time 🤣)
Try switching the trapezoidal nut out on your left side.
The kit comes with an extra trapezoidal nut. Try switching it out. If there is too much pressure from _anywhere_ that will mess with the Z axis turning smoothly what you describe is possible. You may want to put in a chat session with Prusa support over on the E shop as well. Z binding is not a common problem. Remove any addons you have installed on the Z rods - no motion spinners, no clever replacement tops. Get as close to stock as you can.
Did you modify the extruder carriages in any way? Too much weight?
x rods inserted correctly, or are they putting pressure on the z axis?
maybe try unscrewing the trapezoid nuts and check if you can move the x axis up and down smoothly.
are the connectors properly inserted on the controller board?
RE: Thank you very much for your quick replies!
I dis- and reassembled the x-axis and made sure the rods are inserted to the very end of the holes. I also switched the trapezoid nut. The X-axis is sliding smoothly all the way up and down Z-axis, when the nuts are not connected. All addons are already removed, the printer is back in stock and i checked on the board-connectors again. I also loosened the x belt even more, just to make sure (if its too loose, i'll see in my prints and re-tighten it).
Unfortunately none of these things worked out 🤔
The chat-support at the E-Shop wasn't that helpful either. I contacted them, but after talking to three guys there without any real results I thought I'd give it a shot and ask the community.
After the reassembly i managed to capture a video of the jamming. Don't mind the noise, thats just me spinning the controller-wheel to raise Z.
Video
Well, since the embedding of videos doesn't seem to work out, here is the link:
https://forum.prusa3d.com/wp-content/uploads/2021/08/1627933548402.mp4
You can see it right off the get go.
Interesting. One thing that can make this happen is misalignment or un-lubricated bearings on the Z guide rods. These sit inside of the X axis left and right assemblies. If you removed the Z motors but left the guide rods in place, you can see if there are hesitations in the bearings on the left side. Did you remember to lubricate those bearings well before you put them in? While the manual says no lubrication required - that is no longer true. The thin shipping oil that the metal linear bearings are packed in needs to be replaced with grease - the lubrication tool that comes with the little tube of lube is adequate for doing this task. If you did not lubricate those bearings you will probably develop problems.
I just put a MK3S+ together last week - and remember how much of that clear fluid comes out of those bearings as you lubricate them.
Also, the Z alignment rods can be "crooked" if they also are not fully socked in on top and bottom. It's a bit more subtle than the X rods which have an inspection hole.
I totally stuck to the manual
When I first assembled the printer, I didnt use any lubrication. After the first issues, I sprayed some Ballistol (I dont know if thats a thing outside germany, but we use it for everything: cars, bikes, guns, leatherware) on the smooth rods.
To be sure I cleaned all rods with Isopropyl, before I started as described here: https://www.help.prusa3d.com/en/guide/maintenance-tips_23200 and just put some of the prusa-grease on the rods (while I was at it, I did so with x&Y rods too).
Unfortunately that did not help much, so I decided to disassemble rods and bearings and use the orange tip to also get grease into the bearings. I also made sure in reassembly, that the bearings are 45°rotated as shown here in step 3: https://www.help.prusa3d.com/en/guide/3-x-axis-assembly_27464
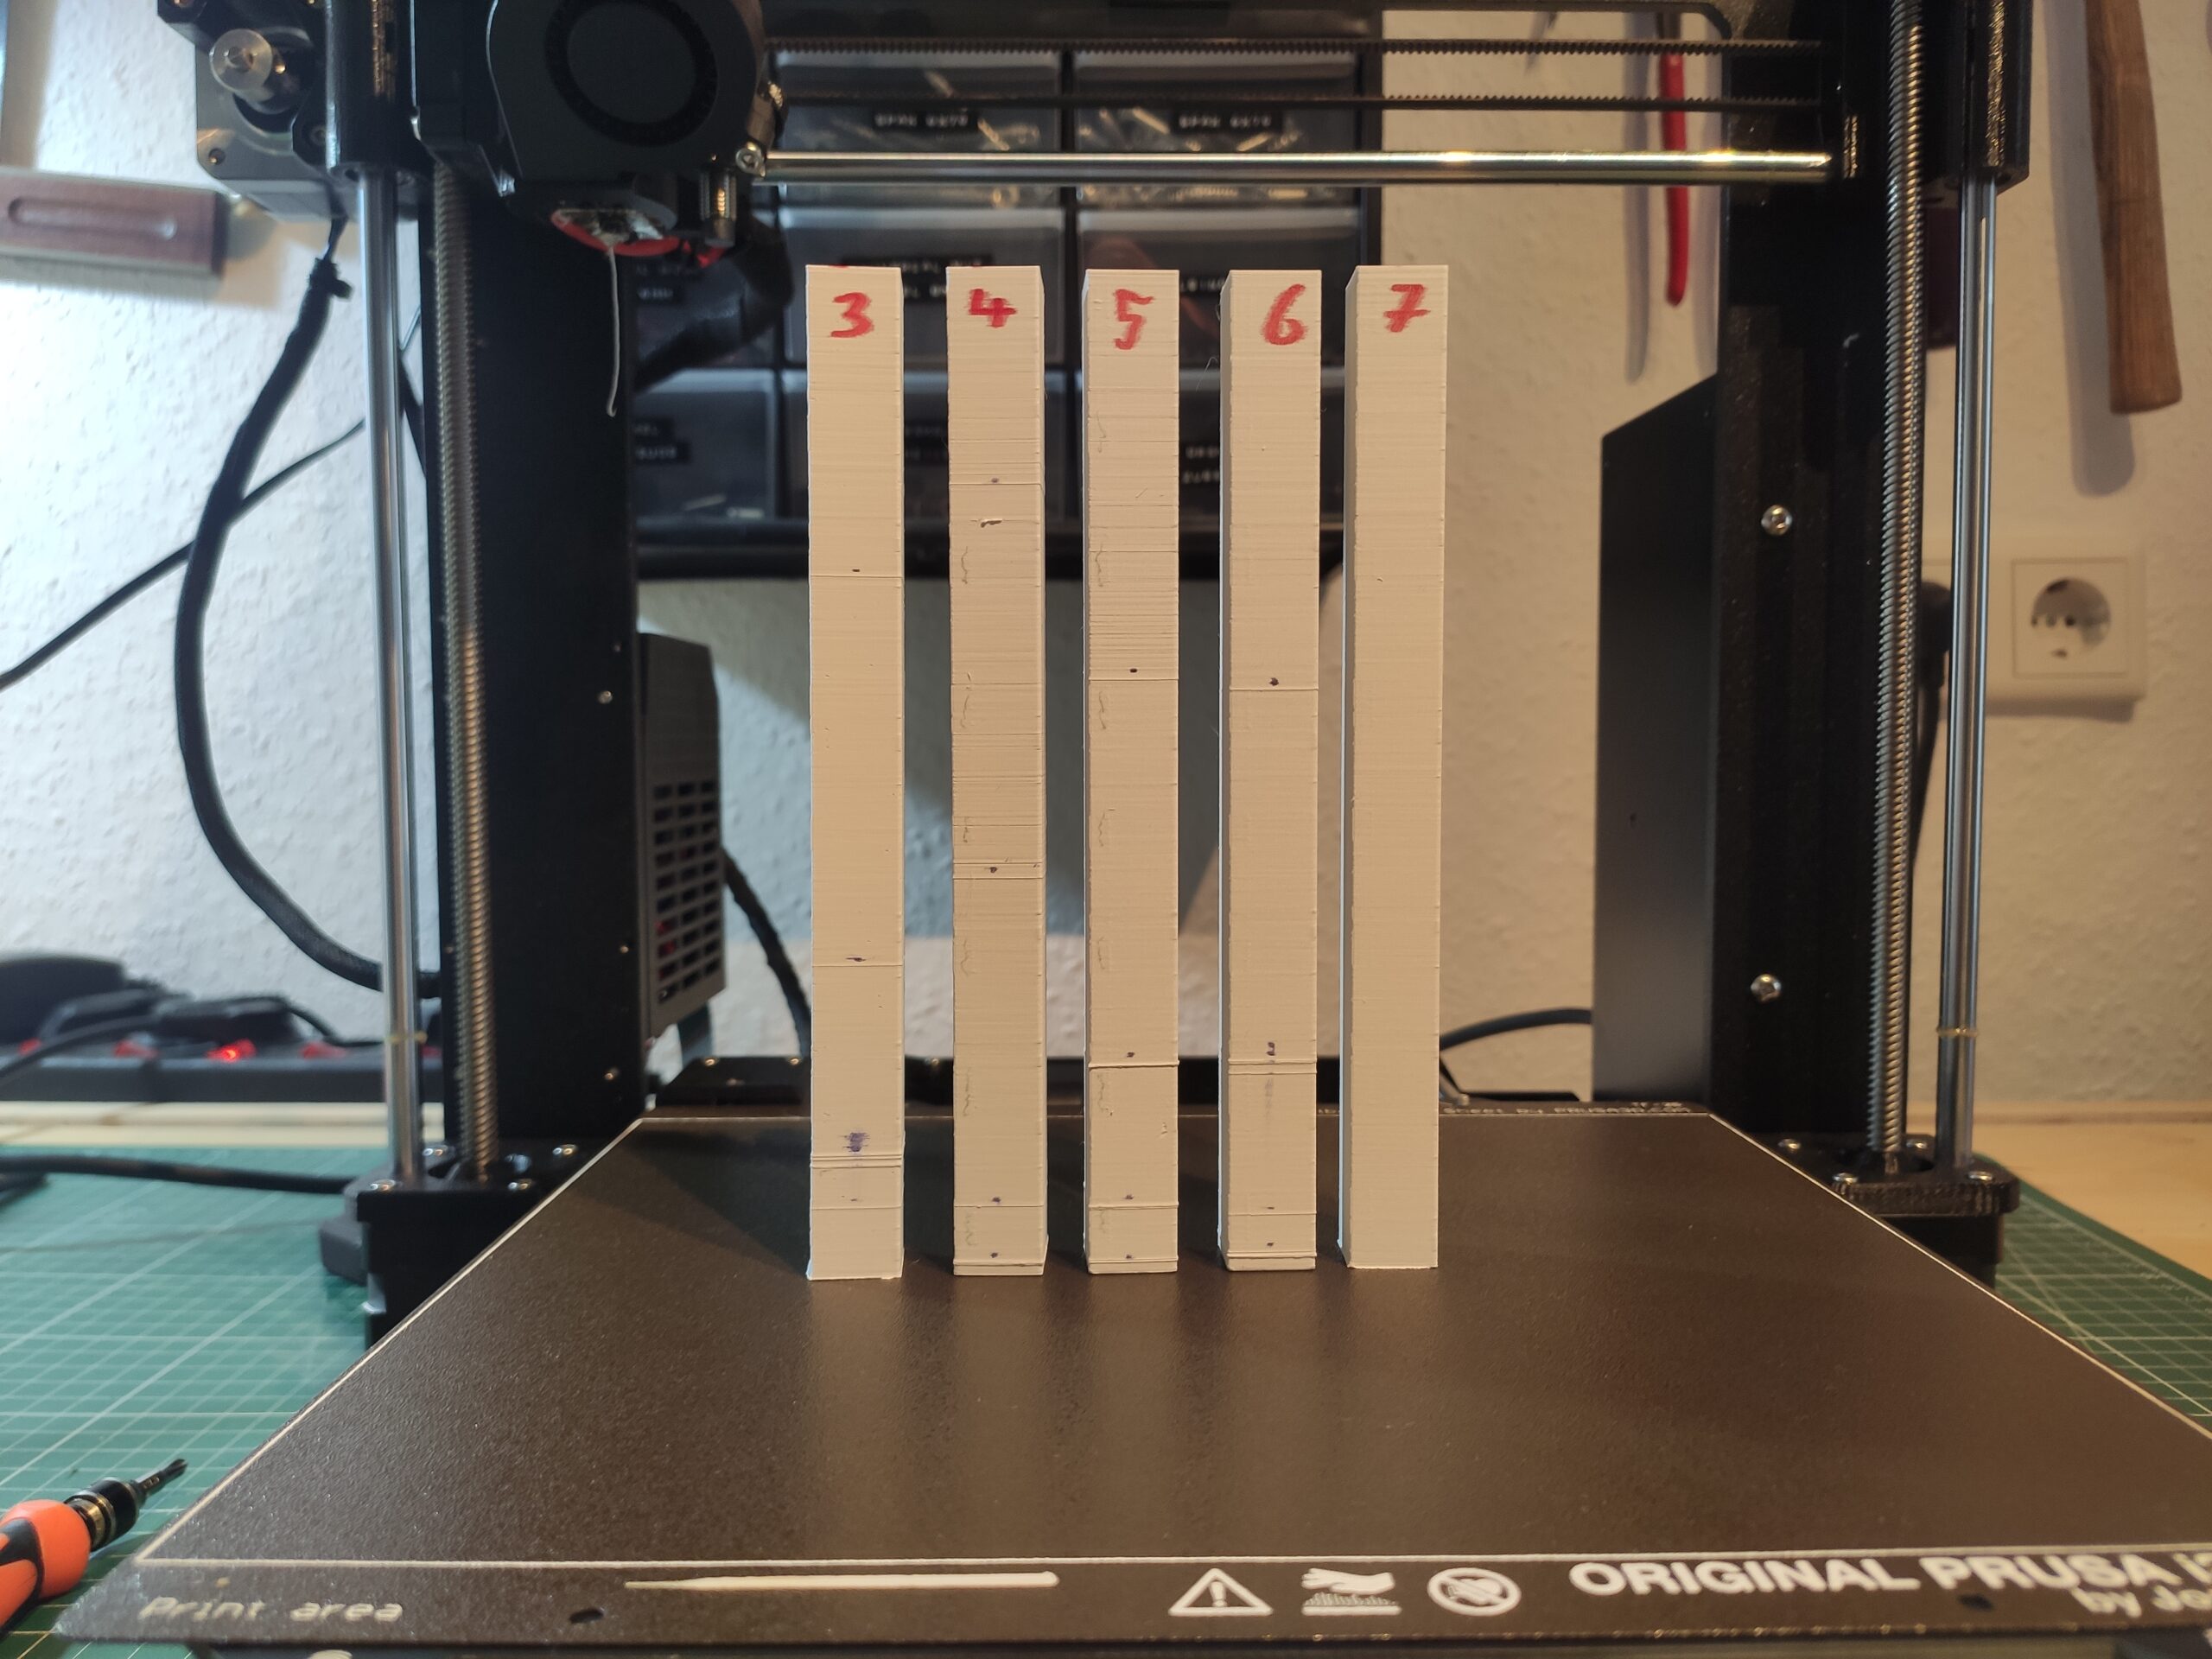
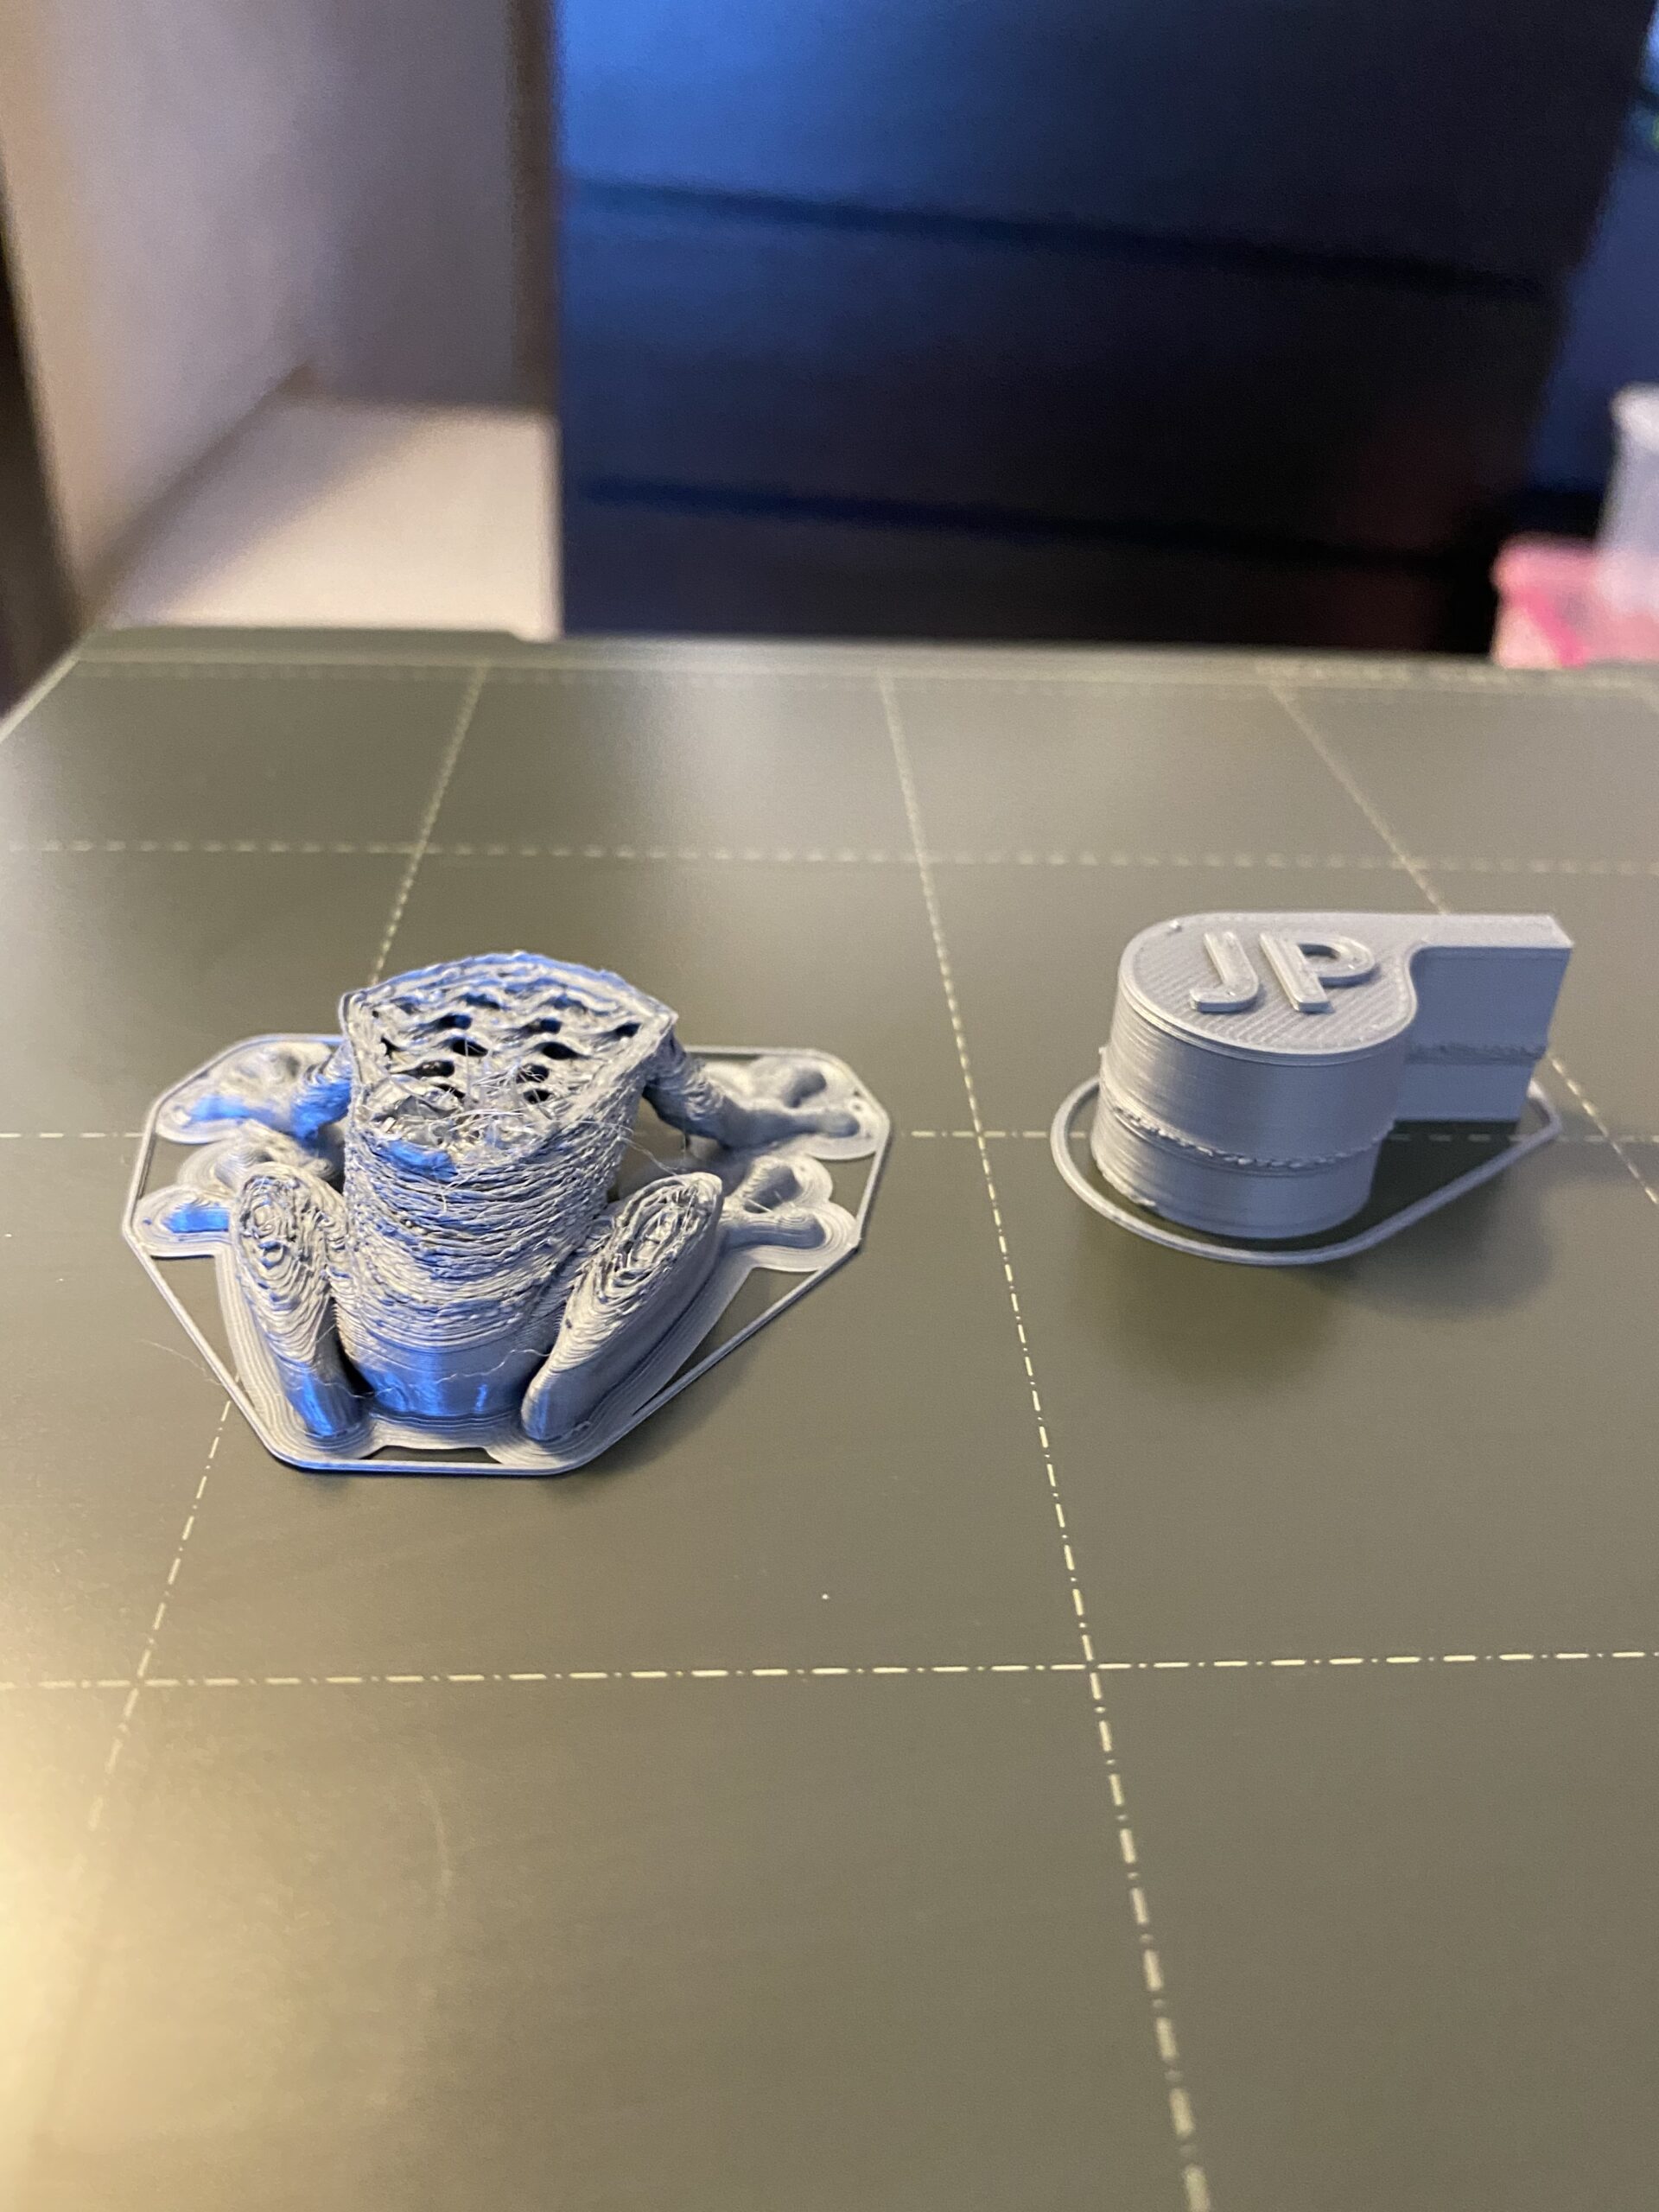
Once again - no real improvement, as you see in the images:
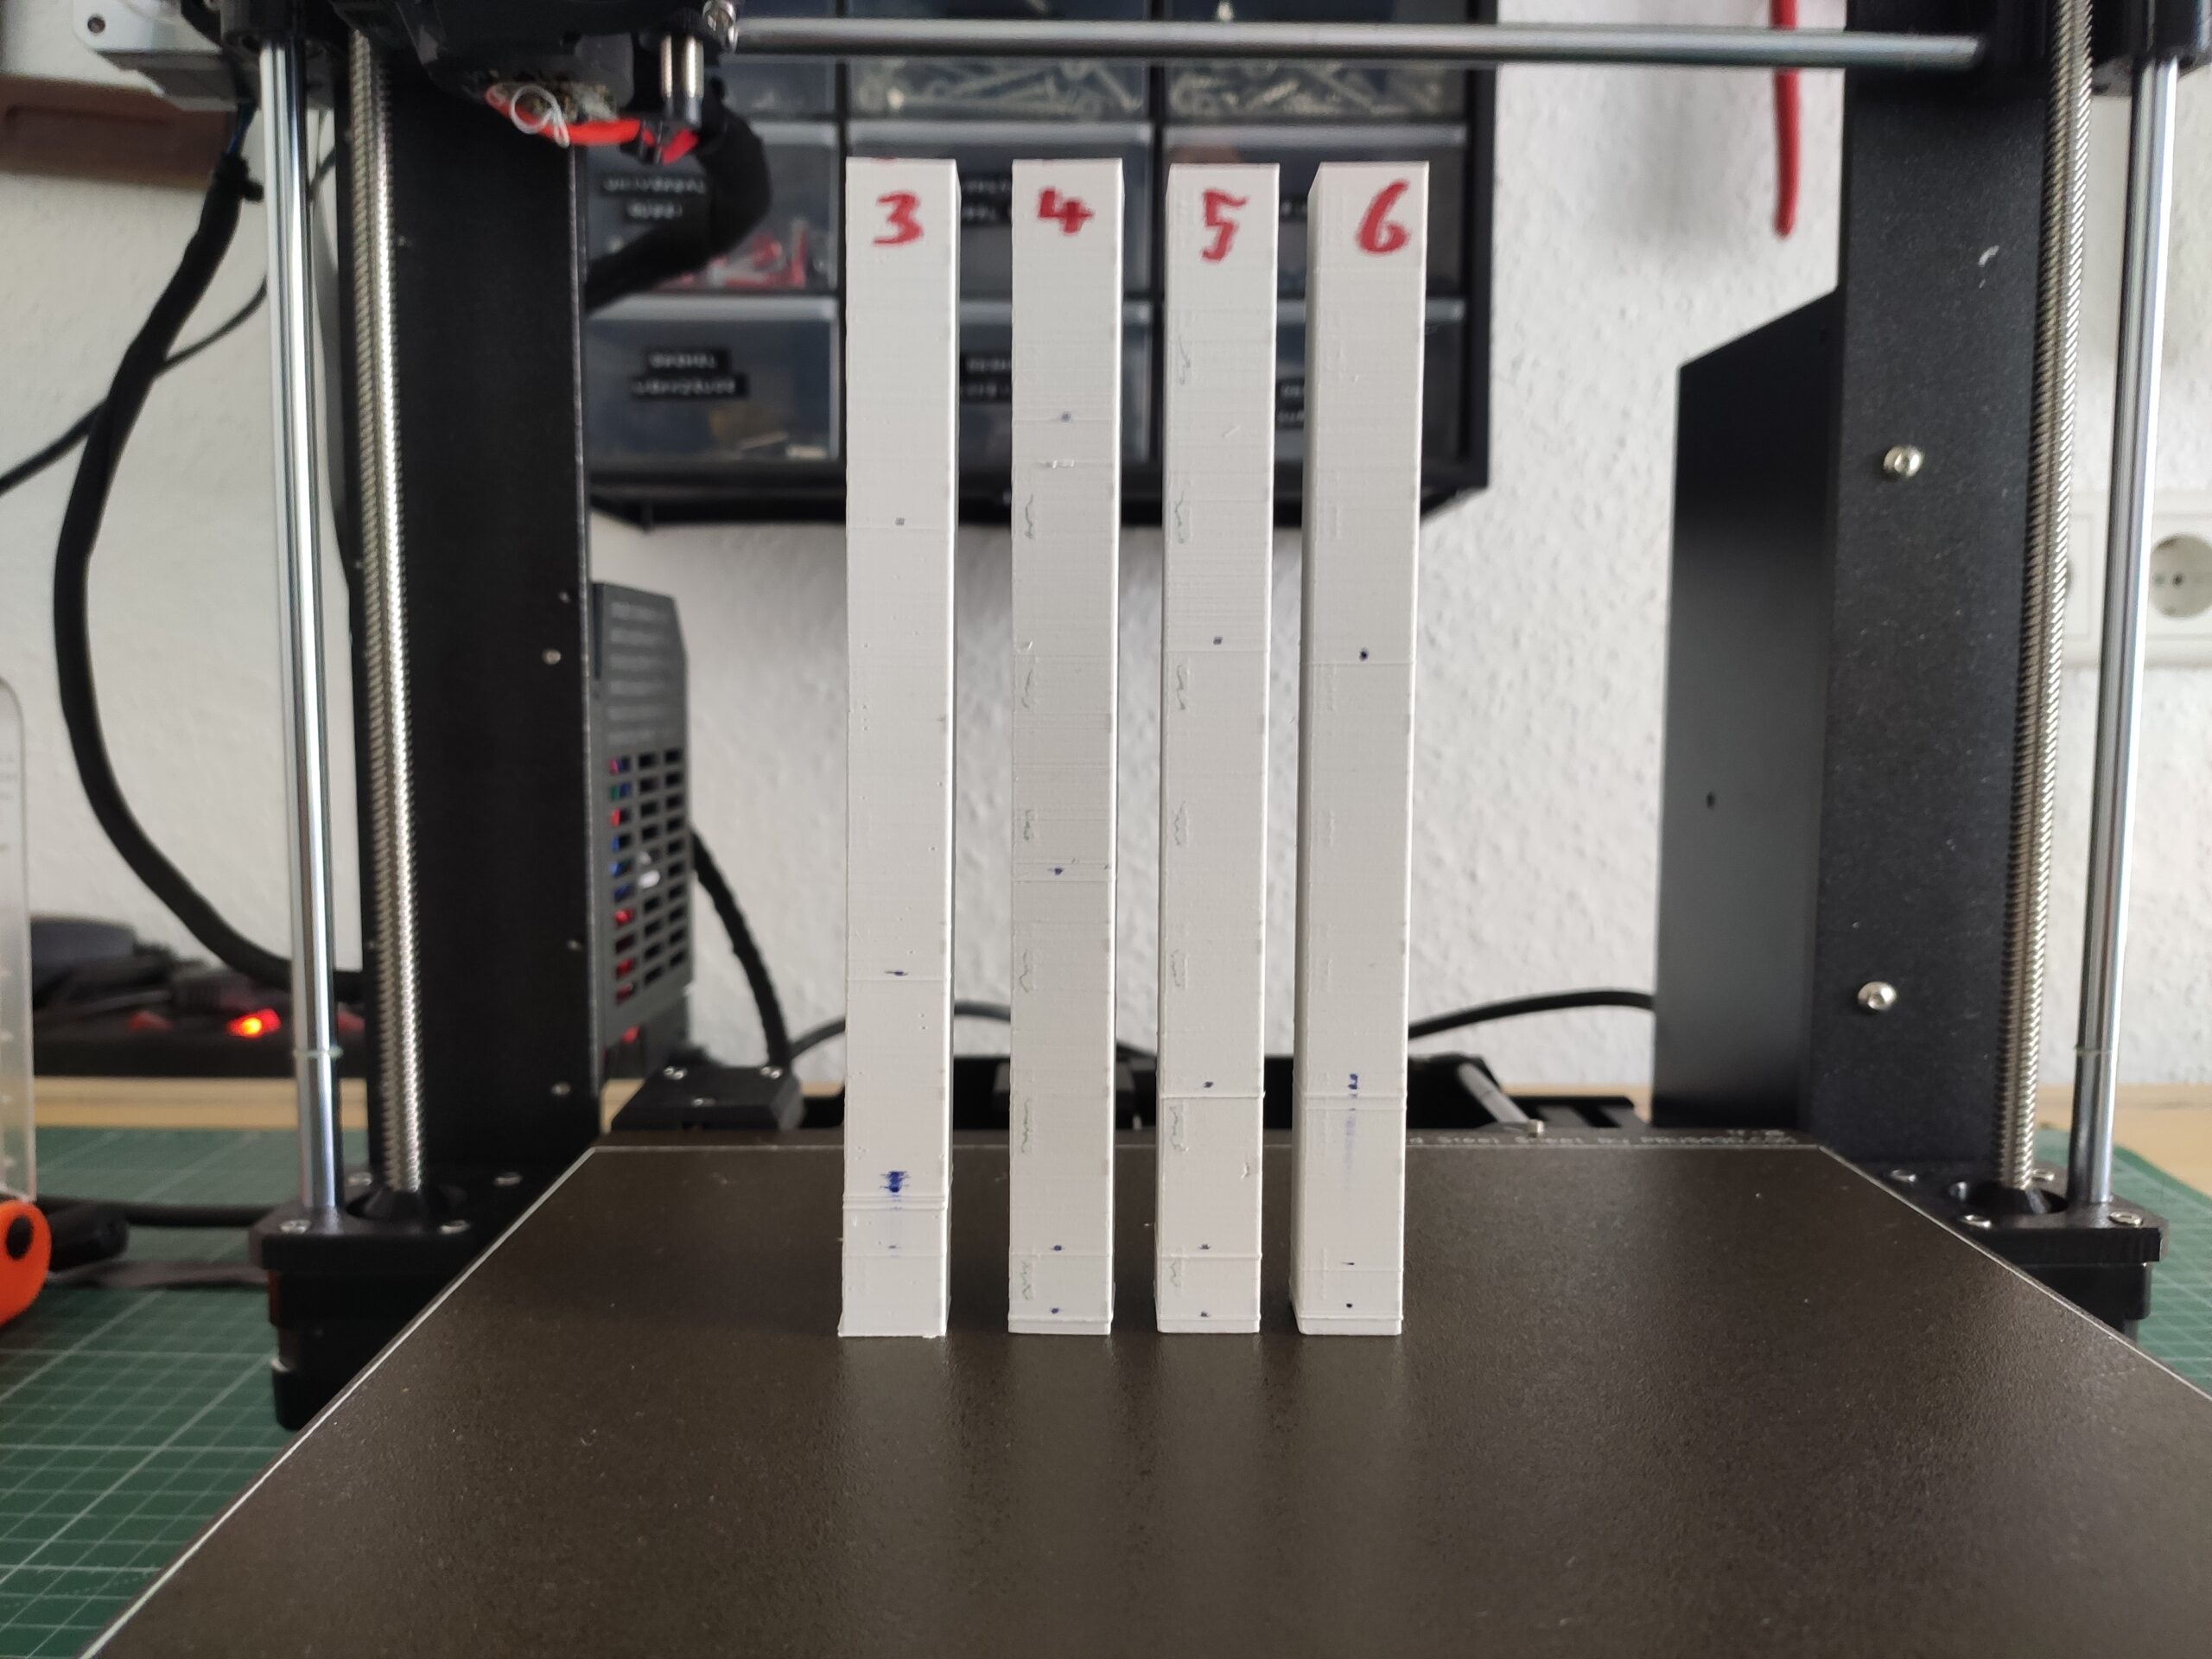

Specimen #3 was printed before I put grease on the Rods, #4+5 before I put grease in the bearings and #6 after that. L and R are each the difference in mm from top of the axis to the axis holders.
The blue dots indicate the seams, which almost certainly occur on specific heights (note, that between #5+#6 the x-axis was partly disassembled!). There was also some vertical seam in 4+5, but that was, because i loosened the x-belt.
Next step for me: I'll order a new left Z-axis - just to make sure, that it isnt the problem with the NEMA itself. And to make sure, some new bearings - even though I think that they are alright, as at no point I noticed that any of the balls were falling out.
Any more recommendations? I might have some time to kill, while parts are shipping 😆😆😆😪
I guess its solved 🙂
So, I got my new axis today and since I changed it, the problem is gone 🙂
sample #7 has an even surface and #8 is already 50% on its way, showing no seams yet (most of them were in the lower half, so I dont expect them to come now)
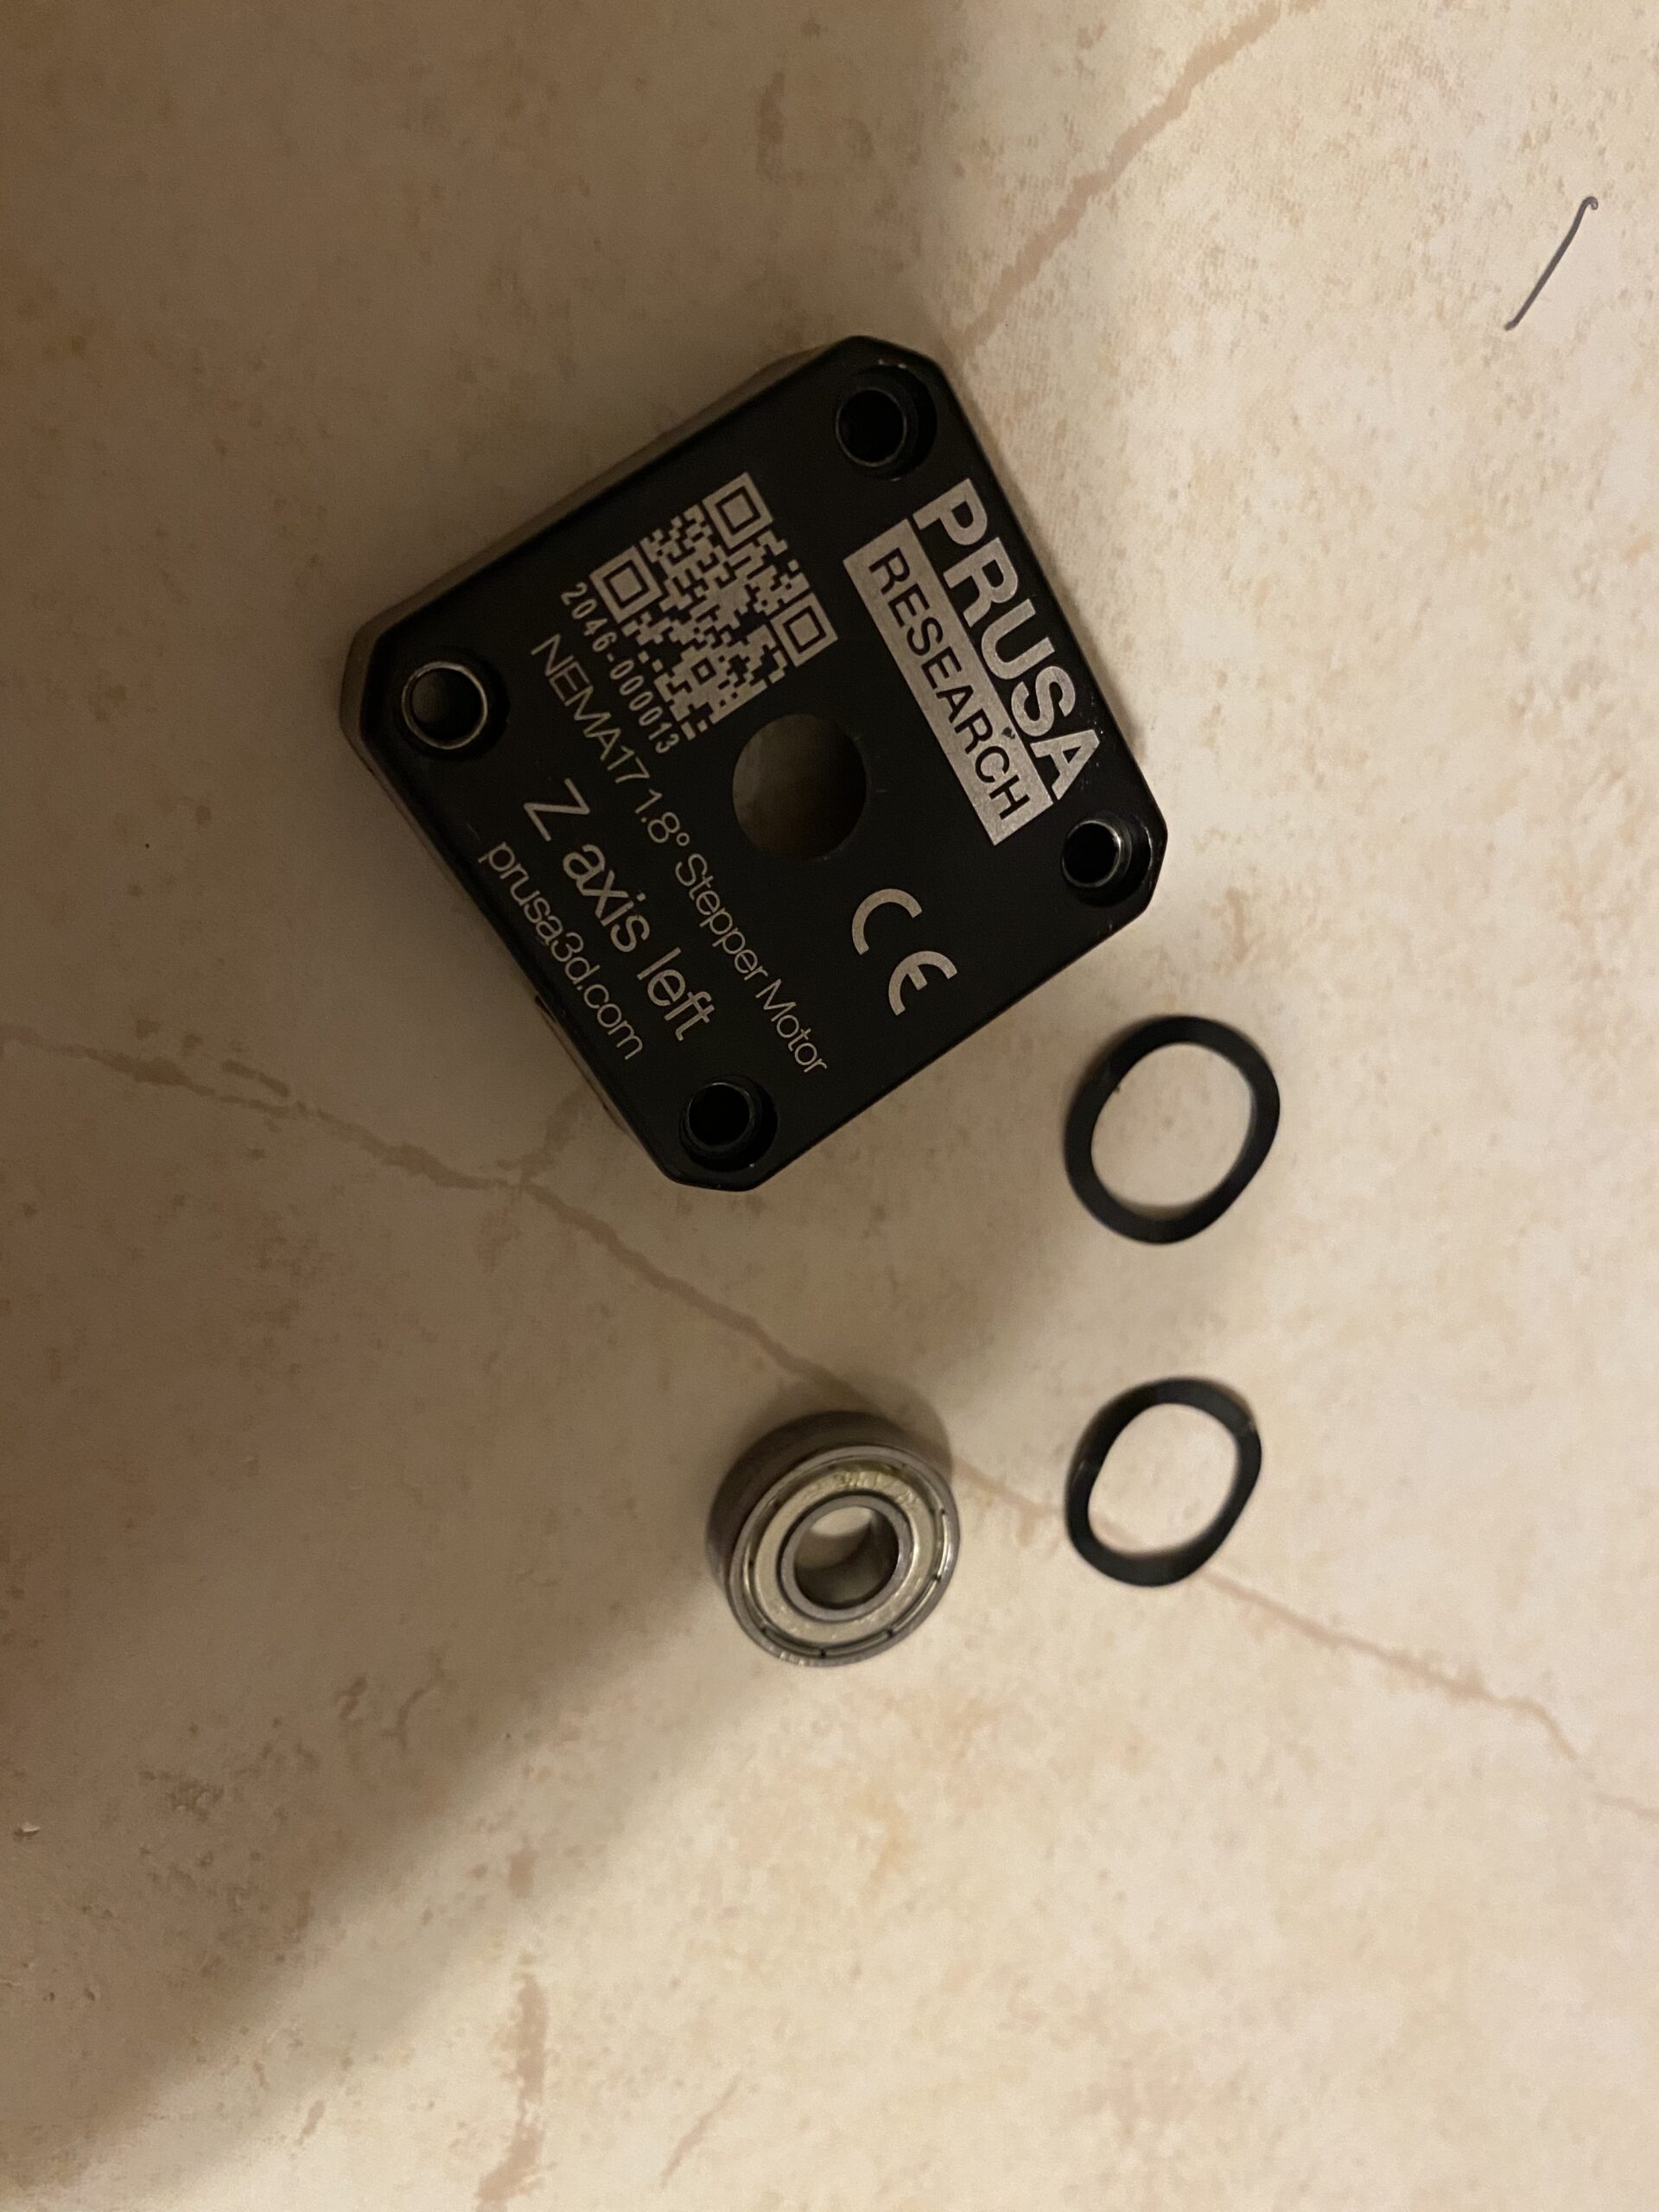
As I was curious, what the problem could be, I took a close look at the Nema&Axis:
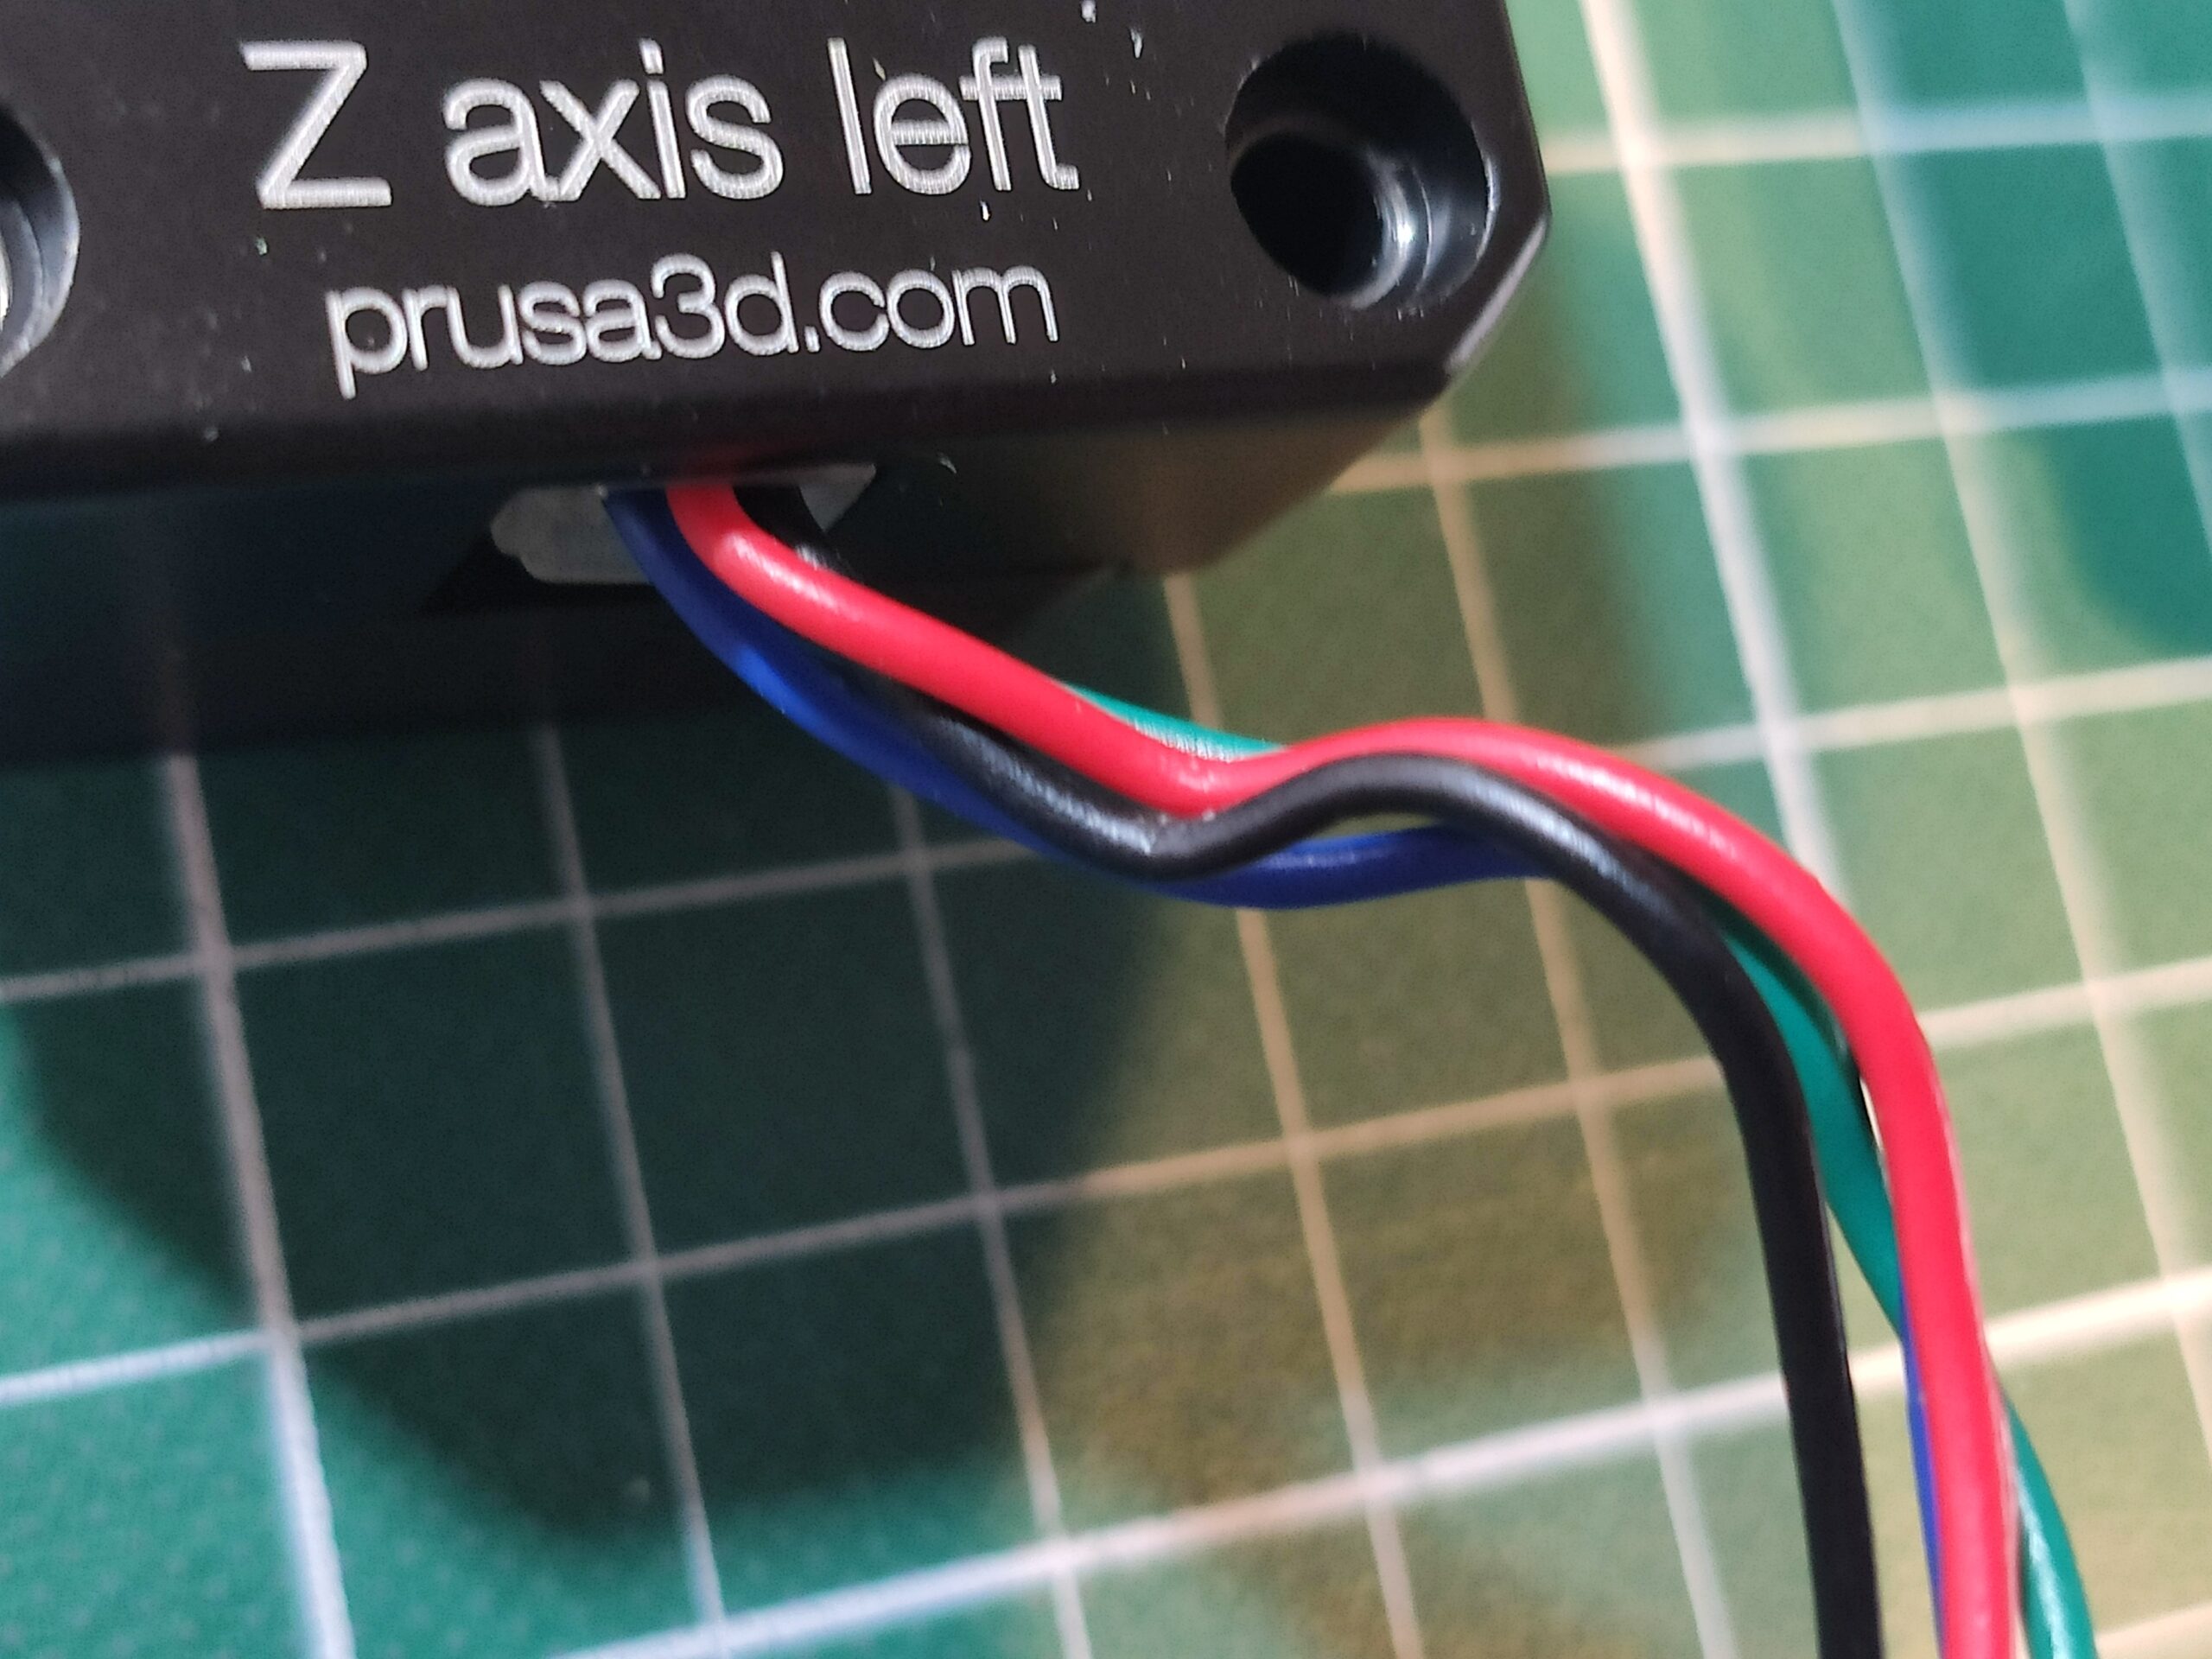
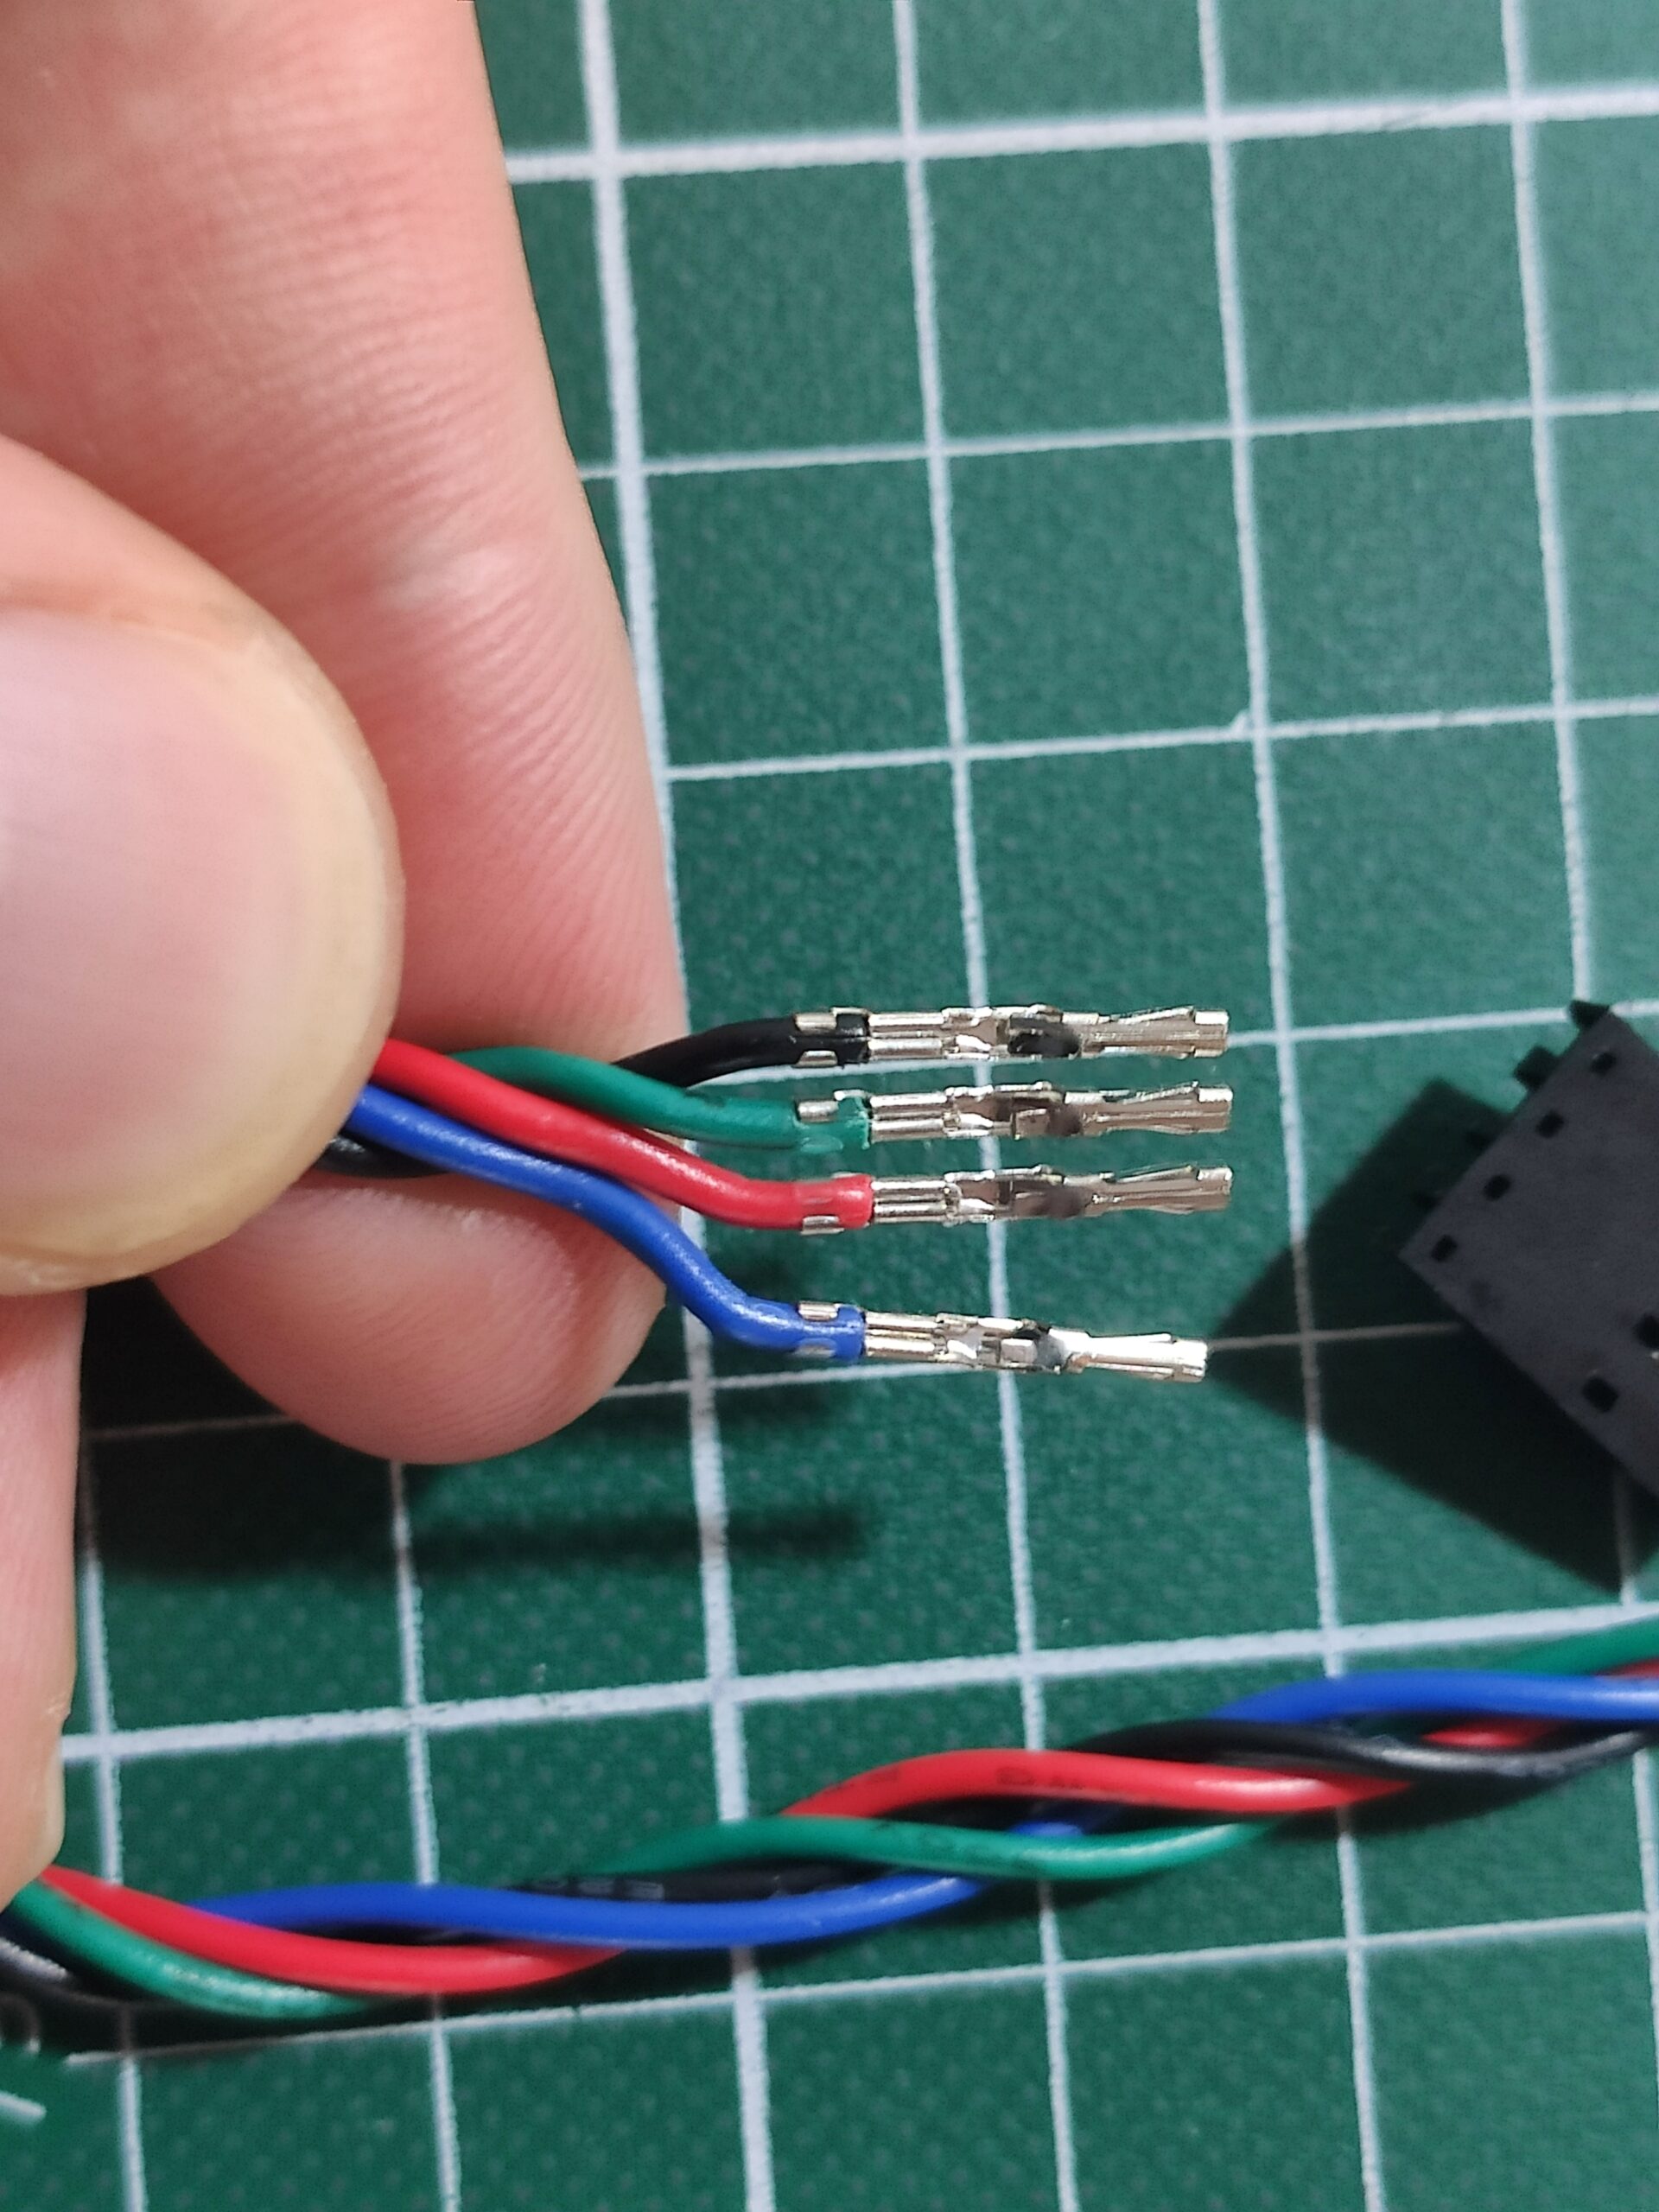
Wires and pins looks pretty OK, so I dont think its an issue with the cables. Then I opened the Nema and I think I found the Problem:

There were two springs (these black circles) pushing it upwards, but i guess its supposed to be only one? I opened another Nema I had from an earlier project (right side) and there was only one spring in it.
Is it normal for Prusa Nemas to have double springs, or could it be that I was just unlucky and there was one too much in my motor?
You just saved me a lot of time
Same issue here - got one spring out, the printer finally could calibrate!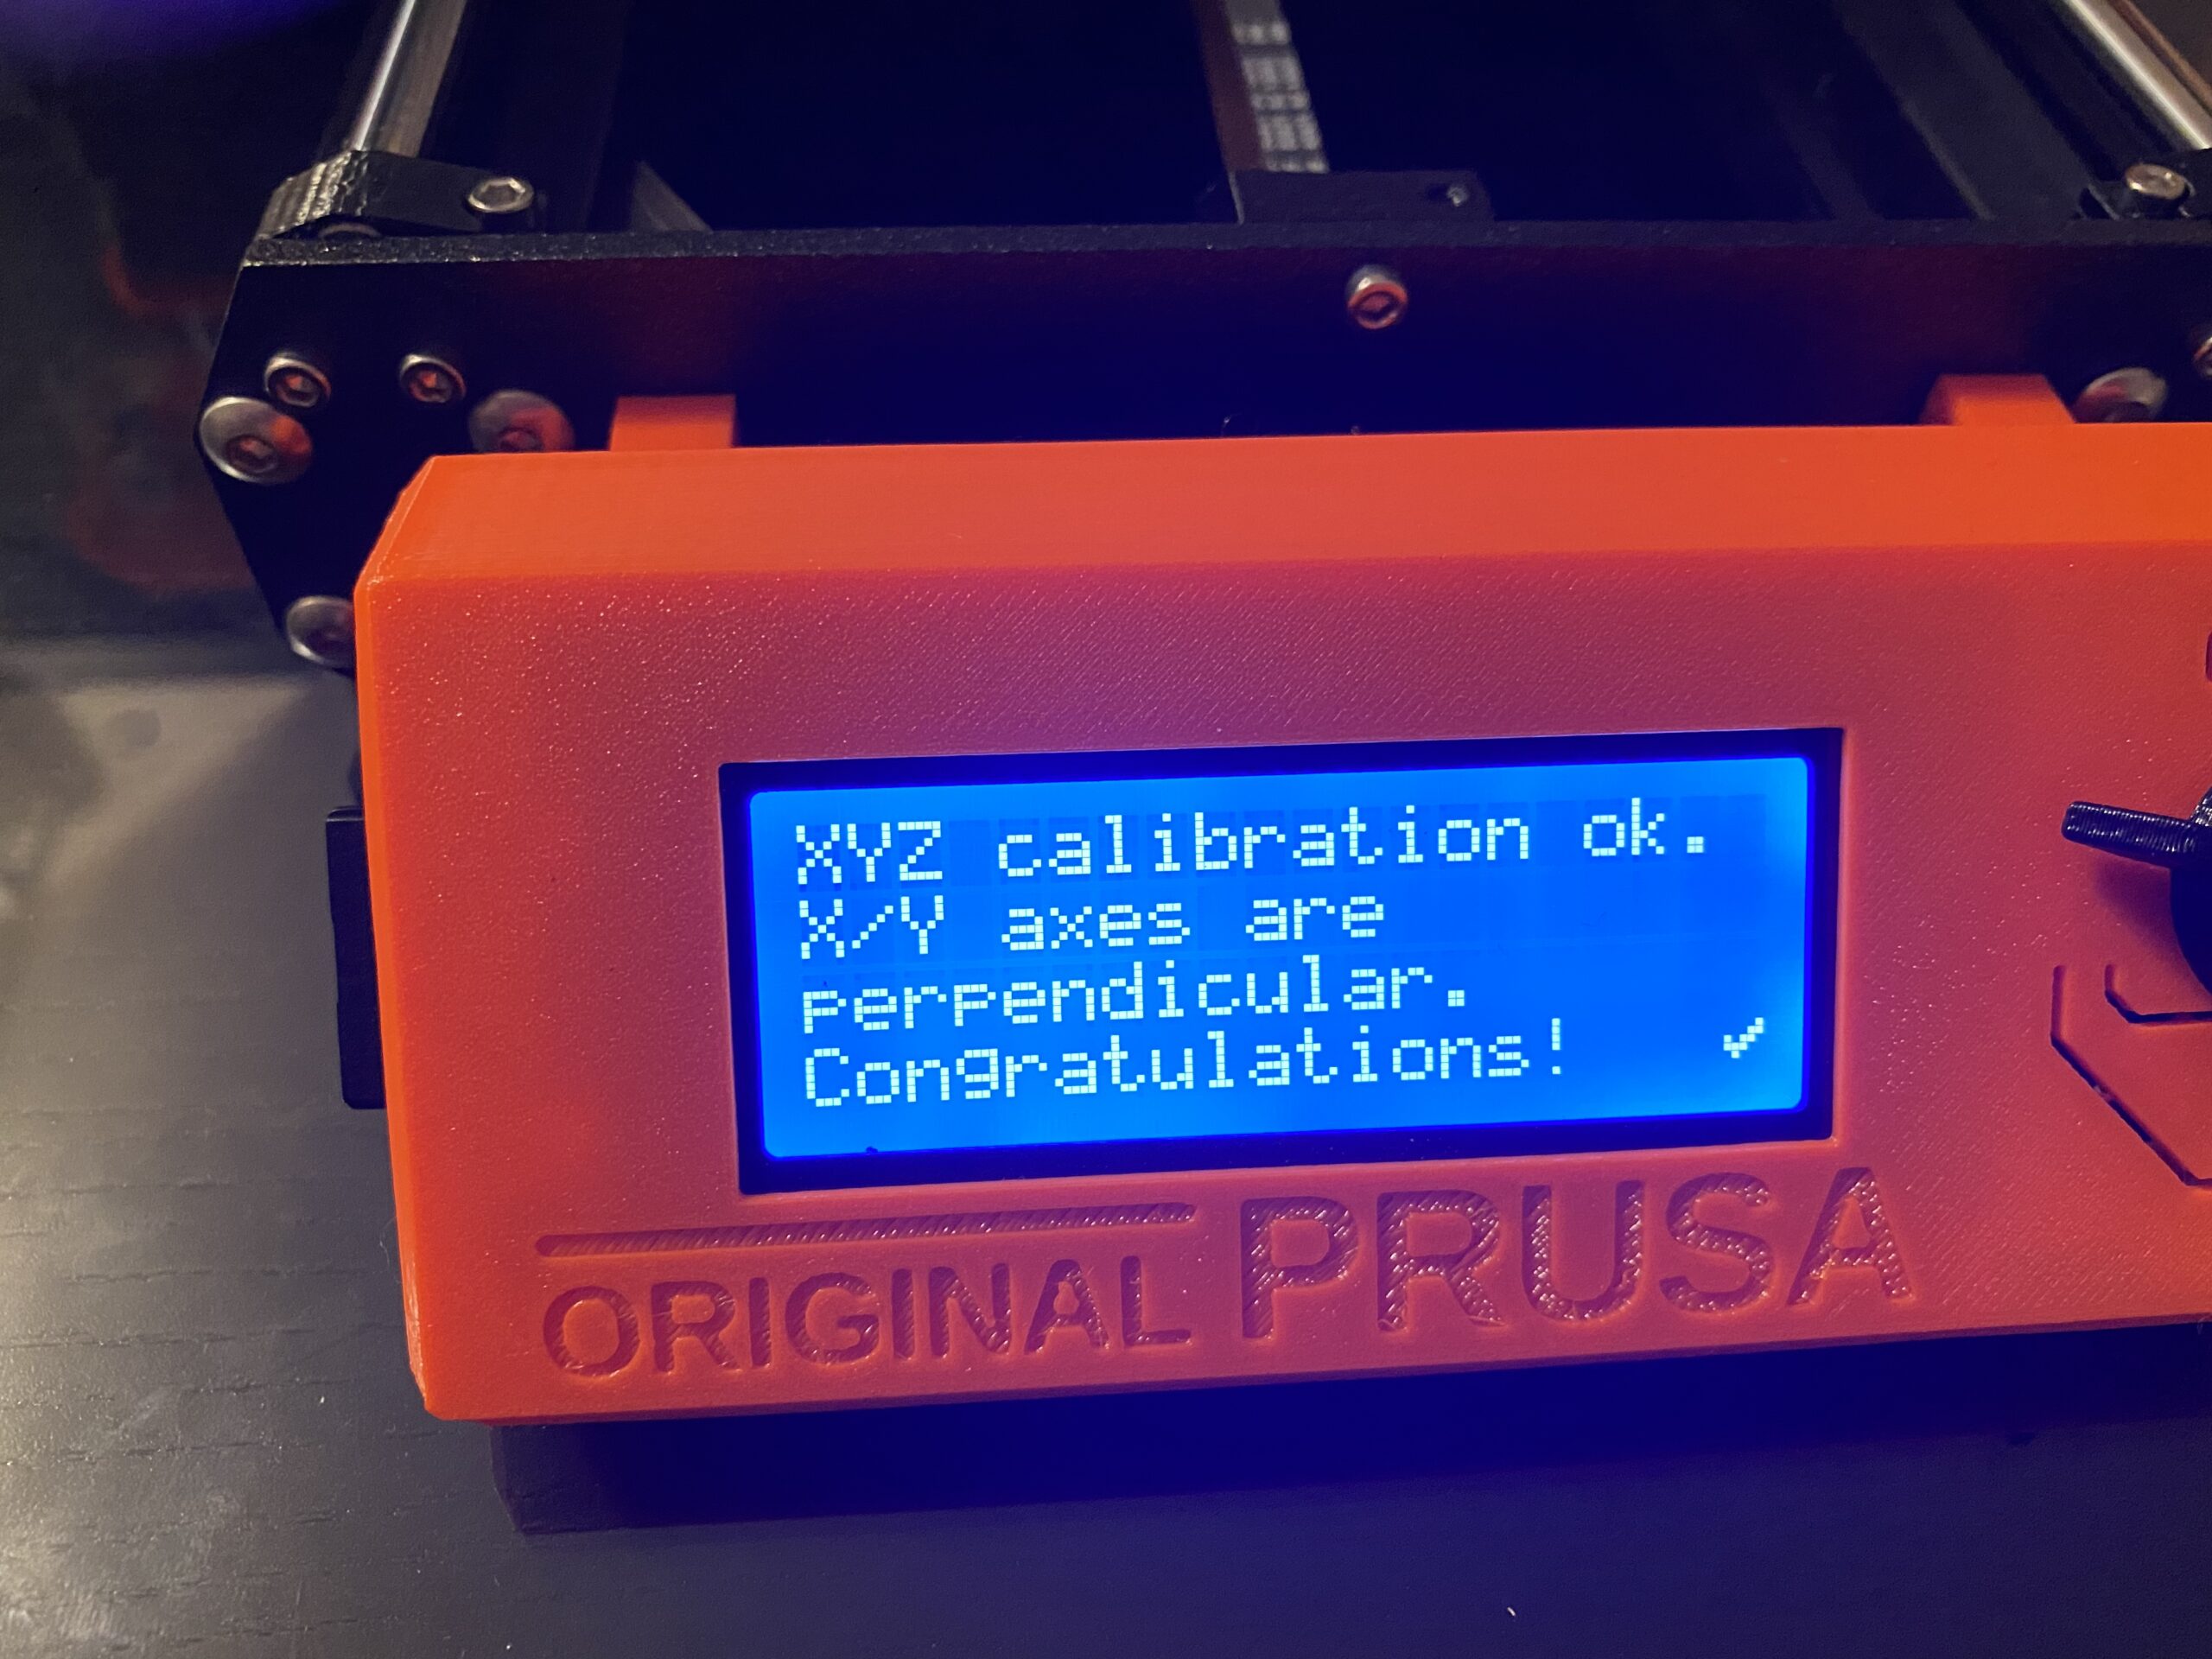
Glad, that my workaround was helpful for you too!
But the question still is: Do prusa-Nemas usually have two springs or is this kind of a bad batch? 🤣
The solution appears to be partial…
Actually the XYZ and first layer calibration went perfectly but the printer struggles to pass 5-6 mm height. The screw drive is still not rotating smoothly. My guess is may be there is no space for two Belleville springs under the bearing, and during assembly the bearing gets overloaded and damaged due to cover screws tension. It’s hard to believe that for that price Nema use high quality thrust bearings.
Well, there goes that warrantee
I would have asked support for a new Z motor set - I don't know how they will deal with "and I took mine apart"
spring issue
I suspect that is a question for Prusa, or LDO, who I believe make Prusa Motors.
I have never taken a z motor apart, and I suspect there are not a large number of people who have had this experience,
Certainly in the 6 years I have been on the forum I have not noticed this being a common issue!
regards Joan
I try to make safe suggestions,You should understand the context and ensure you are happy that they are safe before attempting to apply my suggestions, what you do, is YOUR responsibility.Location Halifax UK
Motor.
I would still contact support and see if you can get another motor. I would tell them I replaced the motor and it works now. They will probably replace it.
--------------------
Chuck H
3D Printer Review Blog