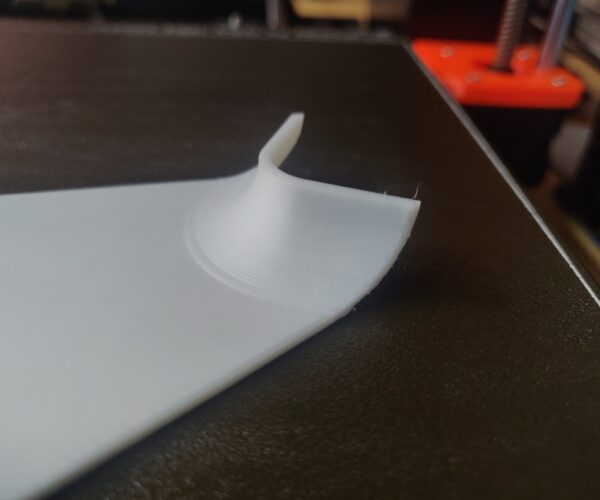
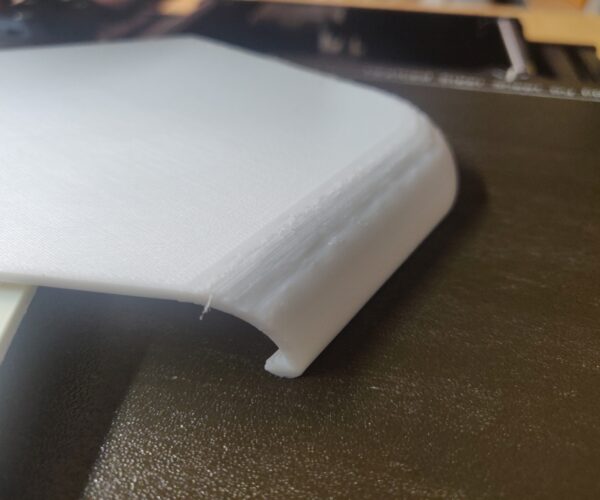
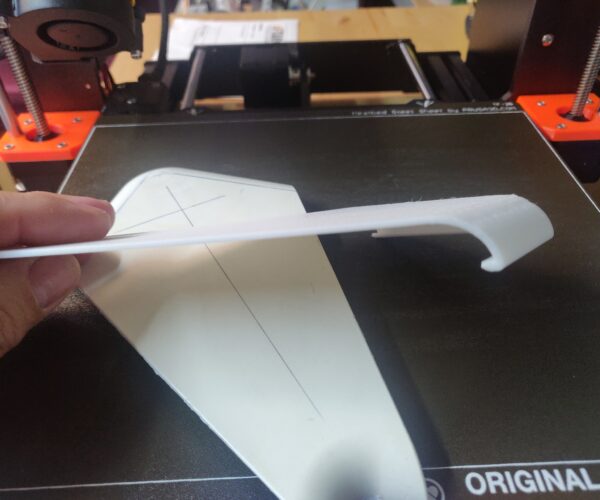
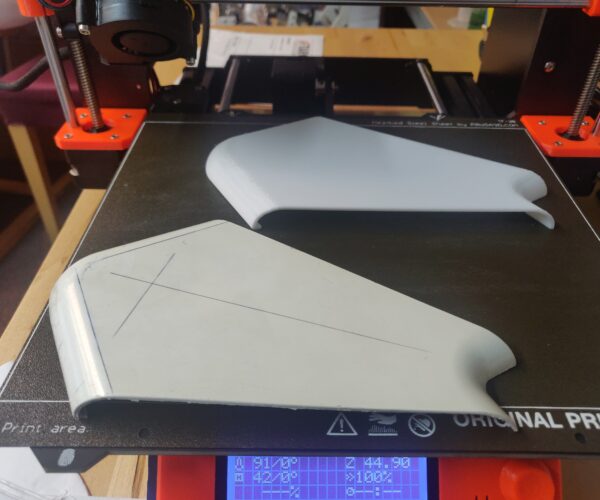
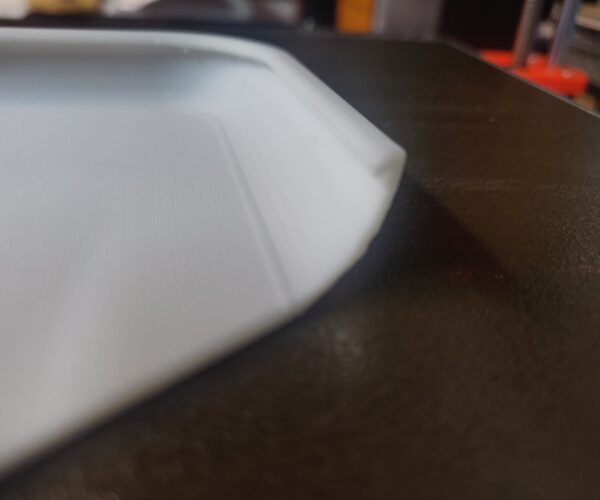
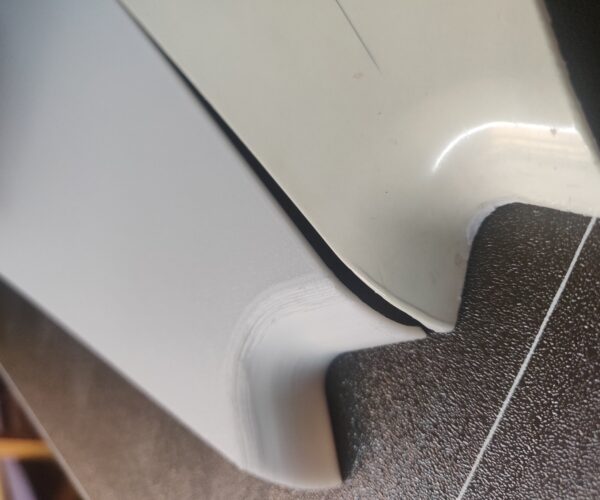
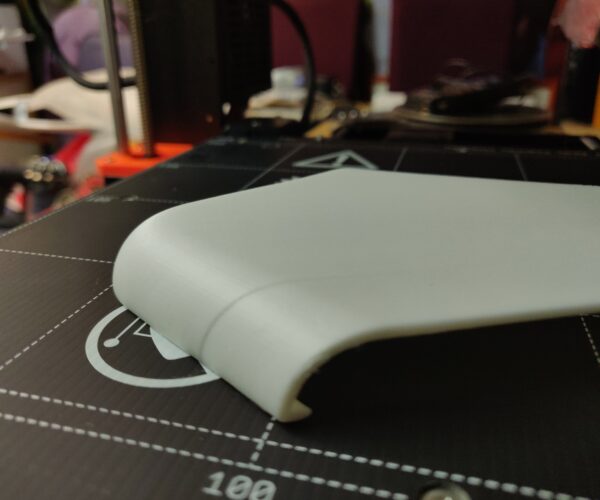
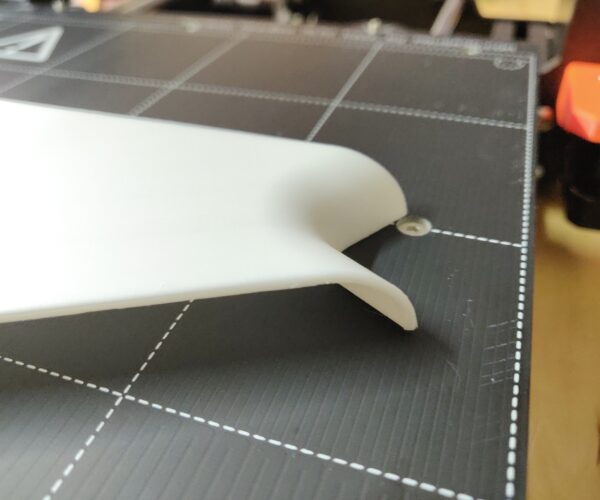
help on printing this and why its doing what can bee seen in the pics
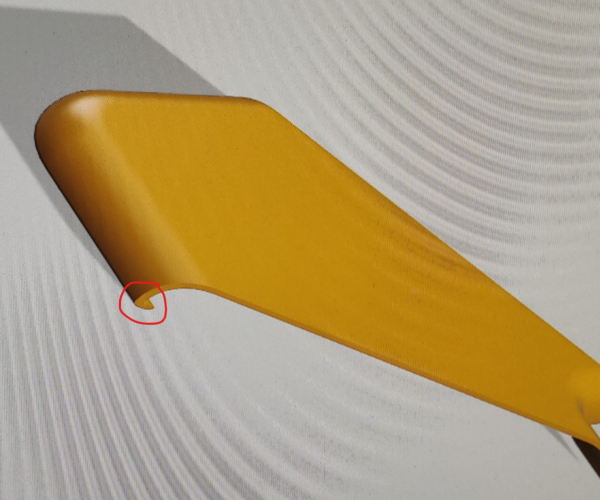
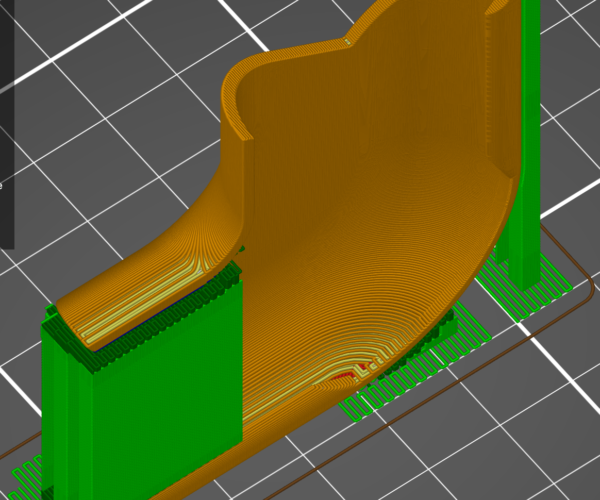
I'm trying to print this part and the external radii are notprinting very well - they are much worse with supports (it warps horribly) this is done without supports and I can clean it up with sanding, but I would rather just have a decent print. The inside radii are pretty good. The lip (circled in red in the design image) is also very weak and just snaps off very easily.
I'm using Prusa's (pretty horrible) "basic" PLA (£700 for a printer and you get cack filament with it 🤔) and some Geeetech PLA for testing.
RE: help on printing this and why its doing what can bee seen in the pics
You are basically printing an extreme overhang, unfortunately fdm printers just cant do that yet, hence the support needed. Of course that also isnt great for surface finish. If you dont understand the term overhang then a quick google search should bring up many sites explaining it.
For greater strength you need to increase your print temps to increase layer bonding but that's always the weak point anyway. Once again not a lot you can do about that, its the nature of the process. You can always change material to a more suitable one.
You are basically against the limits here with your expectations.
RE: help on printing this and why its doing what can bee seen in the pics
Few thoughts.
Radius going in the Z axis are hard for the first half. If you keep in mind the rule of thumb of no more than 45 degree overhangs a radius goes way beyond that in the beginning.
Because the portion you showed is so small there's not much time for the layers to cool before the next is laid down. Look under the "filament settings / Cooling" and make sure setting allow each layer time to cool.
What layer height are you using? I've found lower heights and slower speeds give me better result on radius parts.
RE: help on printing this and why its doing what can bee seen in the pics
@gkmakeit AND @neophyl
thanks both, and yes I understand that there is an undesirable overhang, but it prints waaaay worse with supports. I didn't take pics but its all warped and shonky to the point that not even post-print sanding will fix it.
I also get that z-axis radii are not great, but the inside ones are almost perfect.
Layer height was .15 (prusa slicer "0.15 Quality" setting, nothing else changed) now doing another at .07 (prusa slicer "0.07 Ultra detail" ) much slower and increased the temp by 5°C we'll see how it goes.
@neophyl - what would be a more suitable material? I was looking at PLA plus and nylon but, to be honest, I wonder if I can't get PLA to print well, if i will get them to print well...
RE: help on printing this and why its doing what can bee seen in the pics
The different material comment was in relation to the reported layer strength rather than the curve printing. I don’t think you are going to solve that as the technology just isn’t that good yet. Not for fdm anyway.
Pla is at the low ends of the strength end when it comes to layer adhesion. It’s tough but brittle. PETG is more flexible so while not as stiff does not snap suddenly, it elongates and stretches before failure. Then there’s things like Asa, PC etc.
For the pla you have you can try the higher temperatures and you can also try lowering the part cooling fan speed if the model doesn’t require it but your overhang curves would get even worse so that’s probably not viable for that model. For other geometry it’s worth trying though.
RE: help on printing this and why its doing what can bee seen in the pics
That initial slope upward is going to be difficult for any 3d printer.
If I were doing this and quality was a consideration, I would think this would be a good opportunity to try soluble supports if you can do them.
RE: help on printing this and why its doing what can bee seen in the pics
@grizlyadams
The inside radius will be fine because it's fully supported by the layer below. If you want to share the file or just that portion I can see if some tweaks will get a decent result.
RE: help on printing this and why its doing what can bee seen in the pics
@gkmakeit - here's a link to the F360 file https://a360.co/2DptGEs - this is s small test piece of each end joined together to make a small part, although I guess that may exacerbate the cooling issues, just reverse through the timeline for the full piece. If F360 isn't what you need let me know and I can export it as something else.
Don't spend too much time on it - I can make it work with the post-print sanding/finishing, it was just a matter of interest to see if there was a magic trick/something obvious I didn't know about to make it work.
The main thing I don't understand is why it's so bad with supports - perhaps I have the supports wrong. Anyway, as I said, don't spend too much effort/time.
cheers
RE: help on printing this and why its doing what can bee seen in the pics
@grizlyadams
Yeah those first few layers when you slice them are just hanging over thin air, gonna be hard to get that to work. I tried a few different setting, but didn't really help much. Could you print it this way, might come out better?
RE: help on printing this and why its doing what can bee seen in the pics
Haven’t played with the file as I don’t use f360 but the default support settings in the slicer profiles aren’t very good. The z contact distance by default is 0.1 which means they stick too much as that’s for soluble supports. A value of 0.2 or 0.25 results in much easier separation. I also find upping the interface layers to 4 helps too.
it’s worth printing some quicker test pieces with different support settings to get a feel for what they are like.
RE: help on printing this and why its doing what can bee seen in the pics
thanks @neophyl - I'll take a look at the support settings - I must admit that I assumed that all the Prusa defaults would be spot on given that they actually print so much....
RE: help on printing this and why its doing what can bee seen in the pics
@gkmakeit
i did think of printing like that, but to be honoest, I didn't even try because I assumed the big flat area would turn out rubbish - its nice on the flat textures Prusa print bed.
I'm almost there with tiny supports under the overhangs only. I'm finding Prusa slicer's support management VERY irritating.
thank you and everyone else for taking the time to look/help
cheers
RE: help on printing this and why its doing what can bee seen in the pics
@gkmakeit
I printed it side on, had a lot of trouble with bed adhesion because the edge is so thin, but got that worked out but then this happened - I understanding it happening if the part detaches from the bed, but this was stuck to the bed very well...
Otherwise very happy with it as the radii are great and the layer adhesion on the little return part is solved too.
RE: help on printing this and why its doing what can bee seen in the pics
@grizlyadams
It's hard to tell from the pictures, but in the third picture the lower edge looks curved. Just because it doesn't "come off the plate" doesn't mean part of it didn't warped up. The step doesn't appear to go the whole length of the part? Are you using a brim on the part?
RE: help on printing this and why its doing what can bee seen in the pics
@gkmakeit
yes I used a brim - maybe it wasn't big enough? Every time I print it I get one or more similar layer misalignments in different places.
Nothing changes in the environment during the print, no sudden heating or cooling, no air movement with the door opening or closing. Its completely random and inconsistent when it happens in the print.
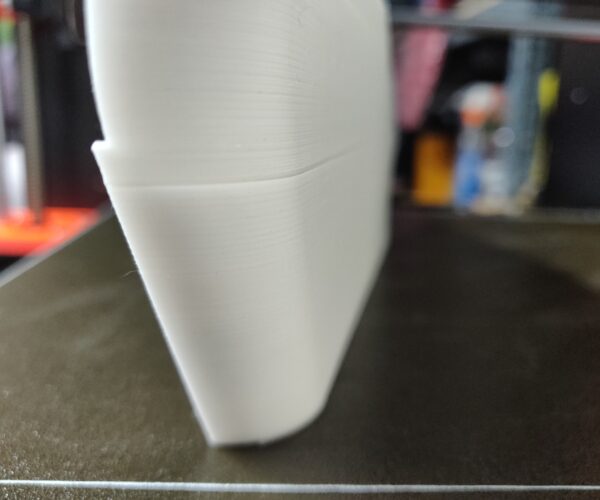

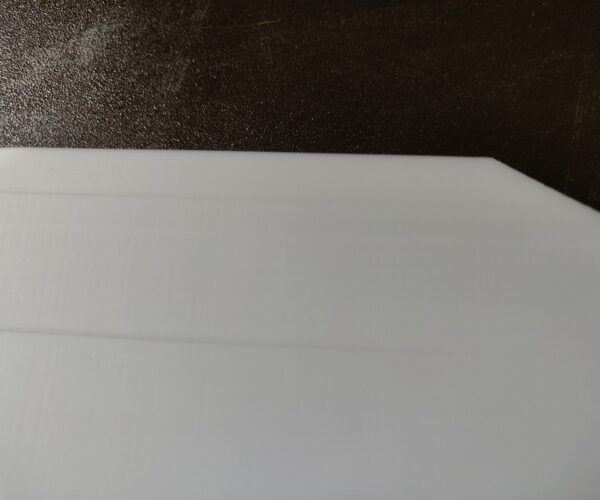

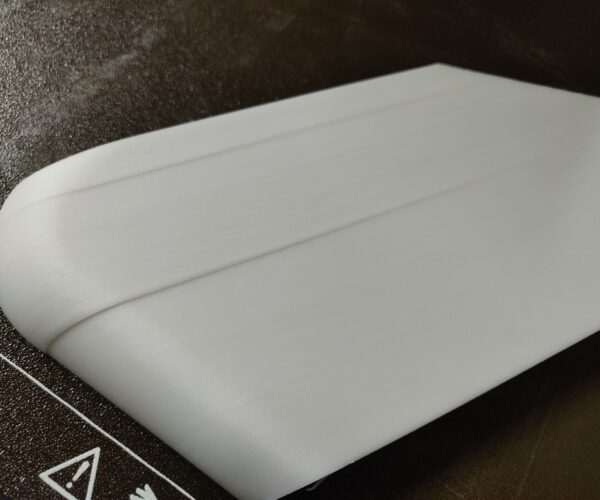
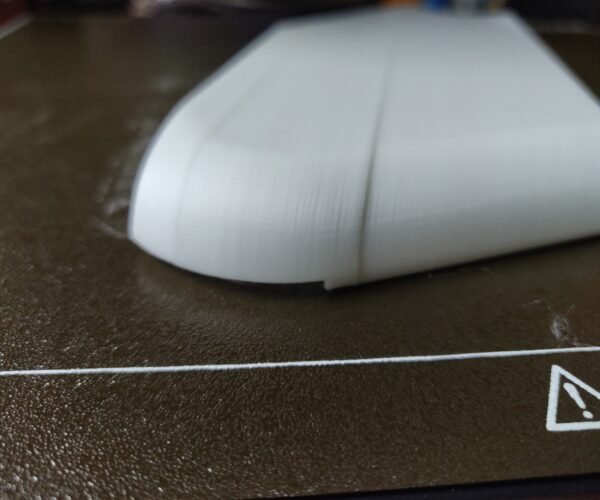
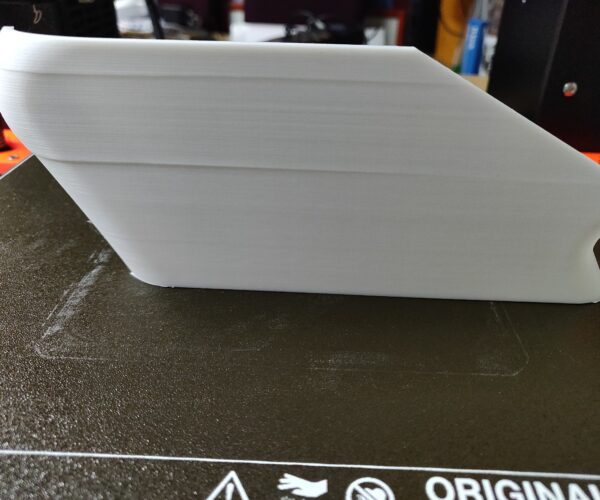 some are the whole layer and some are just one end of the part.
RE: help on printing this and why its doing what can bee seen in the pics
I would not go down to 0,07mm. Instead I d use 0,2mm and use a slower printing speed instead. Maybe around 15 mm/s for all perimeters and 20 mm/s for solid infills.
