Can't print any examples with BRAND NEW factory-built I3 Rapidly approaching to Einstein's definition of insanity
I bought a factory-assembled I3. and so far I have not been able to print ANYTHING, including the Prusa Logo test case.
I have had numerous emails back and forth with tech support. All I get from them is that the Z-axis is too high. I've run the self test and the Wizard dozens of times. Each time I run the 1st layer calibration, I set the z-value a bit lower than the previous time. I'm deep into Einsteins's definition of insanity: Repeating the same thing and expecting a different result. The manual of course, is useless, simply saying the the filament should stick "nicely" to the sheet, as if "nicely is an engineering standard. I can't flow if off with breath, but I can brush it off with a very soft brush or a finger.
(Note: I am using fresh Prusa PLA filament and have cleaned the hot sheet using dish detergent and denatured alcohol. I've also watched every Prussa video about setting the 1st layer, and read everything I can find here on the Forums. When the square part of the Logo starts to form, it looks like the PINDA actually drags across it, tearing it off the sheet. I have not touched thePINDA and it is in exactly the location as provided by the factory.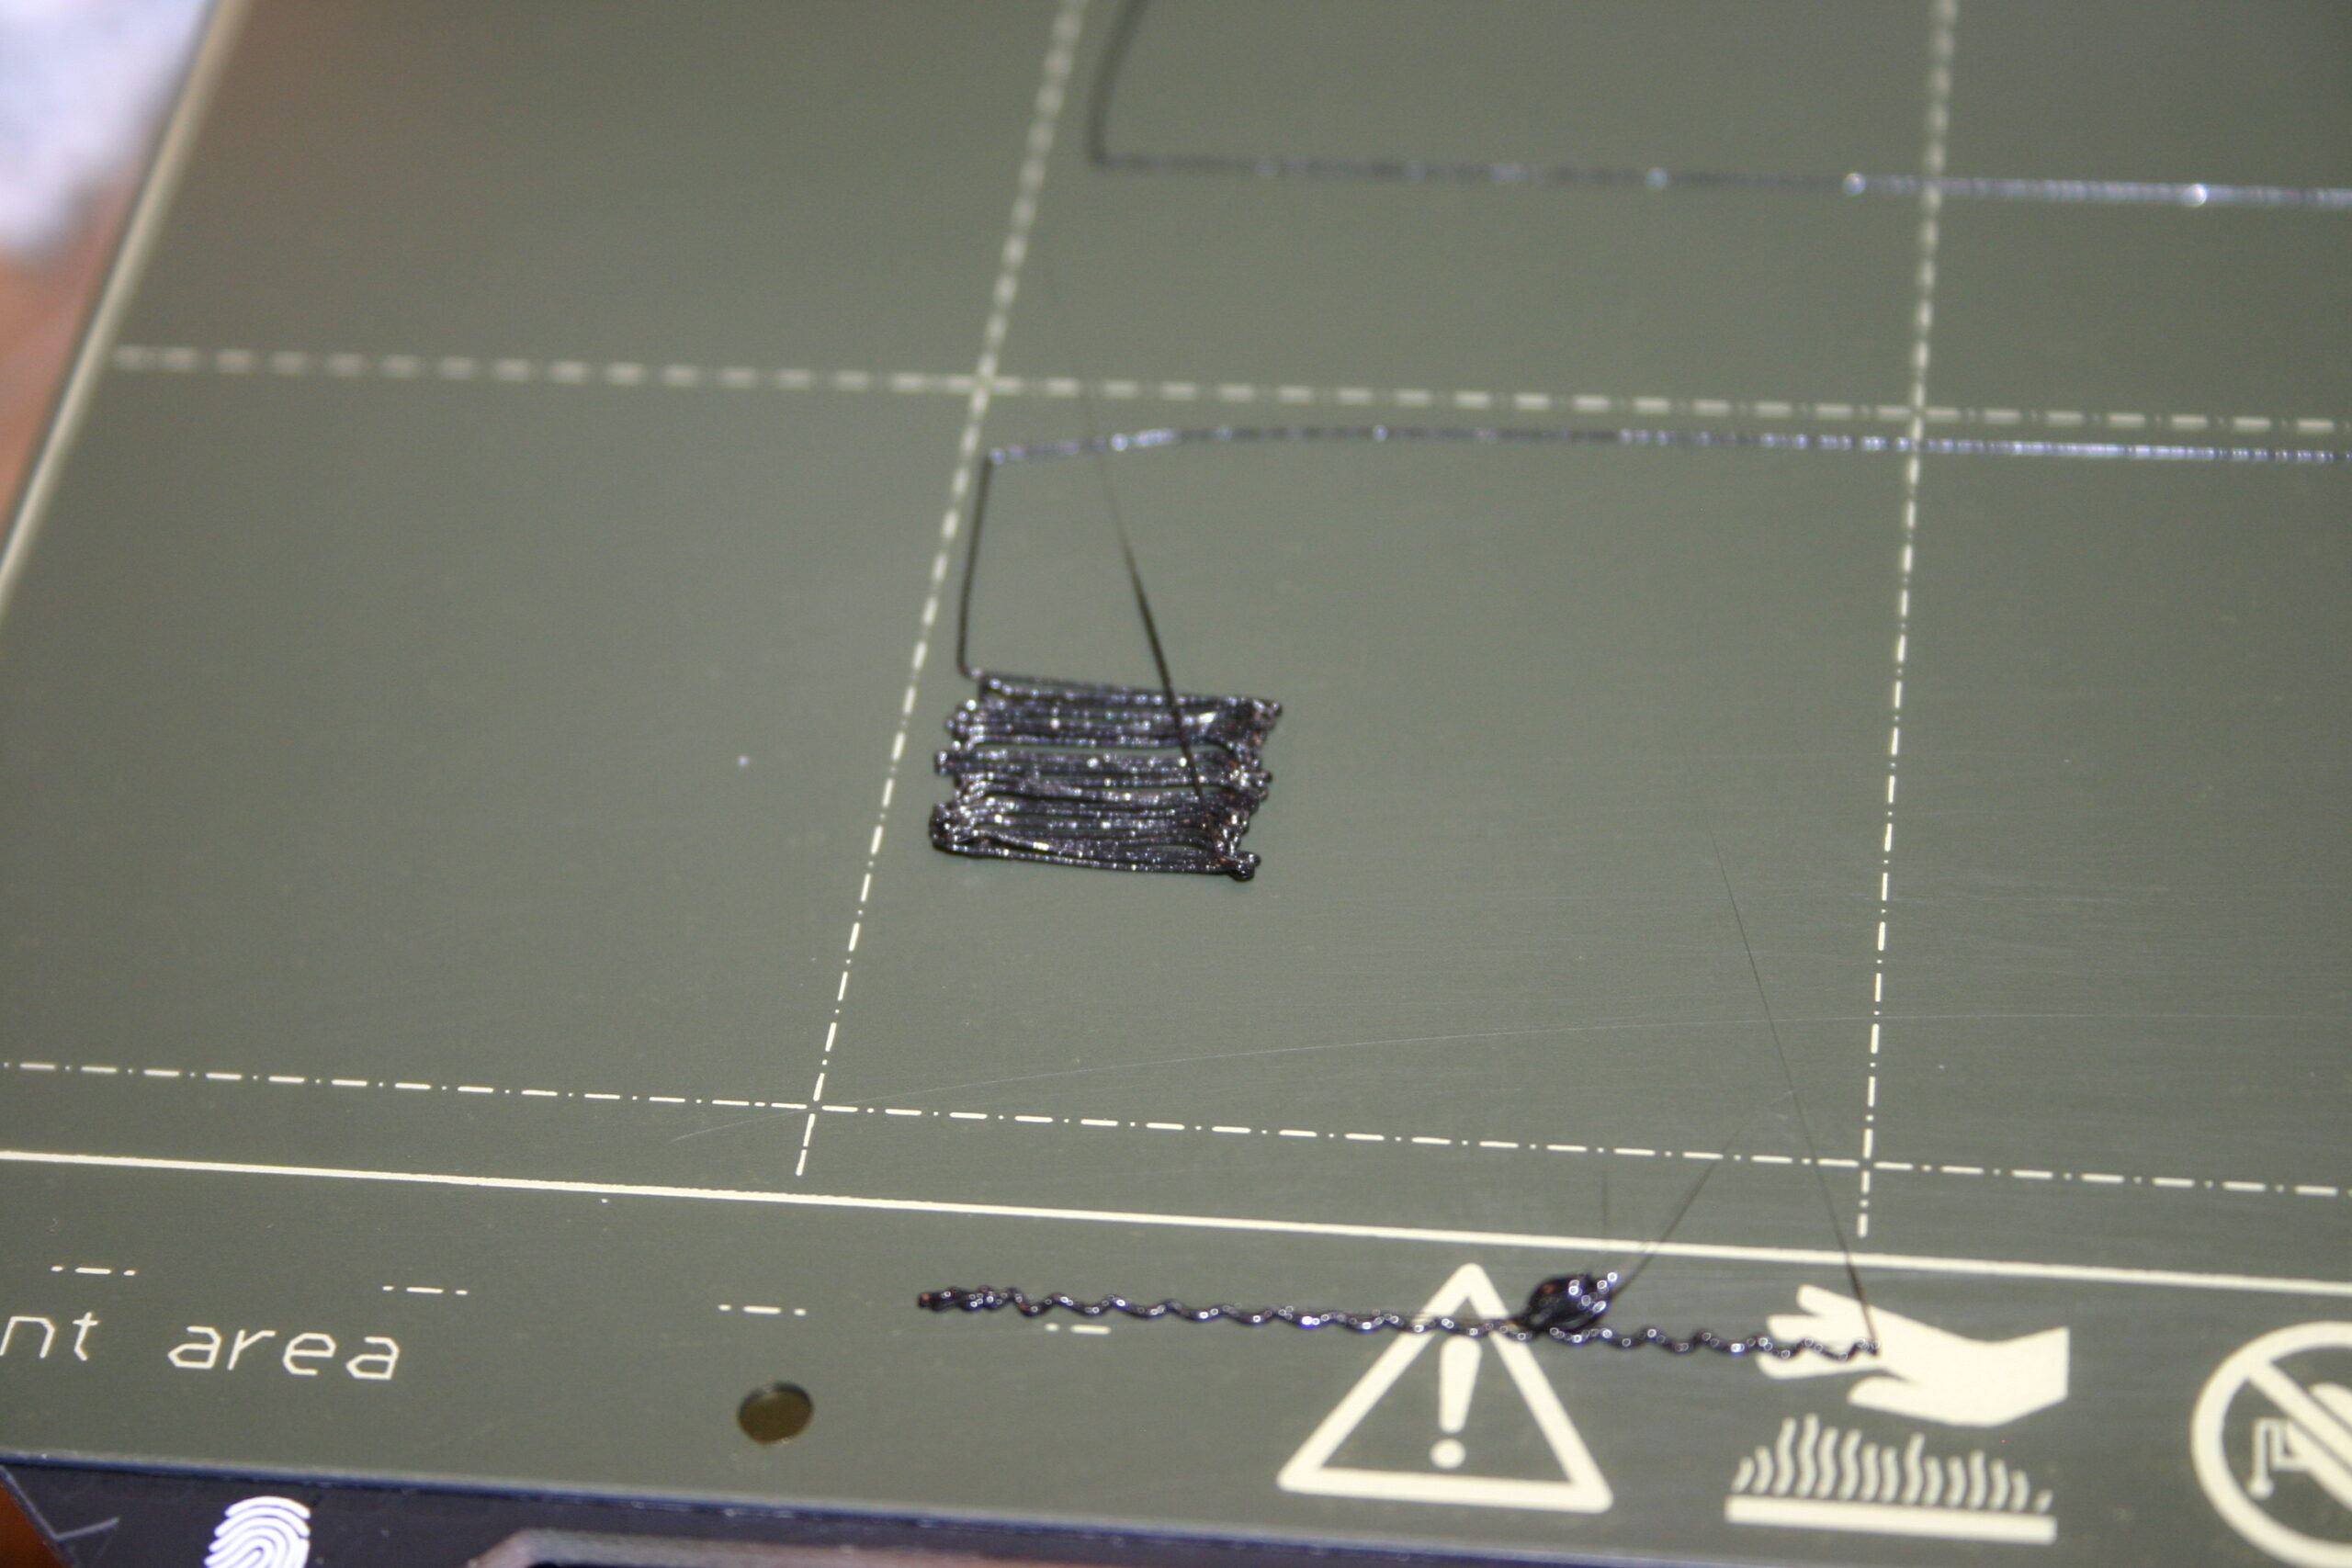
factory assembled apparently =/= factory tested and pre-adjusted
yep, that looks way too high.
you might want to look at the extruder assembly instructions and check if the height of the pinda sensor is ok (~1mm higher than the nozzle so it should never touch the bed or print).
and since you bought it pre-assembled...your bearings most likely only have the rust-protection oil in them and not a proper grease filling.
Stock calibration is misleading
There's a zip file in the first post-try using that to do the Z height adjustment. I was way too high before I ran that gcode and now I'm at least in the ballpark of where I should be. Note that you'll hear a number of beeps when you print it, but it's normal.
Prusa i3 MK3S+
Your still ti high.
Wen you clean with dish soap, use a lot of hot water, and there is no need to do alcohol after this., dish soap cleans the best, yes you can print a few prints and clean with alcohol(use a lot of alcohol), after that use dish soap again.
Print a few cubes, spread out over the bed, start printing, adjust the live z , start in a to high position, and lower it every few lines, and yes you need to go very low, then you see the good setting.
In your first picture you see the lines are not square, in de corners, then you are to high, the square at the end needs to be without holes.
After moving the printer, do z-calibration.
z leveling, setting in printer set this to 7x7.
It's simple... except for the complex part
[...] I have had numerous emails back and forth with tech support. All I get from them is that the Z-axis is too high. I've run the self test and the Wizard dozens of times. Each time I run the 1st layer calibration, I set the z-value a bit lower than the previous time.
One of the problems I had early on what the ambiguity of the words used relative to Live-Z calibration. "A bit" and "lots" don't mean much if you don't have a reference. Here's a quick unscientific rundown:
- Starting out with a new sheet, I set my Live-Z to 0. This is "way high". The nozzle is visibly above the print surface.
- I start a print (the "Life Adjust" 75x75mm print is ideal, but anything with a similarly large solid area will do). The filament will flow out in a round extrusion and float about.
- I lower (make more negative) the nozzle by "a lot" (0.1mm) until I see the filament starting to stick. At first, it will appear to stick but move easily with a poke of the finger. Keep going.
- As the filament starts to stick to the point that it doesn't easily poke loose, I slow down and keep lowering the nozzle in "large" (0.06mm) increments. This is what I consider a minimal adjustment to correct any problems. Keep lowering until the gaps between extrusions disappear.
- Look at the edges where the infill meets the perimeter extrusions. If there are still holes, I start lowering in "small" (0.02mm) increments. Continue until the gap close up. You'll notice the appearance will change when you hit the "aha" level and look very even.
- If you go too far, just back up "a bit" (0.02-0.04mm). Adjust up and down in "small" (0.02mm) increments until you get a clean, even surface.
You're always better off starting high since it's easy to see when you've moved low enough. If you've having no luck, raise Live-Z to 0 and start again. If you're too low, it can look like nothing is extruding or you just get smears of filament. There is no one "right" Live-Z setting, and it will vary between sheets or after making hardware changes like nozzle changes (though it shouldn't by much).
I've put together some notes and pics here that might be helpful. Adjusting Live-Z is a bit like cooking a soft-boiled egg. You can read about it a hundred times, but there's a feel for it you just have to learn for yourself. Once you've mastered it, it's a breeze and you'll wonder why people have such a hard time with it.
Be super aggressive with Z change
The #'s that display in the live-z adjust screen are microns. That means there are 1000 of them to a milimeter of movement. So moving the number one or two at a time will take a few years to get your Z close to where it needs to be. Calibration is not for setting live Z - all it does is get you to within a few thousand microns of where correct will be for your particular unit, steel sheet, filament and local environment.
first layer
Yes, your Z is way too high.
Best way I found was to use live adjust Z after getting reasonably close with the initial Z calibration. Everything else is just too complicated or time consuming. I can't waste 1 hour to adjust Z per printer.
I start a real print job and just push the turn knob to get into live adjust Z mode (only during 1st layer of course ...) then I watch the nozzle doing its work and dial the knob down to where it looks perfect. It usually works on the first try and it is super quick and easy.
In rare cases I have to go up or down one or two clicks on the next print because I concluded that it was not 100% optimal.
Of course, the printsheet needs to be clean and fat free for all of this to work. Dish soap and non scratchy sponge works best.