Bad Prints After a While How to Fix?
Hi,
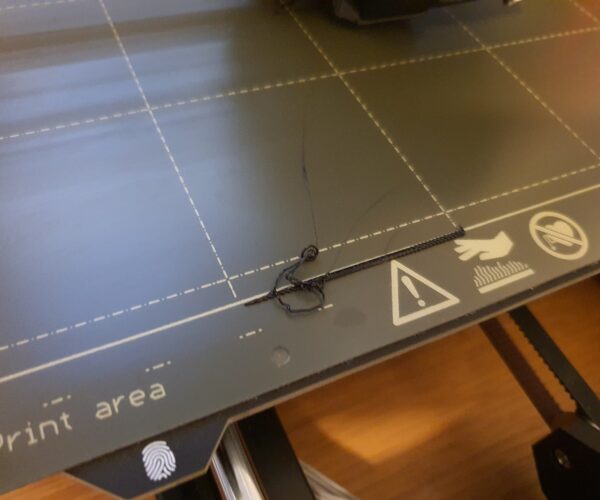
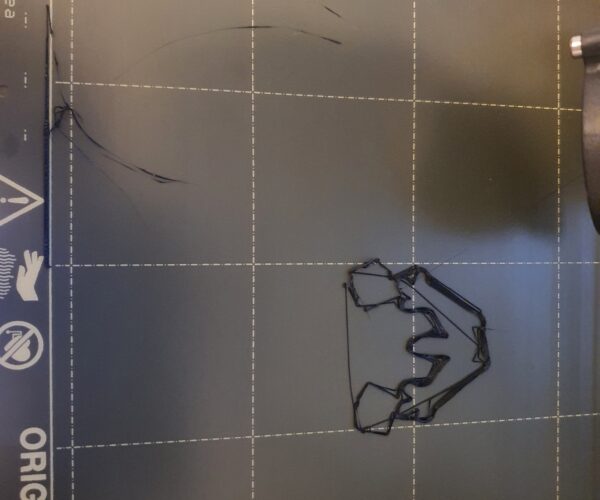
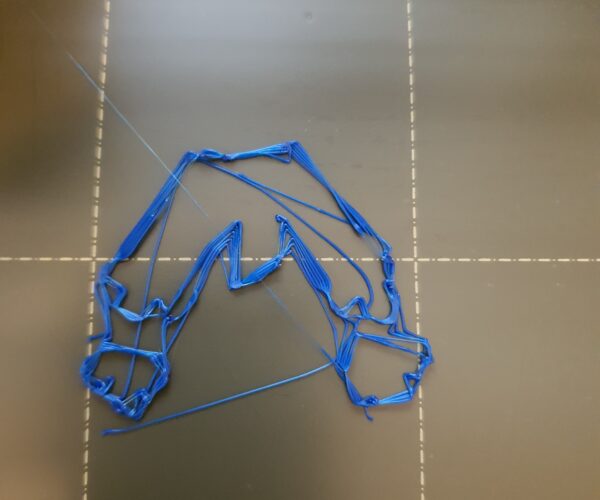
I havent done any printing for a while and when i turned my printer on and tried to print, the prints came out really bad
I did calibration, and cleaned the nozzle but i still have no idea how to fix the printing. Can anyone suggest what i must do?
Thanks!
RE: Bad Prints After a While How to Fix?
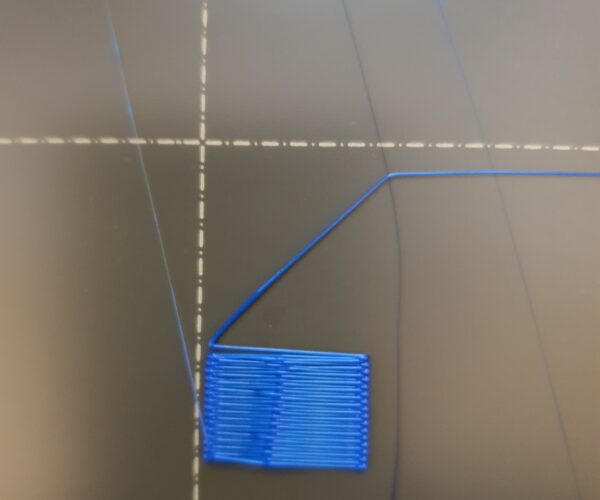
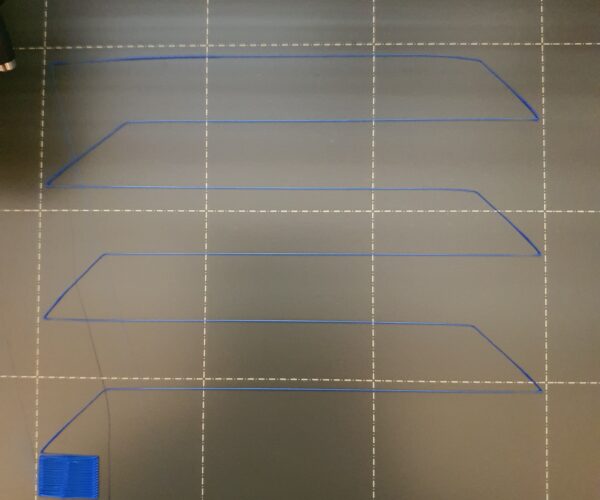
Clean the bed (with soap and hot water) and rerun first layer calibration and post a picture of the resulting rectangle still on the bed.
If at first you don't succeed, skydiving is not for you.
Find out why this is pinned in the general section!
RE: Bad Prints After a While How to Fix?
It looks like you might be too high. Do as posted above. The rectangle will reveal the answer.
--------------------
Chuck H
3D Printer Review Blog
RE:
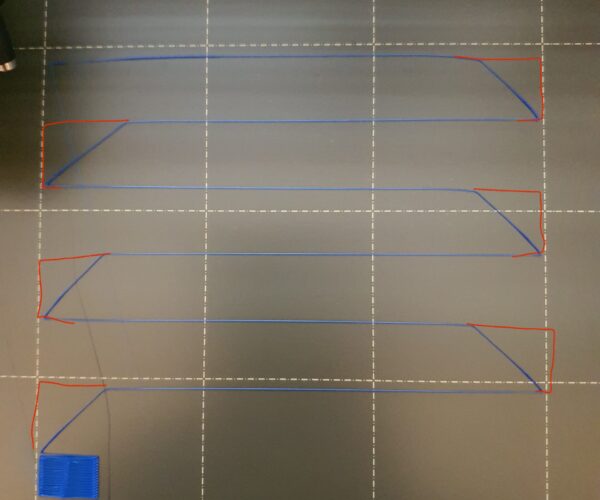
You are way too high still.
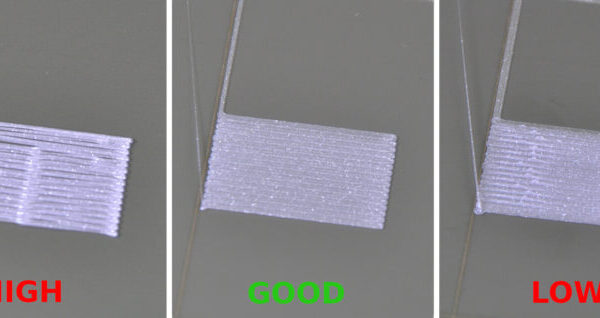
Run first layer calibration again (and again, and again) until you get it right. See https://help.prusa3d.com/article/first-layer-calibration-i3_112364 for examples on how it is supposed to look.
The value you get is specific to your printer and depends on the mounting of your PINDA relative to your nozzle. It‘s just a number. You only need to adjust PINDA if your value reaches 2.000.
Your printer is fine. Don‘t worry, just calibrate the first layer and it will work like a dream. Just be patient….
If at first you don't succeed, skydiving is not for you.
Find out why this is pinned in the general section!
RE: Bad Prints After a While How to Fix?
Your printer is fine.
Most likely this is a very true statement.
The vertical lines in the first layer calibration should be, well, vertical, not slanted. From the picture I agree with everyone else, you're too high. Here's my procedure for calibrating Live Z:
I use the built-in first layer calibration wizard in steps of -0.100 until I get a good zig zag pattern with the corners sticking and a reasonably looking square. I then switch to this calibration strip https://www.printables.com/model/105404 for fine-tuning in steps of -0.020 or even -0.010. The larger format makes it easier to read the results, compared to the in-built wizard, plus you can try up to 8 different Live Z settings in one print. It's a variation of this method https://forum.prusa3d.com/forum/original-prusa-i3-mk3s-mk3-assembly-and-first-prints-troubleshooting/life-adjust-z-my-way/ .
Your current live Z of -0.3 is on the low side. I try to shoot for a Live Z somewhere around -1.00. But absolute values mean nothing, they depend on printer and sheet. A Live Z in the -1 range simply gives you enough wiggle room up and down, to adjust for different sheets and filaments. This gadget may help you get into the proper range: https://www.printables.com/model/57192.
So, don't hesitate to go lower!
Formerly known on this forum as @fuchsr -- https://foxrun3d.com/
RE: Bad Prints After a While How to Fix?
I agree.
Z looks too high and depending on how your filament was stored it might be wet.
Drying the filament and adjusting Z should fix this.
RE: Bad Prints After a While How to Fix?
Don't get frustrated, the calibration gets easier once you know what to look for. And there are numerous ways to optimize the process, as fuchsr described, but initially you do not need to make it more complicated, you can just use the build in calibration until you get a reasonably looking square - as fuchsr said. After that you will be able to print the frog in the middle of your build plate - no problem. If you want to print bigger things or a lot of small surfaces all over the plate or want to optimize the first layer even further you can try other methods. With better results -by the way- if you understand what they are doing and why.
Same goes for drying your filament, if you are using PLA this is not the main problem, you will be able to print nice looking frogs even without drying your filament. Will the surface get better and will you have less stringing if you dry your filament? Yes, of course, mpothmann is right, that helps making your prints even better, but I am pretty sure it is not the cause of the failure in adhesion your pictures show.
Keep it simple in the beginning: Run the printer self test and calibration routine. If that is done, do the build in first layer calibration until you get a reasonably looking square. And then print some frogs as a reward. If you then feel like it: go for more sophisticated methods to enhance different aspects of your prints...
If at first you don't succeed, skydiving is not for you.
Find out why this is pinned in the general section!
RE:
As long as the lines have no 90° angles (like the ones I painted in) you are WAY too high.
If you start getting 90° angles, that means at least the filament is now sticking to the surface, you start judging the final rectangle by this picture:
(note that the "high" picture on the left almost looks exactly like your rectangle in the picture above)
If at first you don't succeed, skydiving is not for you.
Find out why this is pinned in the general section!
