RE: y and z self test failure after update to 5.1.0
I experienced the same issue, however the fix, at least in my case, was straightforward. The bearings on the right hand runner are positioned to stop the Y axis movement front and back. Seems to me that placing an object between the frame and runner is simply reducing the forward movement which can easily and permanently be achieved by moving the front bearing forward a similar amount. In my case I found this this did in fact position the bearing properly over the pocket in the Y carriage. Problem solved.
RE: y and z self test failure after update to 5.1.0
I don't get how these distances have to be installed. Which one goes where?
RE:
You must position a spacer at the rear on the steel rod where there are the 2 bearings.This spacer will reduce the Y travel in order to pass the tests (here in red)
@Prusa is burying its head in the sand by not taking this problem seriously, it's quite sad for such a company.
RE:
I did it once, but the speed and force of the forward Y axis movement bumps the front bearing towards the front frame, shortened again the distance between the bearings out of accepted tolerance.
The only final solution which can solve the issue is a new FW update which makes the calibration speed and force a bit smoother. Like it was at 4.7 FW version.
I experienced the same issue, however the fix, at least in my case, was straightforward. The bearings on the right hand runner are positioned to stop the Y axis movement front and back. Seems to me that placing an object between the frame and runner is simply reducing the forward movement which can easily and permanently be achieved by moving the front bearing forward a similar amount. In my case I found this this did in fact position the bearing properly over the pocket in the Y carriage. Problem solved.
RE: y and z self test failure after update to 5.1.0
I've not experienced the same problem after a fair bit of use. Though there's a chance I will.
RE: y and z self test failure after update to 5.1.0
Very thank you @pink_clown!!!
Solved for me!
As a work around I printed on mk4 distancers and put it on the far end of the left Y rod, where there are lighter bumps towards the frame.
After the printer finds the Y- axis far end it runs forward, so the place you put the distancers is equal.
The thickness of 1,5 - 2mm makes a deal. Printing time about 2 minutes.
Try for your printer the best.
Within Firmware would be one click to change the allowed Y length. Hm...
.

RE: y and z self test failure after update to 5.1.0
Thank you @pink_clown - the spacers did the trick on my MK4, Whan an aggravating issue!! I need to research this more, but for now the shims do the trick. Thanks!
RE: y and z self test failure after update to 5.1.0
Same here. I just place a screwdriver tip between and it worked. Is Prusa addressing this as i found that 5.1.0 was the only one that would pass without the hack. 5.1.3 is what im running but it wont pass without the screwdriver hack. Jesus you can hear the thing smack up hard during the calibration, no wonder it fails.
RE:
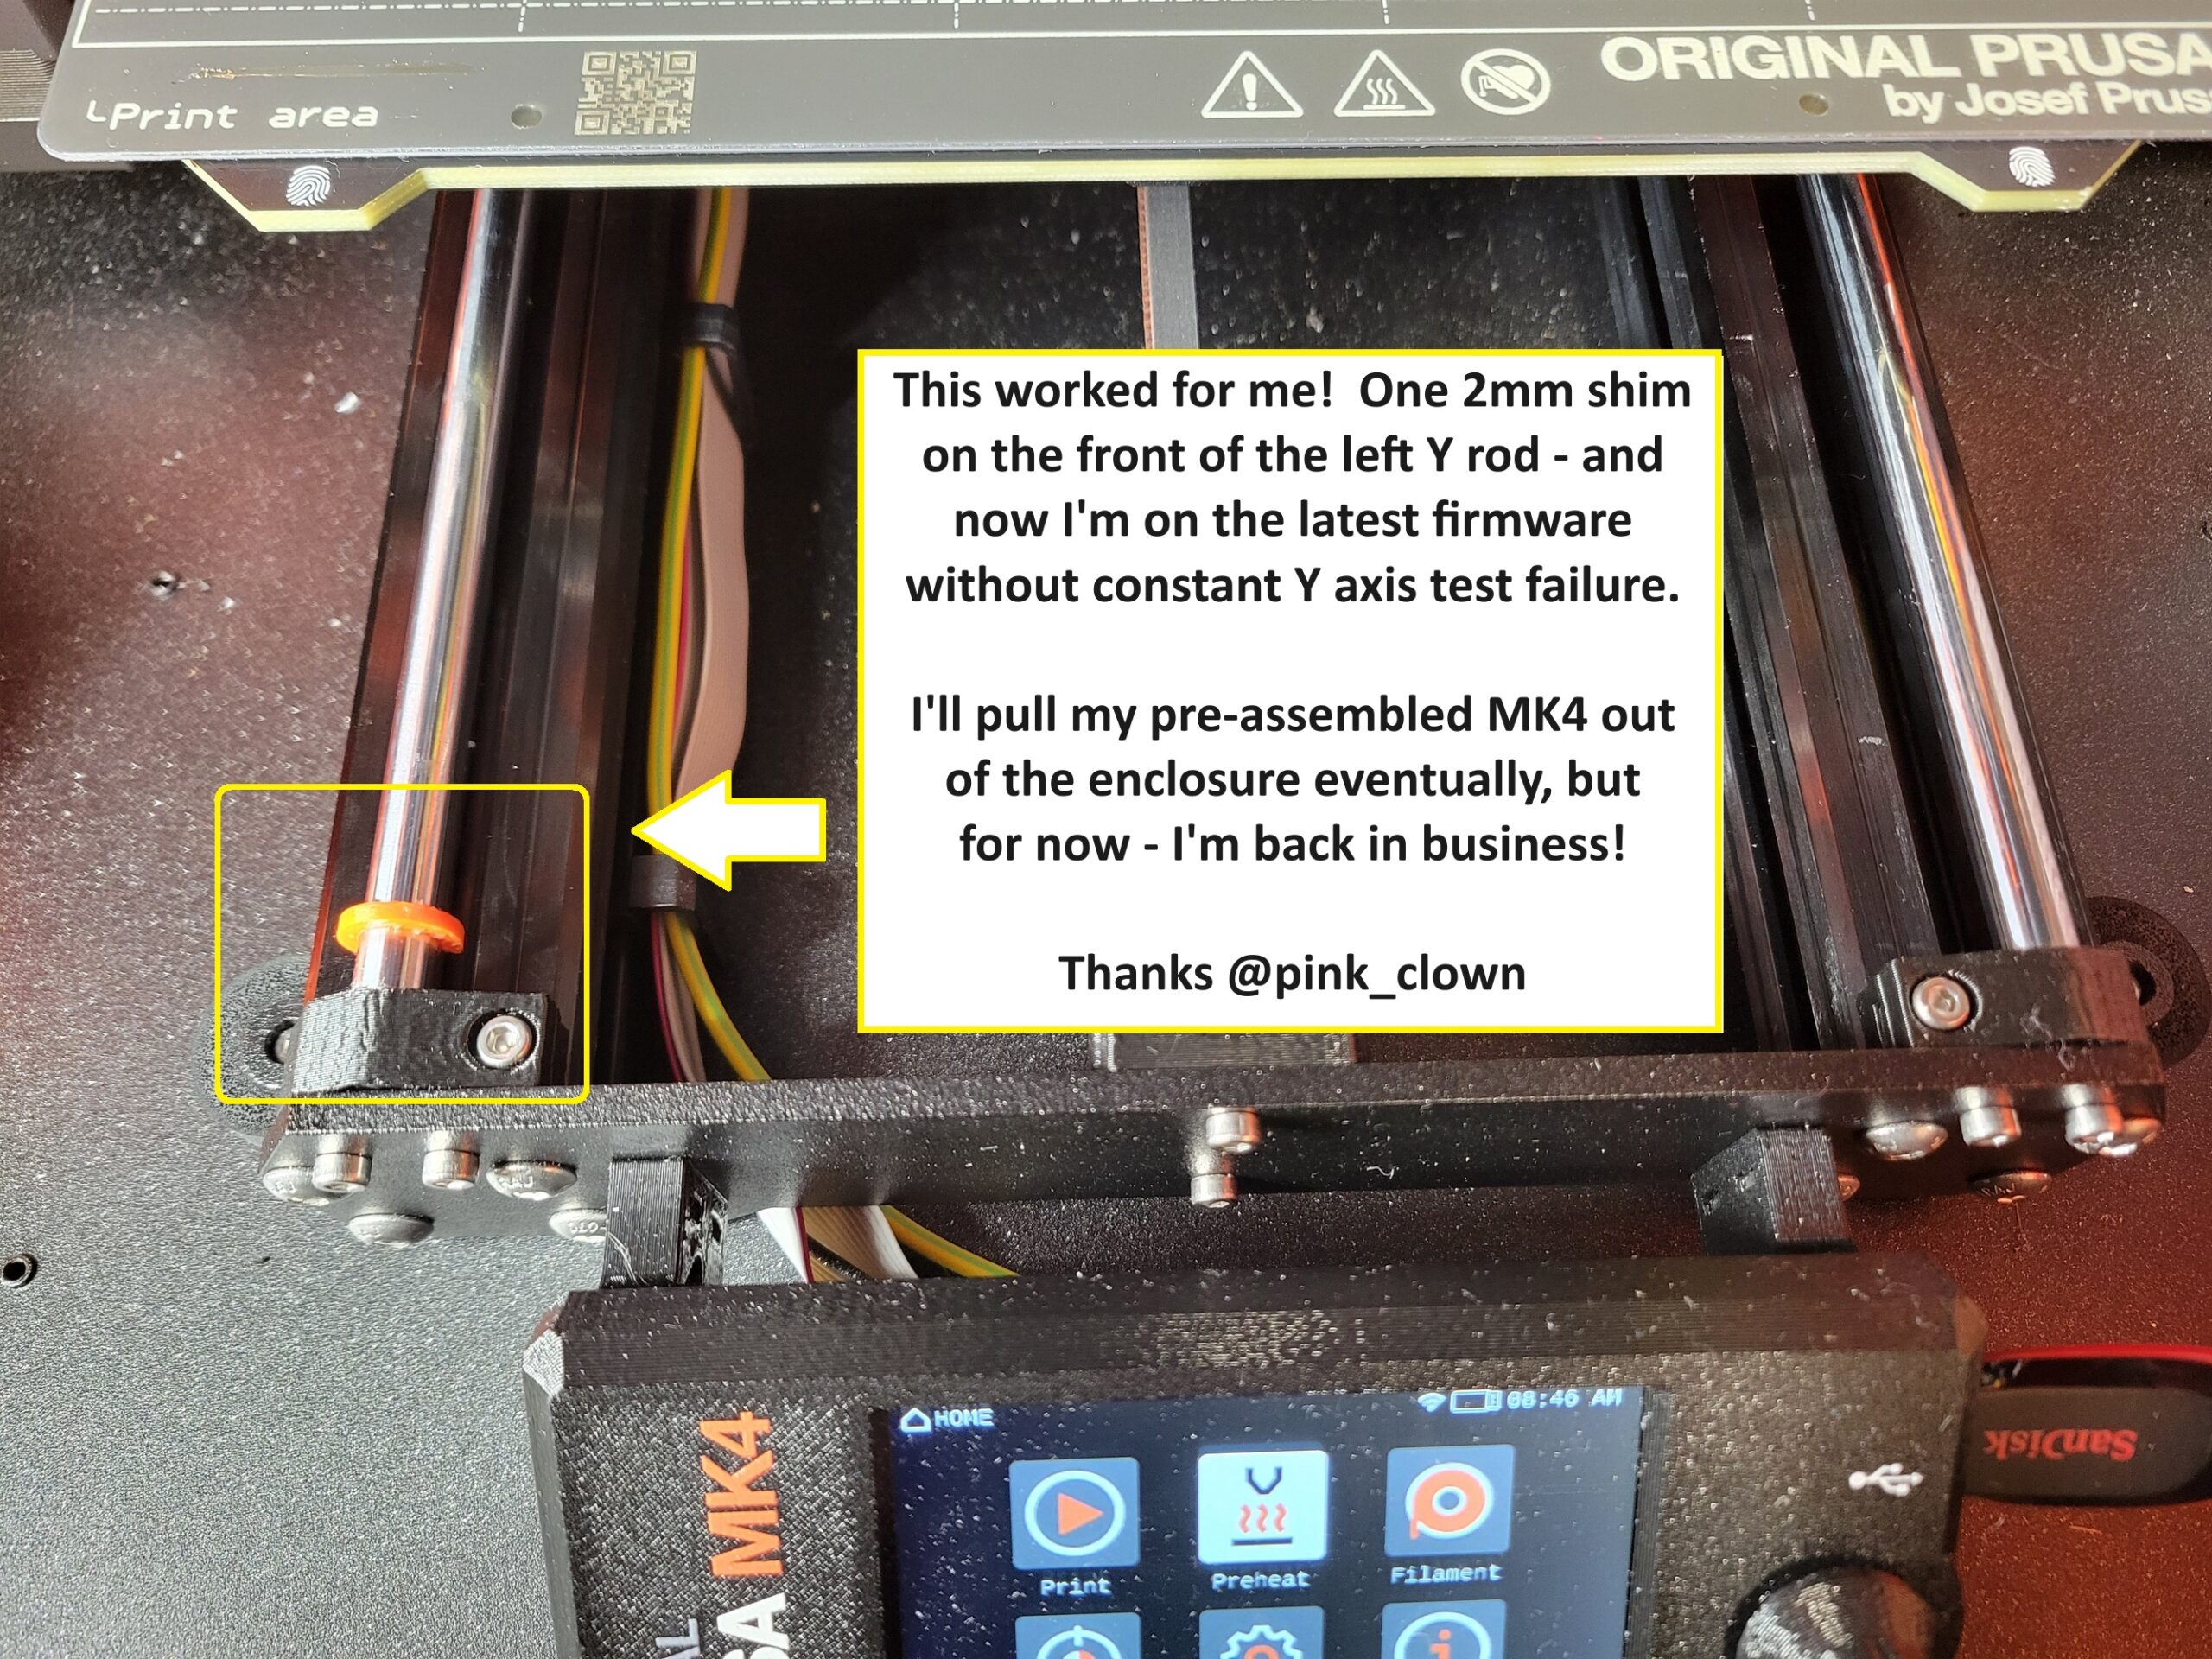
This worked for me! One 2mm shim on the front of the left Y rod, and I'm on the latest firmware without constant y-axis test failures! Thanks @pink_clown!
RE: y and z self test failure after update to 5.1.0
The same solution is to loosen the front left bearing slightly and move it the thickness of that ring forward towards the front plate, tighten and throw that ring out.
RE: y and z self test failure after update to 5.1.0
Hi guys,
I am happy it helped you. When you do some math it is as follows:
1. The distance between the front and end frames is 311 mm
2. To get the Y travel distance of 210 mm the distance between the far ends of the bearings should be 101 mm plus/minus the tolerance.
3. Keep in mind, the beginning of the print area front line depends on the position of the rear bearings.
4. You can get it by disassembling the bed and moving the bearings or or insert the distancer. It is up to you.

RE: y and z self test failure after update to 5.1.0
Let me also share a trick I recently learned from somebody who is working on the firmware: Before switching your printer on to do the calibration, move the heat bed all the way to the back. Then turn on the printer, and if isn't actually out of spec, the calibration will succeed. MAGIC! 🙂
RE: y and z self test failure after update to 5.1.0
I eventually just moved the bearing. However, the fact that the bed slams into its stop hard and then fails, common sense coming from an industrial controls would tend to lead you that the distance is too short between the limits and increasing the distance is counterintuitive. On another note, why when the test fails can they display a follow up messages saying something like "Check you y axis in the - direction. The -y axis in the - direction needs increased" failing tells you nothing and can be frustrating. Also firmware 5.1.0 worked for me. When when an older firmware works and the other doesn't, common sense tends to point you to a firmware issue. Or in the release notes state that if you are having y and z self test issue the self test is more sensitive, if it fails check your bearing distance. I also tried moving it all the way to the back before the test and it did not work for me. Don't get me started on that mess of a belt tuner....
RE: y and z self test failure after update to 5.1.0
Yeah. I understand why the printer needs to move the bed hard to the end stops ONCE.
Just do not understand why it has to repeat 10 times.
And similarly the X axis does the same thing.
Seems like they are trying to wear the (relevant parts of) printer out and CAUSE calibration failures.
RE:
@bryn51
the rode end indication in the legacy MK1 was done via electrical end switches. Recently they use the TMC3309 step motor driver Stallguard functionality. When the motor bumps to the obstacle (this is also used by the crash detection) the TMC driver detects a so called back current. If the detection threshold is set too high, the bumps are repeated until the response is strong enough. I would suspect that this has also a relation with the Y axis testing "enhancement".
As the source code for MINI, MK4 and XL are at the same place, could be, that something has been changed for one type of the printer, having impact on all types of the printers, not taking in account, that other printers work slightly different. Different TMC drivers with different Stallguard thresolds?
RE: y and z self test failure after update to 5.1.0
so i face this same prob again with a new bear mk4 and i corrected the belt holder Y already but same prob on Y test , then as mention i moved the bearing front left a little and same with the back one same side and then Y perfecto so it's really stupid from the fmw prusa bt that the solution , just move a little bit 1mm max or less the bearing and the Y axe test is positive ..
done
RE: y and z self test failure after update to 5.1.0
I was having the same issue with the calibration test, the "tweezers" fix worked for me. Is there going to be a build update, or a firmware update for this issue?
RE:
I upgraded my printer from Mk3S to MK4 two weeks ago. I ran into the y calibration issue. I moved my forward bearing forward until it was centered in the holder instead of being aligned towards the center of the plate. Moving it forward resolved my calibration issue.
RE: y and z self test failure after update to 5.1.0
huh...MK4 fails Y axis calibration test. Do the manual shimming on front of left rod, Y axis calibration test passes.
Print the shims, install the largest shim on rear of left rod, Y axis calibration test fails.
Remove this shim, place on front end of Y axis rod, U axis calibration test passes.
Huh?
Why does the rear or forward position of the shim result in differing calibration test results ?
With shim in forward location Y axis calibration test values displayed during tests are -4 then +150
With shim in rear position Y axis calibration values displayed during tests are -4 then +211
Two questions, in an attempt to understand the calibration test the test failure.
How would belt tension affect overall Y axis travel distance (assuming belt tension is the culprit behind the Y axis calibration test failure?)
Why is the same value of -4 displayed when the shim location is in either the front or the back location (I would assume rearward travel with the shim in the rear position would alter the -4 value in the positive direction)