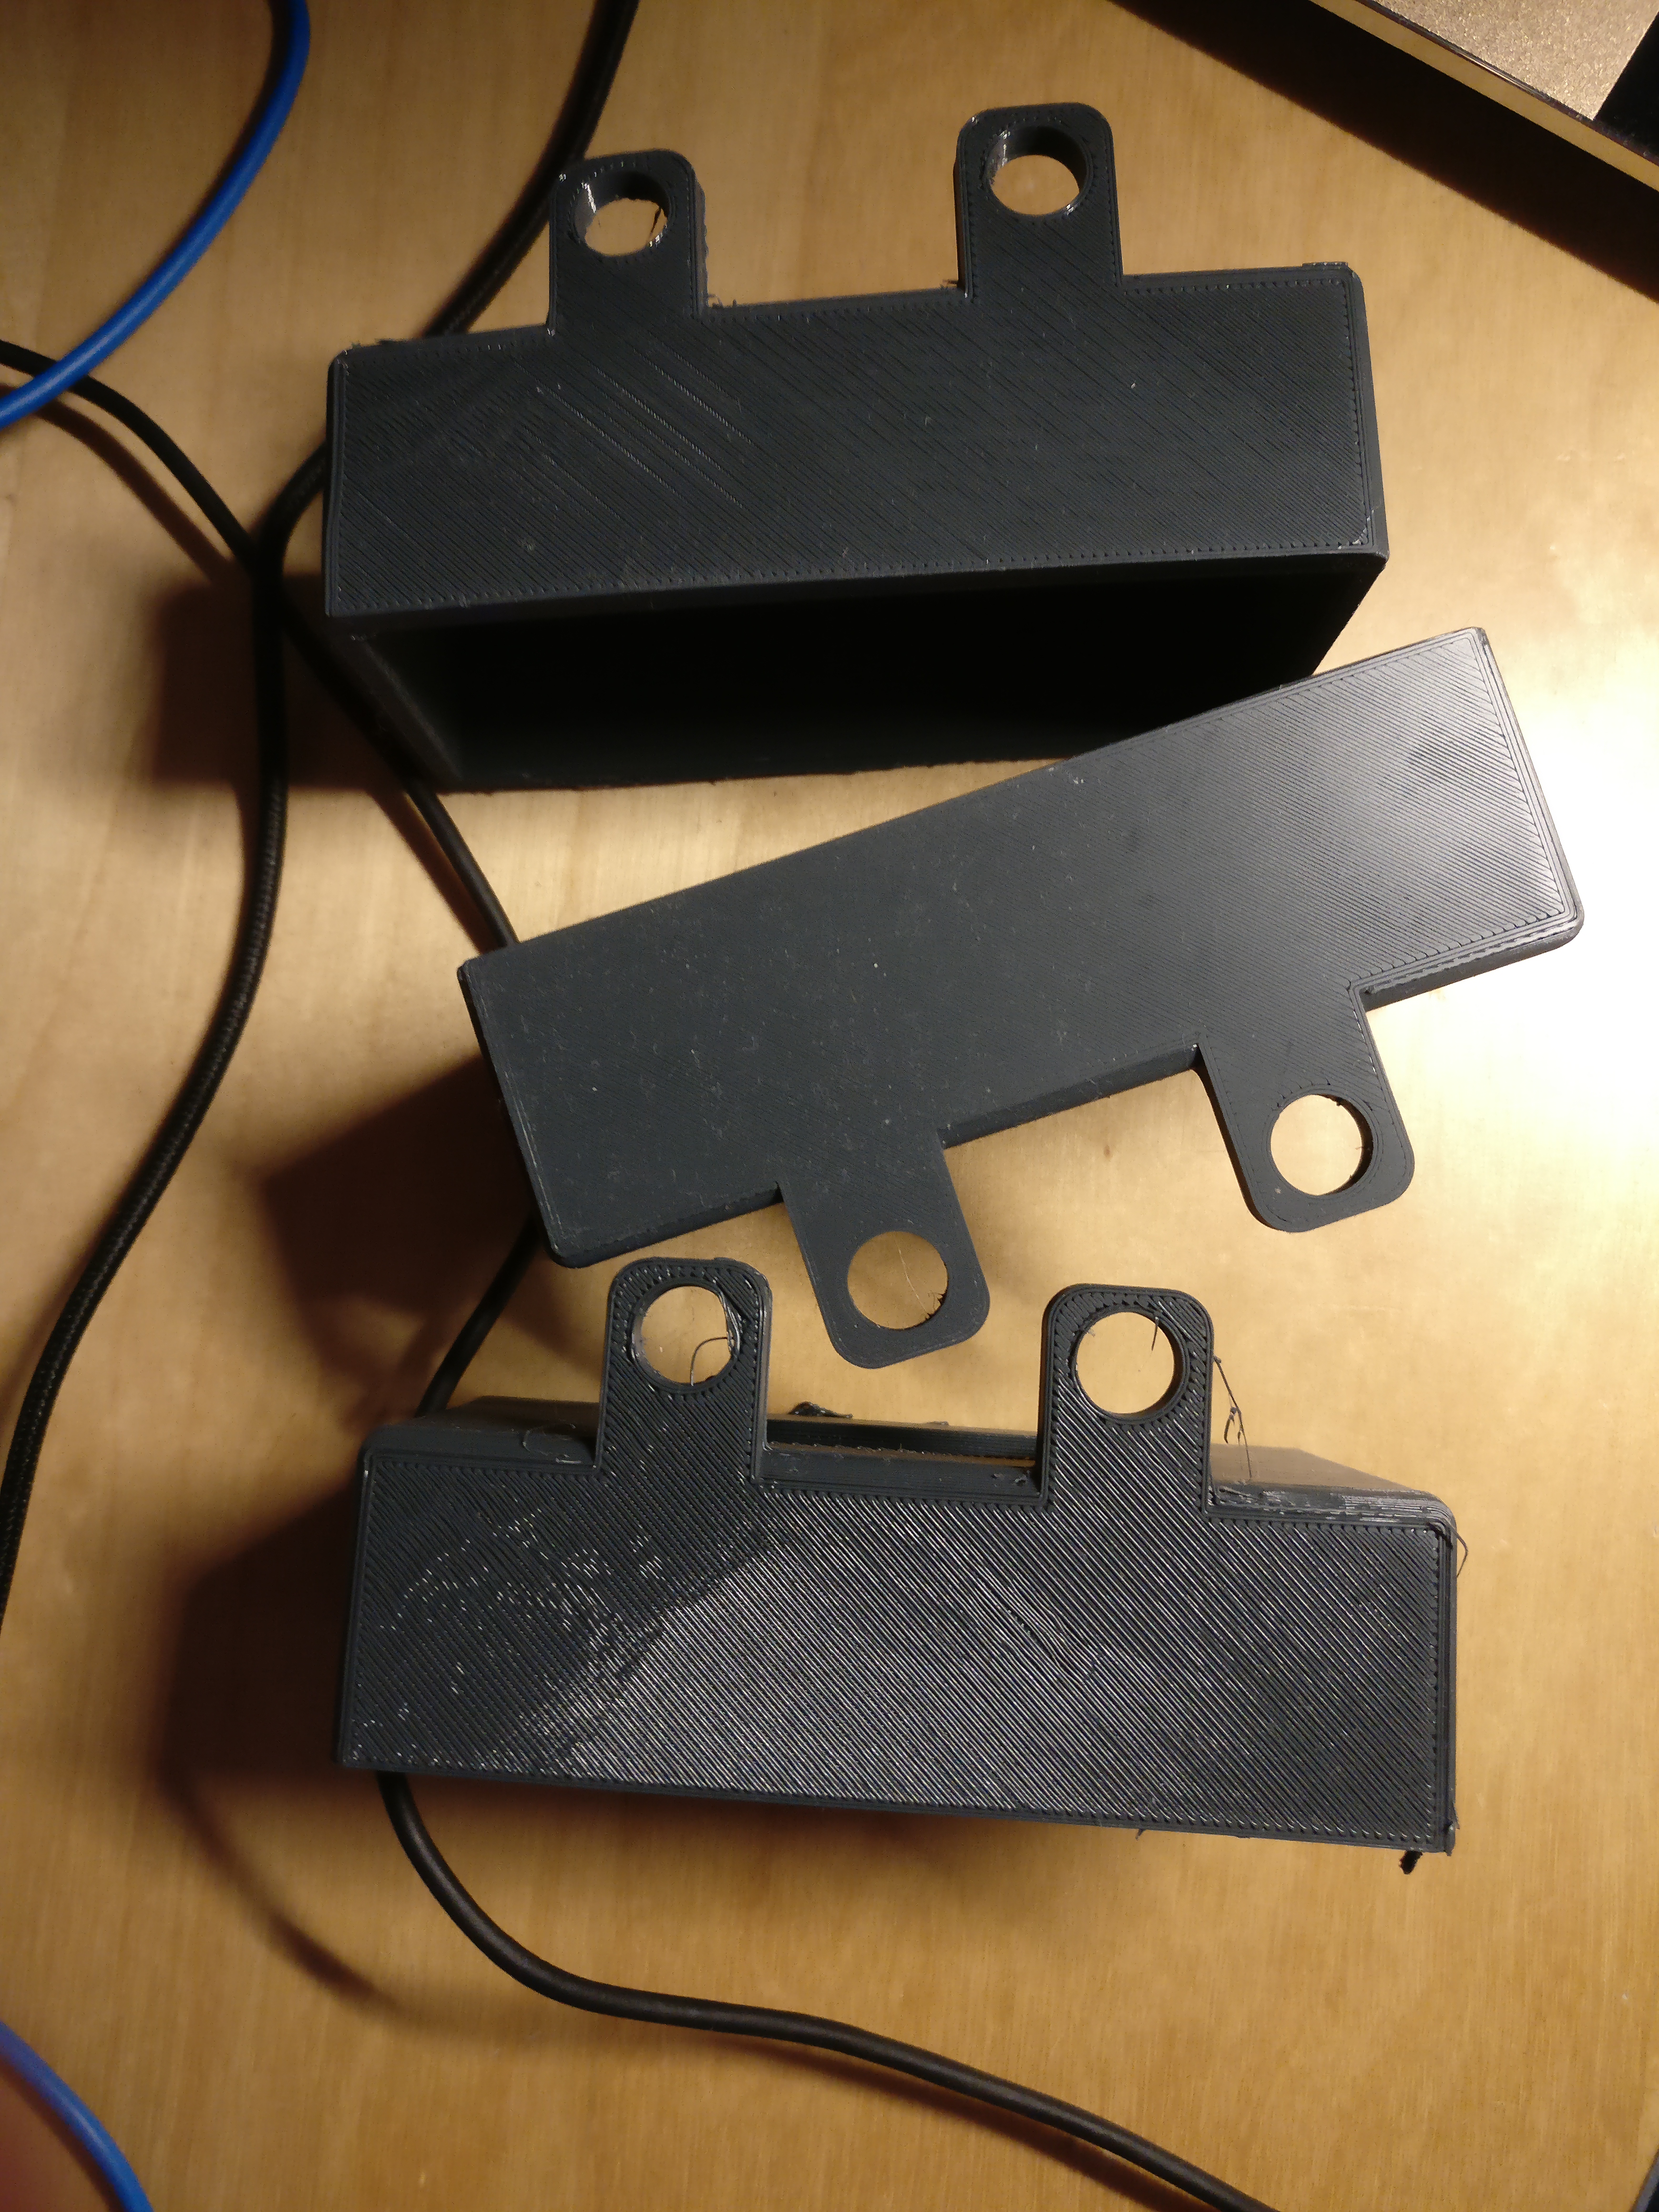
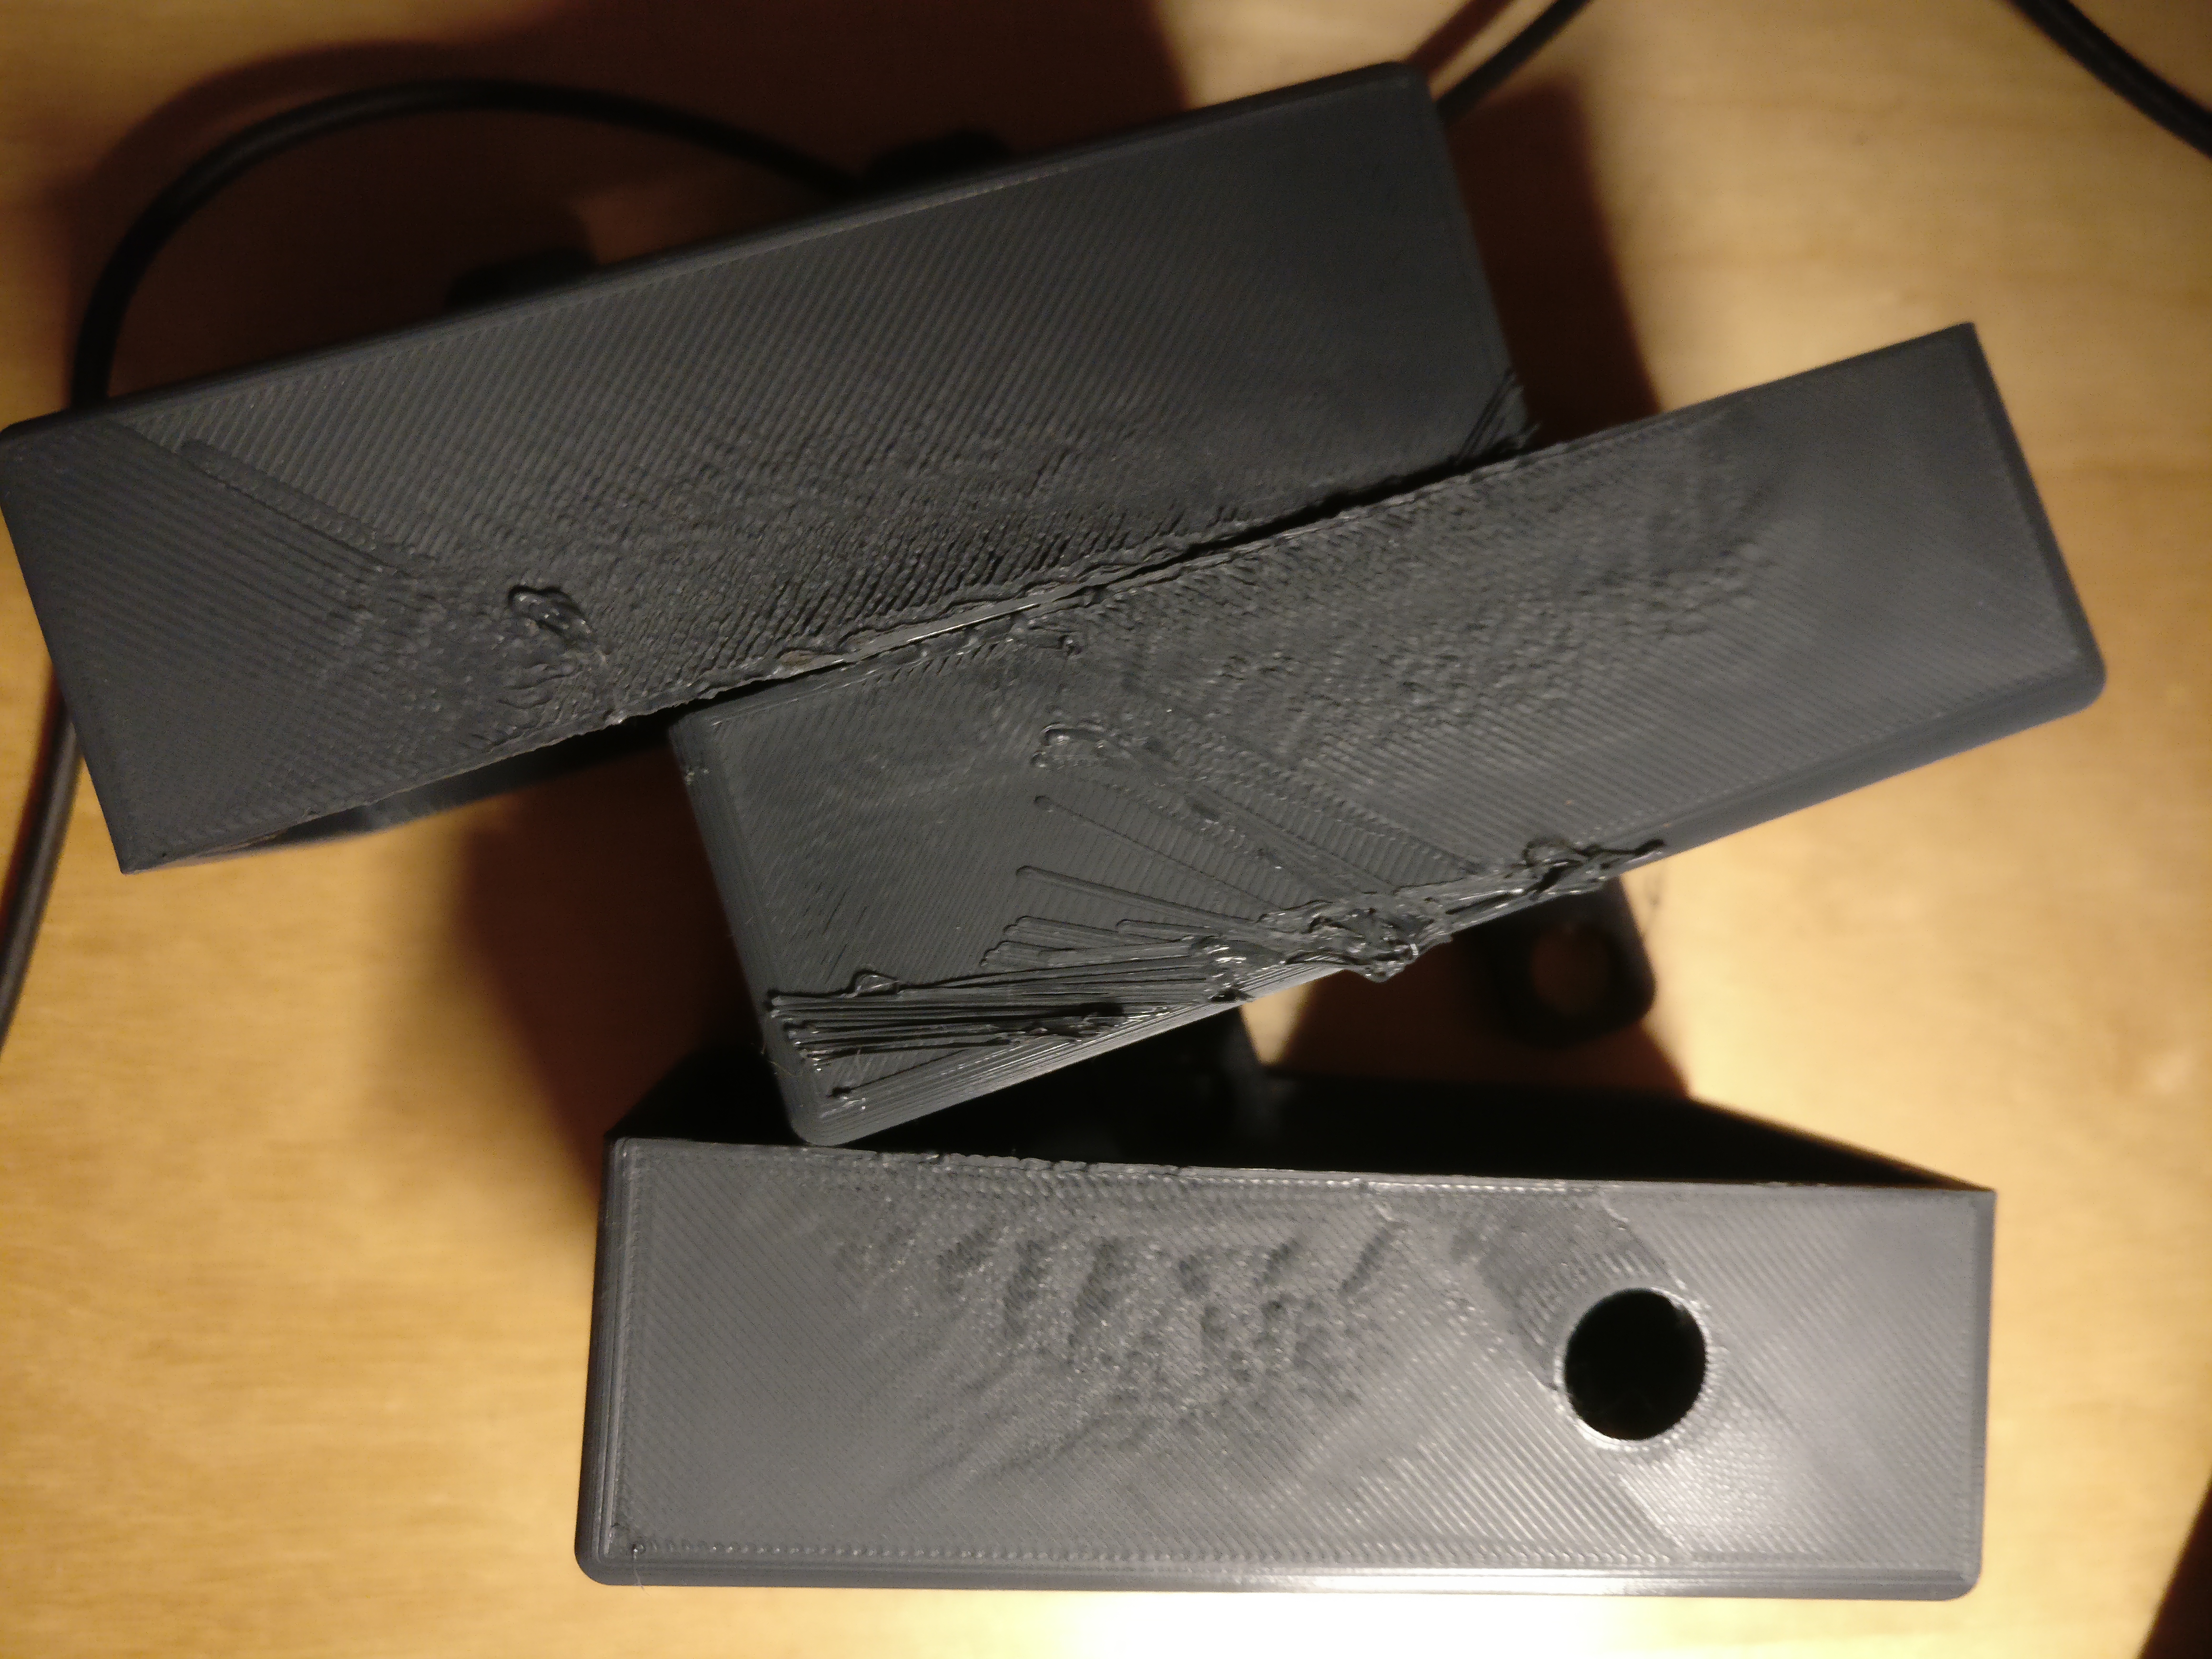
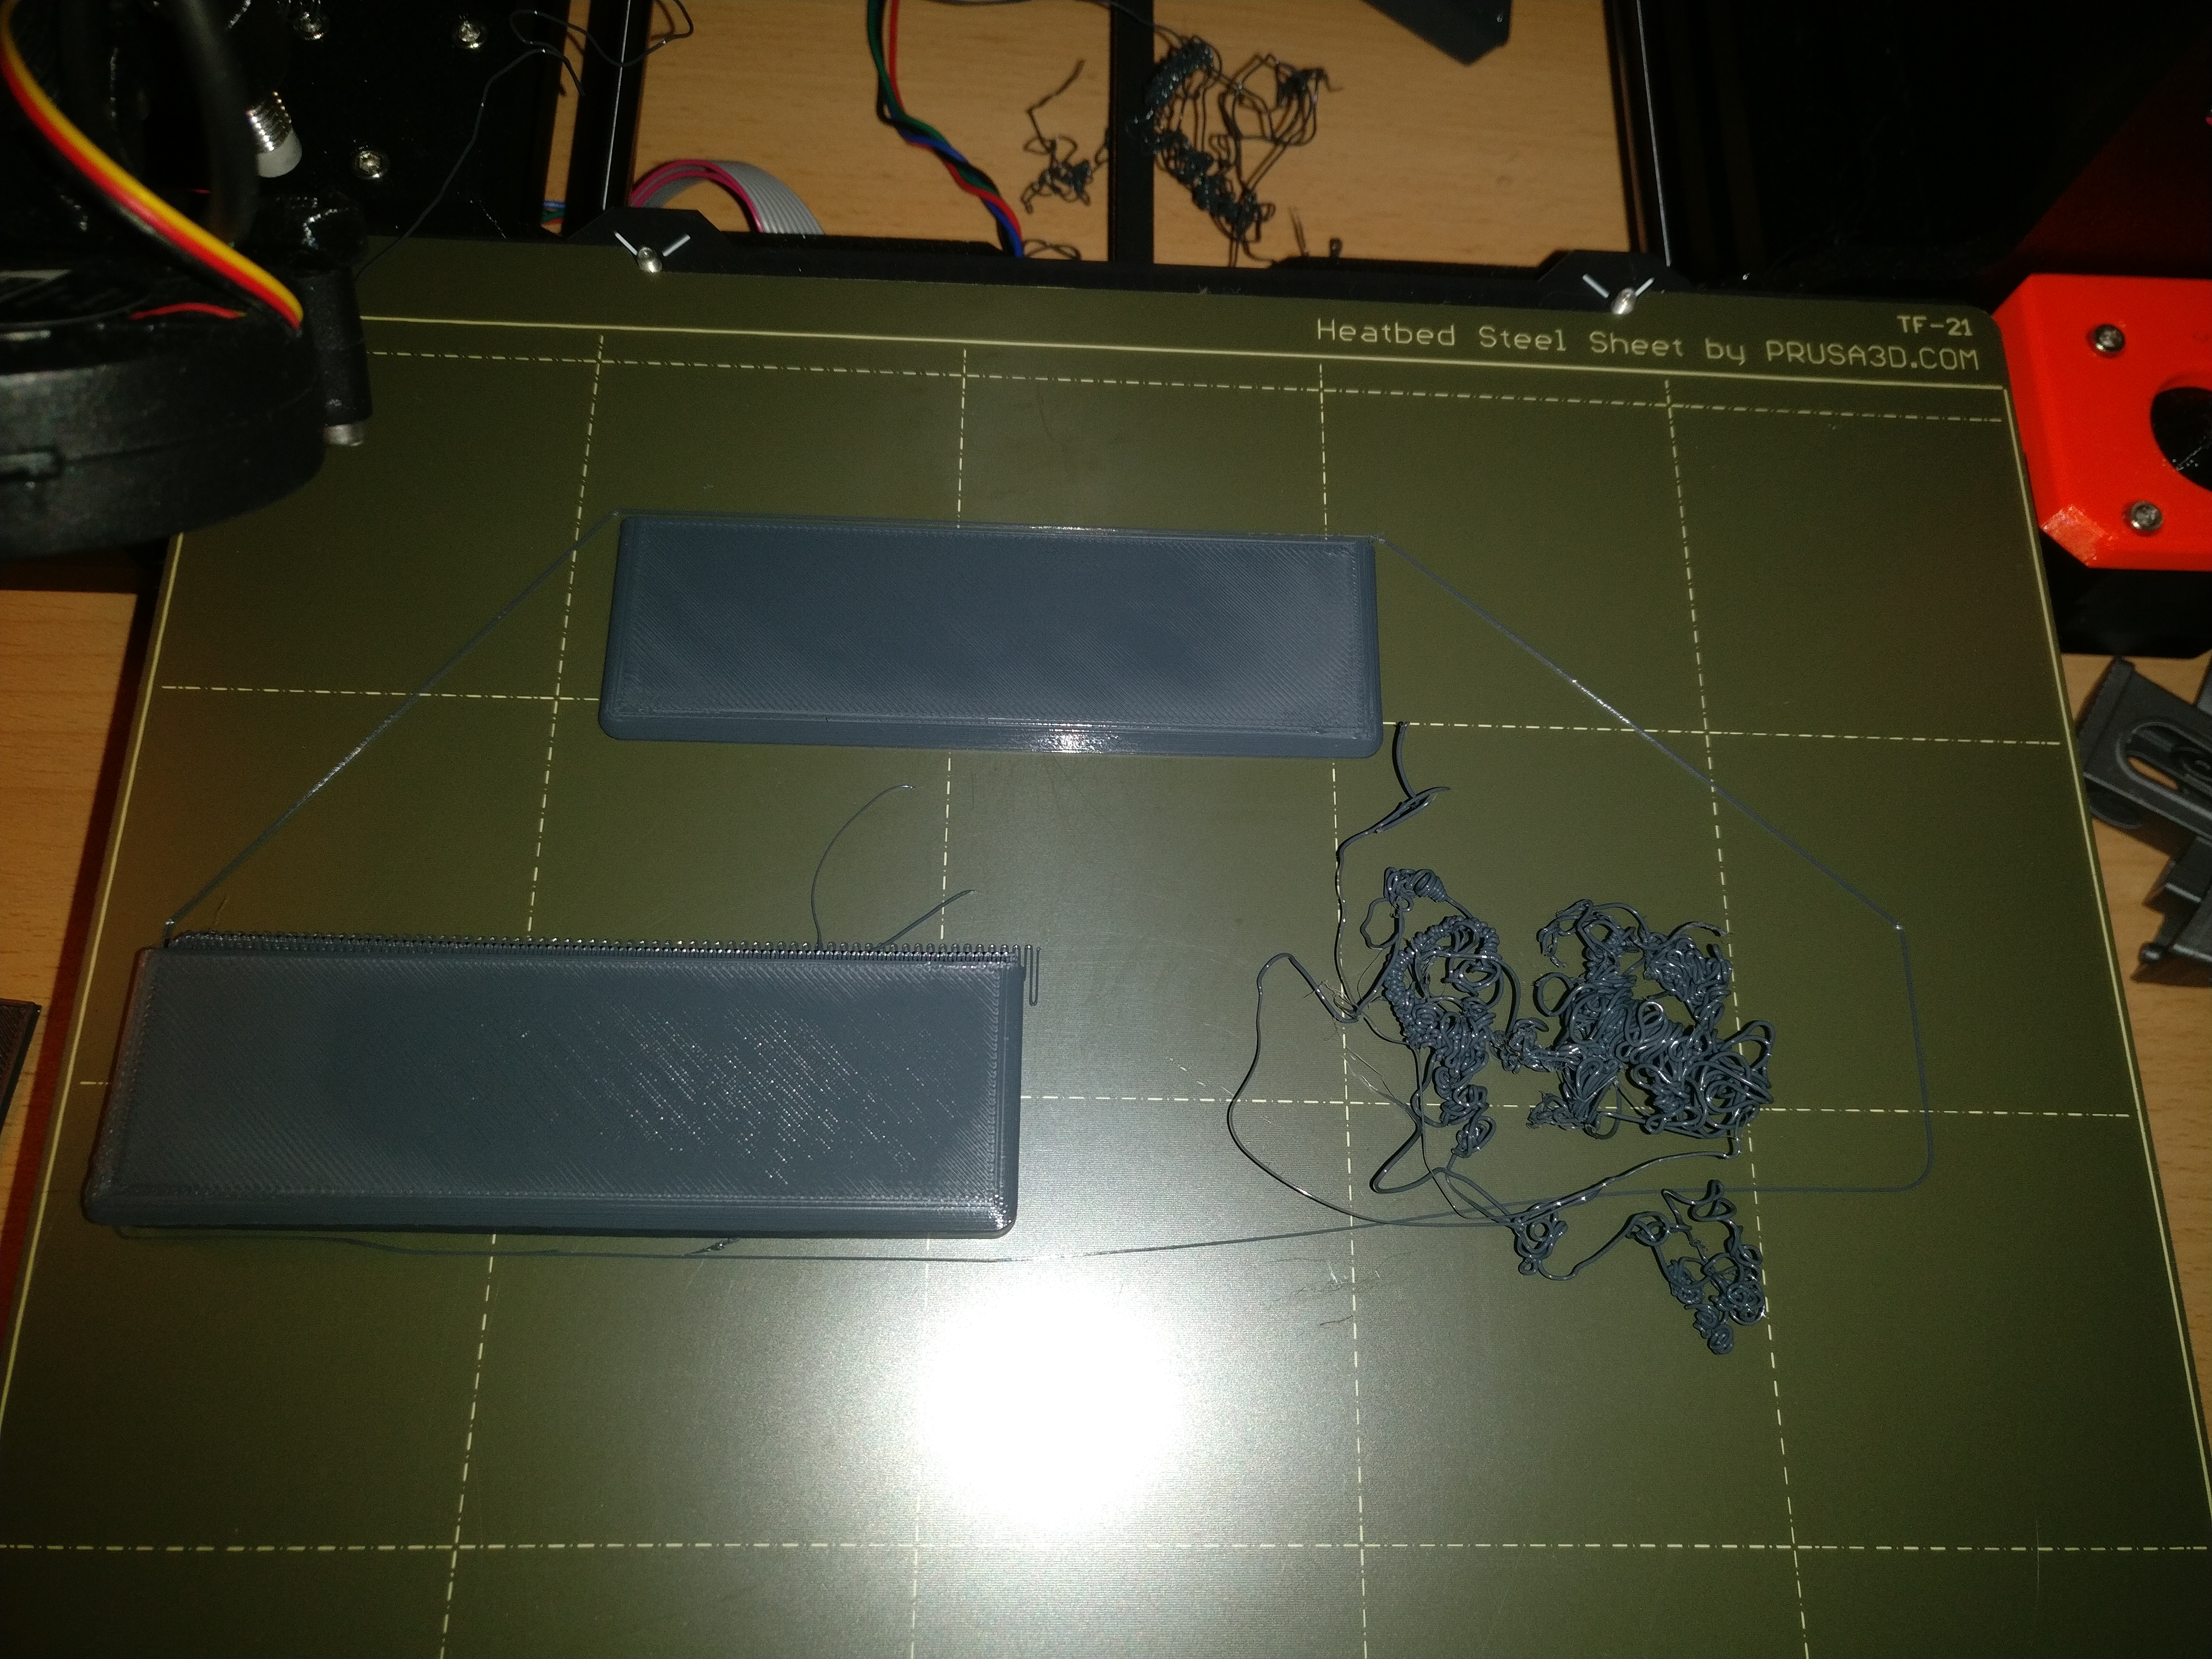
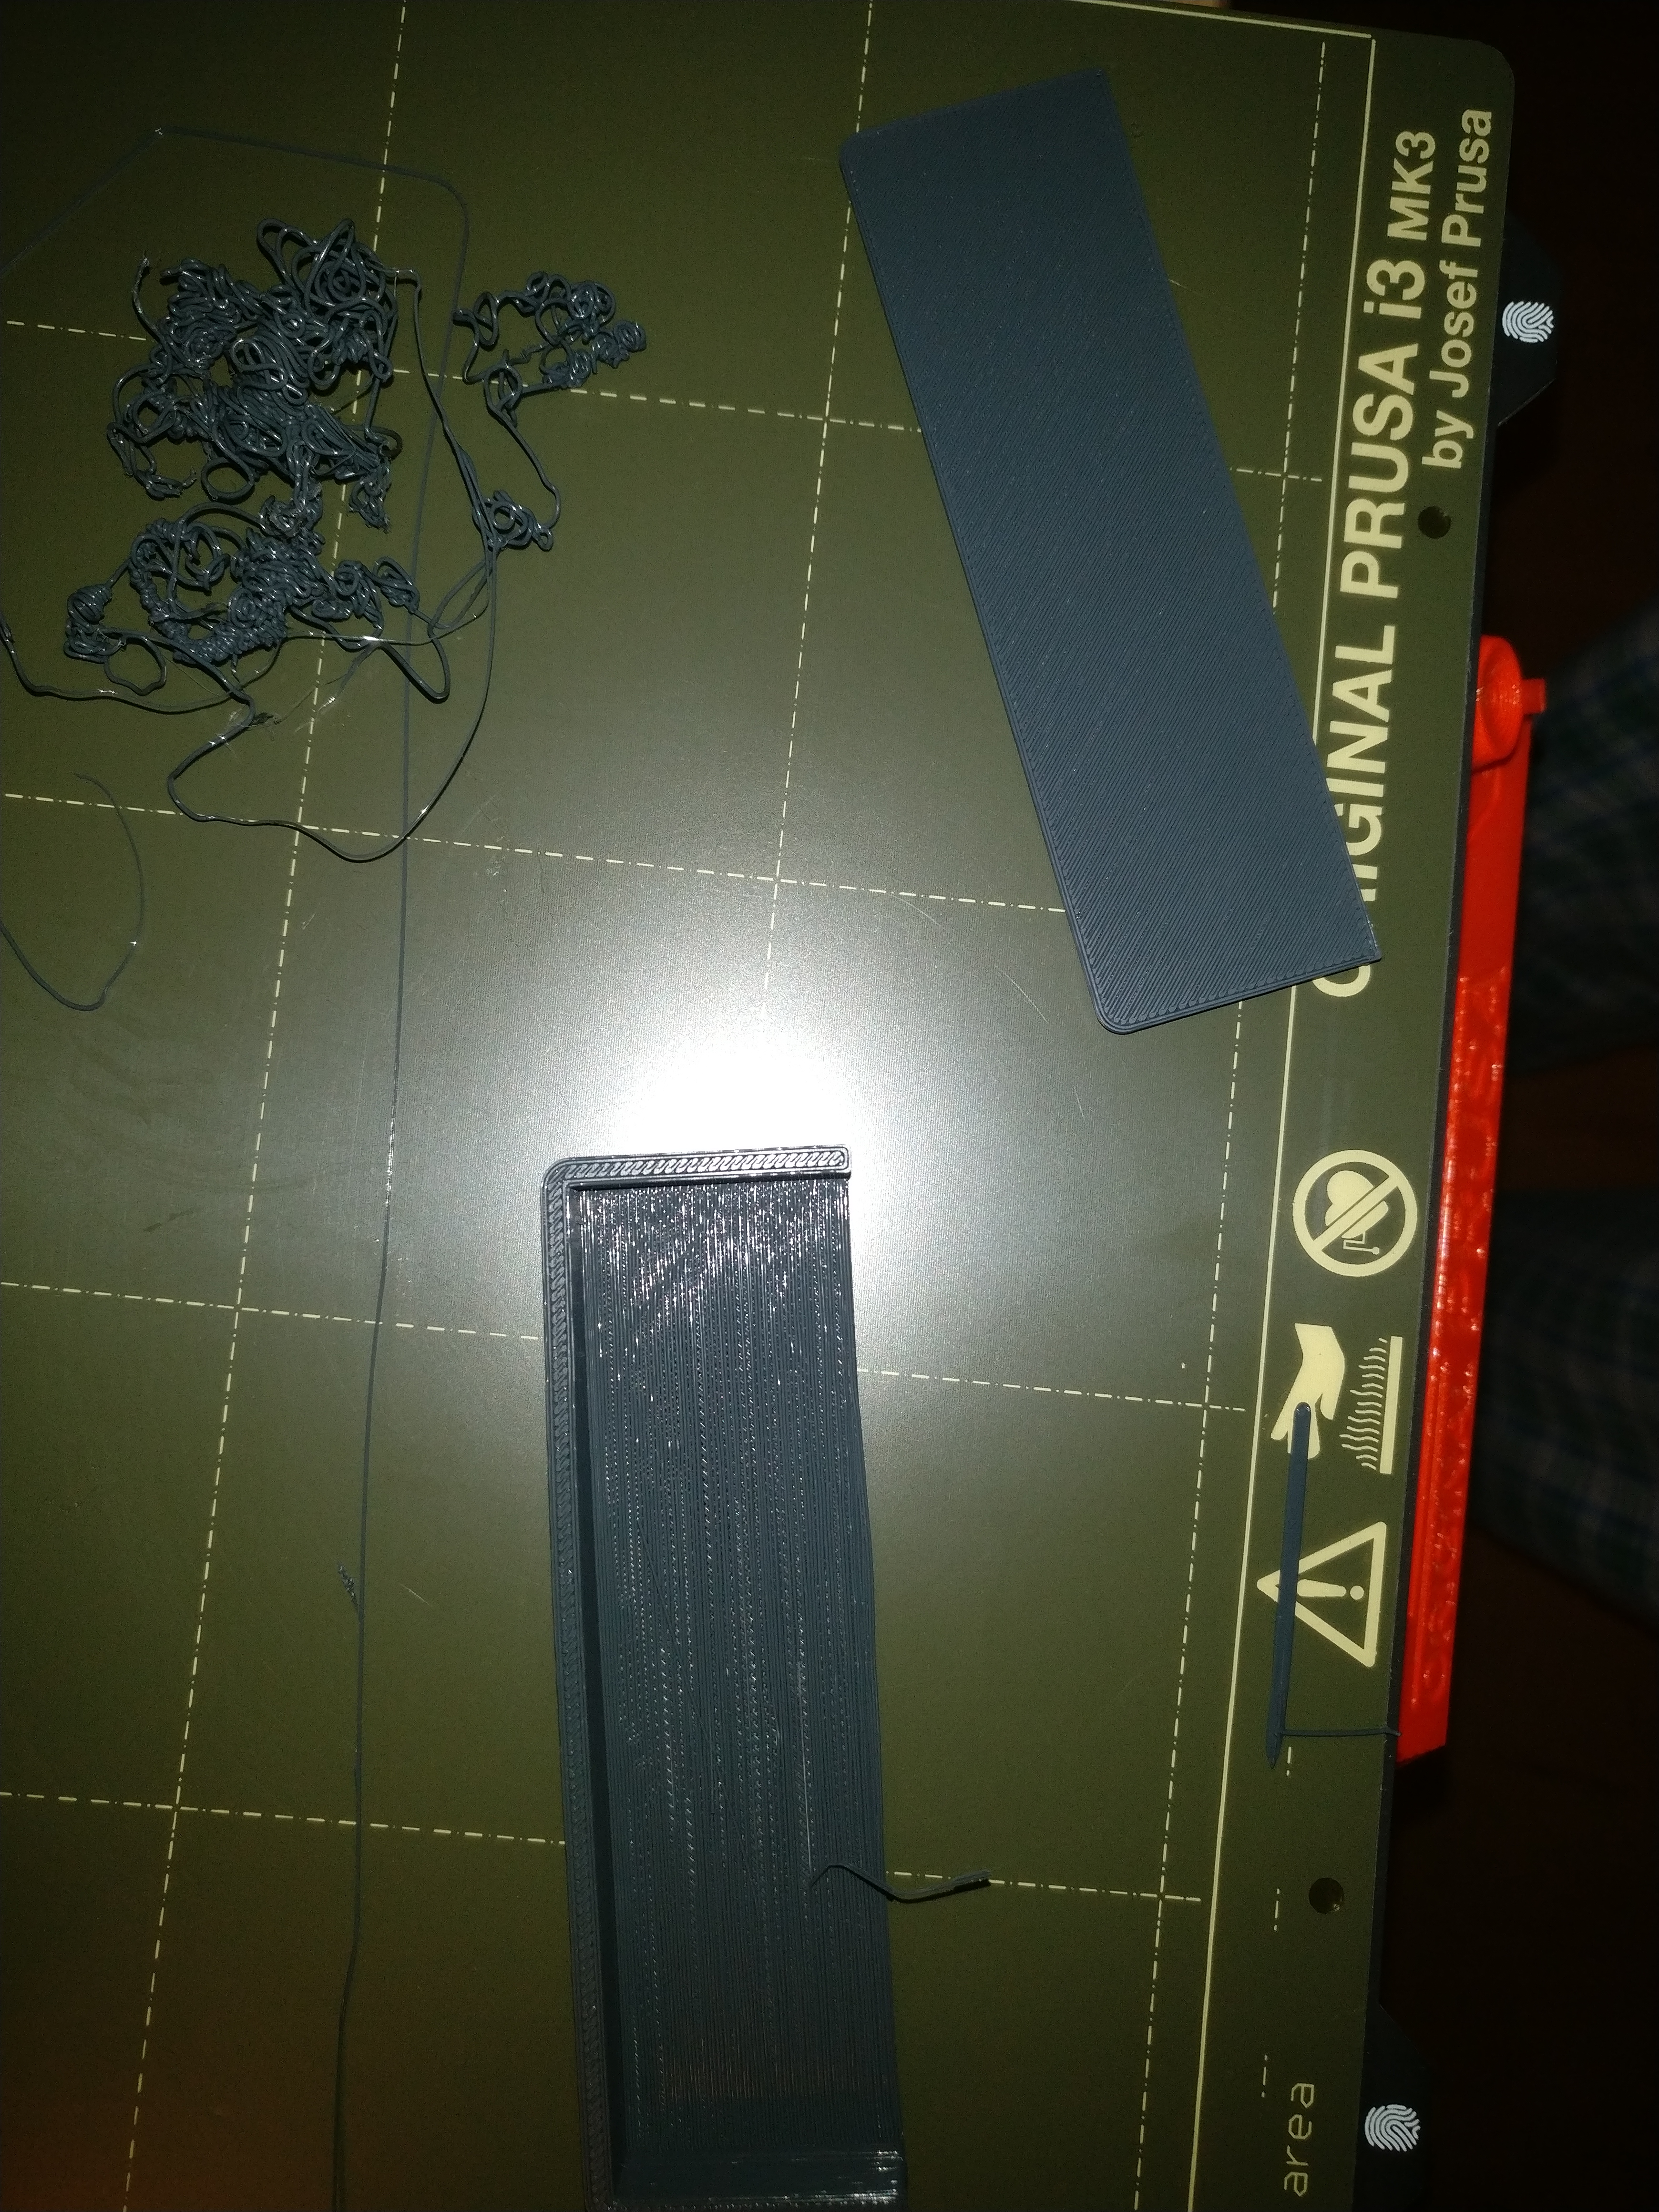
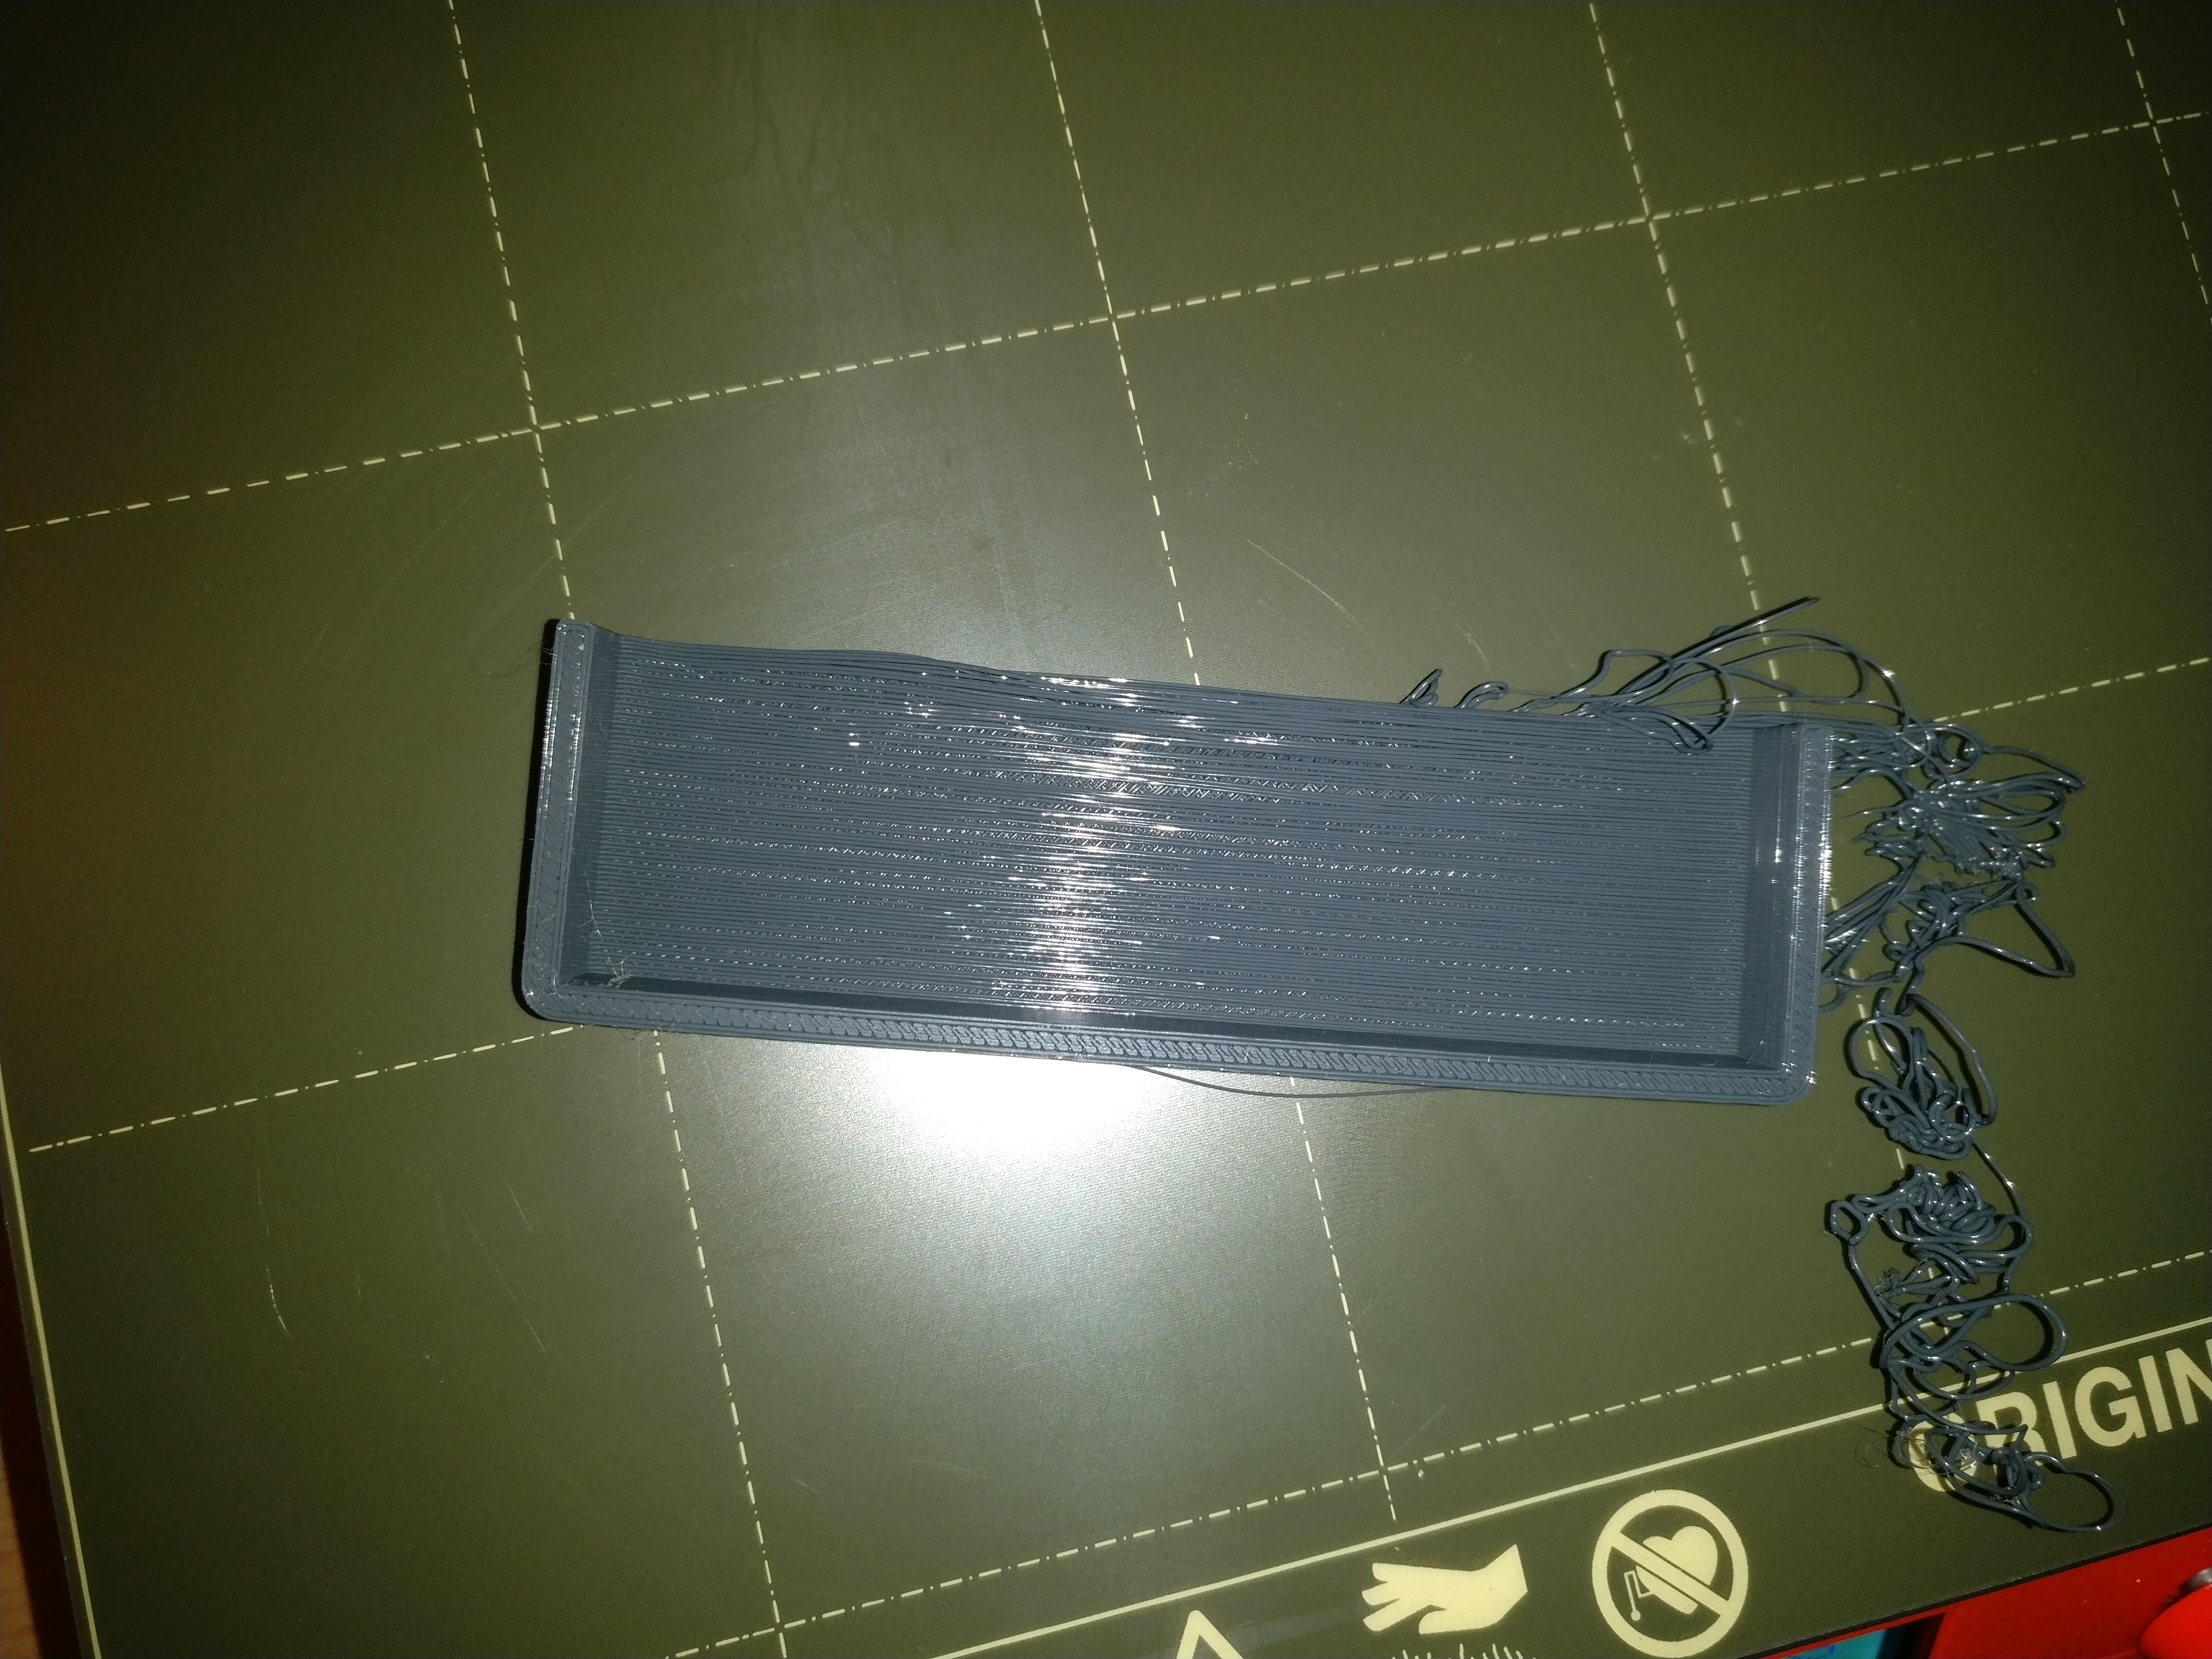
Last Layer above support really bad quality, general bad quality
hey I am trying to print some pieces with supports nothing ultra complicated but I am unable to get the top layers any good quality.
The last one (the worth) is printed with 0.9 extruder multipler.
To be honest I really don't know what to do anymore all sides layer are perfect.
Bottom ones are okay but every layer on the top is really bad
How could I fix it? Any advices?
RE: Last Layer above support really bad quality, general bad quality
It looks like the parts are breaking free of the bed. If so, then the problem is adhesion, not the supports. A clean bed is essential for any printing task. Soap and water, with adequate rinse time is a key part of bed maintenance.
RE: Last Layer above support really bad quality, general bad quality
@tim-m30
Thanks for your answer i will try that out but it didn't seem to move and why does it affect only the last layer? any ideas?
RE: Last Layer above support really bad quality, general bad quality
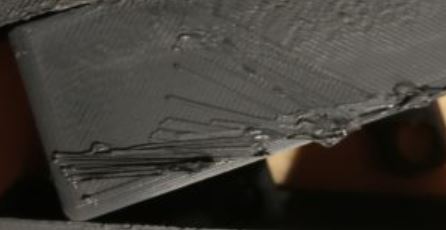
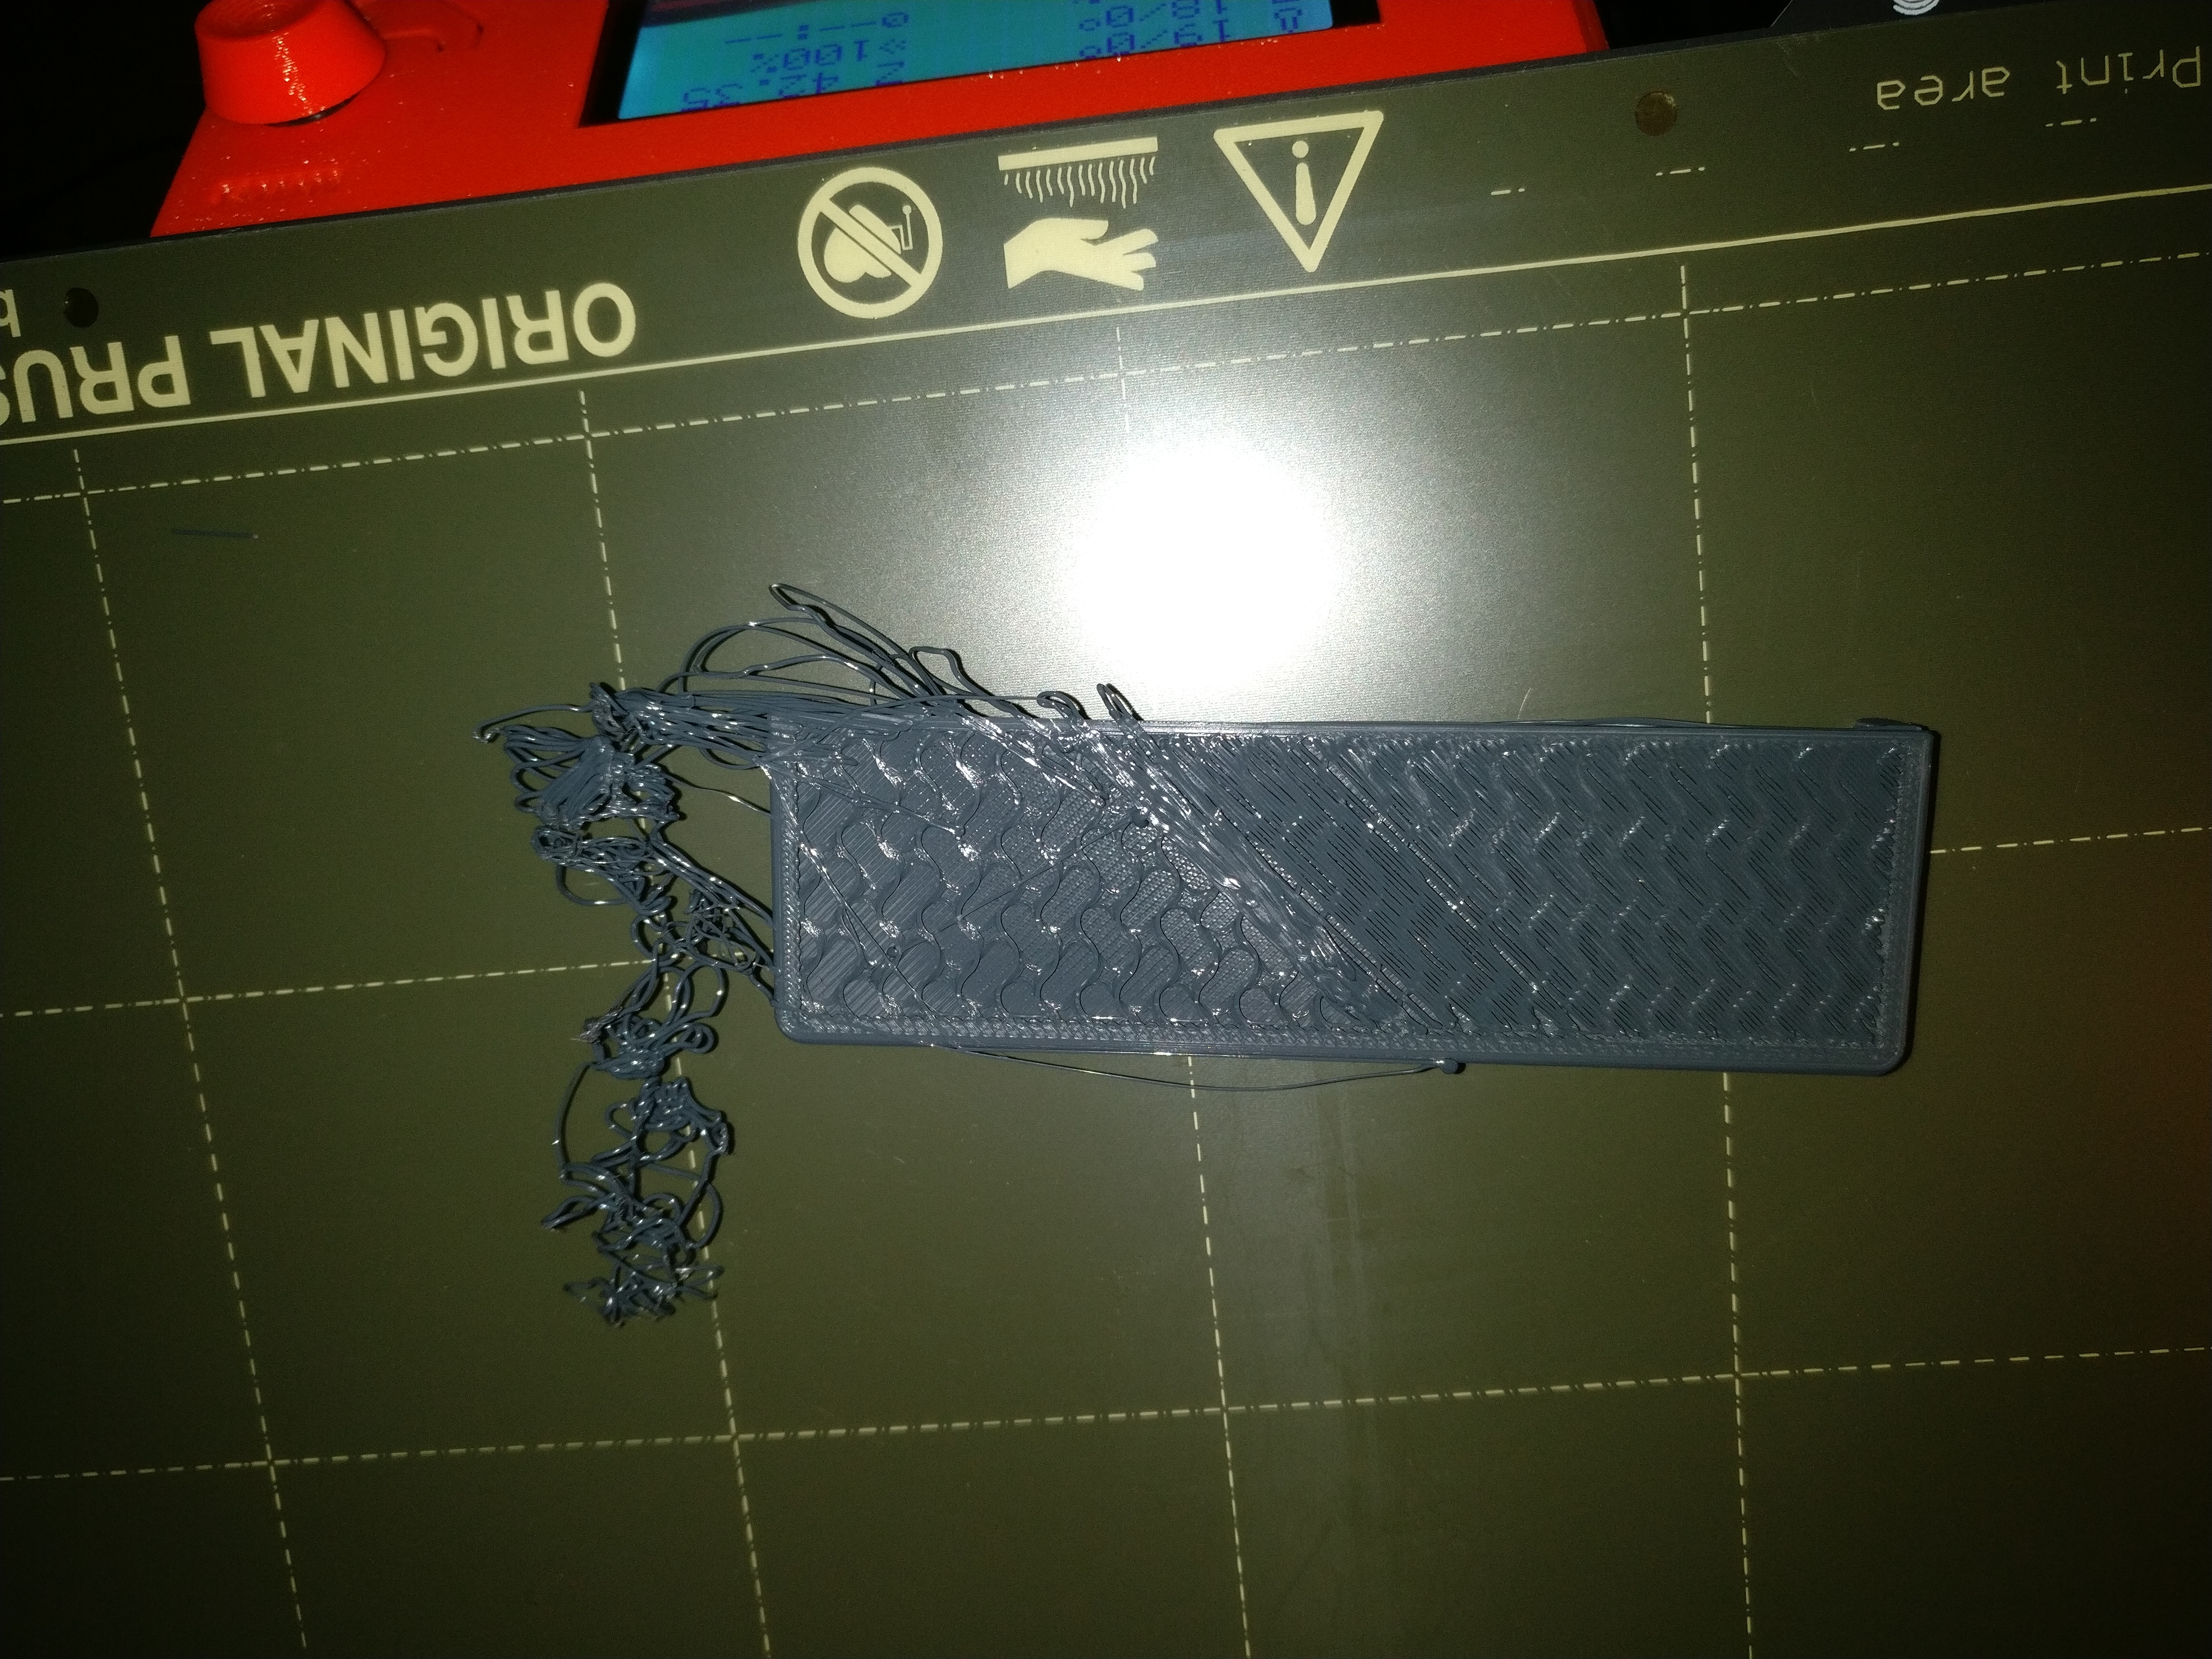
The only way to get a pattern that looks like this is for the part to break loose from the table or you had a catastrophic printer failure.
If printing via USB, might be a comms problem. But an error there would be just as likely to fail anywhere.
Over extrusion during the top layers infill can cause humps that snag the nozzle as it passes, the result is a loose part. Those ripples on the prior layer are over extrusion.
Along with cleaning the bed, adjusting for filament diameter and checking extruder ratio calibration would be high on my list of things to do.
RE: Last Layer above support really bad quality, general bad quality
Quick question: If you re-print that part with the weird pattern on top (the "starburst" extrusions), does it malfunction the same way? If so, try again with the filament sensor disabled. That looks a lot like the pattern I get on some prints with the current sensor firmware bug.
RE: Last Layer above support really bad quality, general bad quality
I really really have to wonder if Prusa is even capable of fixing the filament sensor bug; the problem is so obvious to anyone who has interrupt handling experience that I honestly must conclude no one at Prusa has ever written code for real time processing or code that requires meticulous and concurrence multiple interrupt stack handling.
RE: Last Layer above support really bad quality, general bad quality
@tim-m30
I am printing with octopi i just cleaned my bed i will try to print now in 3 different ways, also my fillament sensor is disabled since it never detected the cable correclty (already talking with the support)
How do i adjust to filament diameter?
Also i tried extruder ratio that was the result even too in the little test cubes it was nice.
I will try this print c:
RE: Last Layer above support really bad quality, general bad quality
Also i tried to make a "perfect" layer using this but i think i got it but to be honest i am pretty unsure and what does uM means?
RE: Last Layer above support really bad quality, general bad quality
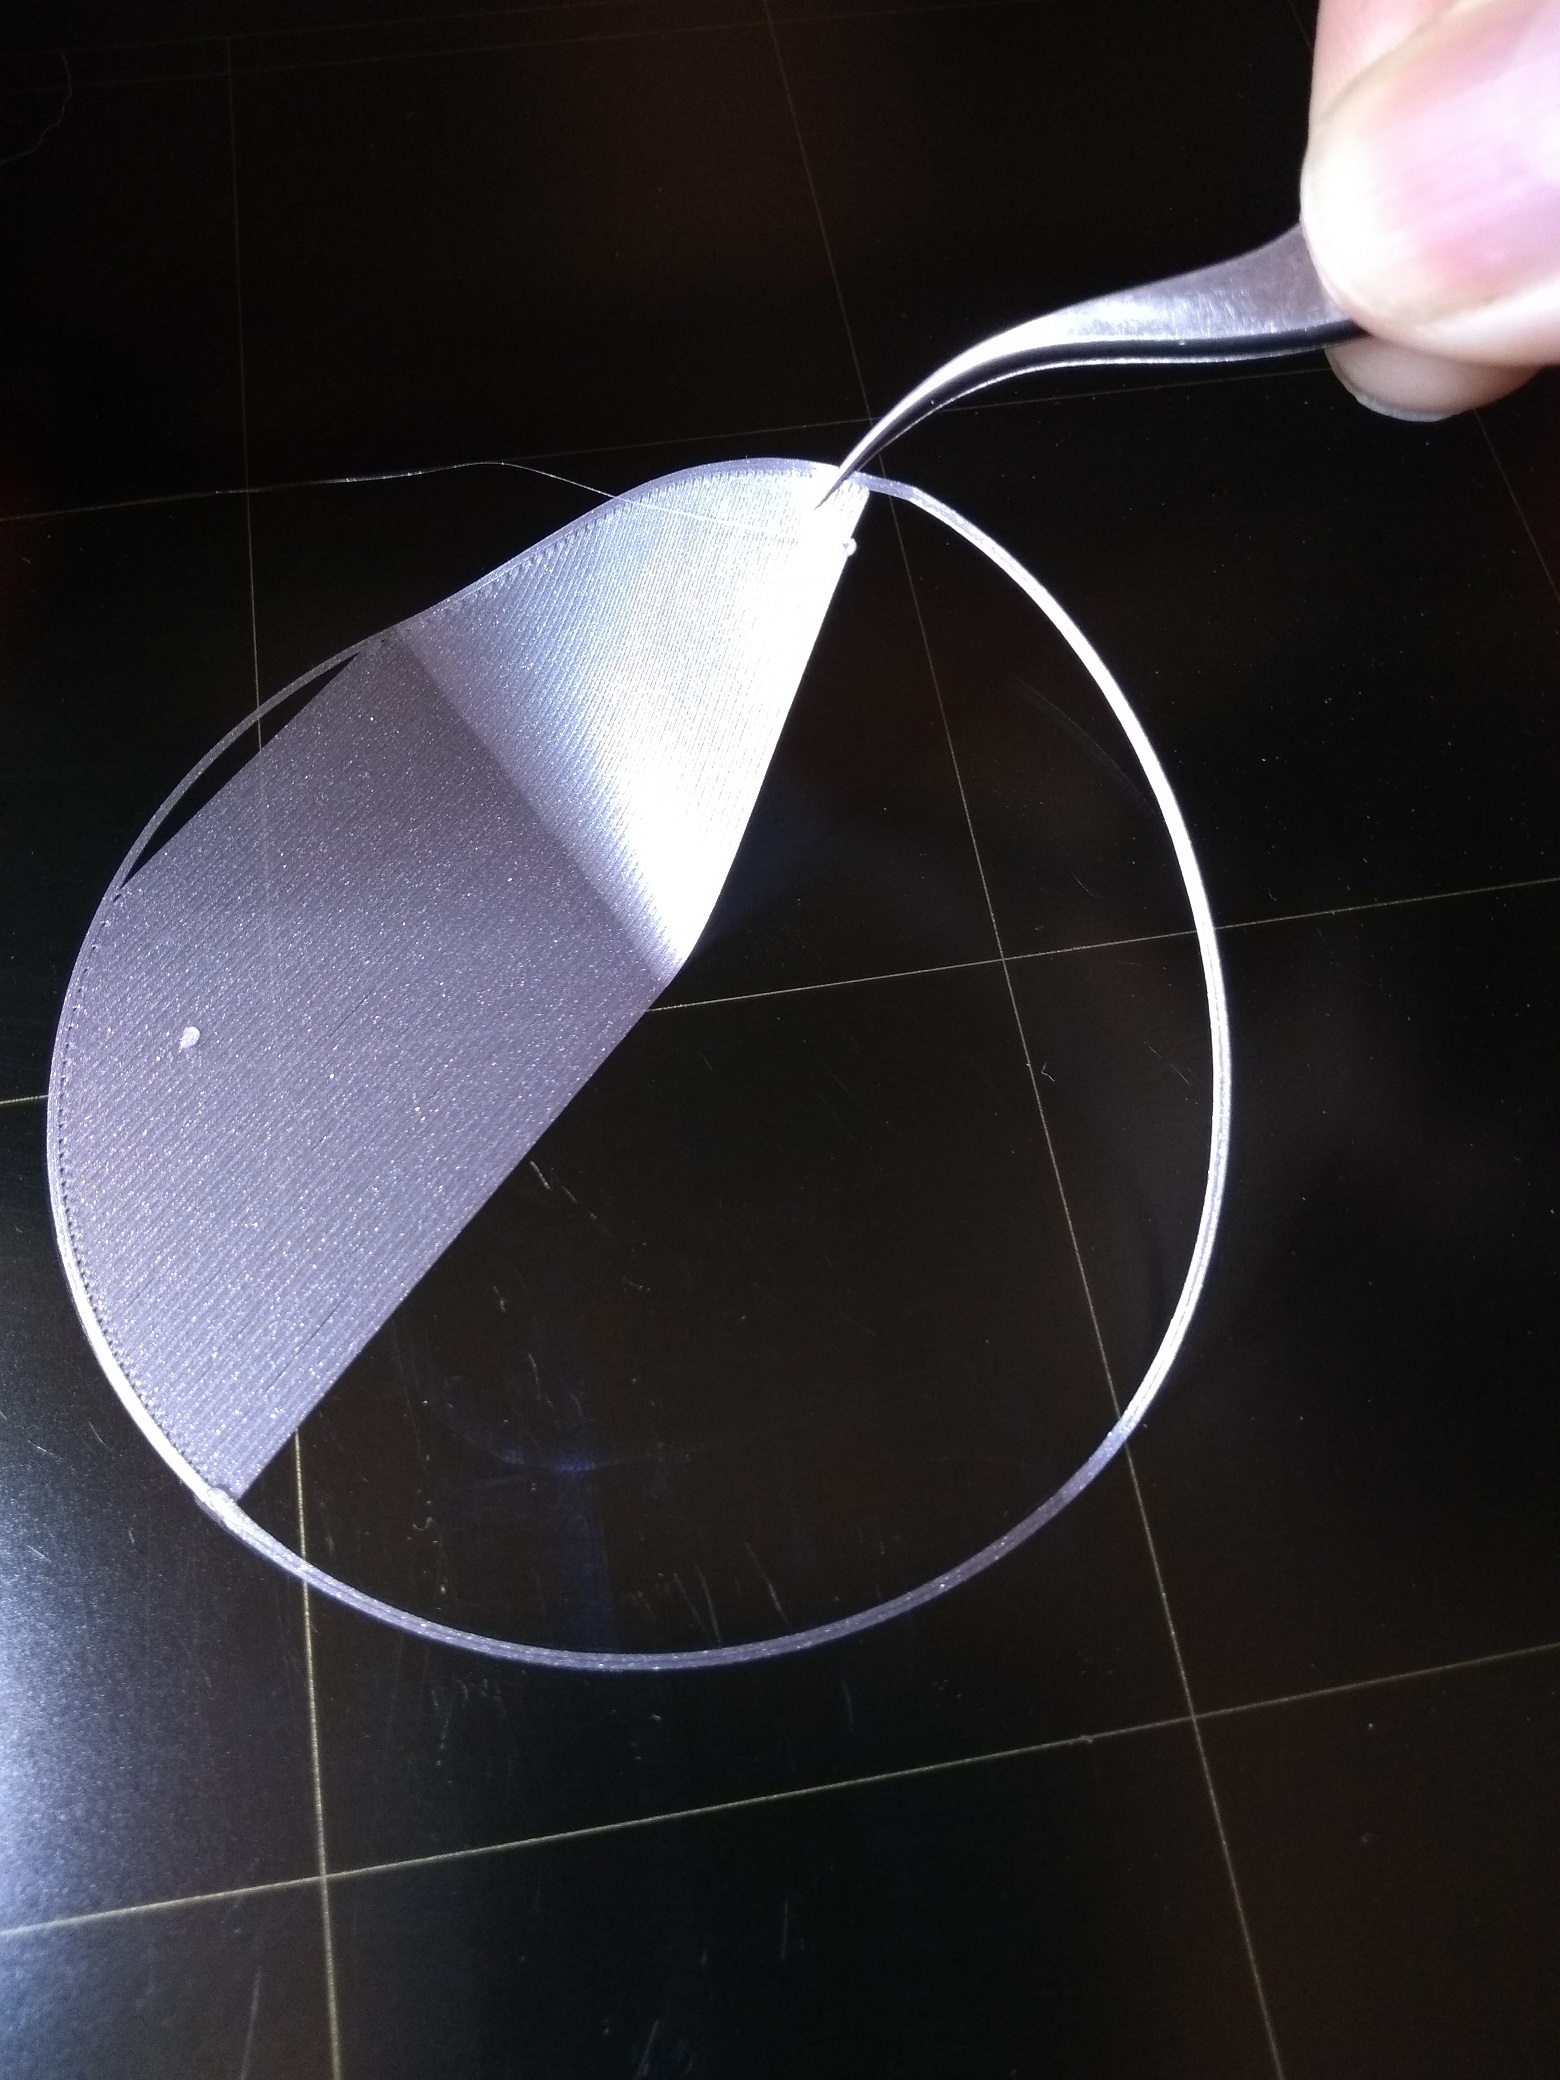
To adjust Live-Z to get layer 1 right, print one of these circles, and adjust Live-Z to achieve a solid, flat, piece of plastic as shown in the photo:
RE: Last Layer above support really bad quality, general bad quality
@tim-m30
So the test is really really really weird if I corp it like I showed only the part that came out good is the totally flat one.
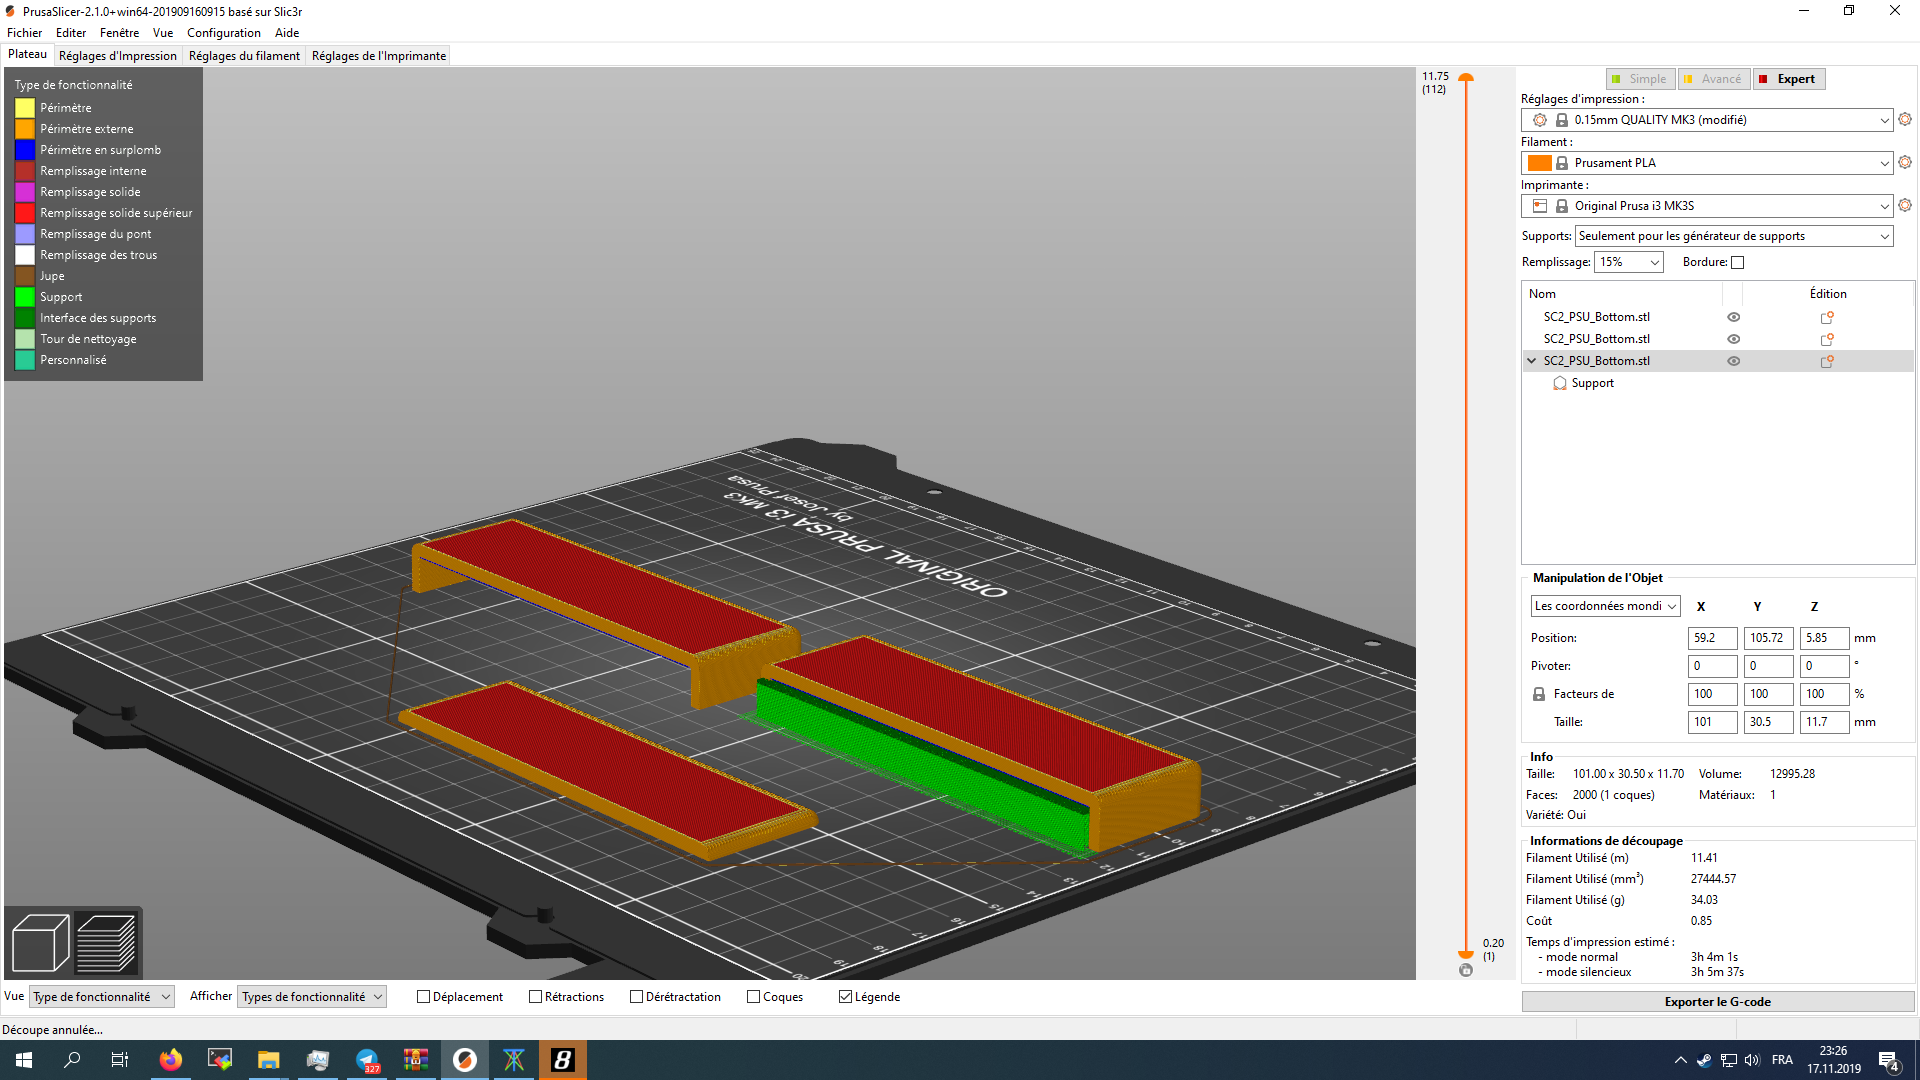
I took this model between https://pinshape.com/items/55011-3d-printed-simucube-2-sportpro-power-supply-mounts
RE: Last Layer above support really bad quality, general bad quality
The part is not adhering to the bed. This happens for two reasons, both apparent in your photos: Mainly oils on the surface that must be removed; and your Live-Z value is not low enough.
Soap and water is the best method to remove old fingerprints and stray dirt that accumulates.
Perform a layer 1 calibration using the cal target above, and try to get a sheet of plastic that is 100% solid, no threads or gaps as shown in the photo.
Until you get layer 1 right, and have a clean bed, you are wasting your time.
ps: here's my bed cleaning recipe book:
Hot Water wash: often, as needed, and after any of the following
(not recommended for daily use on Powder Coated sheets)
- Handle the bed only by the edges.
- Wash the bed in hot water, use a fresh paper towel as a wash cloth, with a few drops of plain dish soap (Dawn, unscented, no anti-bacterial, etc.).
- Rinse well in hot water - if you have very soft water, rinse a bit longer.
- Dry the bed with a fresh paper towel.
- Handle the bed only by the edges.
- Place bed on printer.
Alcohol wash: every few prints as needed
- Gloves recommended.
- Once in a while, an alcohol rinse is helpful to remove PLA residue. It does not remove finger oils well.
- Pour a 5 cm puddle of 91%+ alcohol in the middle of the bed, with clean hands use a fresh paper towel to scrub the bed. Wipe up all the alcohol.
Acetone wash: infrequent as needed
(Not recommended for USE on Powder Coated sheets, but some find it necessary)
- Pour a 2 cm puddle of acetone on the bed, scrub it around with a fresh paper towel. It will evaporate fast as you clean. This step removes PEI oxides that form over time and with heat, and improves PLA adhesion to a like new state.
Streak test: when contamination is suspected
- With a fresh piece of paper towel, and very clean fingers, dampen the towel with 91%+ alcohol, and wipe the bed side to side moving back to front, like you're painting it with alcohol. The alcohol should be thin enough on the towel it quickly evaporates from the bed. If you see any streaks, the bed is dirty and needs a wash.
RE: Last Layer above support really bad quality, general bad quality
Also i tried to make a "perfect" layer using this but i think i got it but to be honest i am pretty unsure and what does uM means?
Since no one else answered this question for you, "uM" (or more accurately "um" or better yet "µm") stands for micro meter. One µm is 0.001mm (millimeter). The liveZ setting is in mm, so a liveZ value of "-0.570" is -0.570mm. Some people think it is easier (or "better") to convert to µm to not have an absolute value less than one, so -0.570mm becomes -570µm. I don't agree because the display doesn't show "-570", it shows "-0.570". (IMHO, conversion for the sake of conversion is confusing to people who don't understand the conversion, especially when the reference is given without the conversion...)
See my (limited) designs on:
Printables - https://www.printables.com/@Sembazuru
Thingiverse - https://www.thingiverse.com/Sembazuru/designs
RE: Last Layer above support really bad quality, general bad quality
@tim-m30
I washed it again but i think in the case that it falled off it's simply because this was the part without support with very very thin layer touching the bed.
I will redo my 1mm calbiration test that you sended c:
But is it possible that the part is simply a "shitty" STL?
RE: Last Layer above support really bad quality, general bad quality
@sembazuru
Thanks for your answer, really interesting and yes I would have gotten surely confused about it c: !
RE: Last Layer above support really bad quality, general bad quality
The area of the part failing (the long bridge) is large enough it should not be breaking loose. Of course, the bridge angle may be contributing to the failure, along with whether or not you've enabled bridging perimeter detection.
That type of orientation is not a simple and easy to print situation. It requires some planning. Probably best to ignore it and stick with printing the part large area down.
As for cleanliness: this is probably the most difficult part of printing, and a hard learned lesson for users to understand. One finger print on the bed will ruin a print; especially if you wipe the bed with alcohol.