RE: How to avoid these marks on the top of my prints?
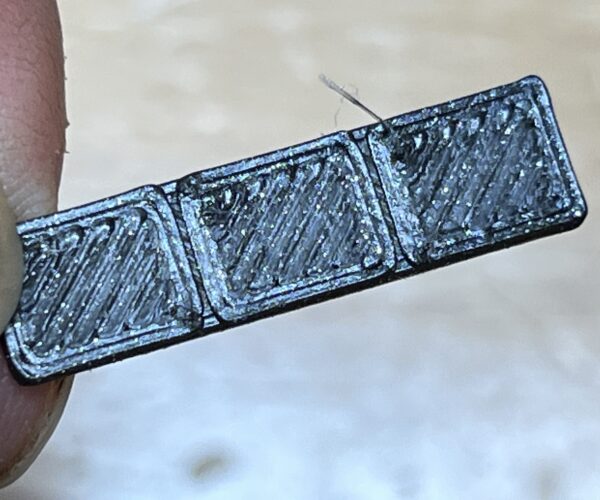
Here's what just came off one of my printers. It's a printer with a Dragon hotend and a 0.6mm 3dMaker tungsten carbide nozzle that is used pretty much every day for production prints of a model I sell on eBay (much larger than this tiny print), and I like to believe it's decently calibrated 🙂. The filament is Prusament Galaxy Black.
This is using the 3mf you uploaded:
I don't think it looks a lot different than what you've got.
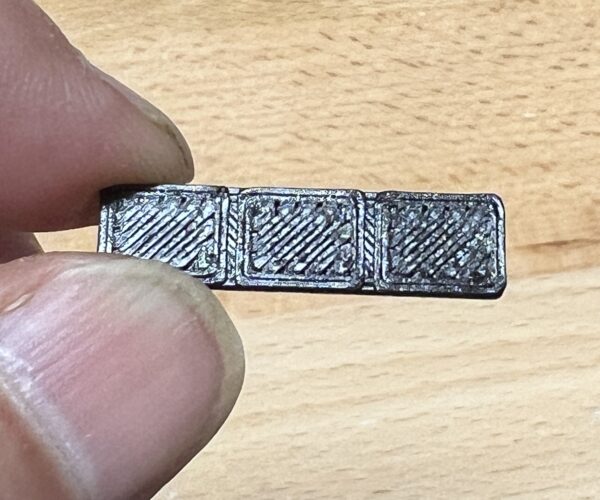
I also tried printing multiple copies (4x) on one sheet and brought the extrusion multiplier down to 0.9:
Maybe it's a tad better but in all honesty, not by much.
I should also point out that I found the iPhone camera to do weird things to the image in the way it processes the data. I think visually it looks a lot better than in these images, which appear to over-emphasize peaks and valleys. If I had printed these guys without the context of this discussion, I would have been pretty happy with them.
Frankly, you can go down a rabbit hole of trying to modify retraction, LA, use ironing, etc., but I doubt you're going to see a quantum leap of improvement in quality for an object of this size and a 0.6mm nozzle. And certainly for the intended use I'd be more than happy with the looks.
Formerly known on this forum as @fuchsr -- https://foxrun3d.com/
RE: How to avoid these marks on the top of my prints?
Were you having this issue when using 2.4? have you tried 2.4?
RE:
@R&D: I noticed the same issue in both Prusa Slicer 2.4 and 2.5.
@fuchsr: Thank you so much for doing the test prints, I really appreciate it! Your prints do look a bit better than mine.
I tried setting the extrusion modifier to 0.9 and 0.95. In both cases, the top surface overall looks a bit cleaner/smoother, however in both cases I can spot a few gaps/holes on the edges between lines. Here's a photo of the 0.9 version:
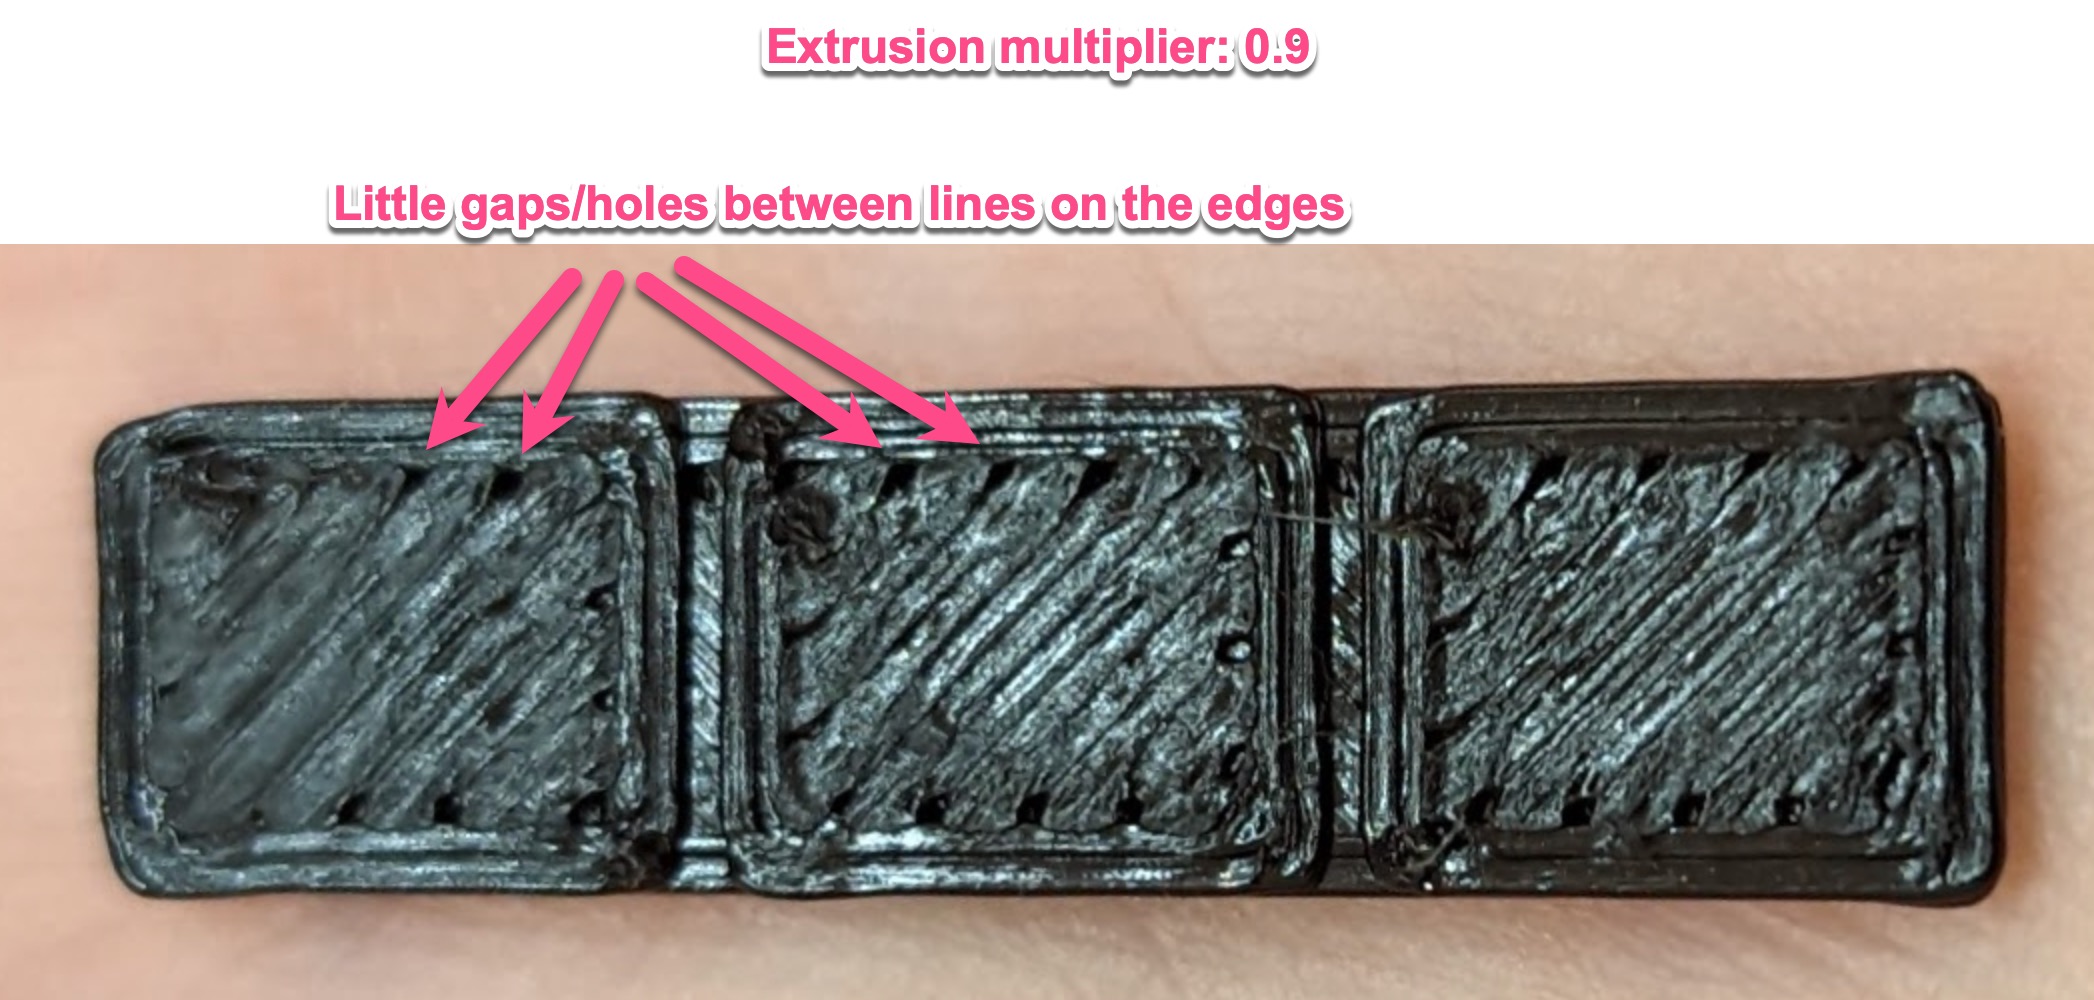
But again, I've also run a number of extrusion calibration tests (e.g the cube wall thickness test) and all seem to indicate that I'm already pretty spot on by default, or maybe even a bit *under* extruded by 1-2%. So this is quite a head scratcher...
The over-extruded look seem to only affect the top layer of my prints. The rest really prints beautifully.
Now, I've noticed that turning off the "Wipe while retracting" setting in "Printer Settings > Retraction" seems to improve the little smudges/marks that really bothered me in the first place:
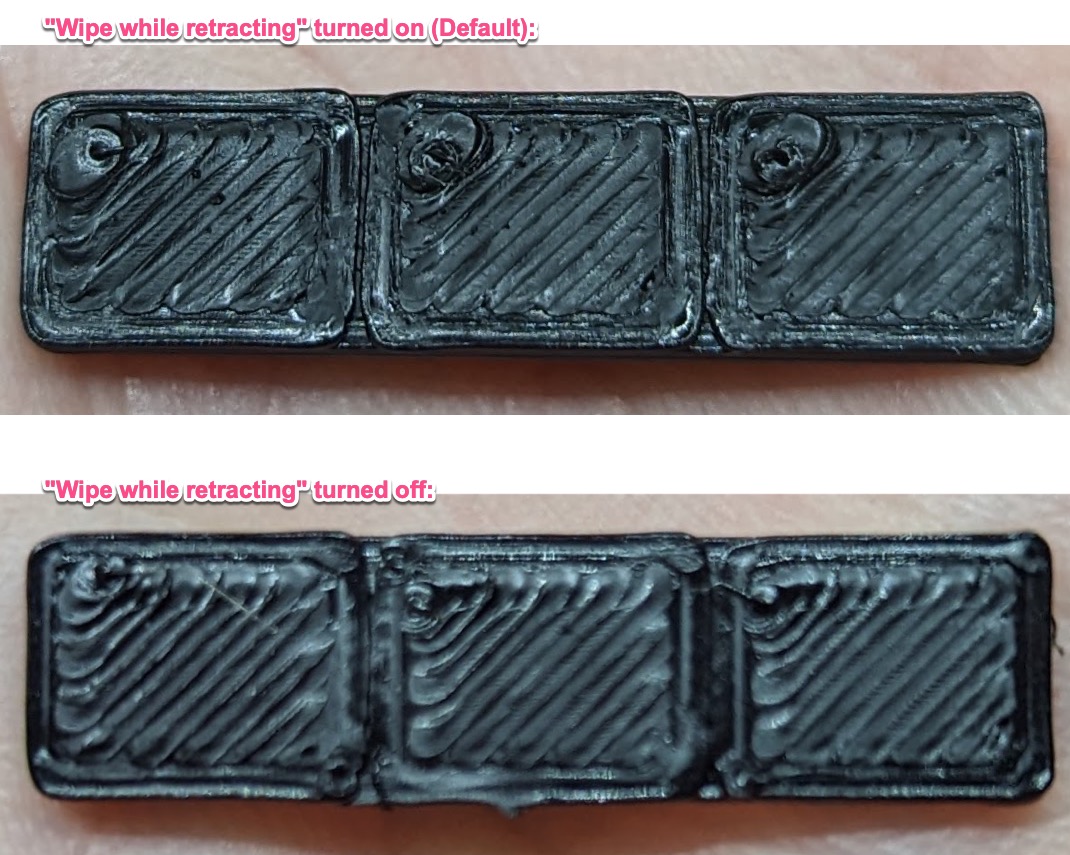
By turning that setting off, I assume I'd probably risk to lose in quality in other aspects, no? Perhaps with increased chance of stringing?
The reason why those marks bother me so much is because I'm working on a separate model that has a lot of details on the top surface. It's essentially a round dial with some embossed numbers. The prints come out with lots of those little marks. I'll try to create a small sample of that model and take some photos so you can see.
I will also try the test prints using a 0.4mm nozzle, see if that makes any difference.
RE: How to avoid these marks on the top of my prints?
I haven't look at the model itself, but now that I see the output with a thumb finger next to it; the model seems pretty small. For such a small model, with a 0.6mm nozzle you may be getting as good as you will get - which I think is what @fuchsr alluded to.
If you want cleaner details you may have to move to 0.4mm or 0.25mm nozzle.
RE: How to avoid these marks on the top of my prints?
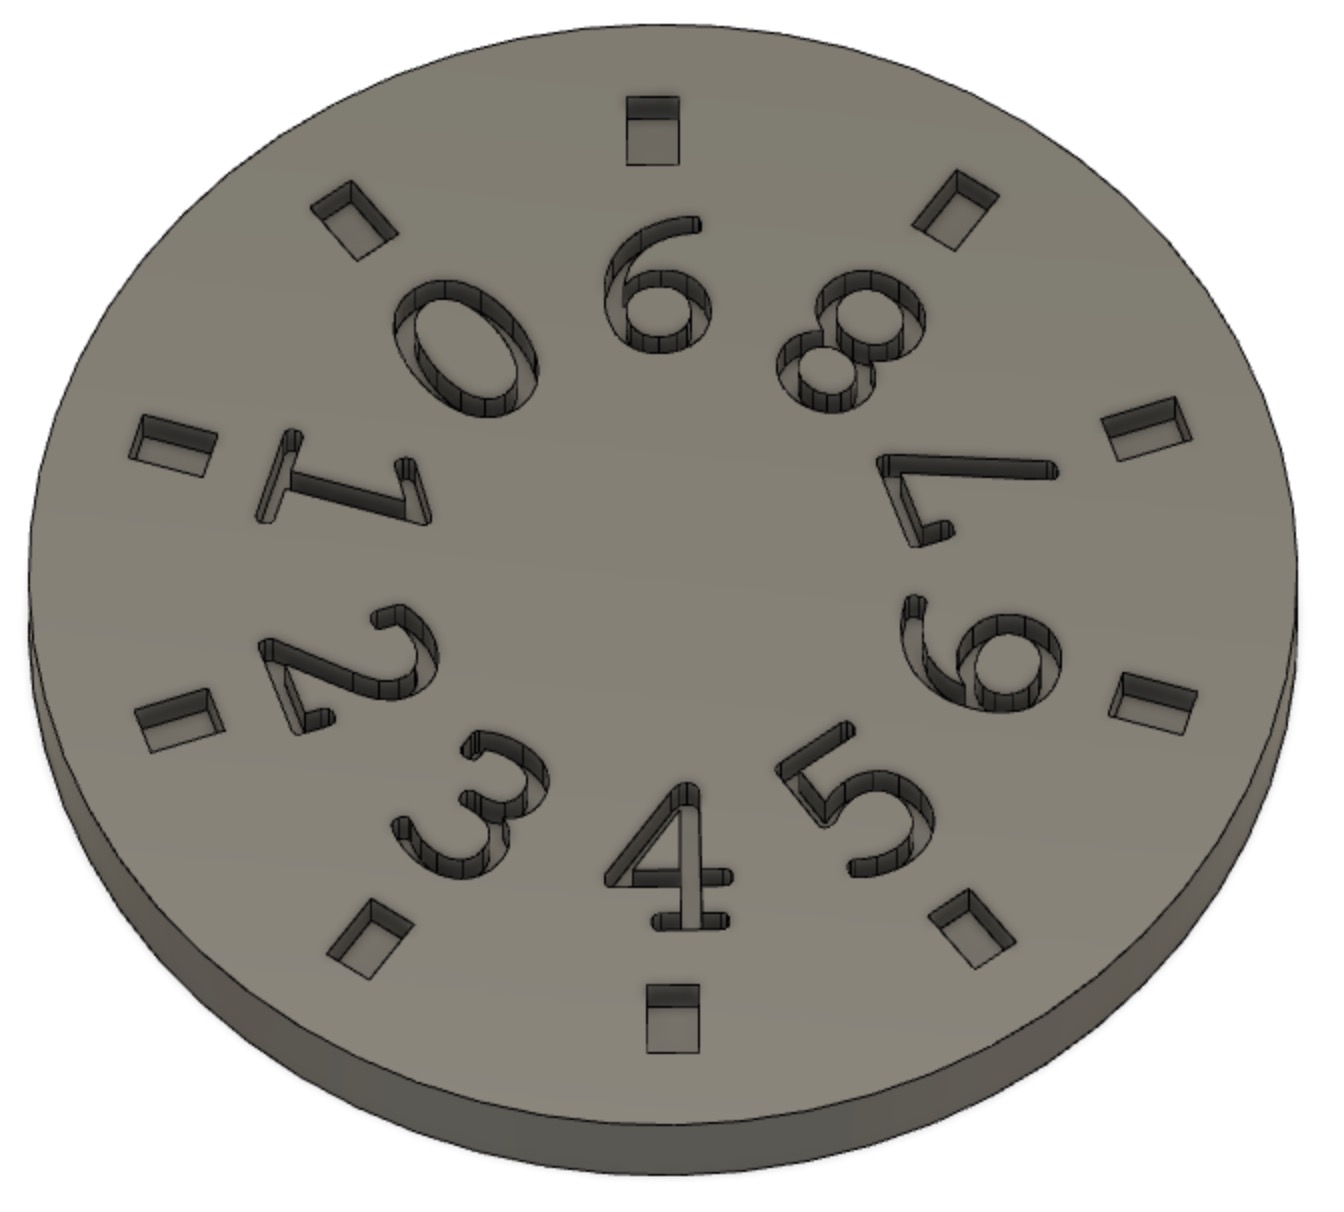
So I've now tried with a larger, more practical print (see attached 3MF file). It is a ~42mm diameter dial with numbers (0-9) etched in:
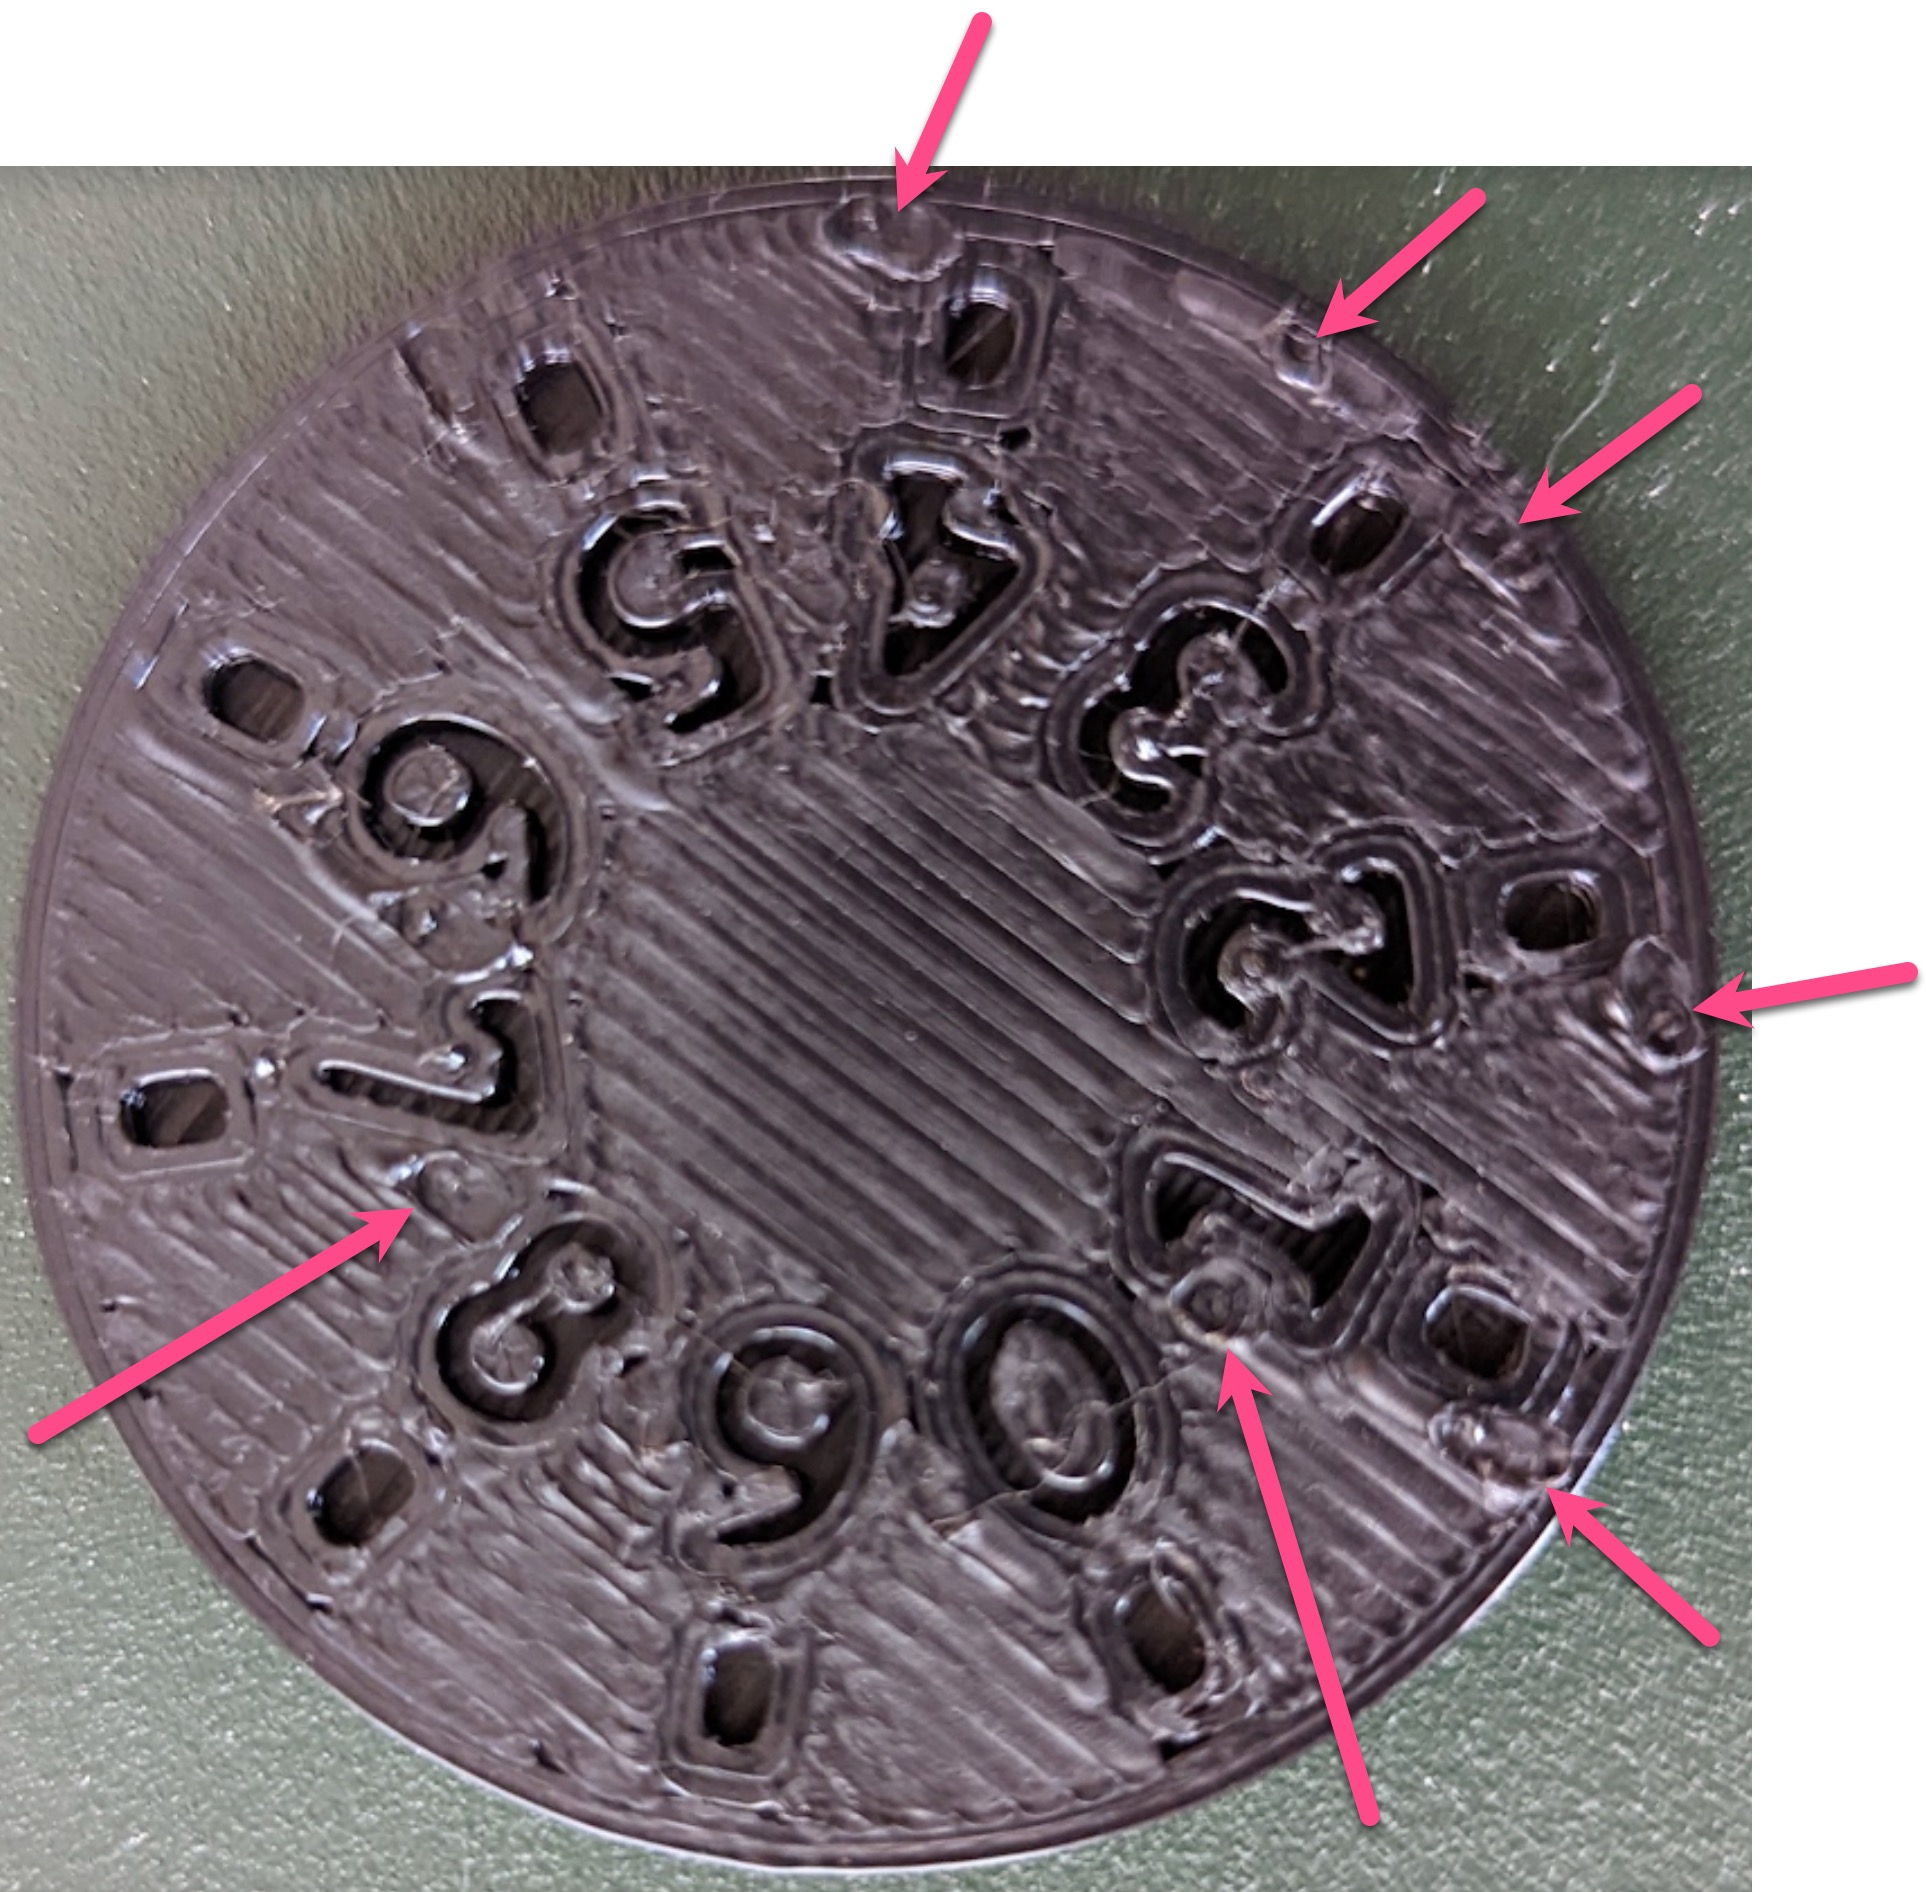
I first printed it with all the default settings. As you can see below, there are multiple round smudges, which not only look a bit ugly but also make the surface quite rough to the touch:
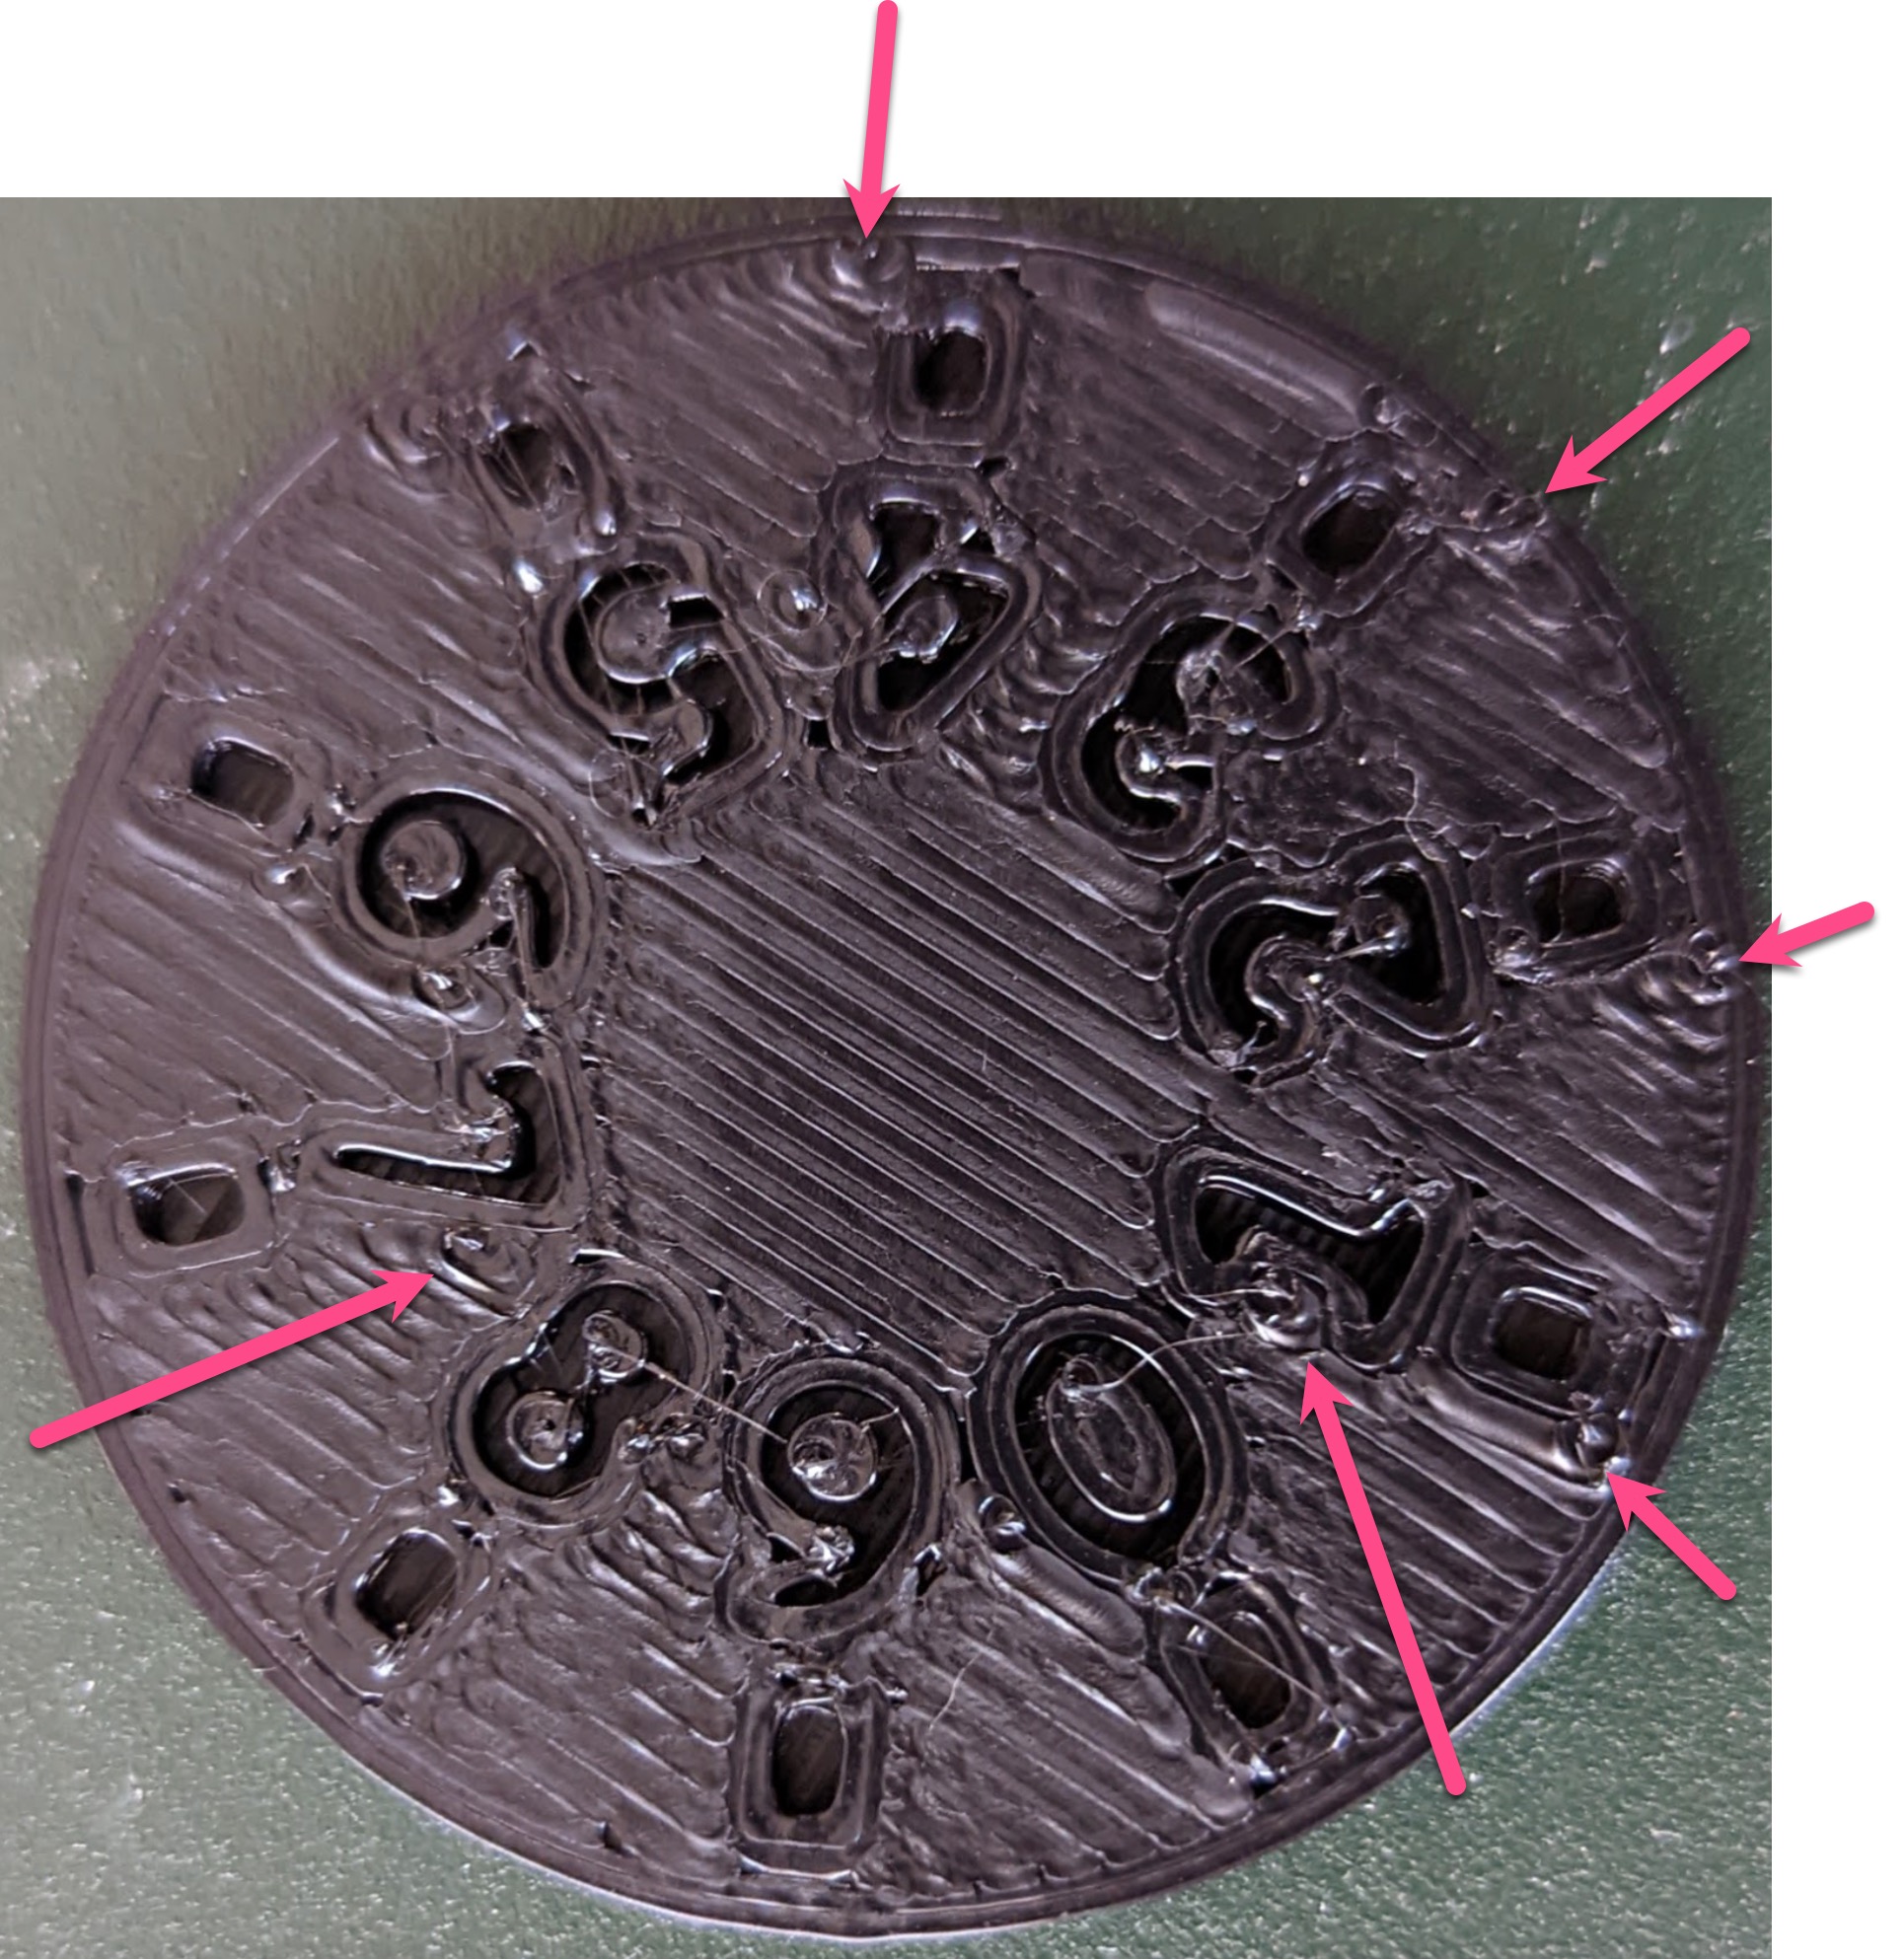
Here's now below the same thing but with the "Wipe while retracting" printer setting option turned OFF. The round smudges are now a bit less noticeable, I think:
![]()
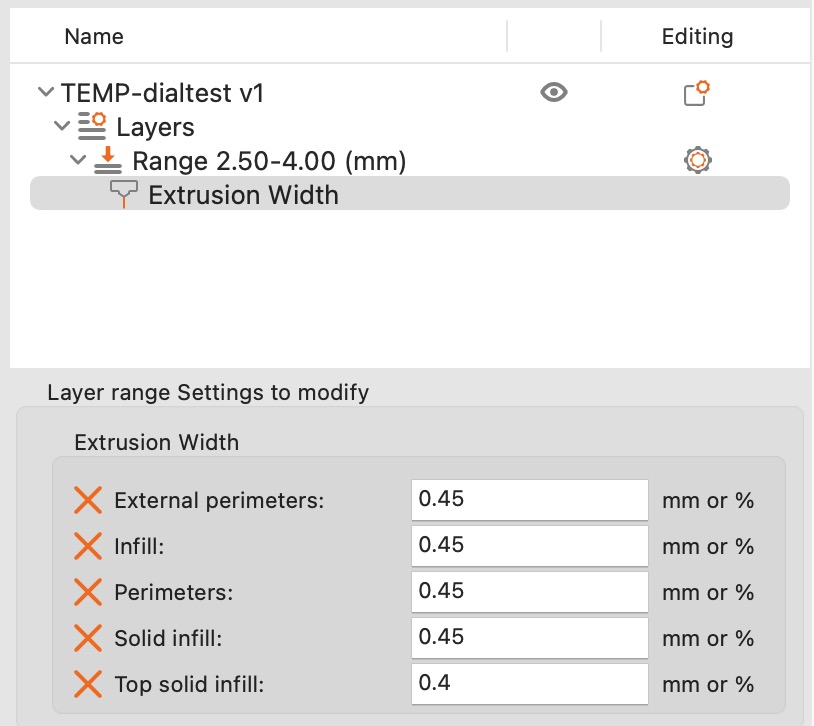
Then, as several of you mentioned than using a large nozzle would be inappropriate for this kind of detailed surface, I went ahead and added a height range modifier to reduce the extrusion width from 0.65 to 0.45 on the top surface:

As you can see below, it now looks MUCH better! The only last little issue I see is that there several tiny gaps here and there:
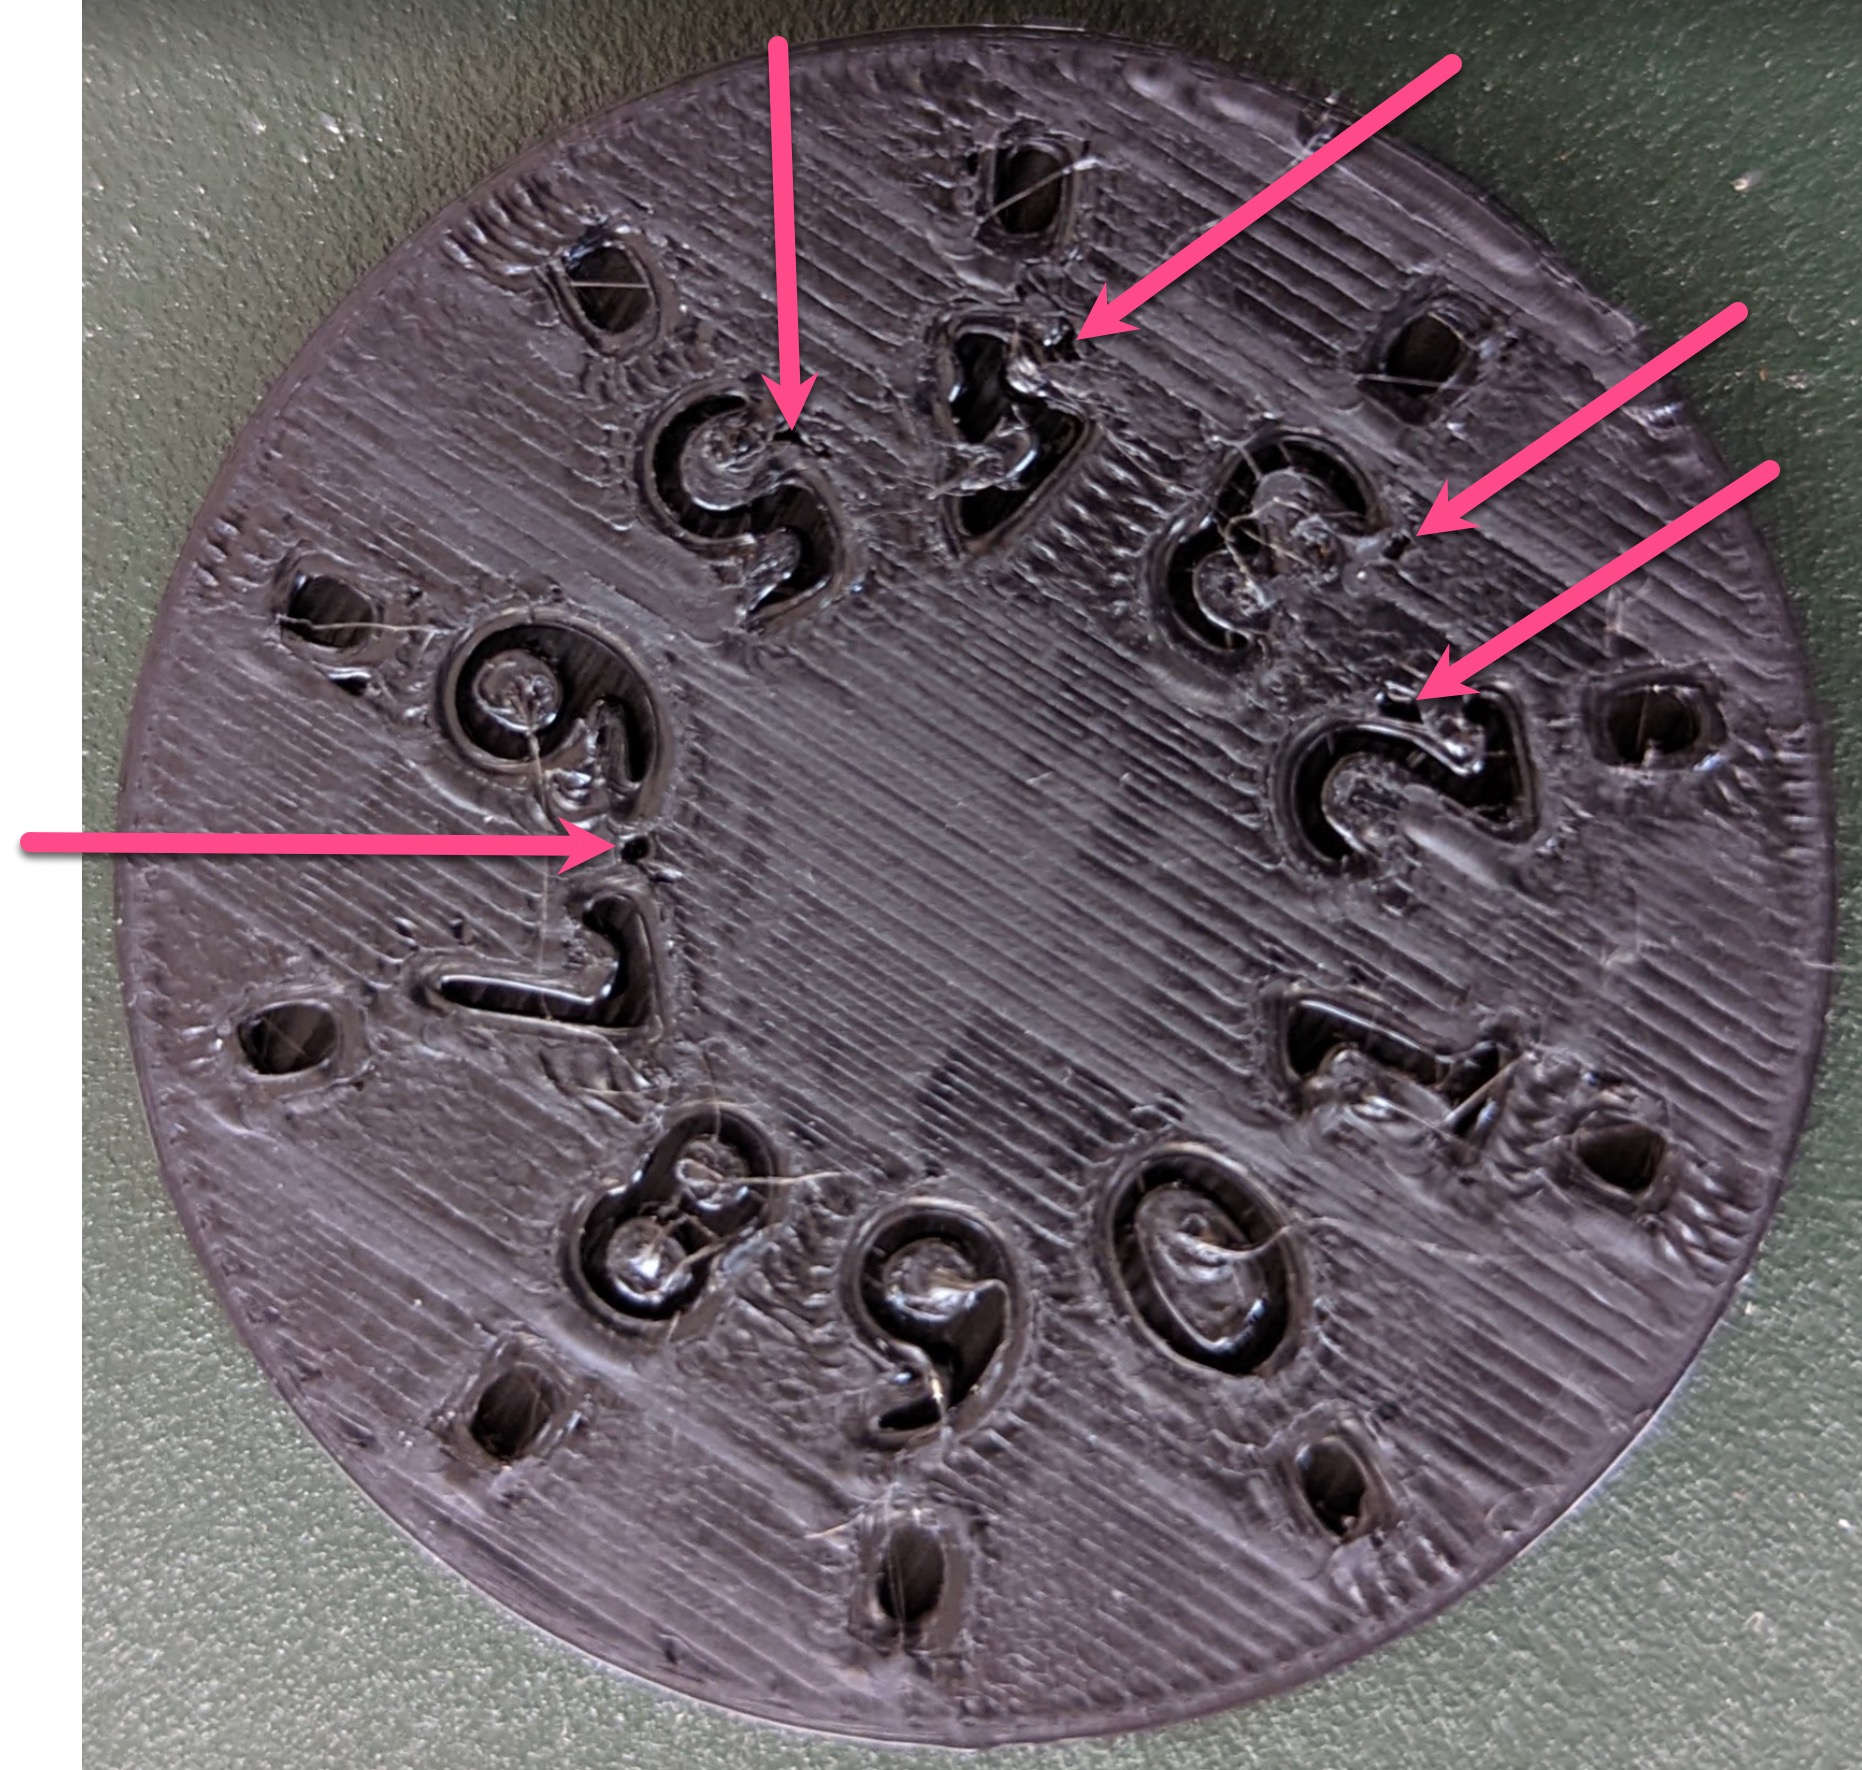
I've tried turning on the "Fill gaps" setting but that didn't fix it. Do you know how to fix those gaps?
Lastly, just to clarify what I'm trying to achieve. The dial you see above will be part of a much larger model. I want to use a 0.6mm to make prints faster, but also maximize quality just on those few areas that have a lot of details like in that dial.
Thanks again for all your help and advice!
RE: How to avoid these marks on the top of my prints?
One more update. I managed to close those little gaps by bumping the "Infill/perimeters overlap" from 25% to 70% after stumbling on this article: https://superherodiy.com/blogs/knowledge-base/top-layer-has-gaps-between-perimeter-and-infill
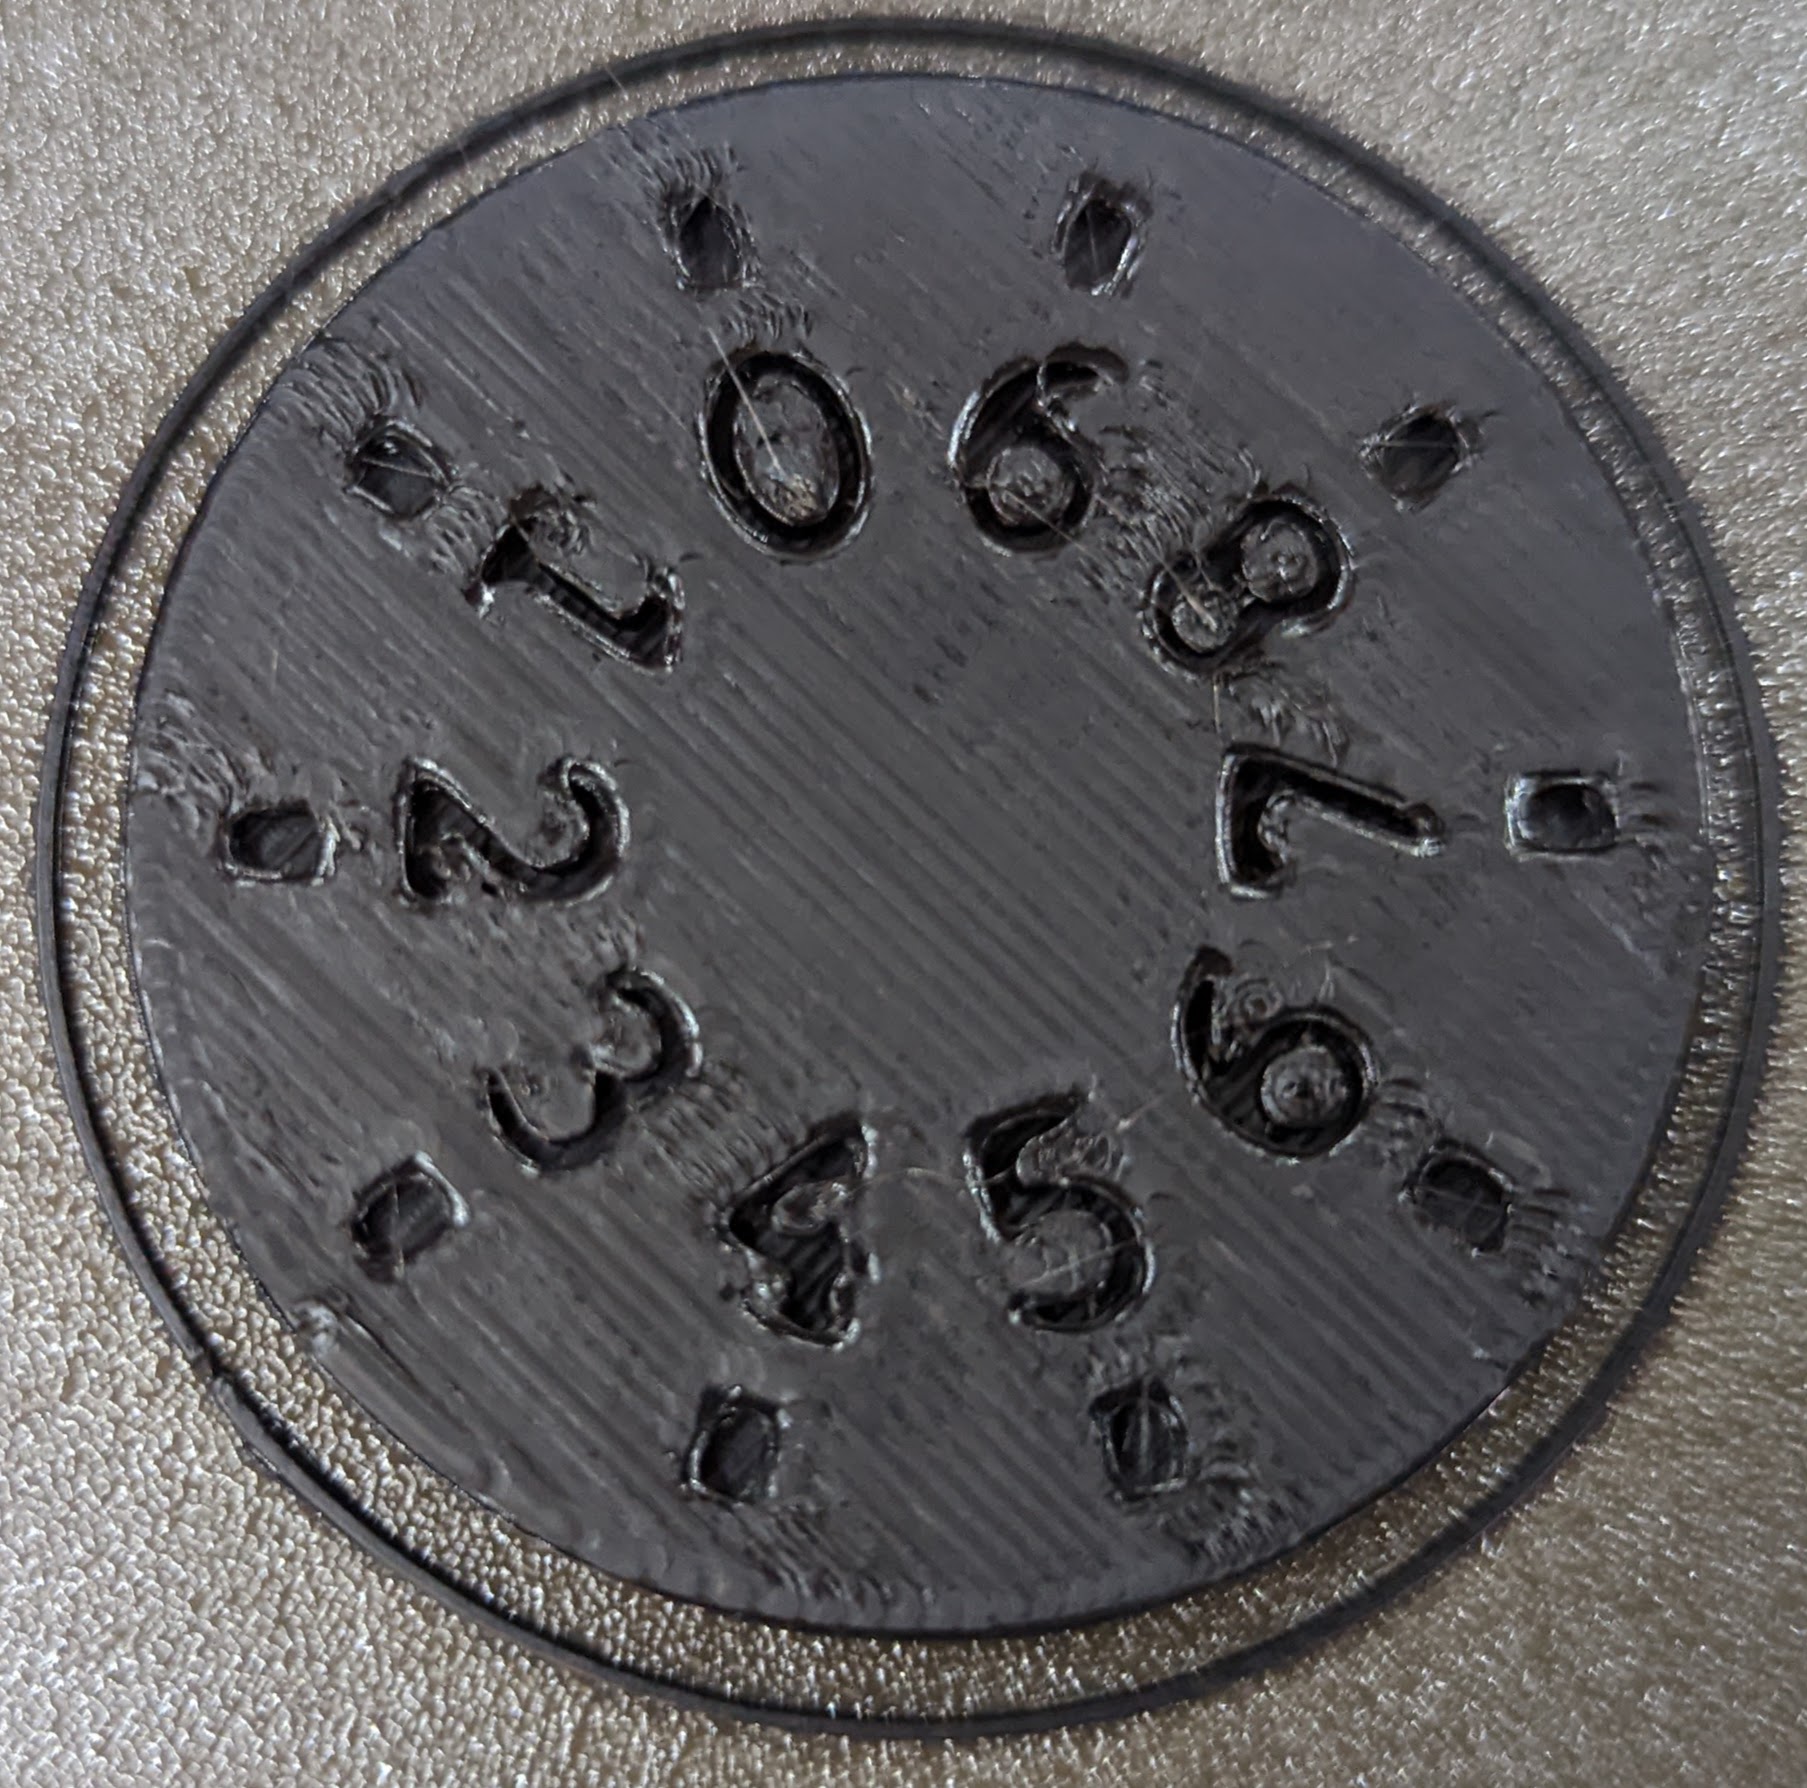
One nice benefit is that it makes the surface quite slick, almost as if I had used ironing.
So overall I'm pretty happy with the result at this point!
I'd still have a few questions though:
- Do you think that turning off "Wipe while retracting" could cause some issues?
- Is there a way to turn off "Wipe while retracting" just for a specific height range modifier, or some other type of local modifier, instead of turning it off for the whole print plate?
- Would a specific type of top fill pattern work better versus the default one (monotonic) to preserve the level of detail on the top layer of this dial?
RE: How to avoid these marks on the top of my prints?
Good to see you're getting to the point where you're happy with the results. Just one point I want to make is, for a project like this, consider printing some parts with a larger nozzle while printing other parts (like these dials) with a small nozzle. I admit I'm not a big fan of this "a 0.6 mm nozzle and Arachne is better than 0.4" craze that was caused by Sandelerer's jumping-the-shark (imho) video. Maybe it encouraged some people who had never looked at other nozzle sizes to try them (so kudos for that) but claims of the death of the 0.4mm nozzle are greatly exaggerated. In particular as far as horizontal surface detail is concerned like in this dial model, I think you'll be better off with a 0.4 (or even 0.25) nozzle.
Formerly known on this forum as @fuchsr -- https://foxrun3d.com/
