Z banding issues
RE: Z banding issues
Just a quick update.
I moved my printer to a solid stone countertop and ensured it's level and not wiggling (as much as possible anyway) and also had a friend print me the belt tension tester, and adjusted my x-axis belt to be a little looser. But neither of these has fixed the problem :(. I'm really running out of ideas.
Also the belt tester is amazing https://www.prusaprinters.org/prints/46639-tension-meter-for-the-gt2-belts-of-i3-mk3s-or-prus
RE: Z banding issues
So another update in my journey.
After stumbling upon a thread about the bondtech extruder I noticed a few people mentioning that they needed to change the retraction length. So I changed the retraction length to 2mm, and also enabled "Retract on layer change". And wow, I suddenly noticed a massive difference.
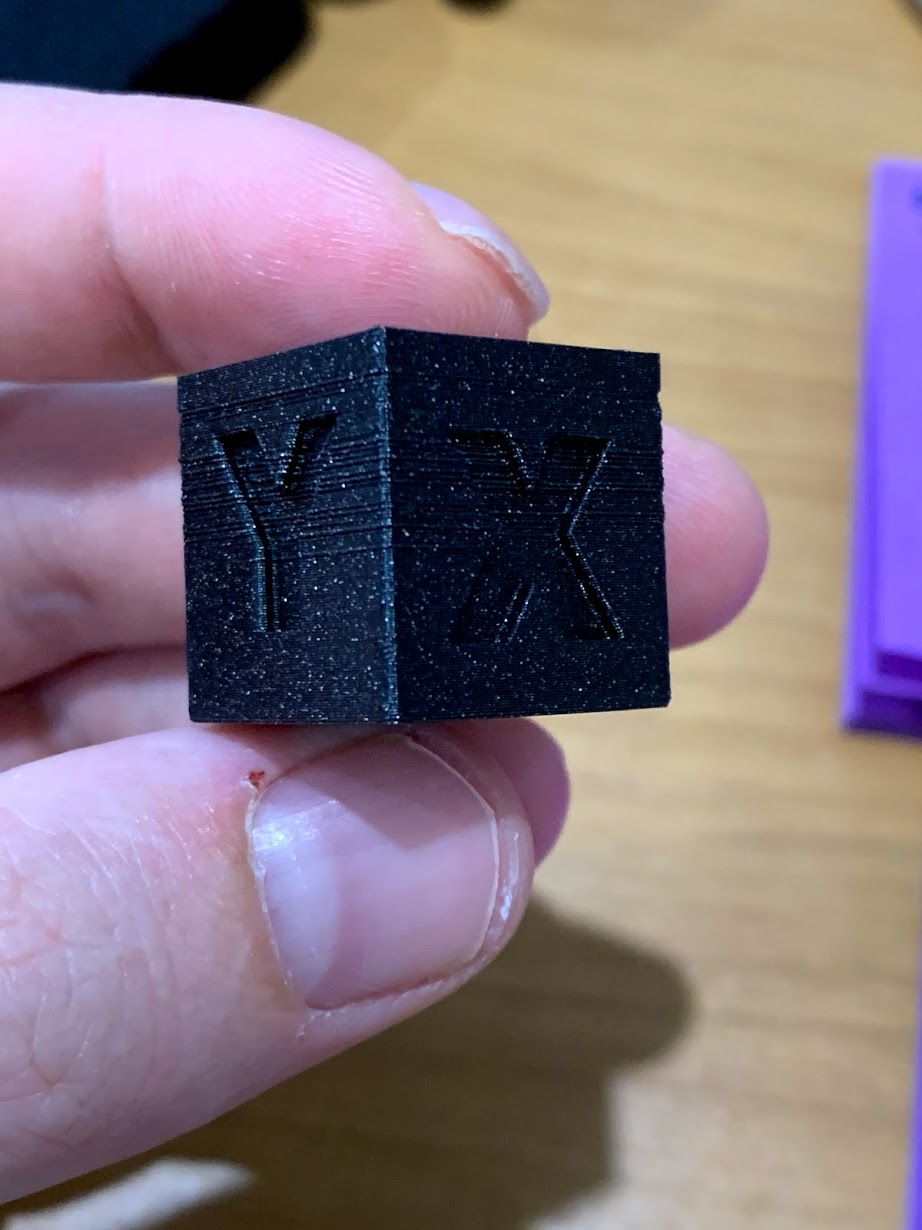
The 20mm cubes I was using as a test print to reproduce the problem suddenly started printing near perfectly, the z-banding issues were gone. I was not expecting this to make much of a difference to be honest so was estatic that it did.
I then went back to trying to print a board game insert component I have been trying to print since buying the printer and while it was much improved, it still had one very obvious banding issue. Back to being stumped...
My friend suggested I try another filament. I had been avoiding changing filament as I felt in theory prusament should be best, and if I couldn't get it working with Prusament then it's unlikely to work with anything else. But it was worth a shot, so I loaded up some Esun PLA+ (white). I first tried to print the same cube, and again it was perfect. I then retried the board game insert component again, and wow, print perfection. I then printed a 2nd piece that was very similar and again print perfection.
So I'm not sure what to make of it, but a few possibilities...
- Prusament might need a temperature adjustment, possibly lower? I'm using the 215 recommended though.
- Maybe the extruder screw needs tightening or loosening for Prusament, the feel of Prusament is a bit different to Esun PLA+
- My Prusament roll (that came with my printer) is defective.
I'll endeavor to keep posting here as I explore in hope it helps someone else.
RE: Z banding issues
@nizmox
As far as print temps are concerned, I always use the stock prusament profile and never had any issue. But I would suggest you print a temperature tower to see if a different temperature gives you better results. I do that for any new brand of filament I use
Formerly known on this forum as @fuchsr -- https://foxrun3d.com/
RE: Z banding issues
@nizmox
As far as print temps are concerned, I always use the stock prusament profile and never had any issue. But I would suggest you print a temperature tower to see if a different temperature gives you better results. I do that for any new brand of filament I use
Yea, if anything Prusament should be the most dialed in without needing tweaking.
Another possibility is the retraction settings, lowering retraction had a direct effect on lowering visible lines, so I could try lower it further, though it is already at 2mm which is a lot lower than the stock 3.5mm. Maybe 2mm is the sweet spot for eSun PLA+ but not Prusament.
RE: Z banding issues
So do you currently have the Bondtech heatbreak installed in your Mini? I've had loads of issues when I swapped from the factory fitted heatbreak to the Bondtech, in the end it turned out that the tube in my Bondtech heatbreak was 0.1mm shorter than needed, so perhaps that was causing some binding inside the heatbreak and leading to z-banding, have a look here (Polish forum):
https://reprapy.pl/viewtopic.php?f=8&t=6332&start=70#p118320
So I basically took the entire hot end assembly apart (as in took it off the printer entirely to have easier access) and slowly put it back together, following Prusa's instructions for fitting a new heatbreak and now it works fine (see photo in the link above). The main thing I've noticed is that with the Prusa heatbreak, the tube is longer than needed, so you can preload things before assembly. With the Bondtech, everything is cut down to size, so if there's any variance / errors anywhere (like in my case, the tube being slightly too short), there's simply no room to manoeuvre and you cannot preload the tube, meaning you are left with a gap.
I'd honestly try giving Prusa's heatbreak a go again and see if that makes things better.
RE: Z banding issues
@tompjagiello
I do have the bondtech heatbreak installed, my friend who also owns a mini and has a tonne of experience with printers did the upgrade for me (and also the extruder). I had a massive improvement in print quality by changing my retraction length to 2mm, but I was still getting some occasional banding/layer shift issues. Then after changing to eSun filament I'm getting near perfect prints. So it could potentially be an issue with the heatbreak but what's weird is since I have switched to eSun filamanet I've had near perfect prints.
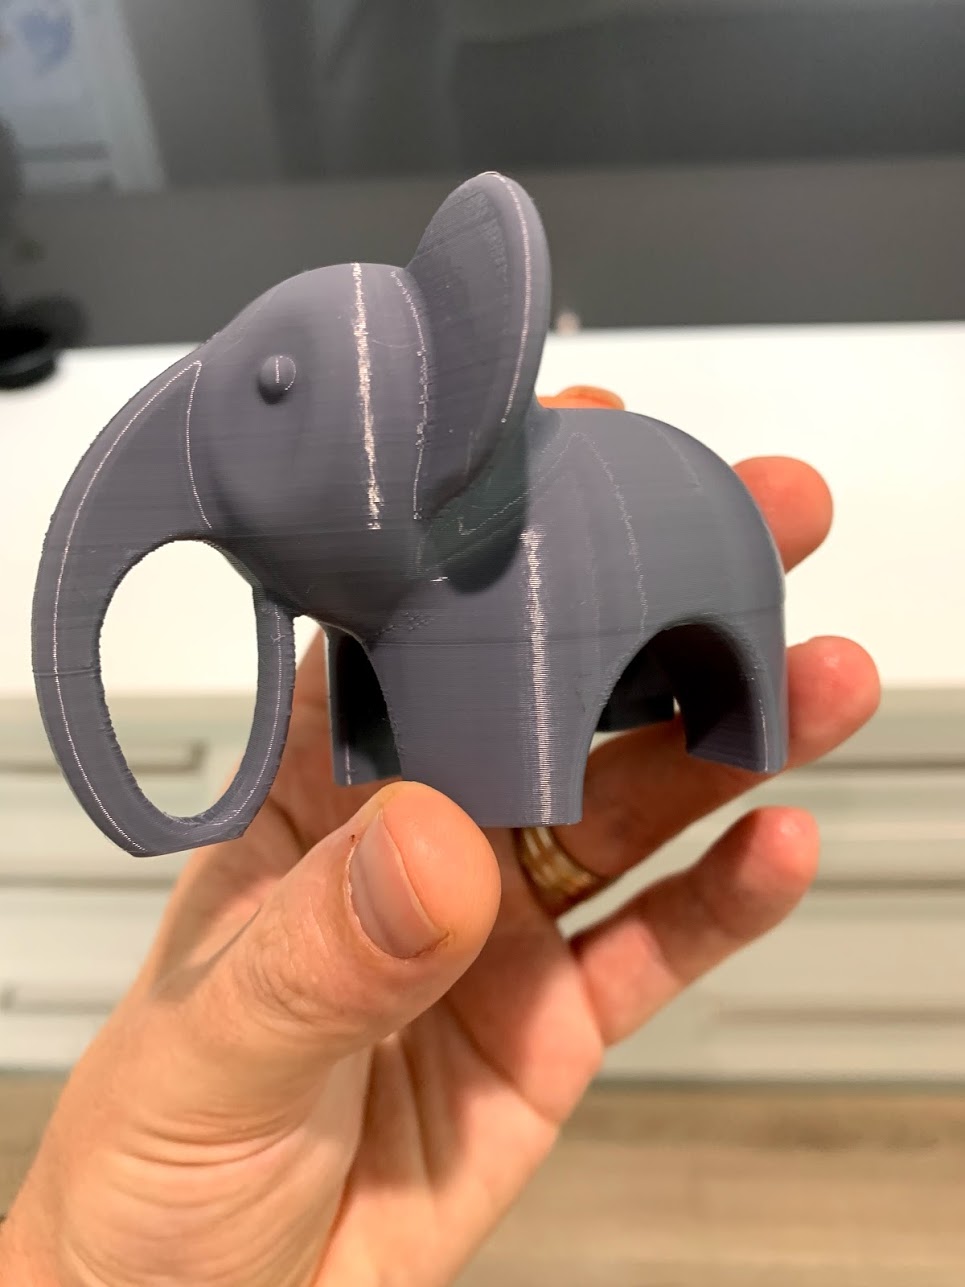
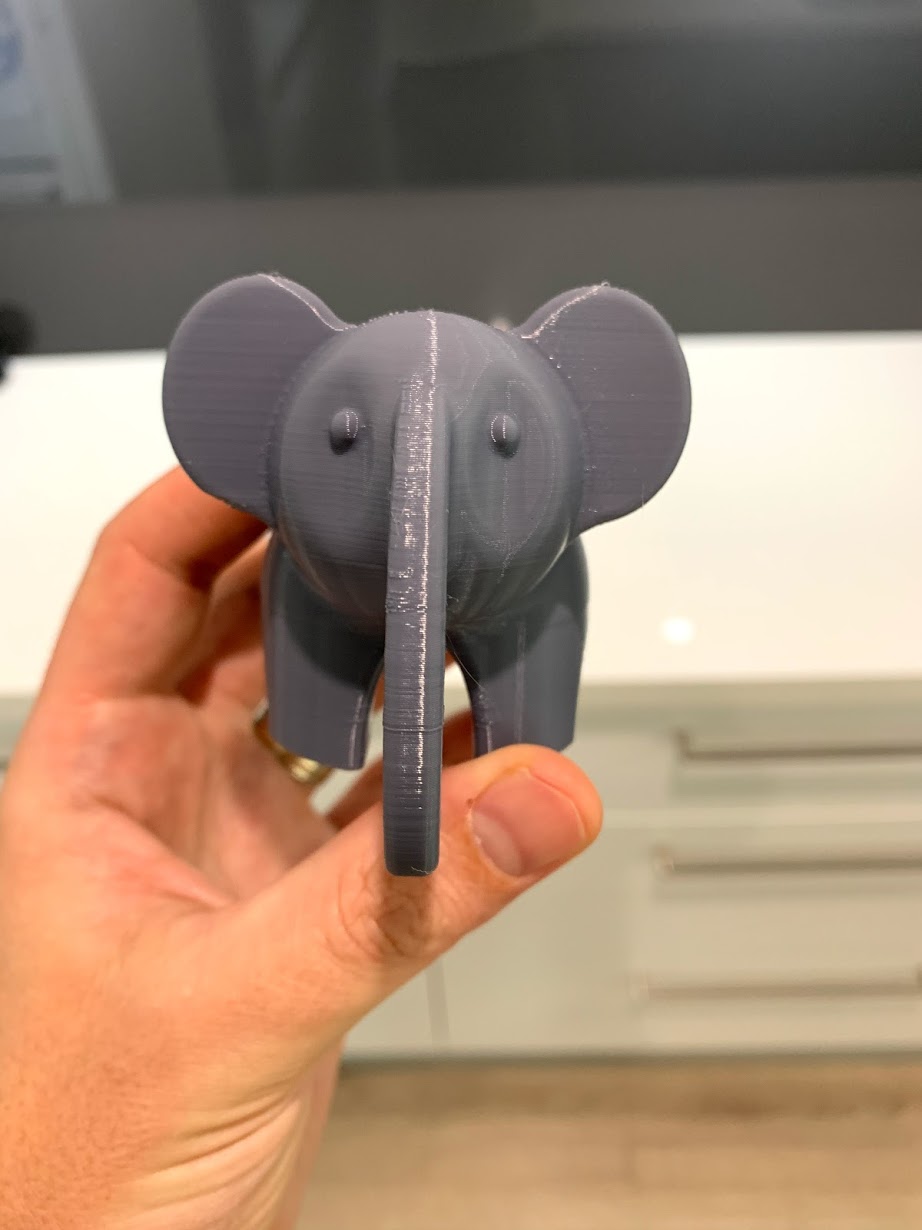
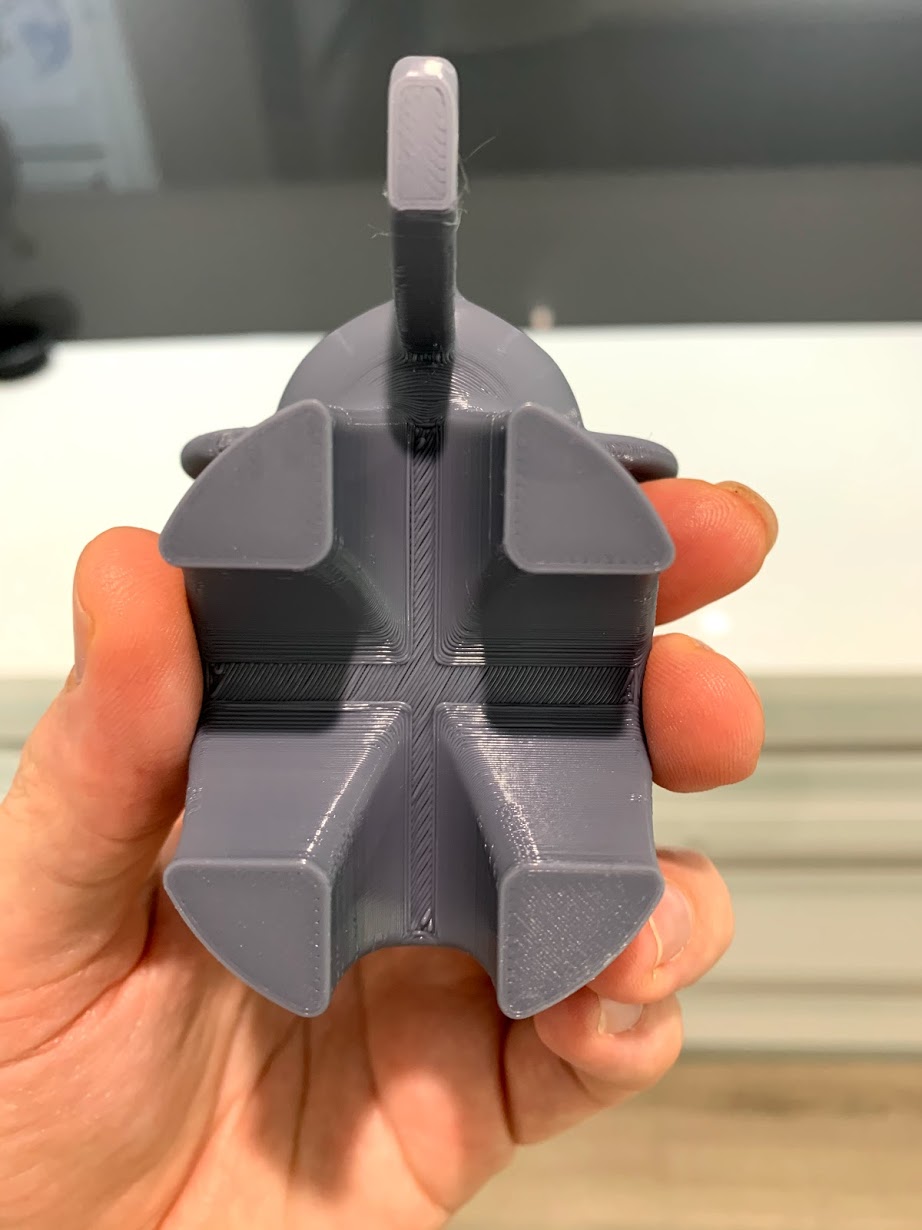
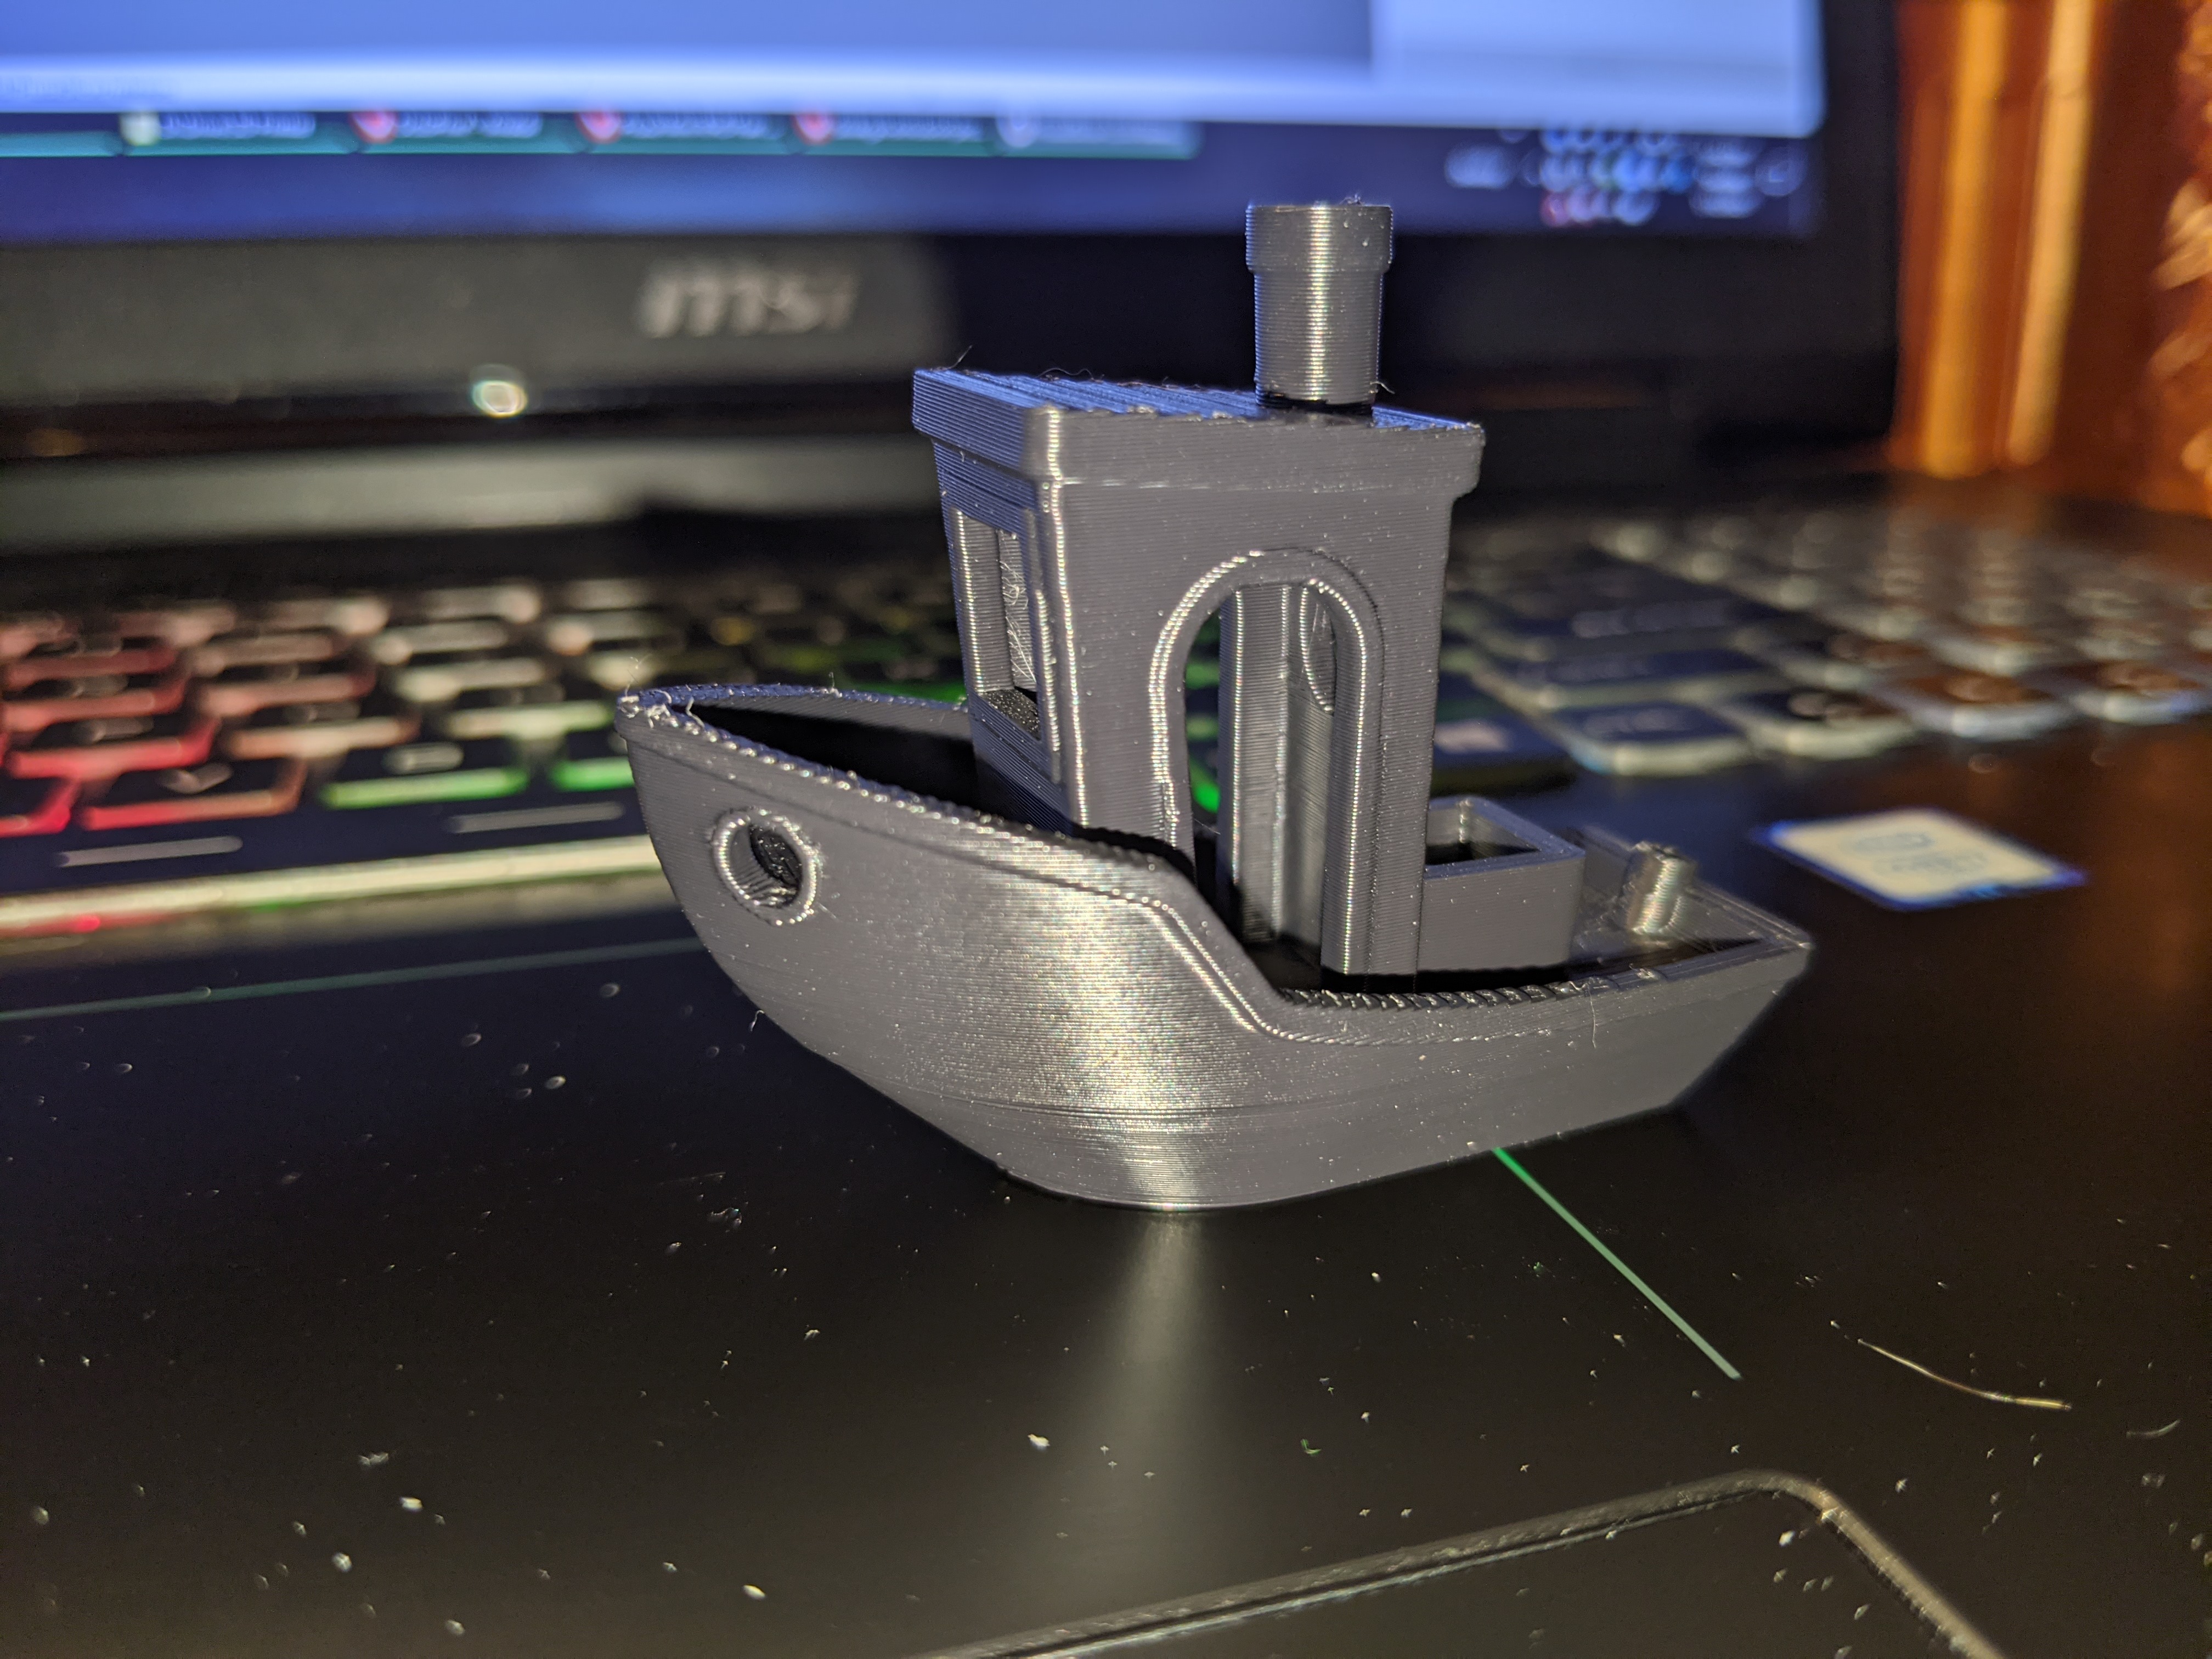
I'm really not sure what could be the issue with Prusament, but I feel like it's unlikely to be the heatbreak if it prints fine with other filament. This is an elephant I printed with eSun.

RE: Z banding issues
Really hard to say as you've also changed the extruder, so it's two things which might introduce errors or the error might be coming from something else in the system. I was in a similar position thinking well it can't be the Bondtech heatbreak as sometimes it prints fine, besides people say the stock heatbreak is crap. In reality though I think that if the printer is assembled properly it should print well on stock parts. Was that ever the case on yours? My Mini came preassembled and was all fine, but I was getting slight dimensional errors in prints (0.1mm so nothing massive), so wanted to correct that. Prusa support at one point said my heatbreak is incorrectly assembled and I took it apart - that is when my issues started and I decided that I might as well install the Bondtech heatbreak to help things. Turns out it only made it worse, so upgrades are not always upgrades :/
I'd still suggest going back to stock setup, if that doesn't work, then get Prusa support involved (I've not had much luck with them) and perhaps send the whole unit back?
RE: Z banding issues
So more "fun" with my printer to be had, discovered two new issues today.
I tried to print the first model that utilises the entire print bed, it was 18cm in length. Soon after it started printing I head a "dunk" sound and take a look. I realised the nozzle colided with the screw at the back of the print bed (twice). I quickly stopped it, and I don't think there has been any damage to the printer but can't be sure. I had disabled skirts to fit within the print area. It seems like the printer is printing too far back on the print bed. When i print something it is not centered on the print bed. Because of this, when it does the "Prime all printing extruders" step, it prints just behind the first line on the bed and not in front of. Then when it prints it goes too far off the back of the bed. It looks like you can tweak the bed position in prusa slicer, but I feel like this shouldn't be happening, does not seem like a common issue.
The second issue I had today was I wanted to adjust my MINDA height. It's been at around 1.245 and I know that's outside the ideal range of 0.8-1.0. So I followed the steps to adjust it. I used 8 sheets of 80gsm paper, which are 100 micron thick (0.1mm) whih should equate to 0.8mm approximately. But after doing the adjustment I noticed it was actually worse at 1.45 after first layer calibration. This left me really confused. I then realised that my print be seems to slope downwards from left to right, and because the MINDA sensor is on the left and nozzle on the right, 0.8mm spacing leads to a nozzle height much higher than 0.8mm. It's big enough of a slope to be visible to the naked eye. No idea why this is the case if I find out the cause I will post here.
Feels like issue after issue at this point, I really hope it gets easier...
RE: Z banding issues
If the prints are not centered in the Y-axis (front/back) it could be that the whole Z-axis is placed abit offset.
Here is a link to the manual: https://help.prusa3d.com/en/guide/building-your-mini_177717#178482
The picture shows an injectionmolded part. It should not differ from a printed one if you have that on.
Prusa Mini+ kit. BondTech extruder. FW 5.1.2
Prusa MK3S+ kit. Stock. FW 3.11.0
Prusa MK3S+, used. Stock. FW 3.13.3
RE: Z banding issues
@nizmox
For the x-axis tilt, this instruction will let you adjust the x-axis to be level with the build plate: https://help.prusa3d.com/en/article/xz-axis-skew-correction-mini_158518
RE: Z banding issues
@nizmox
For the x-axis tilt, this instruction will let you adjust the x-axis to be level with the build plate: https://help.prusa3d.com/en/article/xz-axis-skew-correction-mini_158518
Thanks for this, it did kind of help.
I had actually read this already when I replaced my x-axis belt, but re-examined and think I found a problem. When looking at the x-axis vertically it did not look perpendicular to the bed and was kind of flexing forward. What I think happened, is when I did the belt replacement as mentioned earlier, I did too much of the tightening AFTER I had installed the belt via the screws. Although this got me to the correct tension it was flexing the rods.
So I completely removed the x-axis belt, got it as tight as I could in the notch, then reassembled and adjusted tension again. The rods now look much better and are perpindicular to the bed. I had to screw them down far less to achieve the correct belt tension.
I also tried to see if tightening the bottom screw a bit more could adjust the level relative to the bed, but it doesn't seem to have made much difference? Though I did not re-attempt setting MINDA height so it's hard to tell. There seems to be too much of a slope to correct by this method. It doesn't really seem to be affecting my print quality though, so maybe i just ignore it.
On to the next problem which is getting the print to be centered in the bed so it does not hit the screws. My friend suggested running the wizard again which I have not tried, I've only been running self test, auto home, mesh bed level.
RE: Z banding issues
I've had the exact same issue with the banding with Prusament, I also have the Bondtech heatbreak. I've been able to get decent results by tightening the idler screw one full turn tighter and slicing with Cura for Prusament only. Remember to loosen it back to stock tension when changing filaments. Odd, I know, but every other filament prints perfectly, so I don't want to try changing my printer just to get Prusament working, and potentially muck up every other filament I use and have a returning clogged issue. I'll just not pay the extra premium for Prusament. 😶
For your X axis skew, if the slight adjustment doesn't work (via the idler-side screws), the fix I've seen before is to loosen the 3 mounting screws used to attach the Z axis to the Y axis, make sure it's on a level surface, ensure the Z axis is slid all the way back, and gently snug the screws back up. Too tight and it can cause the X axis skew, you might also try slipping a piece of paper in between the extrusion and the Z axis to help.
Adjusting belts, Prusa actually has a very simple to use tool that can be printed here: https://www.prusaprinters.org/prints/46639-tension-meter-for-the-gt2-belts-of-i3-mk3s-or-prus I used Overture PETG for it, and my belts fell right in the proper range.
Since you recently got the printer, it's a Prusa Mini+, so it comes with the SuperPinda vs the old Minda probe. I had the old Minda and when I swapped in the SPinda, my Z offset had gone from -0.930 to -1.880. It reads a lot further than the old Minda, but is stable. Instead of following the instructions on adjustment, use something thicker at least 1+mm. The middle of the ziptie is about 1mm or slightly above as I recall, this brought my offset to a workable -1.550, so anything between 1-2mm thick should work decent, I'd aim for 1.5mm thick (print one!) and then readjust the SPinda + Live Z.
I think I know, I don’t think I know. I don’t think I think I know, I don’t think I think.
RE: Z banding issues
@skreelink
Thankyou, this is some very good advice.
I agree with you on the Prusament, it's not worth the hassle or the extra cost. The eSun filament I am using is cheaper and prints amazingly, so I'll just stick with what works. What filament brand do you use out of interest?
I'll try what you suggested for the x axis skew, I did loosen it already and retighten but i'll give it another go. I wonder if I should remove the rubber foot underneath the electonics before tightening and then re-apply. I wonder if it's pushing it upwards and causing the skew.
I think I have the tension problem sorted, yes that tension meter is amazing! I had my friend print one and it's helped hugely to know if the tension is right. There's no real way to tell without this, I really think Prusa should include one with the printer.
Unfortunately I do not have the SuperPinda. I do really want one but it goes immediately out of stock as soon as it becomes available so I've simply not been able to order one. I'll keep trying and plan to upgrade when I can. Right now I'm running at around -1.15 and haven't had any noticable issues I just know it's outside the ideal range.
Will report back with what success I have. Thanks again!
RE: Z banding issues
@nizmox
Huh, arriving in December it should have been a Mini+, the only difference is literally the SuperPinda (and new Y axis clips, but that's not a performance upgrade). Is it yellow or black tipped? Yellow sensor = Minda, black sensor = SPinda.
I missed the post where you already had the tensioner, whoops. Also I just thought of something about your X skew, there's four screws on the plastic piece holding the X stepper motor, they hold the linear rods in for the X axis. Try loosening them up a little and pushing the rods in, just to make sure they're fully seated and one's not sticking out further than the other. I don't know how far you or your friend have dug into the printer, but it's good to check. I've done a full colour swap on mine, all the orange parts are now dark transparent green. 🙂
As far as filament brands, I've tested Eryone, CC3D, and 3D Solutech so far for PLA, Overture for PETG, Yoyi for TPU, and Polymaker Polylite ASA.
My favorite so far for PLA is the Eryone, this is a bust of Darkness from Legend printed in Eryone Galaxy Red

Look at how SMOOTH the back of it is.

Also, my favorite benchy is actually the one out of ASA, which was printed at 260C at the nozzle, 100C on the bed. One reason for choosing to keep the Bondtech heatbreak for me is the fact I print a lot of PETG and I like how ASA prints. I want to keep that heat creep to clog chance down.
PETG I have dialed in enough the last calibration cube I ran was 20x20x20.01 mm, and I printed a tolerance coin, all sizes moved fine, even 0.10mm.
If I can get these results from "cheap" filament, so be it. 🙃 (Protip, Polymaker ASA is not a cheap filament, the others are)
I think I know, I don’t think I know. I don’t think I think I know, I don’t think I think.
RE: Z banding issues
@skreelink
The demon prince there you've printed is amazing 😮 !
So I contacted Prusa about the Super PINDA, turns out my printer arrived in November and I had my dates slightly wrong. It's still incredibly frustrating that I can't just buy one since they're never in stock though. I would really like to upgrade.
Anyway so I finally got around to messing with the XZ axis skew. I loosened the three bolts attaching the Z-axis arm to the base and adjusted it to be as level as I could manage. One thing I realised is unless the surface you're operating on is also incredibly level you're not going to be able to rely on a spirit level. But it then occured to me, really the only thing that matters is that the print bed, is perpendicular to the z-axis arm. So I instead used a small square to get it as close to 90 degrees as possible and tightened up the screws. I then readjusted the x-axis arm as best I could to get this at right angles to the z-axis and re-did the belt tension.
I then did a quick test print to see if it made a difference and it did, the print was now much more centered on the bed, on both the X and Y axis! So I then reattempted my large print at 18cm in length. Unfortunately it still hit the first screw at the back before i cancelled the print, I didn't hear any sound but I did notice a tiny depression in the print where it should be a straight line. Damn.
So I then decided to try a quick hack I'd been thinking about for a while... I again loosened the three screws pulled the z-axis arm forward a little, and inserted a cable tie into where the carriage is supposed to stop. I then pushed it back, so now it was about 1.5-2mm further forward than where it was previously. I tightened up all the screws again and gave it another shot.
This time, everything was great! The initial nozzle clean is in front of the first line on the bed, and the model is almost perfectly aligned to the front and back line of the bed at 18 cm. Take a look at the pictures. So while I'm happy I seem to have solved it, it does feel very hacky and considering this issue could damage your printer I think Prusa really needs to do something about it. Even if the screws were just not as long you wouldn't have this issue. But anyway I've been happily printing large prints since I made the adjustment.
I do think it's possible that adjusting the Pinda height to be lower (i'm still at -1.15) might have helped with alignment, but it honestly doesn't feel worth it now I have it working ok. I'll wait till I can finally purchase a Super PINDA before I bother with that.
Before:-
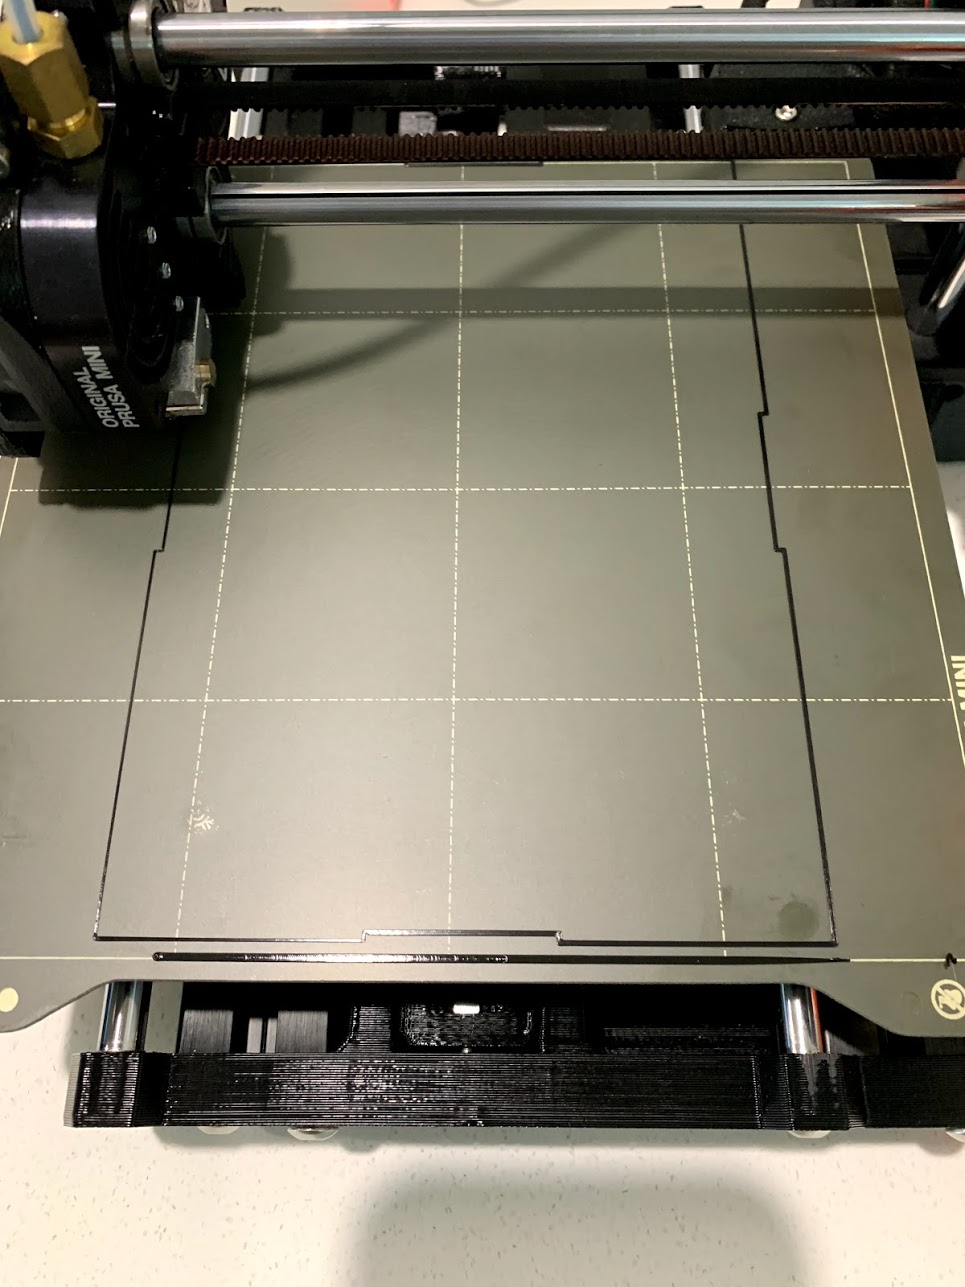
After:-

RE: Z banding issues
@nizmox
Good to hear you're starting to get good results! I see now the tip of your probe is, indeed, yellow. This means you have the standard Minda probe. Until you can order a SuperPinda, you can try pre-heating the Minda probe before each print. I did this successfully until I got the SPinda and never had to recalibrate my Z height. I only got the SPinda so I wouldn't have to waste the time to pre-heat. A note; the Z- height doesn't really matter much unless it's too low with the smooth sheet. Example: My smooth sheet is currently -1.550, when I installed the SPinda it was -1.800, which was already too low for my textured sheet at 0.3 thinner. I had to adjust the SPinda up to give me enough wiggle room for my textured sheet (which is now -1.850).
To preheat the Minda, in Prusaslicer click the "Printer Settings" tab, Custom G-Code, then modify the Start G-Code. This is what I had:
G90 ; use absolute coordinatesM83 ; extruder relative mode
G28 ; home all
G1 X100 Y100 F4000
G1 Z1.5 F50 ; park position
M104 S170 ; set extruder temp for bed leveling
M140 S[first_layer_bed_temperature] ; set bed temp
M109 R170 ; wait for bed leveling temp
M190 S[first_layer_bed_temperature] ; wait for bed temp
G4 S180 ;Warming MINDA
G28 ; home all without mesh bed level
G29 ; mesh bed leveling
M104 S[first_layer_temperature] ; set extruder temp
G92 E0.0
G1 Y-2.0 X179 F2400
G1 Z3 F720
M109 S[first_layer_temperature] ; wait for extruder temp; intro line
G1 X170 F1000
G1 Z0.2 F720
G1 X110.0 E8.0 F900
G1 X40.0 E10.0 F700
G92 E0.0M221 S95 ; set flow
The most important lines was the "G1 X100 Y100" and "G1 Z1.5" lines, this moved the hotend to the center of the heatbed 1.5mm above it. Then the "G4 S120" made the printer wait 180 seconds (3 minutes) to let the heatbed warm up the Minda. A value between 120-180 is decent here. You can, of course, just use this entire block in place in your slicer, that's why I pasted the entire thing. Just make sure to drop your own PID tune at the top. 🙃
Adjusting the Z height is easier by slicing the model here: https://www.prusaprinters.org/prints/40417-mini-first-layer-test with the heatup script and using the tune menu. This guarantees you're matching the Z height with a warmed probe, vs calibrating with a cold probe, then heating it up for subsequent prints.
I think I know, I don’t think I know. I don’t think I think I know, I don’t think I think.
RE: Z banding issues
So another update in the neverending saga.
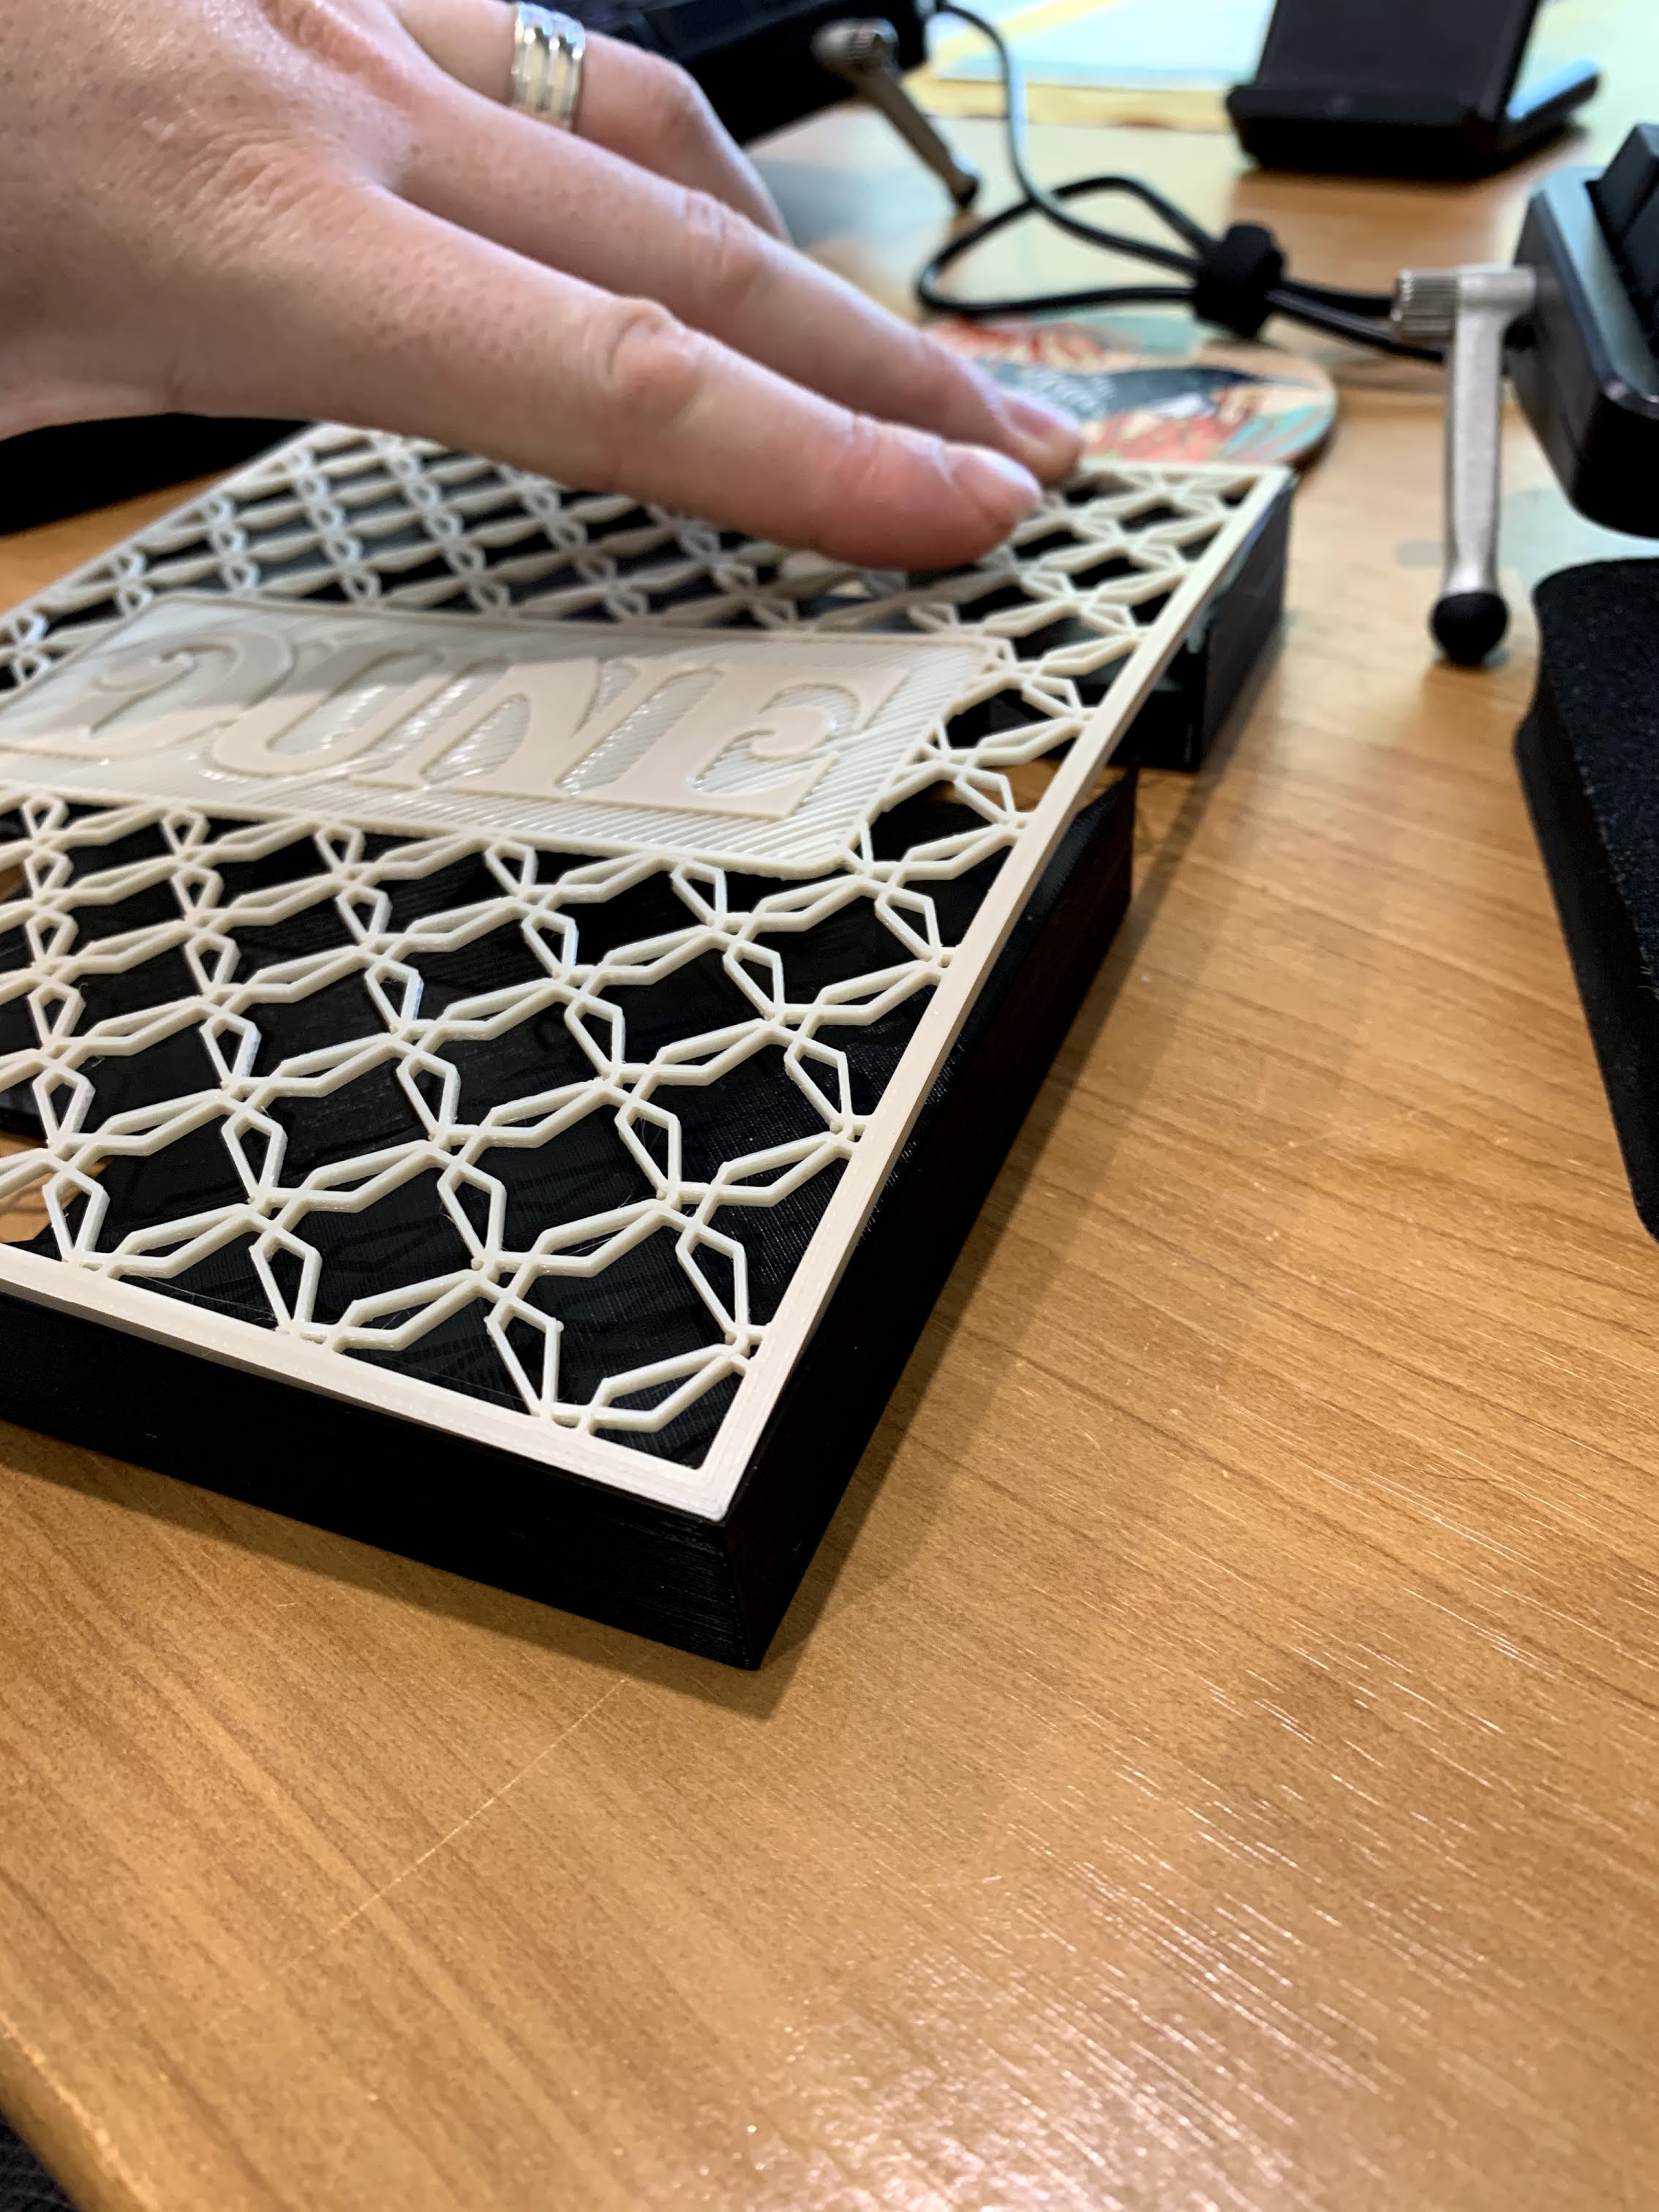
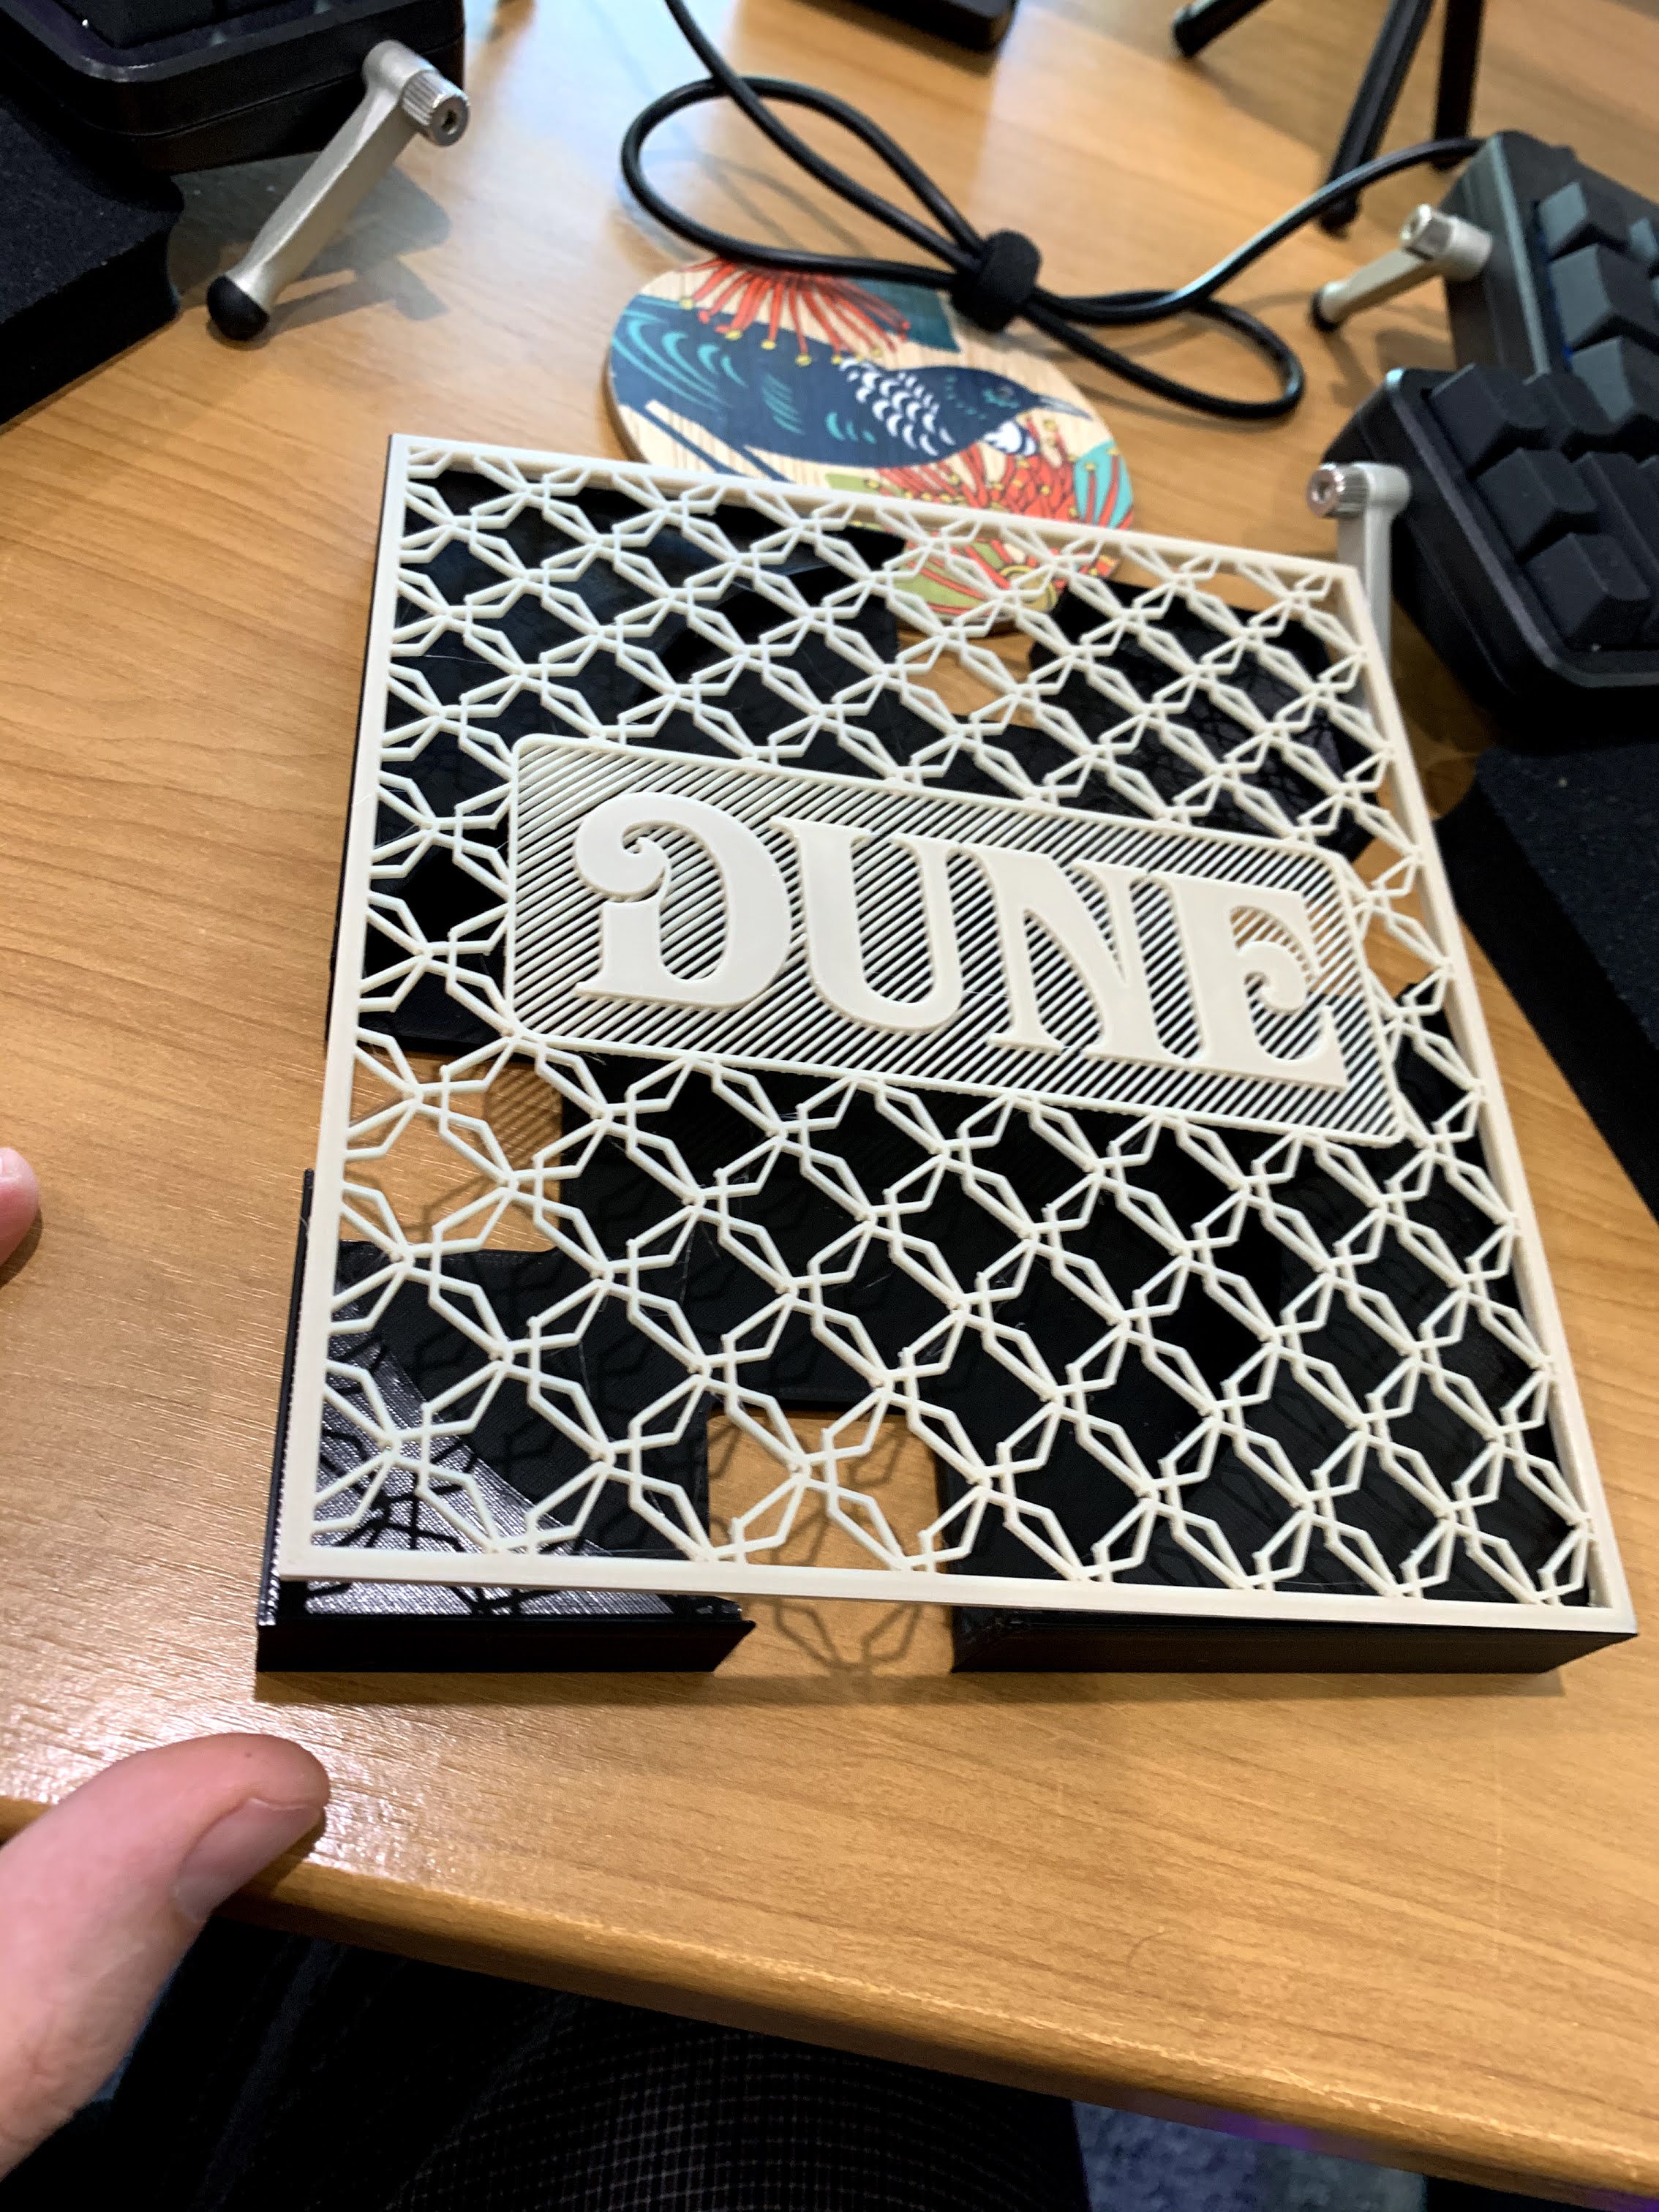
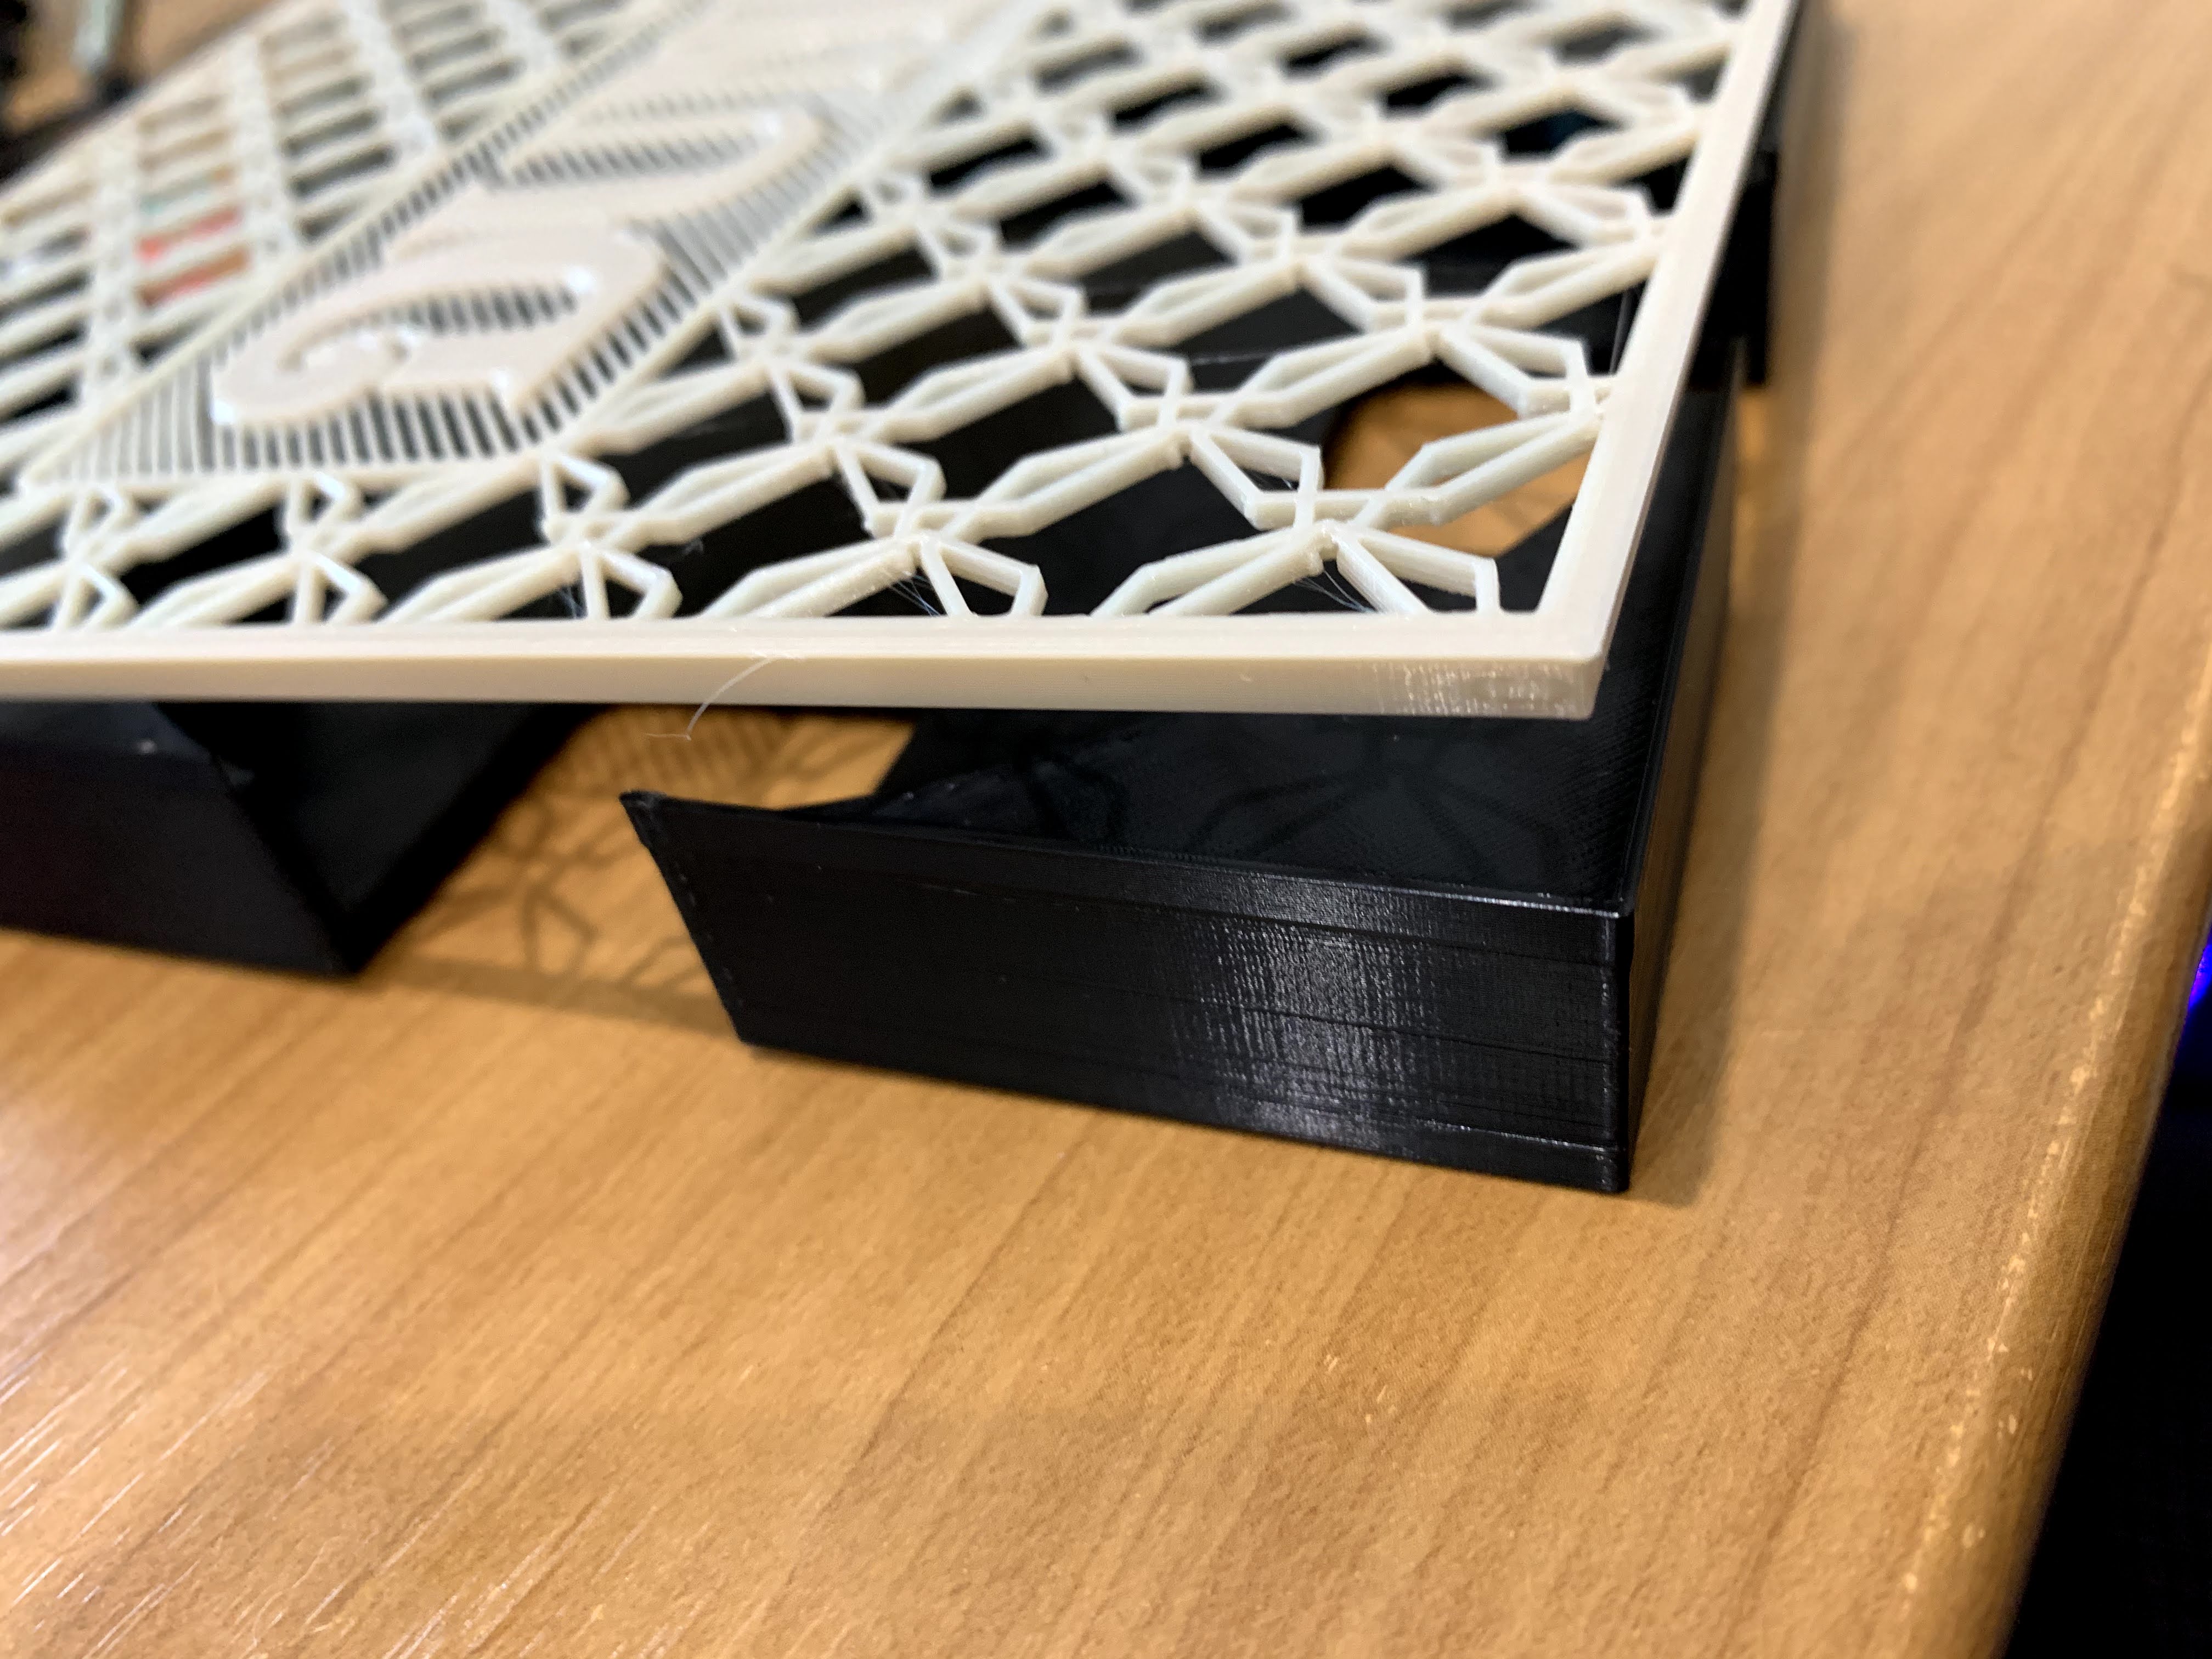
After fixing the print positioning issues I set about trying to print the large board game insert pieces I had been wanting to print. They seemed to print great. These components have a bottom section to store pieces and then a lid to attach to the top. I had already printed a bunch of these, but they were all small versions, this was the first time printing at 18cm length. Once I was done printing the top and bottom pieces it was then I noticed the lid wouldn't fit, and soon realised the pieces I'm printing are not square as they should be. 2 of the 4 edges are not at 90 degree angles, which then causes the lid to bulge and not fit properly. The lids are printed upside down so I assume it is skewed on the other two corners, doubling the issue. I can quite easily see the issue using a set square.
My theory is that this is probably caused by my print bed not being level. I ran the octoprint bed visualiser and can see there is a fairly significant slope from the back right corner down to the back left corner, almost 0.5mm. I have seen other people have issues with their bed leveling related to ZX axis skew, but I don't think this is my issue, because in those cases it's usually two corners too high and two corners too low and therefore obvious how to adjust the axis to correct. My issue looks more like the bed is actually warped. The only thing i could think of that could cause this would be if the carriage is twisted? i.e. the two poles underneath moving the print bed are not level with each other and slope in opposite directions.
I'm kind of at my wits end at this point, never did I think buying a printer would be quite this painful to try and work through all the issues. If anyone has any suggestions on what more I could try please let me know. I know there is a silicone bed leveling mod I could try but I'd have to get the pieces and it kind of feels like i'm fixing a defect at this point. I'll reach out to Prusa as well but it's getting really disheartening 🙁
@skreelink
Thanks for all your help, it is very much appreciated. I used your MINDA warming code when runing the bed visualiser to ensure it was as accurate as possible. I haven't tried it with one of these prints I've had issues with yet, but suspect it's probably not the cause of the warping.
Bed Visualiser:-


Warping issue:-

RE: Z banding issues
Warping is sadly, the nature of the beast, especially with large, flat objects. As far as it being out of square, it could be the model or (since there's very open insides) the forces are pulling it as it cools, it retracts a little and warps. Either downscale the lid a little when you slice it (say 98-99%) so it drops in easier, or you can try changing the extrusion multiplier under the Filament Settings tab to 95-97. The extrusion multiplier is good if you're slightly overextruding, which will bulge corners and push a little more material out which could interrupt the stresses and warp a little. From what I can see in your image, it could use a slight reduction in the multiplier.
As far as the bed visualizer, don't worry about it too much, as that's what the probe is for. Compensating for these differences. 🙂 I would say you can also try a raft, but you're already maxing out the build plate. Also make sure to let it fully cool down before removing it from the bed, especially thin/large objects. Besides just the stresses of pulling on them, while still warm the plastic isn't fully hardened and can be pulled, stretched, and deformed some and then it cools and sets that way.
I think I know, I don’t think I know. I don’t think I think I know, I don’t think I think.
RE: Z banding issues
I suggest You implementing the silicone bed leveling mod o place some strips of paper tape to get a better flat bed.
then print the attached (edit... not allowed uploading a stl) to check all axes are properly aligned, XZ can be easily adjusted by following the official prusa guide, for the others...good luck.
for XY You could try this https://www.thingiverse.com/thing:4378040
the YZ can be adjusted ensuring the X rods are aligned to the dotted lines in the heat bed (without PEI sheet).