RE: Show your enclosures
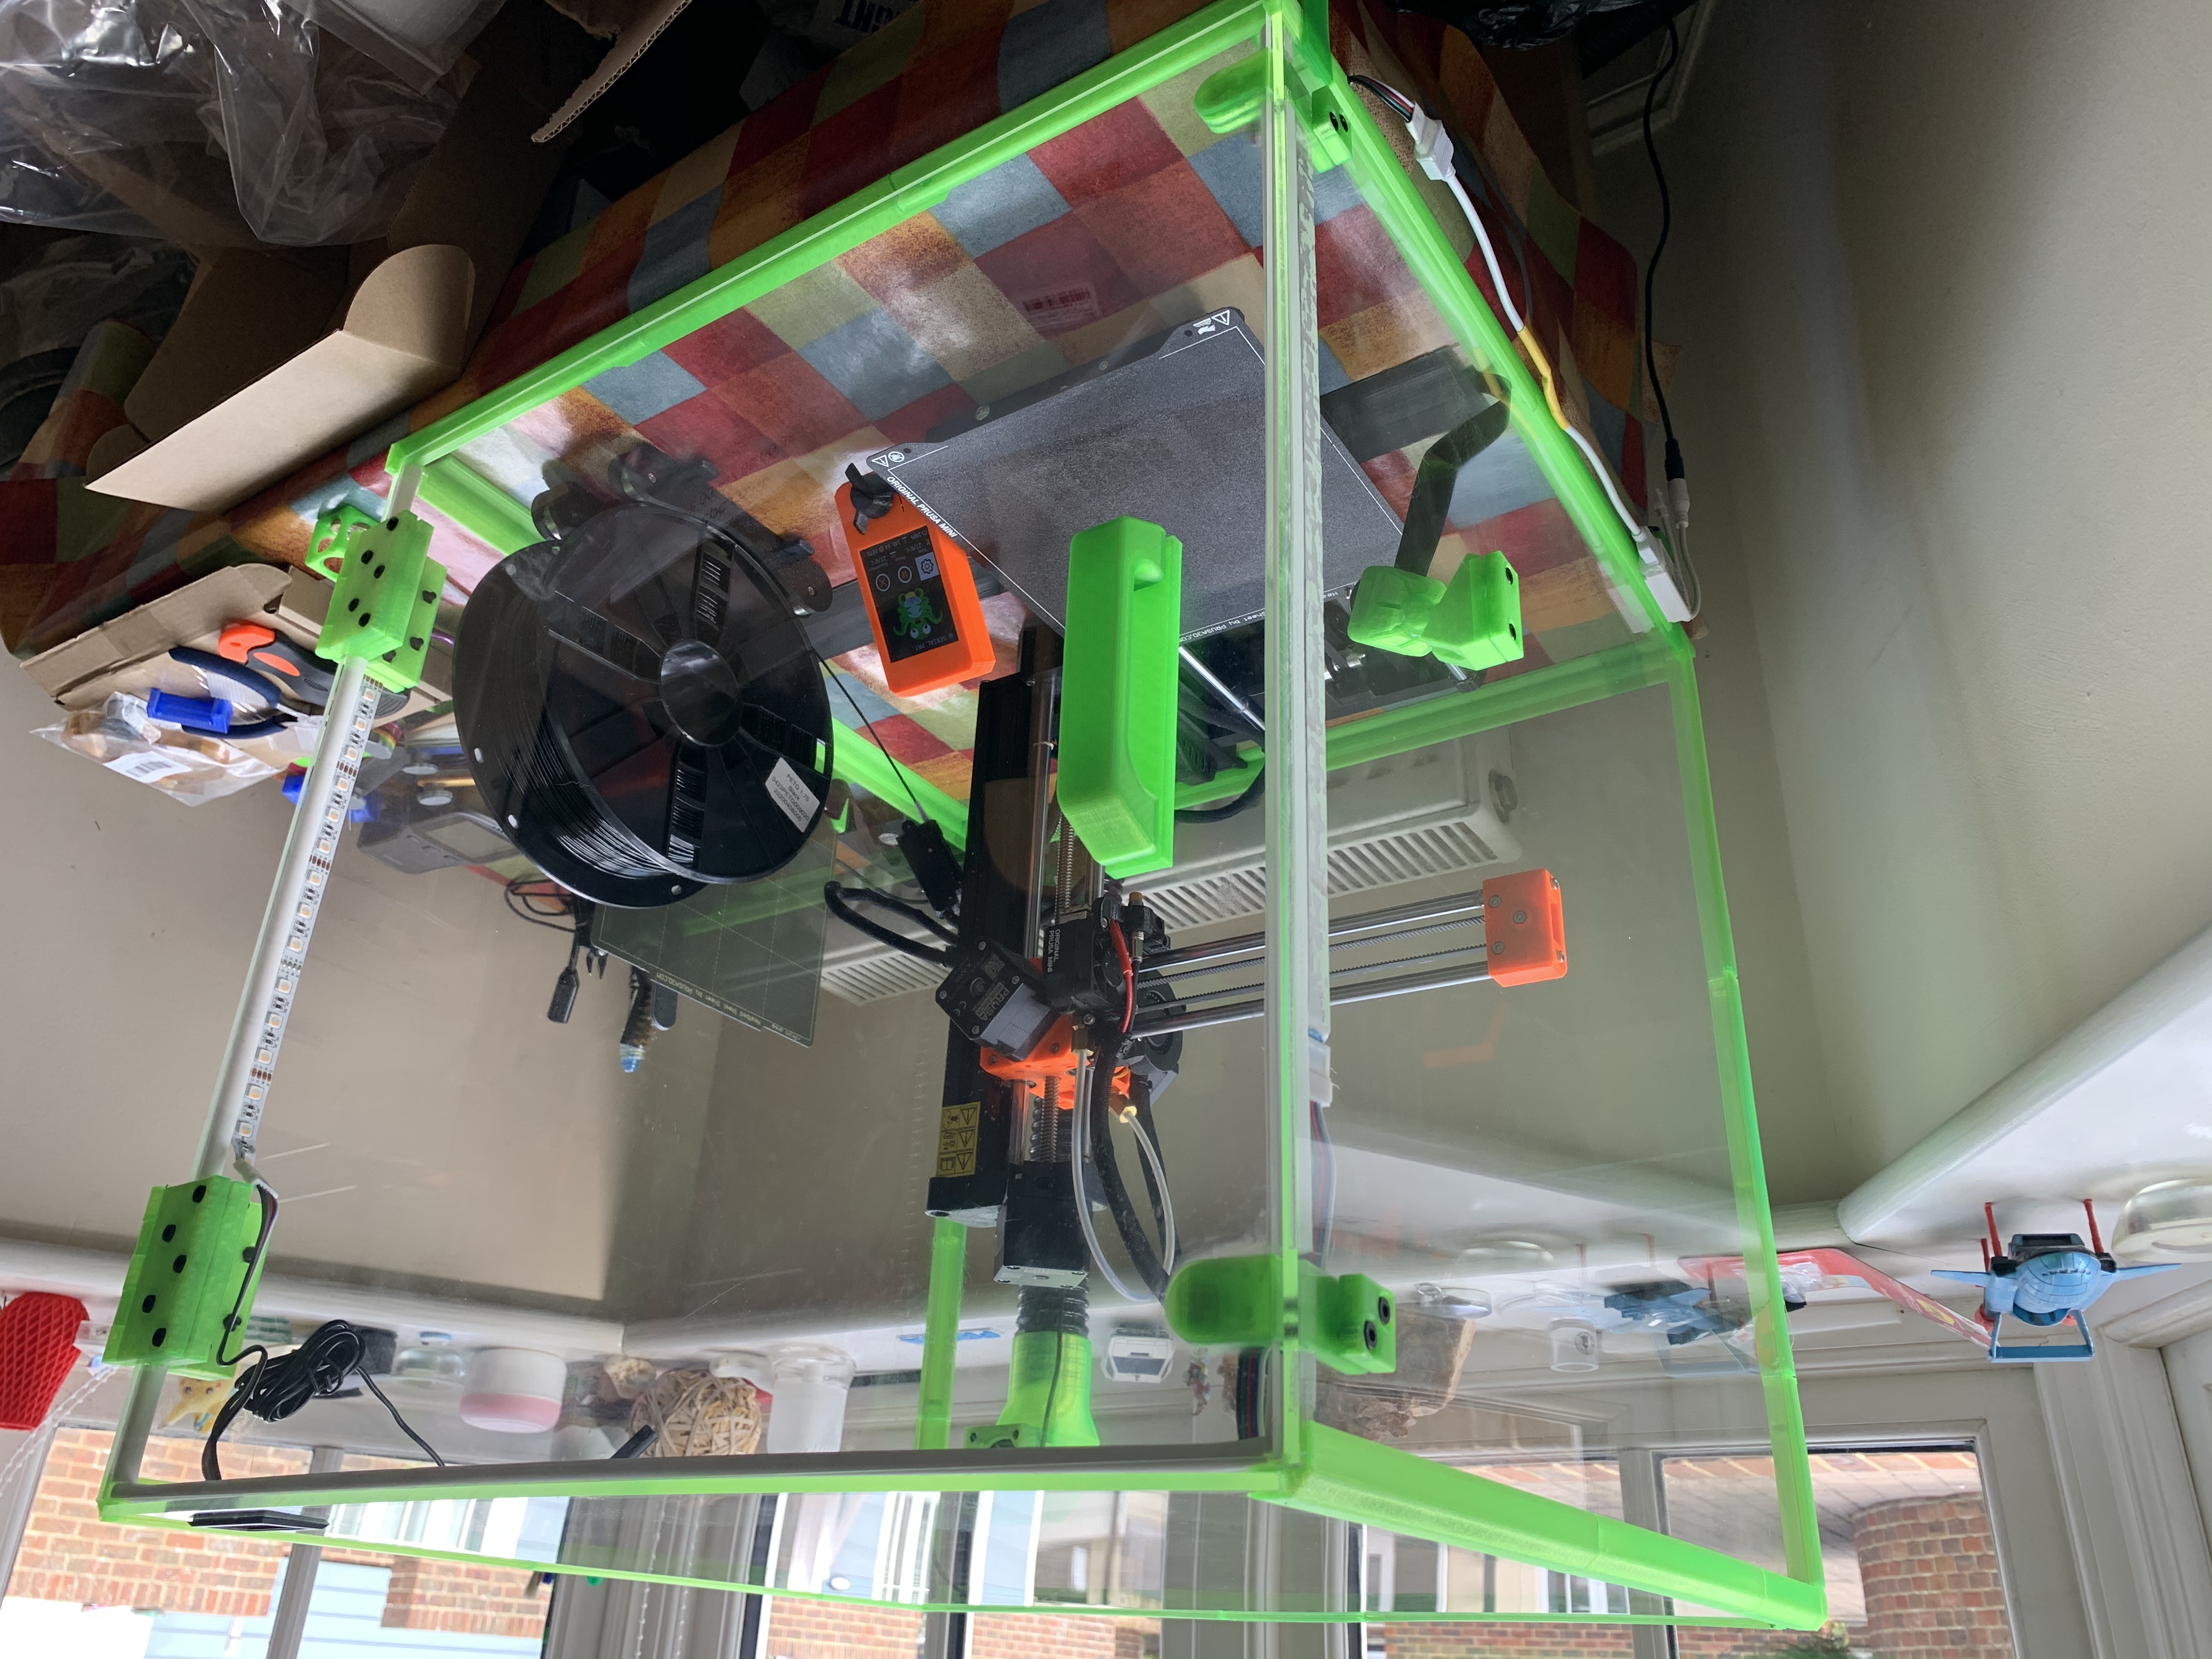
I finally finished my Mini enclosure, made from 500mm x 500mm acrylic sheets of 4mm thickness, some M4 nuts and bolts, Prusament Neon Green PETG, AmazonBasics Neon Green PLA, and AmazonBasics Black PLA.
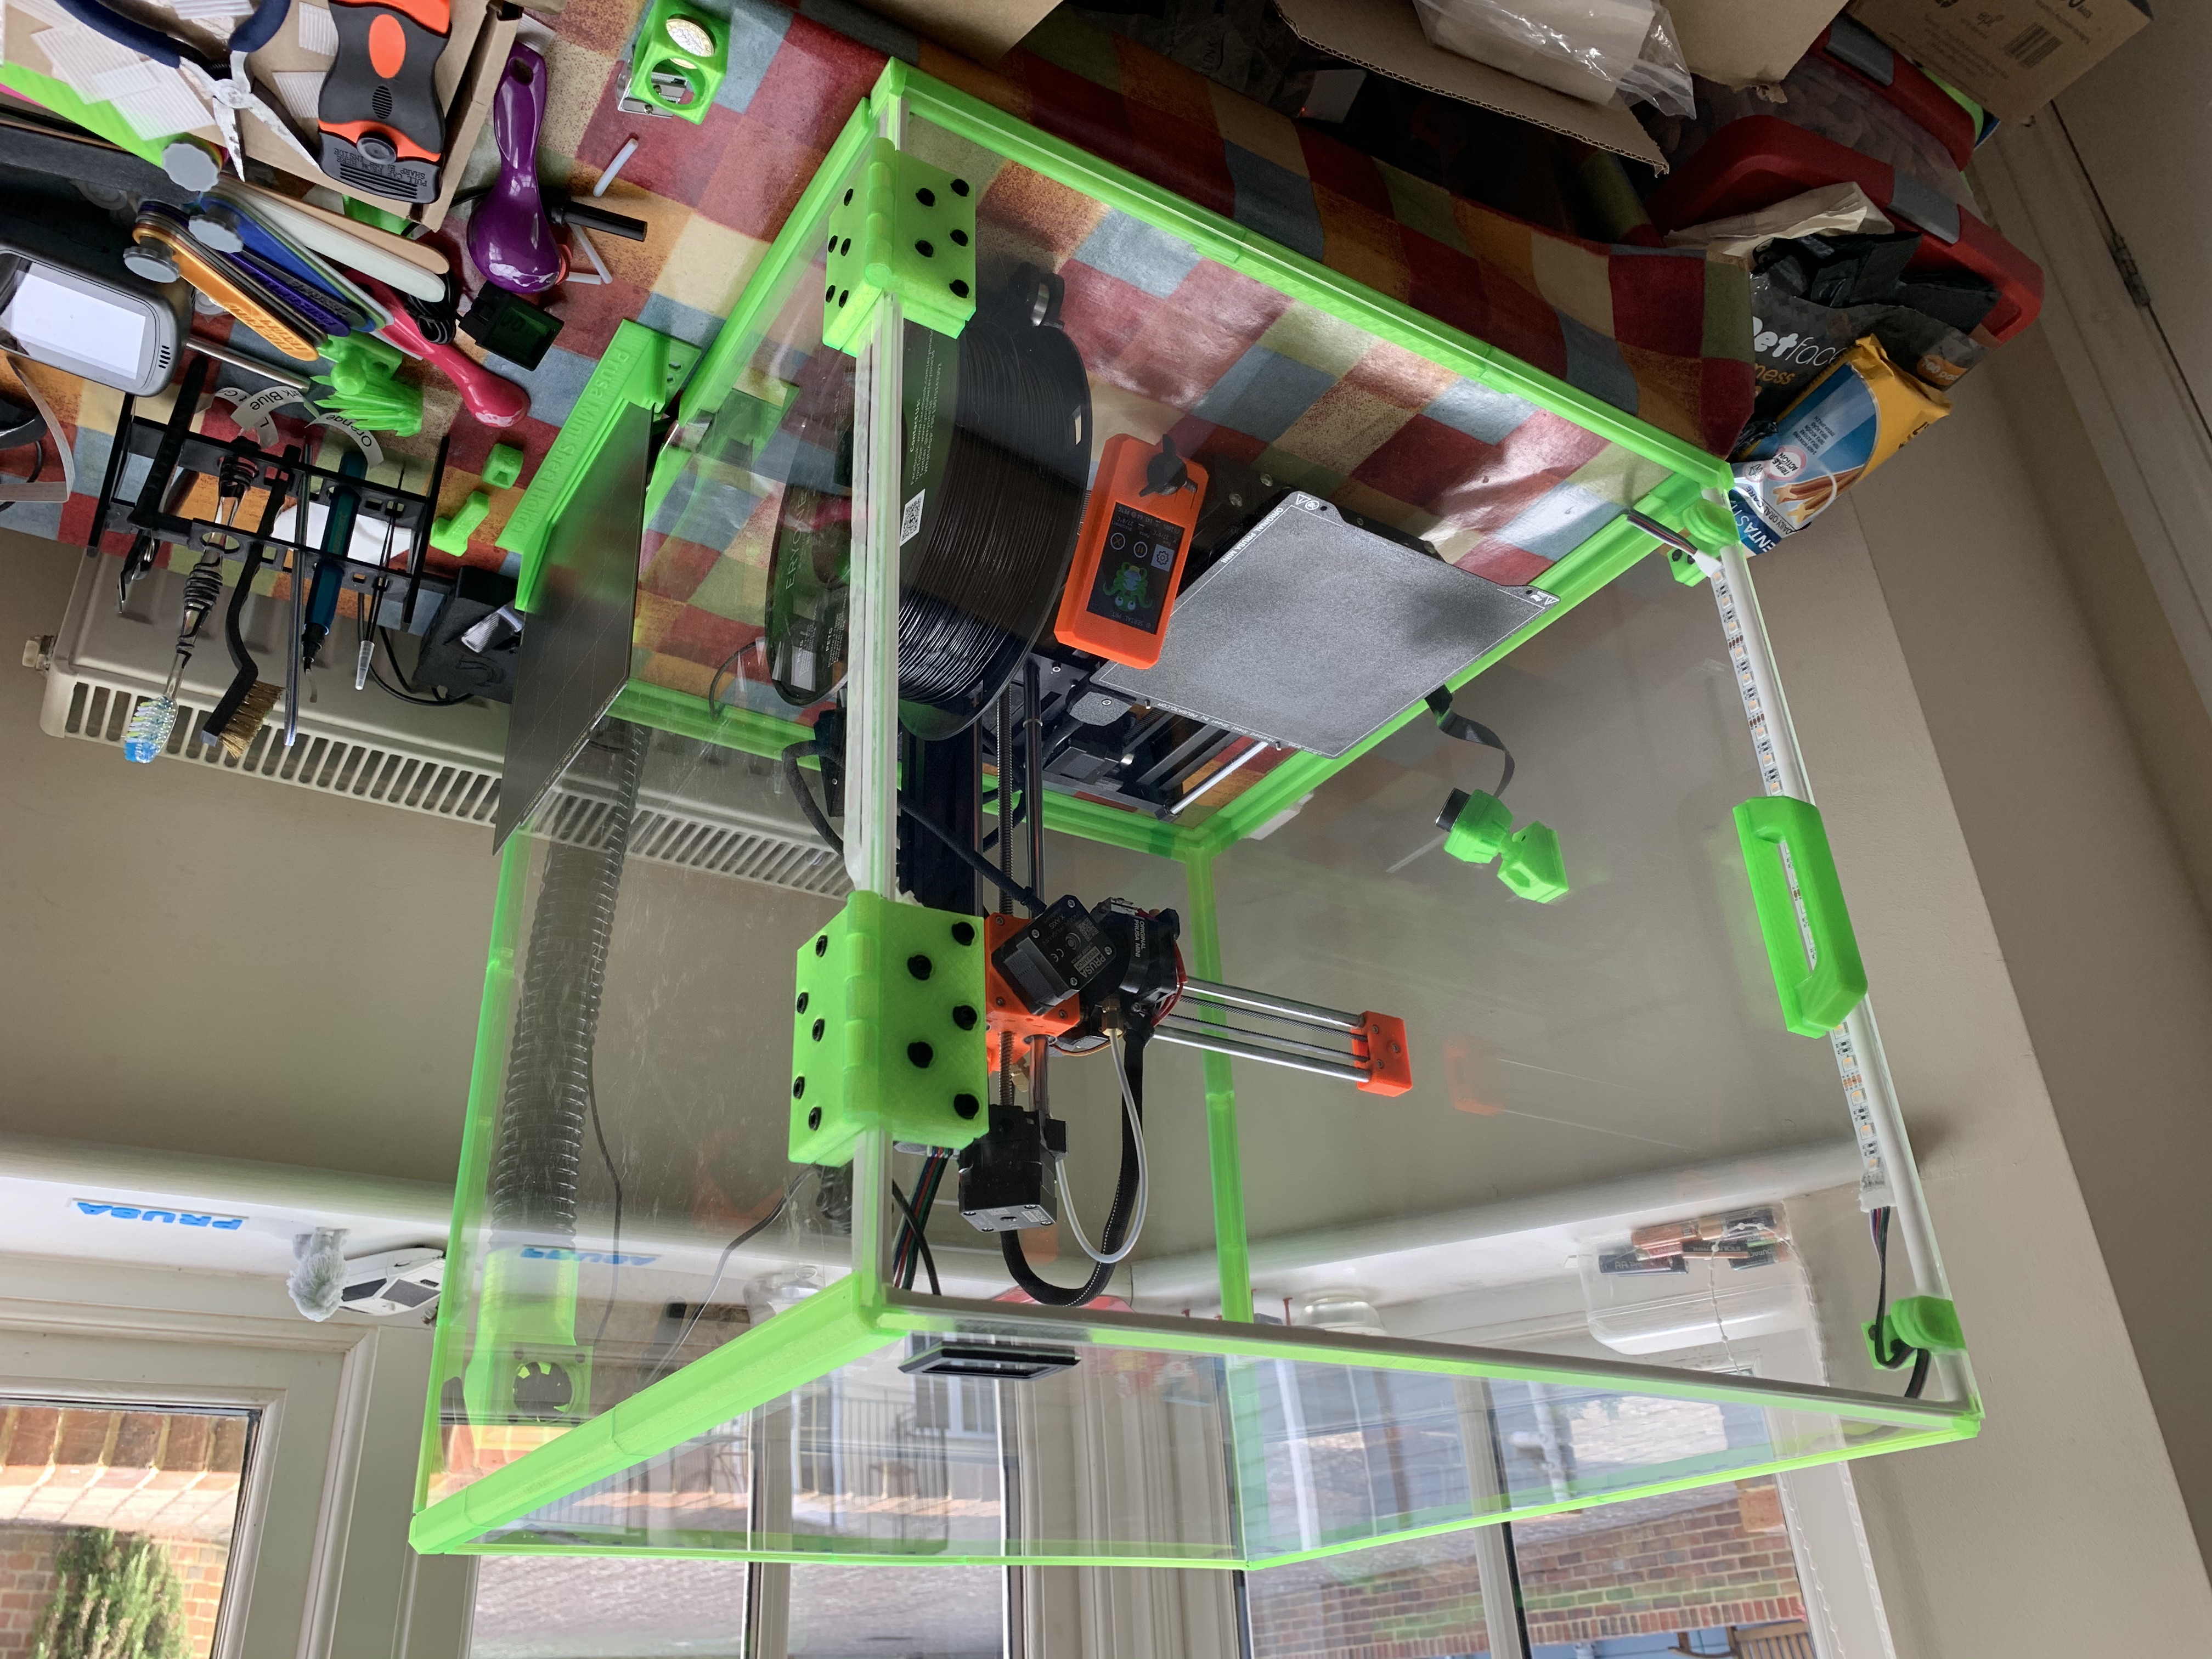
I could have had a lower height (and probably would have ordered sheets if I could get them) but I'm glad I had the extra room because it makes reaching in and fiddling with things very easy.
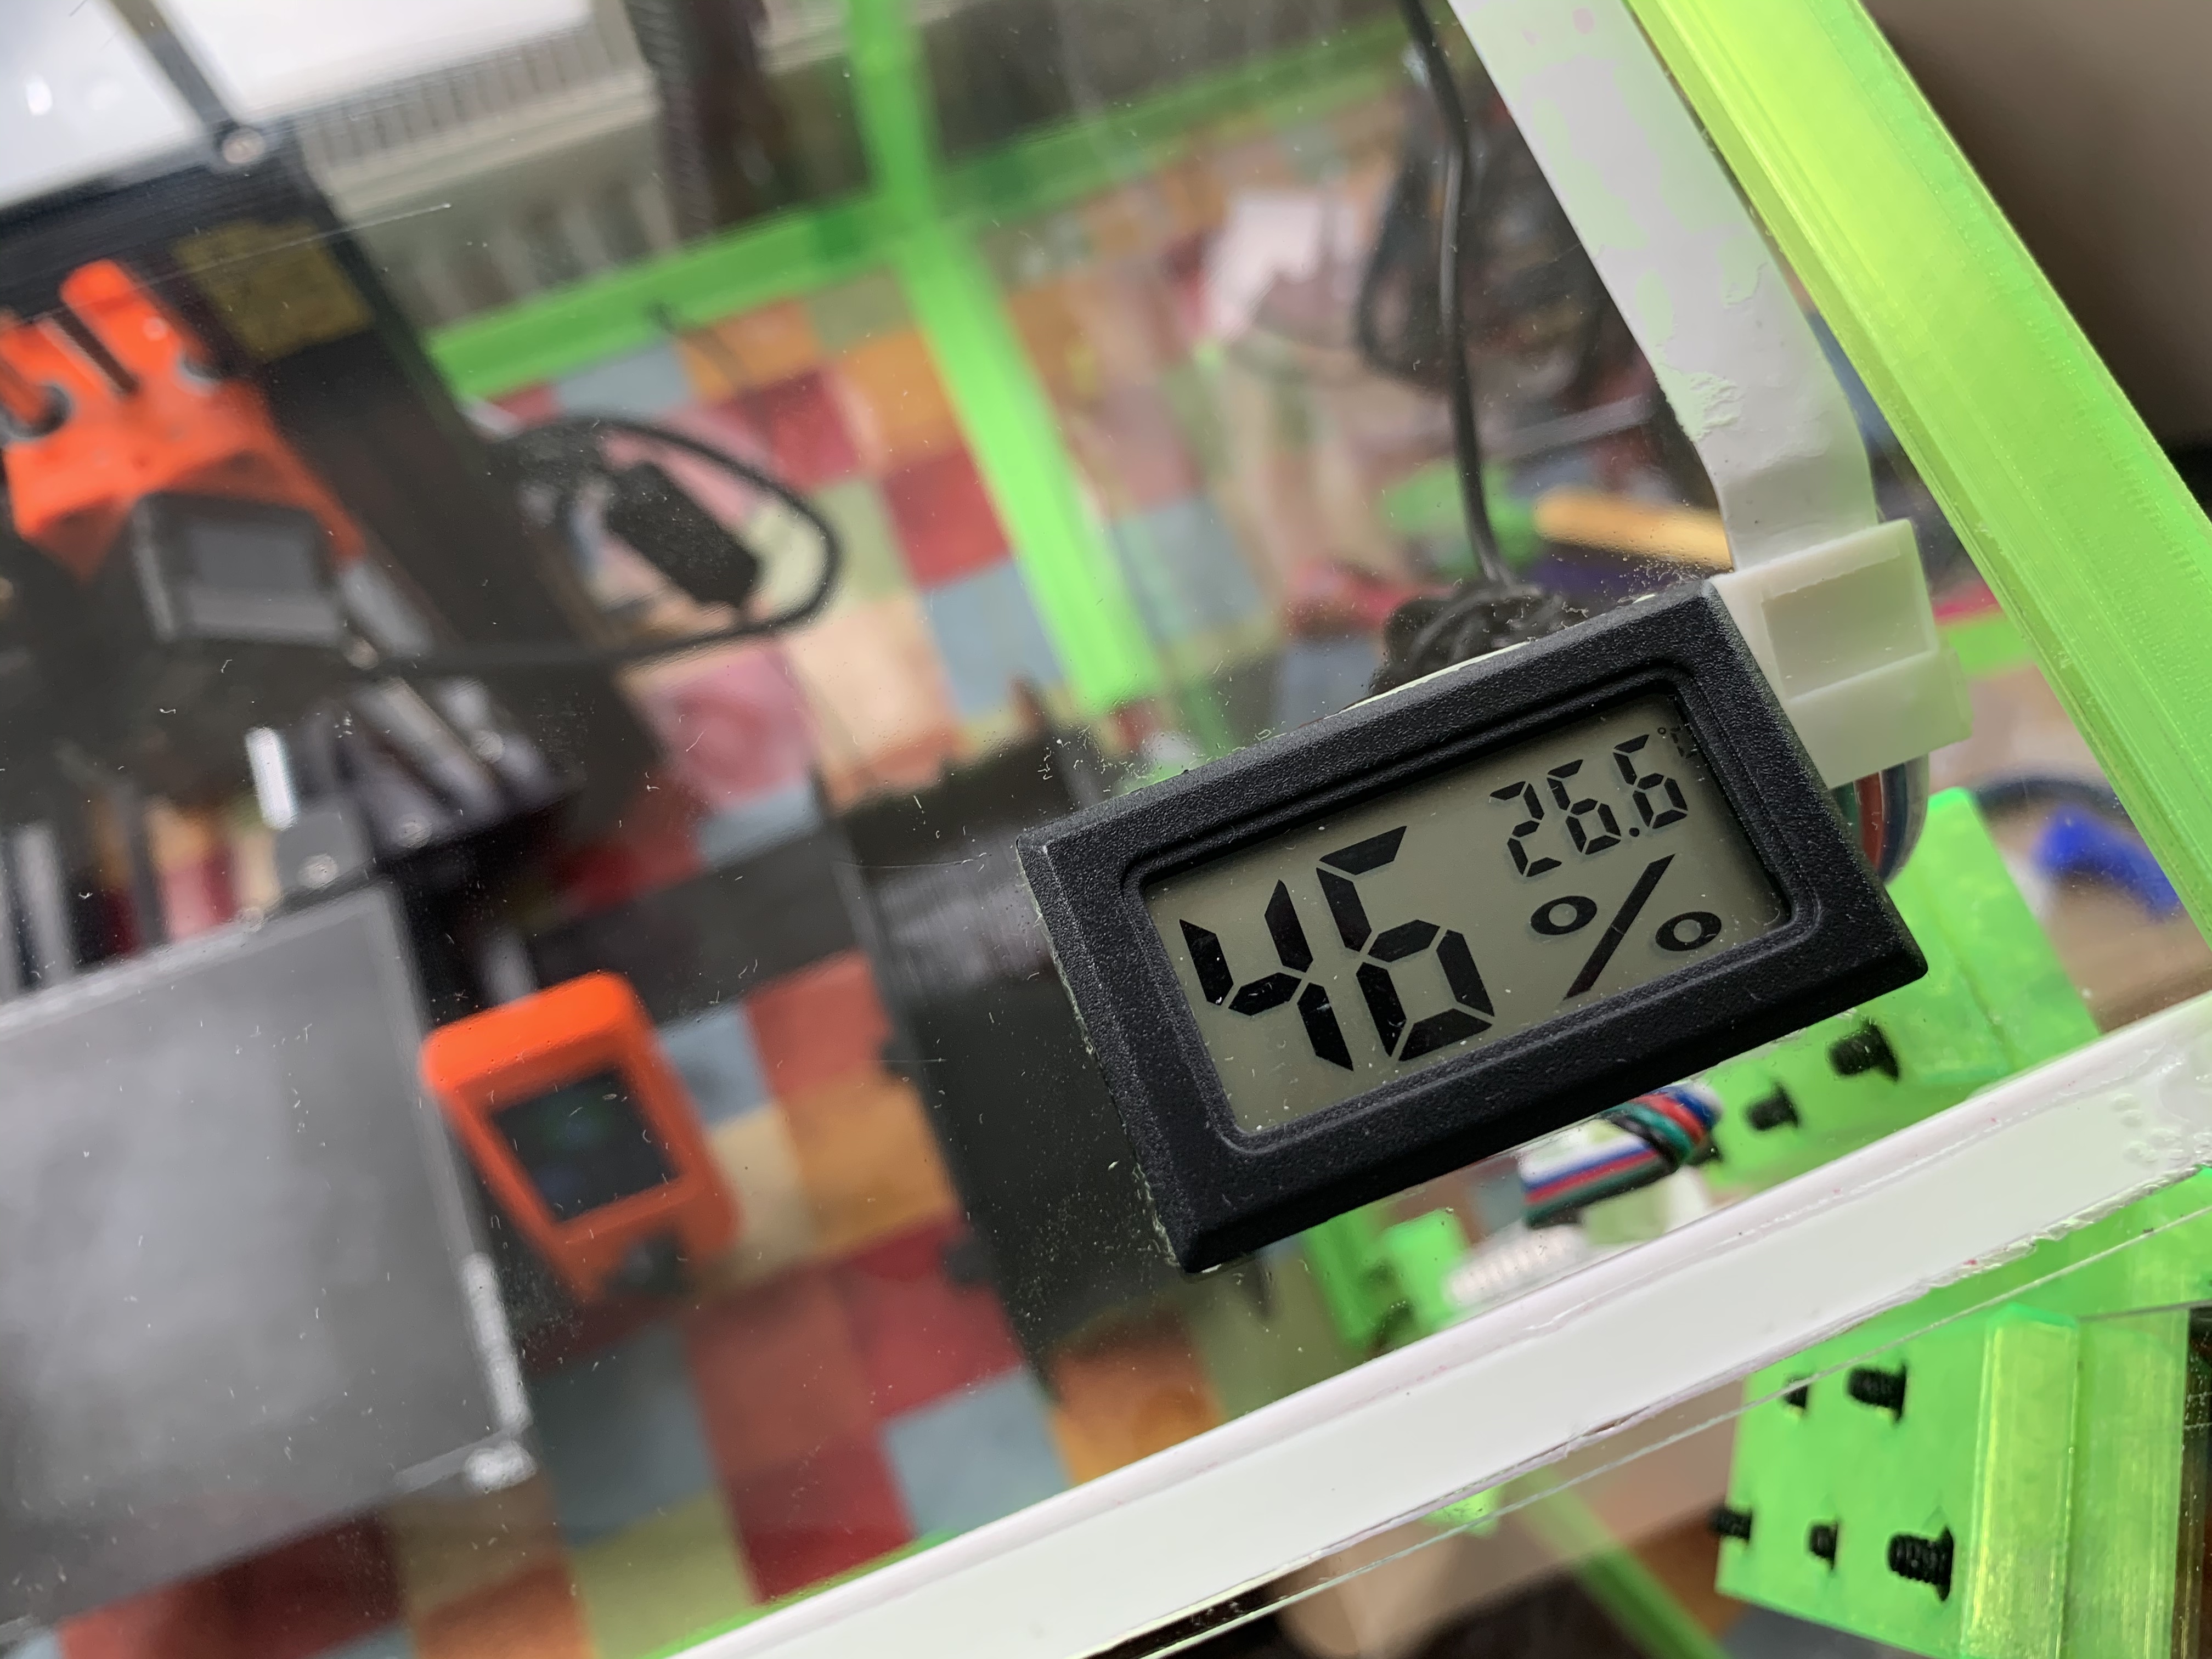
It's nice to know how warm life is inside, and how humid!
My Pi Camera 2.1 needs a mount and a fish eye lens...
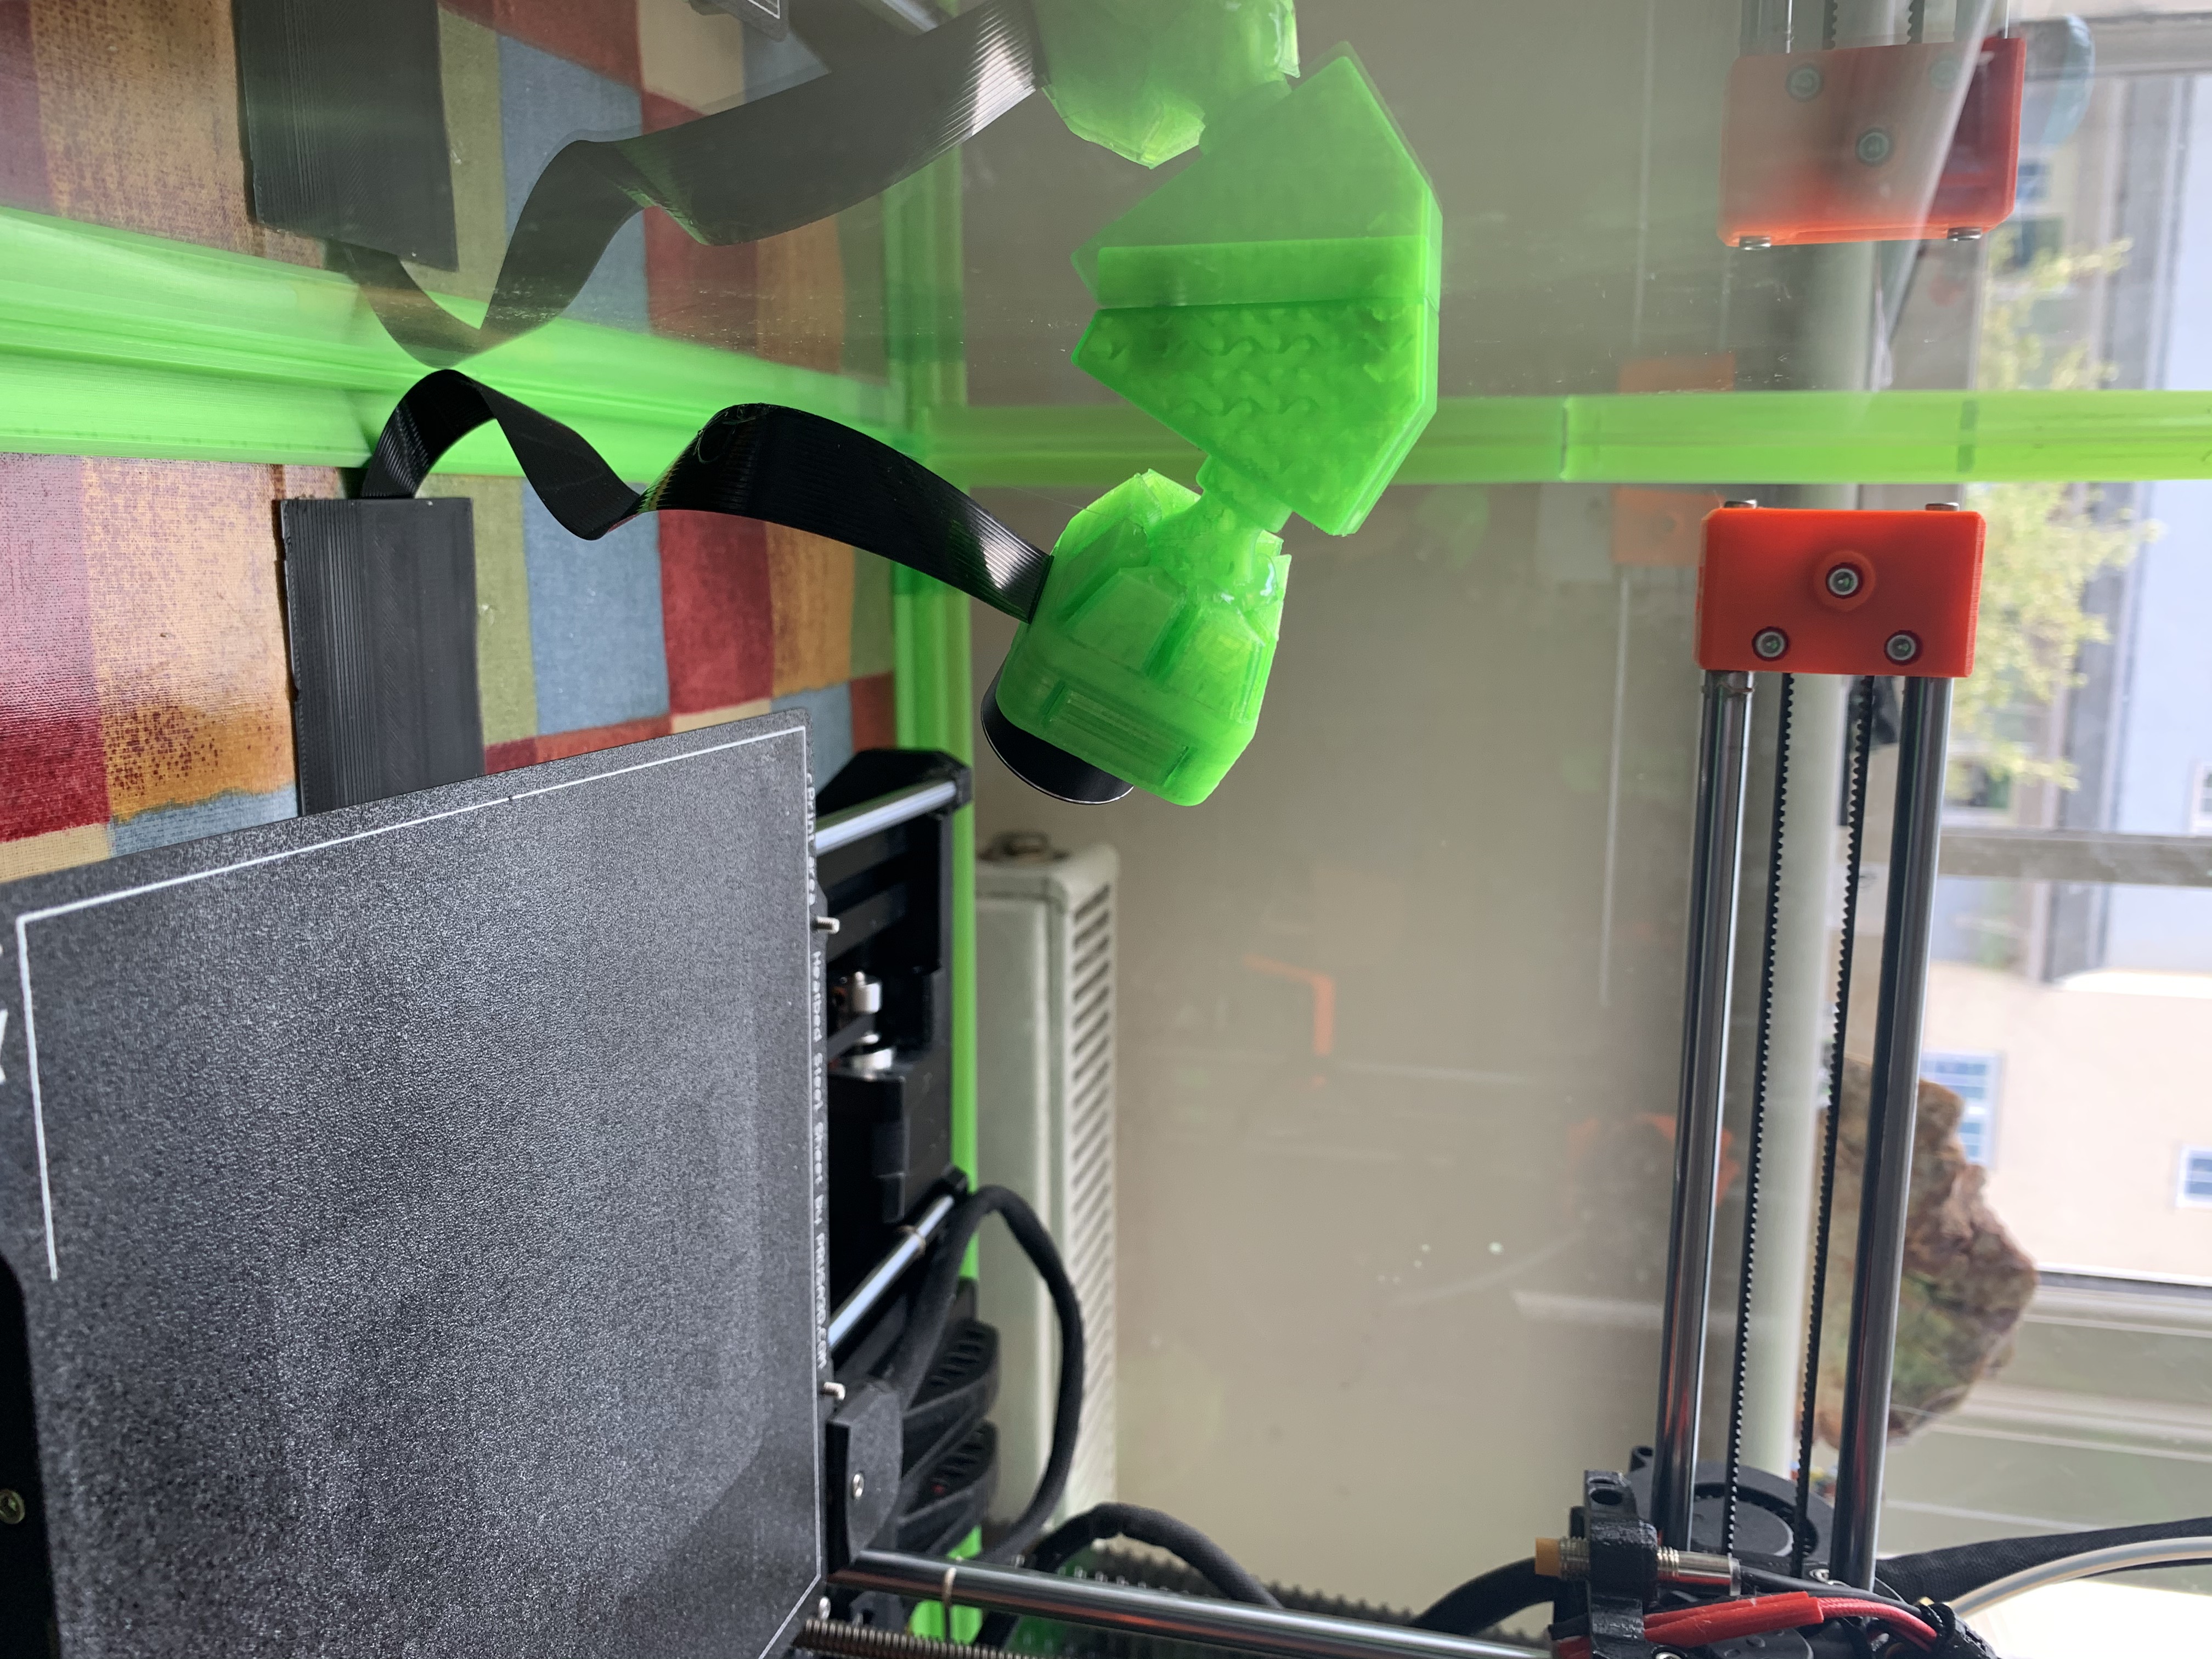
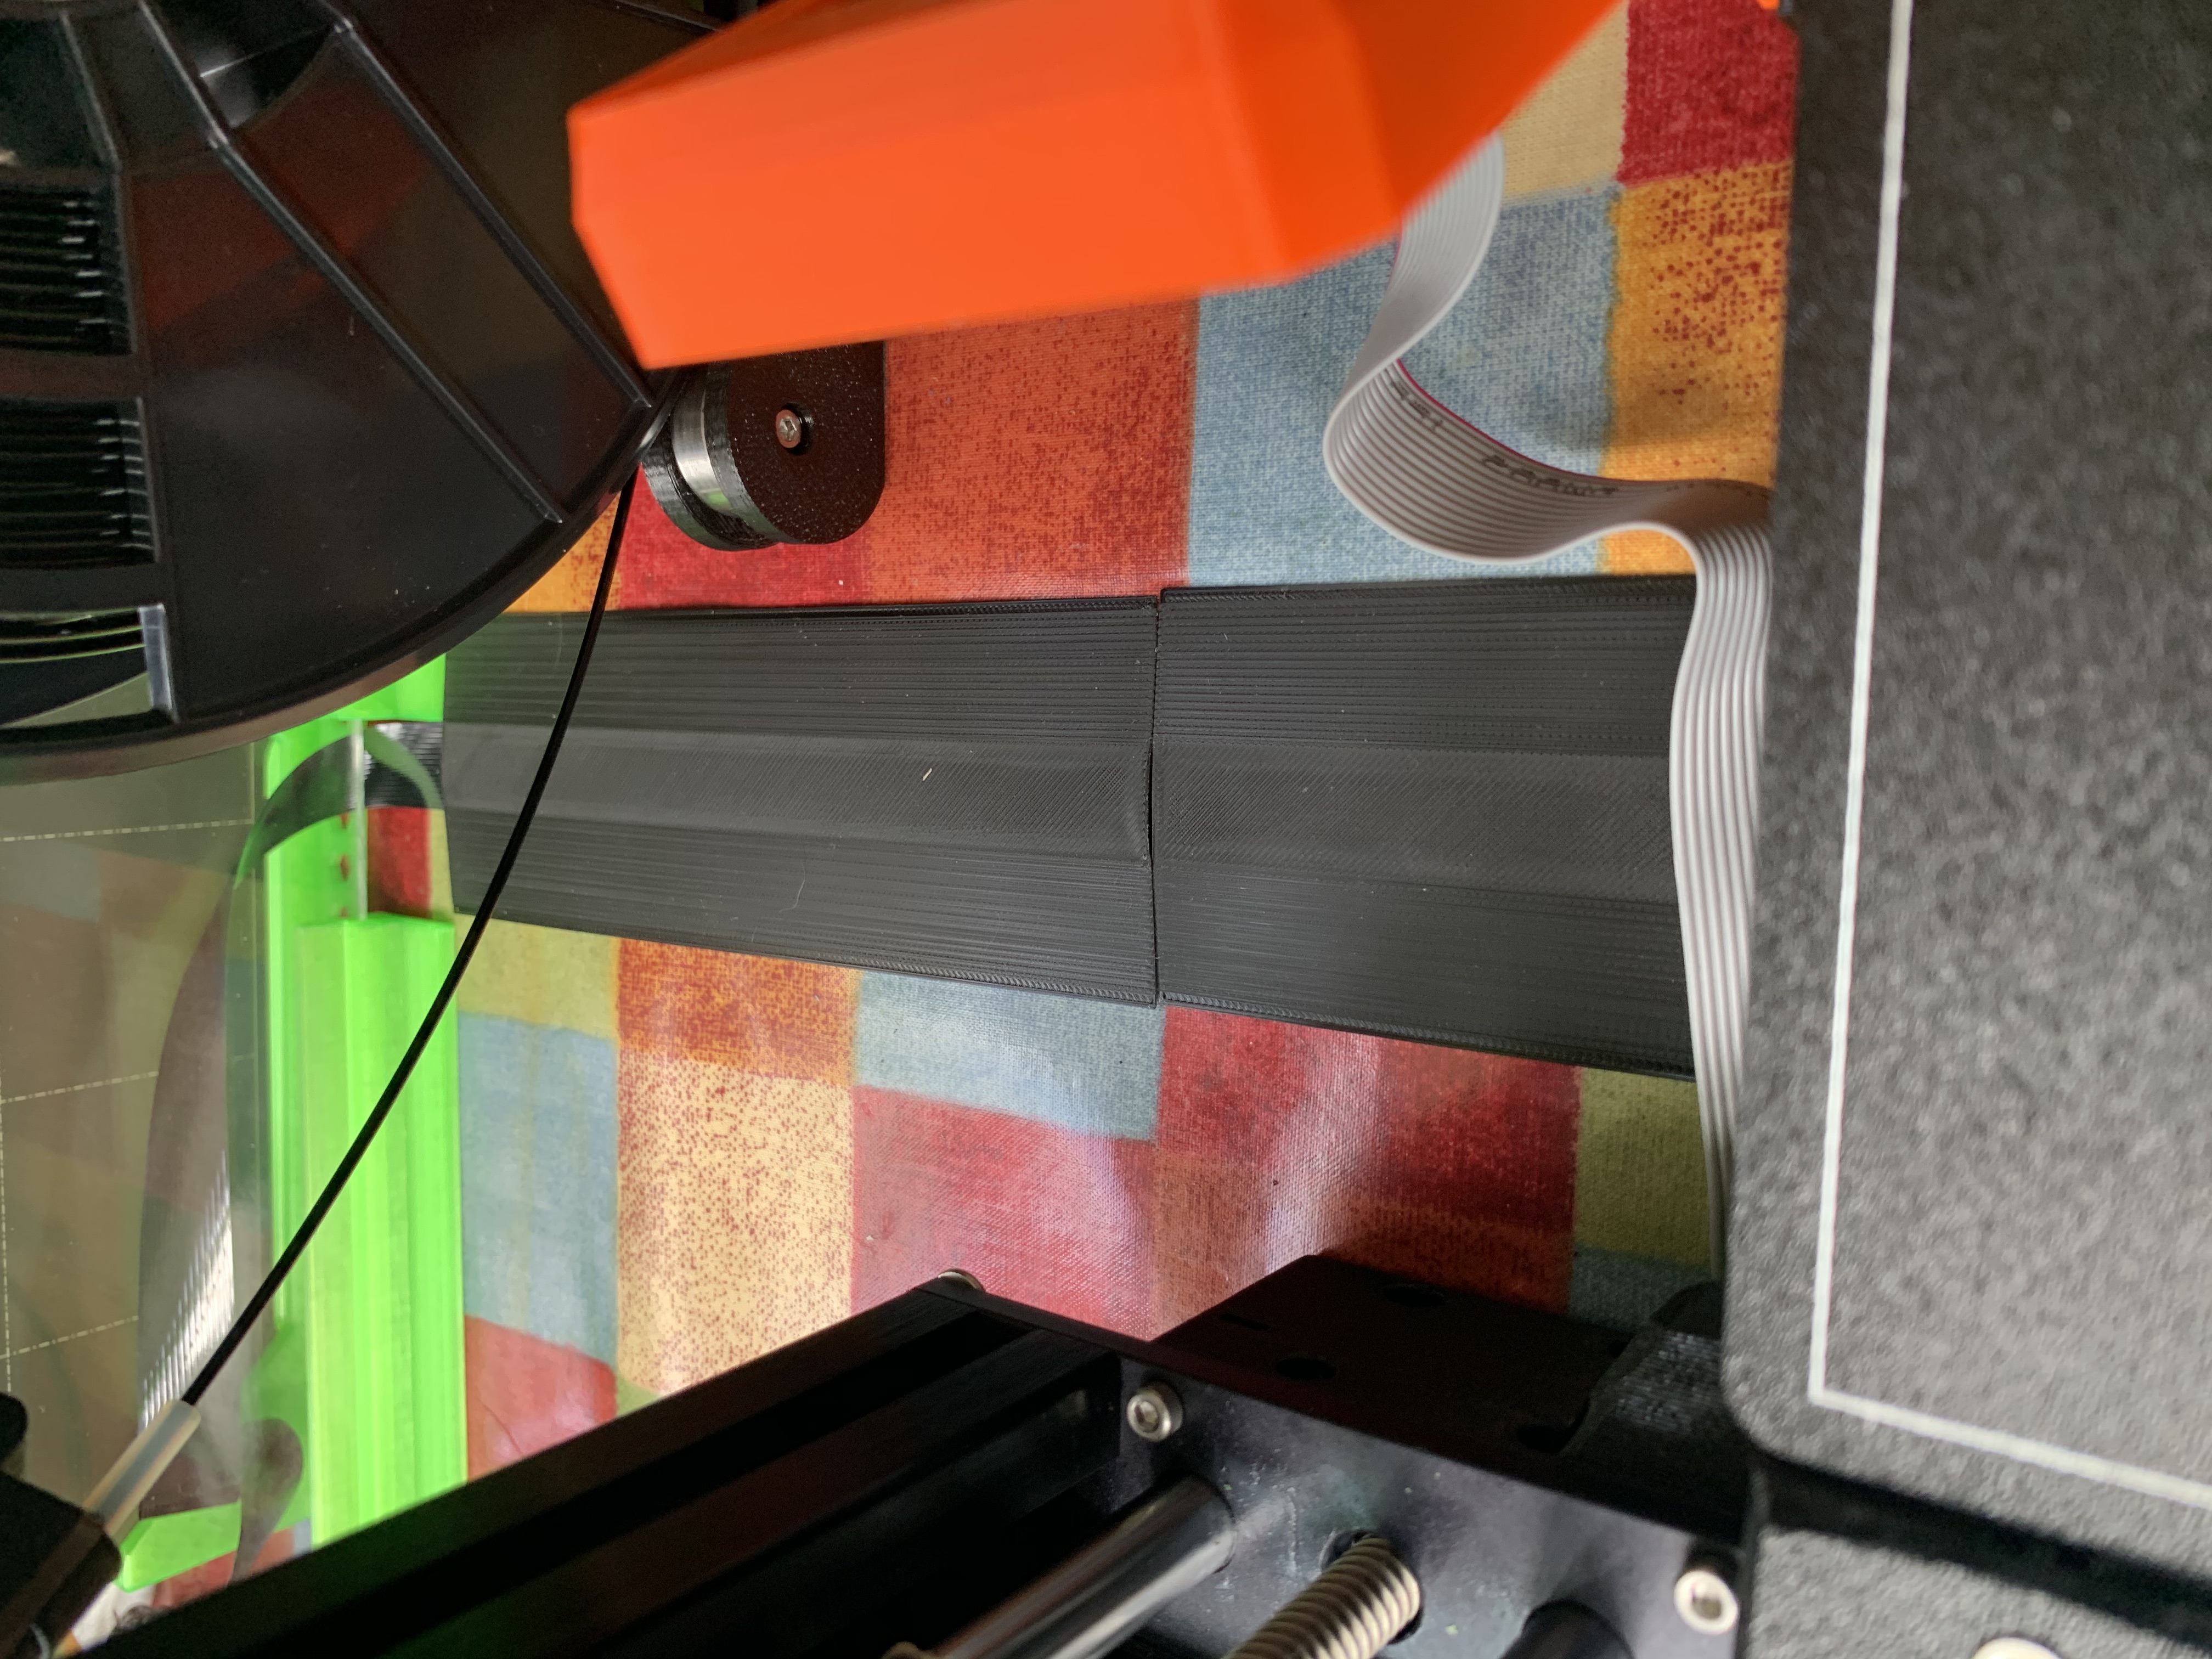
It also needs some trunking to guard the flex cable (I just hot glued it to the plastic tablecloth).
Even though it's a lot of clear panelling, where it lives in the kitchen the light isn't so good after dark, so I added RGBW lighting with a remote, WiFi and even works with Alexa.
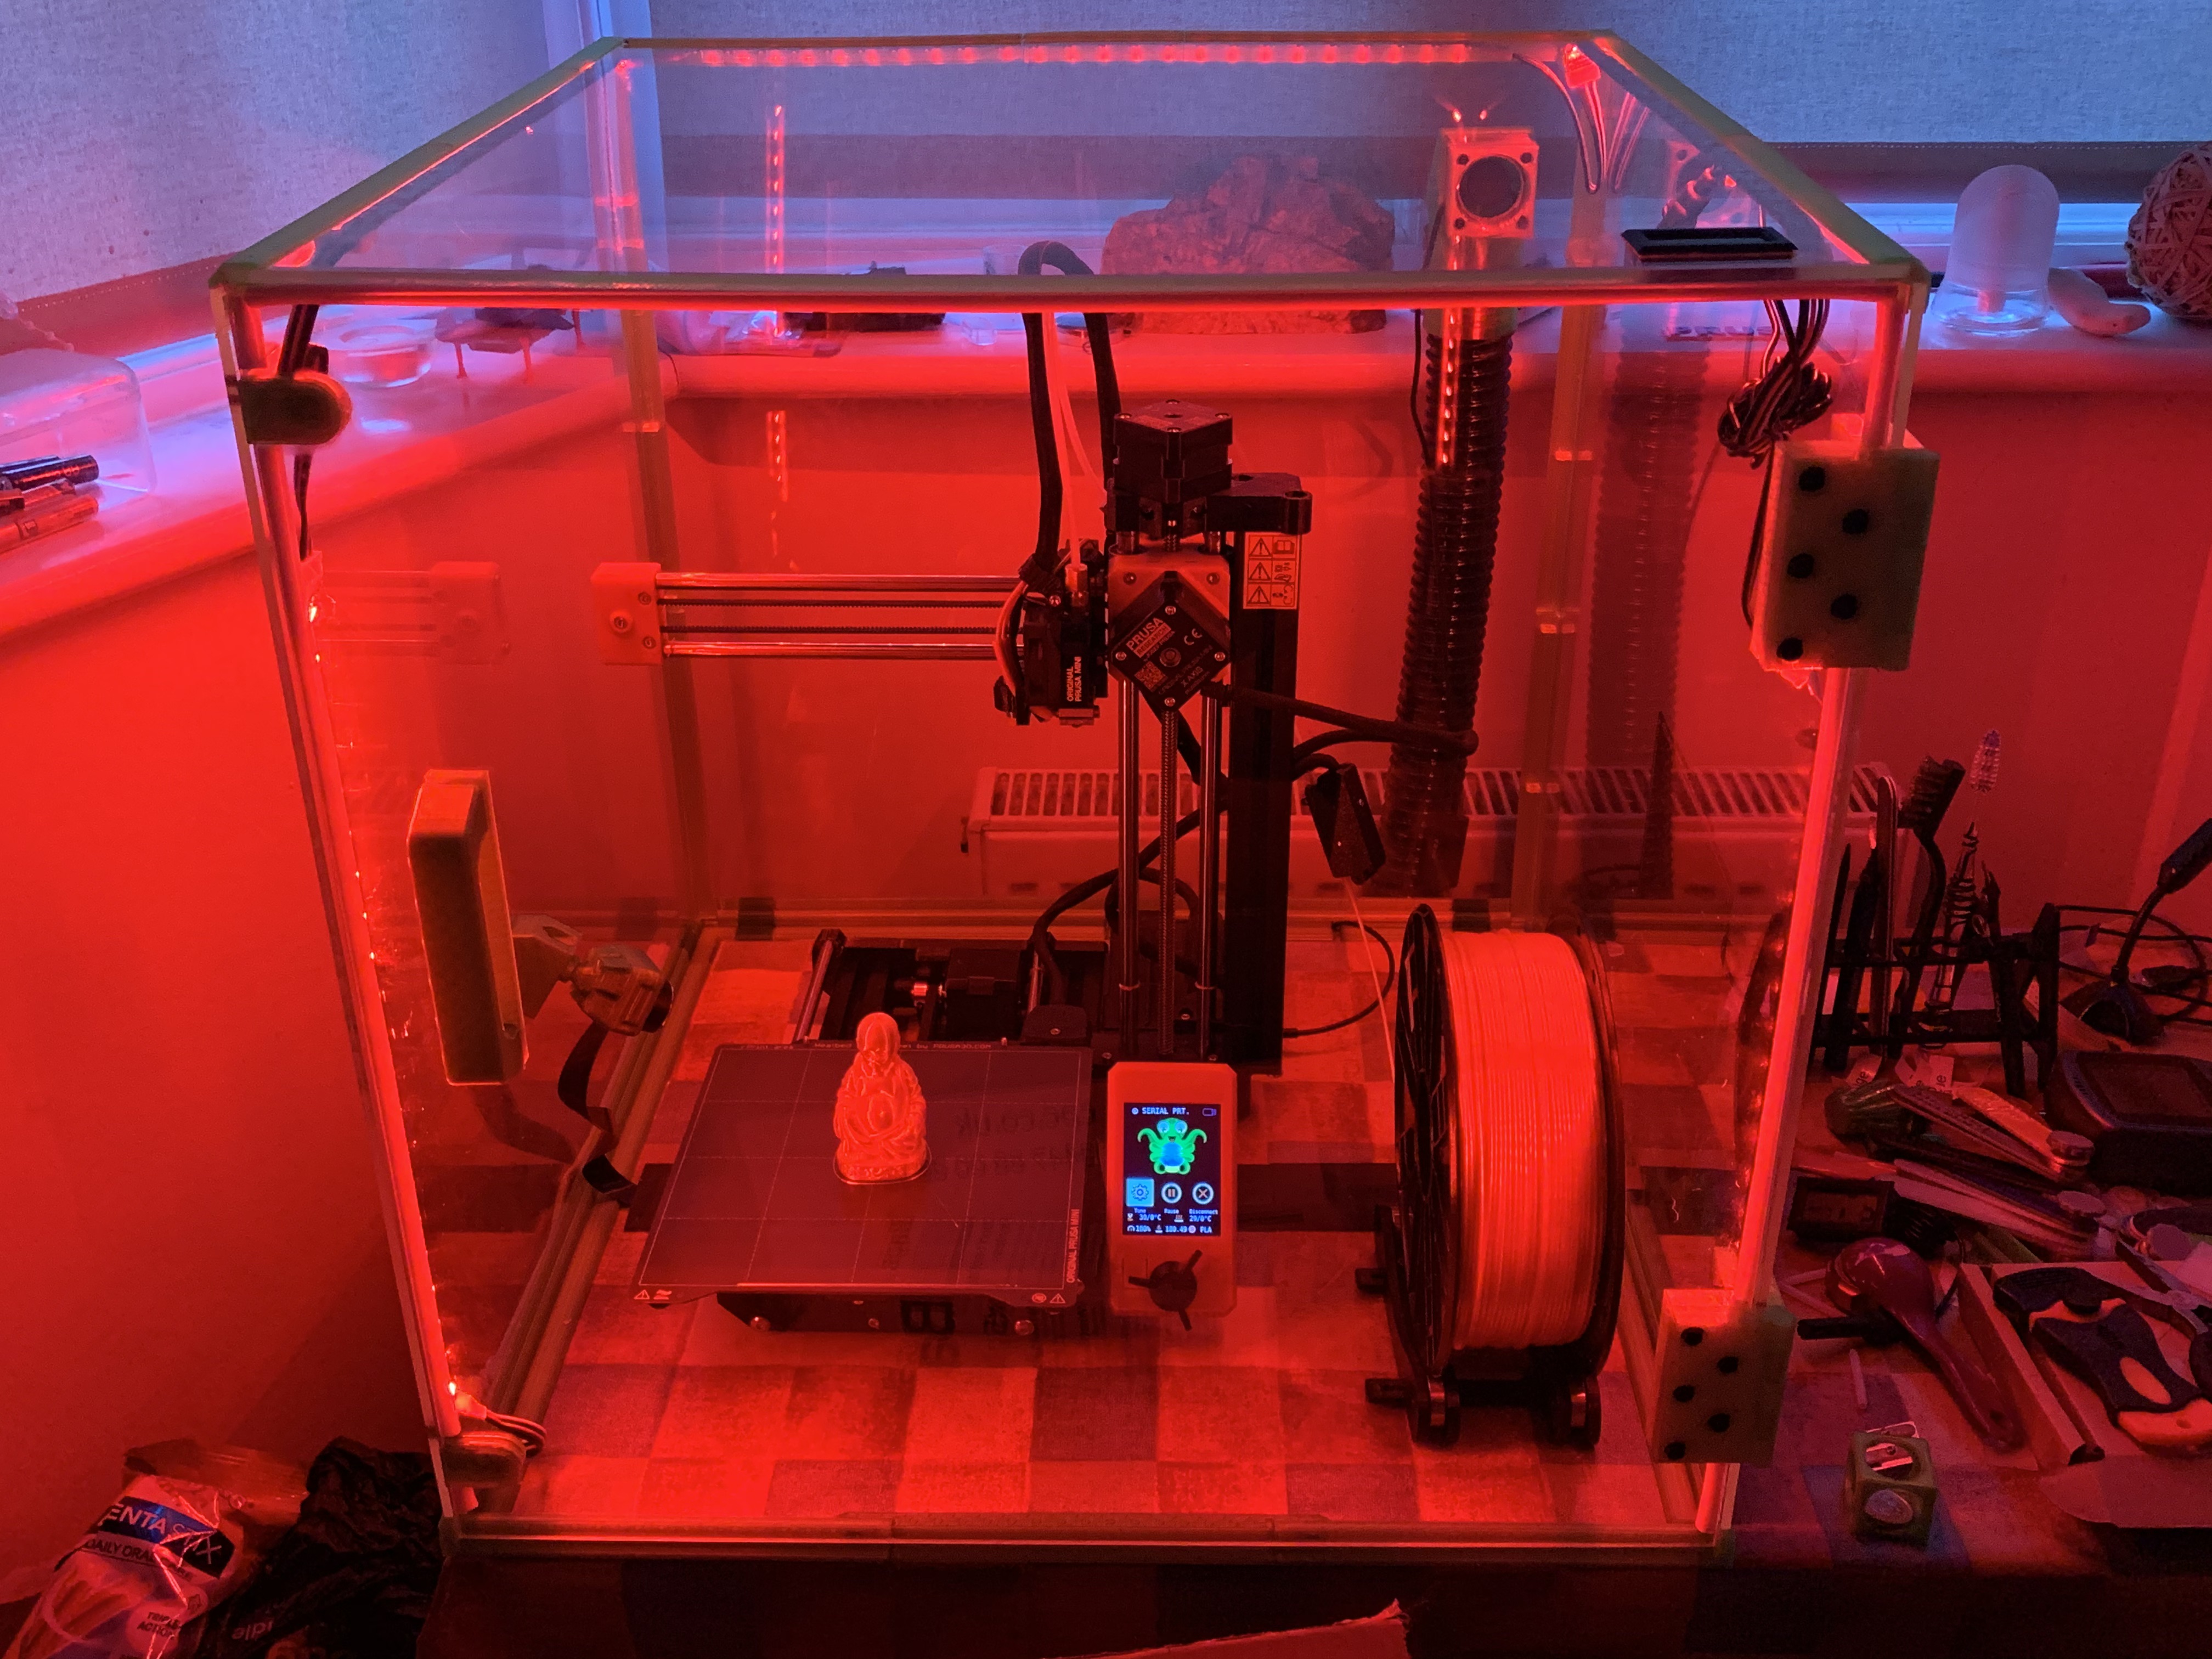
You'd think neon green would look best with a green light but it doesn't. Also being able to change the lighting colours can be useful as some filaments are easier to see in different coloured illuminations. Also it's just cool to look at and play with. 🙂
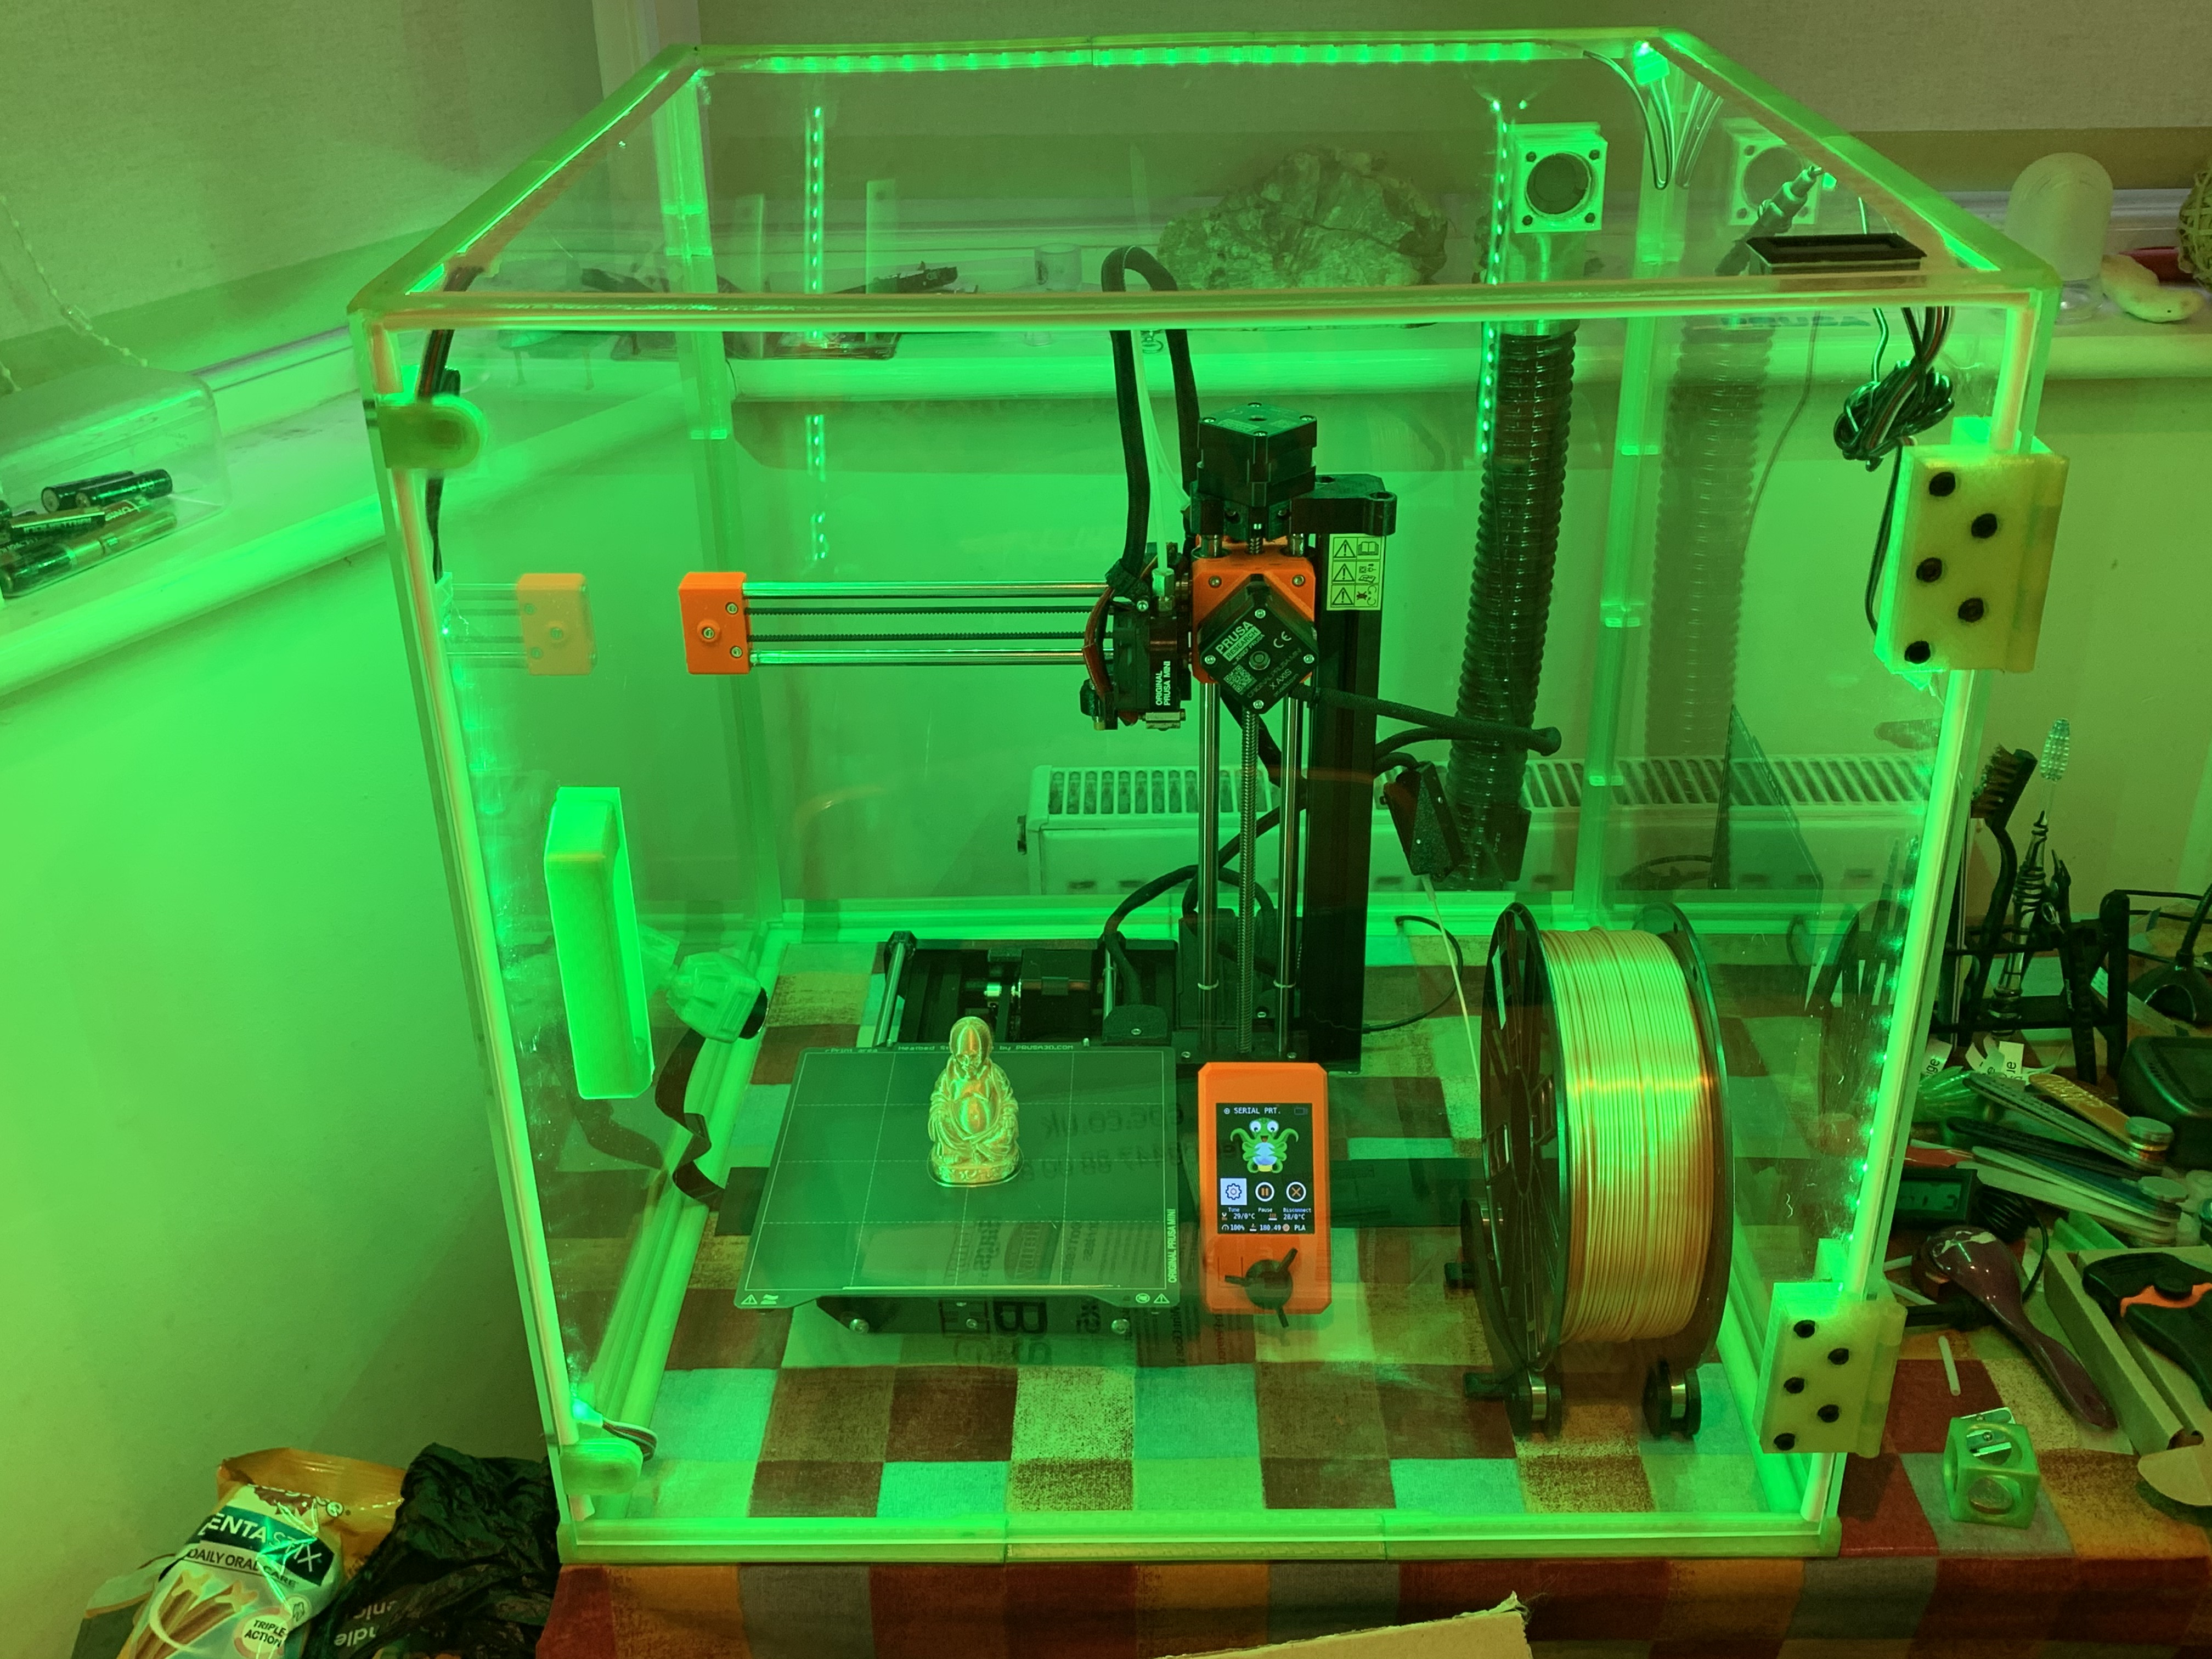
Blue shows up the green the most, I don't know why.
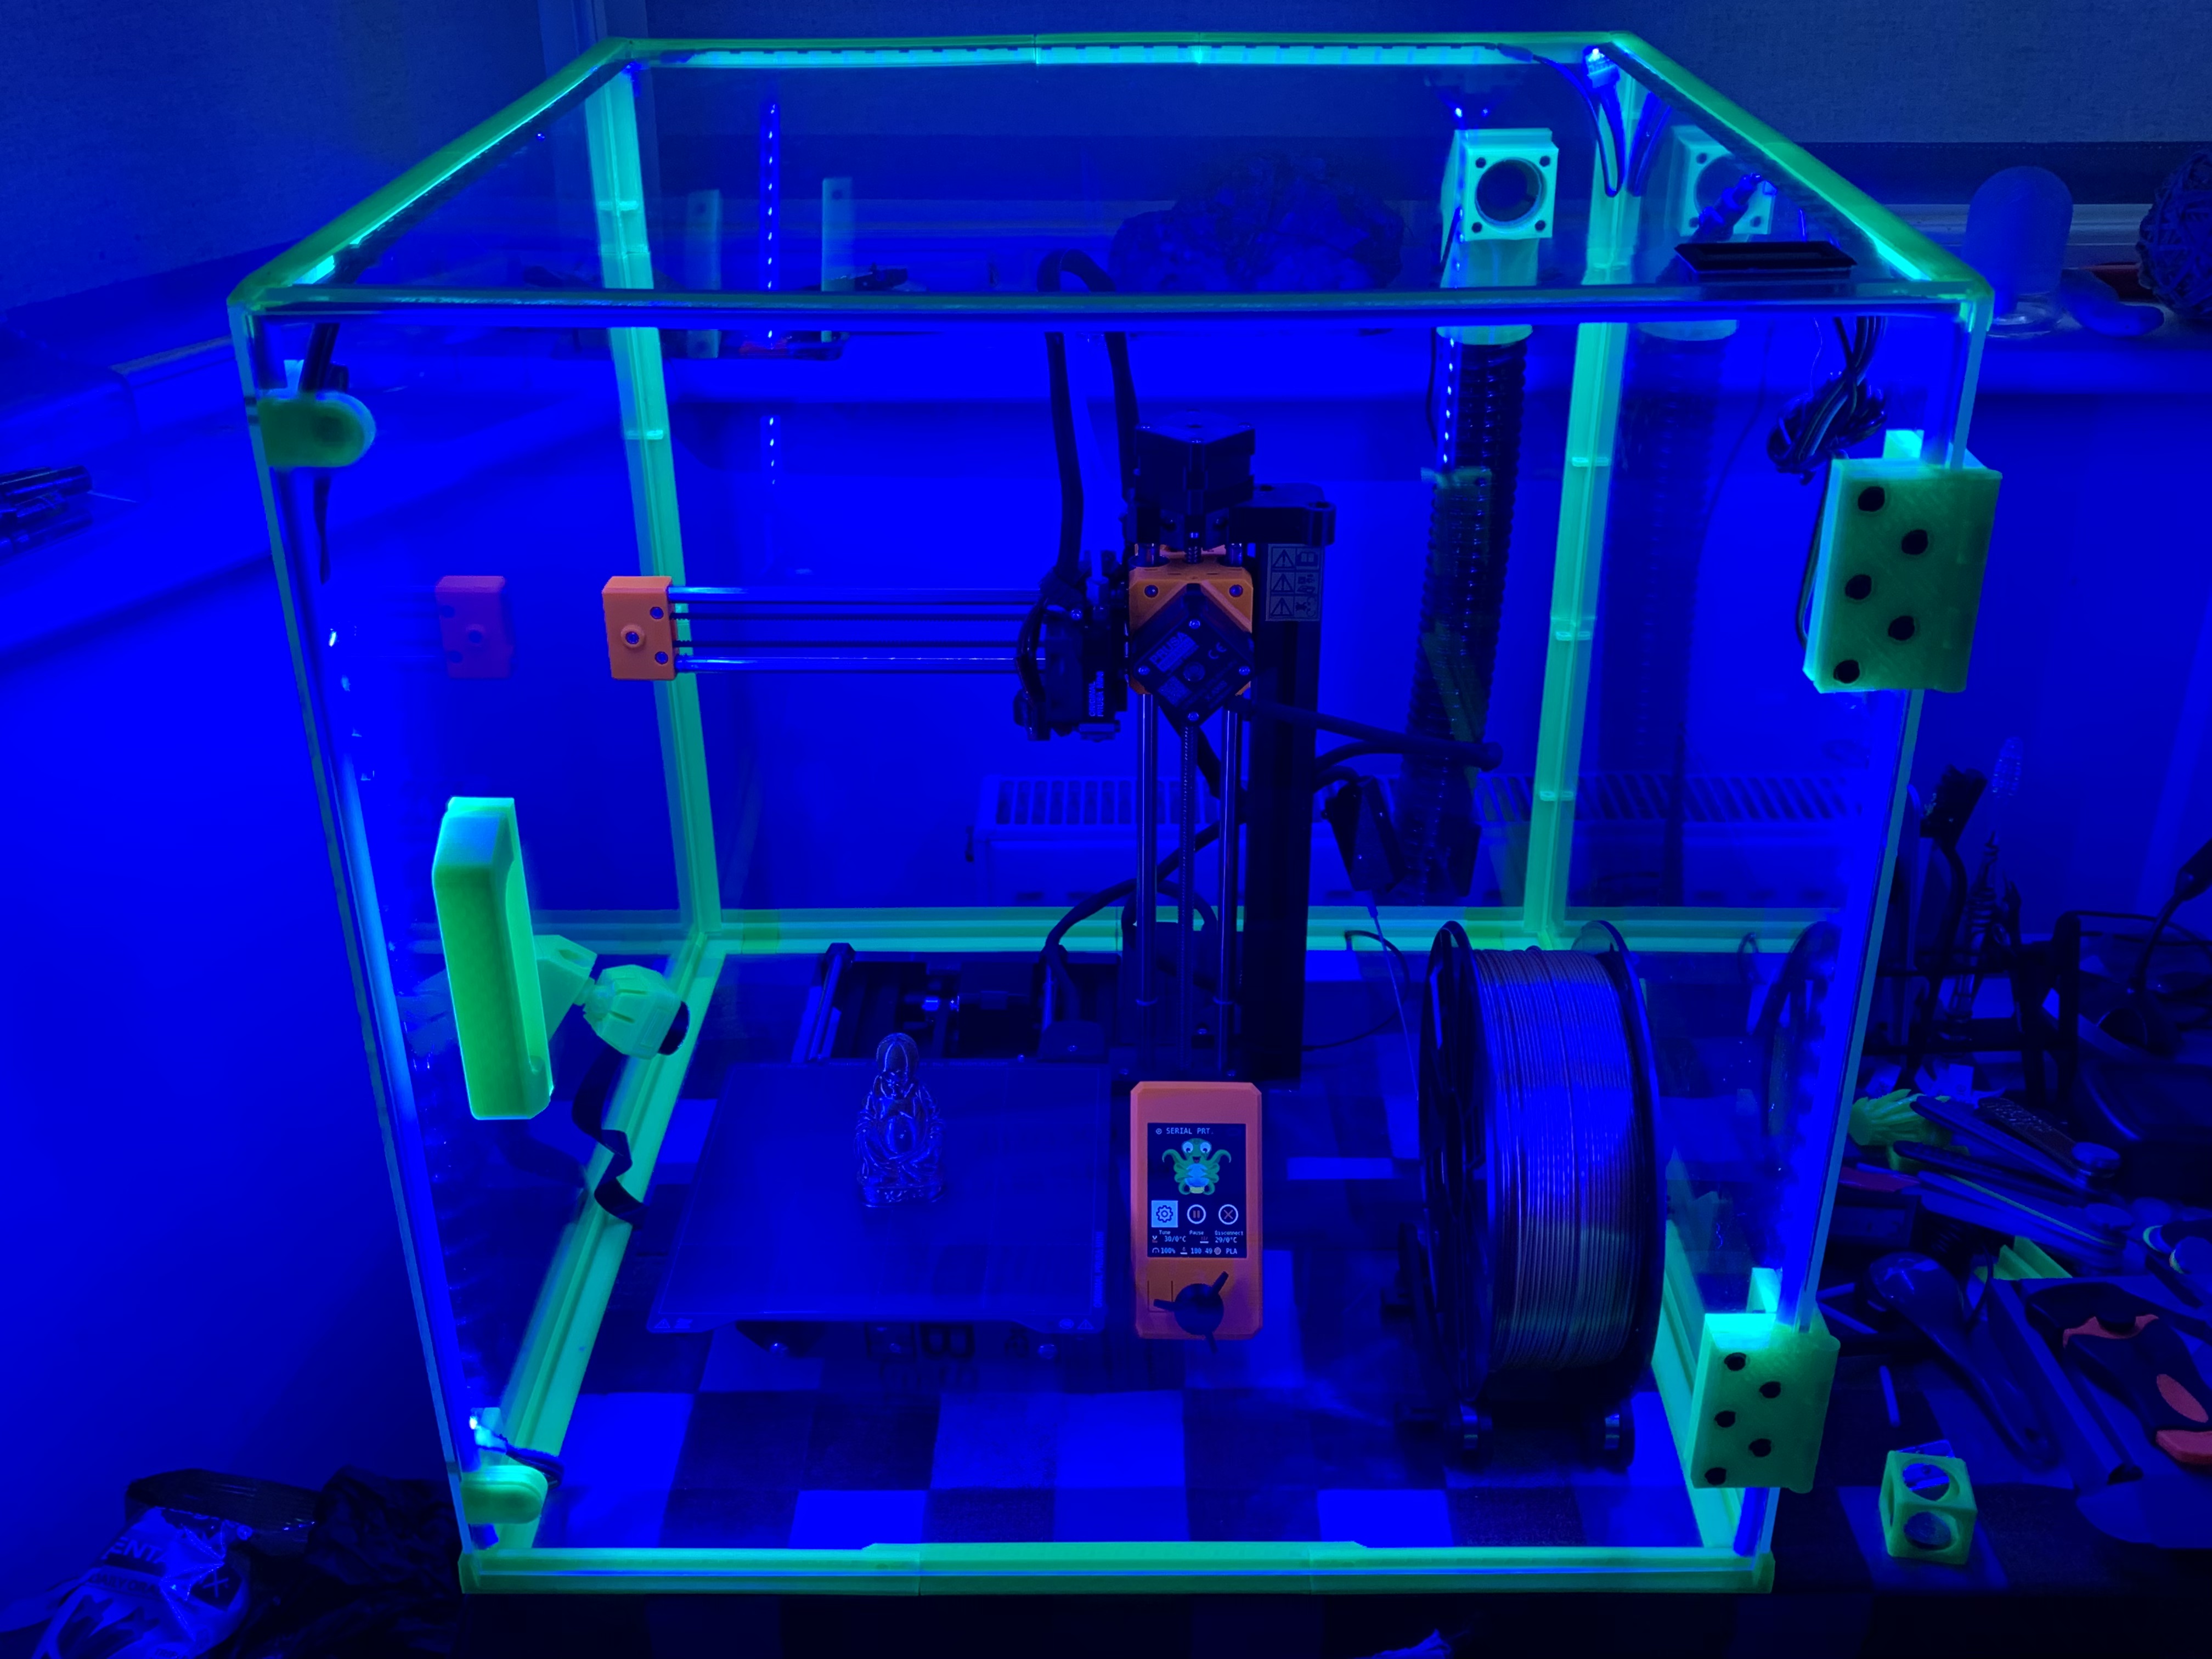
The RGB lights together make a light that's not the sort of white which is pleasing to look at, it's not exactly cold, maybe it is cold, but it's not natural.
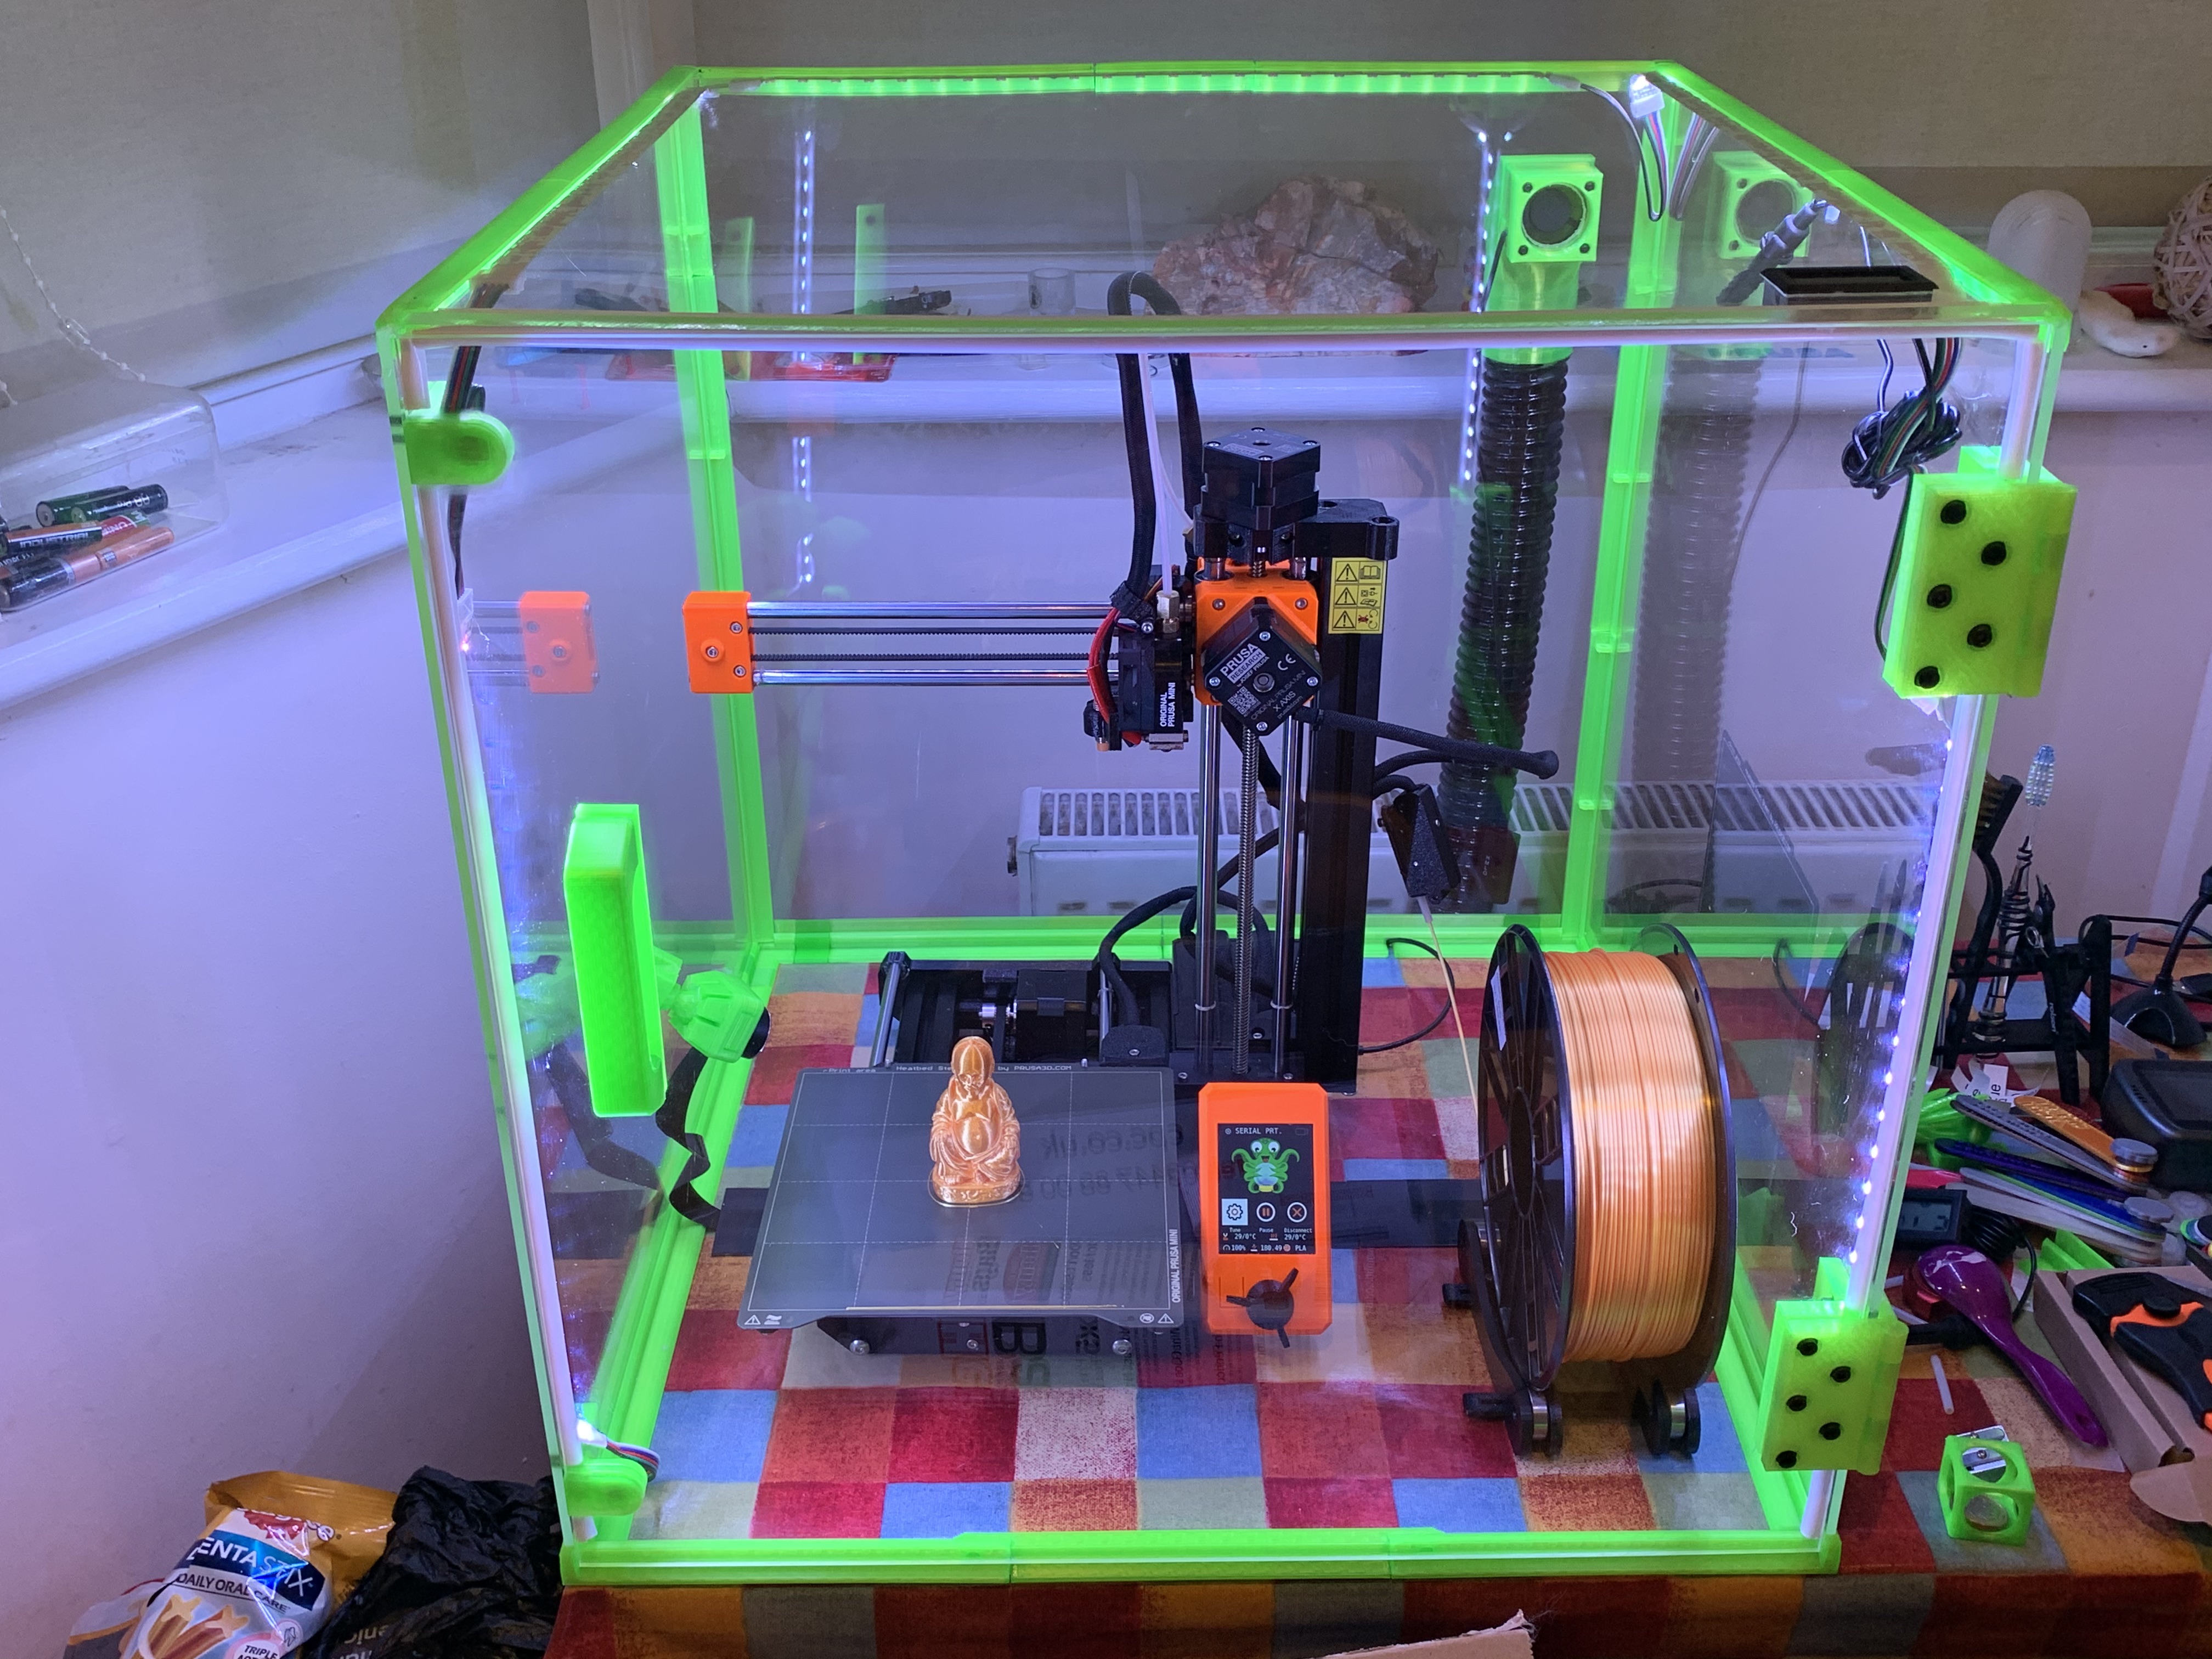
But the warm white lights match the room lighting perfectly and look very pleasing!

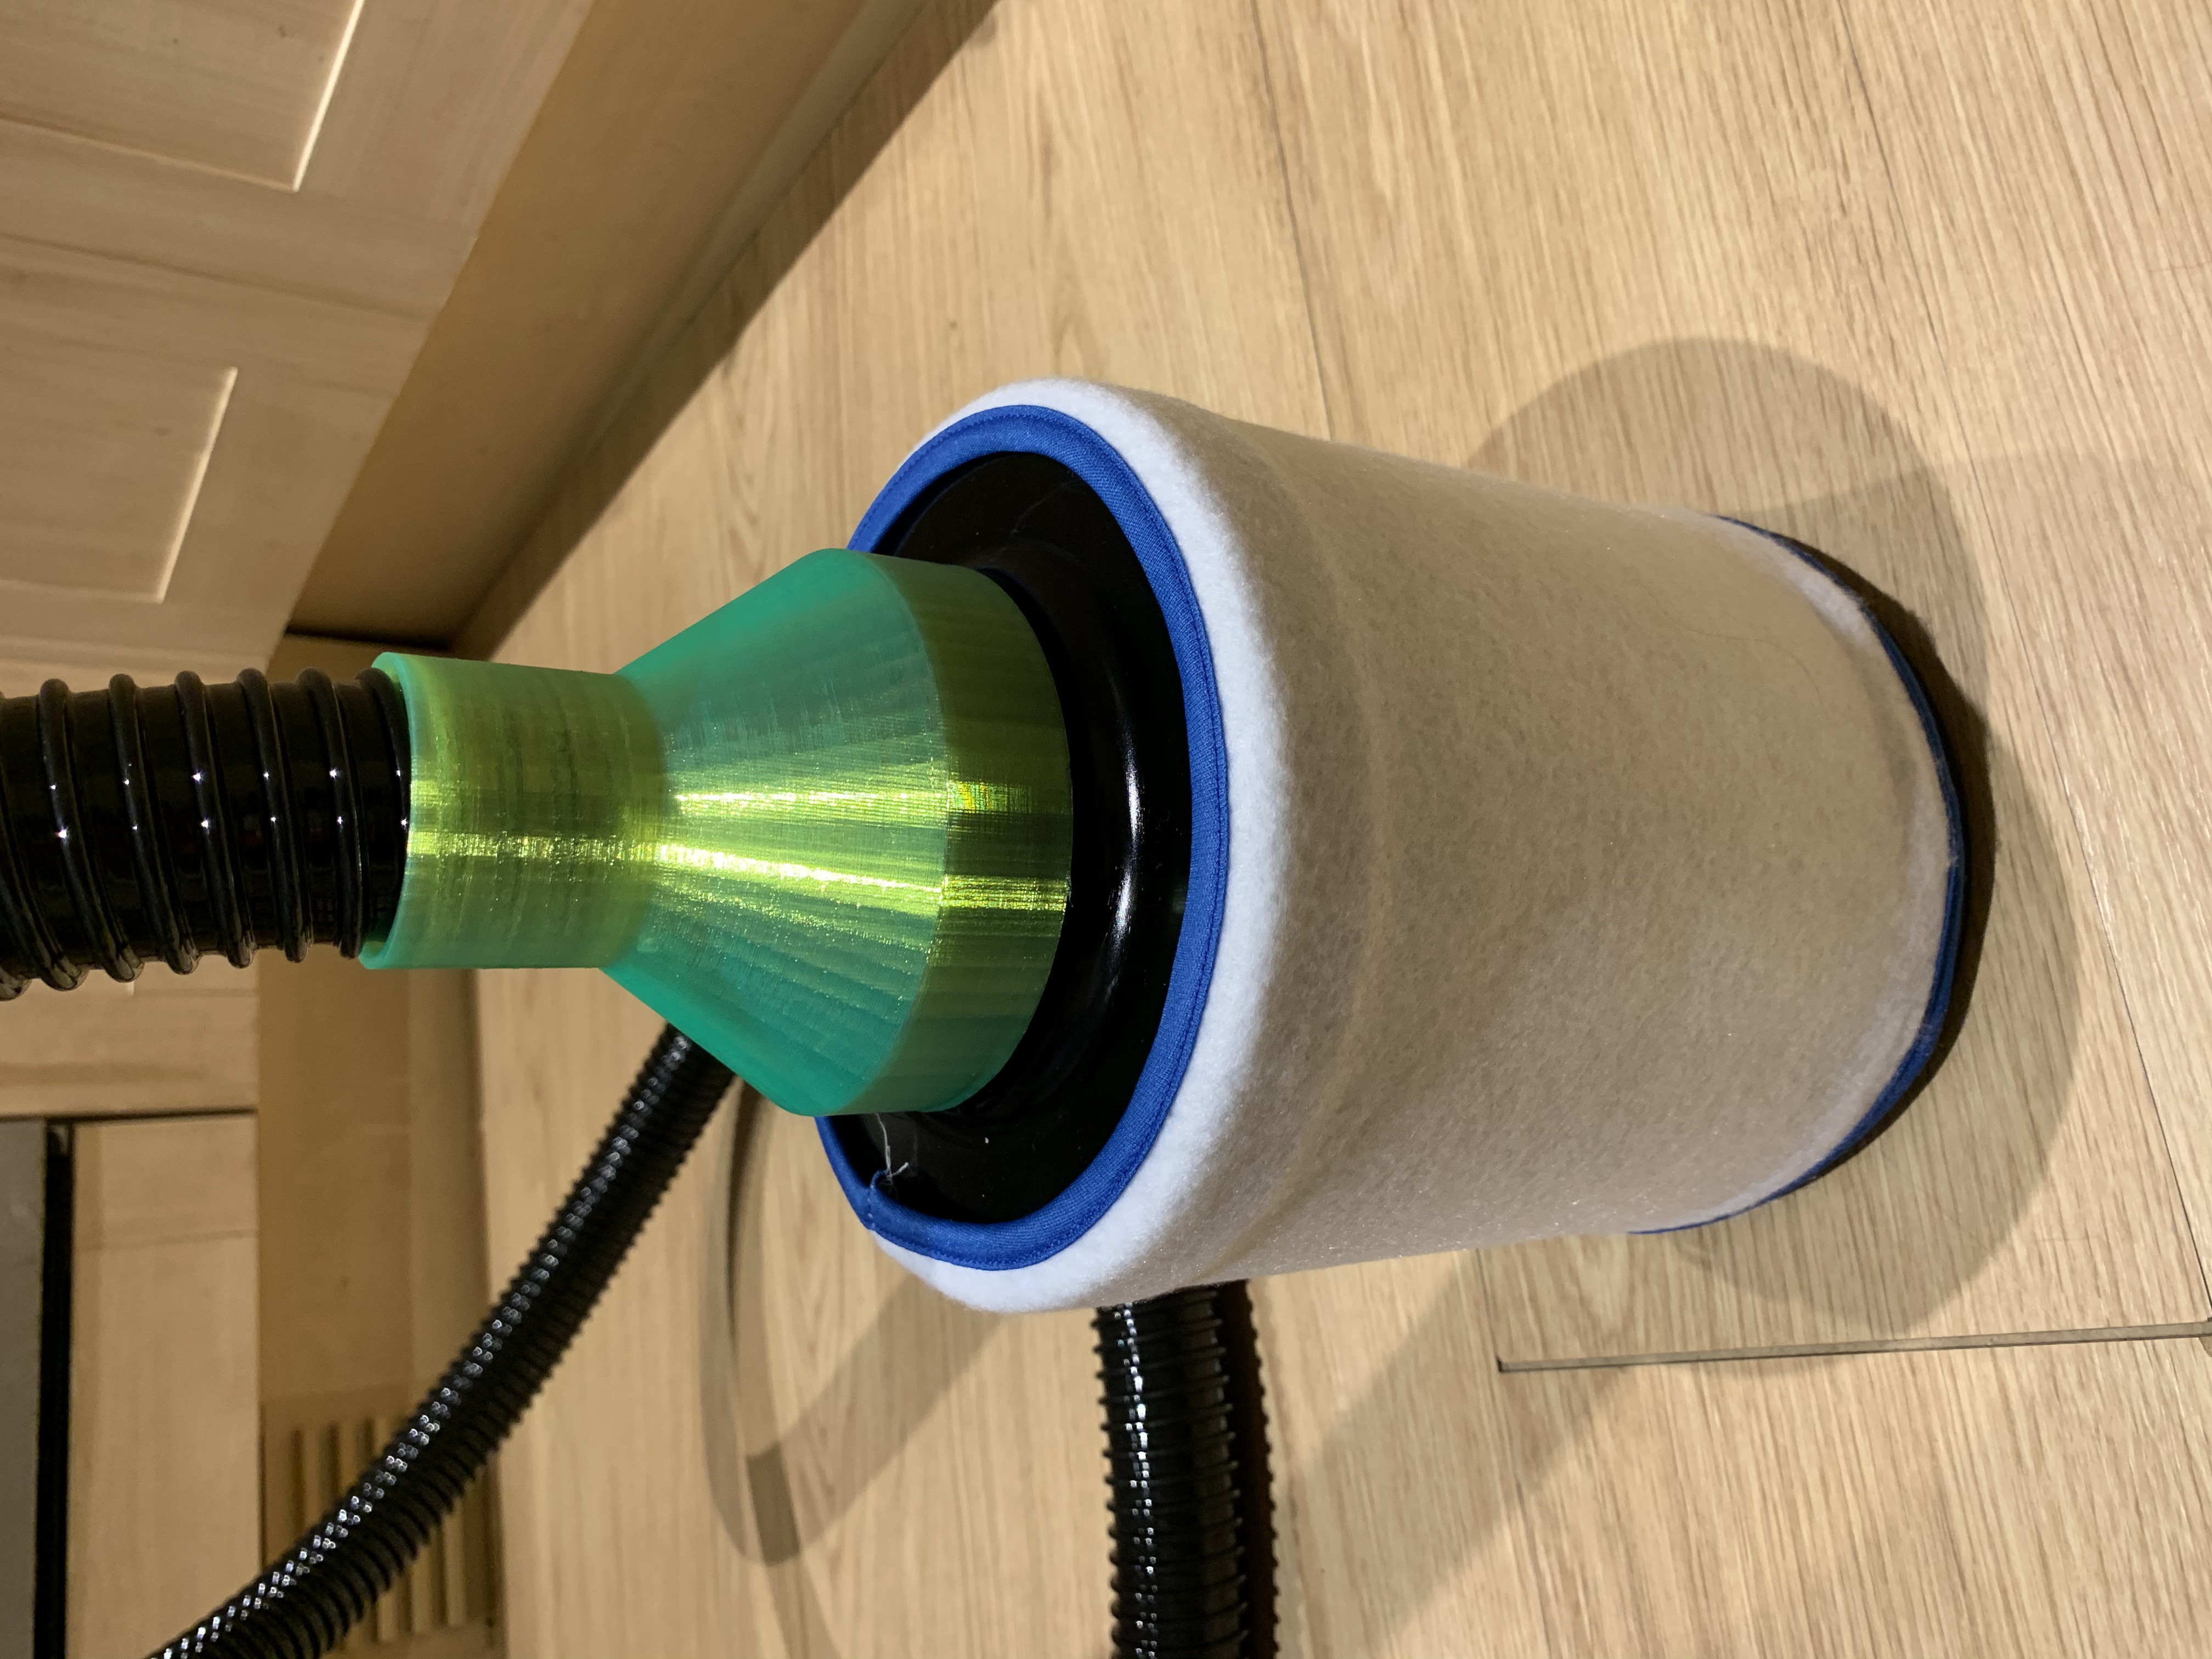
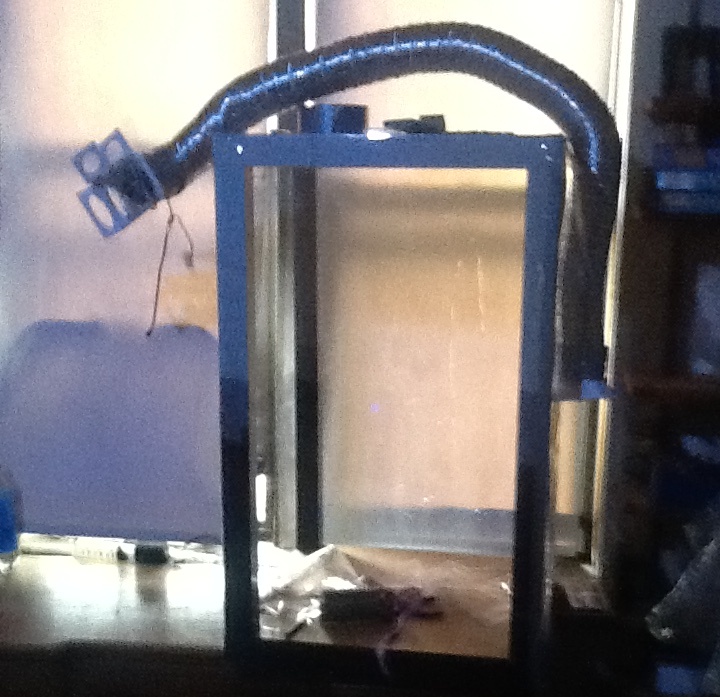
There is a vent at the rear which has a usb powered fan with variable speed control. I tested things with a fog machine and whilst it isn't air tight nothing leaks out, everything goes down the vent to a filter which works really well.
This wasn't easy, it's not a perfect enclosure, it took me a long time to design and print all the parts, but I am so happy with the result. Also I'm happy I can stop worrying about how to make bits of it, and get on with printing fun things!
I'll probably put all of the files up on Github, I don't really want this to go on PrusaPrinters because people might think it's an easy print out and make build.
RE: Show your enclosures

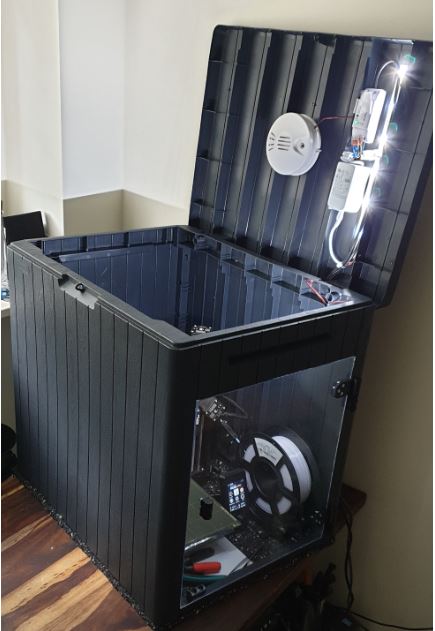
I use 12U server box. I've installed Jablotron smoke detector connected to my device to shut off power and repease firesupressant in case of fire.
I have come here to chew bubblegum and perfect my MINI ... and I'm all out of bubblegum.
RE: Show your enclosures
@hawwwran
Is that a C-Tech filament from Alza or such? How does it behave with MINI?
RE: Show your enclosures
@hawwwran
Is that a C-Tech filament from Alza or such? How does it behave with MINI?
This gold is Sunlu Light Gold Silk PLA. Very nice gold color. I found all the silk PLAs I have to be less brittle then usual PLAs. It's more springy and it's able to bend without breaking. I like it for it's material behavior and of course for the looks.
I own more c-tech filaments from Alza and I can say I'm happy with it. I see no problems with it what so ever. The "luminous" green is one of my favourite filament. It behaves so smooth. I don't know why, but it prints very well. I use the wite one for generic purposes.
I have come here to chew bubblegum and perfect my MINI ... and I'm all out of bubblegum.
RE: Show your enclosures
For those who built Lack enclosures, how loud is it? And does the side panels make a difference for the noise?
RE: Show your enclosures
Hi,
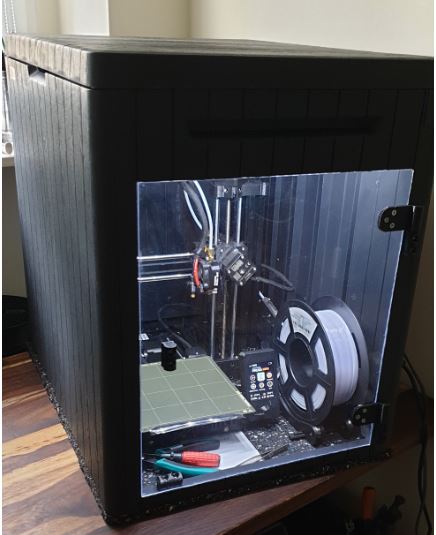
I used a Keter Box (as you can find at Ama... : B07NQ6R7R1 or DIY market). Did not used the bottom as I want it easy removable, attached a plexiglas door with printed hinges.
The top cover is foldable, I put in a smoke detector connected to a Tastomta flashed Sonoff for printer switch-off in case of smoke.
Further I used Octoprint and RaspiCam for remote control.
Cheers

RE: Show your enclosures
I don't see that anyone has move the electronics outside of the printer enclosure. Is this not needed?
RE: Show your enclosures
I don't see that anyone has move the electronics outside of the printer enclosure. Is this not needed?
The temperature inside my enclosure will reach about 35C at most, which is fine for the electronics. But I think if you were regularly printing ABS and wanted it to be 45C-50C then maybe it would be sensible to move it outside. 🙂
RE: Show your enclosures
Yet Another Lack Enclosure. My Lack based box is a bit different. I had 2 problems. First I wanted to rest the box on a desktop that was too narrow for the Lack table's legs; second I wanted a taller box. Solution: one Lack table upside down on the bottom a second right side up on top joined leg to leg.
I was going to print brackets to join the legs but I found that wrapping them with duct tape was good enough. I was going to use plexiglass panels and door but when I saw the price of plexiglass that size I decided to use clear vinyl sheets instead. I tried duct tape for the vinyl but it wouldn't hold so I used a staple gun instead. The free hanging vinyl door wouldn't keep the smell of ABS in so I will add Velcro to get a better fit if I ever use ABS again.
RE: Show your enclosures
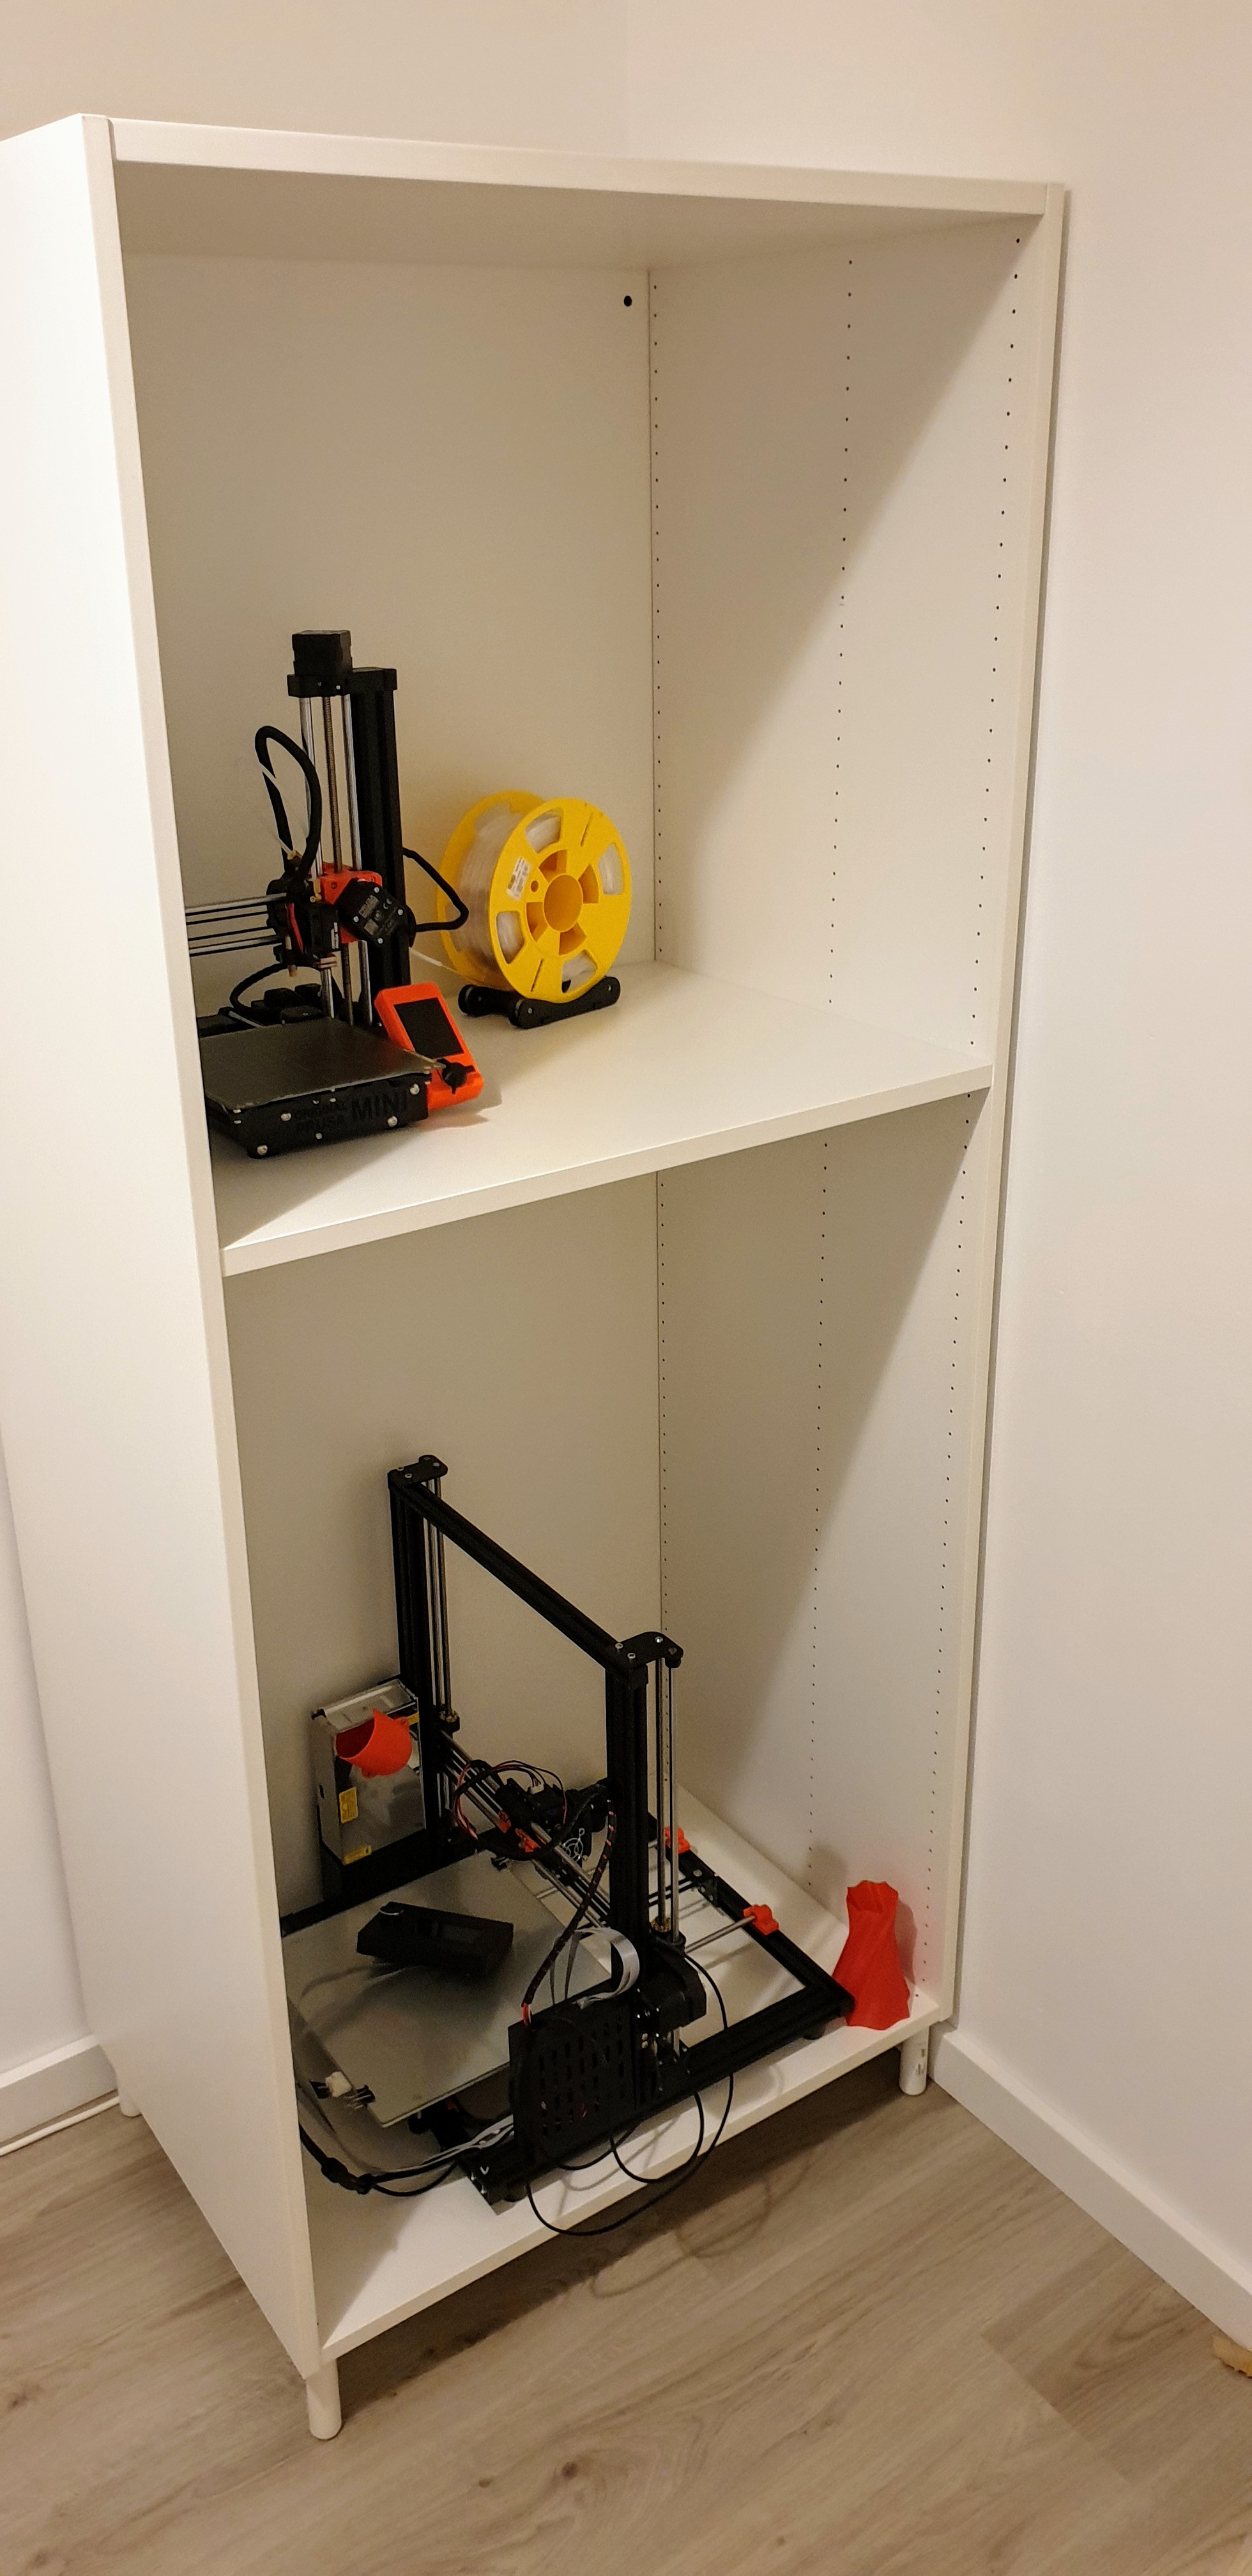
Work in progress haven't decided the actual height of the shelves due to the glass door layout.

Will get some holes in the shelves and more mounting options, plus it looks like it has space for another Original Prusa MINI.. convenient..
RE: Show your enclosures
This is the "Lack" enclosure that I've made for my printer. I used corflute for the sides and back insteasd of clear acetate sheet to save a few dollars, with the front doors being the only clear acetate. Because my wife was not entirely happy with the slight smell that is produced when when printing with PLA and PETG, I've incorporated an extraction system. Air is drawn from behind the printer at the back of the bench top (the rectangular hole), and I use a 100mm extractor fan connected to 90mm PVC pipe to blow the fumes through a hole in the floor into the dead space under our house. The extraction system is essentially invisible, low profile and works a treat. Lighting inside the enclosure is via a stip of LEDs powered from 8x AA batteries. My filament spool is mounted horizontally, which gives a smooth and friction free feed.
[img] 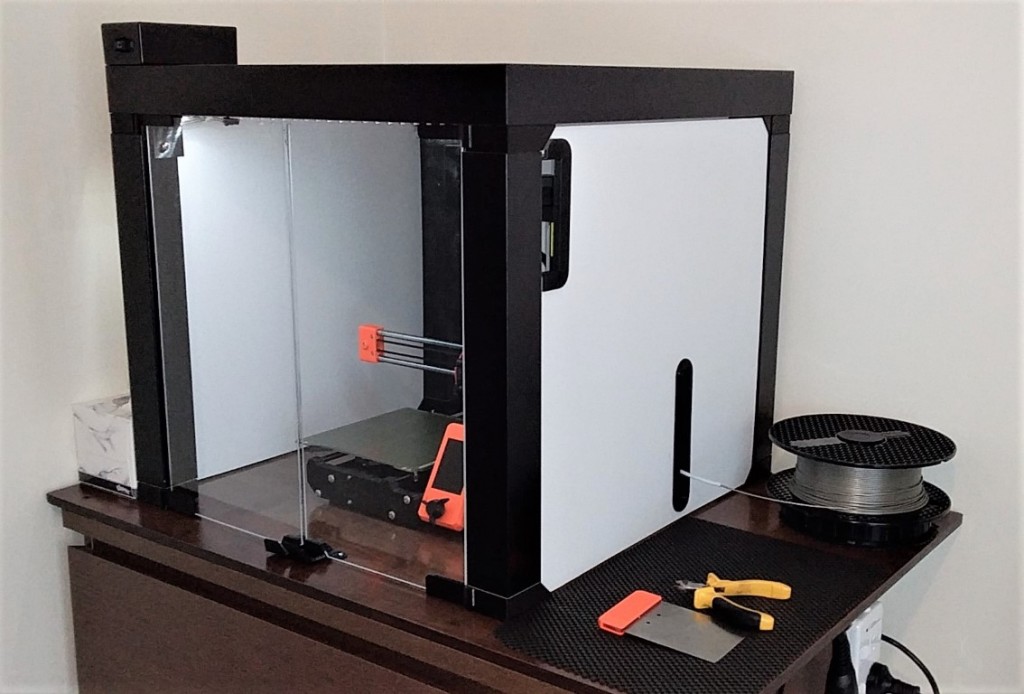 [/img]
[img] 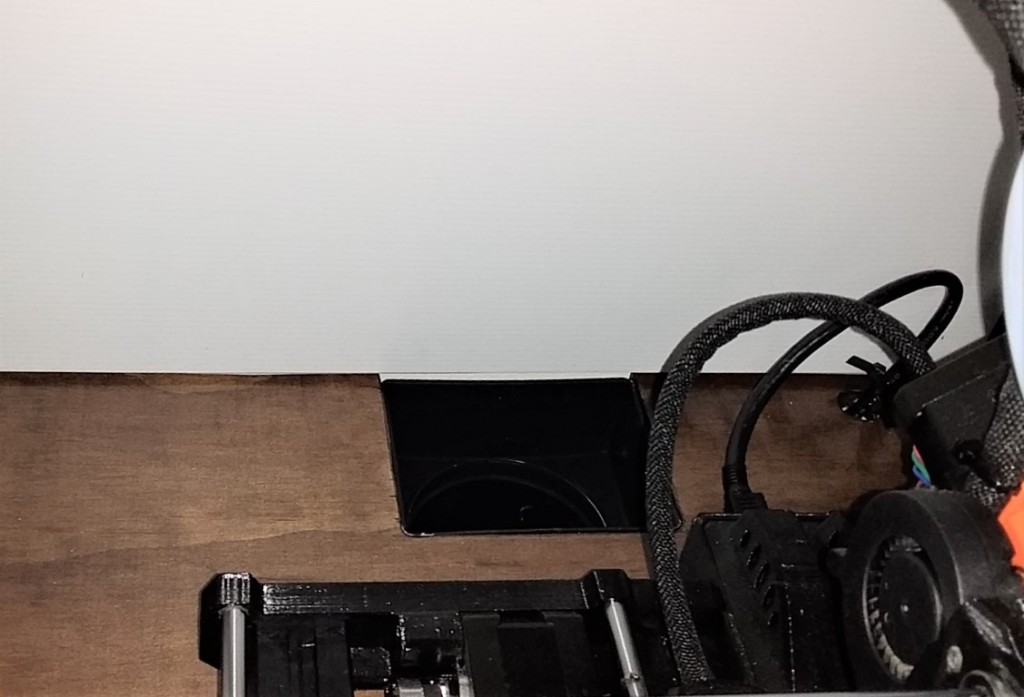 [/img]
RE: Show your enclosures
It's slowly coming together, still I have to modify the old Anet A8 Plus to make it fit in the lower area.
I still need to add some insulation and door seal strips and some mass to prevent resonance of the printer(s).
RE: Show your enclosures
I do not have the Mini, but I've been following and enjoying this thread, as I'm thinking of making an enclosure for the I3.
I like the consistency and quality that a controlled environment gives to such higher-end printers such as the Uprint and Dimension, particularly when printing with ABS. (I'm in the habit of warming up the office a bit before print runs.)
I have the printer on a counter in a home office, and I'm thinking of something like a 24 inch (~61cm) cube of plexiglass and 3d printed hardware, which would fit nicely around the printer (and MMU2S) as it sits today. I know that the brackets are on line at the usual suspect sites and pre-cut plexiglass, although not cheap, is reasonable and commonly available.
The only real down-side to this plan is that the power supply should be relocated outside of the enclosure, along with possibly the electronics box as well.
RE: Show your enclosures
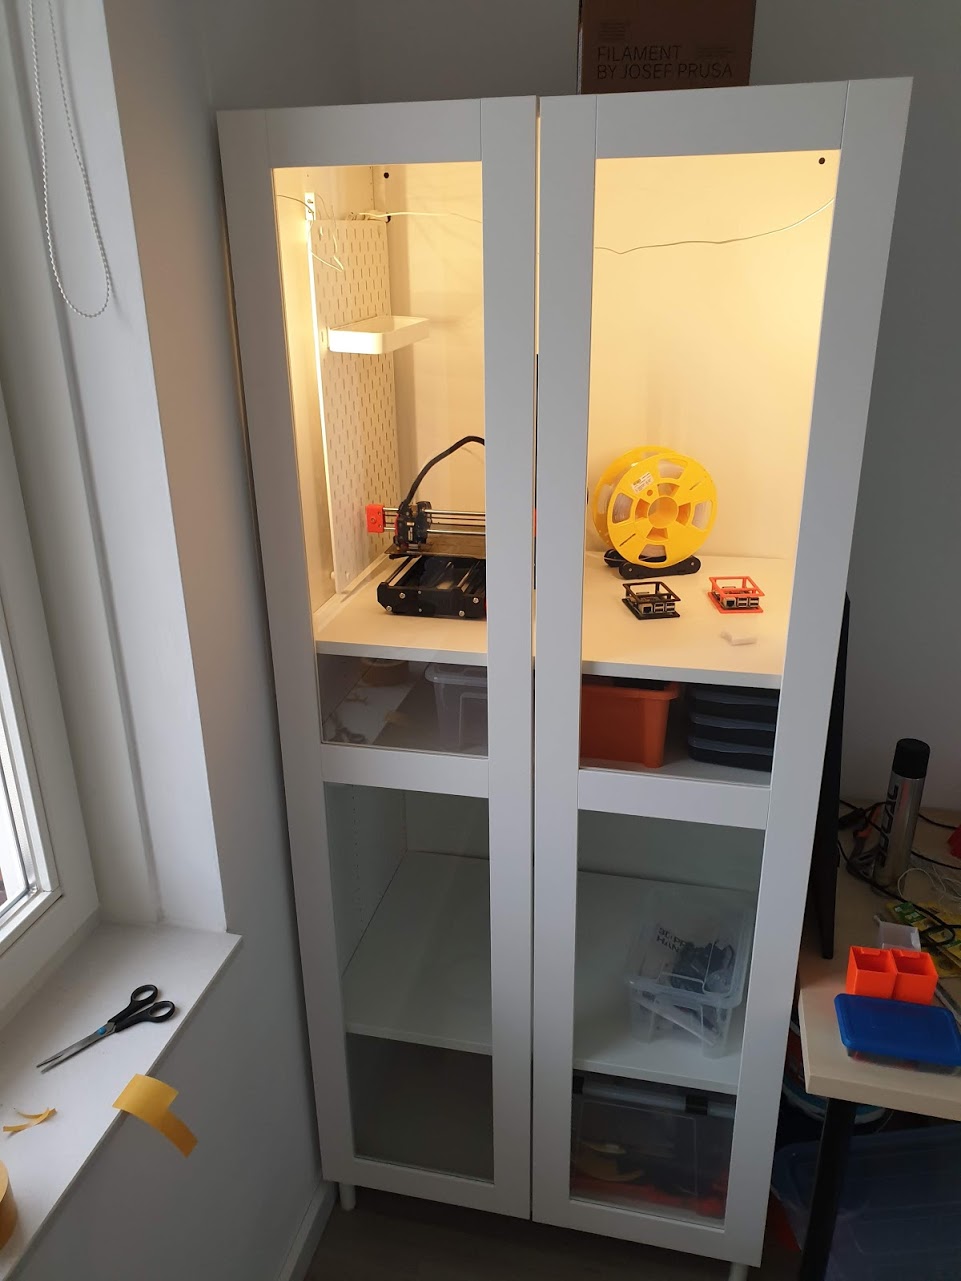
Got my Mini last week, and went to Ikea in the weekend.
so right now it's super basic.
I used this adapter to stack them on each other. it will do for now.
On my todo list:
Leds - preferably RGB
Fire/smoke detector - not sure yet which one to use
Pi 4 w/octoprint - already on it's way
Thermometer + humidity sensor.
Plexiglass
Slack Lack
and I'm just starting 🙂
RE: Show your enclosures
On my todo list:
Leds - preferably RGB
Fire/smoke detector - not sure yet which one to use
I used these LEDs, RGB with remote:
https://www.amazon.com/gp/product/B07XZ82QVW
I had a 5V supply.
I made a smoke detector based automatic shutoff:
https://sites.google.com/view/smokedetectorpowershutoff/home
The only issue is that it is very sensitive to power line glitches. A regular UPS does not even switch fast enough to keep things going.
Also some tips here:
https://sites.google.com/view/newbieprusaminireview/home
Regards,
Mark
RE: Show your enclosures
I would strongly recommend getting RGBW LEDs, the white colour you get from RGB is very blue and noticeably different from natural white light and warm white indoor lighting.
These are the ones I got:
https://www.amazon.co.uk/gp/product/B01D1I50UW/ref=ppx_yo_dt_b_search_asin_title?ie=UTF8&psc=1
And this is what I use to control them with a remote (and Alexa):
https://www.amazon.co.uk/gp/product/B07MRHVJ52/ref=ppx_yo_dt_b_search_asin_title?ie=UTF8&psc=1
These were also useful:
https://www.amazon.co.uk/gp/product/B088C34TFL/ref=ppx_yo_dt_b_search_asin_title?ie=UTF8&psc=1
You will need a 12V power supply of some sort with a DC jack.
RE: Show your enclosures
@marklgoldberg & @robee
thanks for the input!
do we have some spare pins somewhere so we could use LED like this:
@6:00
I really like the idea that it will switch color based on what's going on, and not just "ambient light"
(I have a Pi4 on the way, if that helps)
RE: Show your enclosures
@marklgoldberg & @robee
thanks for the input!
do we have some spare pins somewhere so we could use LED like this:
@6:00
I really like the idea that it will switch color based on what's going on, and not just "ambient light"
(I have a Pi4 on the way, if that helps)
It seems that Prusa's vision of remote operation for the Mini is their built in Webserver, not so much Octoprint. Neither has what I would call great support so far, but they seem to be more interested in developing the built in Webserver. They have only had a few critical fixes for Octoprint issues, but then again, the Webserver has not moved that far forward either. They did preview full capabilities, downloading files, controlling printing, etc. Only a rudimentary status screen is currently available. I still find the built in interface on the small screen the most useful for almost all tasks. That is where they seem to be making the most improvements.
Regards,
Mark
RE: Show your enclosures
I thought I had already posted my enclosure.
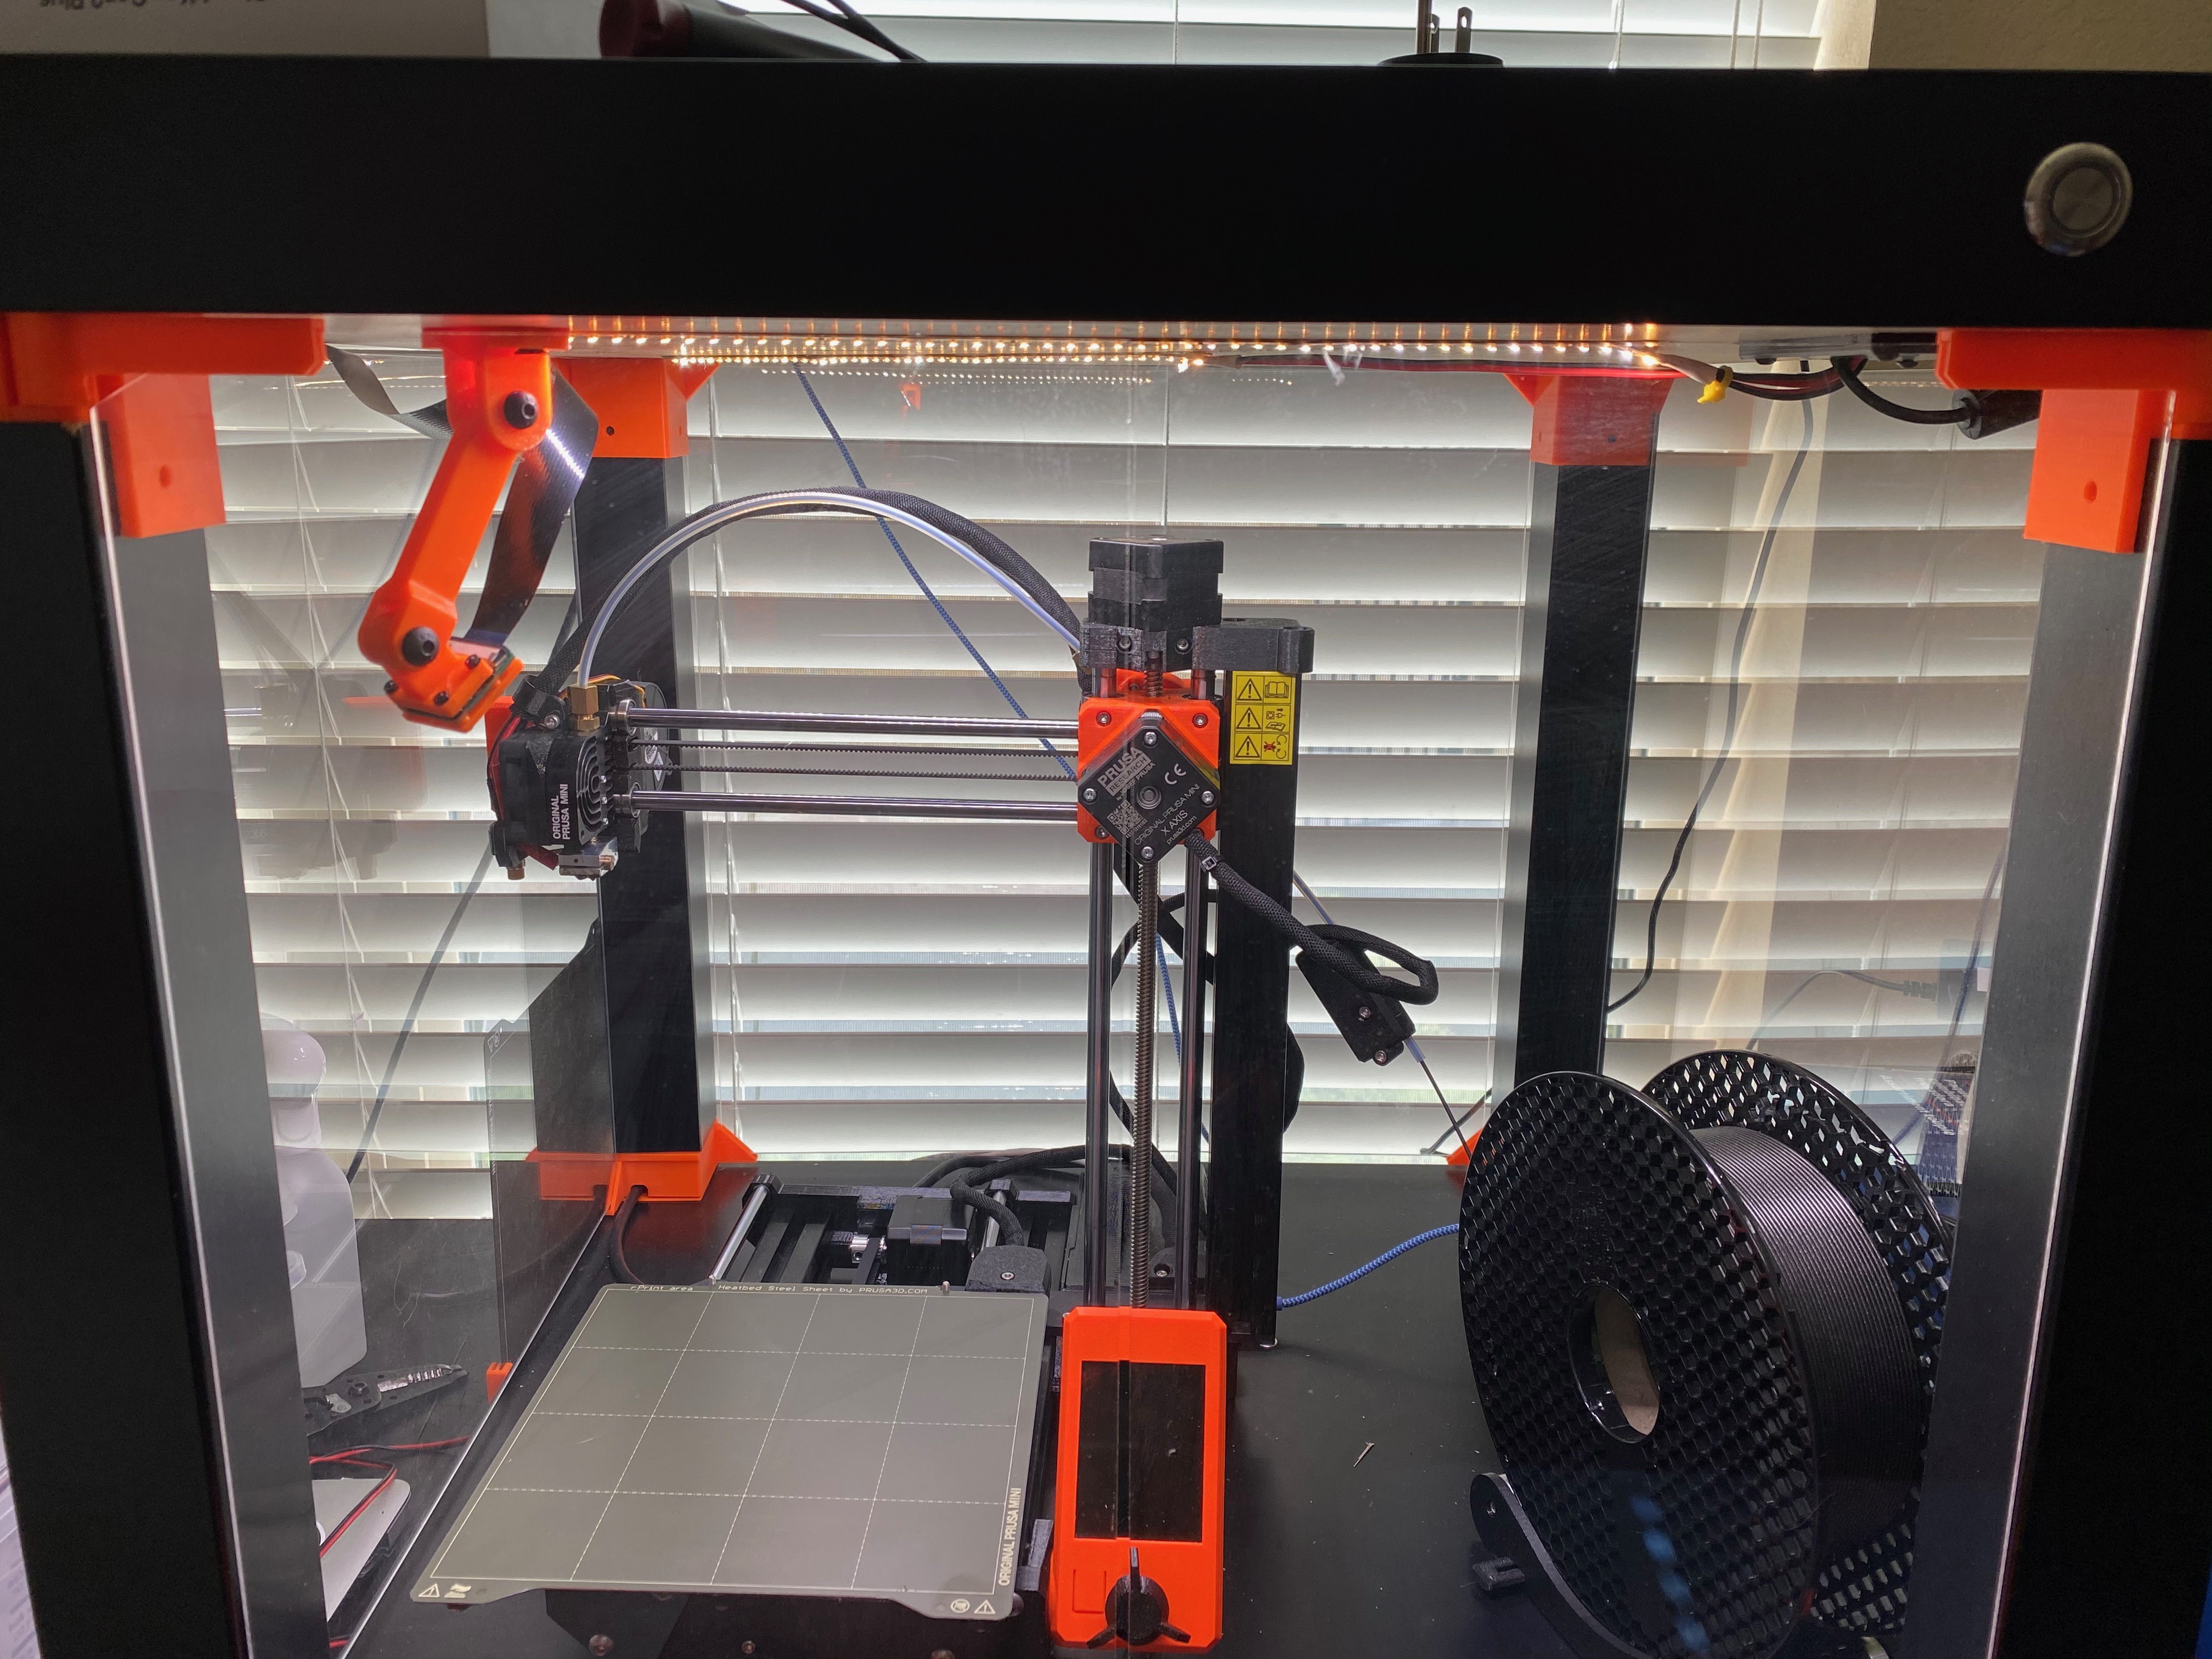
I went with the Ikea Lack design and the easy button with PrintedSolid pre-cut acrylic. I printed the parts in orange PETG that is so close to Prusa orange that it's basically a match.
I added 2 @ 1-ft LED strips from FlexFire LED. I have used them successfully in the past for outdoor accent lighting. They are a bit more expensive but high quality https://www.flexfireleds.com/24v-architectural-ultra-bright-led-strip-light-by-the-foot-natural-white/ I chose 24V 5000K for the lighting.
I was going to try and find 24V inside the Buddy Box but decided I didn't want to break anything, so I bought an inexpensive 24V power brick.

I placed the two strips at angles to each other in order to minimize parallel shadows. Not perfect but 2 of these is so bright, I wasn't about to put 4 of them in.
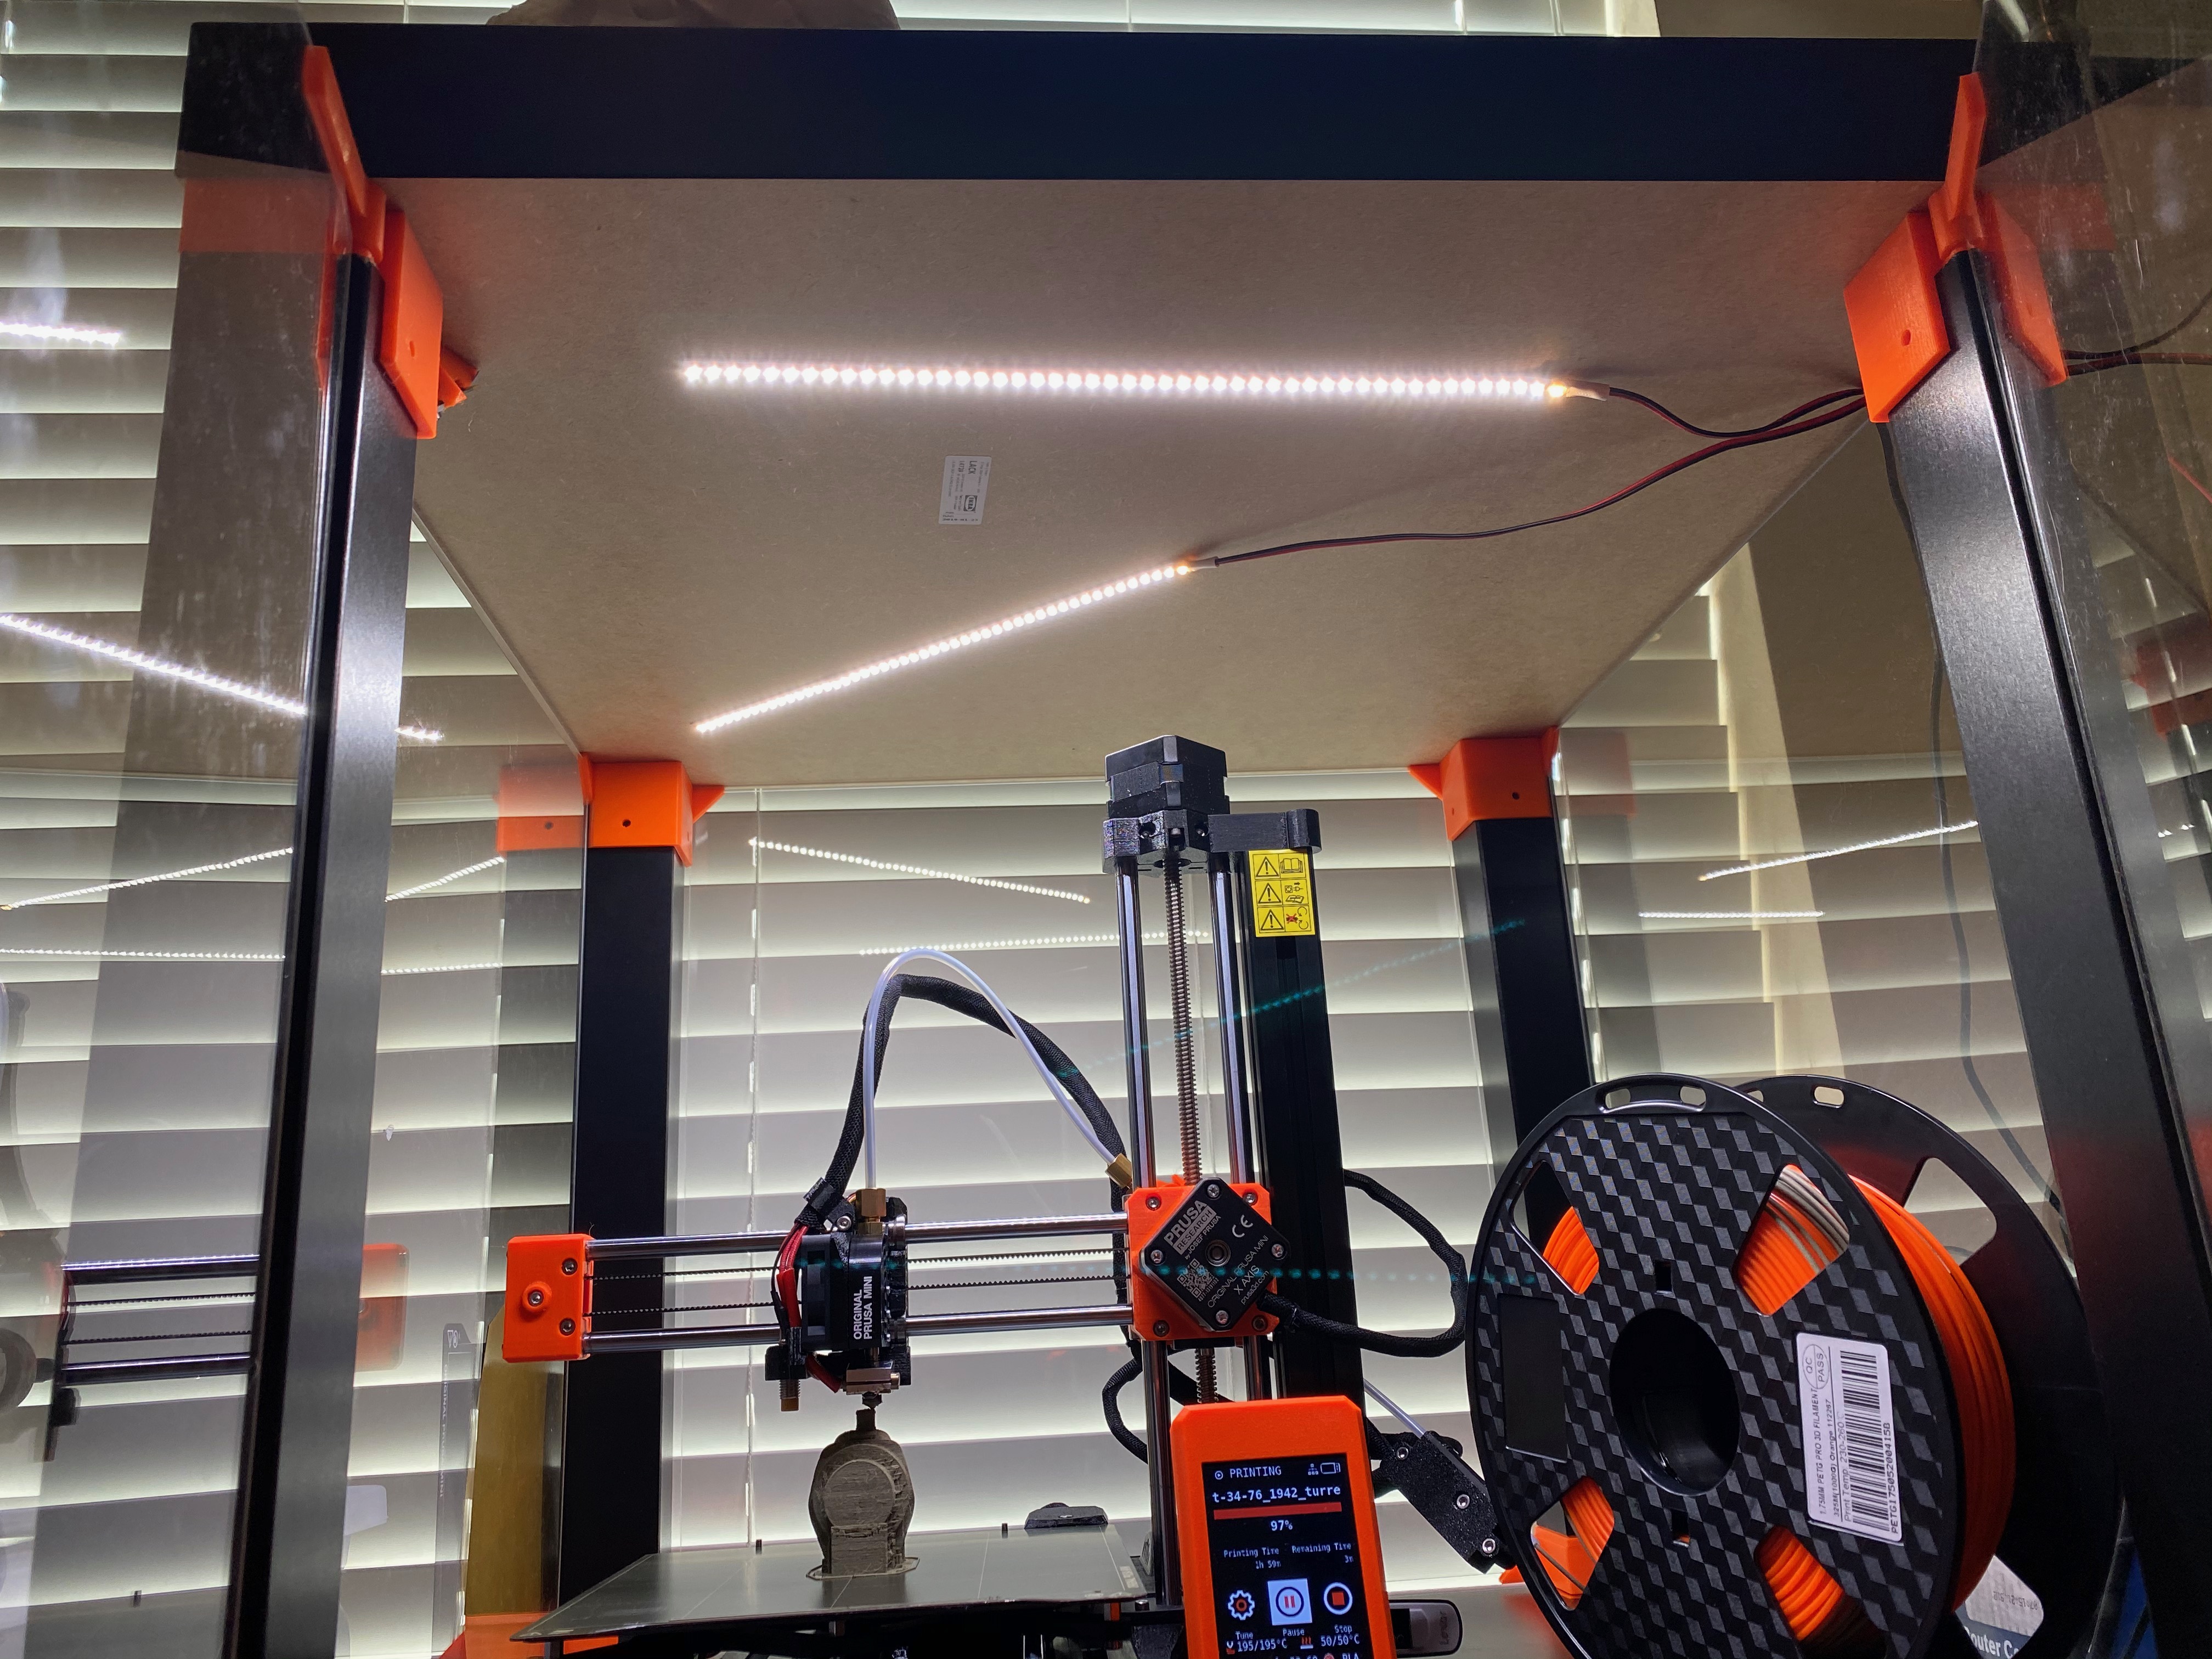
I also found this very cool touch sensitive power button/dimmer that works with the LED lights.


I also printed a box to hold the power connections.

Austin, Texas, USA
RE: Show your enclosures
One more thing, since I couldn't edit the post any further. I did add a Pi camera to work with Octoprint, seen on the left side hanging from the ceiling of the enclosure. My Pi 3+ is sitting atop the enclosure for now, I may eventually build it into the enclosure itself.
Austin, Texas, USA