OctoPi holder for Prusa MINI+
This is work in progress.
After more than 10h of 3Dprinting the four parts of OctoPi holder, I made first photo+screenshots.
This is a good point in time to start this thread.
Later when complete, I will provide freecad+STL+gcode files.
I chose Raspberry Pi3A+ and installed OctoPi, and the 8led ring superglued around Raspberry v1 camera on top is soldered already, I just need to configure OctoPrint to use it in order to print in dark room.
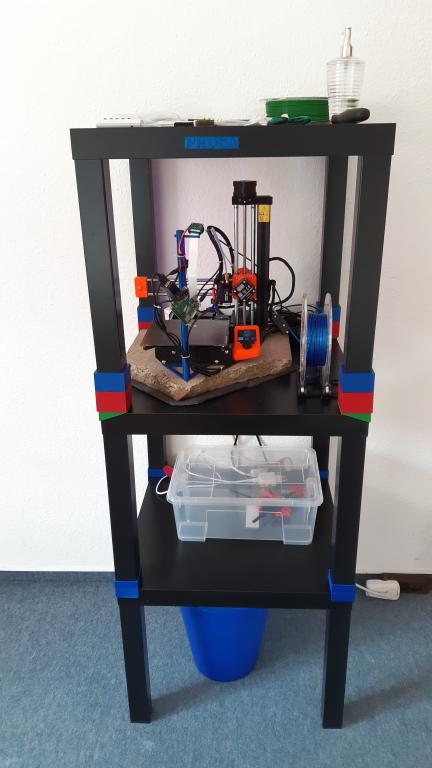
First I created 3mm high triangle that I placed just below front of Prusa MINI+ (3mm is height of anti vibration pads. The 3mm is good in case Prusa MINI+ directly stands on desk, as well as here where MINI+ stands on old gym mat (that makes 3Dprinting really quiet compared to printing directly on desk), with a 12mm diameter 30mm high pin on front. Parts 2 and 3 also have such pin on top, allowing for this stackable construction. In part 3 there are two cylinder holde 76mm apart, where I did solder M3 threaded inserts into. Those allowed to screw the Pi3A+ with two M3 screws through diagonal corner holes into holder part 3. Top holder part 4 has a 5mm diameter cylinder hole allowing to insert a fastener from a 3rd hand. Rotating that fastener allows to change camera field of view in one dimension, truning the stackackble holder in a second dimension. Total height is >30cm, much more than 18cm maximal vertical resolution of the MINI+:

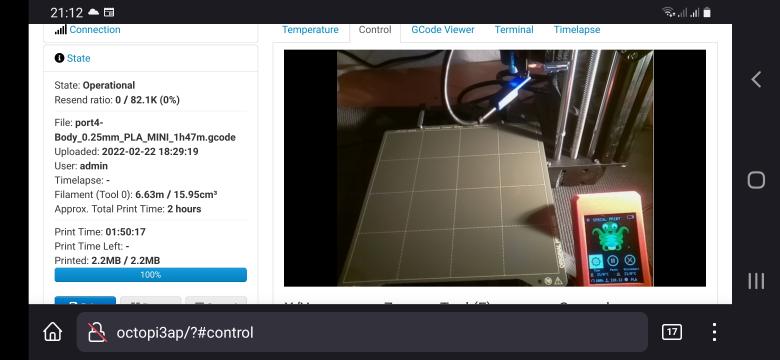
And this is OctoPrint smartphone screenshot showing the same scene:
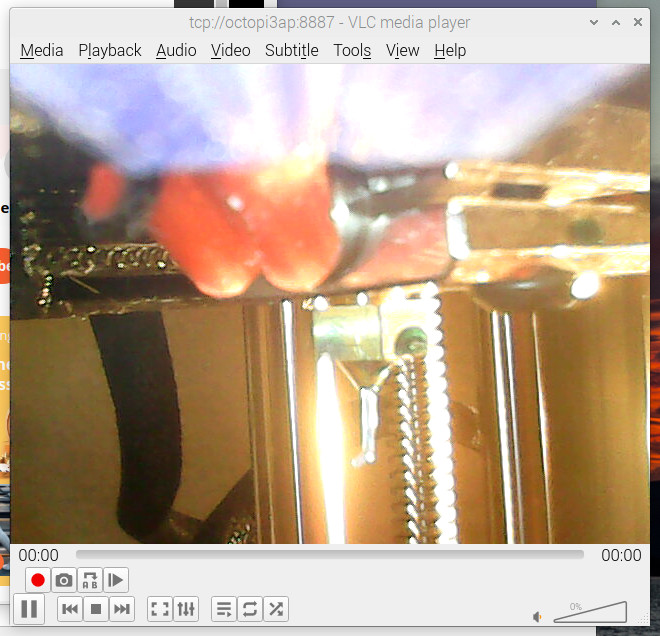
This is same scene view of nozzle camera (can be seen in previous photo) described in this thread:
https://forum.prusa3d.com/forum/user-mods-octoprint-enclosures-nozzles/simple-nozzle-camera-borescope-holder-for-prusa-mini/#post-583282
RE: OctoPi holder for Prusa MINI+
Next step was getting 8led ring to work, find detail view of >30cm high 4 part stackable OctoPi holder photo at bottom of this posting.
I use a 5V/0.6A power supply for the 8led ring, providing up to 75mA for each of the leds (had tested half a year ago that three 16led rings draw 1.7A, or 35.5mA per led: https://forums.raspberrypi.com/viewtopic.php?f=45&t=317587#p1900960).
I soldered according Adafruit "Raspberry Pi Wiring with Diode" instructions, with SB540 because I had no 1N4001 at hand:
https://learn.adafruit.com/neopixels-on-raspberry-pi/raspberry-pi-wiring#raspberry-pi-wiring-with-diode-3006462-5
Then I connected the two cables to OctoPi GND and GPIO21.
After installing libraries onto OctoPi according instructions ...
https://learn.adafruit.com/neopixels-on-raspberry-pi/python-usage#python-installation-of-neopixel-library-3005996-1
... and starting "sudo python3" (below code needs sudo started Python), I executed these commands while screen recording with "Peek":
>>> import board
>>> import neopixel
>>> pixels = neopixel.NeoPixel(board.D21, 8)
>>> pixels.fill((0,0,0))
>>> pixels.fill((255,255,255))
>>> pixels.fill((0,0,0))
>>> pixels.fill((255,0,0))
>>> pixels.fill((0,255,0))
>>> pixels.fill((0,0,255))
>>> pixels.fill((255,255,255))
>>> pixels.fill((0,0,0))
>>>
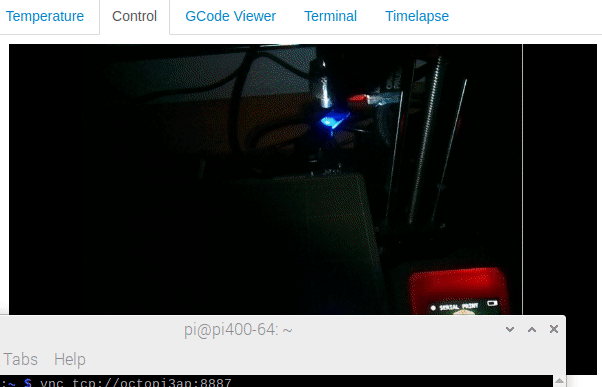
The room was dark, but even with 8led ring off, a little light from borescope nozzle camera leds is present:
Detail view of OctoPi holder: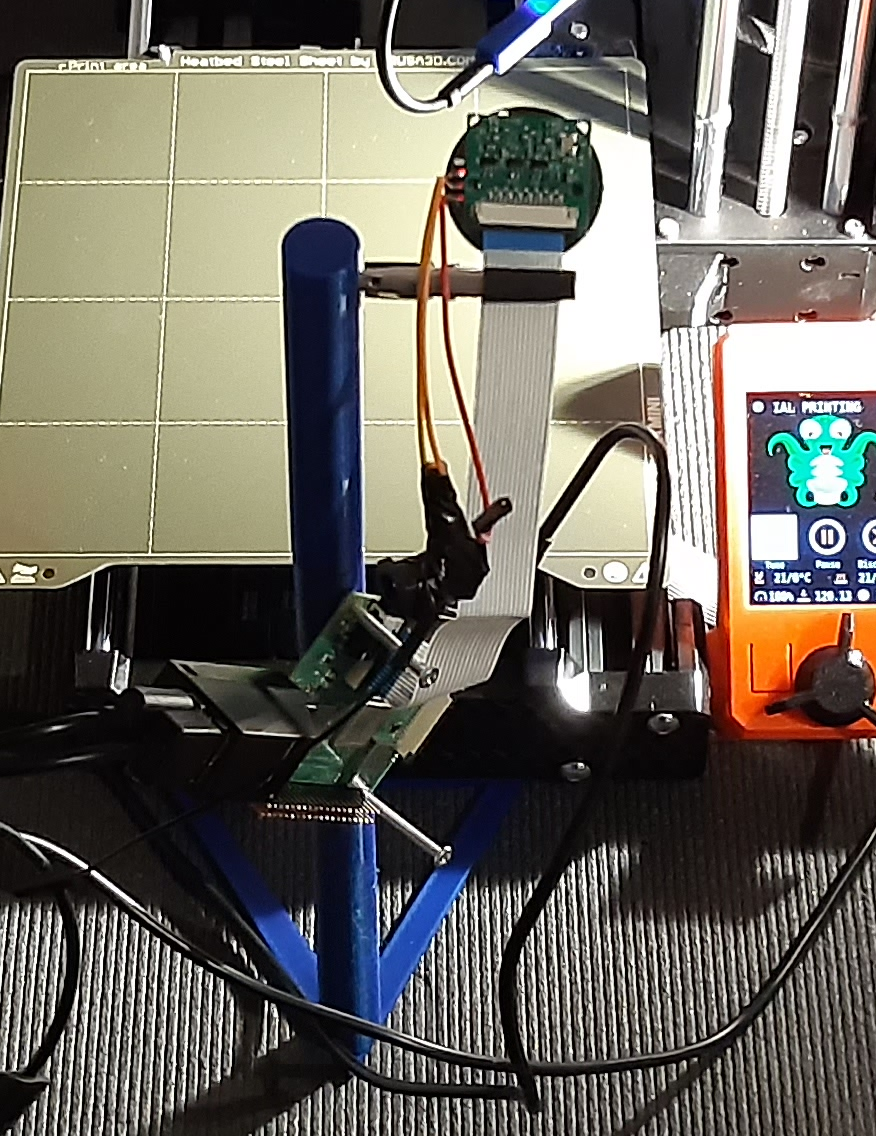
RE: OctoPi holder for Prusa MINI+
Done!
Only had to switch led ring DI cable from GPIO21 to GPIO10 for newly installed "WS281x LED Status" plugin to work.
I searched on OctoPi of younger son for plugins, and installed these on octopi3ap as well:
- OctoPrint-Dashboard
- OctoPrint-FloatingNavbar
- Navbar Temp
- PrintTimeGenius
- Simple Emergency Stop
Only changes to OctoPi holder:
- zip-tied cables to OctoPi holder or just together
- new clean cable routing
- moved plug socket closer to MINI+ power supply
- did cut away not needed gym mat
For detailed view, full 12MP photo is here:
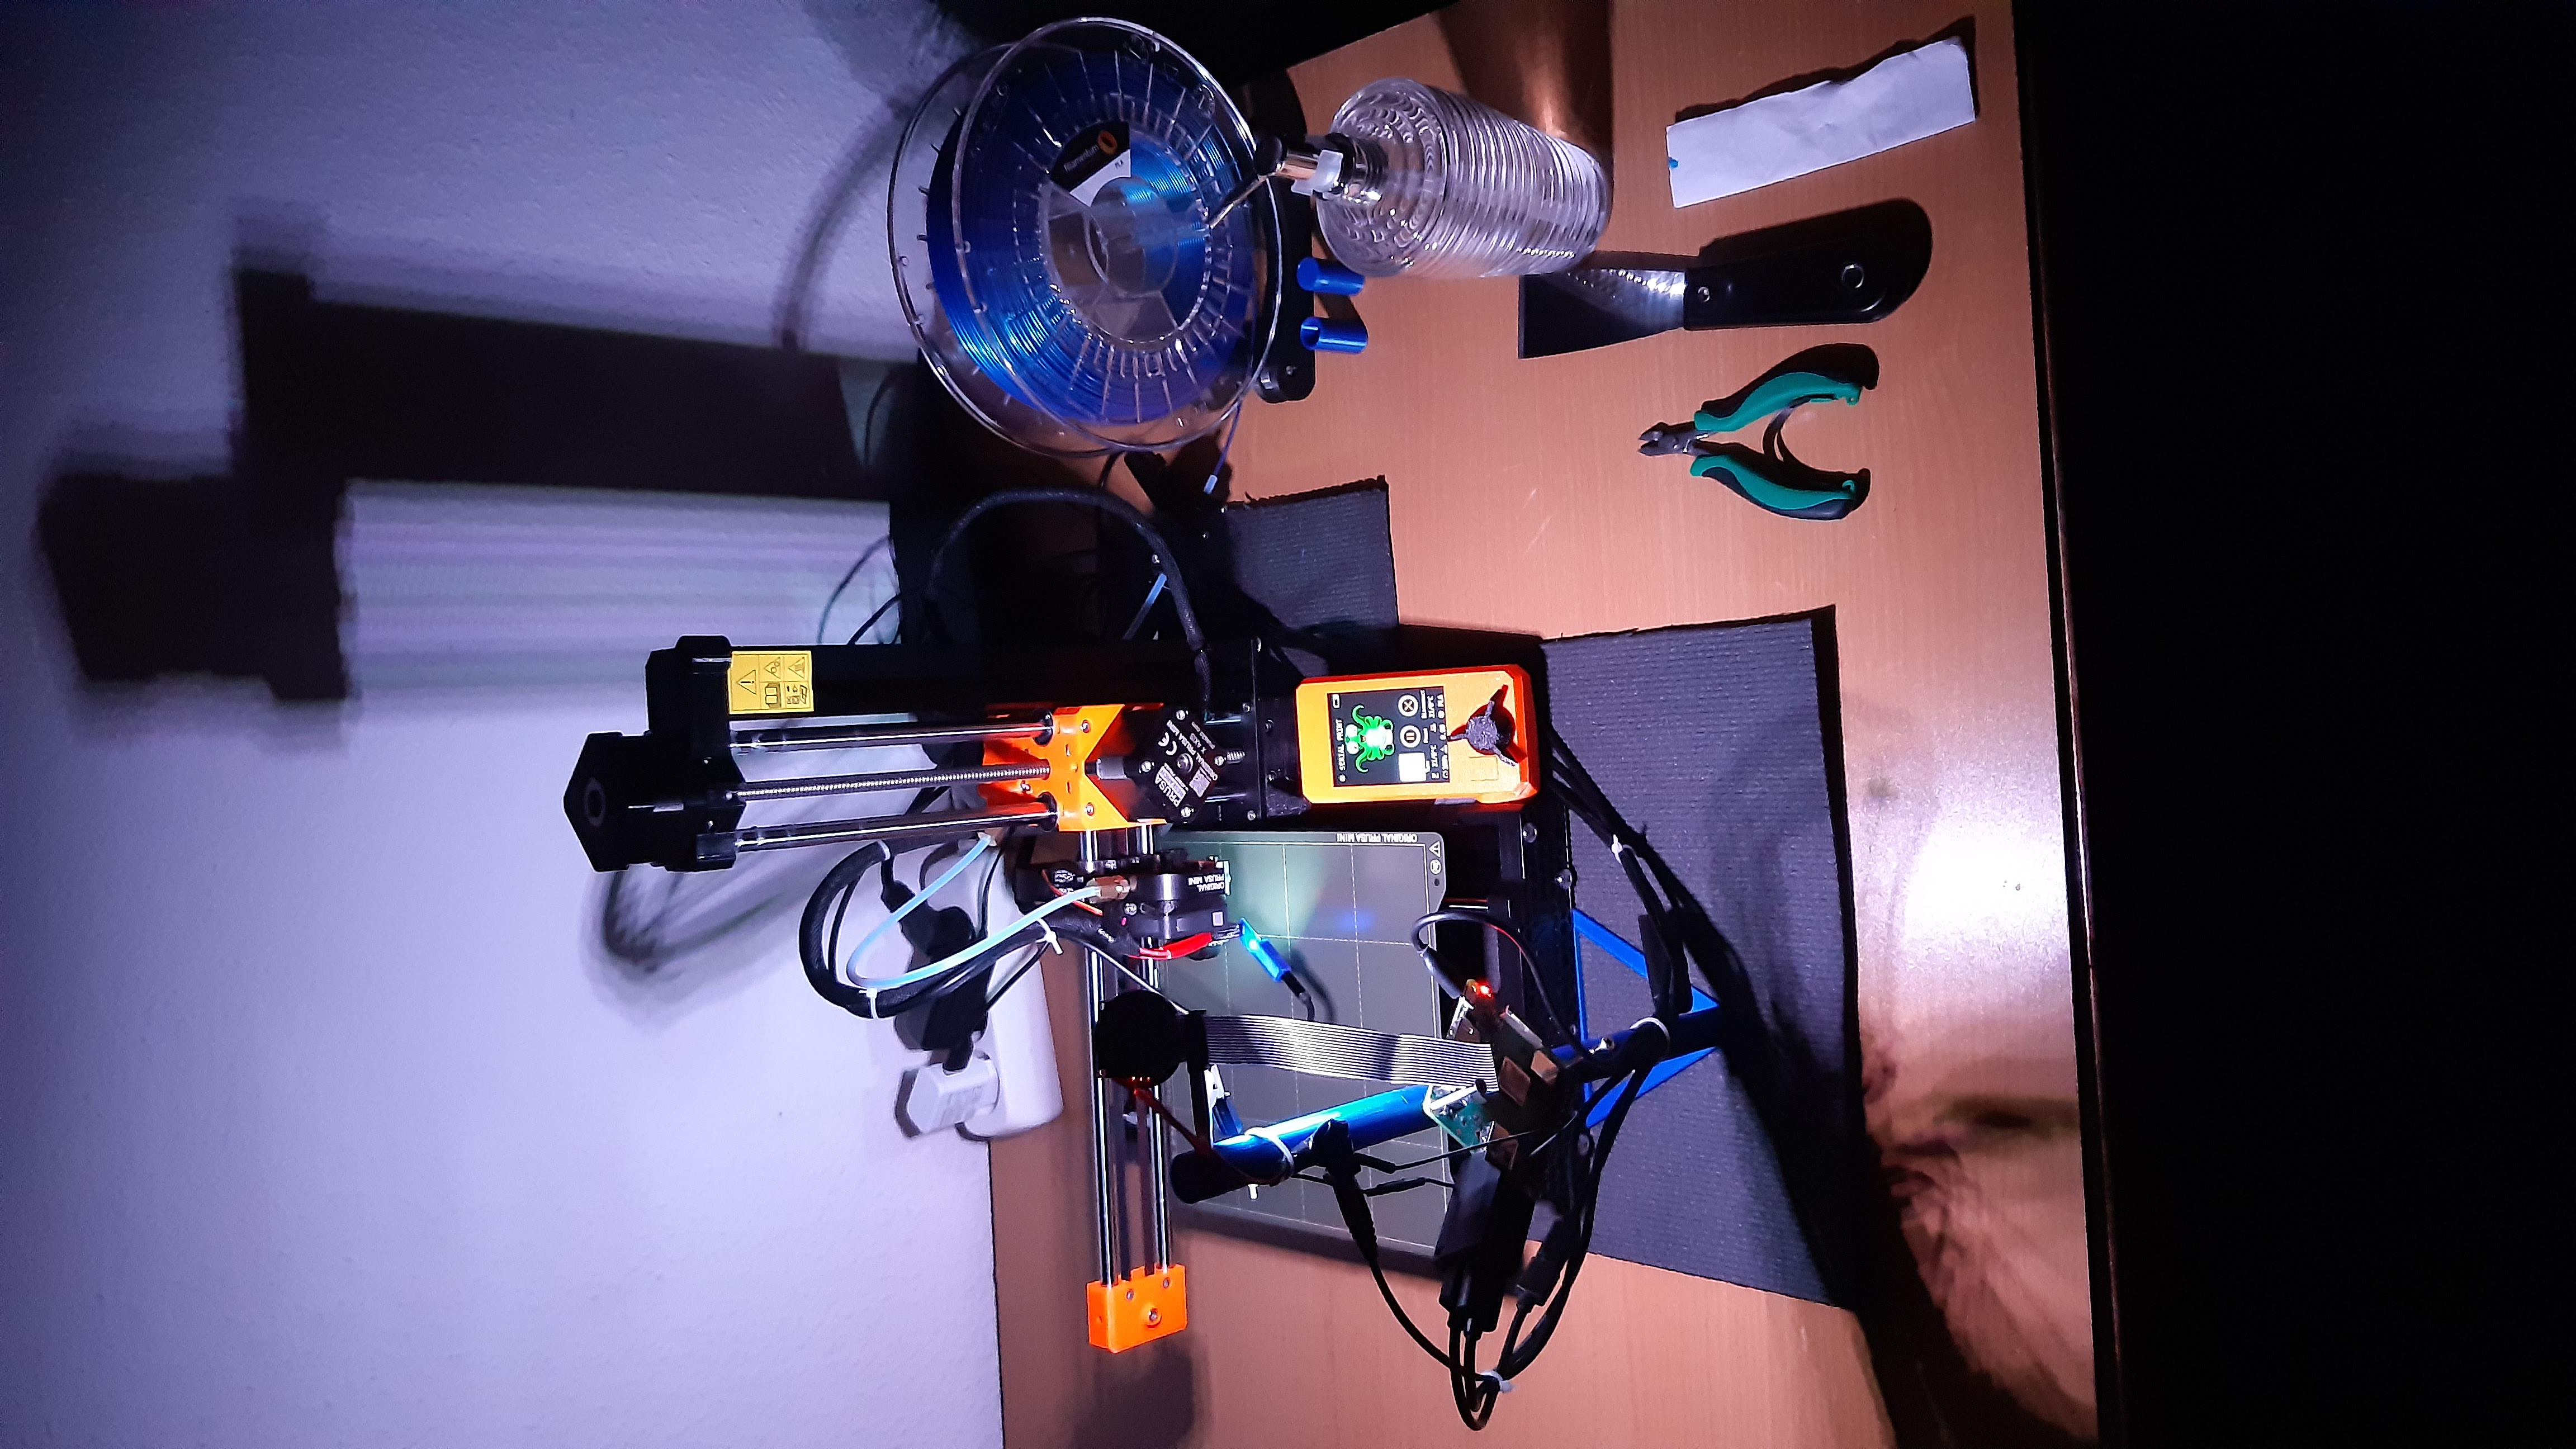
Room was dark, and to get bright light for photo I pressed "torch" button in OctoPrint.
Part of that photo scaled to 25% size — I really like the final setup (isopropanol in soap dispenser, for cleaning heatbed):
So from "OctoPi holder" standpoint all is done.
Just posted in other thread that full integration of nozzle camera into OctoPrint is done as well:
https://forum.prusa3d.com/forum/user-mods-octoprint-enclosures-nozzles/simple-nozzle-camera-borescope-holder-for-prusa-mini/#post-585166
As can be seen in this scaled to 50% size animation, pressing buttons "RaspberrySceneCam" and "BorescopeNozzleCam" (bottom right) switches displayed camera view in Control tab !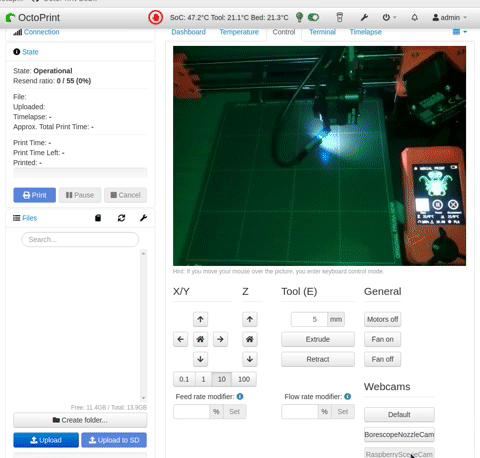
RE:
Later when complete, I will provide freecad+STL+gcode files.
Ooops, forgot to post the promised files, need to learn how to attach files here:
https://stamm-wilbrandt.de:httpdocs/en/forum/files.tgz
pi@pi400-64:~/holder $ tar -ztf files.tgz
files/
files/port4-Body.stl
files/port4.FCStd
files/port3-Body.stl
files/port23-Body_0.25mm_PLA_MINI_2h56m.gcode
files/raspi_base-Body.stl
files/raspi_base.FCStd
files/port4-Body_0.25mm_PLA_MINI_1h47m.gcode
files/port3.FCStd
files/raspi_base-Body_0.15mm_PLA_MINI_1h25m.gcode
files/port2.FCStd
files/port2-Body.stl
pi@pi400-64:~/holder $
RE: OctoPi holder for Prusa MINI+
Corrected URL:
https://stamm-wilbrandt.de/en/forum/files.tgz
Total print time for the 4 parts was 6.5 hours only, not 10h.
RE:
I don't really understand why people want to imprison their PIs in cases, in order to produce heat problems they won't have otherwise. My solution was always two side air access to the Pi, mostly hanging down from booshelf, or as with OctoPi holder by mounting to holder with both sides air contact: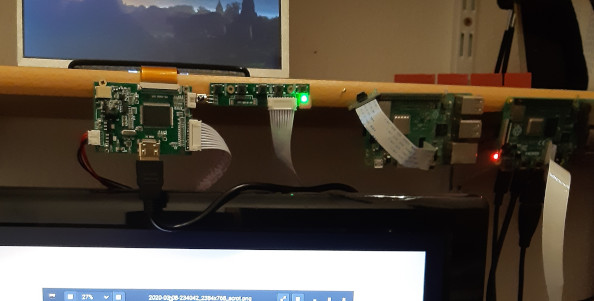
Some comments on the diameters of the through side holes of port3.FCStd (right) and port4.FCStd (left) of OctoPi holder: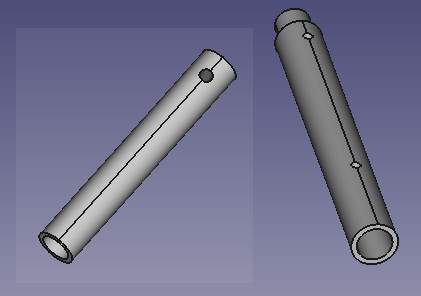
The distance of port3 part two side holes (LinearPattern) is 76mm. This works for diagonally mounted Pi3A+ as well as other "B" format PIs since they have holes where the Pi3A+ has as well.
I used 3.2mm diameter for the holes (going completely through the holder) because that was recommended for the M2 threaded inserts I wanted to solder. After 3Dprint I realized that I wanted to screw the Pi3A+ with M3 screws, and those threaded inserts require 4.0mm diameter. I was lucky that 210°C soldering iron easily made M3 threaded insert go into holder as if it was butter despite the missing 0.8mm.
In case you want to use PiZero2W for OctoPi (I would not try single core Pi0W for OctoPrint), just change 76mm to 62.4mm in LinearPattern. Change diameter of the holes to the diameter recommended for your M3 threaded inserts.
I did measure diameter of soldering third hand clamp I wanted to use as 5.0mm. So I did choose radius of port4 part side hole as 2.56mm to give 0.12mm free sapce for turning the clamp. Adjust to your clamp diameter accordingly.
Summary:
I have used OctoPi holder now for some days, and found nothing that would need to be changed for me. And I really like the design. Pi3A+ sitting in front and the zip-tied cables match the open design of Prusa MINI+ in my eyes.
RE: OctoPi holder for Prusa MINI+
A 13$ Ikea "Lack" desk got free of use, and I placed it on top of my Prusa MINI+.
Once reason is as shield against dust from top, a second the space for printer manual, spare parts, dispenser with isopropanol, pliers, …
There is only one problem that I can see right now: before reaching full z-height extruder carriage cable would hit desk from bottom. I measured 15.1cm height of nozzle above heatbed as shown here. The 2.9cm missing to maximal print height of MINI+ are OK for me right now: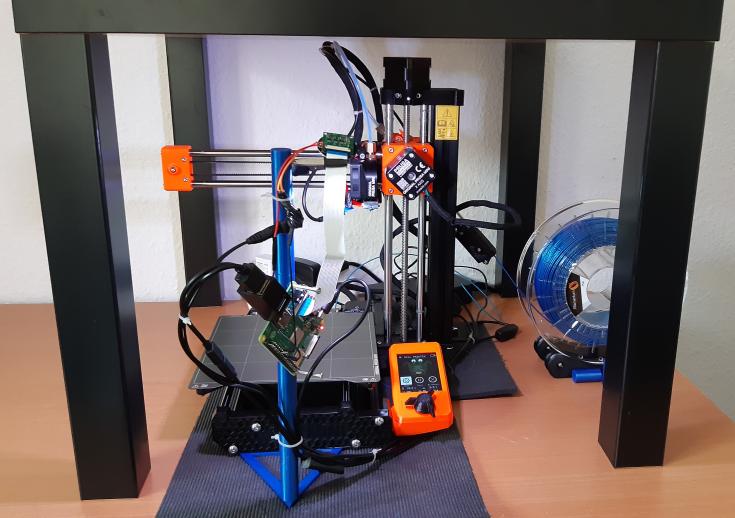
RE: OctoPi holder for Prusa MINI+
Full 180mm print height again by using Lack table raisings:
https://forum.prusa3d.com/forum/general-discussion-announcements-and-releases/ikea-lack-table-raising/#post-595882 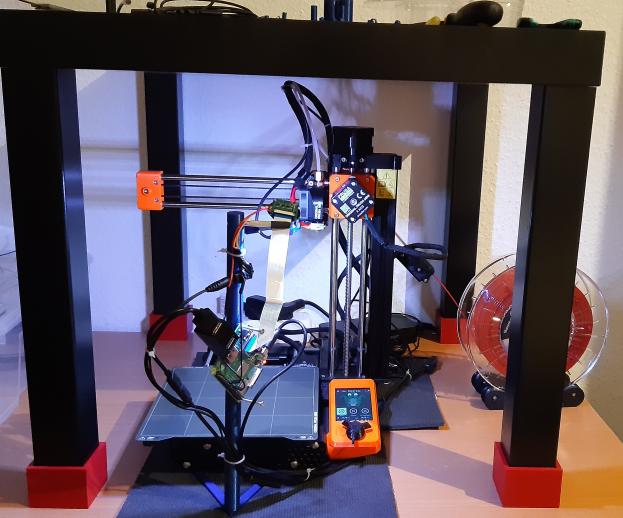
RE: OctoPi holder for Prusa MINI+
Just 13 hours in 3Dprint of "Kindle Paperwhite Hard Shell Case" for my daughter, with 170.77mm my highest print on MINI+ sofar:
https://www.thingiverse.com/thing:2748334 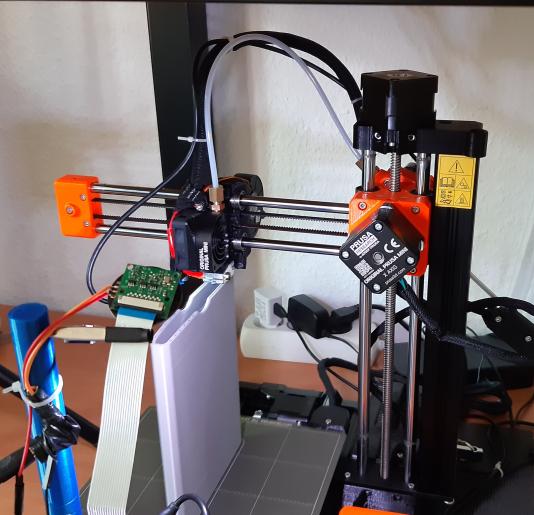
A little bit too high for scene camera default field of view to see nozzle …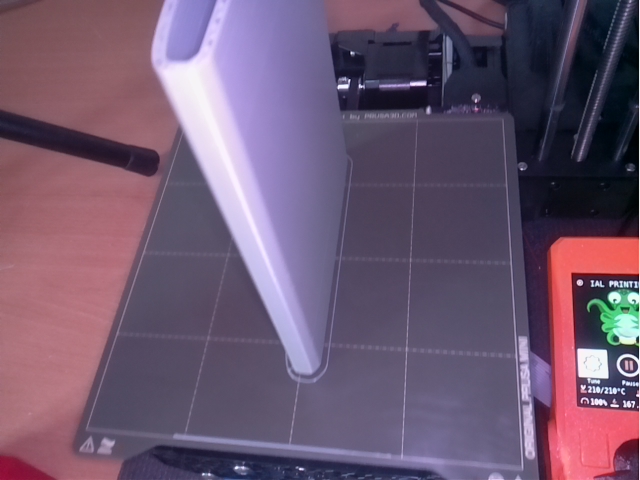
… but toggling to nozzle camera view in OctoPrint is good enough for me, no need to change scene camera FoV this time: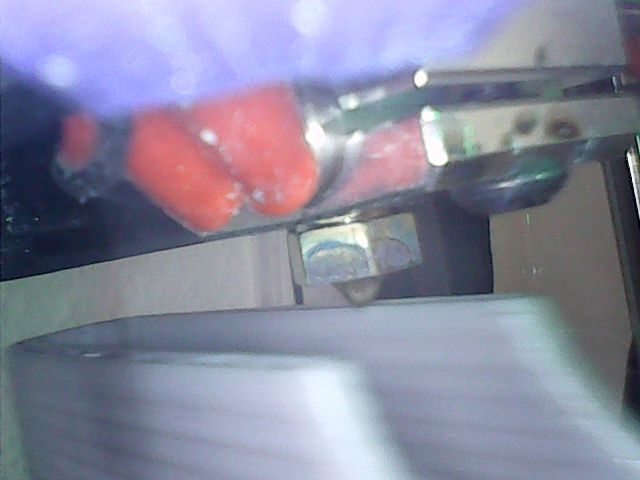
RE:
I 3Dprinted another 4cm extension for the Lack table feet in order to insert 4cm high concrete slab between MINI+ and absorber, and published model yesterday:
https://forum.prusa3d.com/forum/original-prusa-general-discussion-announcements-and-releases/best-vibration-absorption-for-table/#post-600357 
Today I 3Dprinted replacement for soldering 3rd hand clamp used to hold camera on top of OctoPi holder, and published model on printables.com:
https://www.printables.com/model/158586-octopi-and-pi-camera-holder 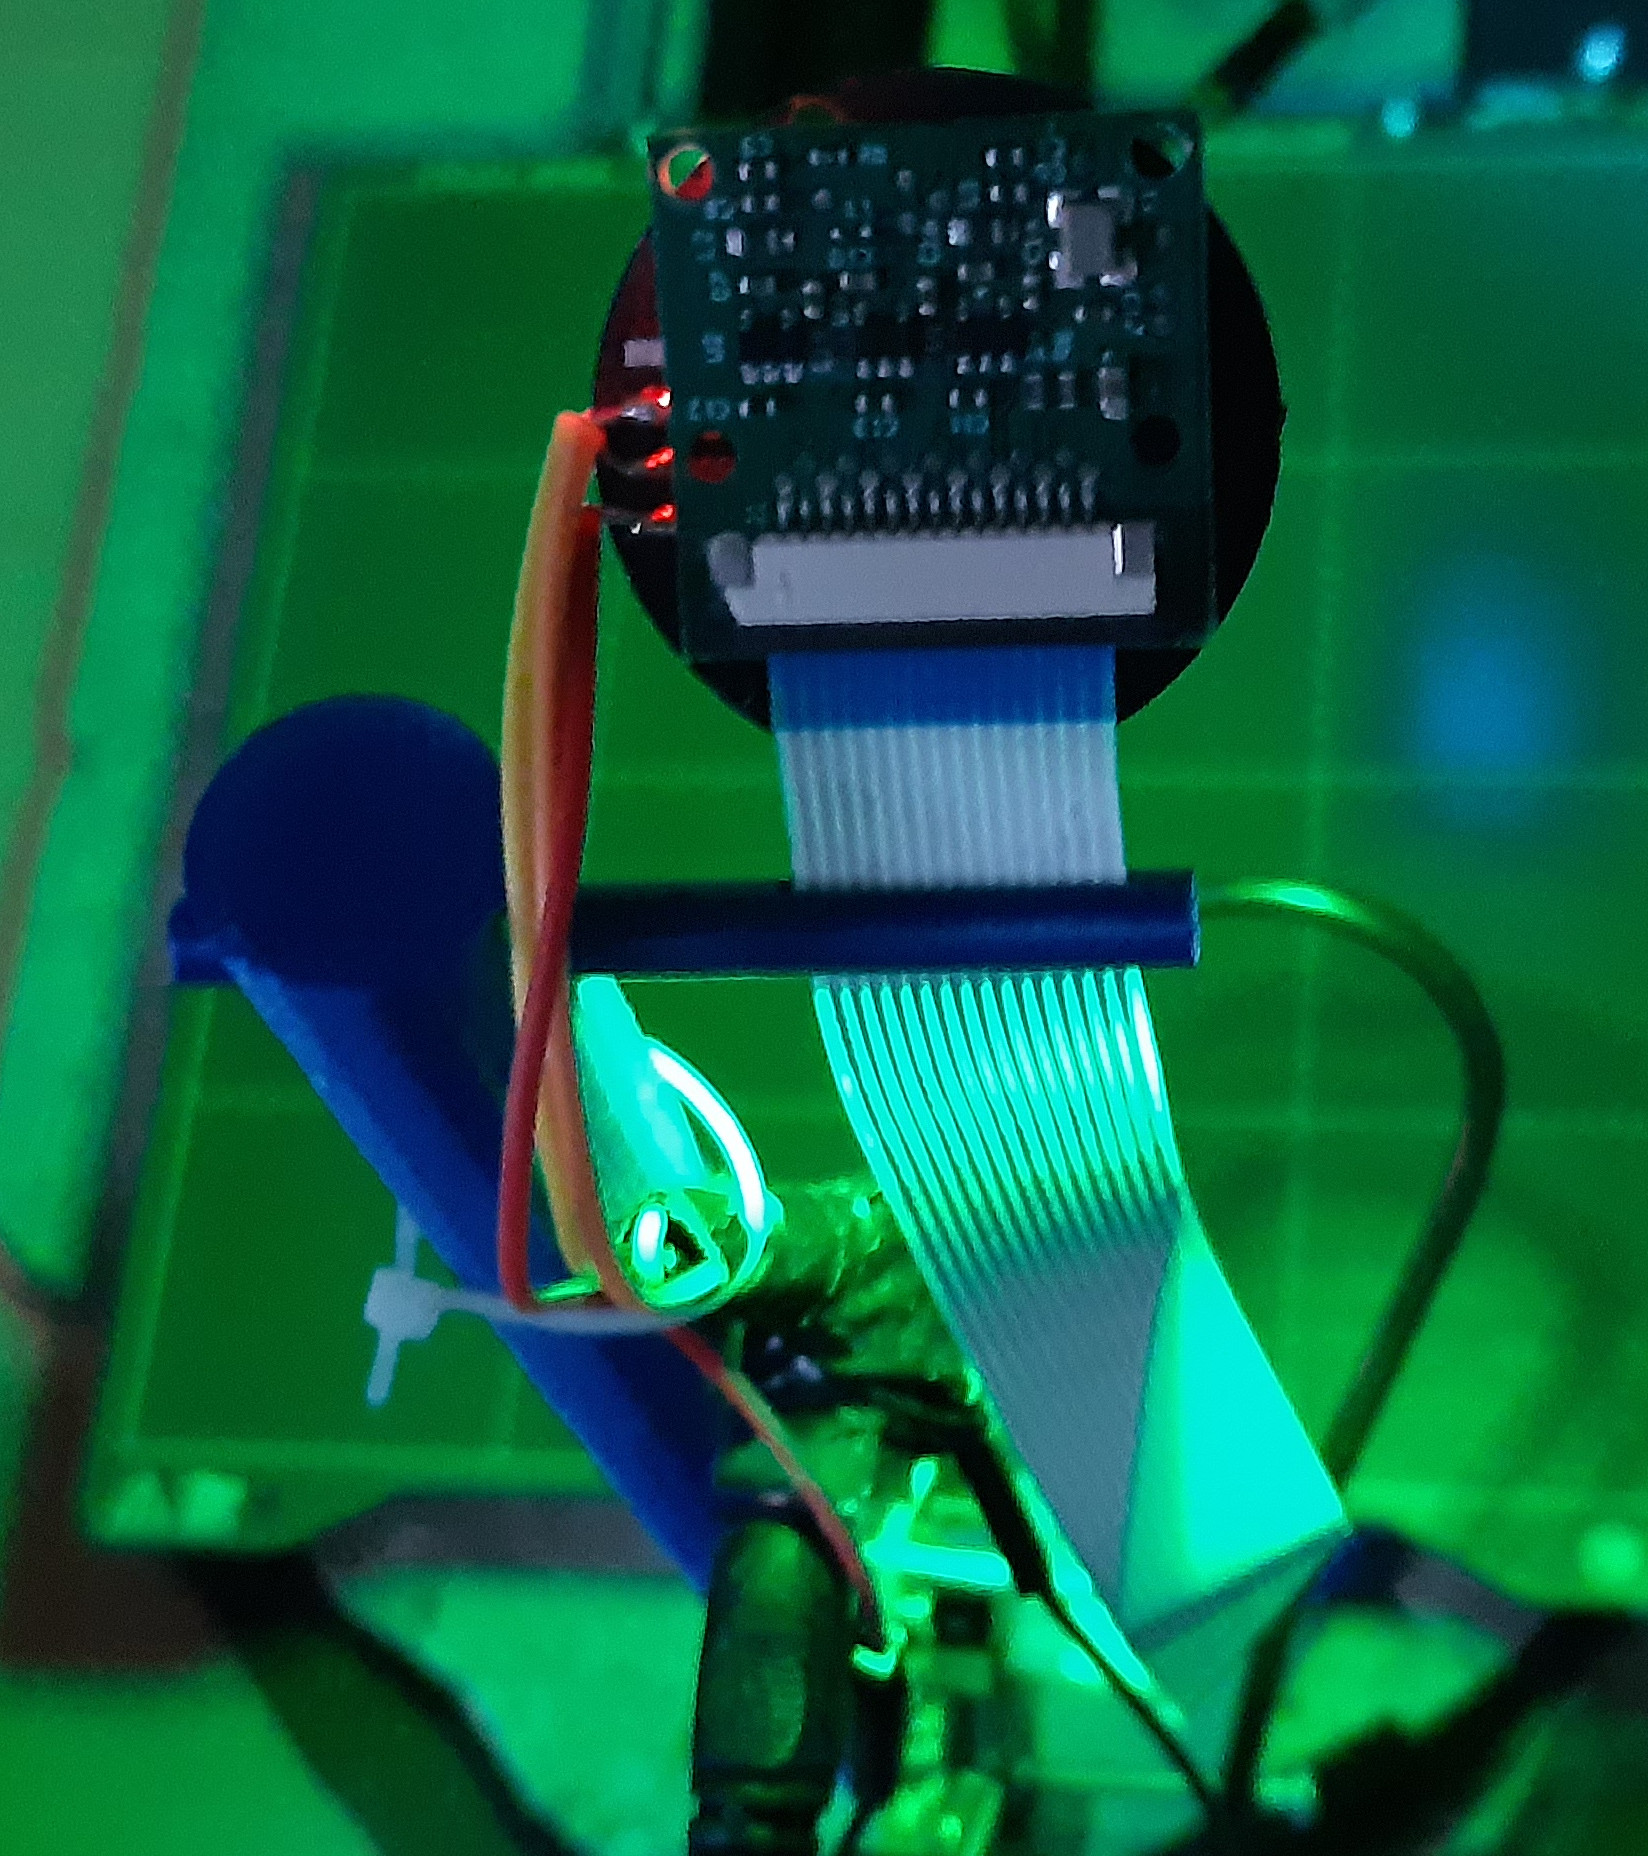
RE: OctoPi holder for Prusa MINI+
The big desk below 3Dprinter is gone, and replaced with another Ikea Lack table, which is stacked on a third.
Everything (MINI+, its power supply, triple socket, spool holder with spool, OctoPi holder) fits on single Lack table!
Today I created and published new stack adapter fitting my 4cm leg extensions:
https://forum.prusa3d.com/forum/general-discussion-announcements-and-releases/ikea-lack-table-raising/#post-602261
So now I have this 3 Lack table "no glue, now screw" construction for my Prusa MINI+ 3Dprinter between 2nd and 3rd Ikea Lack table: