RE: Different Hotends
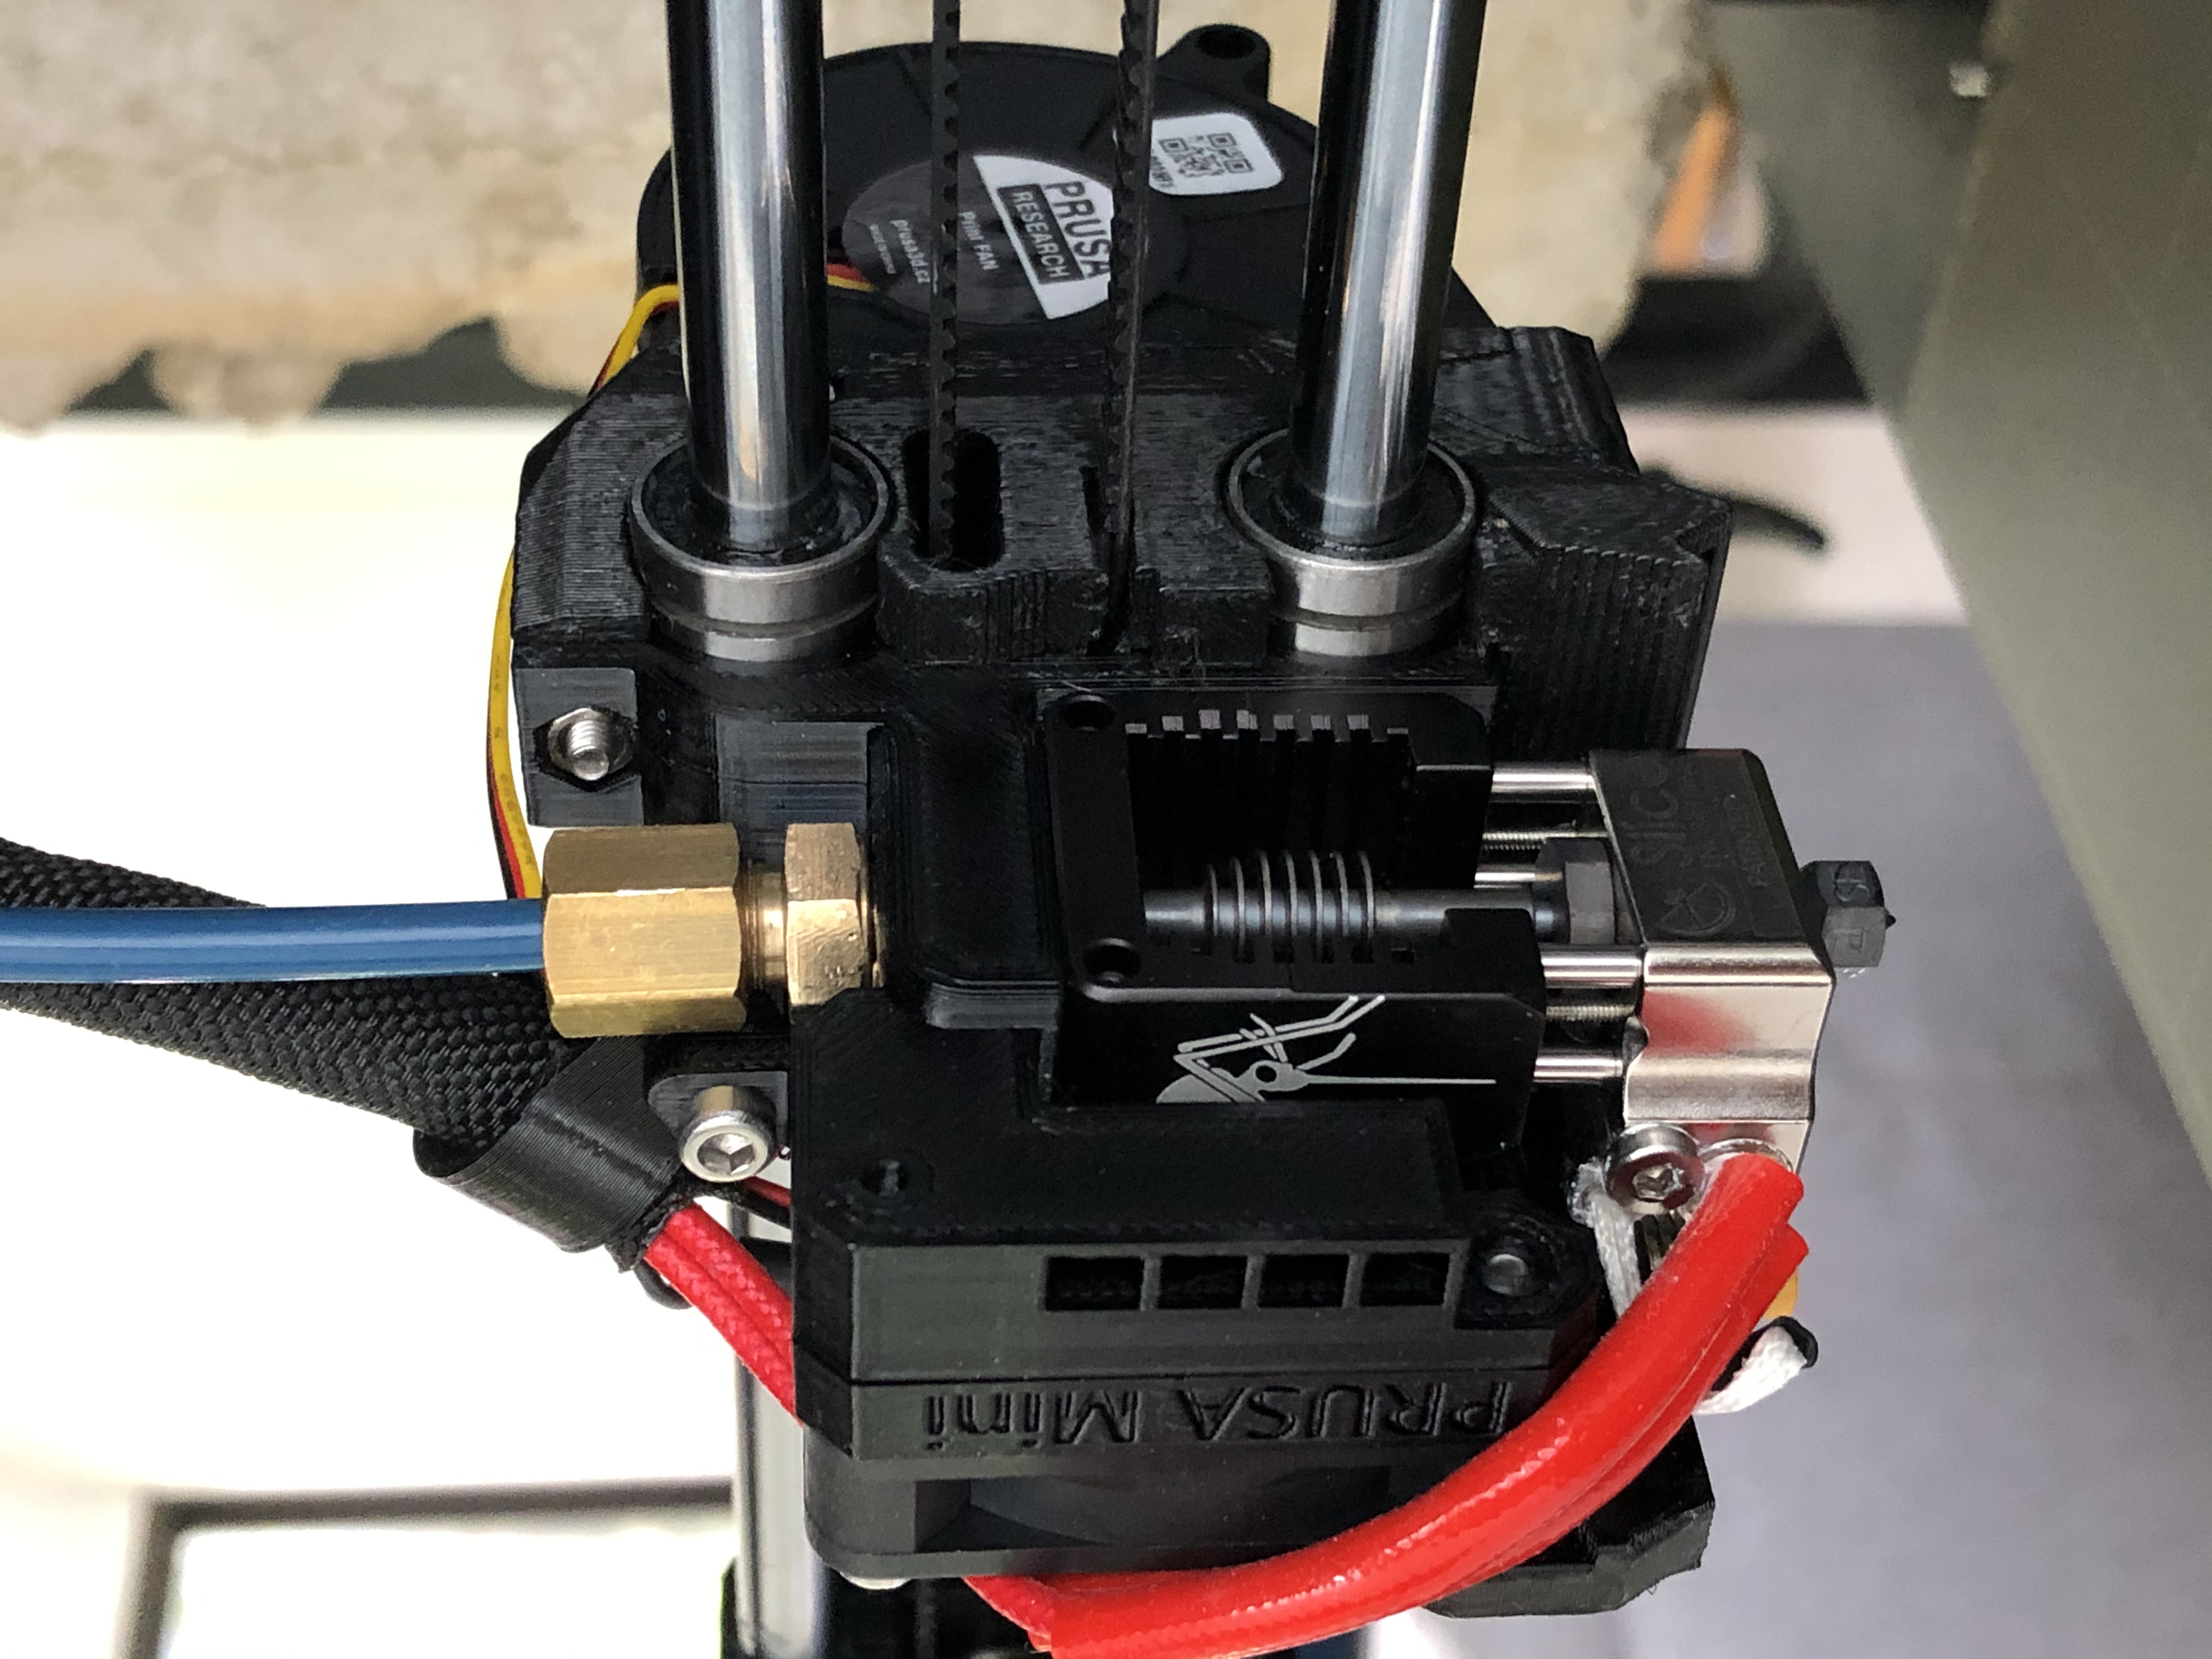
Mosquito Hotend on Prusa Mini
Totally overkill but completely worth it. I've been running this setup for a short while, around 50hrs or so print time. Printing mostly with PETG at the moment. It has been performing flawlessly for me so far. Bye bye heat creep.
I want to do this same upgrade. Can you share what you bought and what you printed to make this work ? Any g-code or other modifications needed ? I am so over the heat creep.
RE: Different Hotends
@kevman
I'll post the printed parts (the mount and fan shroud) once I have finished tweaking. They are working well but a little bit of adjustment will improve the heat management. There is very little space between the bottom of the fan shroud and top of the hot block. I might lower the hotend a millimetre or so to increase the gap.
The only additional mounting hardware that I use are two M3 nuts. The mosquito is mounted with the included screws. Boron nitrite paste to properly seat the heater cartridge and thermistor. Finally a short piece of ptfe between bowden-tube brass fitting and the hotend.
No additional g-code was use. However, the nozzle temperature tend to over shoot by up to 4 deg. C when heating up to the print temperature but this will stabilise relatively quickly and remains stable during the entire print. My guess, this is due to different thermal characteristics between aluminium and copper-alloy of the mosquito. I am also running the 4.1.0-RC1 firmware which may have some influence on the initial temperature overall shoot.
RE: Different Hotends
@fniemi
I have put up the files for the Mosquito mount and modified fan shroud. Thanks.
https://www.prusaprinters.org/prints/36125-mosquito-mount-for-prusa-mini
https://www.thingiverse.com/thing:4527473

RE: Different Hotends
@woraphot
Thank you for uploading this. Dod you need supports for the shroud when printing ? Did you use PETG ?
RE: Different Hotends
@kevman
No need for support when printing the fan shroud.
Yes I use PETG.
RE: Different Hotends
Seems like a decent upgrade. The only thing that I am concerned with is whether the cantilever design can support this change in weight. Could the nozzle go lower once the whole assembly is on the far left of the X-axis?
I am saying that without knowing what is the weight difference between the V6 and the original Mini hotend.
Original Prusa Mini + Smooth PEI
Prusa Slicer 2.6.0
RE: Different Hotends
@woraphot
Are you using the stock Mini fan, or did you get one from Slice to go with the Mosquito?
RE: Different Hotends
@davem
FYI - Slice only offers 12V & 24V two wire fans. The Mini uses a 5V three wire fan.
- MK3s w/Mosquito Hotend- Mini w/Copperhead Hotend- XL - 5 tool -OpenScad -3d Builder -FreeCAD -Alibre -OctoPrint/x3(Pi3B)
RE: Different Hotends
@jasii
Ah, good point.
RE: Different Hotends
I've been exclusively running PETG for the past two weeks and last night it happened-extruder stopped feeding half-way through an overnight print and won't unload. Gotta clear it in order to print the adapter, but I just ordered a Mosquito. I'll probably get to installing it next weekend.
RE: Different Hotends
@davem
I'm using stock fan.
RE: Different Hotends
I've posted a new update for the Mosquito mount for Prusa Mini.
https://www.prusaprinters.org/prints/36125-mosquito-mount-for-prusa-mini 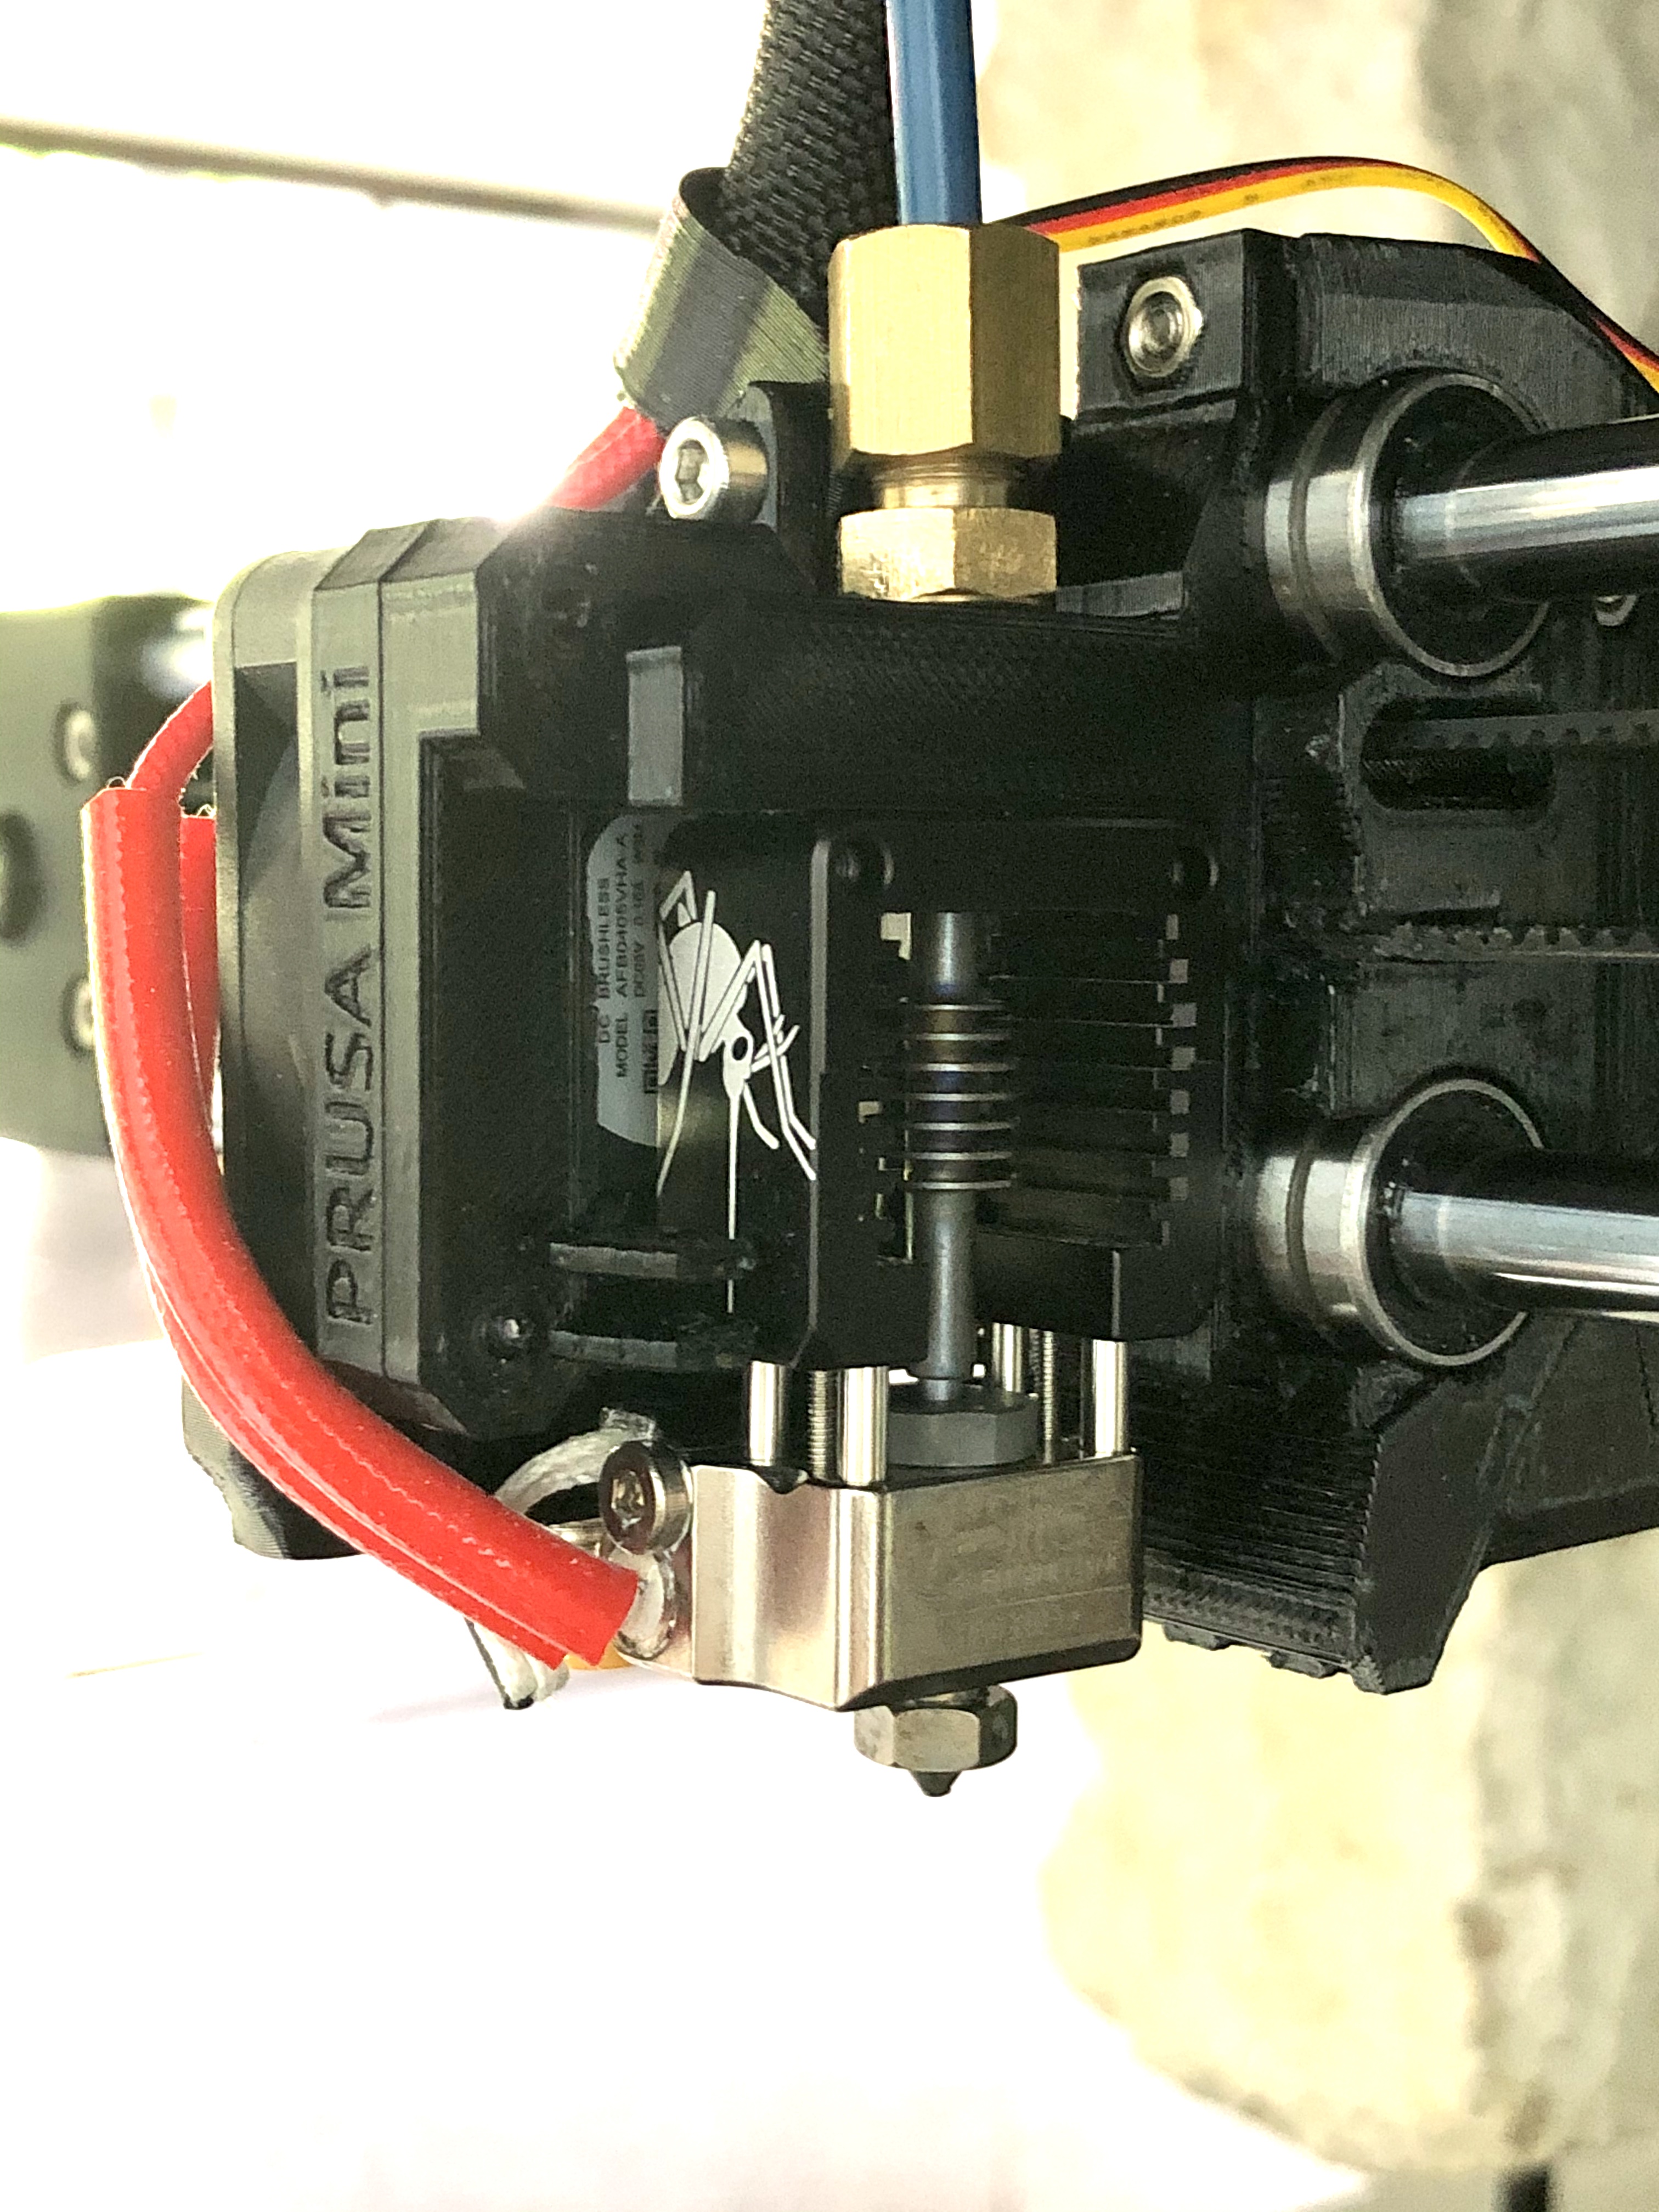

-Better control of Hotend fan airflow to reduce airflow leak towards the print surface.
-Address the issue of airflow from the print fan hitting the hot block.
-The X-Carriage is optional
RE: Different Hotends
@woraphot
My Mosquito is coming tomorrow. Do you know of any resources/instruction for replacing the x-carriage? Prusa Knowledge Base doesn't seem to get into that kind of detail. I know it's optional, but you say it's worth the upgrade- might as well do this right.
Thanks for your hard work on this upgrade. Can't wait to see it in action!
RE: Different Hotends
So I’m going to consider doing this upgrade if I can ever get the mini to print the parts. One question I have is what is the impact of the height of the nozzle being lower and the offset of the Y? Do You need to correct that in some way when printing with the new setup?
RE: Different Hotends
@kevman
My plan right now is to reset the MINDA probe based on the new nozzle height, then recalibrate z height. I don't think anything further is necessary to compensate for that change.
As for the Y change, I don't think 1.5mm is cause to worry. I'd be curious to know if @woraphot made any gcode adjustments.
RE: Different Hotends
@davem
X- carriage can be removed by first, remove the front part where the hot end is attached in the following order;
-remove MINDA holder, fan and fan shroud.
-remove the print fan which in turn expose one of the two screws holding the Hotend to X-Carrige.
-undo the two crews to remove the Hotend.
Next loosen up the x-axis belt tension and remove from the x-carriage. The LM8UU bearings can be slide out along the x-axis (with a bit of pursuasion) and you are done.
I find the re-attaching of the belt can be a bit of a challenge. Take your time doing it. I use a thin flat screw driver to gently push the belt into the carriage. Be careful not to use excessive force or you may break the teethed section of the x-carriage.
If you don't feel comfortable swapping x- carriage, I'd suggest leaving it for another day. Have your printer setup and running with the Mosquito first.
Good luck and enjoy.
RE: Different Hotends
So I’m going to consider doing this upgrade if I can ever get the mini to print the parts. One question I have is what is the impact of the height of the nozzle being lower and the offset of the Y? Do You need to correct that in some way when printing with the new setup?
The Z-axis will be taken care of by the MINDA. You have to re-adjust and calibrates, of course. I think there is enough tolerance in the MINI so that you still have 180mm built height.
The Y-axis; at the beginning of a print when the printer lay down some melted filament (nozzle pressure equalisation) this will be very close to the edge of the build plate on my MINI. That's it, no need for any G code correction or anything. However, if you find that on your MINI the filament is being laid down outside of the build plate, simply slide the build plate 1mm or so forward on the y-axis before the bed levelling.
RE: Different Hotends
Thanks ! I know the x-carriage is optional, but what is the advantage of using it vs keeping it stock ?
RE: Different Hotends
Thanks ! I know the x-carriage is optional, but what is the advantage of using it vs keeping it stock ?
Keeping it stock means one less new variable to deal with. I'd suggest you try the mod. x-carriage after you have the Mosquito up and running reliably and predictably.
The stock hot block has part of it trimmed off to allow the airflow from print fan to be directed towards the nozzle tip. With the stock x-carriage and Mosquito combo., a good percentage of airflow from print fan will be blocked by the Mosquito hot block. Effectively, you will be cooling the hot block and warm up the print fan airflow and hence loose the print fan effectiveness. I found that the only time I have run into trouble is when trying to print at 245 deg. C. or higher with 100% print fan. The Mini will struggle to reach the set temp. and error follows. The mod. x-carriage redirect print fan airflow away from the hot block and hence will not run into the above mentioned problems.
Unless you are planning to print at 245 deg. C. or higher with 100% print fan then keep the stock x-carriage and print with your stock profiles. The mod. x-carriage will most likely require you to adjust your print profile to suit your need and get good results.
I'm also testing yet another mod. version of the x-carriage which try to focused the airflow to be as close to the tip of the nozzle as possible. This means more adjusting of the print profile, eg. less cooling etc..
In short, keep it simple and enjoy your print.
RE: Different Hotends
@woraphot
Mosquito is installed! I love it.
One question- have you adjusted your PID values at all? Running through the calibrations, I’m unable to pass the “self test” due to temps. When preheating to PETG, for example, it’ll hit 230 no problem, then overshoot to about 236-237 before cooling takes effect and settling at 230.
I’ve checked my installation, verified the boron nitride paste is on the heater and thermister, so I don’t think that’s the problem. Have you seen anything similar?