RE: Bondtech Extruder for Prusa MINI
@24kjames I can only call yourself "lucky" 👍 🤗 . I've tested few various types of flex materials and still finds it near imposible on Prusa MINI 😪 😯
My focus lately was on Filamentum TPE 96A - a bit softer, but still in range of "should be printable" filaments - but without success. Everytime the filament gets stuck and chewed in extruder ... sometime after few minutes, sometimes after an hour. But printing on 10% of speed means, that even 1h of priting is just about having only few milimeters of height printed - so i can't see that as "partialy successful" either.
What helps at least to start the print is print on near left side - because PTFE tubes are a narrower. Slow down to 10 -20% of standard prusa flex profiles and lower the flow ration a bit. And that isnt a kind of printing you want to do regulary, ... if you would be lucky enough! Not to mention the waste of 20cm of filament everytime when you need to rip it out of extruder.
I'll give another shot to TPU as you mention that it works for you in factory condition of printer. Would you be so kind and share the speeds and other settings that you use for successfull prints?
And if it won't work .... yeah .. bondtech 😣
RE: Bondtech Extruder for Prusa MINI
@adam-prchlik
That is awful, that you are having such a difficult time. It really sounds like something is fundamentally flawed with your printer. I don't enjoy mine as much, knowing you, and others, struggle due to no fault of your own. If this really is a lottery, and I really did just get "lucky," all I can say to that is, "it's about dang time." Certainly there is an error rate with anything in mass production, which is always unavoidable, so I guess it really does come down to those particular odds. If my experience was even vaguely similar to yours, I would have punted the thing back to Prusa.
So, I'd be happy to share with you, any details of my setup. I came back here with the primary objective of sharing some photos of the print(s) I referred to previously, specifically TPU prints with overhang that were printed without support material. I will post these photos here, and then return with the information you requested. Roughly, I used stock Prusa TPU profiles, with minimal adjustments to heat bed temp, brim, and first layer height. Stand by for exact details.
For now, here are some TPU prints from my Mini. They have been cleaned up. (I will soon post some fresh prints, hot off the bed with no cleanup, in order to give the most honest representation of the quality.) Three of the pictured prints are made from Filamentum 98A, and the fourth is Sainsmart TPU (which also claims 98A, but is definitely softer than Filamentum 98A.) All were printed without the use of support material, and all feature various degrees of overhang in their design. All were printed in their upright orientations. Most of the photos are various angles of the same single print, which is my attempt to represent the average quality, and general characteristics of prints coming off my Prusa Mini.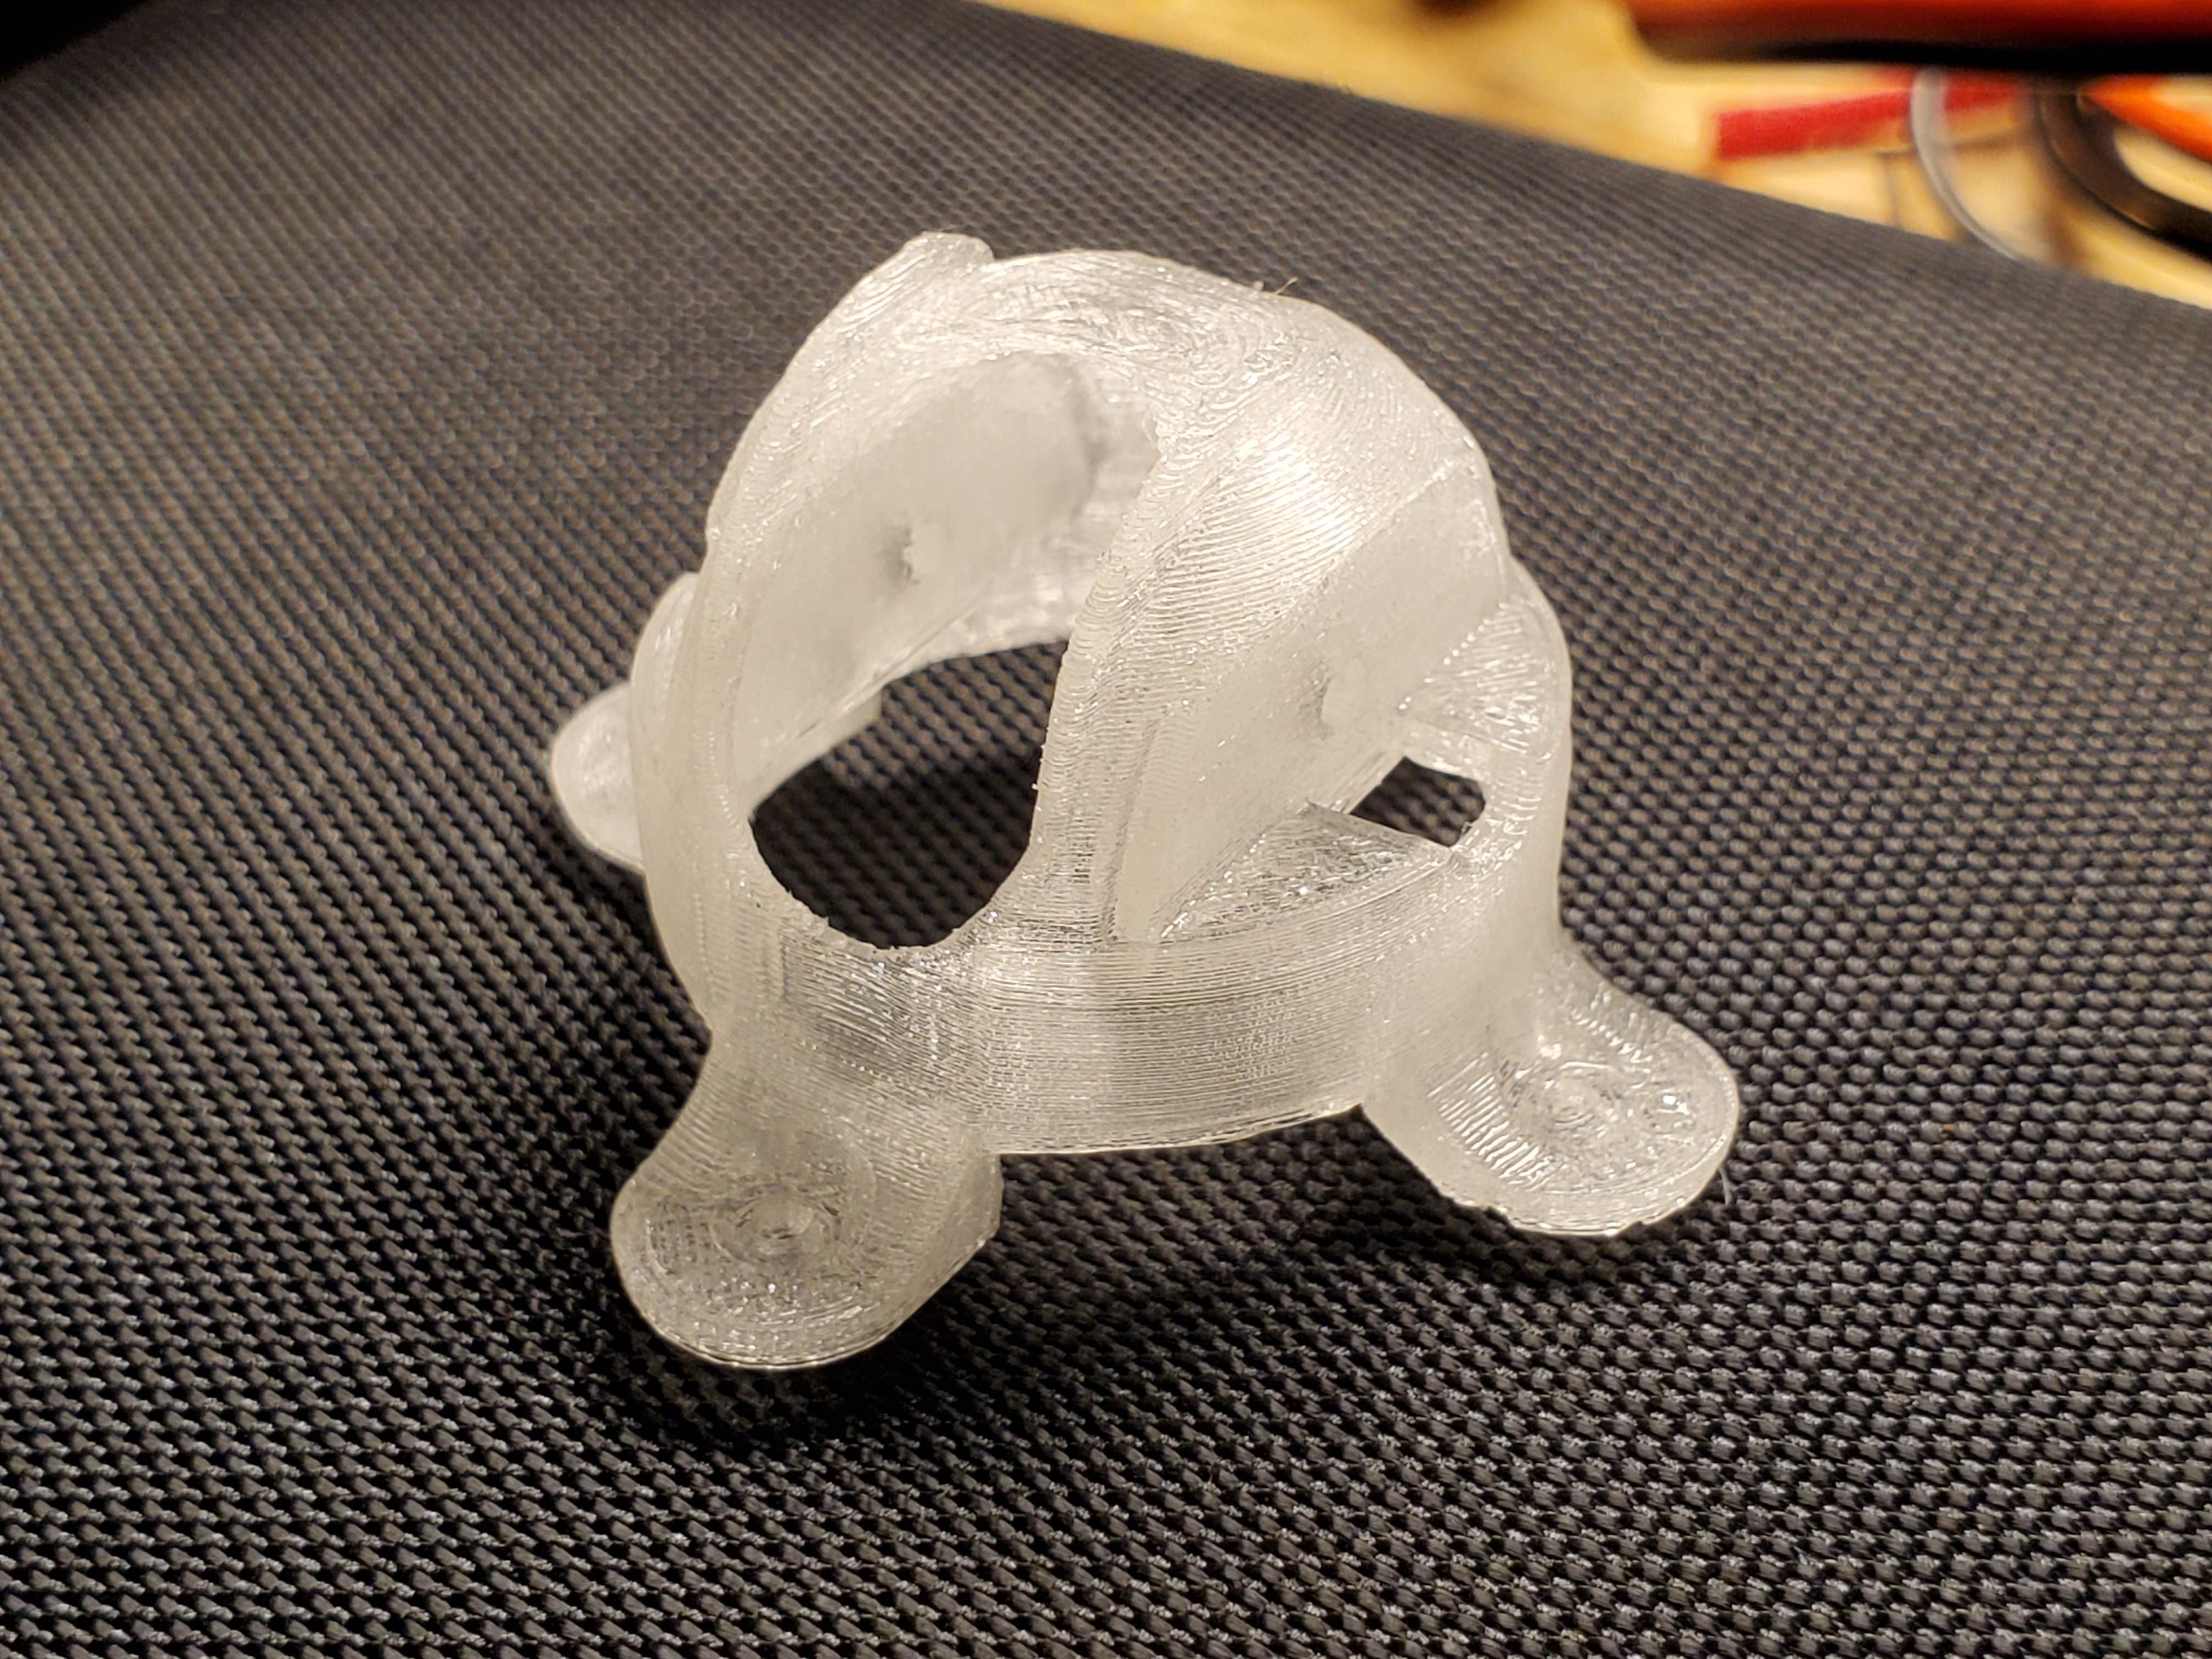
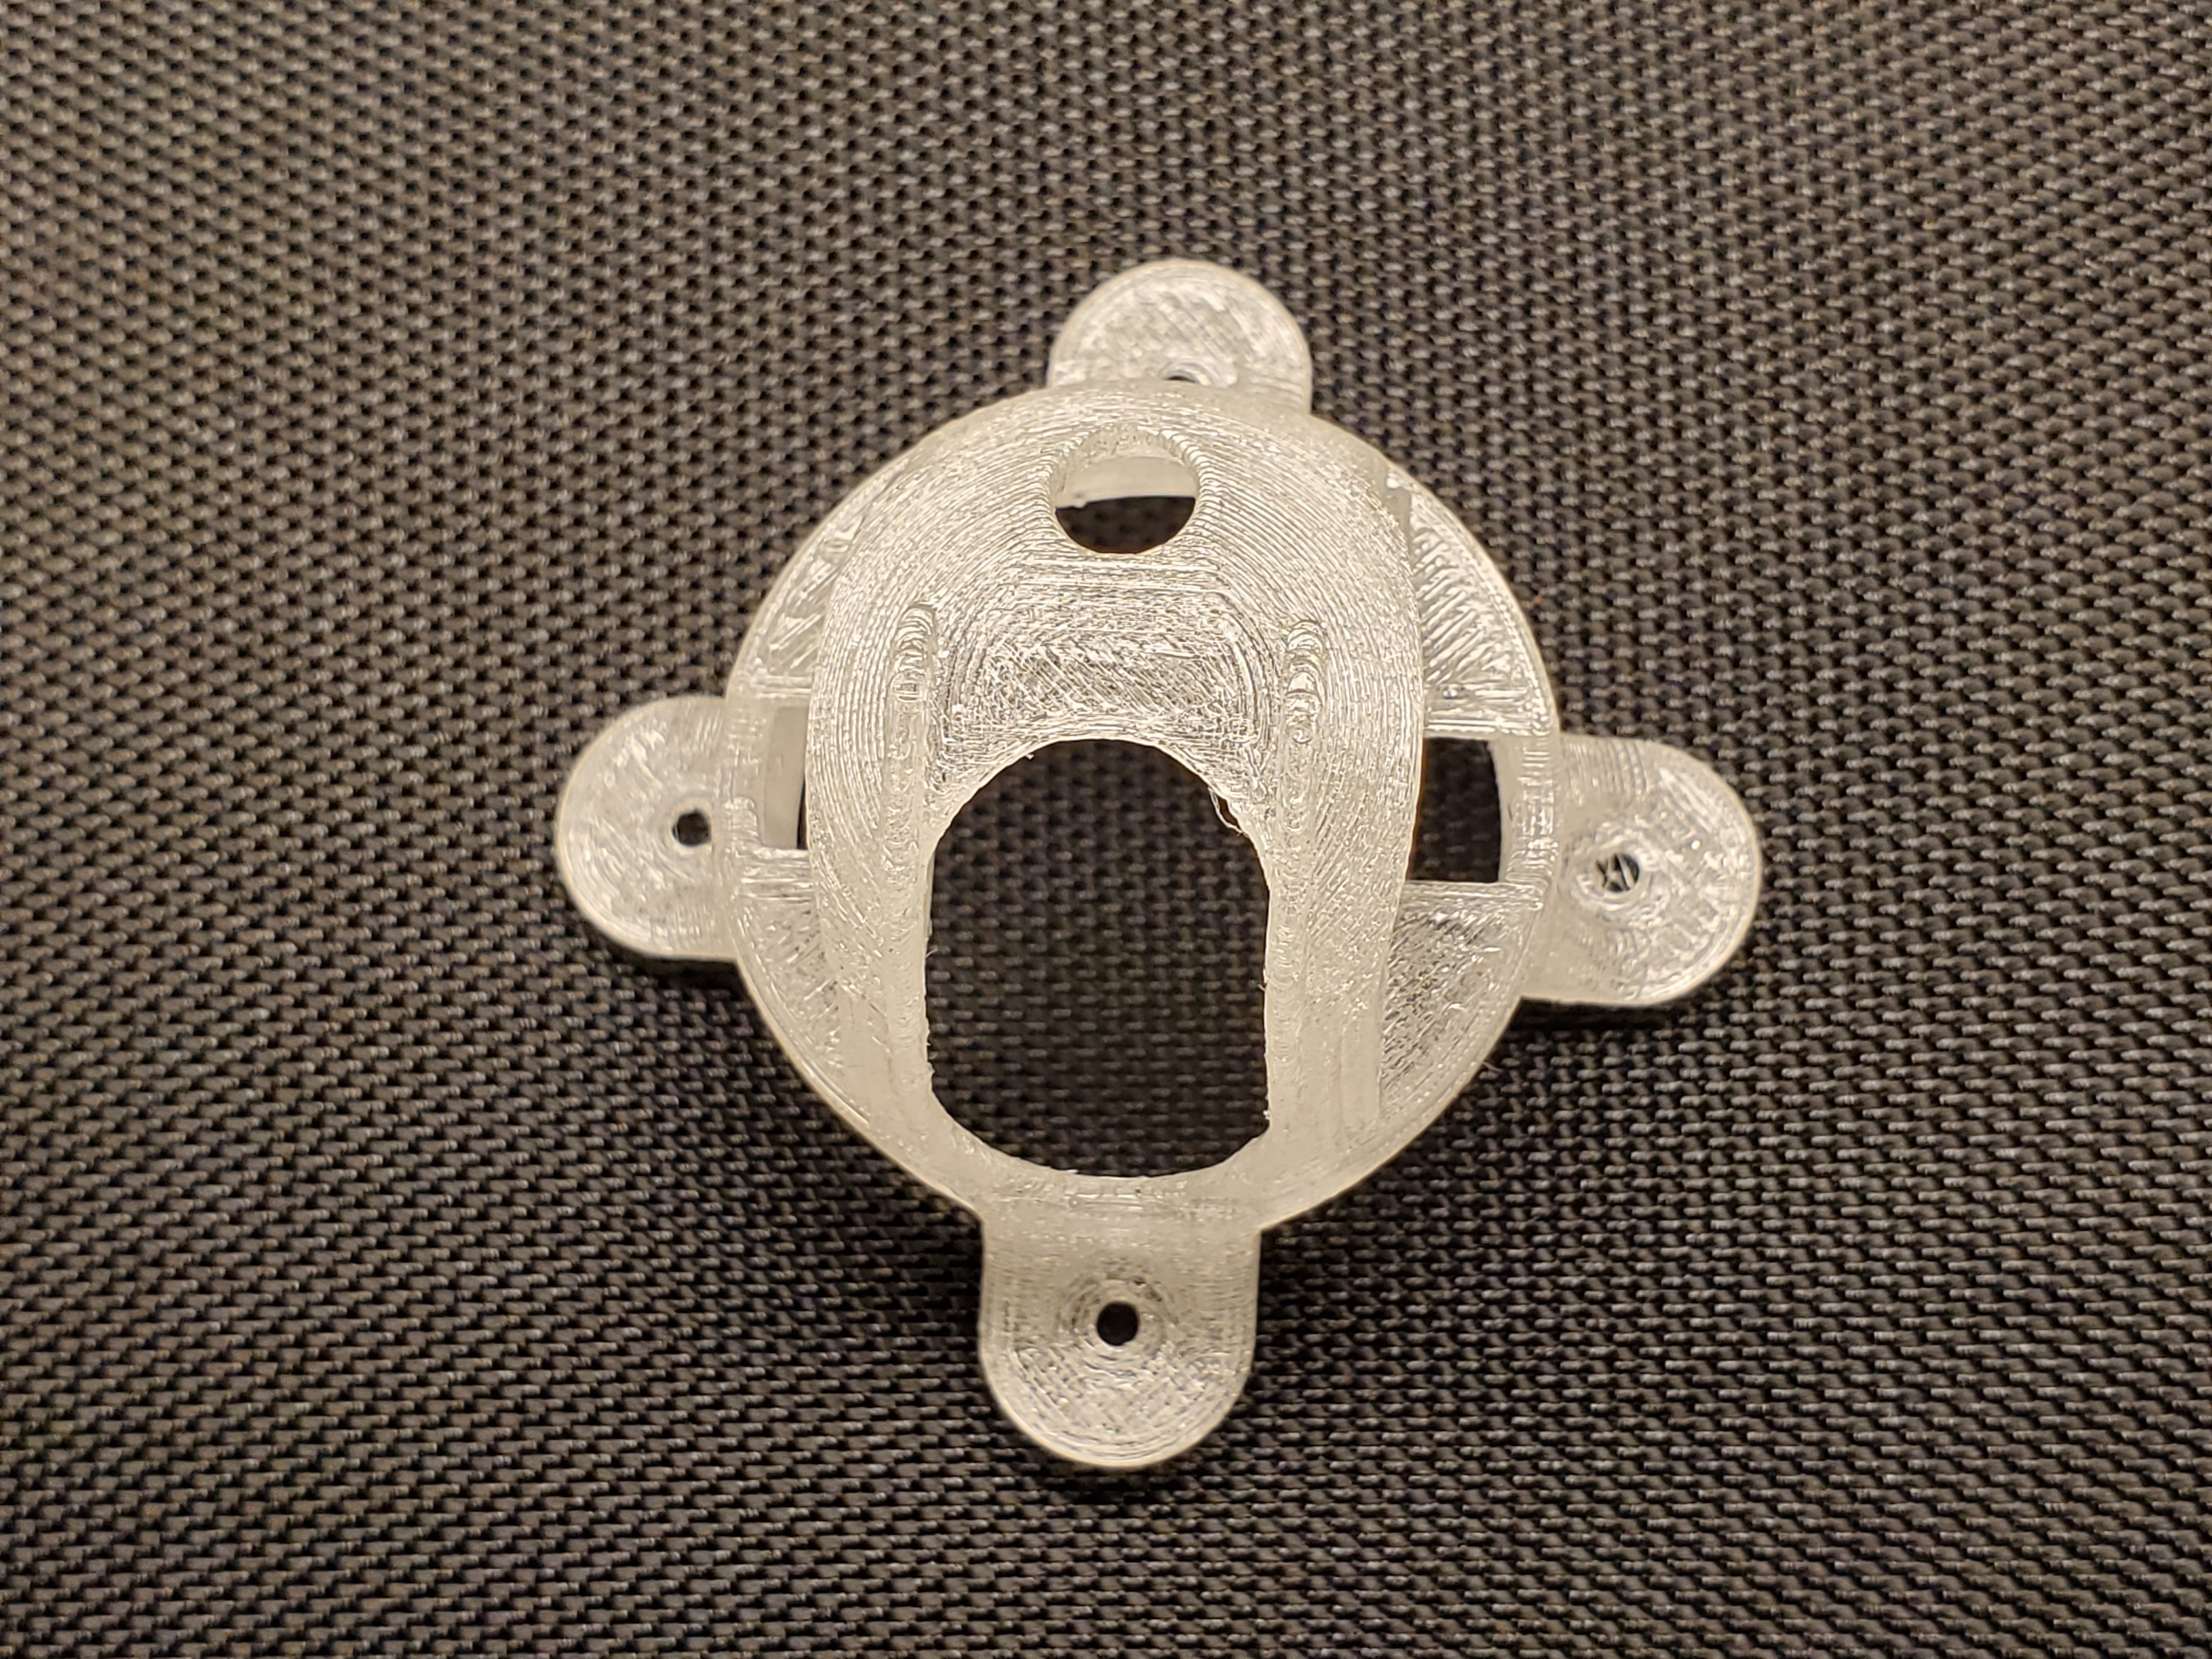


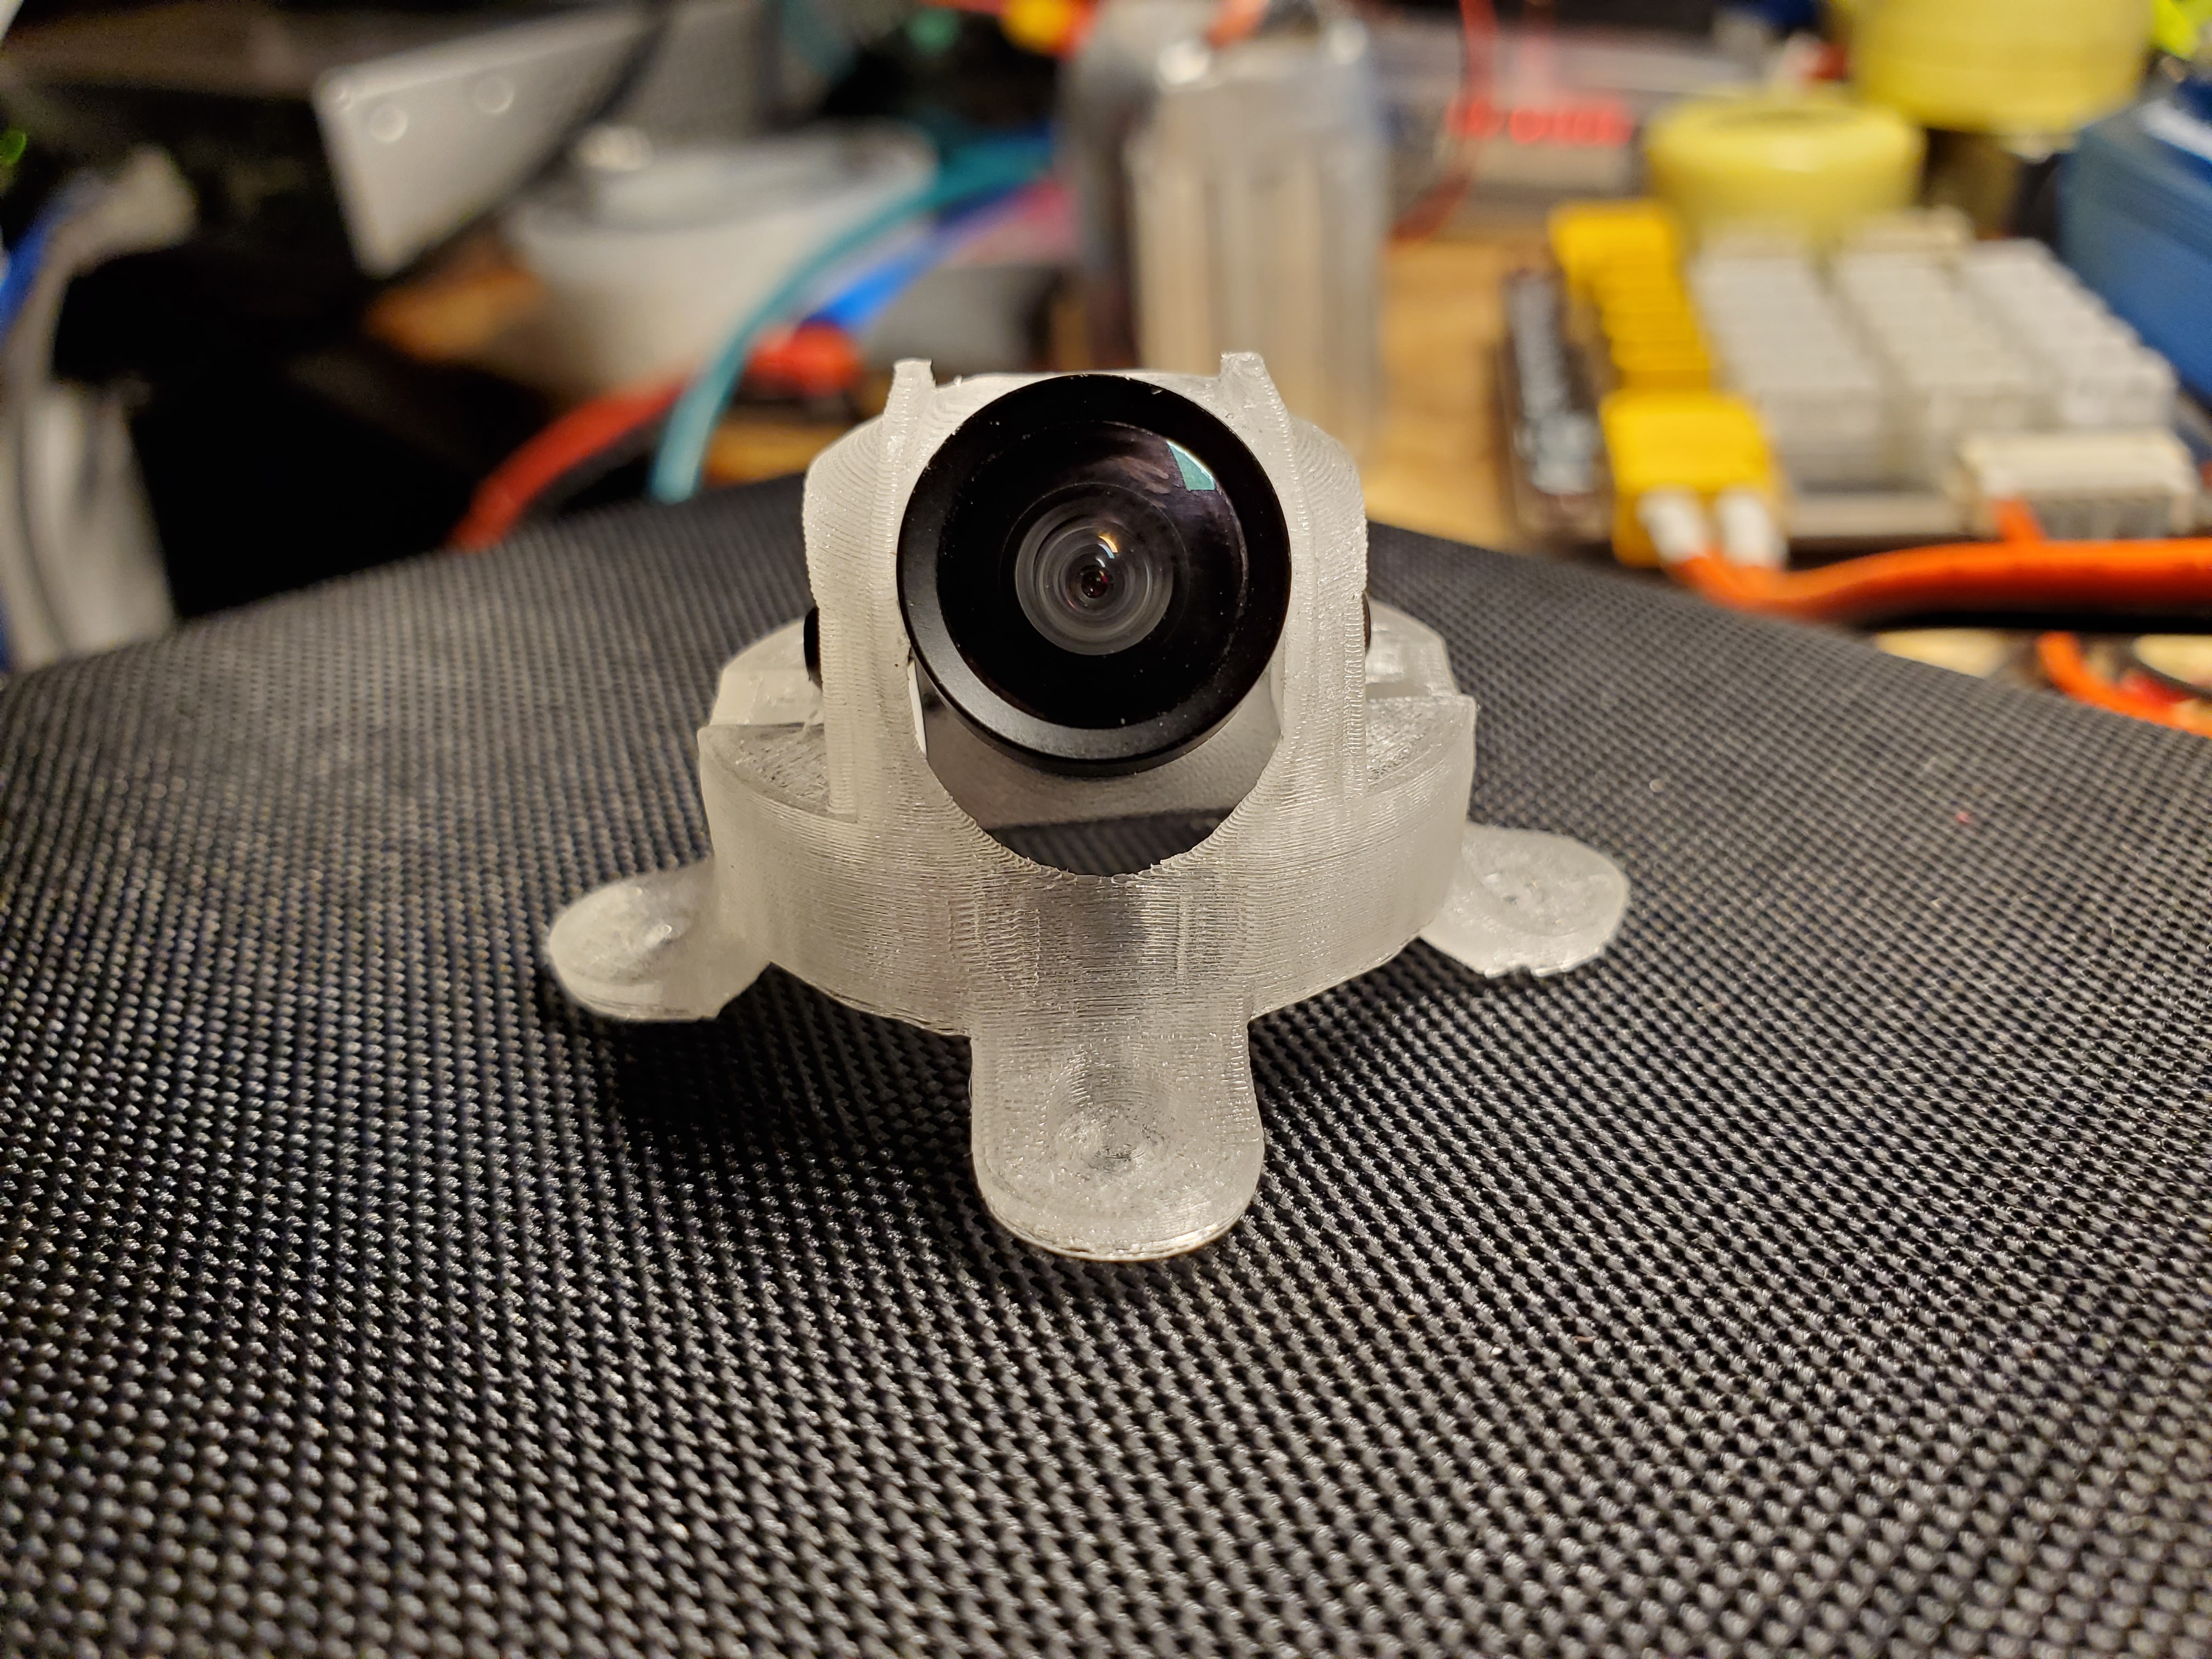

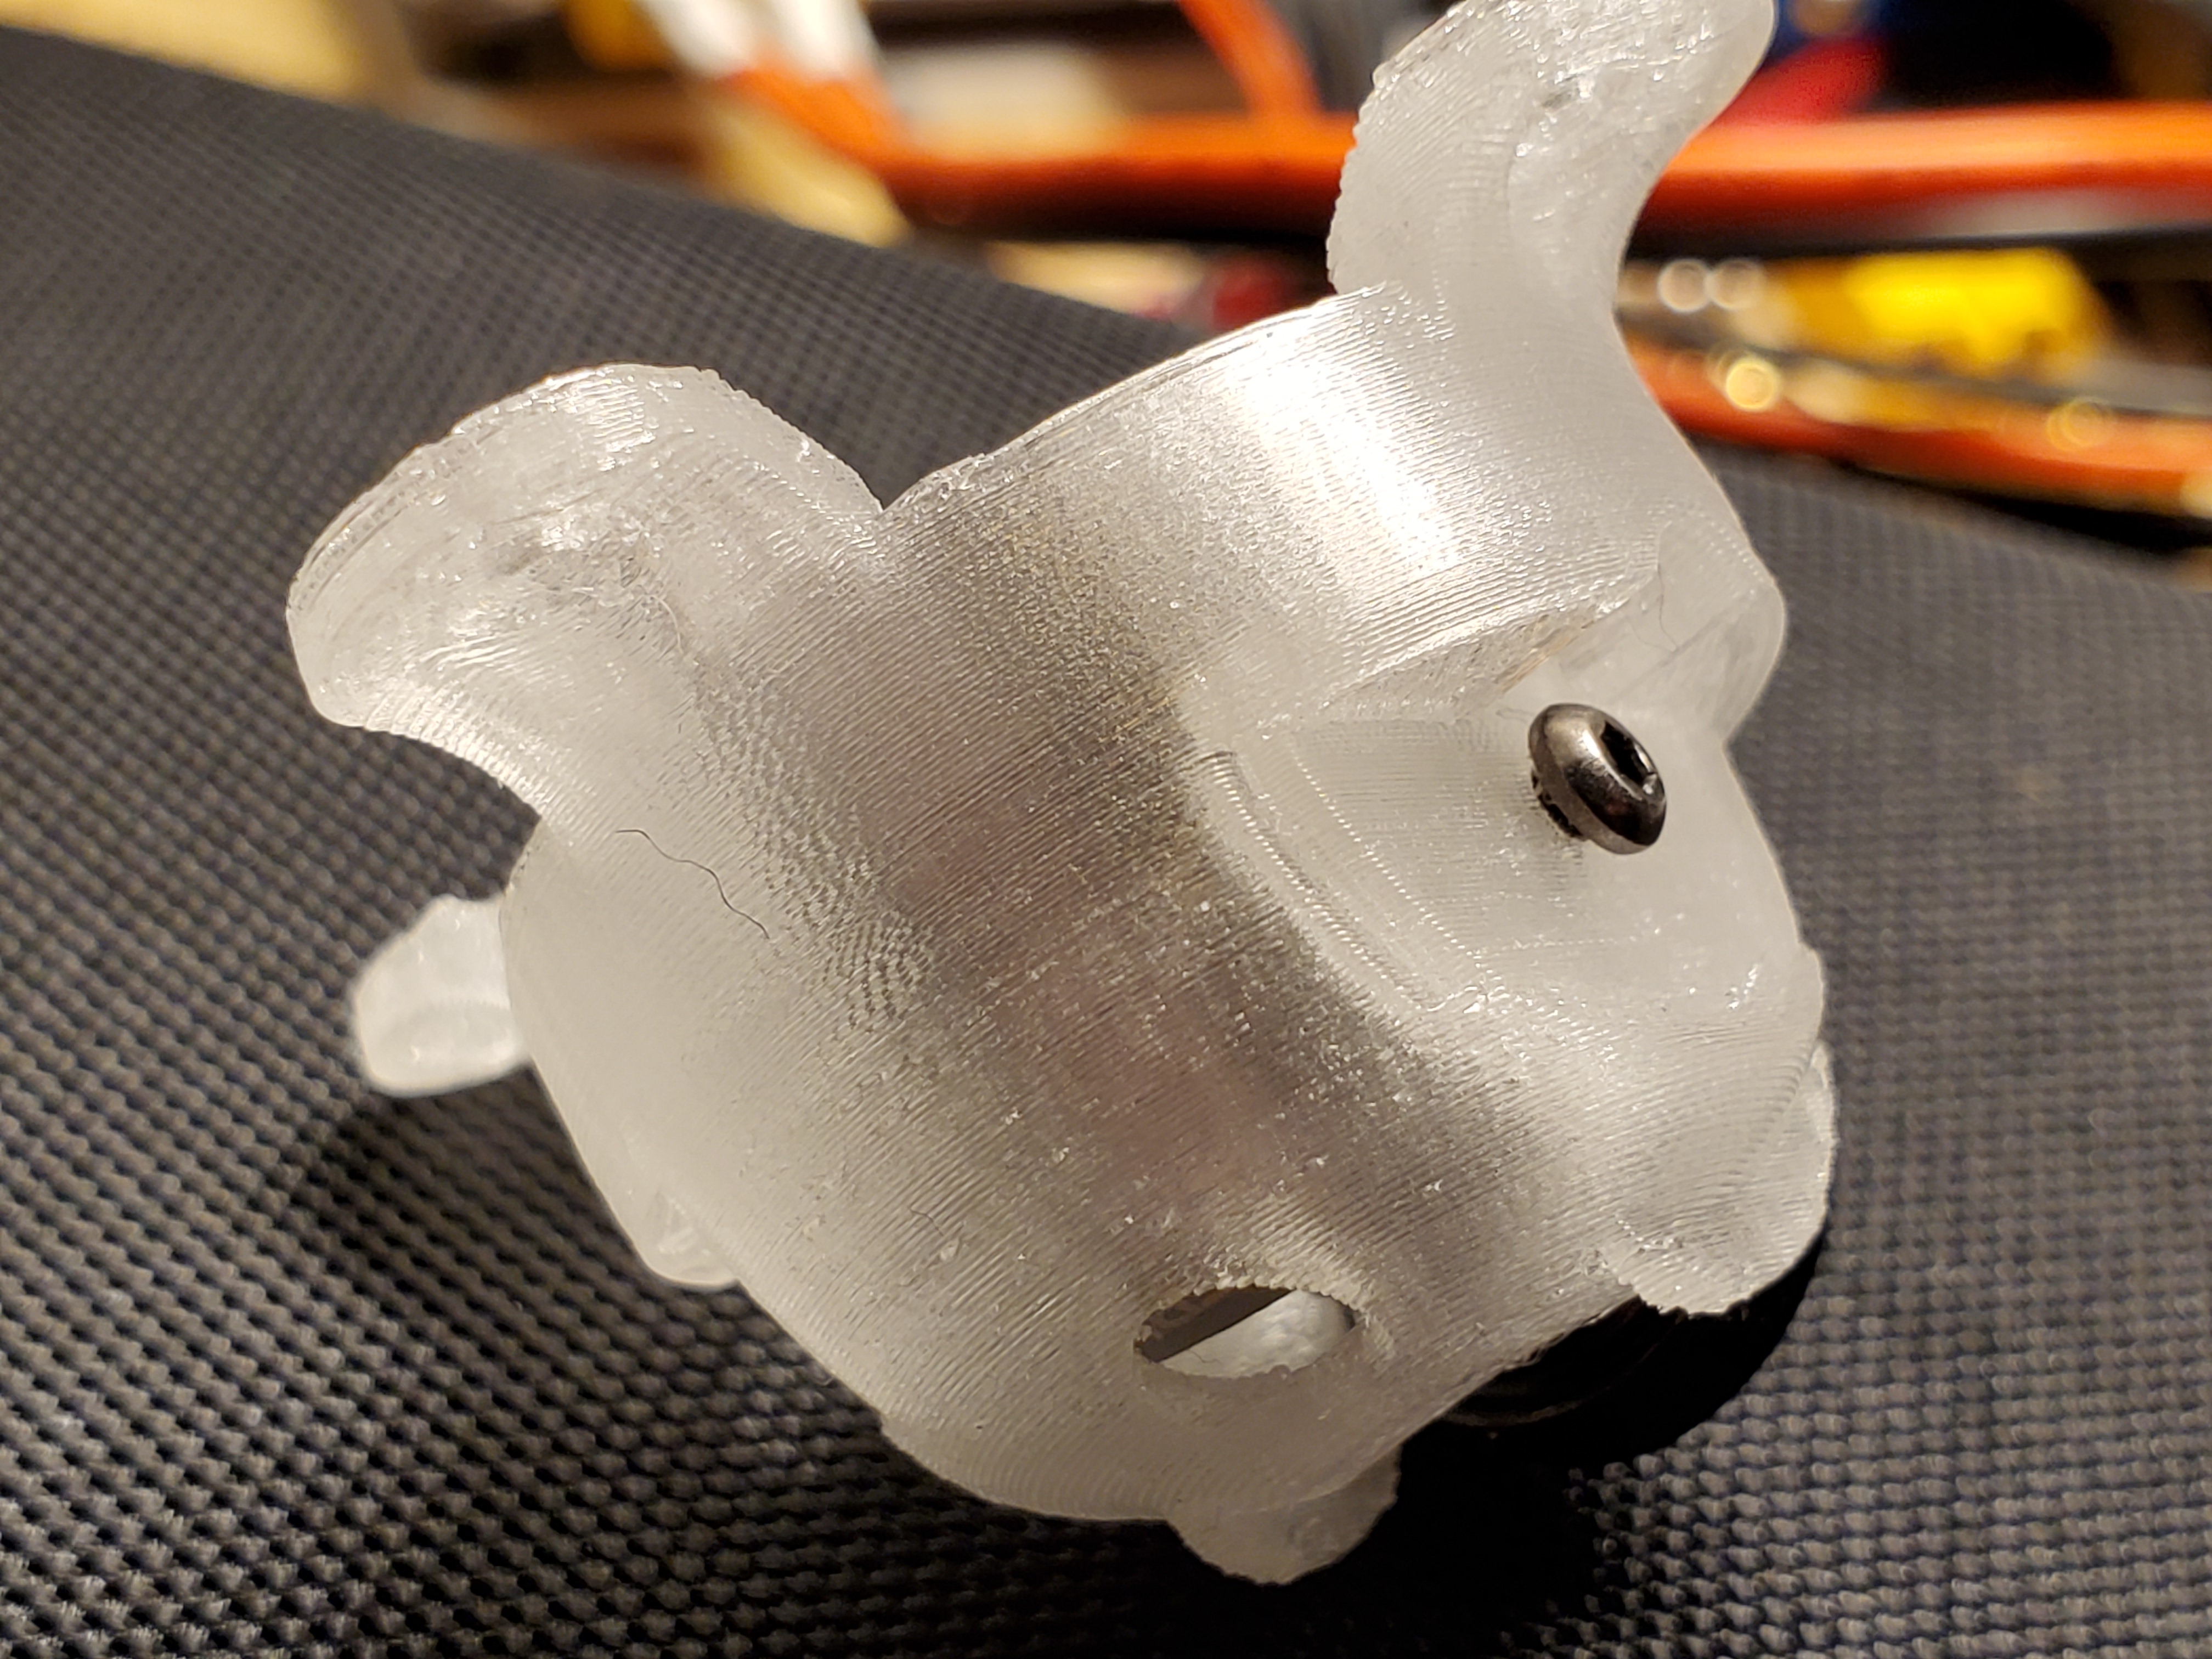

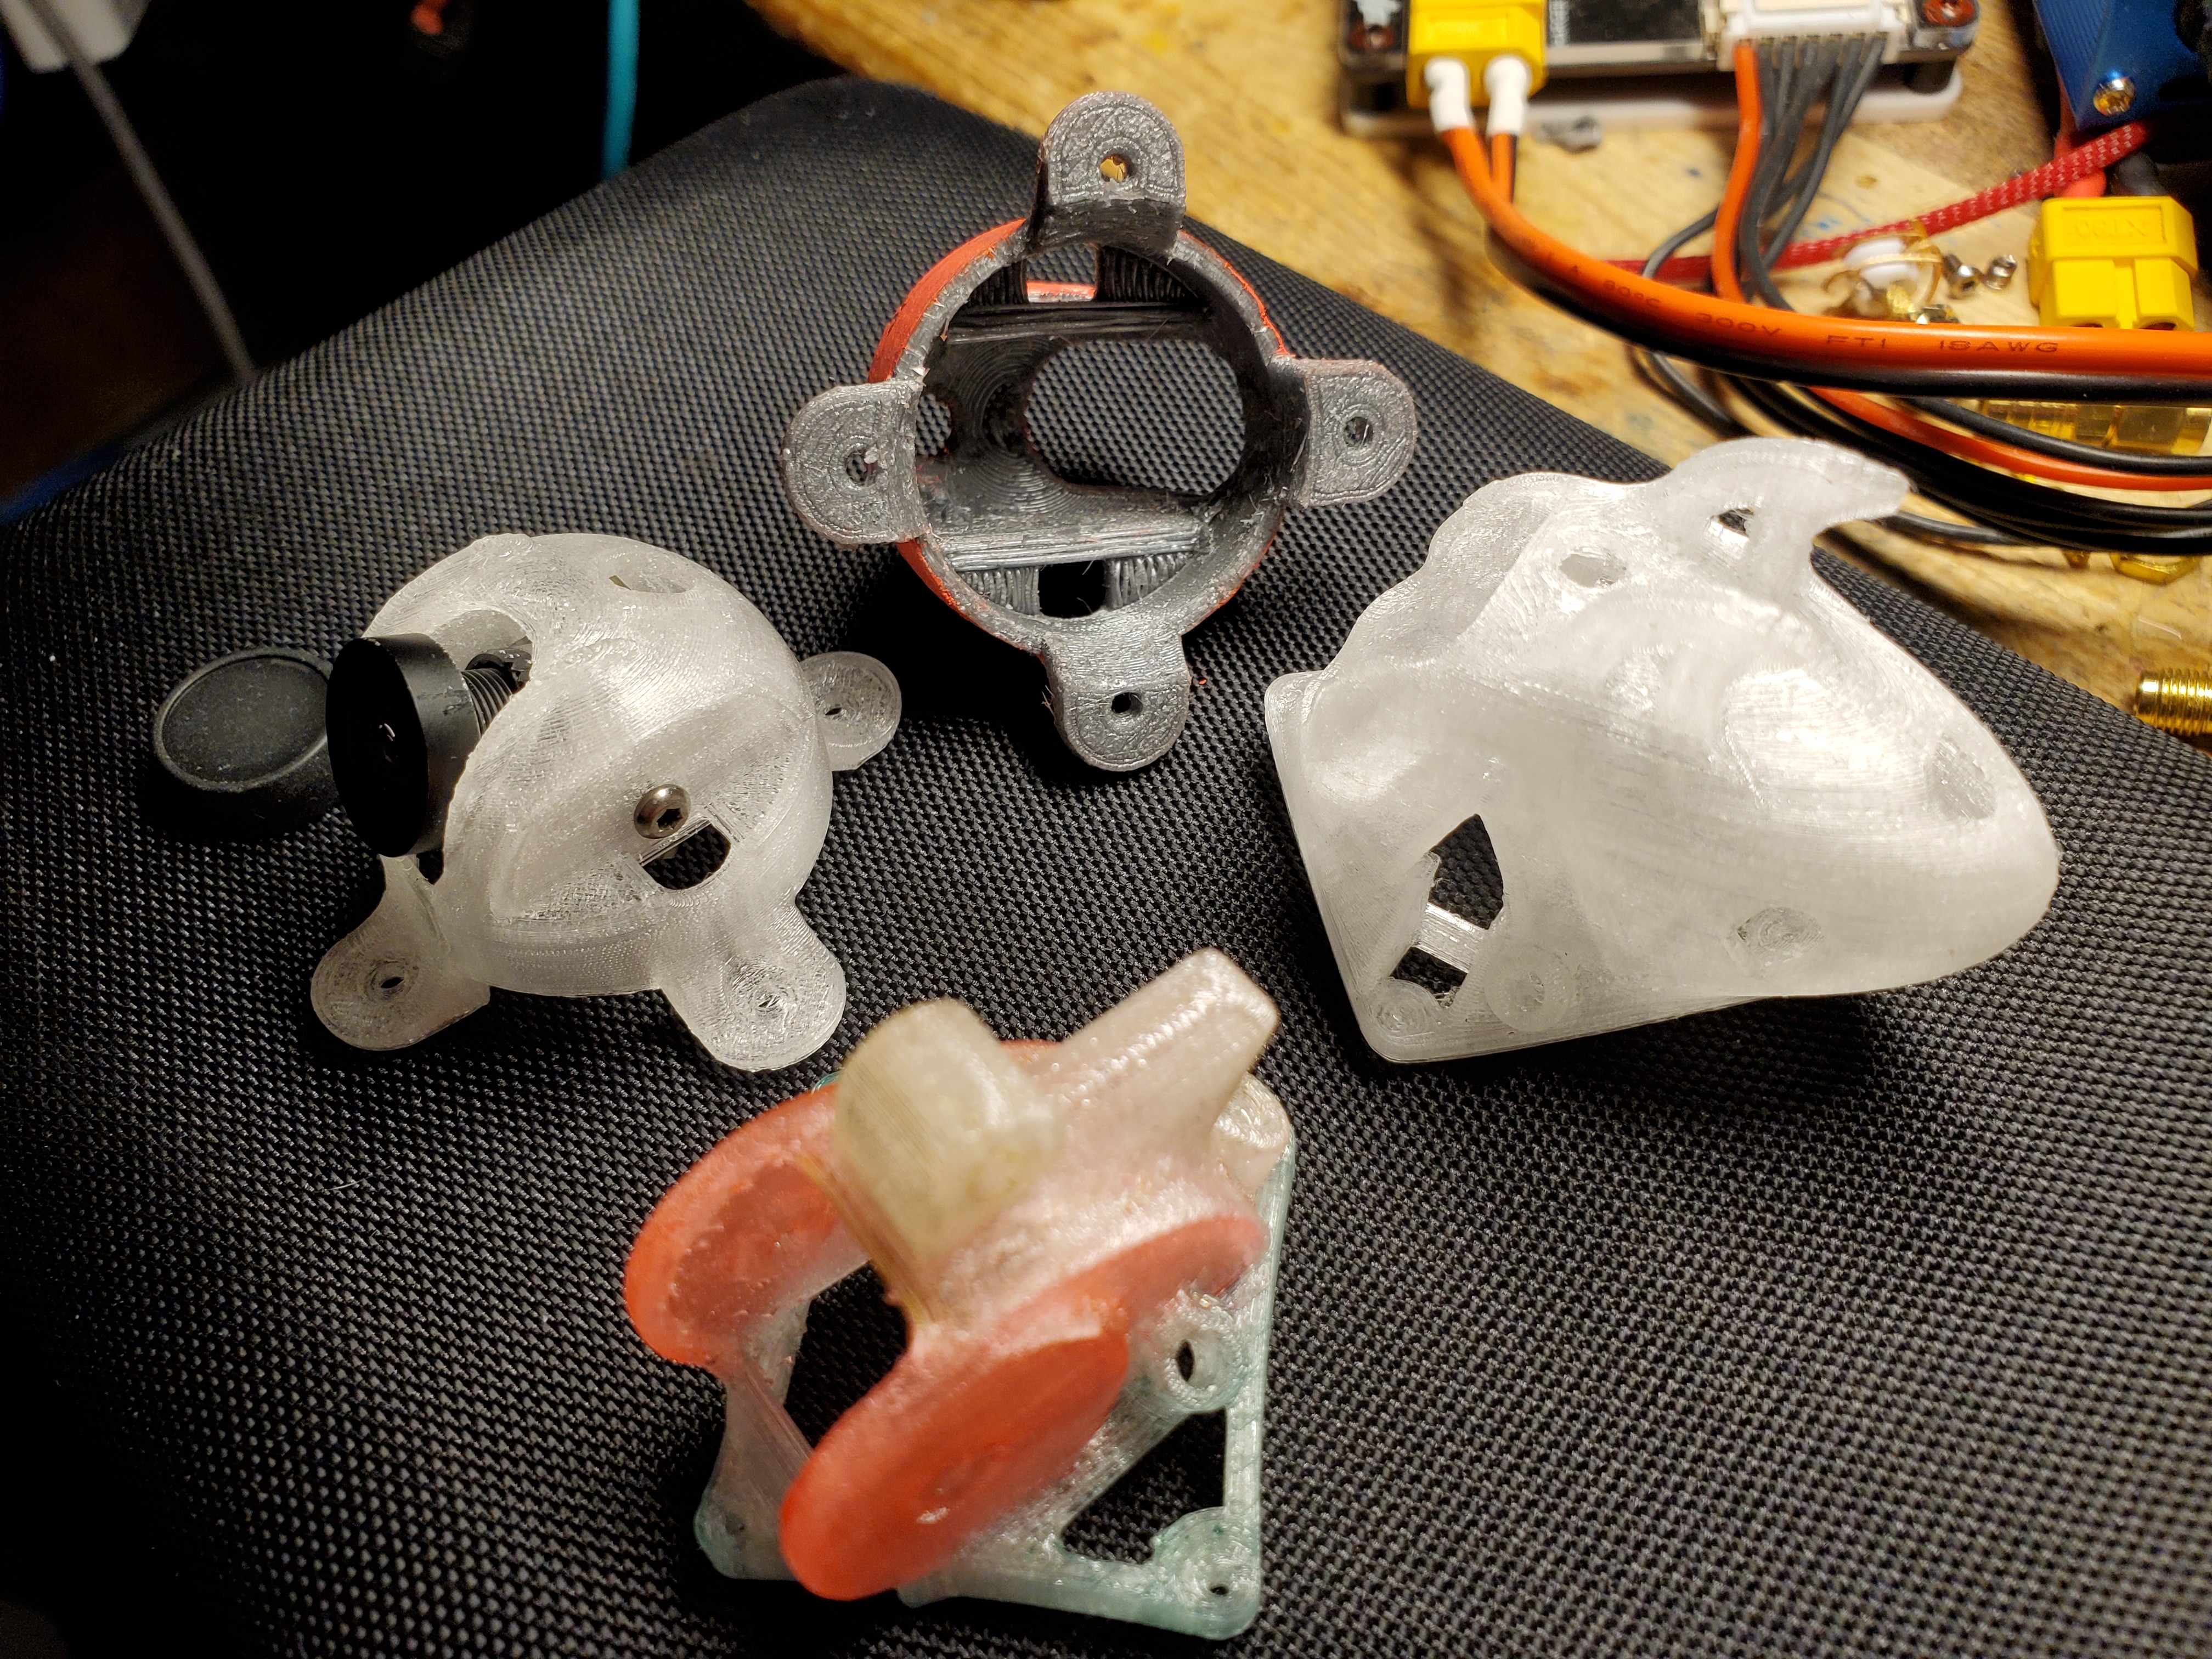 Silver grey print is Sainsmart TPU, while the clear/natural is Filamentum 98A.
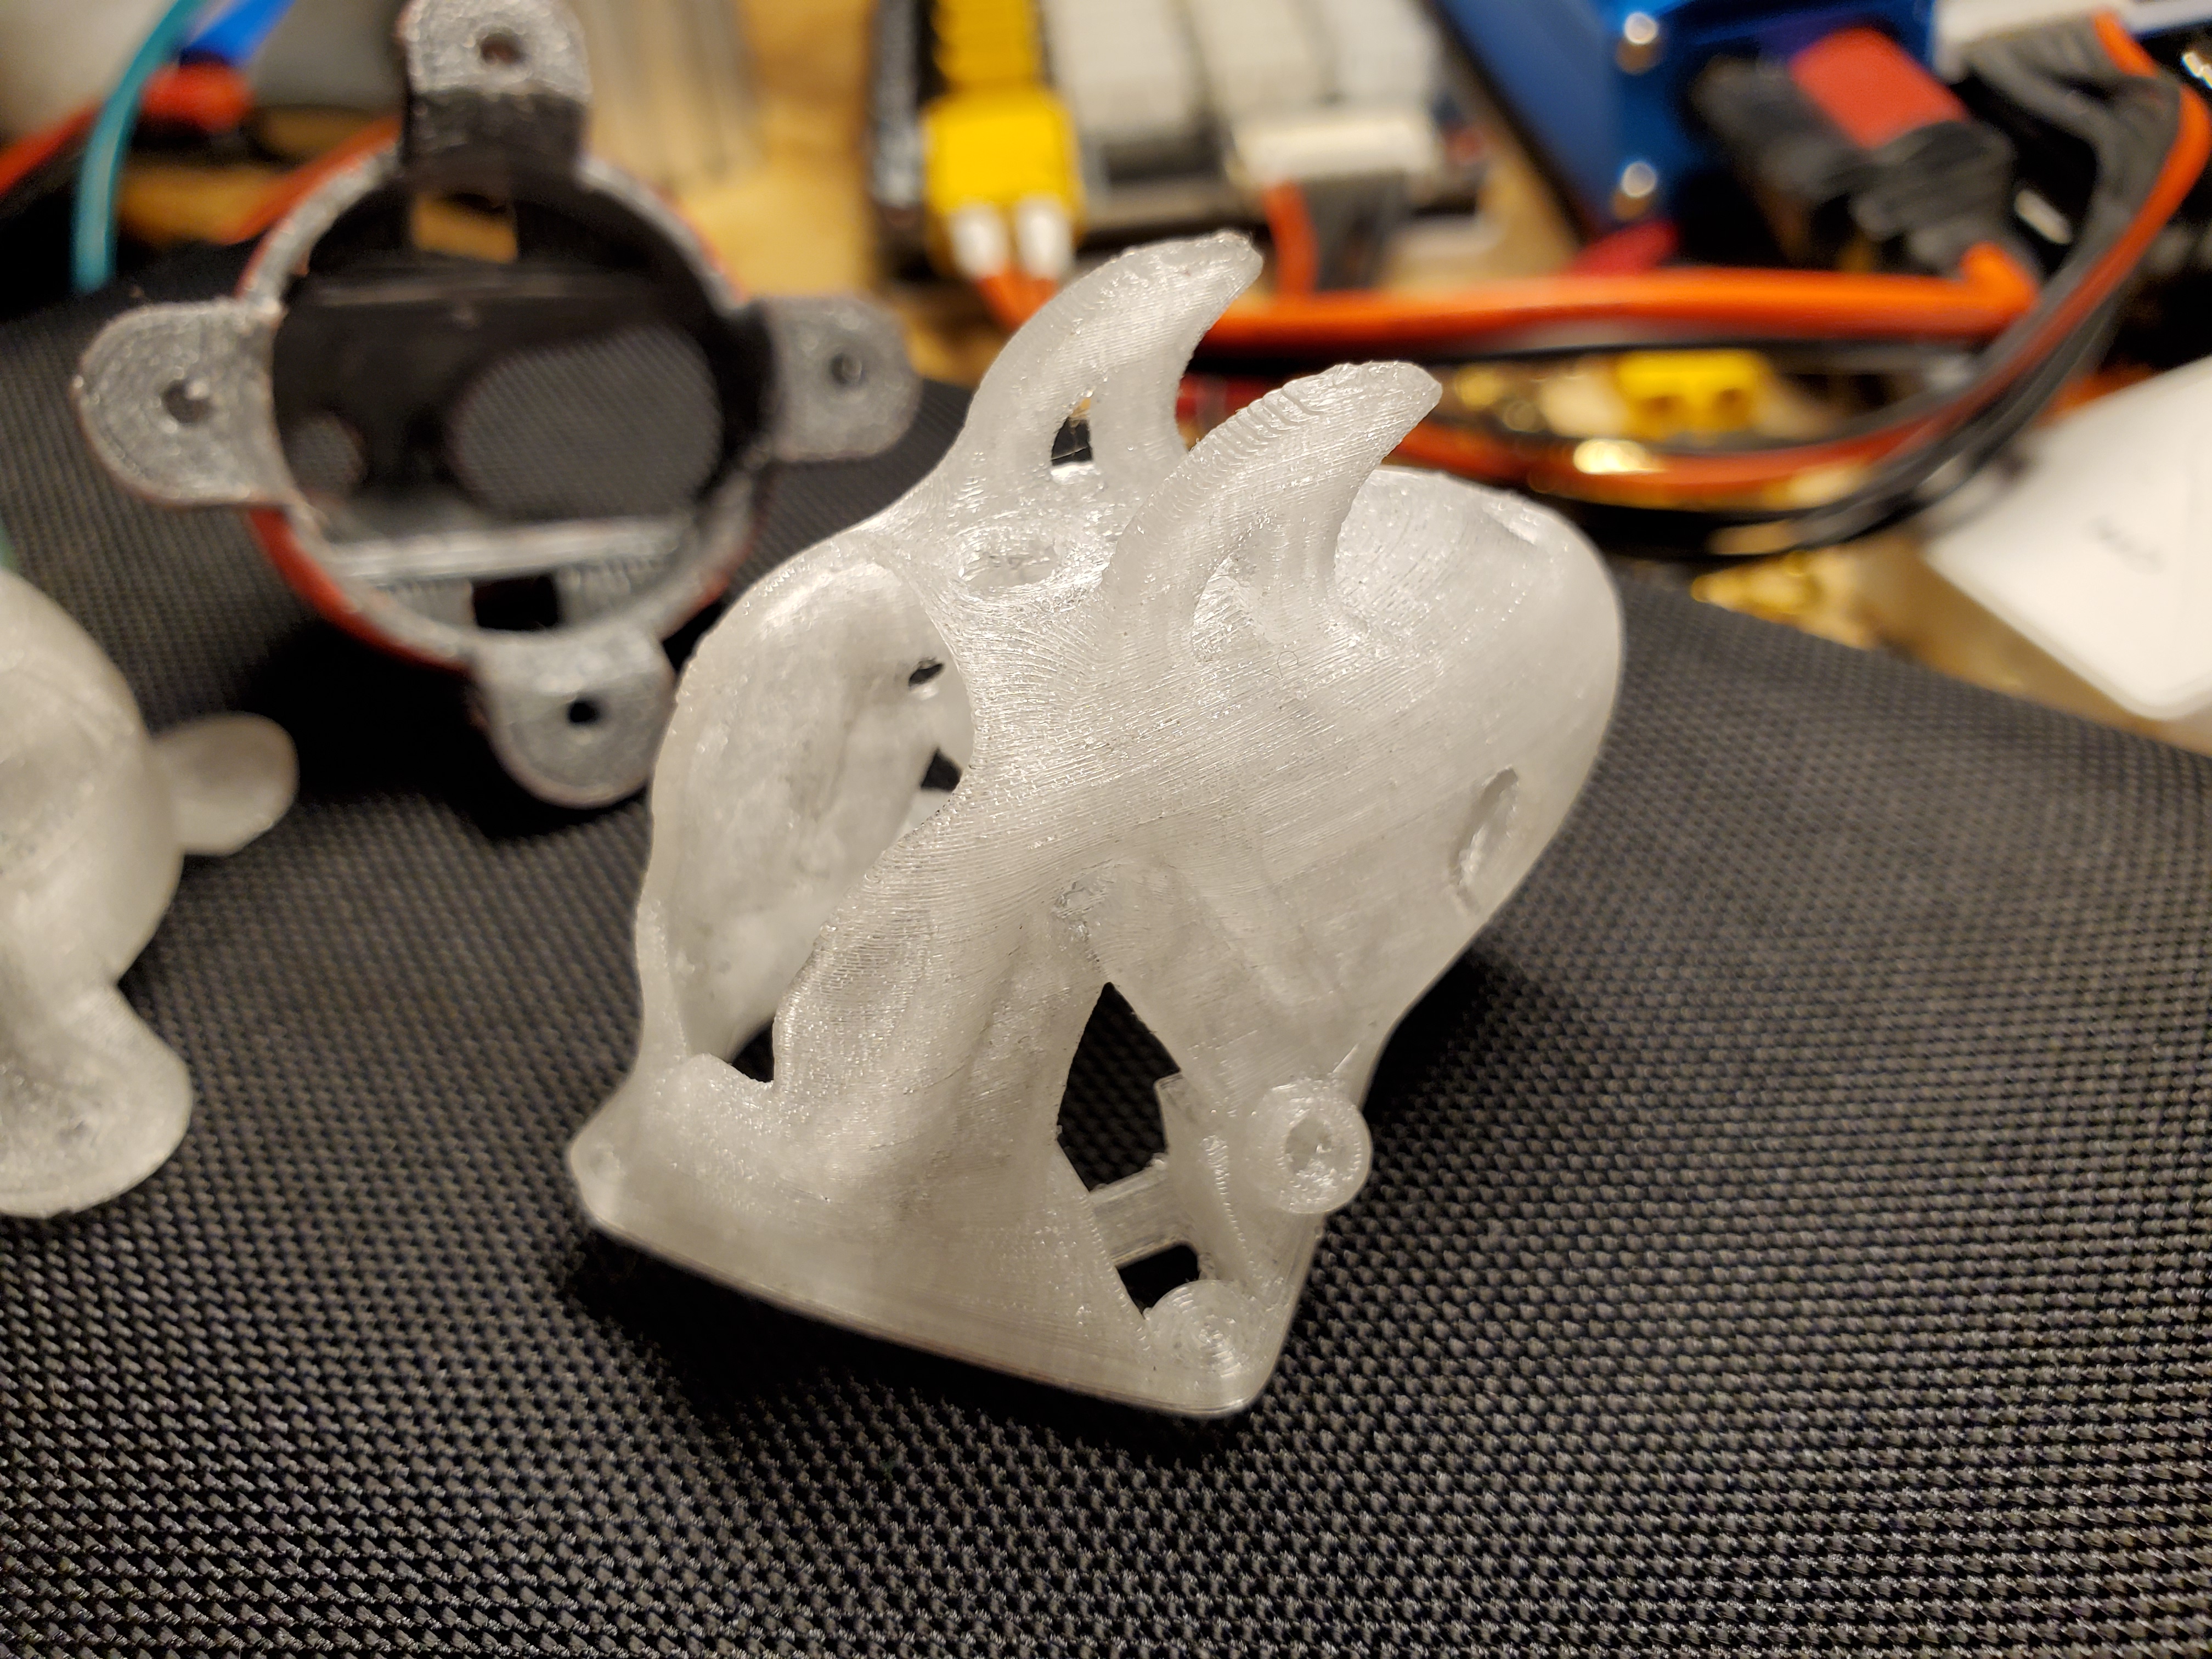
RE: Bondtech Extruder for Prusa MINI
@24kjames
more and more i think i will buy some filamentum TPU 98A to test it. And thanks for sharing the details ... if you can print just with regular TPU profiles, it gives me at least good reference point. Nice prints by the way 🙂
Actualy i am not blaming Prusa Research - that's how MINI is constructed, with bowden and tubes and everything. Extruder is just too far from nozzle. I have one of the "older pieces" (waited 3 days after oficial release ) and i think, there actually could be some difficulties with screws (how tight they are) that holds heatbreak, because it can slowly slide/shift down and resulting gaps can cuase serious problems. But ... MINI is so stupid simple in construction, that i can't see what could go so wrong in production to introduce such problems ... every other aspect makes it almost perfect home printer - with PLA i can print with such details that our office MK3 is just sitting in corner for months.
For me, point of failure with flexibles were everytime the extruder gears and chamber around them ...filaments gets mushed, tangled and chewed inside. So maybe few milimeters of tubing closer to the gears would make the change .. or that Bondtech. But i am enjoying MINI a lot with solid filaments so i am hesitant to rebuild it from original state.
RE: Bondtech Extruder for Prusa MINI
@adam-prchlik
Really quick question - have you checked extruder idler tension? It may just be tight resulting in filament wrapping around gears.
RE: Bondtech Extruder for Prusa MINI
@crawlerin
Great point!
--------------------
Chuck H
3D Printer Review Blog
RE: Bondtech Extruder for Prusa MINI
@crawlerin
super good question... i've checked tension multiple time ... and when i say "checked" i mean, tried multiple positions, but on MINI this is almost impossible to tune consistently.
Due to mentioned heatbreak slip i was also in point where i wasn't able to print ... so that forced me to disassemble extruder and extruder carriage. So i learned a lot - but still not sure how to properly tension extruder gear. Hopping that tension spring does the job somehow. The method i go with is try and error.
RE: Bondtech Extruder for Prusa MINI
@adam-prchlik
It is a challenge. Too lose and it won’t extrude. Too tight and it chews through the filament. I think all struggle to find the middle ground.
--------------------
Chuck H
3D Printer Review Blog
RE: Bondtech Extruder for Prusa MINI
@adam-prchlik
Yeah, it's one of those not exactly measurable parameters where you just have to eye it, similar to belt tension. "Flush with surface of plastic part" and "Loosen for flexibles" is what you get in manual. Bondtech is not more scientific either with their description 🤣
RE: Bondtech Extruder for Prusa MINI
🙂 good point @crawlerin
At least Bondtech has it's tension screw accessible. I can imagine that you can put some sort of "ruler" to compare at least position of screw head.

RE: Bondtech Extruder for Prusa MINI
In the Bondtech installation guide to set the filament tension screw it says, “Fully tighten the thumb screw and release it about 2 full turns for hard filaments and 3-4 turns for soft filament.”
RE: Bondtech Extruder for Prusa MINI
INCOMING!..
Ah yes, most of the trouble I hear about with the Mini is associated with those units produced in the earliest months. Not all, but most. You might reach out to Prusa for any parts that were revised since the date your unit was manufactured. I believe one claimed revision in particular, which was the cause of various symptoms that all resulted in eventual critical failure (can't print at all,) was the PTFE tube. In early units, the tube was just a little too short, coupleish millimeters. Apparently, some users concluded it didn't hold up as expected to the high temperatures, and shrank ever so slightly as a result, based on the fact that their issues developed over time, after an initial period of otherwise trouble free printing. Elsewhere, other users found reason to believe it was assembled at the factory with too short of tube from the start, and one user claimed to know this issue was acknowledged, and addressed at the factory with a revision to the tube length. The common solution appeared to be simply installing a new tube of slightly greater length, the further details of which I cannot recall. Additionally, this was seen as an opportunity to upgrade while they were at it, by sourcing the highest quality tubing from Capricorn for the replacement tube. Please understand this information is strictly hearsay being consolidated here from memory, the sources of which were scattered, and many, and possibly even from earlier is this very thread, as I really don't recall exactly. Anyway, I can't be certain how Prusa handles these things, but with my limited experience it seems reasonable to think these types of minor revisions would be tracked, and I hope this information would be made available to users as the need might arise, hence my suggestion above.
Yes! The idler adjustment, very important. I forgot about that. I found that adjusting the stock extruder idler tension for printing with TPU, literally could not be easier. Finding the adjustment screw for the idler was far more difficult for me, mostly because I refused to use my brain at first, opting instead to, "find in page," so it could be spoon fed to me. Nowhere could I find the words 'Mini,' and, 'idler,' in the same sentence, in fact not even together anywhere in a single official document! 'Idler,' does not appear in the official assembly documentation, nor the manual, nor knowledge base articles for the Mini. I did find, to what extent the idler was to be adjusted, but only in reference to other Prusa models. I gave up, and reached out to support via email, detailing my above experience, and findings with regard to the official documentation. For reasons unknown, upon clicking, "send," I immediately stood up and walked over to the printer, at my other desk, where I stood poised, and dug my spurs deep into my once slumbering noodle. "What is the extruder? Where is it??" I was nearly shouting, quietly in my own head. "Okay, now where is this fabled, 'idler,' and which screw adjusts it?" I stared, impatiently waiting for answers, at the front (loading side,) of the extruder, where sat a single socket head cap screw, positioned clearly for user access and adjustment..
*How to adjust the Prusa Mini stock extruder idler for use with FLEX [TPU] filaments: Loosen idler screw all the way.
I achieved this by backing out the screw until it fell out, onto the desk, rolled to the edge, and fell off onto the floor. I then picked it up, put it back in, and gave it two or three turns so it wouldn't rattle out, making sure I didn't turn it so far as to feel any tension.
I have the filament sensor, and so followed the advice for loading flexible filament into the Mini, offered in this blog post https://bit.ly/3nX9yv7, where the author has managed to successfully print Ninjaflex (apparently a very soft TPU,) with the Prusa Mini.
Below this point is a summary (my personal notes are in italics,) of the actionable information found in this blog post on the topic of printing FLEX materials with Prusa printers, including the Mini: https://bit.ly/3fAYh0t
----------------------------------------------
If your printer is satisfactorily printing with PLA, here is, presumably, everything one must know/do, in order to successfully print TPU with a stock Prusa Mini:
.5) Changing filament from black PLA, to natural (clear) TPU, I performed 4 or 5 cold pulls (my first attempts at this procedure.) I suspect two, in this particular case, would have been sufficient, as each additional cold pull yielded no further bits of the black PLA that was previously loaded.
1) Loosen your idler as much as possible before you start loading the filament/printing. -See above.
2) Spread a thin layer of glue on your print surface (regular paper glue stick should work fine). This step is necessary when using the smooth PEI sheet. You don’t need to use glue on powder coated sheets. -Thankfully I entered the field of 3d printing post the era where exotic, or counter intuitive substances like, glue stick, Aqua Net (hair spray,) rhinoceros saliva, and common ear wax (no lint,) were used to dynamically promote bed adhesion, and as release material, at the same time!
3) You have to print very slowly, typical safe speed is 20mm/s. -I simply relied on the tuned profiles available in PrusaSlicer. I have these set to automatically update, so I'm always wielding the latest insights/settings gleaned from Prusa's tireless Research.
4) Keep your filament dry. -I live in the desert. I suggest you do the same.
For better looking prints:
5) We suggest setting a less dense infill if you want your object to be more flexible. However, you should add more top solid layers (Print settings – Layers and perimeters – Horizontal shells). -Never touched this. Relied on profile defaults thus far.
6) Set retractions as low as possible. If you struggle to find an optimal value, try to turn them off completely, then raise them little by little. -I figured this would be built into the FLEX profiles. It is not. I've read multiple sources that suggest turning retractions off entirely. I will play with this on my next print, even though I find prints using the default settings to be acceptable. See image at the end of this post for an example of the stringing.
7) Raise the recommended hotend temperature to 5°C higher, and keep the print fan turned off. -I have not done this, instead relying on the default profile settings. See the reslutant prints in my previous post, and at the end of this post.
8) If you need to print supports, set the gap between the layers in Z-axis to at least 0,3mm (in Slicer PE under Print settings – Support material – Contact Z distance). -Since I whined about this, I guess I should try making this adjustment, if it isn't the profile default.
End summary-
And lastly, as requested, here are my few personal tweaks to the Prusa printer profile, and FLEX filament profiles, for Fillamentum Flexfill 98A, and Sainsmart TPU, as I faced curled edges at the print base (likely due to the drafty environment in which my printer resides.)
Print Settings - 0.15mm QUALITY @MINI:
Layer height/First layer height: .4mm (default .2mm)
Skirt/Distance from object: 0mm (default 2mm)
Brim/Brim width: 4mm (default 0mm)
Filament Settings - SainSmart TPU/Fillamentum Flexfill 98A :
Temperature/Bed/First layer: 55C (default 50C)
Temperature/Bed/Other layers: 55C (default 50C)
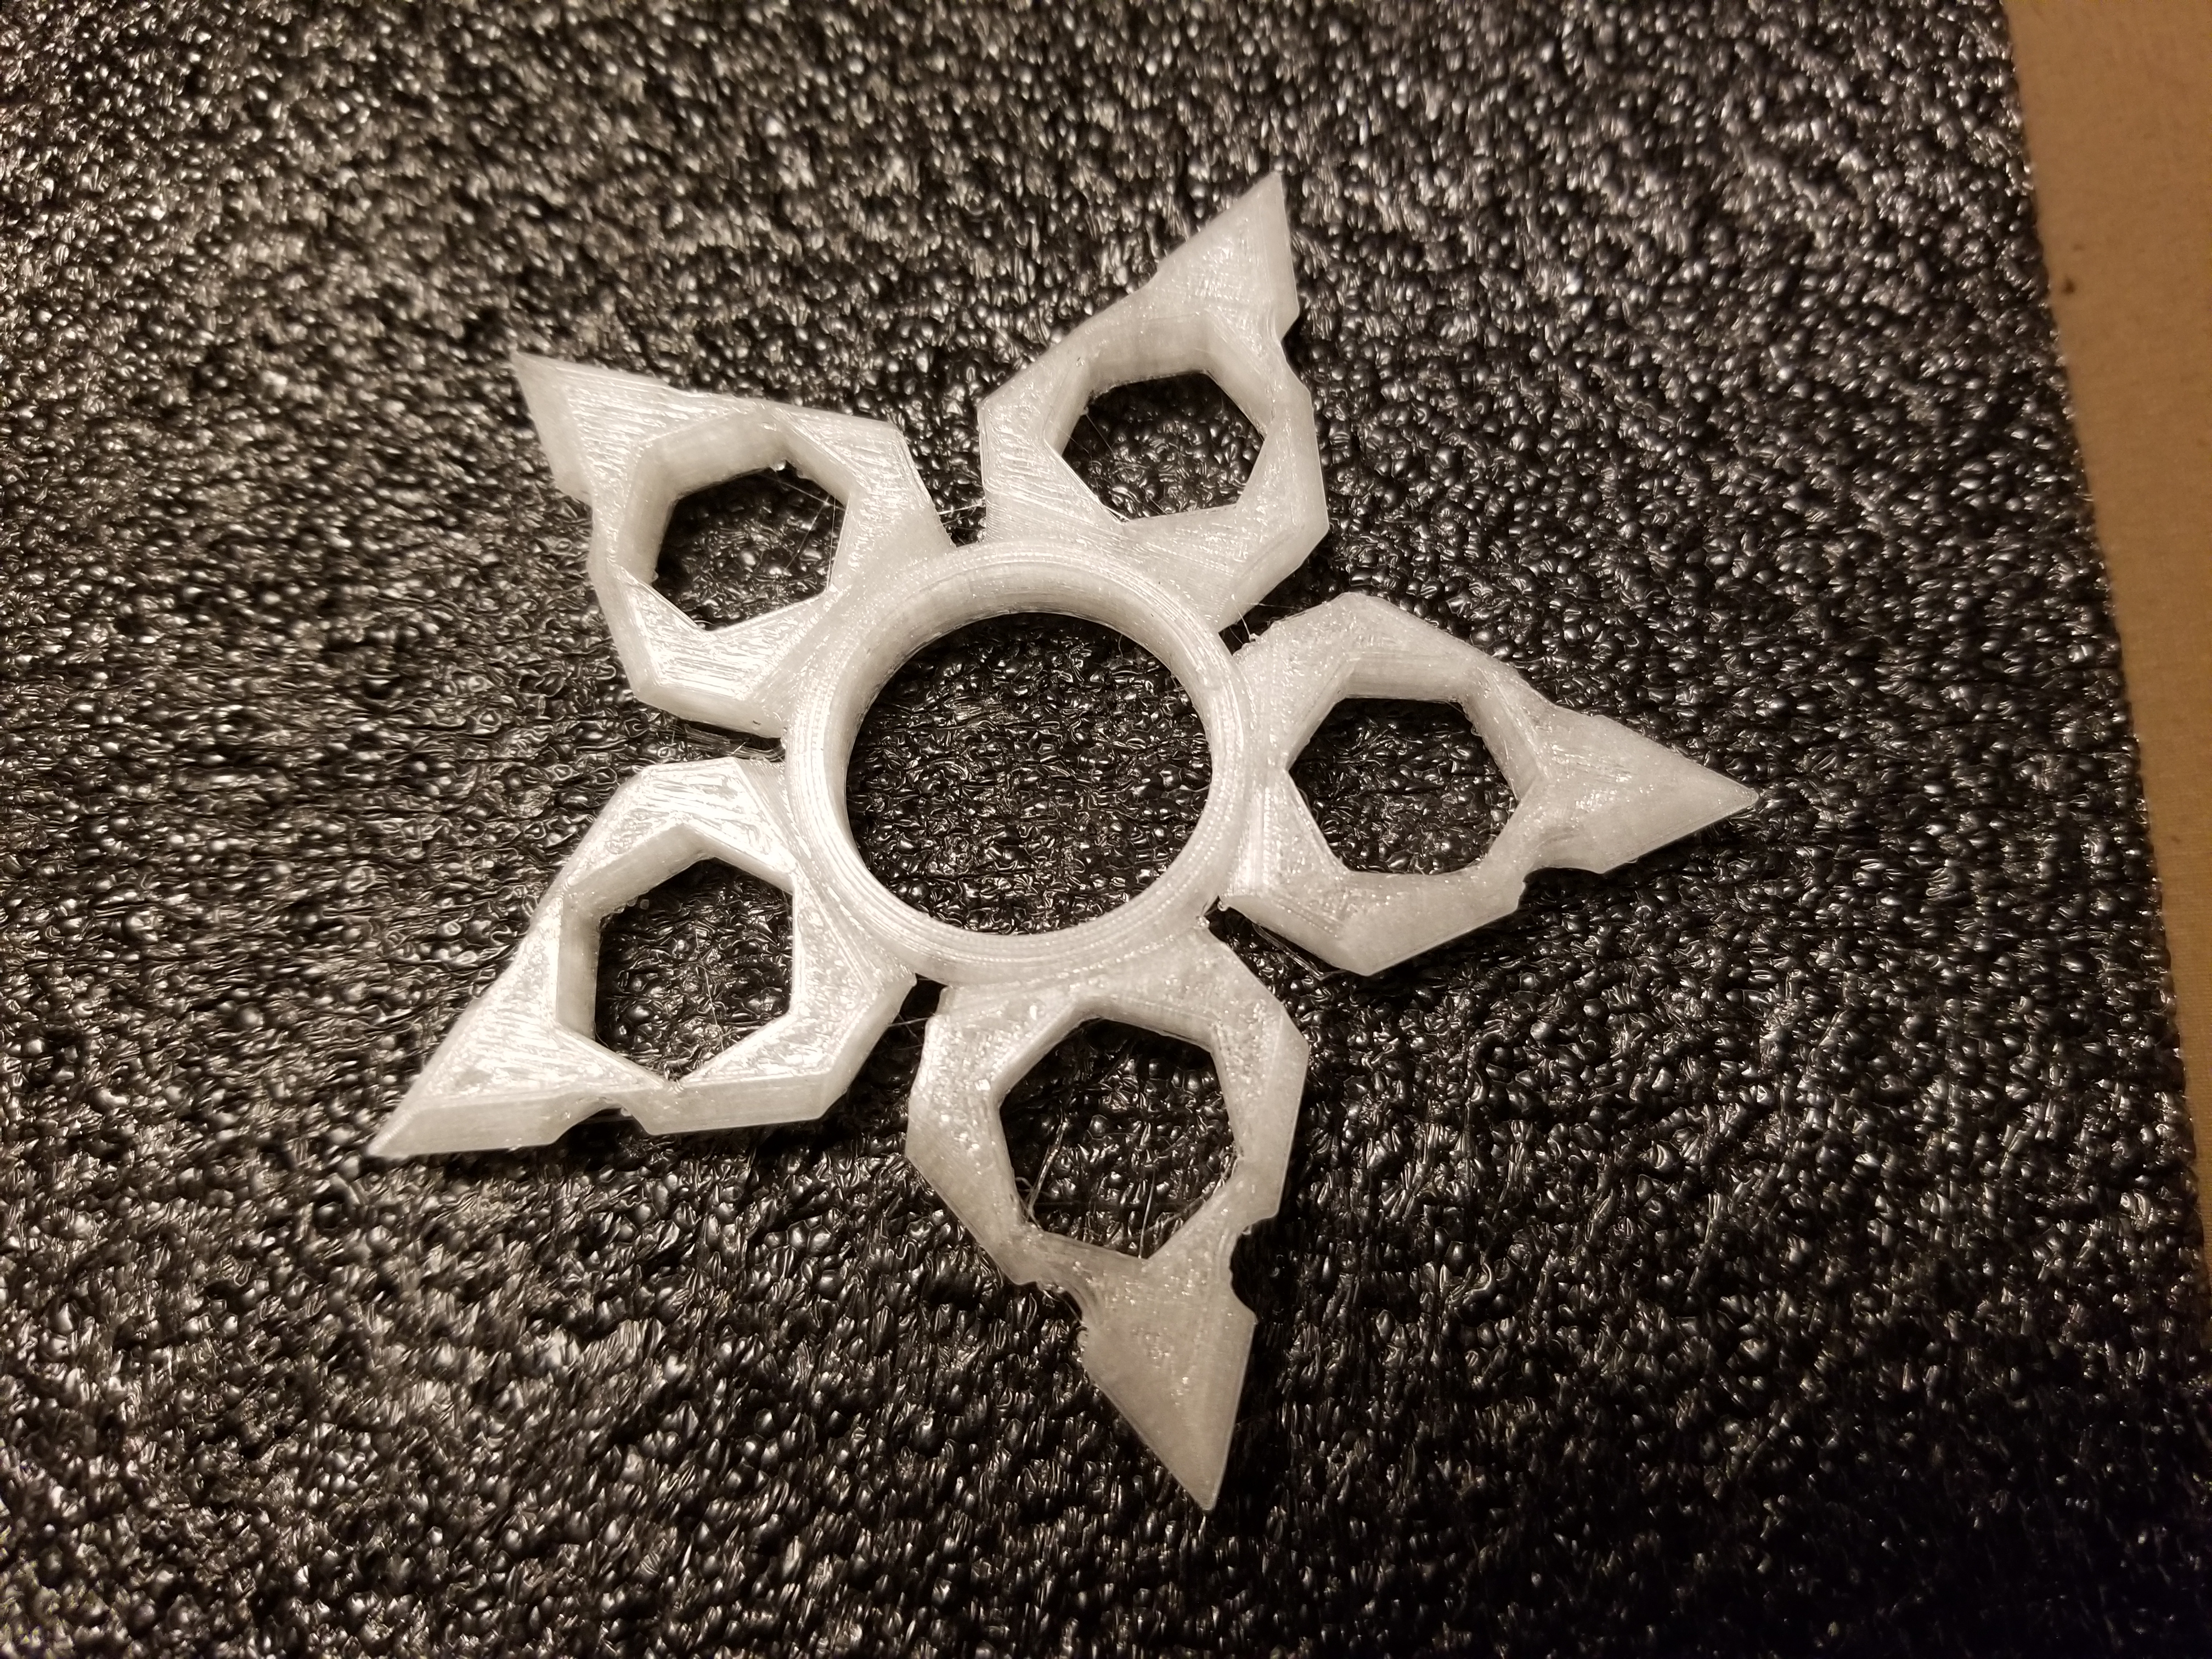
Post Lastly: Here is a star spinner fresh of the heat bed, untouched.
RE: Bondtech Extruder for Prusa MINI
Hello to everyone, i just ordered a prusa mini+, i am interested in the bondtech extruder, does anyone know if it is compatible with the mini+?
RE: Bondtech Extruder for Prusa MINI
Yes it would be compatible.
My Mini has: A SuperPINDA + Bondtech Heatbreak + Bondtech Extruder installed
RE: Bondtech Extruder for Prusa MINI
@pelo1995
There is a Bondtech that has been made for the Mini - make sure you buy that one.
--------------------
Chuck H
3D Printer Review Blog
RE: Bondtech Extruder for Prusa MINI
Pelo: There is a very long thread in the section on extruders and extrusion problems on what you are asking.
I have done three modifications: the Bondtech extruder, changing out the PTFE tubing (including the one in the Bondtech hot-end) with higher temperature rated Capricorn tubing and putting in the Bondtech heat-break.
I did them all at the same time so I can’t say which is really necessary, but I would do at least the heat-break and tubing. They cure the poorly designed Prusa heat-break and the higher temperature Capricorn is both more slippery (I had to back off the retraction setting by 0,2 to stop blobs from forming) and will not shrink in the hot end and prevents melted filament from sneaking around the bottom of a slighter shrunken tube and causing jams.
I put in the dual drive extruder so I can do soft filaments to make gaskets. Others report in that thread it help stop their extrusion issues. It is easy to do, but not inexpensive. Ask Santa for one.
RE: Bondtech Extruder for Prusa MINI
@24kjames
This is super awesome James 😉 Thanks
The tube issues - shrinking sound very interesting and plausible, I've expected that downward pressure just moved heatbreak... but hm, very interesting 🙂
Idler setting - that's what i need to try again. I've tested it with almost loose idler and with somewhat better results, but maybe there was the tube issue involved already. At least i know exactly what works for others. Btw idler screw, took me about 10 minutes to find ... a bit more than i am comfortable to admit 😀 (finished assembly of various prusa machines before)
Printbed adhesion for flex - TPU and TPE sometimes can be the same thing (all thumbs are fingers but not all fingers are thumbs) but i think there is quite difference between TPU that most of users do use and TPE what i'm using. I found warnings on every corner that flex will be a nightmare to remove from print surface ... my prints even needs small blobs of glue stick to secure loose edges during the print 😀 Without glue after few first layers it starts to peel of. Actually best adhesion I've got was using transparent adhesive tape (regular office tape), but that's really unpractical, because the tape and it's glue will melt and fuse with my TPE. Powder coated plate or smooth? Without glue stick they both will fail.
There is more to bed adhesion - the recommendation is to print a bit higher then other materials, trying to no squish flex on surface, because it will add more pressure / resistance that extruder needs to overcome. What is your experience with this guys? (some bondtech owner interested to share a story?)
RE: Bondtech Extruder for Prusa MINI
You could go 1 step further, replace the brass couplers for the boden tube with some PC4-M8 couplers and remove the tube parts from the extruder (small part) en the 35mm part in the heatbreak (bondtech size) and replace it with a boden from one piece. Later I will replace the (standard)boden with an capricornXS (oderderd) I have beautiful prints ever since
Stock MK4S with FW 6.2.6
RE: Bondtech Extruder for Prusa MINI
So this means that your tube goes from the extruder all the way to the end of your heatbreak? Did you trim the edges on an angle like the stock tube?
Original Prusa Mini + Smooth PEI
Prusa Slicer 2.6.0
RE: Bondtech Extruder for Prusa MINI
Nope, since I have a heatbreak from bondtech, But if there is a need to do that I can trim the tube with a cutting jig (I have removed the tube 2 times and the end of the heatbreak is clean)
Stock MK4S with FW 6.2.6
RE: Bondtech Extruder for Prusa MINI
@oxygen
Ahh ok yeah I see! Thanks!
Original Prusa Mini + Smooth PEI
Prusa Slicer 2.6.0