Unfilled gaps in gear tooth
Hi!
I am (3 days) new to 3D printing, so please forgive me if I say something wrong.
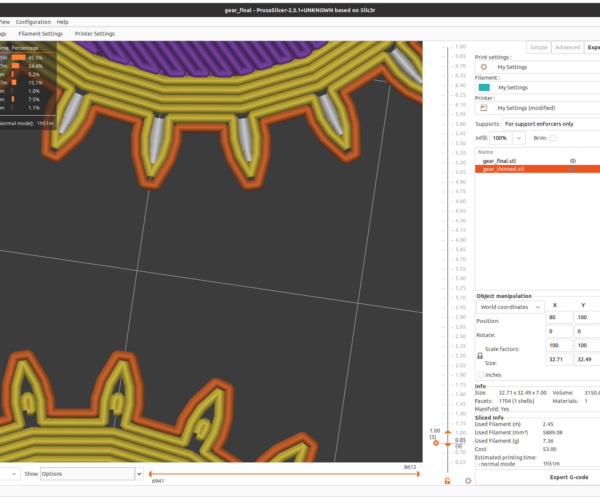
My issue is that I try to print a gear and I noticed that there are gaps inside the teeth.
I though the problem may be the retraction and air bubbles, but then realized that the
gaps are shown in the slicer too. Unfortunately I have no idea which setting can fix this.
On the image the upper gear has thinner teeth and prints perfectly, I tinned the teeth
because they were just a tenth of mm wider than they should, beside other issues
this has been soled by lowering the flow rate. However with the lower flow rate,
the teeth become as thin as in the model, so I set back to the normal thickness. Then
I ended up with the one on the bottom. Unfortunately there are two unfilled gaps in
every tooth, and the print is reproducing them perfectly.
How can I eliminate those gaps?
Tanks in advance!
theo
RE: Unfilled gaps in gear tooth
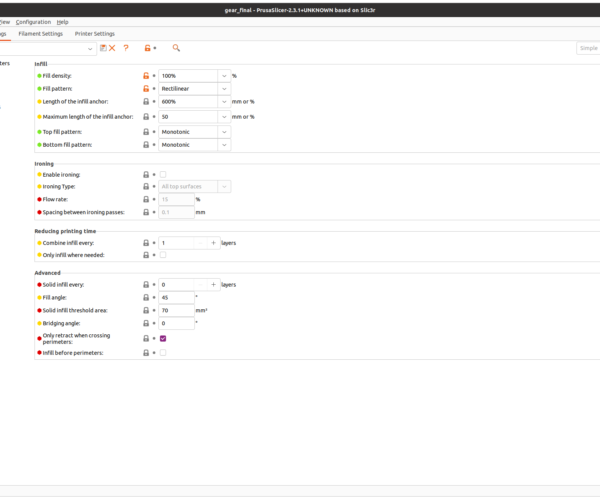
You've probably changed one of the default settings that affect infill. Reset the profiles and watch what happens as you make changes . One of them will cause what you are seeing.
RE: Unfilled gaps in gear tooth
On the image the upper gear has thinner teeth and prints perfectly, I tinned the teeth
because they were just a tenth of mm wider than they should, beside other issues
this has been soled by lowering the flow rate. However with the lower flow rate,
the teeth become as thin as in the model, so I set back to the normal thickness. Then
I ended up with the one on the bottom. Unfortunately there are two unfilled gaps in
every tooth, and the print is reproducing them perfectly.
This is quite a tricky print, not one that I would advise a beginner to try.
Your underlying problem is that the teeth are too thin for accurate printing. To mesh properly printed gears need to have fewer, larger, teeth with room inside for a little fill padding the shape, so the perimeters can follow the outline. In your case the upper gear has undersized teeth where the interior is close to one extrusion wide - but you will have severe backlash. The lower gear has a better exterior shape but the inner space falls between one and two extrusions wide and the slicer has to compromise.
With larger teeth there is room to support the shape properly.
...of course this doesn't help much if you must mesh with pre-existing gears.
To print your design with minimal backlash it may be necessary to change to a smaller nozzle.
Cheerio,
RE: Unfilled gaps in gear tooth
@diem
In the end, using a 0.4mm nozzle to print something 0.2mm in size is the real issue. This is a case for changing nozzle to print the part correctly.
RE: Unfilled gaps in gear tooth
Thank you!
I should have thought of that. It seems so obvious now. However I don't have smaller nose yet, but it is on the way. Unfortunately scaling up the design is not a viable solution because the final assembly size is pretty huge already and I may run out of the printer capacity as well as my patience capacity. These gears are the smallest parts.
Even if it is most probably not the best solution, as you mentioned the importance of the ratio I got the idea to change the proportion between the tooth size and the extrusion width and I got a pretty good result on screen and it prints without gaps. I will see the finished pieces by morning.
Is there a rule of thumb about the ratio between the nozzle size and the smallest feature size of the print?
RE: Unfilled gaps in gear tooth
While you wait for the new nozzle to arrive have you considered trying smaller extrusion widths for external perimeters and perimeters they are usually set to 0.45mm for a 0.4mm nozzle... try say 0.42mm don't go below 0.41mm, you need a bit of squish to get inter trace bonding...
regards Joan
I try to make safe suggestions,You should understand the context and ensure you are happy that they are safe before attempting to apply my suggestions, what you do, is YOUR responsibility.Location Halifax UK
RE: Unfilled gaps in gear tooth
Is there a rule of thumb about the ratio between the nozzle size and the smallest feature size of the print?
Your default extrusion width with a 0.4mm nozzle is 0.45mm - though as @joantabb says it is possible to modify this: be careful, it will have side effects elsewhere.
For anything under 2.5mm, if you require accuracy, design with exact multipliers of the extrusion width.
Cheerio,
RE: Unfilled gaps in gear tooth
@theo
Also - when the new nozzle arrives. It is very common for people to rush through the nozzle change and make mistakes along the way. Mistakes with the hot end are costly.
Read the E3D-V6 guides before you start so you know what to expect, and the proper way to put things back together.
https://e3d-online.dozuki.com/Guide/V6+Assembly/6 (everything you'll be touching)
This is the procedure you must follow to the letter. Can't emphasize this enough. Peek at the Prusa guides, but the E3D guide is the book to follow.
https://e3d-online.dozuki.com/Guide/Changing+Nozzles/45
RE: Unfilled gaps in gear tooth
I think I will stick with 0.4 mm nozzle for now. Lately I got pretty good results. However later I will try with a smaller one.
Unfortunately I've got a set which has 0.3 as the smallest, but it still worth a try.
Probably for me now paying with the extrusion with is the simplest way to solve the problem for now. I ended up with a pretty nice result,
which prints very well, and runs much smoother than the previous ones.
I figured dealing with gears is a very complex issue and it is also very sensitive to even small errors, so the problems started by choosing a wrong design, then i realized that the printer's XY angle was off by about 0.5 degrees (yes I am not using a Prusa, yet), poor adhesion created deformations as well and shrinkage and hole sizes has also has to be also enlarged. After all these hurdles I am ready to print the perfect gear for the build. (hopefully)
So, thank you guys!


