Modify External Texture
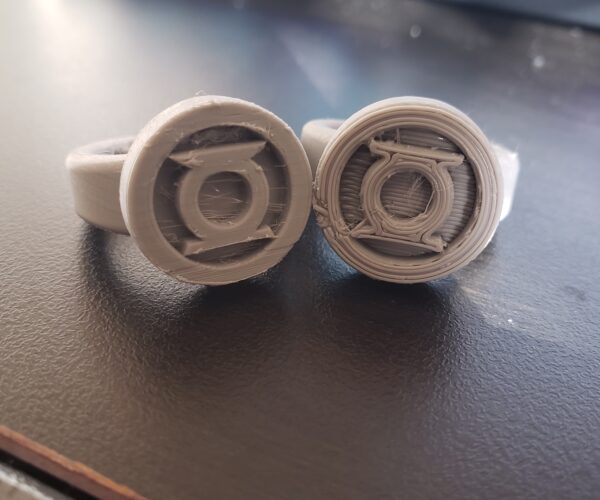
Depending on the orientation of the object I am trying to print there is a different texture on the face of the ring. I have attached pictures for clarification. I was wondering if there is a way to control this manually in the slicer to get the surface texture I want without changing the orientation.
 Preferred texture, ring face is perpendicular to bed, supports required for rest of ring
 Undesired texture, ring face lies on bed, no supports required
(link) <- Ring face is perpendicular to bed, supports required for rest of the ring
(link) <- Ring face lies on bed, no supports required
I am new to 3D printing so any advice is appreciated. Thank you!
Best Answer by Neophyl:
As Sylvia says the biggest issue is your live z adjustment is to put it bluntly terrible. Those first layers should be squished together and smooth. That's all adjusted on the printer though and has nothing to do with any settings in the project.
Use the method described in this thread https://forum.prusa3d.com/forum/original-prusa-i3-mk3s-mk3-assembly-and-first-prints-troubleshooting/life-adjust-z-my-way/ its way better than the built in.
There not much wrong with the actual project you attached, although if I was printing it I would set some things differently.
First, printing at 0.05 layer height is pointless. You are just asking for issues like jamming for no gain as you wont be able to tell the difference. Set to 0.15 layers and then use variable layer height to make the tops and bottom of the ring portion thinner and smoother. It will also save print time.
The 0.2 elephants foot is reducing those first layer perimeters too much, which is making them thinner and so reducing the amount of adhesion. Given that your first layer has no squish anyway then its only hurting things. The whole point of that setting is to compensate for squish from a good first layer. When you get your first layer sorted you might need a bit of compensation. I've reduced it to 0.1 in the project but you might get away with zero. Its one of those settings that you tune for your printer on a case by case basis.
I've set the thick bridges to off (I used PS 2.4 to slice and this is a new setting in 2.4). This will make the surface behind the lantern better.
Lastly I increased the perimeters to 4. This will reduce the amount of gapfill used and should work better for something of this size.
I have attached a modified project version as an example. If you aren't using PS 2.4 yet then I would recommend it and the project will only open properly in that version.
RE: Modify External Texture
I'm not totally clear what your question is or what your preference for orientation would be, but here are some options. You can change the top layer texture by changing the fill pattern or the angle of the fill. You could make the side and top textures more similar to each other by applying a subtle fuzzy skin. As the side is a stack of layers, you have less control over its texture unless you use fuzzy skin or apply a texture in your modeling program.
Mk3S+,SL1S
RE: Modify External Texture
What surface are you printing on ? A 3d print always takes its texture on the bottom layer from that of the print bed, at least where it contacts. Thats just materials science. Print on a smooth sheet and its smooth, print on the textured pei and its textured. Place some carbon fibre textured vinyl on the smooth sheet and print on that and it takes on the same texture (at least for as long as the vinyl lasts).
You havent mentioned what you are using or what your desired outcome is. Sliced pics are ok but attaching your saved ZIPPED up project file gives us a snapshot of all the settings in play and with maybe a picture of a problem physical print where you can indicate the issues would get the idea over better.
RE: Modify External Texture
I think I understand better. You can get a texture on the bottom of the print with a textured sheet as @Neophyl says. You can also change the fill pattern or angle on the bottom layer, same as you can with the top layer.
Mk3S+,SL1S
RE: Modify External Texture
@sylviatrilling @neophyl Thanks for the comments. I have attached a folder containing the project file and an image of the physical prints. The ring on the right in the image has a noticeably rougher appearance than the ring on the left. I realize now that "texture" was probably poor word choice on my part, but hopefully this image clears up what I mean. I am printing on a smooth bed sheet.
The project file I included is exactly how I printed the ring on the right. Is it possible to achieve a ring that looks like the one on the left without changing the orientation of the part in the project file (from my understanding, changing the orientation will require the use of support materials in this case)?
I tried changing "print settings-> infill -> bottom fill pattern/fill angle" to different settings but I did not notice a change in the sliced preview.
Thanks again for the assistance.
Project_Help <- Zipped project file
RE: Modify External Texture
Thanks for the pix. Now we are getting somewhere. It looks like your z-offset is putting your nozzle too high which will particularly degrade the quality of that first layer. The lines of extrusion are not getting enough squish against the bed and come out loose and wobbly. Please run a first layer calibration and post a pic of your result.
Mk3S+,SL1S
RE: Modify External Texture
I looked at your model in the slicer. You are going to get those circular lines of extrusion because those are your perimeters and you need perimeters to build those shapes cleanly. The way to avoid that is to change the orientation, as you have done.
Mk3S+,SL1S
RE: Modify External Texture
As Sylvia says the biggest issue is your live z adjustment is to put it bluntly terrible. Those first layers should be squished together and smooth. That's all adjusted on the printer though and has nothing to do with any settings in the project.
Use the method described in this thread https://forum.prusa3d.com/forum/original-prusa-i3-mk3s-mk3-assembly-and-first-prints-troubleshooting/life-adjust-z-my-way/ its way better than the built in.
There not much wrong with the actual project you attached, although if I was printing it I would set some things differently.
First, printing at 0.05 layer height is pointless. You are just asking for issues like jamming for no gain as you wont be able to tell the difference. Set to 0.15 layers and then use variable layer height to make the tops and bottom of the ring portion thinner and smoother. It will also save print time.
The 0.2 elephants foot is reducing those first layer perimeters too much, which is making them thinner and so reducing the amount of adhesion. Given that your first layer has no squish anyway then its only hurting things. The whole point of that setting is to compensate for squish from a good first layer. When you get your first layer sorted you might need a bit of compensation. I've reduced it to 0.1 in the project but you might get away with zero. Its one of those settings that you tune for your printer on a case by case basis.
I've set the thick bridges to off (I used PS 2.4 to slice and this is a new setting in 2.4). This will make the surface behind the lantern better.
Lastly I increased the perimeters to 4. This will reduce the amount of gapfill used and should work better for something of this size.
I have attached a modified project version as an example. If you aren't using PS 2.4 yet then I would recommend it and the project will only open properly in that version.
RE: Modify External Texture
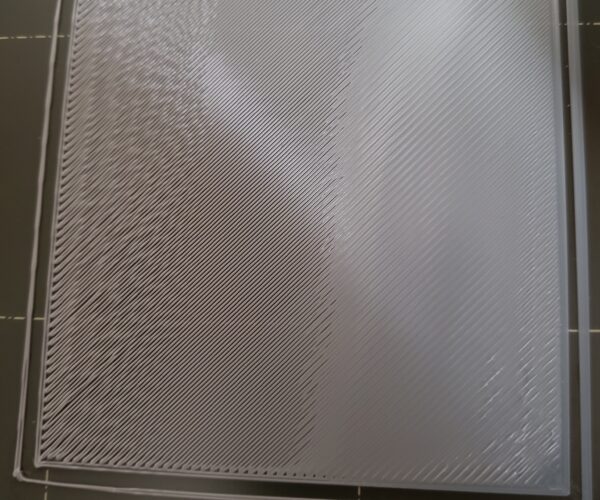
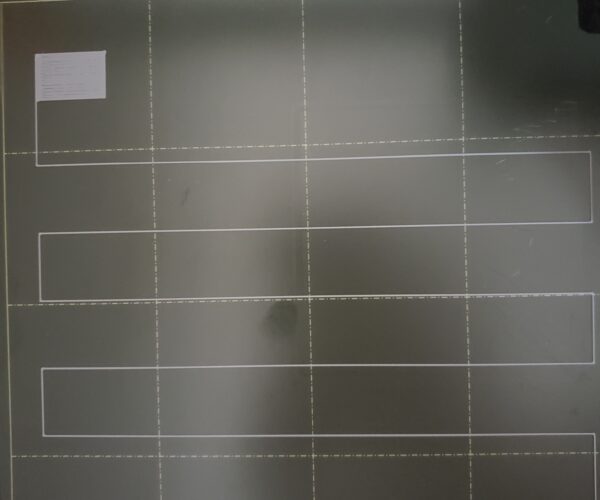
I've been trying to adjust the live z value using the process that @neophyl referenced for a few hours. I attached a picture of the best result I've gotten so far. I think I see what you guys mean about the first layer not getting squished down enough. For some reason, no matter how many times I attempt to tune it, I am unable to get a consistent print of the calibration square sheet thing. As you can see the lower right part of the square seems to be extruding too low (indicated by the ridges and crumbs on the surface). But the upper left part seems to be extruding too high (the lines are not connected). Shouldn't the autoleveling prevent this? Should I continue to lower the extruder height regardless? I have also attached a picture of the built in first layer calibration.
Also thank you for the recommended project settings @neophyl, and for explaining the perimeters @sylviatrilling
RE: Modify External Texture
What surface are you printing on ? A 3d print always takes its texture on the bottom layer from that of the print bed, at least where it contacts. Thats just materials science. Print on a smooth sheet and its smooth, print on the textured pei and its textured. Place some carbon fibre textured vinyl on the smooth sheet and print on that and it takes on the same texture (at least for as long as the vinyl lasts).
You havent mentioned what you are using or what your desired outcome is. Sliced pics are ok but attaching your saved ZIPPED up project file gives us a snapshot of all the settings in play and with maybe a picture of a problem physical print where you can indicate the issues would get the idea over better.
Thanks for the explanatory reply. It solved issue I was facing while printing
RE: Modify External Texture
If you are using a Mk3 series printer, are you using the 3x3 mesh bed levelling which tests nine points on the build plate/ or 7x7 mesh bed levelling (Available via the LCD Menu) which tests 49 points on the build plate.
I use 7x7 mesh bed levelling and I use the setting which ignores 7 points due to magnet placement, resulting in 42 point mesh bed levelling!
regards Joan
I try to make safe suggestions,You should understand the context and ensure you are happy that they are safe before attempting to apply my suggestions, what you do, is YOUR responsibility.Location Halifax UK


