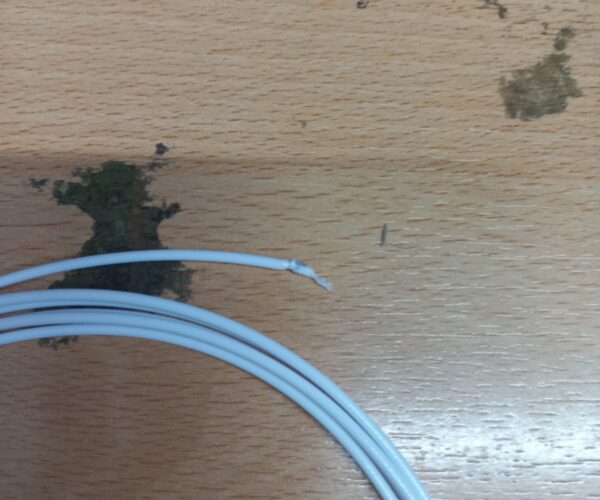
Manual filament change obstruction
Hello everyone,
I'm currently utilizing my Prusa MK3S+ and MK3.5 for printing multicolor pieces by manually switching filaments. By and large, this process runs smoothly, thanks to the gcode generated by Prusa Slicer, which provides guidance during color transitions. However, I'm encountering a vexing issue during these transitions that not only results in the loss of entire prints but also necessitates unnecessary intervention with the printer.
The problem arises specifically during filament extraction when changing colors. It's quite common for a small filament ball to form at the tip, which, upon breaking during extraction, ends up obstructing the extruder's barrel. Consequently, I'm compelled to halt the print, dismantle the extruder, and manually clear the obstruction to resume printing. This predicament not only consumes time but also wastes material.
Interestingly, I've noticed that this obstruction never occurs during the regular filament change process through the printer's GUI. Therefore, I suspect that it may solely be a matter of parameters. However, during the assisted change process while printing, this issue arises at least 1 out of every 10 times, particularly with PETG.
Despite my efforts to search online, I haven't come across anyone addressing this issue specifically. Nevertheless, I speculate that it could be related to the challenges encountered with the MMU2.
I'm curious if anyone else has encountered this problem before and if there's a solution that addresses its root cause. Are there any specific settings in Prusa Slicer or adjustments in the printer that can prevent the formation of these filament balls during color changes?
I'm grateful for any guidance or suggestions you can provide.
Thank you in advance for your assistance!
RE: Manual filament change obstruction
Hello Manuel,
could you please explain better how you print in multicolour ?
There are generally two ways:
A) When you use the MMU to print multicolour objects, the colour changes are all driven by PrusaSlicer using the object colour, and then it generates the gcode for the filament changes plus an additional set of special ramming gcode preparation for perfect tip, and it uses the waste color tower.
B) The manual mode on MMU enabled that is have some bugs.
C) The manual mode on MK4 without MMU, adding a manual filament change in PrusaSlicer, (add color change at a certain layer height) cause Prusaslicer to add just the code M600 and a small command to wipe the nozzle as it starts.
Nothing else, and the gcode line after M600 is the continuation of the object print.
;COLOR_CHANGE,T0,#2EA8E5
M600
G1 E0.3 F1500 ; prime after color change
This means that all the filament eject is based on the FW, and what you manually do by following the LCD instructions. When you confirm that the change is done on the LCD , then the print resume to the next gcode line.
As you see there is no code for ramming before the change, or doing a perfect shape tip as it does with when it generates MMU colour changes with waste tower.
One could say that the filament eject strategy in FW could be improved, but I think now it is just row motor instructions.
I saw also on mine that sometime the filament create big strings, and this happens specially with high nozzle temp.
If you are really tired of this problem you can use this trick:
- Go in PrusaSlicer, in the Printer Settings tab
- Click on Custom G-Code on the left
- Identify the text box Color Change G-Code
- Type the following:
M109 S200; just bare minimum, it is fine for PLA and PETG M600 M109 S{temperature[0]} G1 E0.3 F1500 ; prime after color change - Save your custom printer profile.
Then when you will do manual colour change, the print temperature will be lowered before unloading the filament, and the unloaded filament will be with less or no string. Then you will change the filament, and then when you will resume, the filament temperature will be restored to the other layers filament value.
You may lower the first value to 195° but then it could create issue if you use PETG.
Let me know.
Regards
Search for threads on 'tip shaping'. There is a lot of discussion and a couple of strategies.
And ths is yet another issue made worse by damp filament so make sure you are on top of filament drying too.
Cheerio,
RE: Manual filament change obstruction
Thank you very much for your assistance, and I apologize for the delay; I was testing out your recommendations. In response to your inquiries, here is my current situation:
B) The manual mode on the MMU enabled has some bugs. I frequently use it for printing cabinets, making adjustments during the initial 2 or 3 layers. However, I'm unsure what additional information would be helpful for a better explanation.
Regarding your suggestions, I've tested the provided lines of code, and they appear to yield better results. The filament now extrudes with reduced deformation at the tip (no blob) and fewer strings. However, it still adjusts temperature directly with the nozzle over the print (cooling before unloading and heating after loading). Is there a way to alter the temperature while the hotend is parked at the position where the change occurs?
Additionally, I'd like to note that the code didn't function when I input it into the Color Change G-Code section (the printer didn't execute any action). However, upon pasting it into the Tool Change G-Code section, the printer executed the code successfully.
Once again, thank you for your assistance.
