RE: How to set consistent printed layers
On a Mini?
Mini's have known issues with layer one consistency because the MINDA is not temperature compensated.
As for those triangles, try reslicing that test using the latest alpha of Prusa Slicer : 2.3.0 -- it now provides monotonic infill which should make the directional infill artifacts go away - mostly.
RE: How to set consistent printed layers
The other variable is belt tension. When was the last time you adjusted the belts?
RE: How to set consistent printed layers
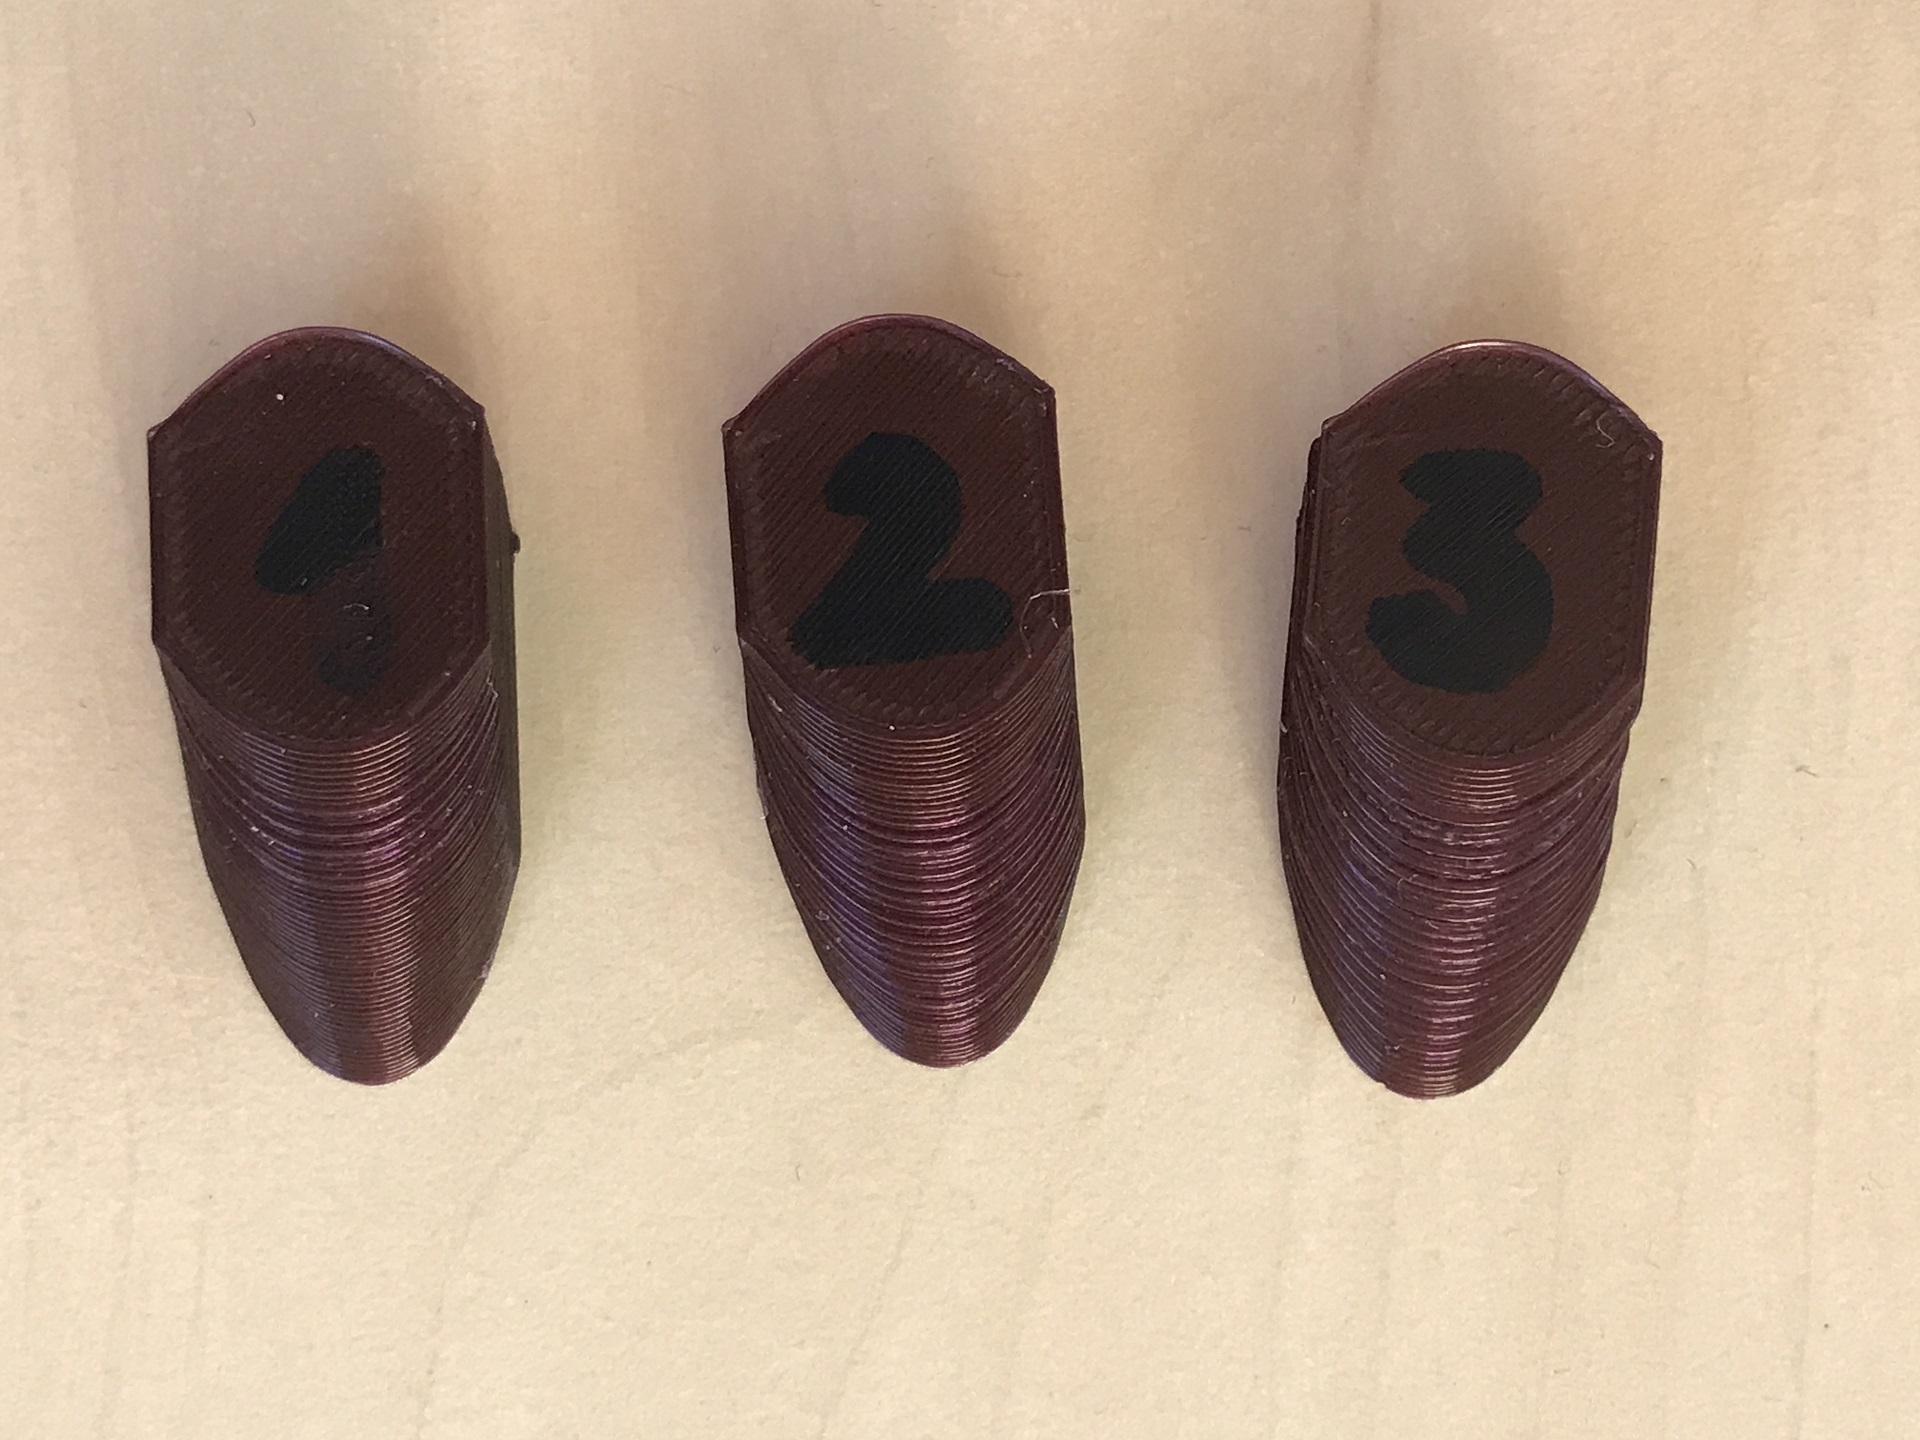
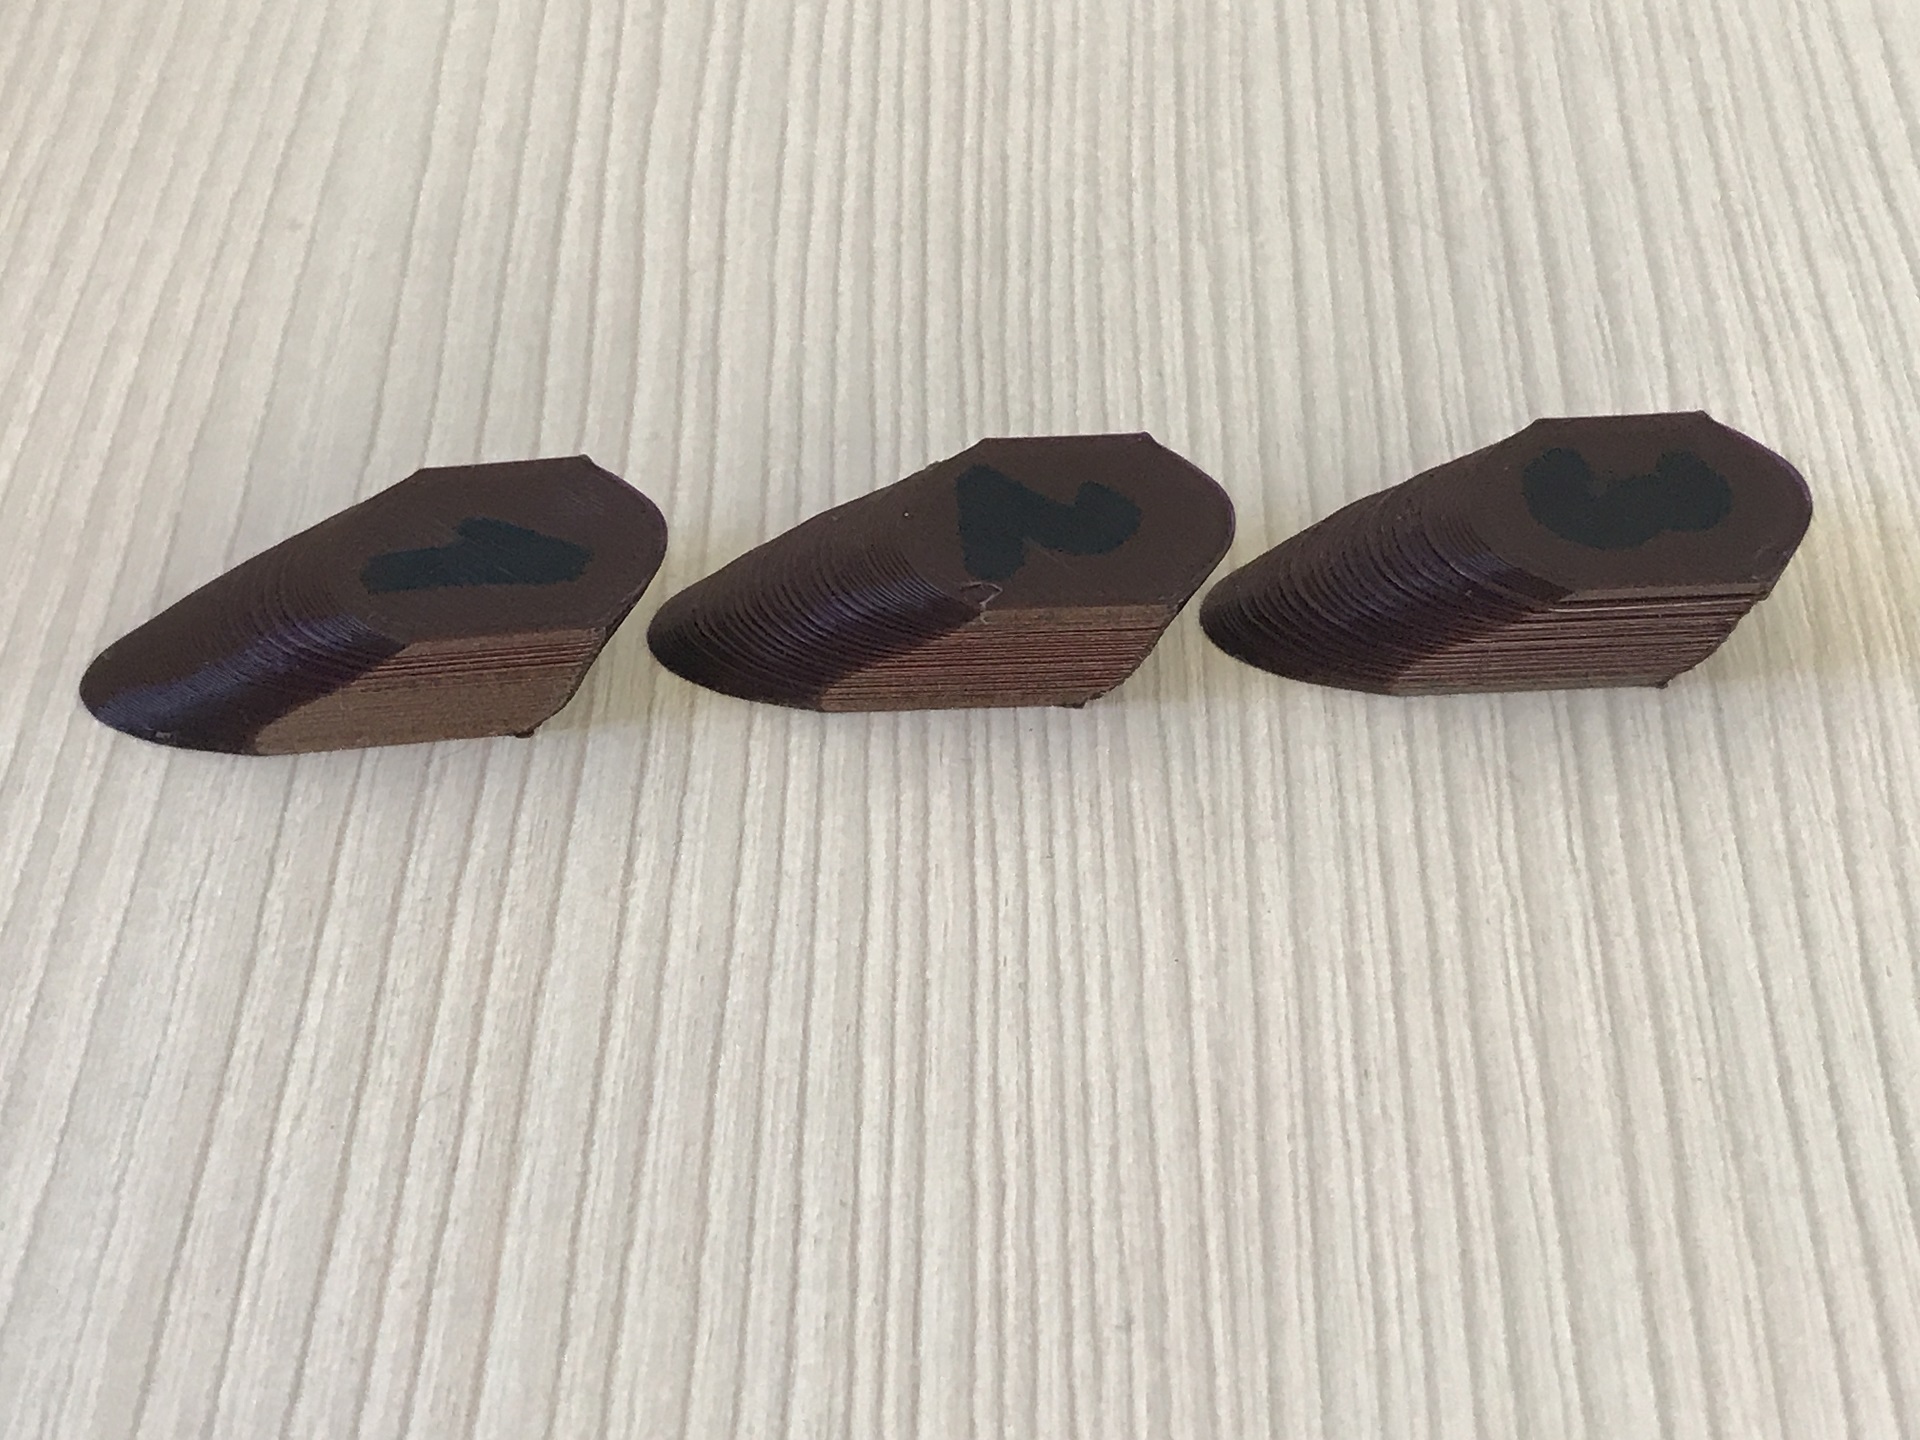
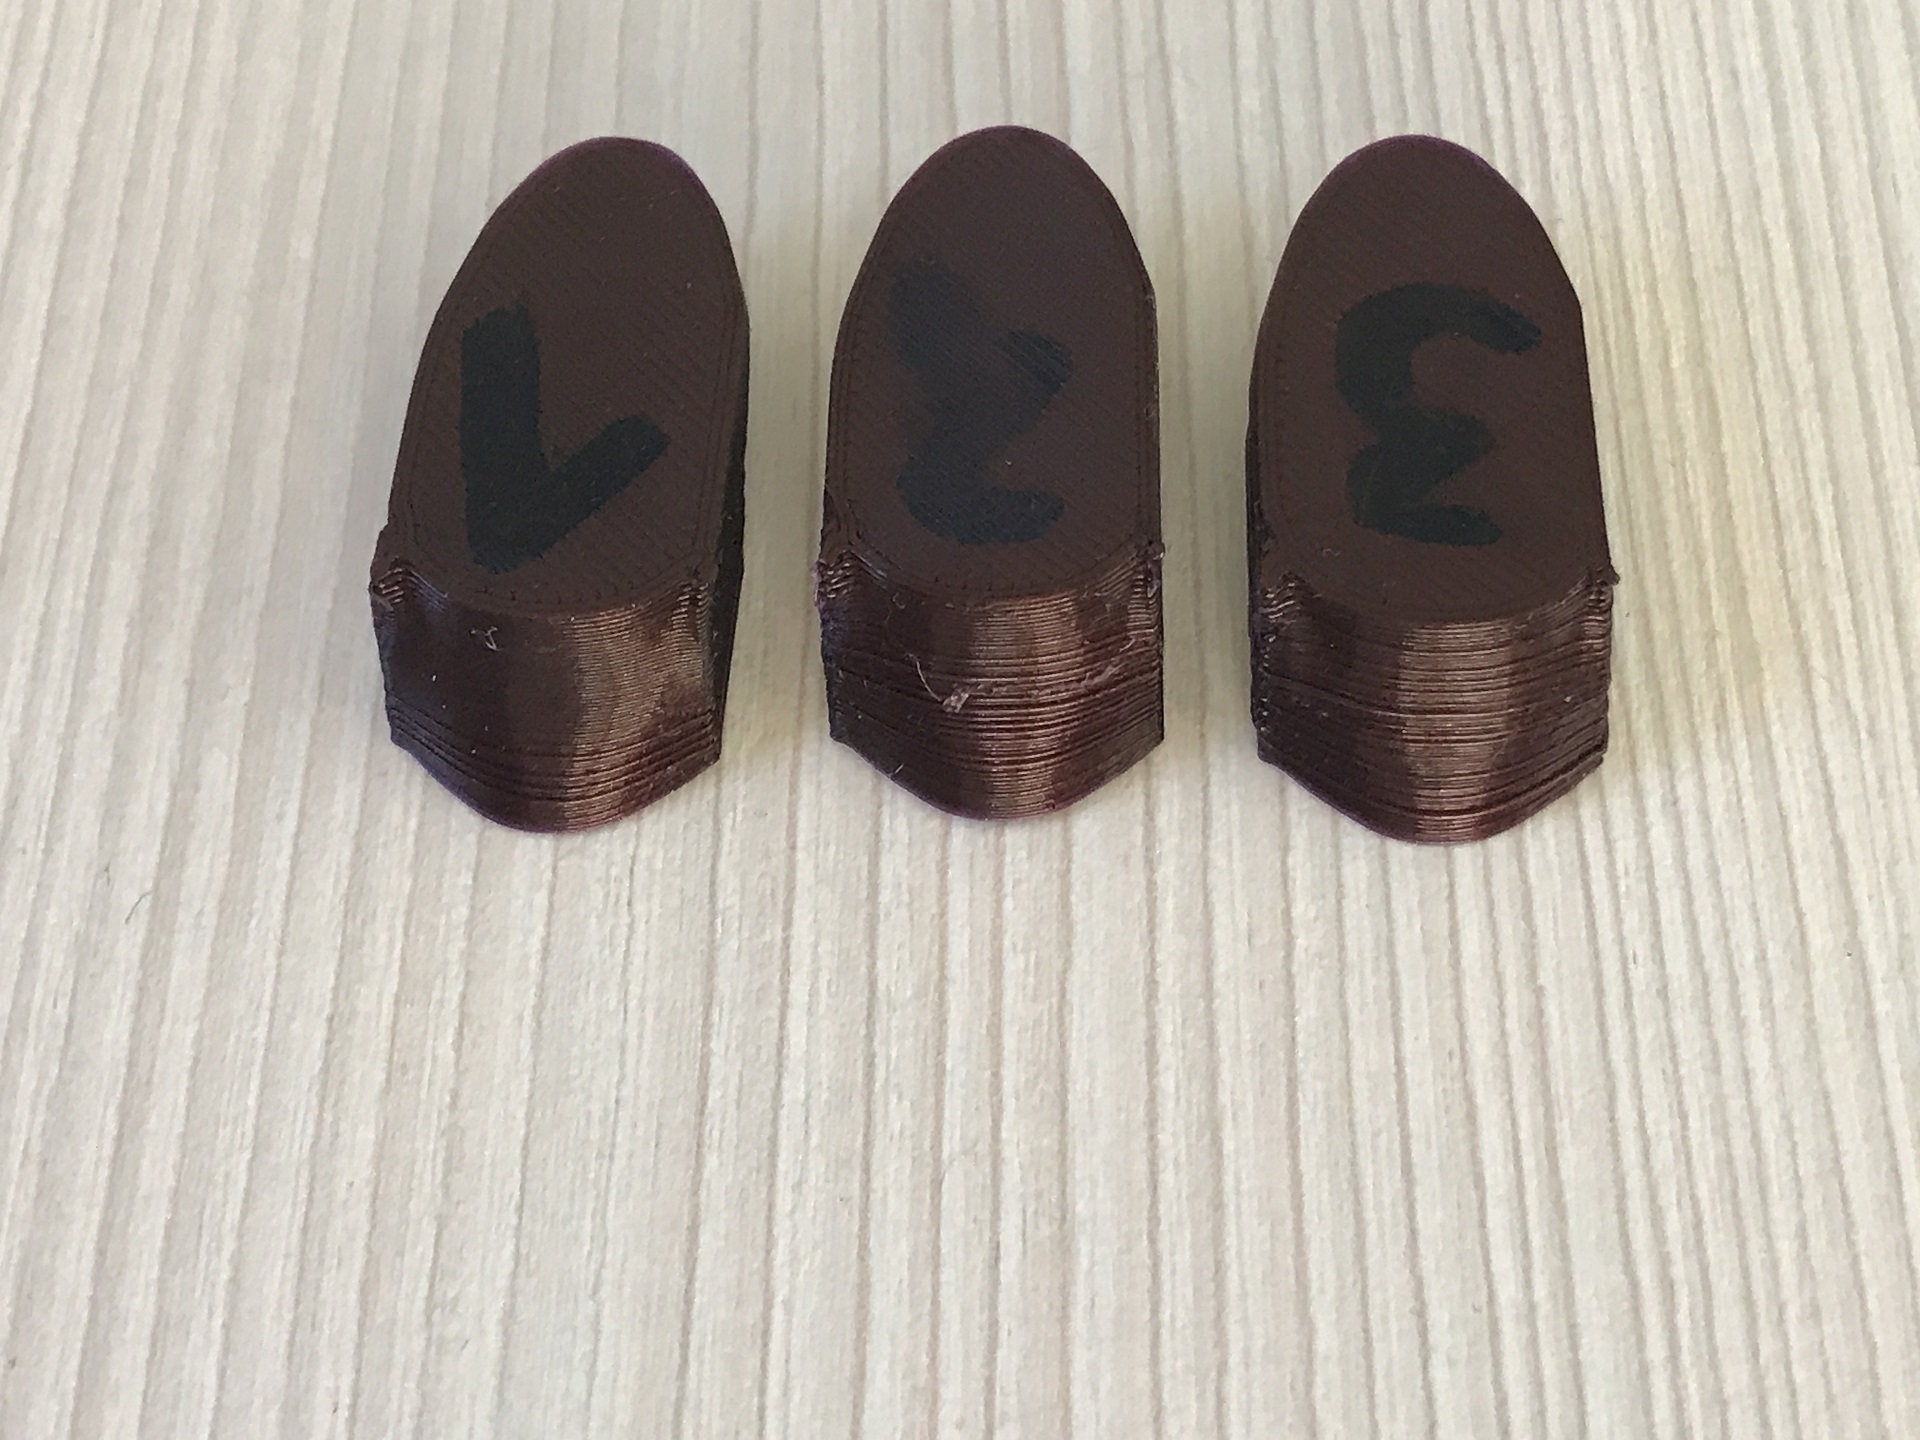
I adjusted the belt tension just before the frog print. They were not too lose and not too tight. Will print a cone figure to see the layer shift type.
Here are prints from just the back of the frog. 1 is OK until the middle, while 2 and 3 are mostly not ok:

RE: How to set consistent printed layers
What are the temperatures of the nozzle during the "bad" zone? Is it stable or can you see the nozzle temp fluctuating?
You might try turning off the part cooling fan as an experiment. If things change, then a silicon sock for the heater block might help, along with a PID calibration.
RE: How to set consistent printed layers
ps: if you are using the belt tension numbers on the printer - well - your belts are not right.
RE: How to set consistent printed layers
@tim-m30
The temperatures of the nozzle during the "bad" zone are the same as in other zones - the nozzle temp fluctuating between 214-216 degree. Next time I print I will watch them closely.
I calibrated the PID and took the average values from 10 auto calibration results.
I am not using belt tension numbers because I do not know what is this?!?
-------------------
I tried printing a calibration cube 10x10x10mm in vase mode using 0.15mm default profile with Filament | Extrusion multipliers 1, 0.9, 0.73. Also tried 0.05mm profile with multiplier 1.
https://www.udoma.org/tmp/23102020/Cube_015_x090.3mf
https://www.udoma.org/tmp/23102020/Cube_015_x073.3mf
https://www.udoma.org/tmp/23102020/Cube_015_x1.3mf
https://www.udoma.org/tmp/23102020/Cube_005_x1.3mf
Here are the results:
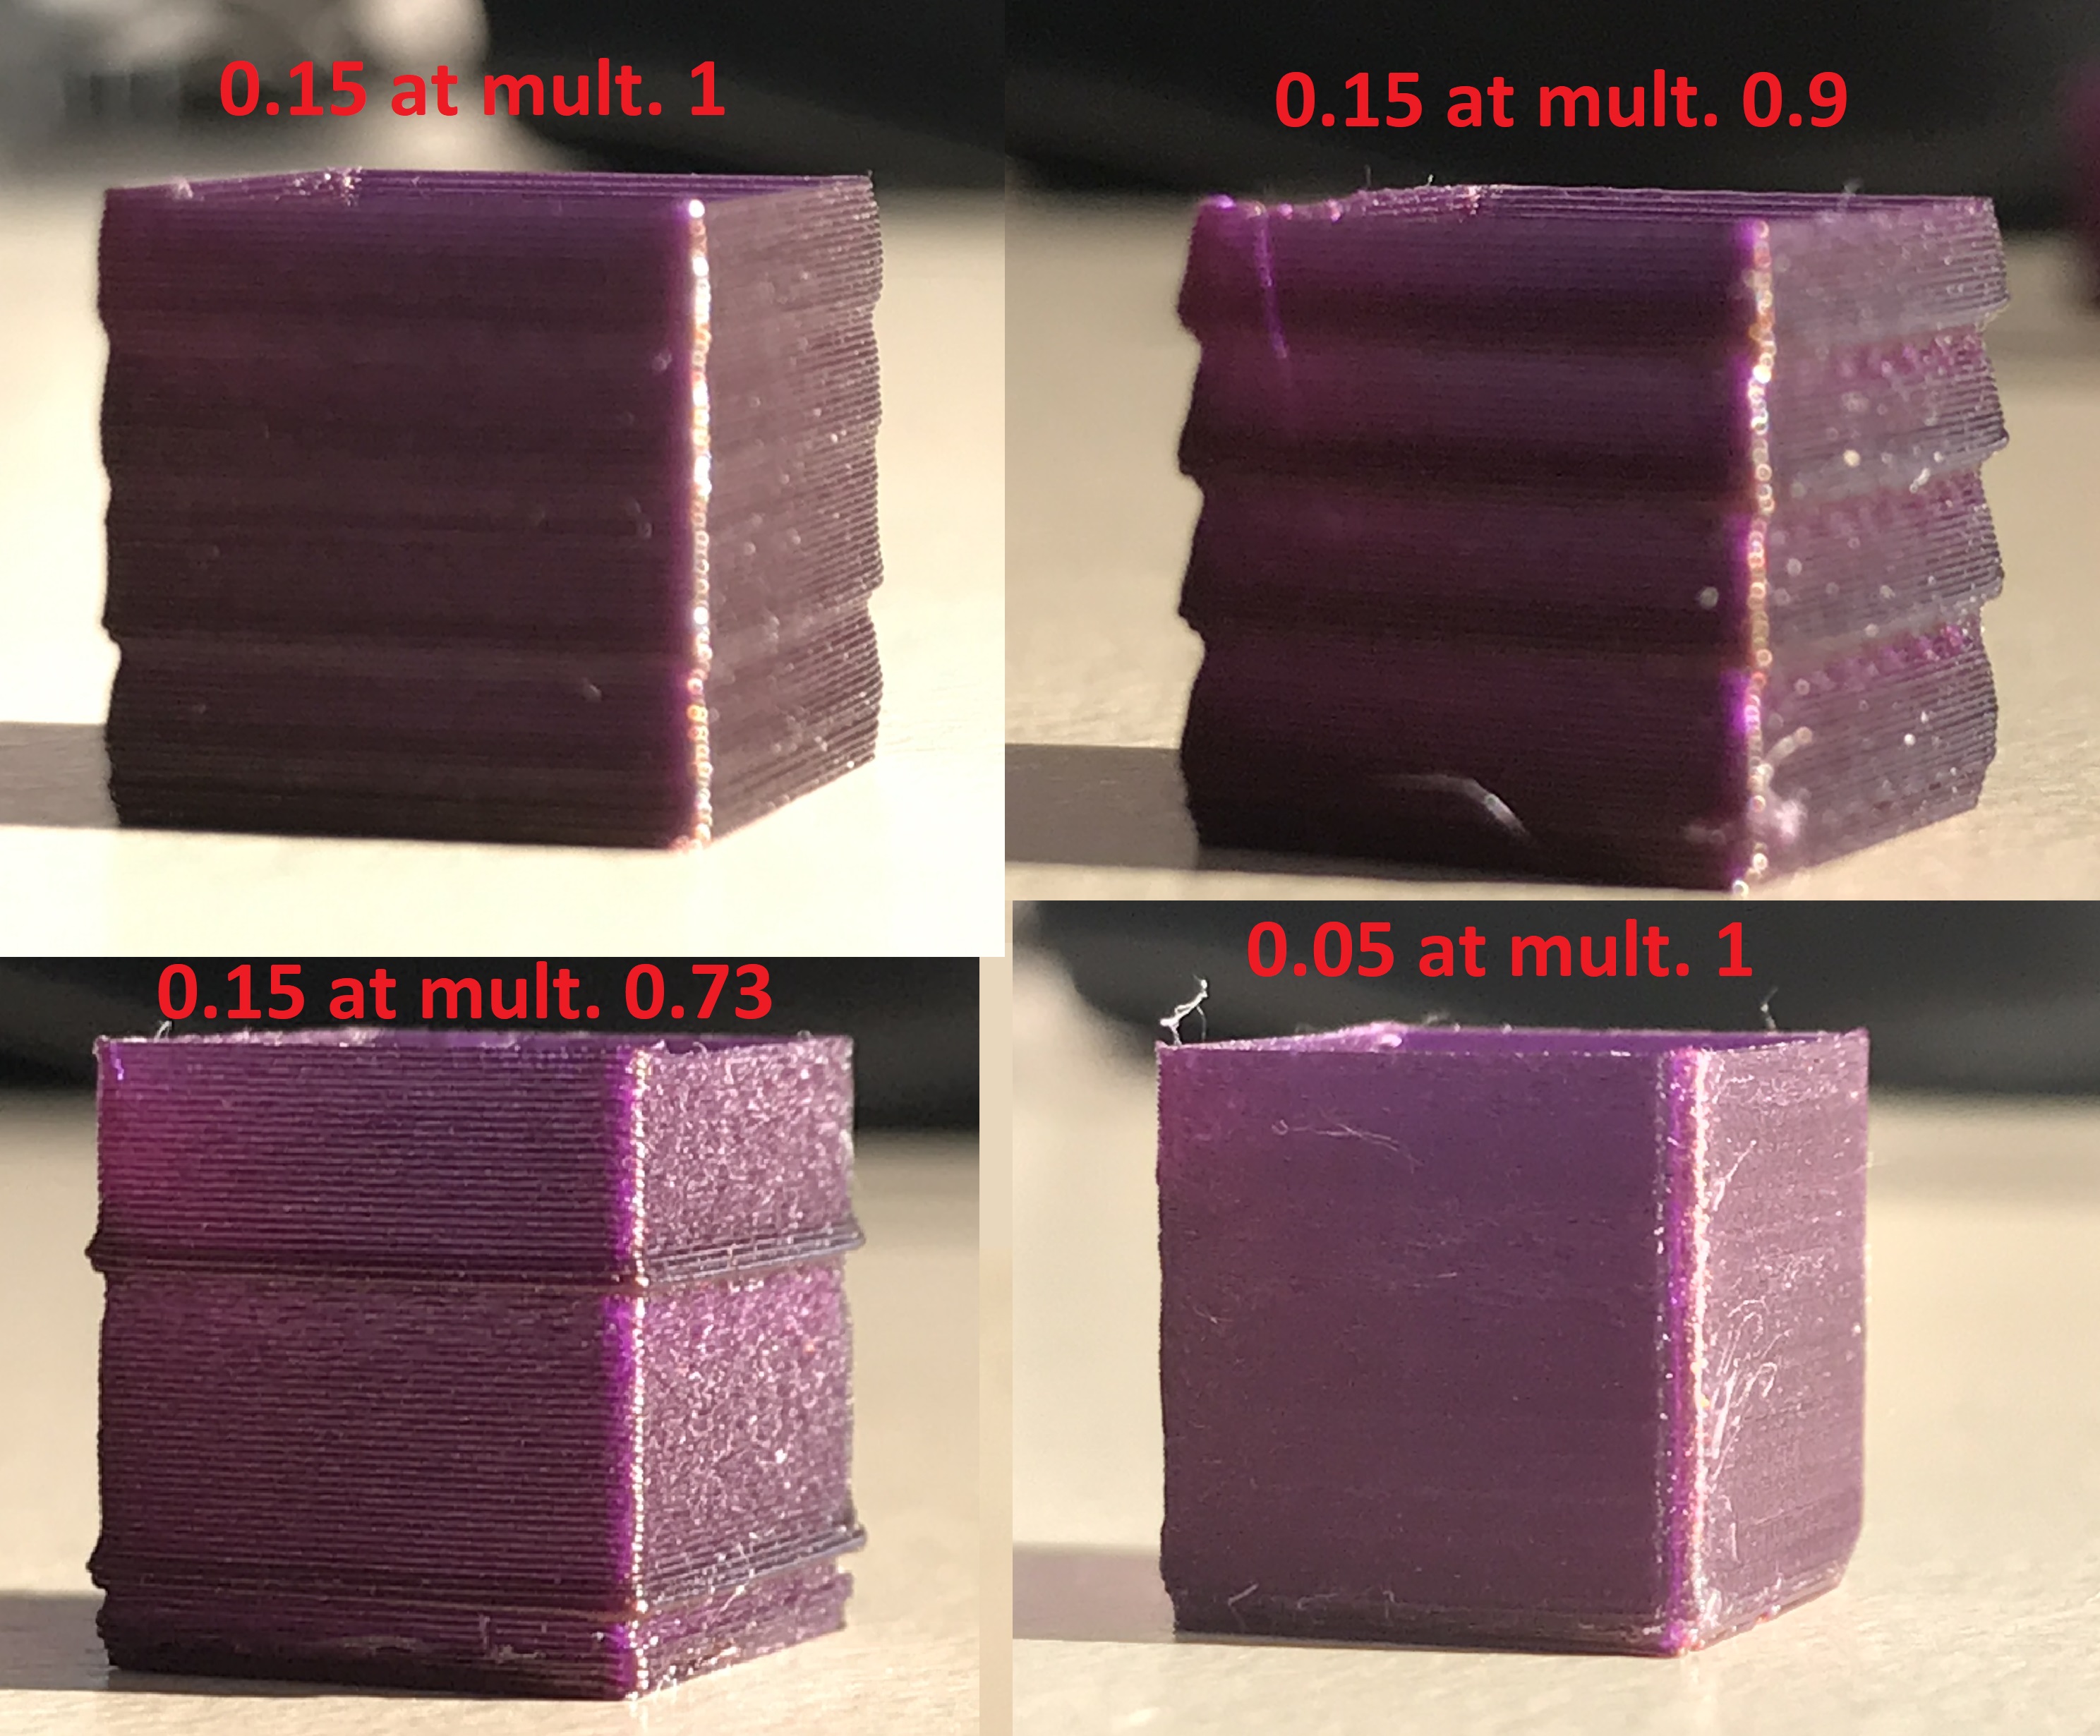
Also here are the results using sunlight passing through the front wall:
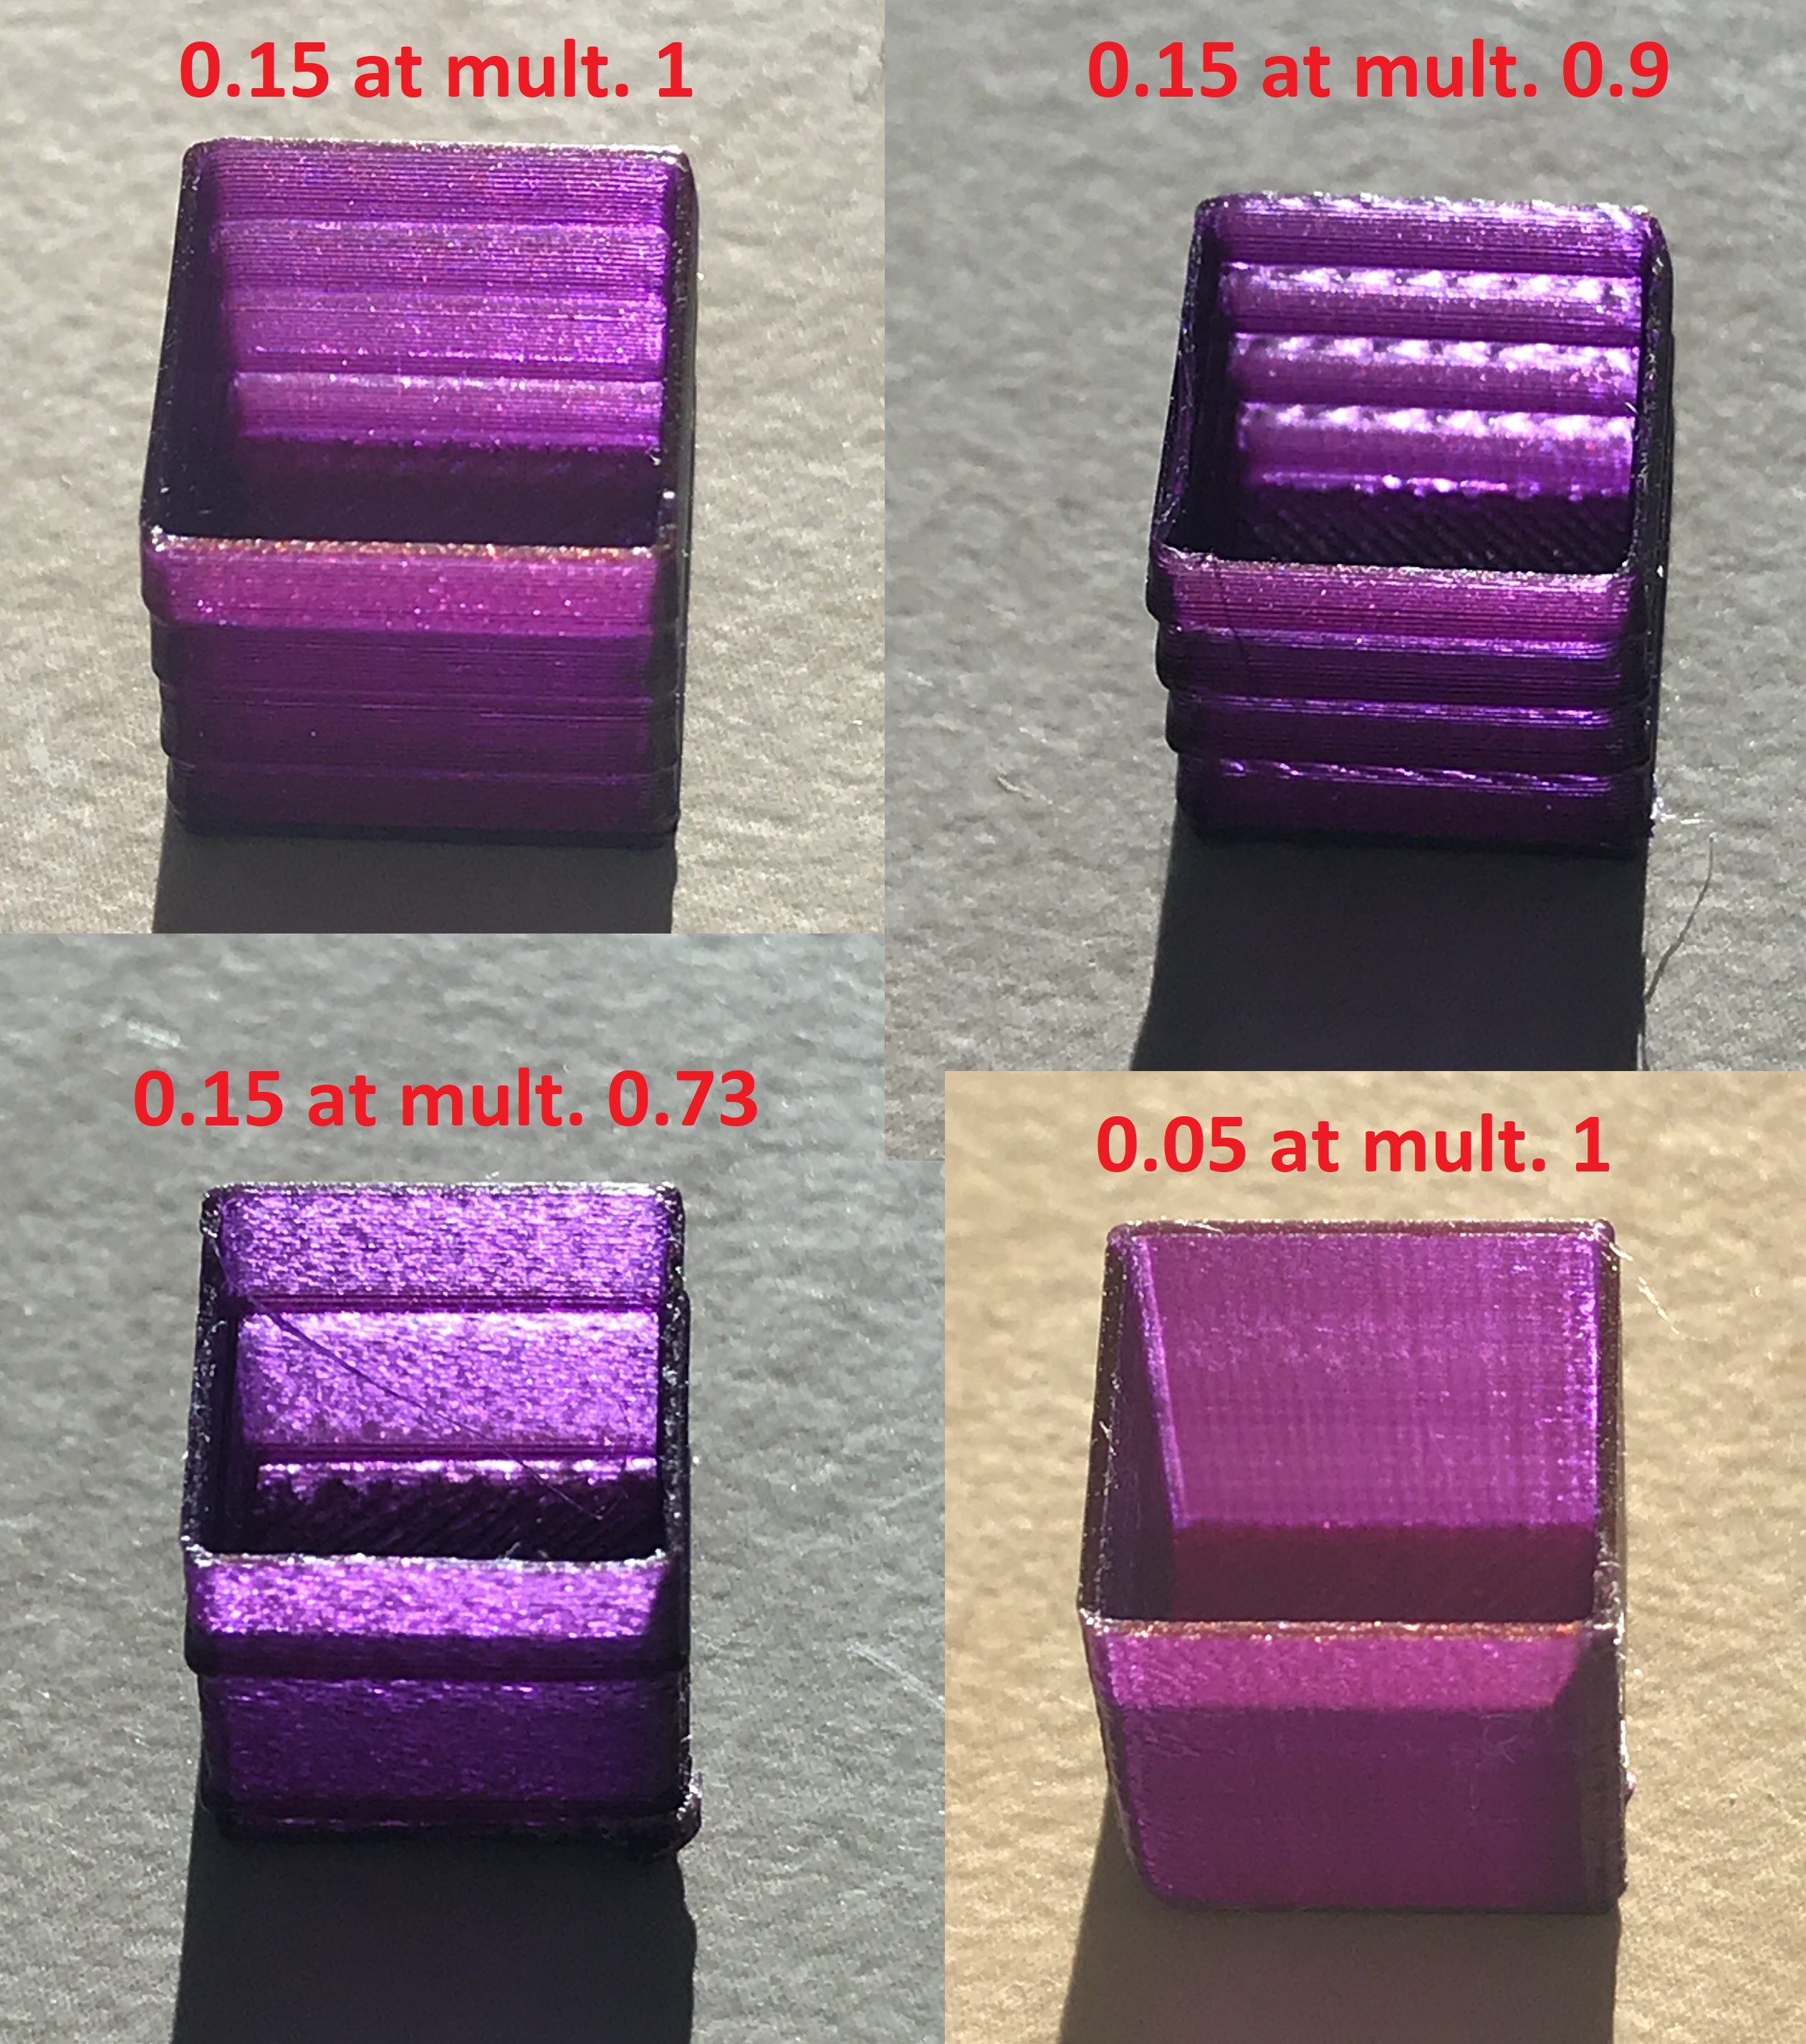
What I see is that if I use 0.05mm default profile everything is OK and the wall is flat.
Using 0.15mm default profile the extrusion is not regular at all – there is a thick part which causes a bulge both on the front and back side of the wall. Going up the bulge then decrees until the next bulge appears. The interesting part is when printing with 0.73 extrusion multiplier the bulge transforms into thicker line.
What causes these bulges and are they normal?
RE: How to set consistent printed layers
You have a belt or pulley or dry bearing problem. Check both X and Y belt drive gears are properly affixed to the motor shafts. And rods should have a light coat of oil or grease on them.
Loosen both set screws enough the belt drive gear can turn freely on the shaft; first, align the gear and tighten the set screw on the flat of the shaft; then tighten the locking set screw on the shaft round.
Next, use the MINI user assembly manual and properly adjust the belt tensions on X and Y belts.
In any case, those test cubes show a hardware/assembly problem, not a software problem.
https://help.prusa3d.com/en/article/adjusting-belt-tension-mini_157324
RE: How to set consistent printed layers
Did all that. Prove me I am wrong but if X and/or Y axis were involved then the X/Y coordinates should move. What I see is that the walls are strait with symmetrical bulges that are fat at the bottom side and thin at top. To me this is an overextrusion (hotend or extruder) and/or Z-axis issue. Otherwise the cube walls would be shifting, but they don't.
RE: How to set consistent printed layers
I haven't printed this (I'm away in my UK bubble this weekend) but I saw a video the other week that mentioned weird thick layers appearing now and then and gave an answer that I haven't been able to verify. I think it was from filament friday, maybe?
He said that stepper motors for many printers - and he didn't mention Prusa in the list - have 200 steps to complete a rotation, in which they raise Z by 8mm.
As a result every step raises Z by 0.04mm.
His main point was that if your layer height isn't an even multiple of 0.04mm (the magic number, he called it) then when it needs to fully sync them, you get a disproportionate tack layer, that is repeated evenly as Z climbs.
Only one of the presents on prusa matches that multiple, I think.
But 0.08, 0.12, 0.16, 0.2, 0.24 and 0.28 are proof against this risk.
Does anyone know if this holds true for Prusa hardware?
RE: How to set consistent printed layers
Not sure about the mini but on the mk3 that is not true. Iirc the min step height is 0.01 which makes any of the default profiles easily achievable.
Also given that I have yet to see anyone else with a mini report the same issues then I highly doubt it’s a limitation of a properly working and set up mini either.
Tim is right that there is 100% something wrong physically with this printer. Although I agree that it’s the Z axis or the extruder to be checking. Instead of spending time on trying different software changes it should be spent on checking every single physical component and alignment.
RE: How to set consistent printed layers
@neophyl
Well that's a relief for me. 0.01 sounds far better.
I'm so glad there are people on this forum with the knowledge to advise on this sort of technical issue
Thanks.
RE: How to set consistent printed layers
@paddy_finn
The other detail whoever that 'expert' was, he doesn't seem to understand microstepping, either. For every full step, there are up to 256 microsteps. 16 is quite common for most drivers, even 32 are common, and the TMC drivers can achieve 256. So that 0.04 mm nonsense, is, well, nonsense.
https://www.trinamic.com/products/integrated-circuits/details/tmc2130/
RE: How to set consistent printed layers
@sth-udoma
No need to prove you wrong - you've already done that by posting images of test cubes with axis problems.
RE: How to set consistent printed layers
Investigation continues.
This is a picture from my last print of 30x30x20mm figure using Prusament orange and Prusa Mini defaults for 0.20mm Quality print ( https://www.udoma.org/tmp/23102020/DropsBumps.3mf ) at 215C:
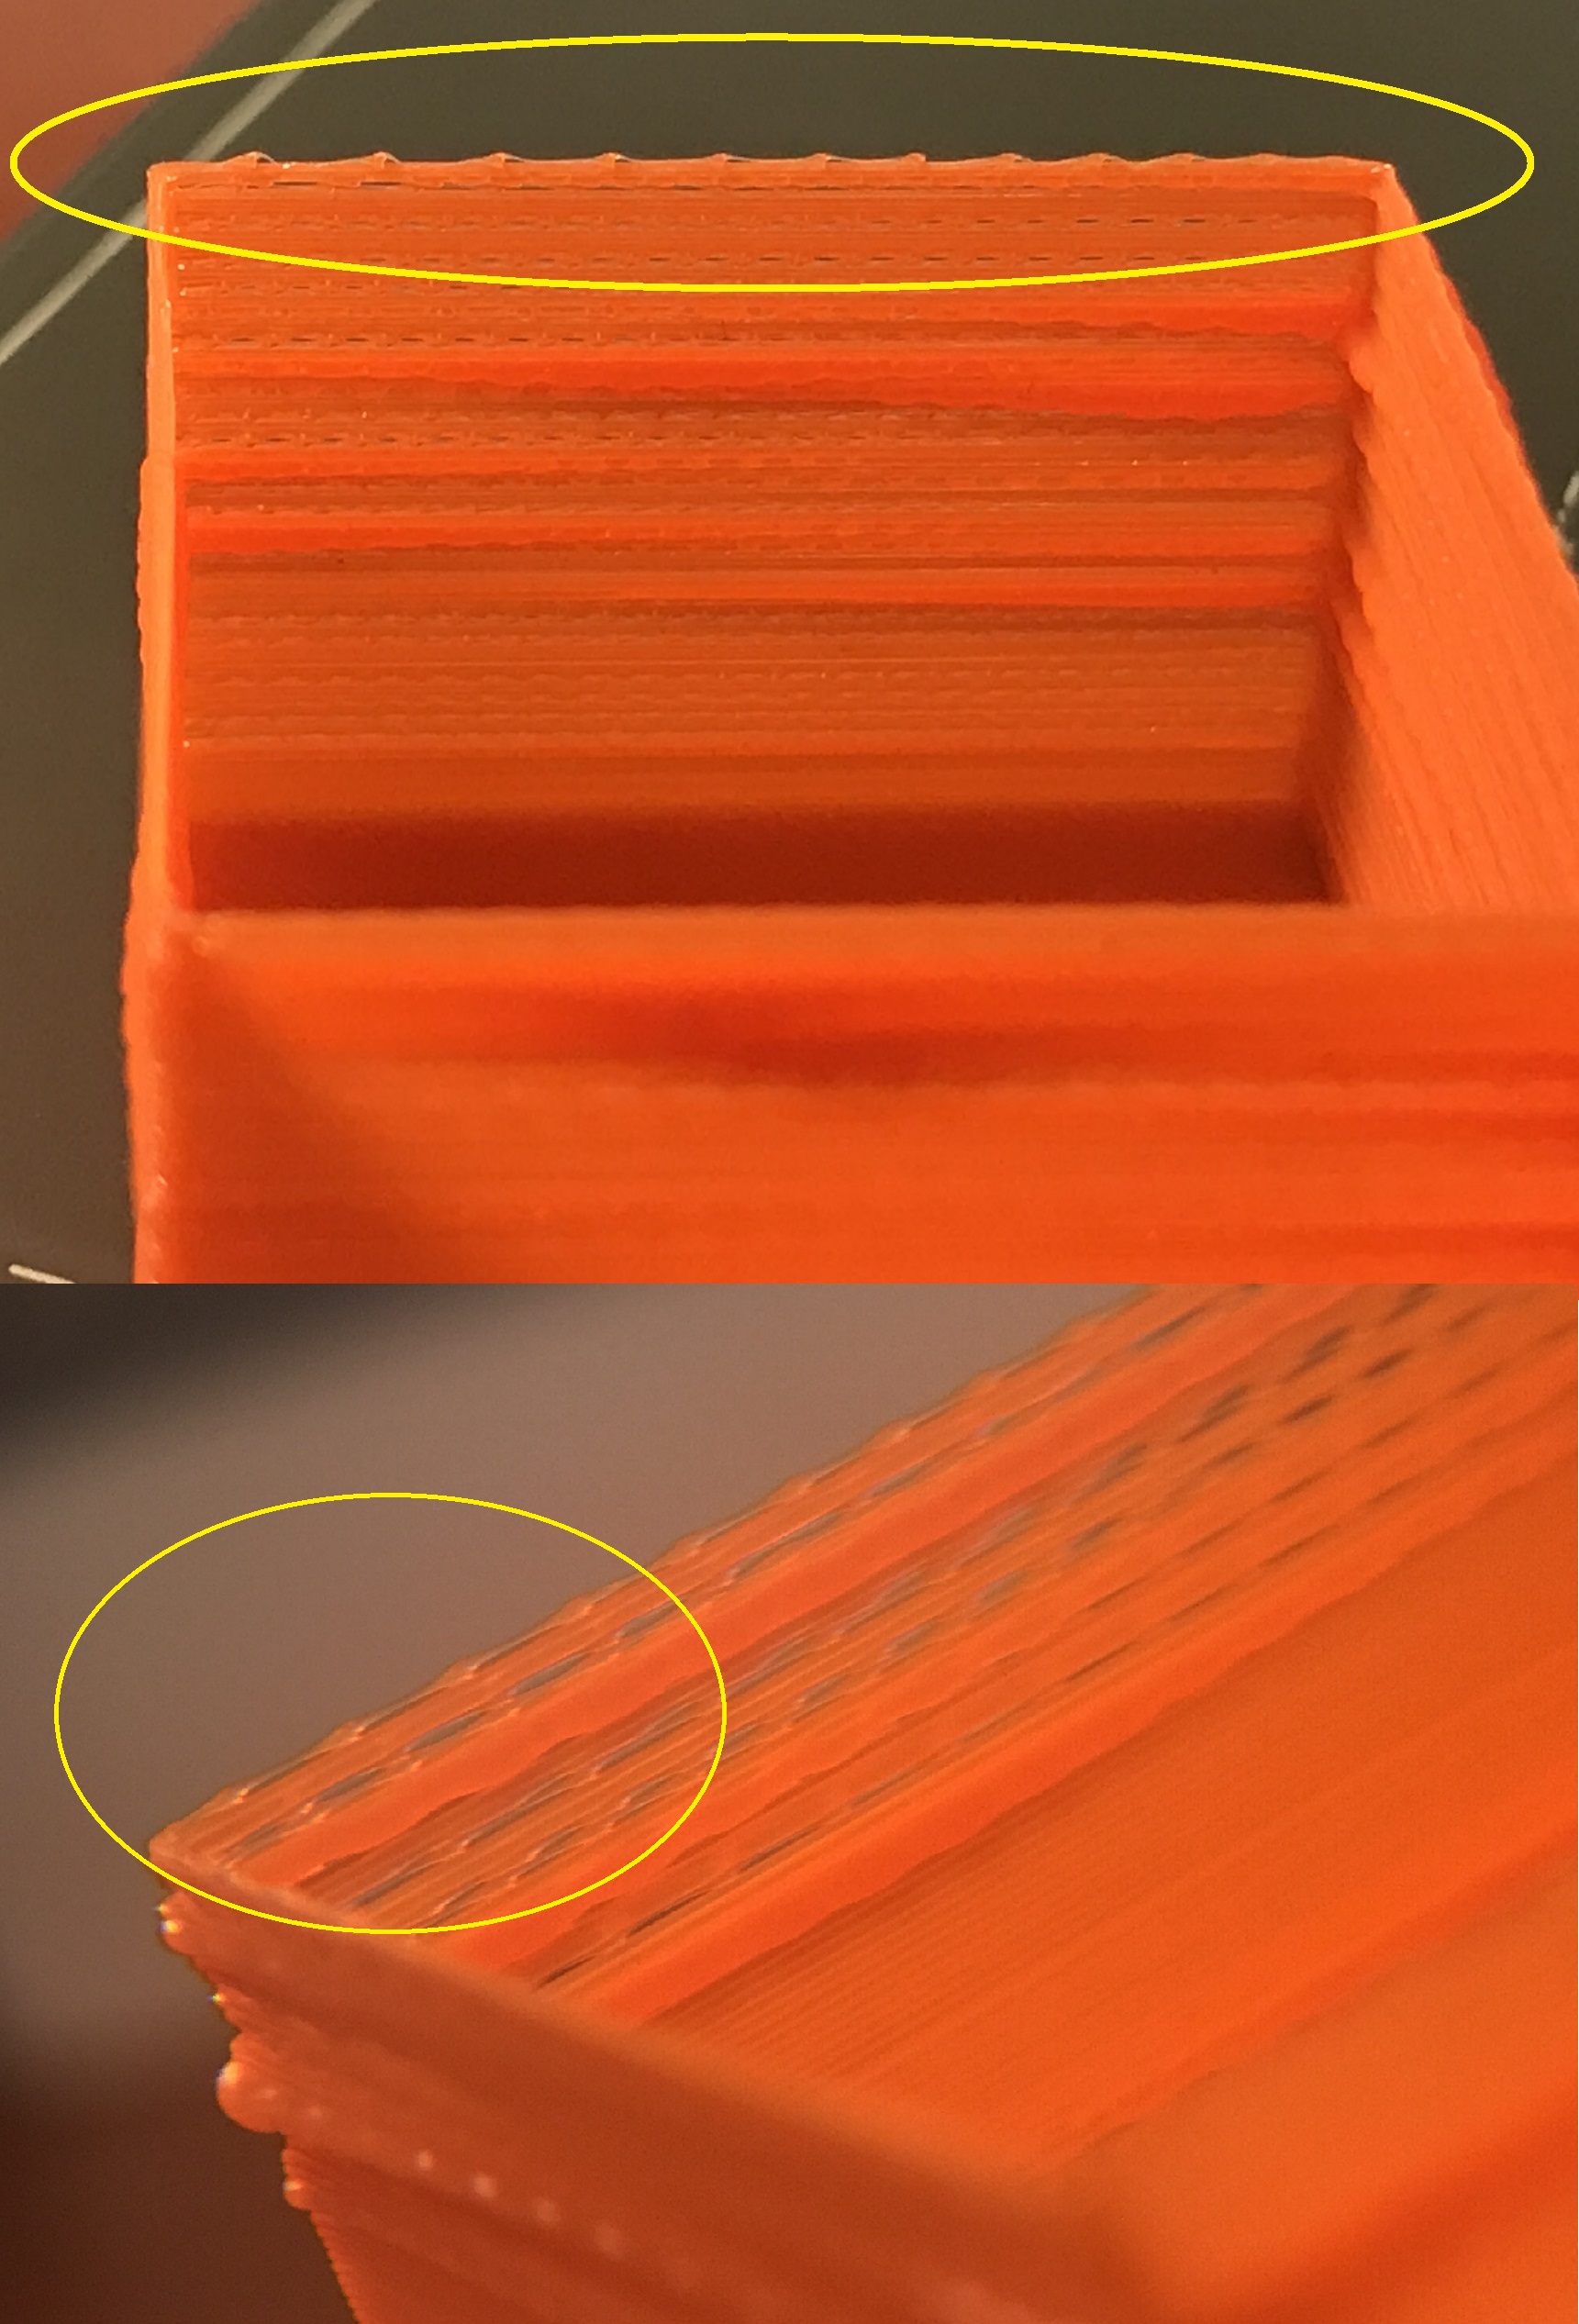
I paused the print to show the latest layer. Looking at the layer building using a magnifying glass I saw that the nozzle covers the layer using drops/bumps (marked with yellow) - it's like it came from a sewing machine. Raising the temperature to 230C most of the time fixes this issue and the layers become normal.
I am using Bondtech heatbreak and extruder. Does any of you have a slightest idea what is causing these behavior?!?
RE: How to set consistent printed layers
Hi!
Finally managed to completely fix the problem by putting back the original Prusa Mini hot end.
During the Bondtech hot-end disassembly I carefully looked what could potentially cause the problem when using it. Here are photos of different components during the disassembly:
1. The filament when unloaded from the printer:
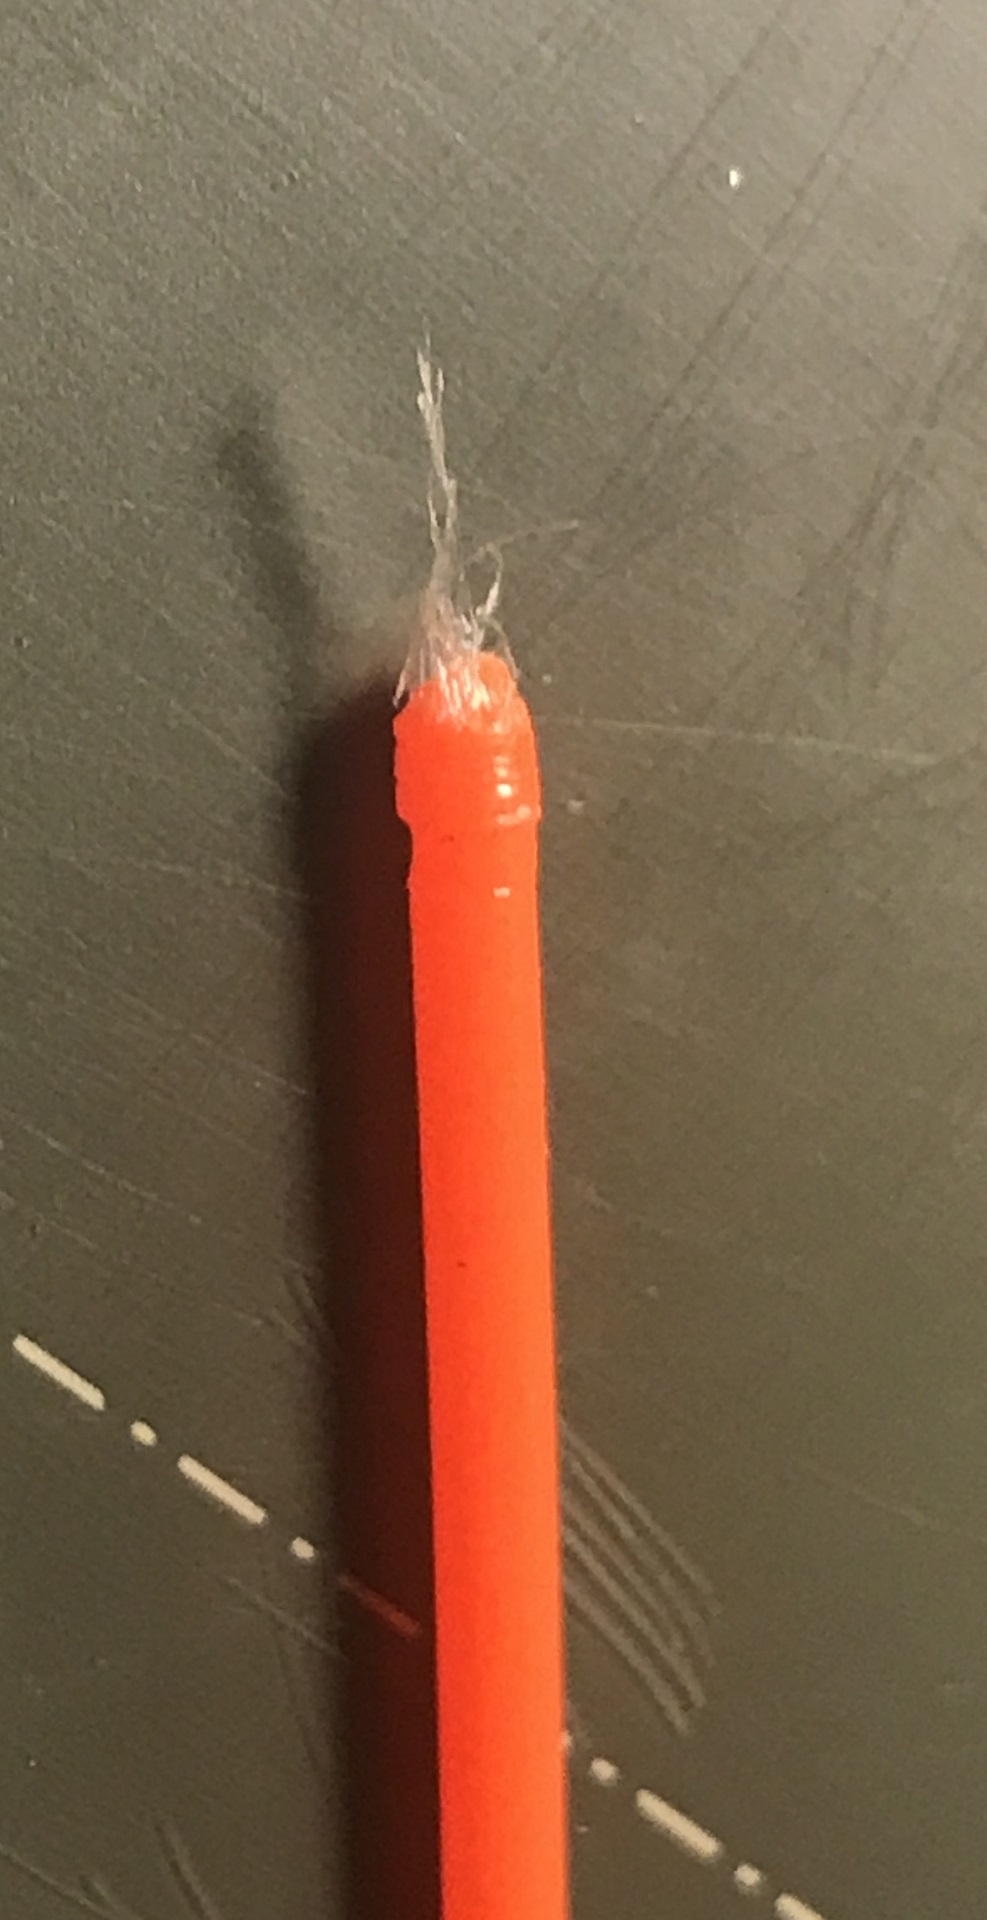
2. A thin string was present when I opened the heat-break section from above:
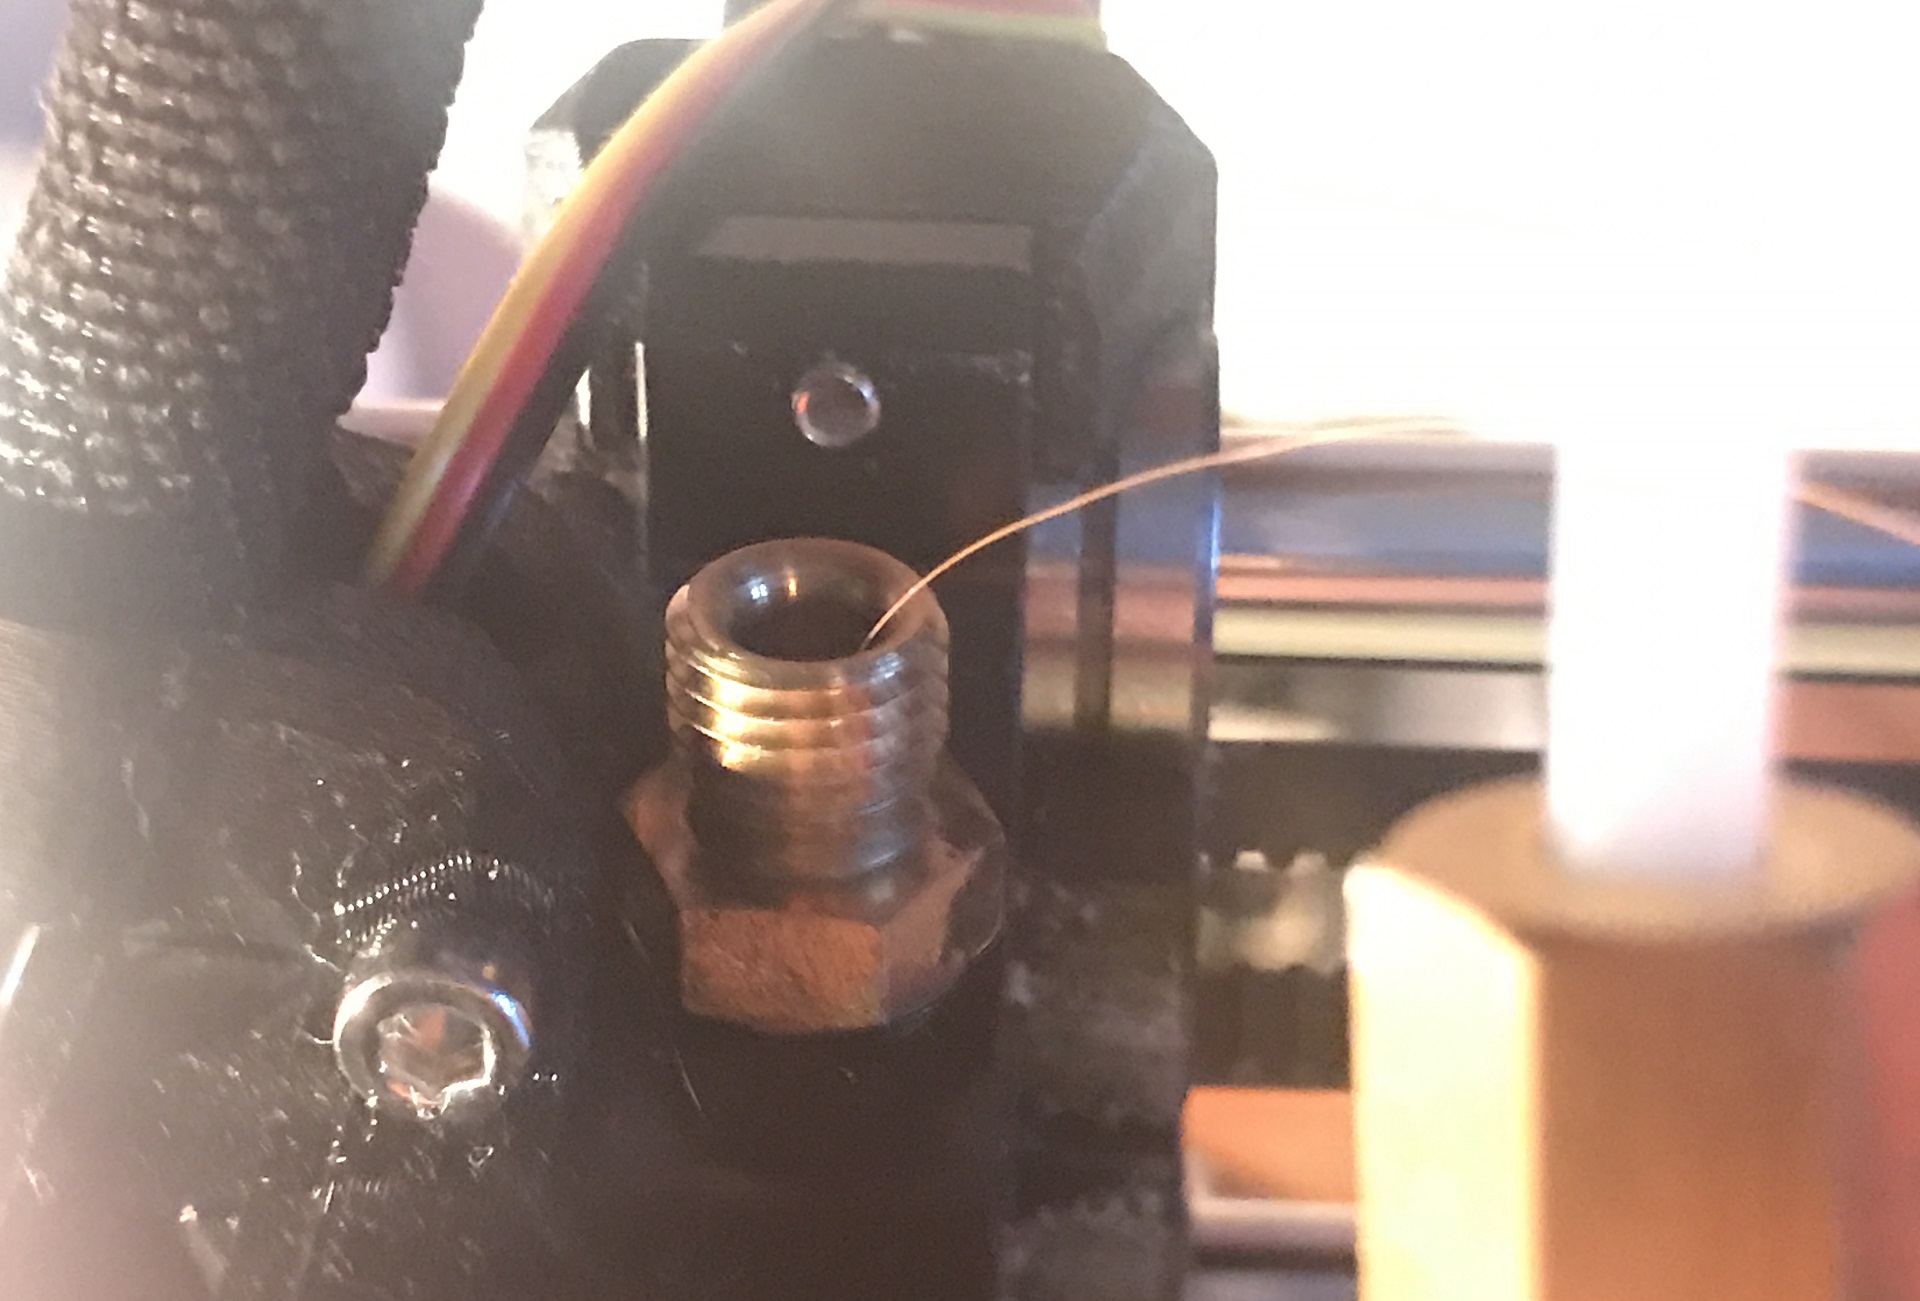
3. After raising the nozzle temperature, I managed to easily extract the PTFE tube pulling the string. Here is what I extracted:
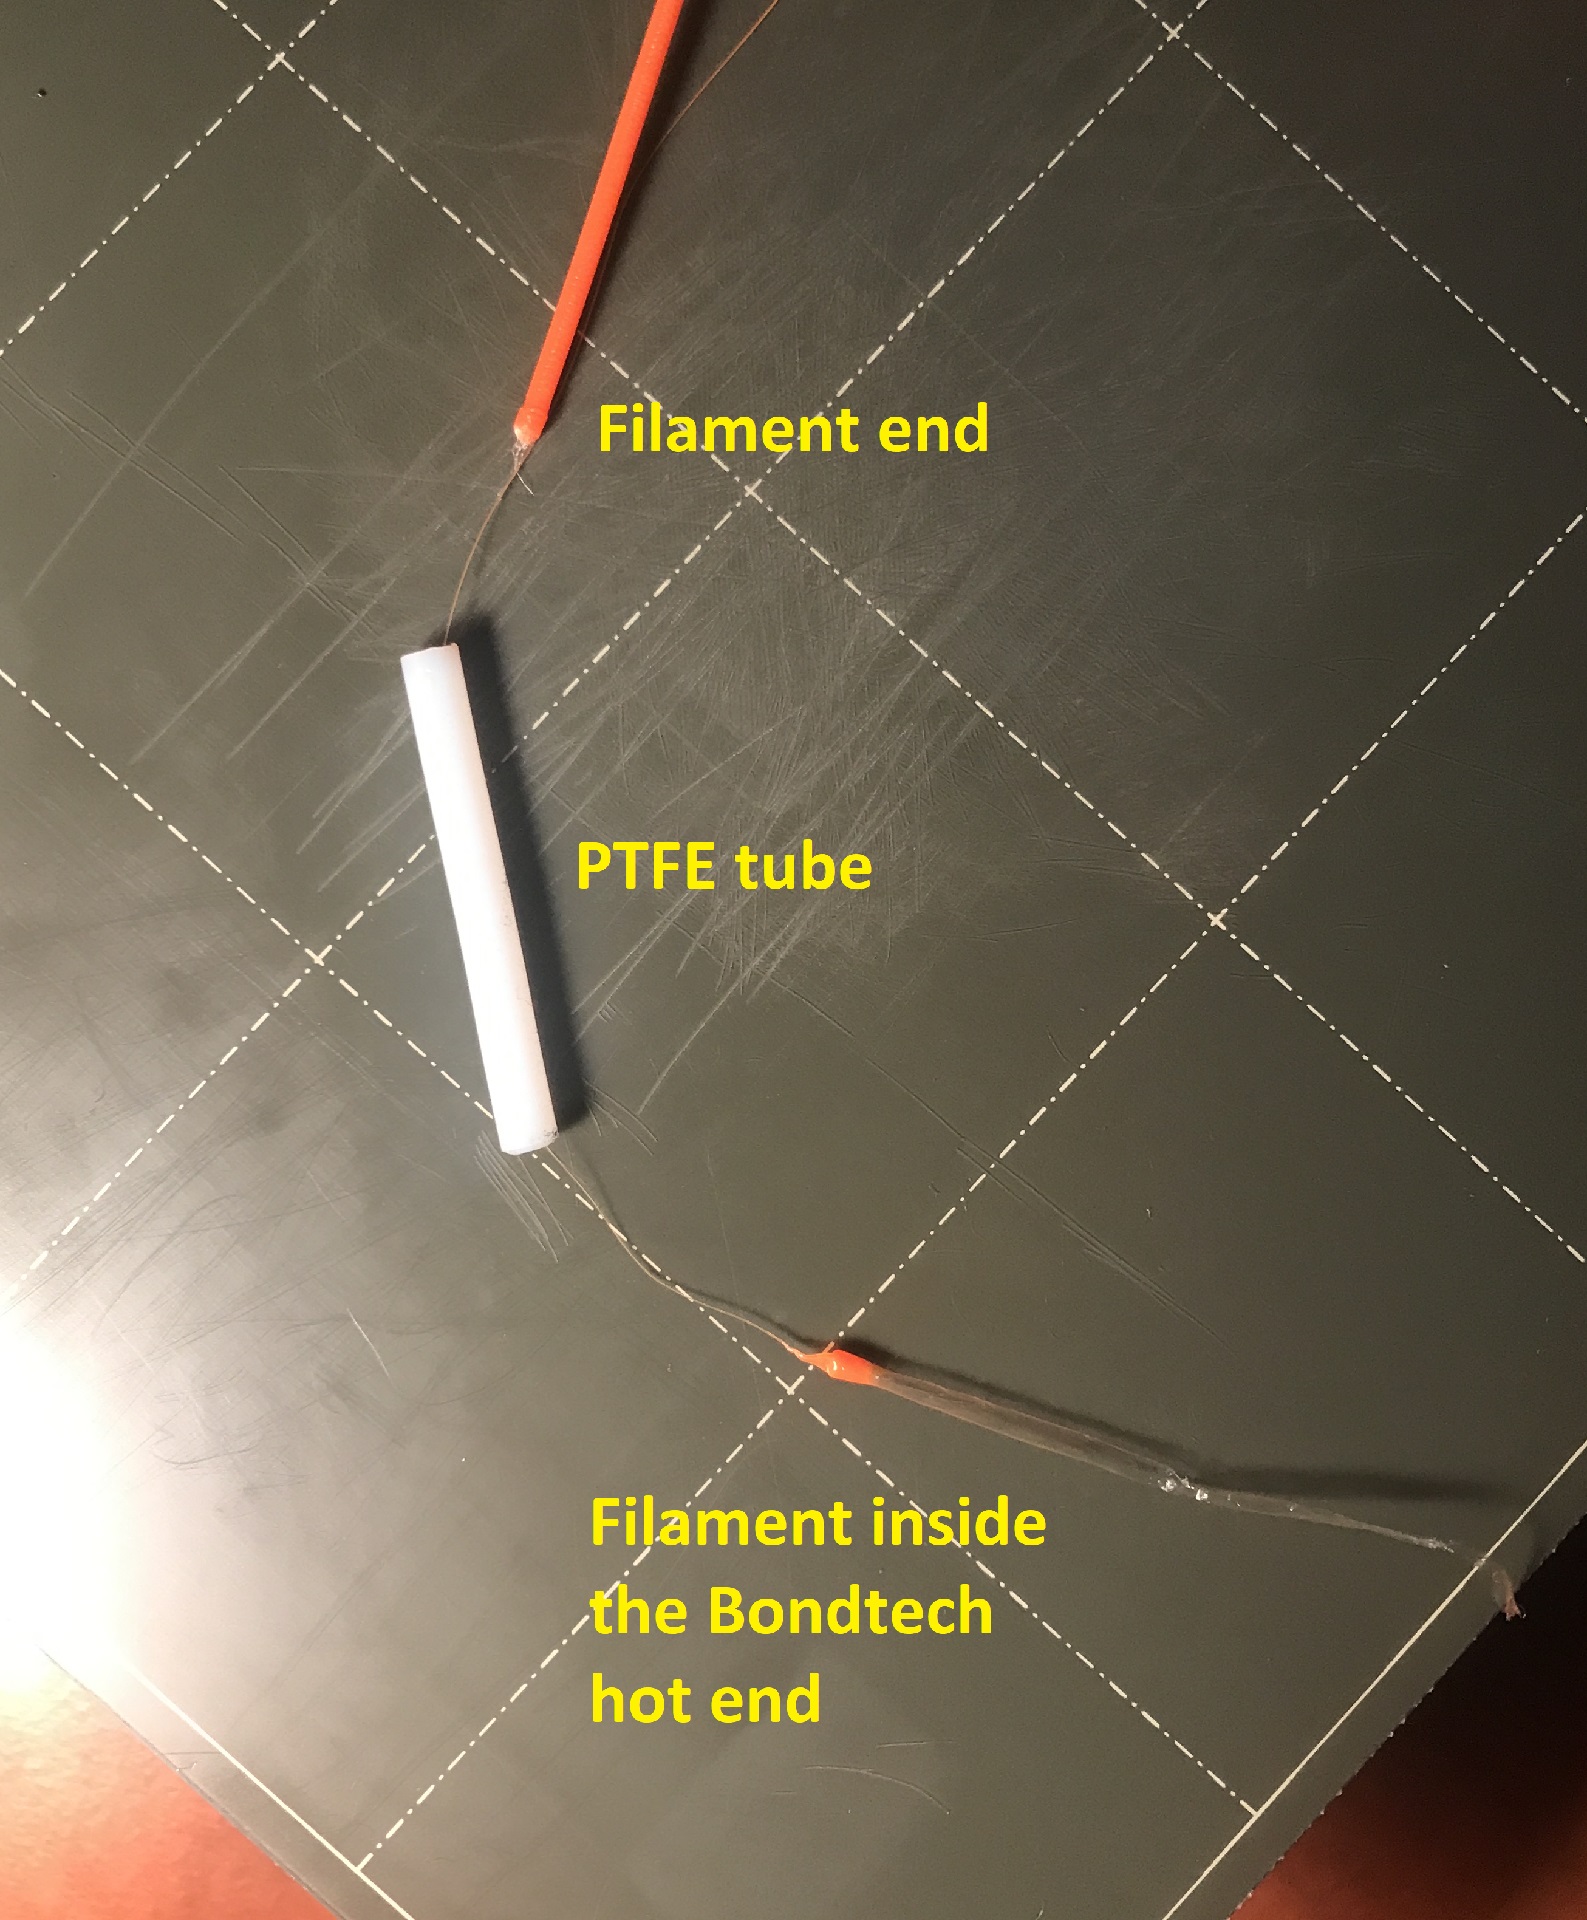
4. Nozzle end (there is a filament on it!):
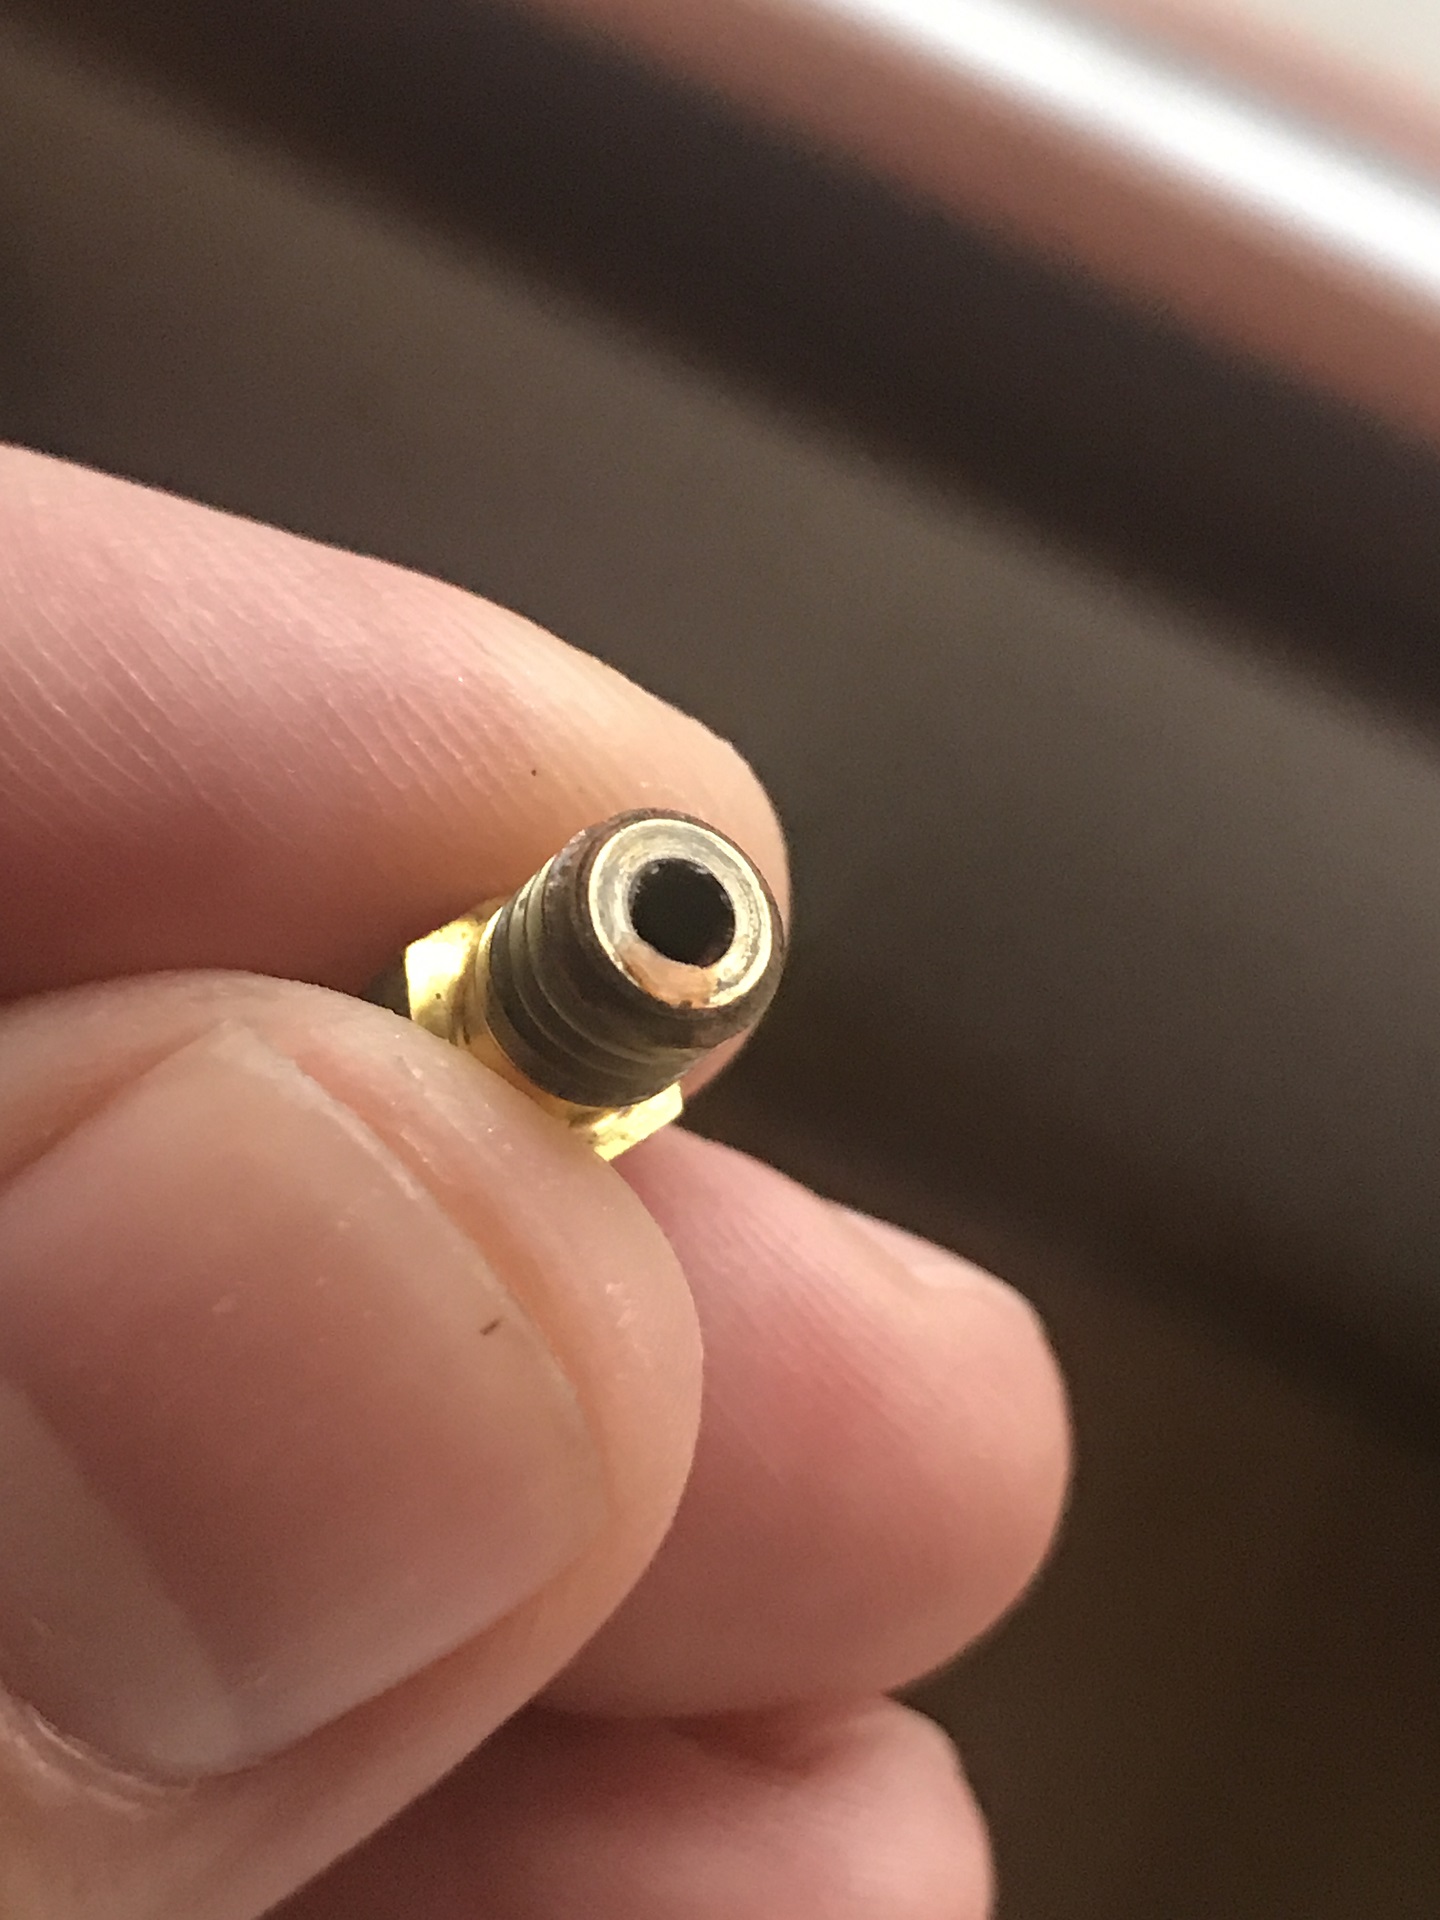
5. Bondtech hot end:
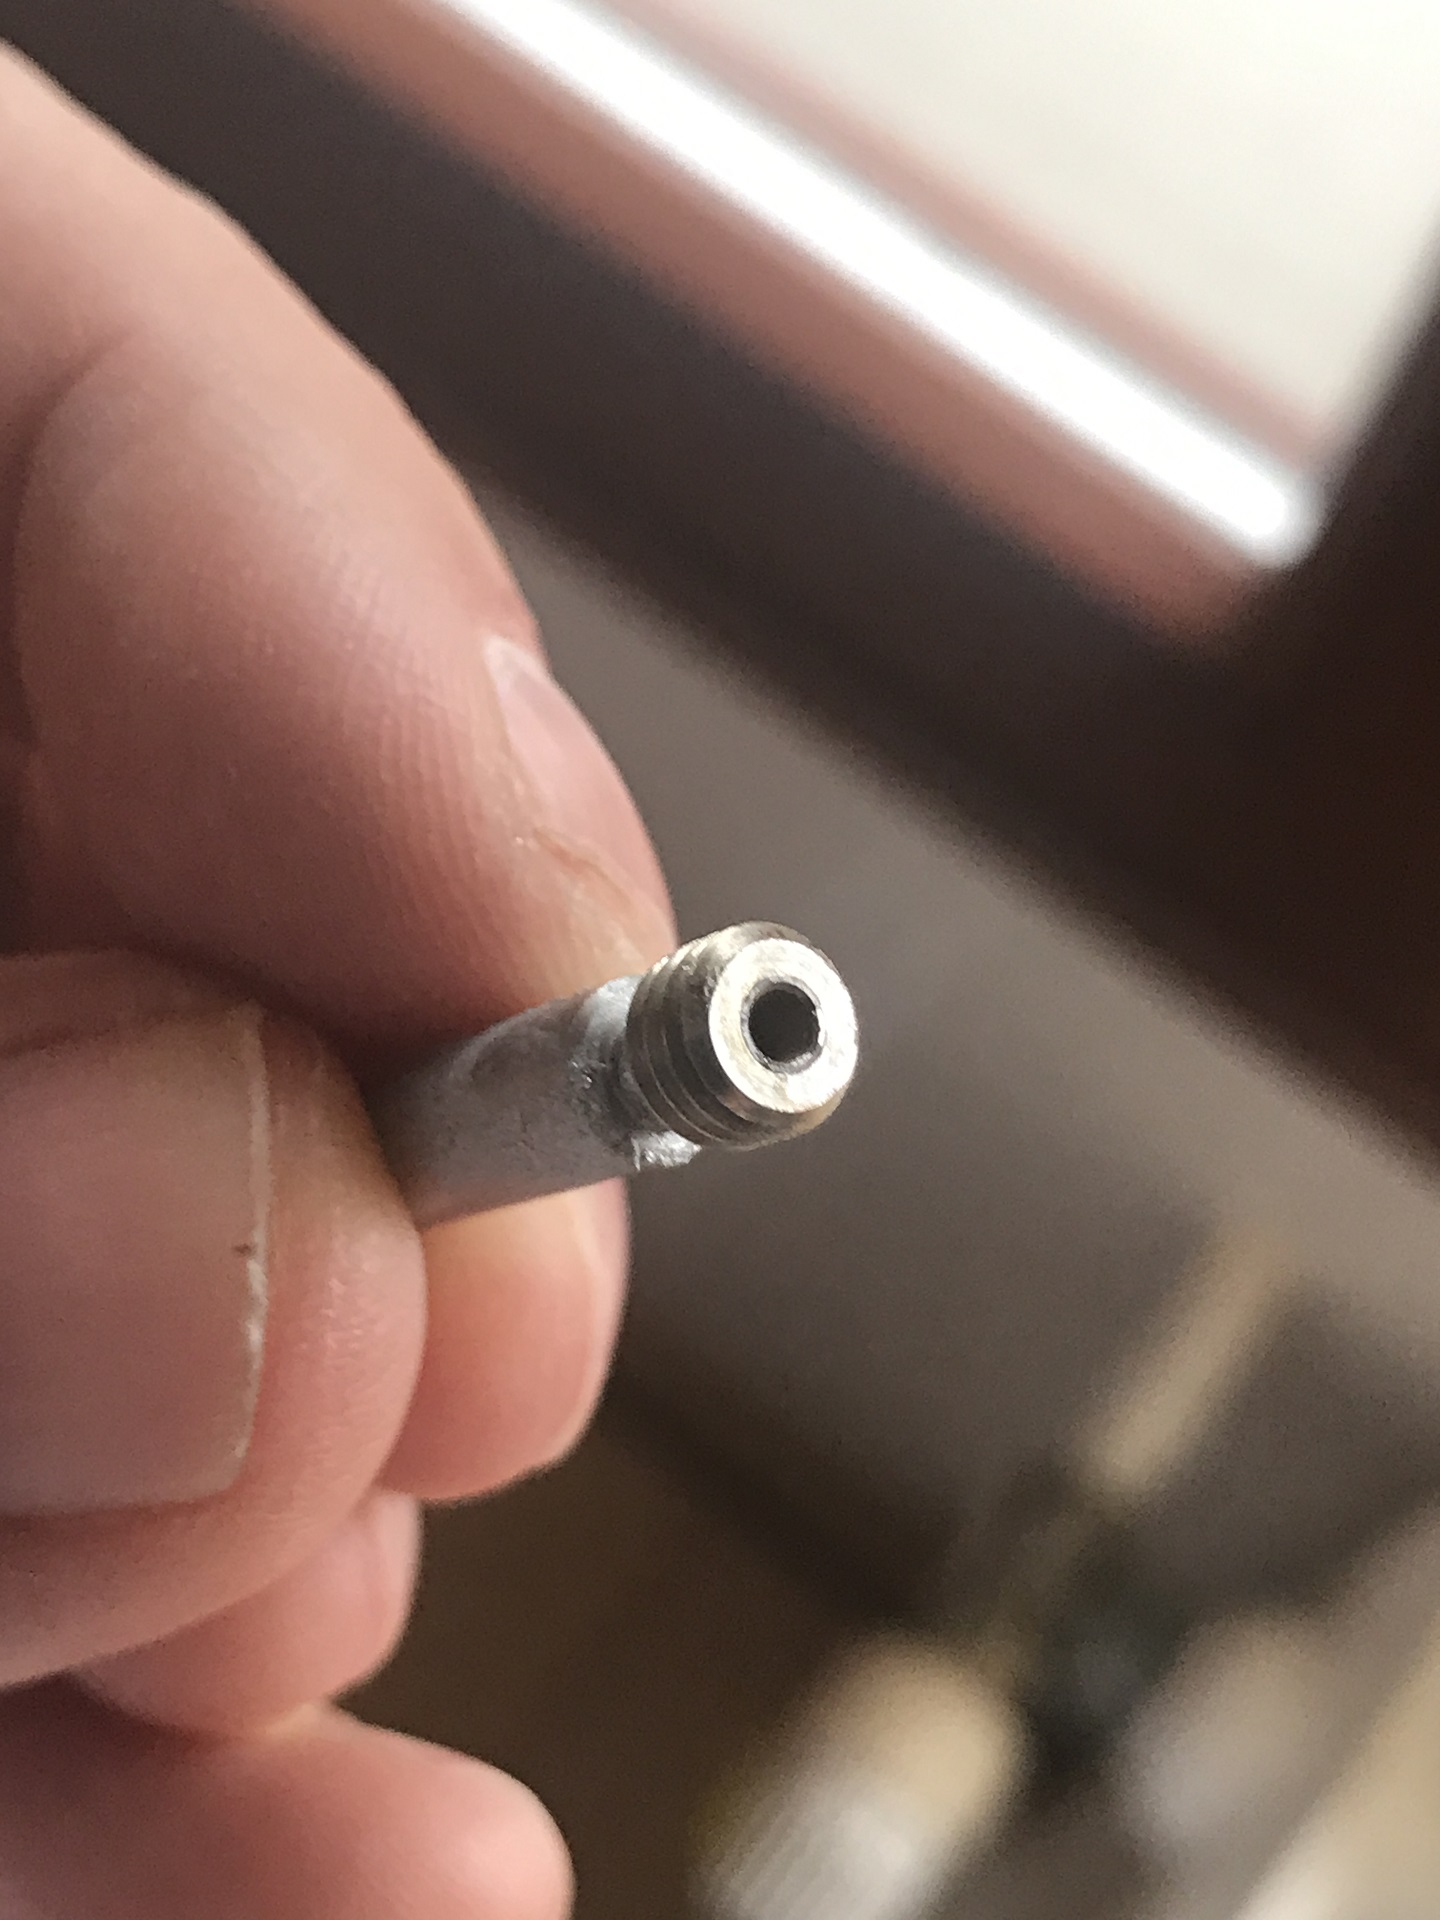
6. Prusa Mini hot end with slightly cone-shaped end that could help when tightening to the heat-break:
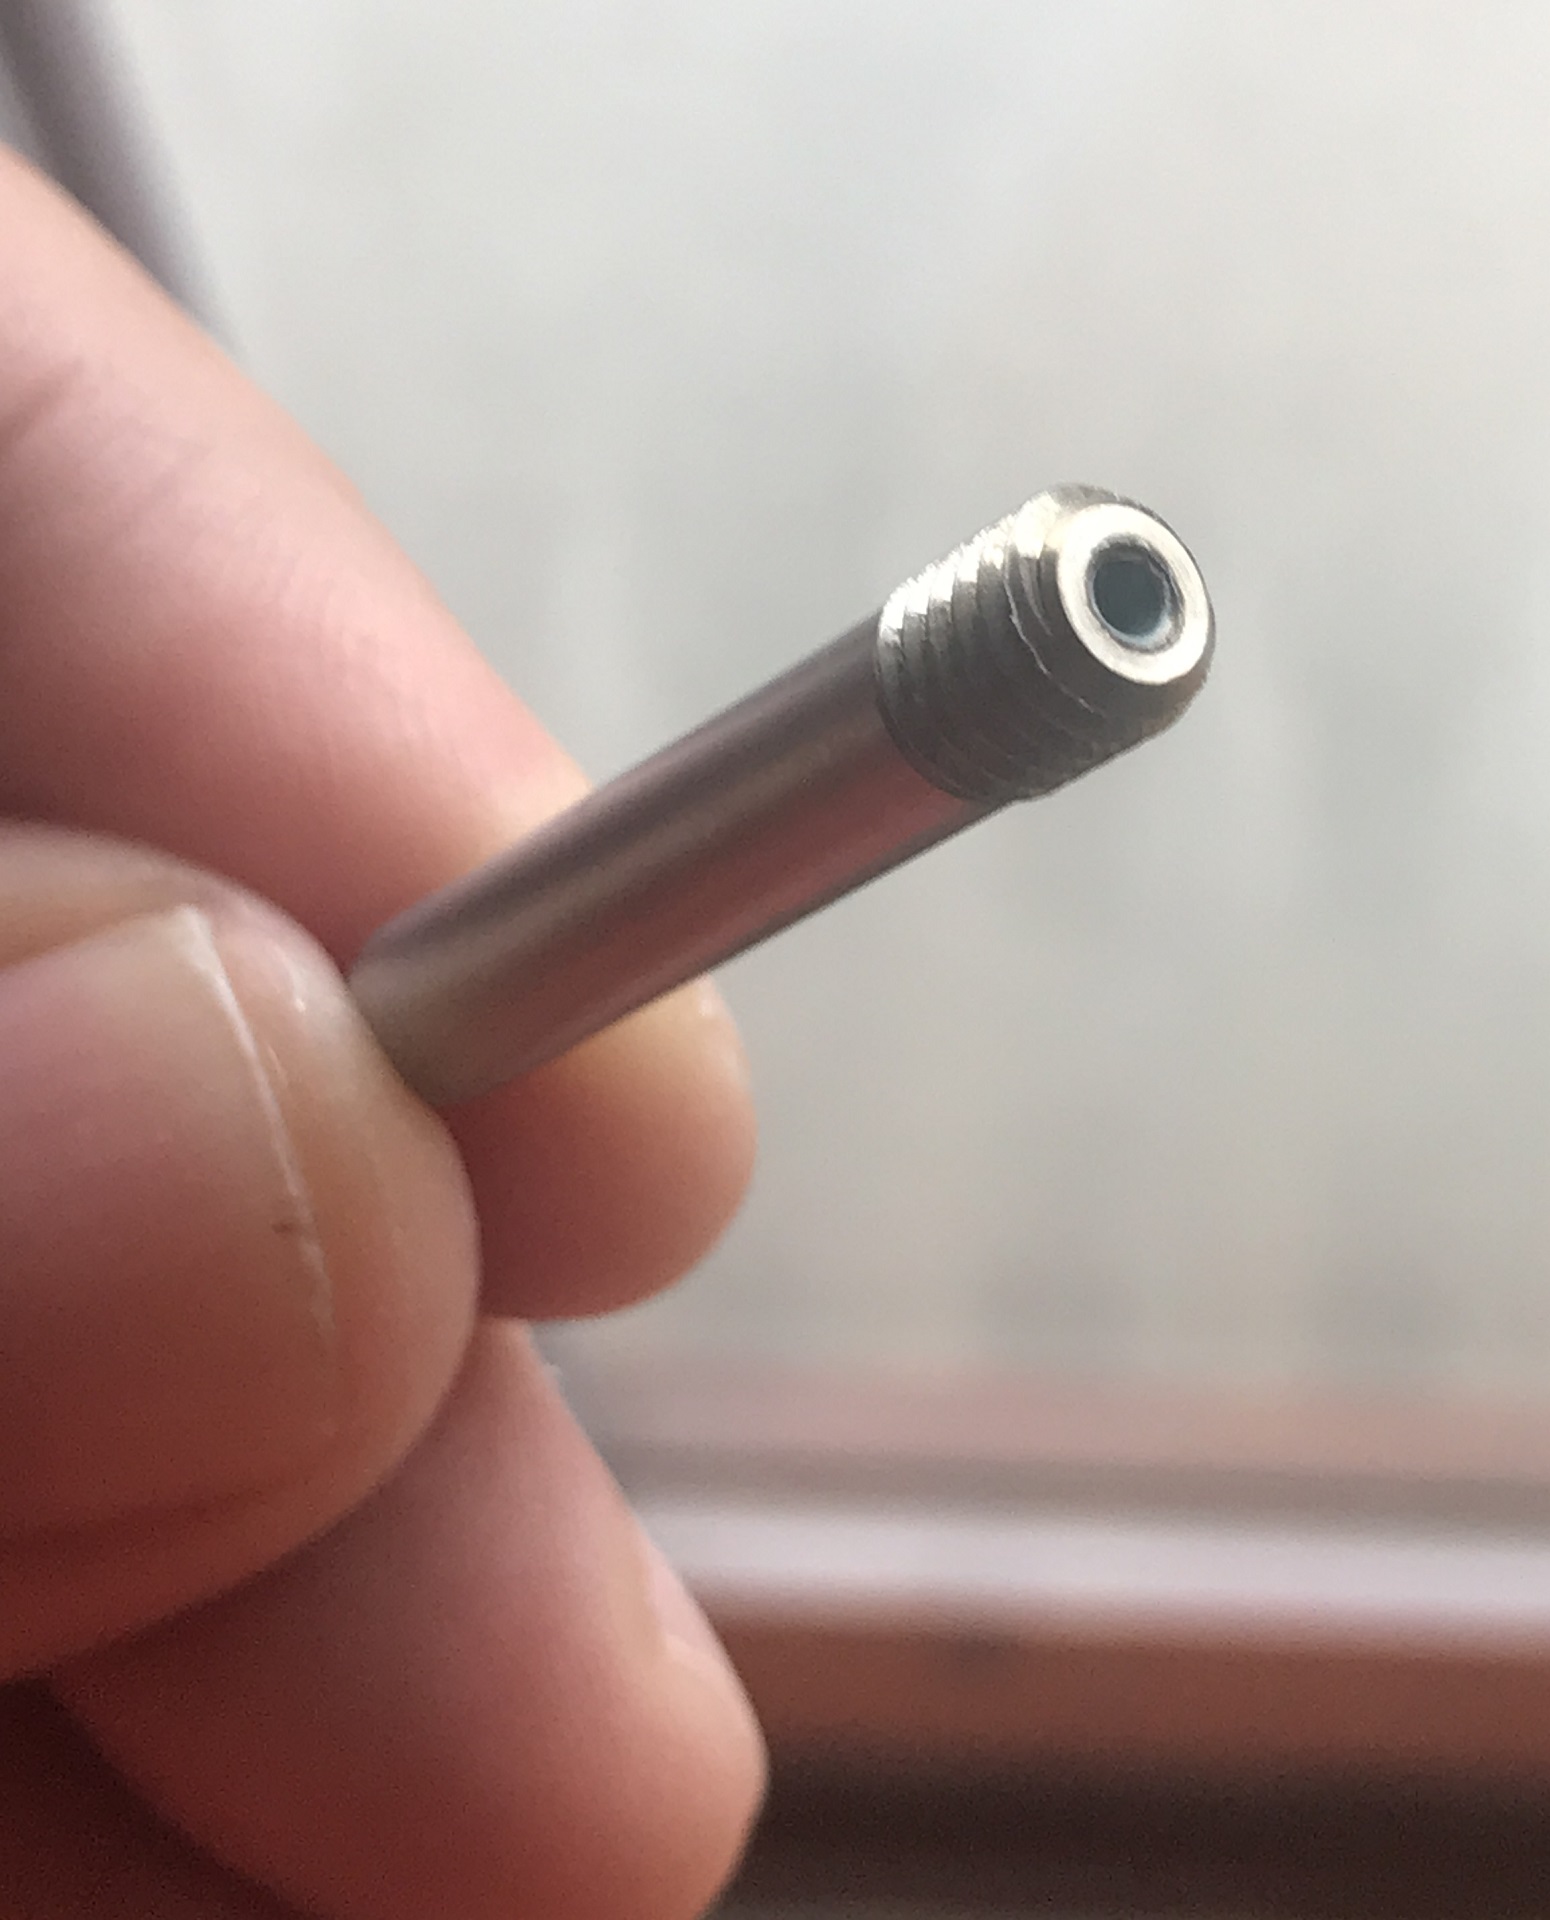
7. Calibration cube perfectly printed using Prusa Mini hot end:
As I see from the nozzle end (photo 4) there is a filament on it which means that there was a gap between the heat-break and the nozzle OR this filament dropped there when I unscrew the nozzle at 280C.
The gap could explain the issue - could it !?! Any other suggestions?
RE: How to set consistent printed layers
No - that can't explain the photos you posted above.
RE: How to set consistent printed layers
It looked like before the nozzle the filament was held or redirected into a container while the nozzle itself was dripping material drop by drop as seen on the pictures. At certain point of time the container/suction was then released by increased pressure causing the filament to overflow for some time. Raising the temperature over 225C most of the time prevented this to happen.
RE: How to set consistent printed layers
but as far as i read there are prusa suggestions to raise the temp on the mini for 10-20 degree above material normal.
as i a a noob i cannot see why this is, but there must be a physical or constructive reason why raising temp specialy on the mini helps with extrusion. maybe only prusa knows more?