how to select an infill open on top?
Hello,
I'm new here int his forum and perhaps someone has already asked/answered my questions. Bare with me when I dare to ask again. 😉
I want to print some coasters were the infill pattern is visible (no closed infill). see attached image.
I was looking in the setup to make the related selection but couldn't find it.
I hope someone can point me to the settings to accomplish this.
I'm using slicer Version 2.5.0+linux-x64-GTK3
Thanks in advance
Best Answer by Neophyl:
The search function here sucks. Its no use. What I do is use google search but with the "site:" limiter, for example 'site:forum.prusa3d.com buldge' as an example to find threads with buldge in them.
RE: how to select an infill open on top?
Your Picture has disappeared.
Joan
I try to make safe suggestions,You should understand the context and ensure you are happy that they are safe before attempting to apply my suggestions, what you do, is YOUR responsibility.Location Halifax UK
RE: how to select an infill open on top?
How about having a look at the Prusa Slicer knowledge base to pick up the basics. For example this section https://help.prusa3d.com/article/modifiers_1767
RE: how to select an infill open on top?
Can’t see your picture, but it sounds like you may want to select no solid top layers in the settings.
RE:
Neophyl: Thankfully, since I have your reply, I can take a look at it.
I would have probably seen it before if the search feature of this board would produce better results.
jseyfert3: here is the sample.

RE: how to select an infill open on top?
The search function here sucks. Its no use. What I do is use google search but with the "site:" limiter, for example 'site:forum.prusa3d.com buldge' as an example to find threads with buldge in them.
RE: how to select an infill open on top?
Neophyl: Thankfully, since I have your reply, I can take a look at it.
I would have probably seen it before if the search feature of this board would produce better results.
jseyfert3: here is the sample.
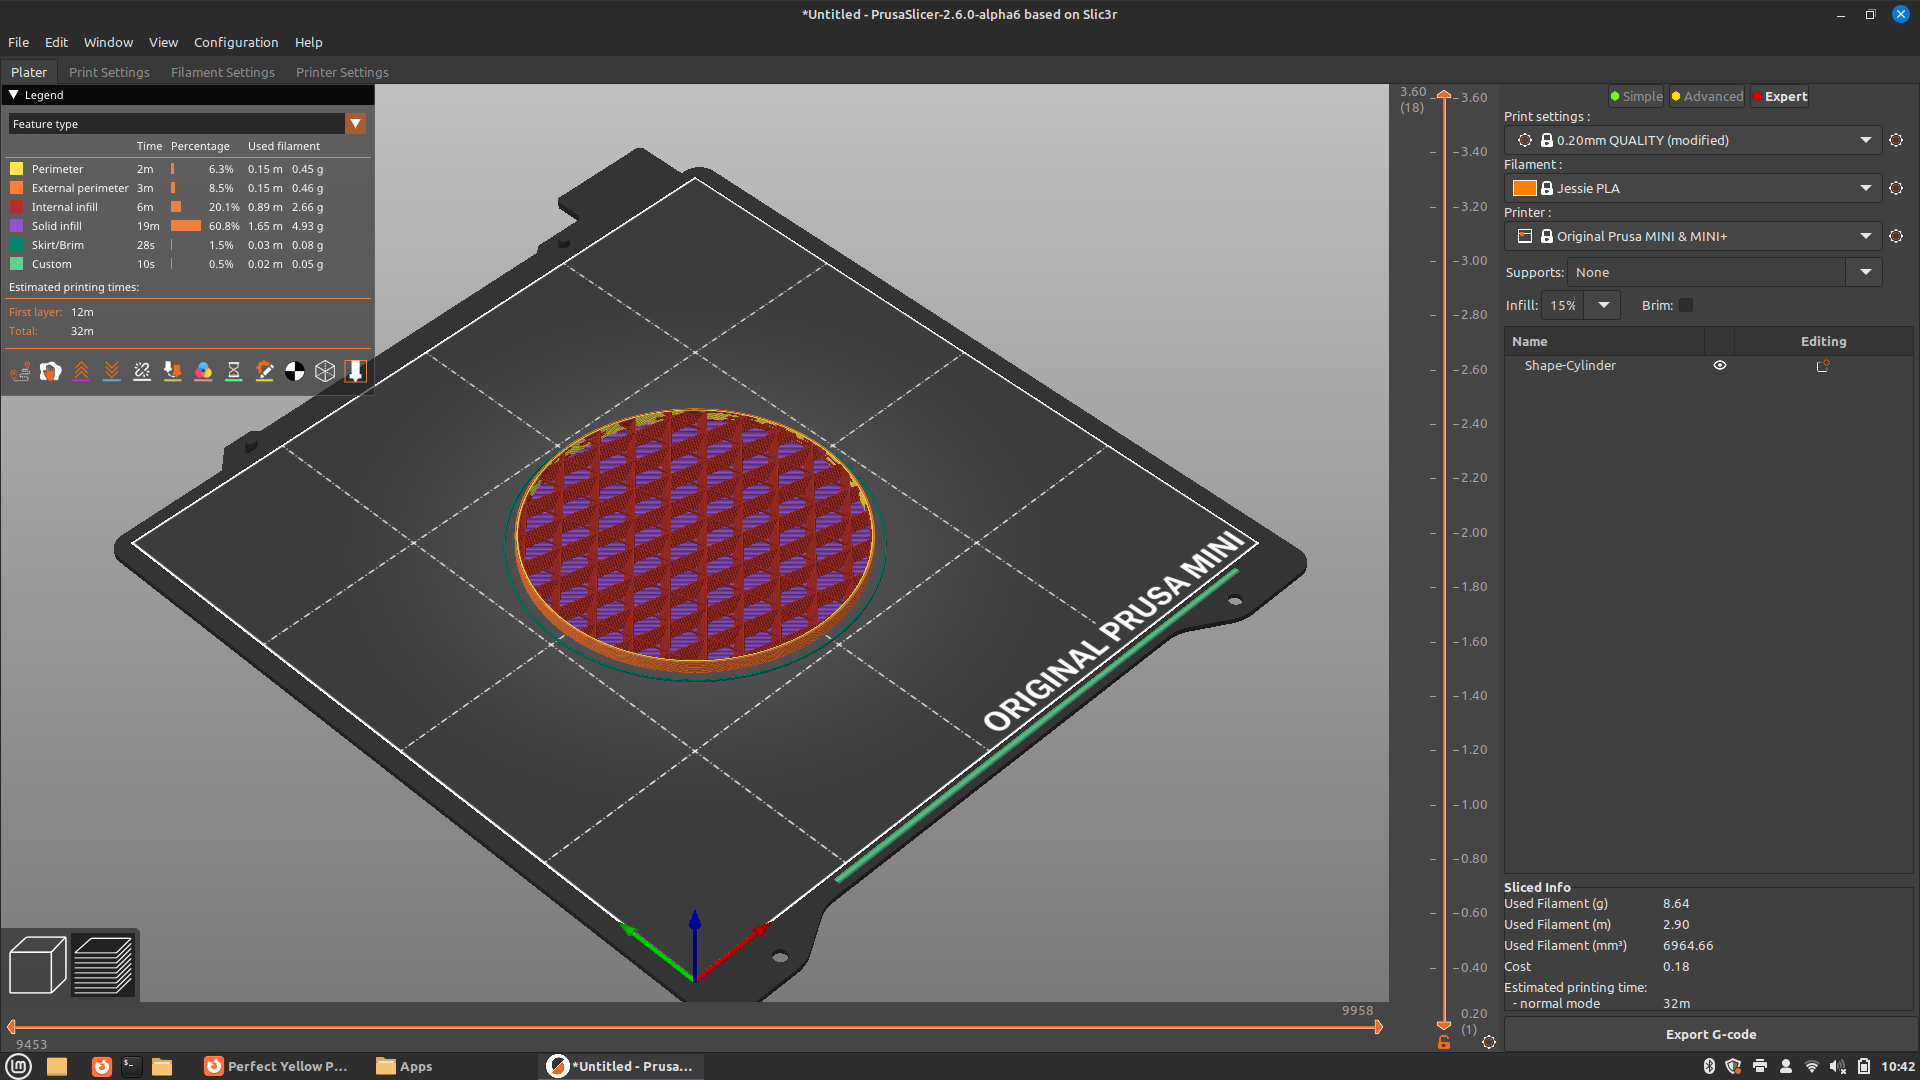
Yeah, I think you want no top layers. Print Settings > Layers and perimeters > Horizontal shells > Solid Layers and set Top to 0. If I just insert a cylinder in PrusaSlicer, scale it to roughly coaster dimensions, change infill to cubic and 0 top solid layers I get this when sliced:
Now if you want the edges to have some distance they have a "top", then you'd have to play with modifier meshes, as mentioned, which I haven't personally done yet.
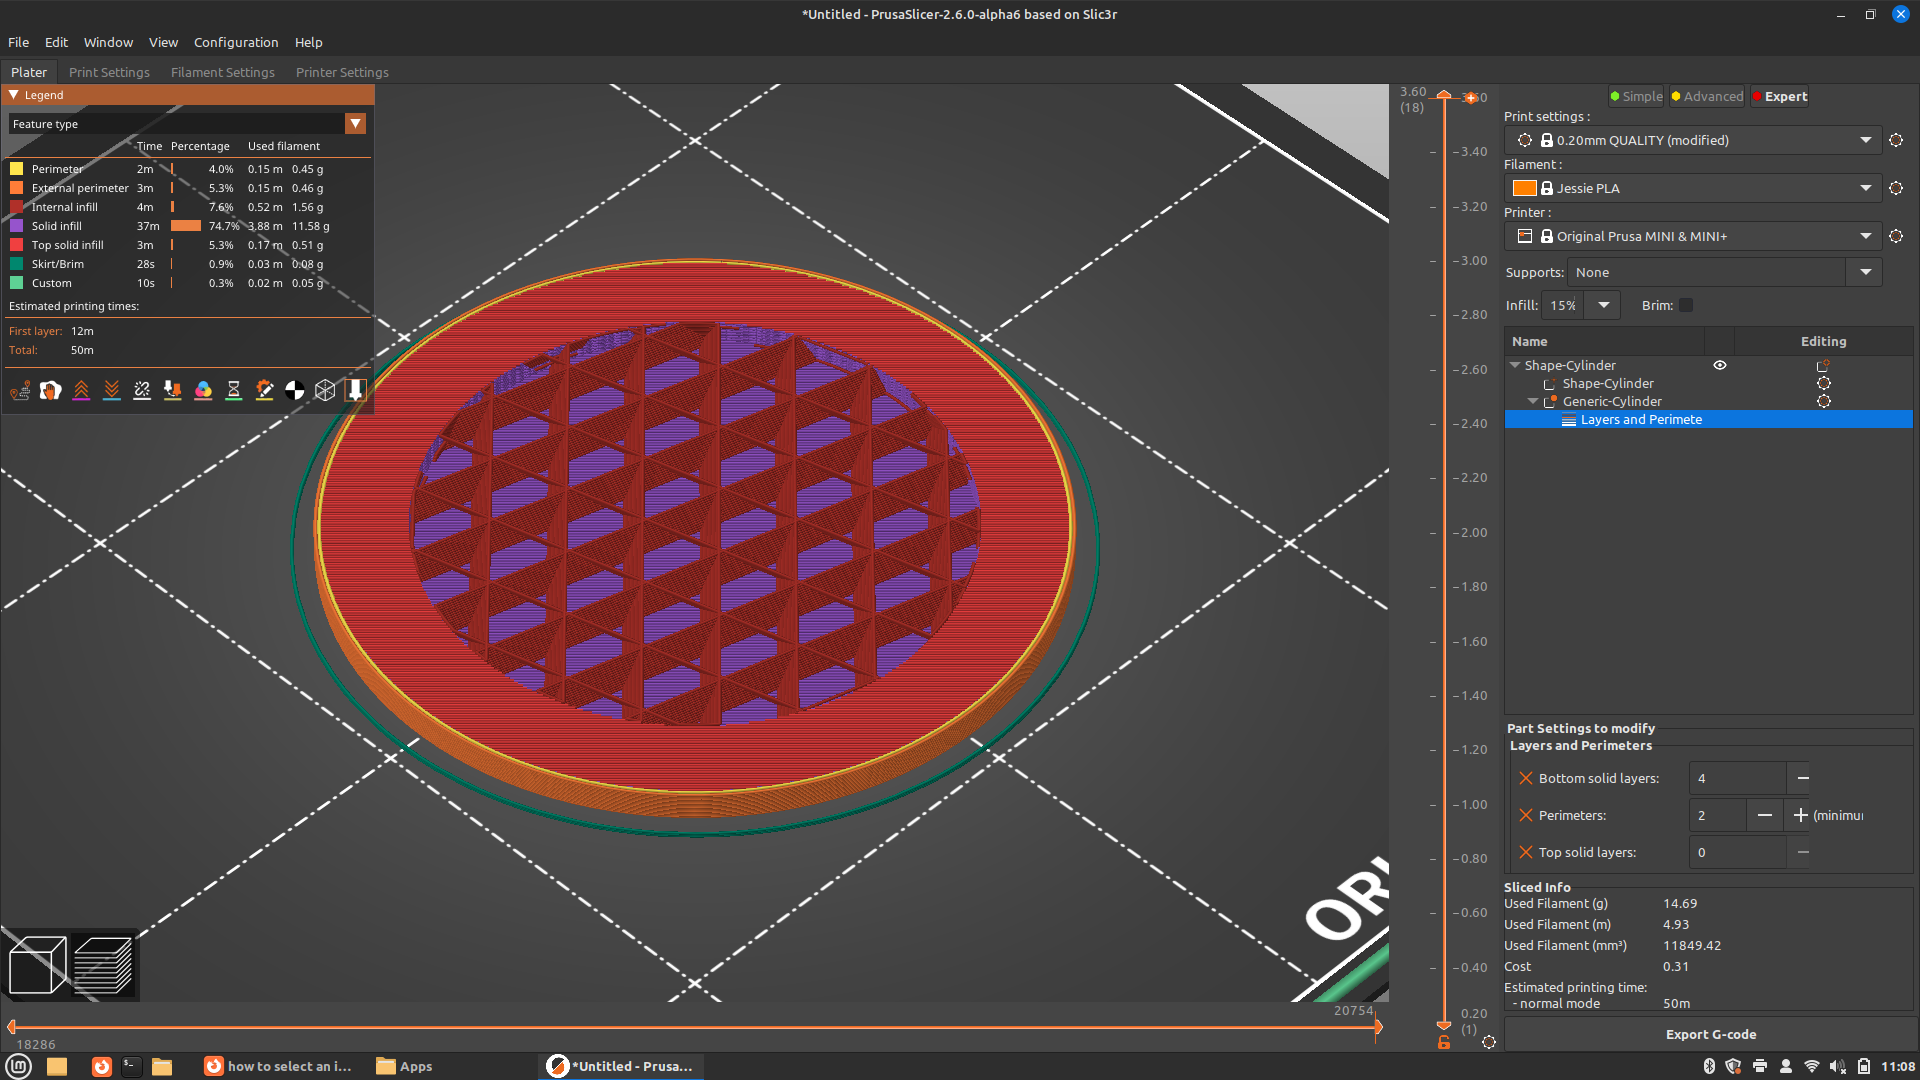
After writing that, but before posting, I quickly looked at the above link. All you have to do is right click on part and click Add modifier > (shape/file). I added another cylinder, scaled that cylinder, right clicked on that cylinder and selected Layers and Perimeters. This added a Layers and Perimeters option on the right hand side, in the parts list. I clicked that and on the right hand side, lower section set top layers to 0. Then went back and set the main print settings to the normal 6 top layers. And we get this:

However that would look a bit ugly because even though the infill in the inner circle goes to the same height as the top flat layer, when it drops the bridging infill layer for the top layers on the outside, that bridges to the next infill section, so you can see this infill sticking out (blue in Slicer).
But then I fixed that because I noted this model was 18 layers high, so I went back and changed the default print settings to 14 solid top layers, with 4 solid bottom layers, so now the ring is solid all the way down with no infill, so the slicer doesn't need bridging infill, and so we get a solid ring with exposed infill right up to the top, like so:
This has been a learning experience for me, and hopefully it helps you figure out what you have available to play around with to get the effect you're looking for. Good luck, and update us with the final result!
RE: how to select an infill open on top?
Thanks for the detailed walk-through. Very educational. Something I have to tinker with. 😀
Neophyl: Thankfully, since I have your reply, I can take a look at it.
I would have probably seen it before if the search feature of this board would produce better results.
jseyfert3: here is the sample.
Yeah, I think you want no top layers. Print Settings > Layers and perimeters > Horizontal shells > Solid Layers and set Top to 0. If I just insert a cylinder in PrusaSlicer, scale it to roughly coaster dimensions, change infill to cubic and 0 top solid layers I get this when sliced:
Now if you want the edges to have some distance they have a "top", then you'd have to play with modifier meshes, as mentioned, which I haven't personally done yet.
After writing that, but before posting, I quickly looked at the above link. All you have to do is right click on part and click Add modifier > (shape/file). I added another cylinder, scaled that cylinder, right clicked on that cylinder and selected Layers and Perimeters. This added a Layers and Perimeters option on the right hand side, in the parts list. I clicked that and on the right hand side, lower section set top layers to 0. Then went back and set the main print settings to the normal 6 top layers. And we get this:
However that would look a bit ugly because even though the infill in the inner circle goes to the same height as the top flat layer, when it drops the bridging infill layer for the top layers on the outside, that bridges to the next infill section, so you can see this infill sticking out (blue in Slicer).
But then I fixed that because I noted this model was 18 layers high, so I went back and changed the default print settings to 14 solid top layers, with 4 solid bottom layers, so now the ring is solid all the way down with no infill, so the slicer doesn't need bridging infill, and so we get a solid ring with exposed infill right up to the top, like so:
This has been a learning experience for me, and hopefully it helps you figure out what you have available to play around with to get the effect you're looking for. Good luck, and update us with the final result!