Help! I do not understand
 Hi
Hi
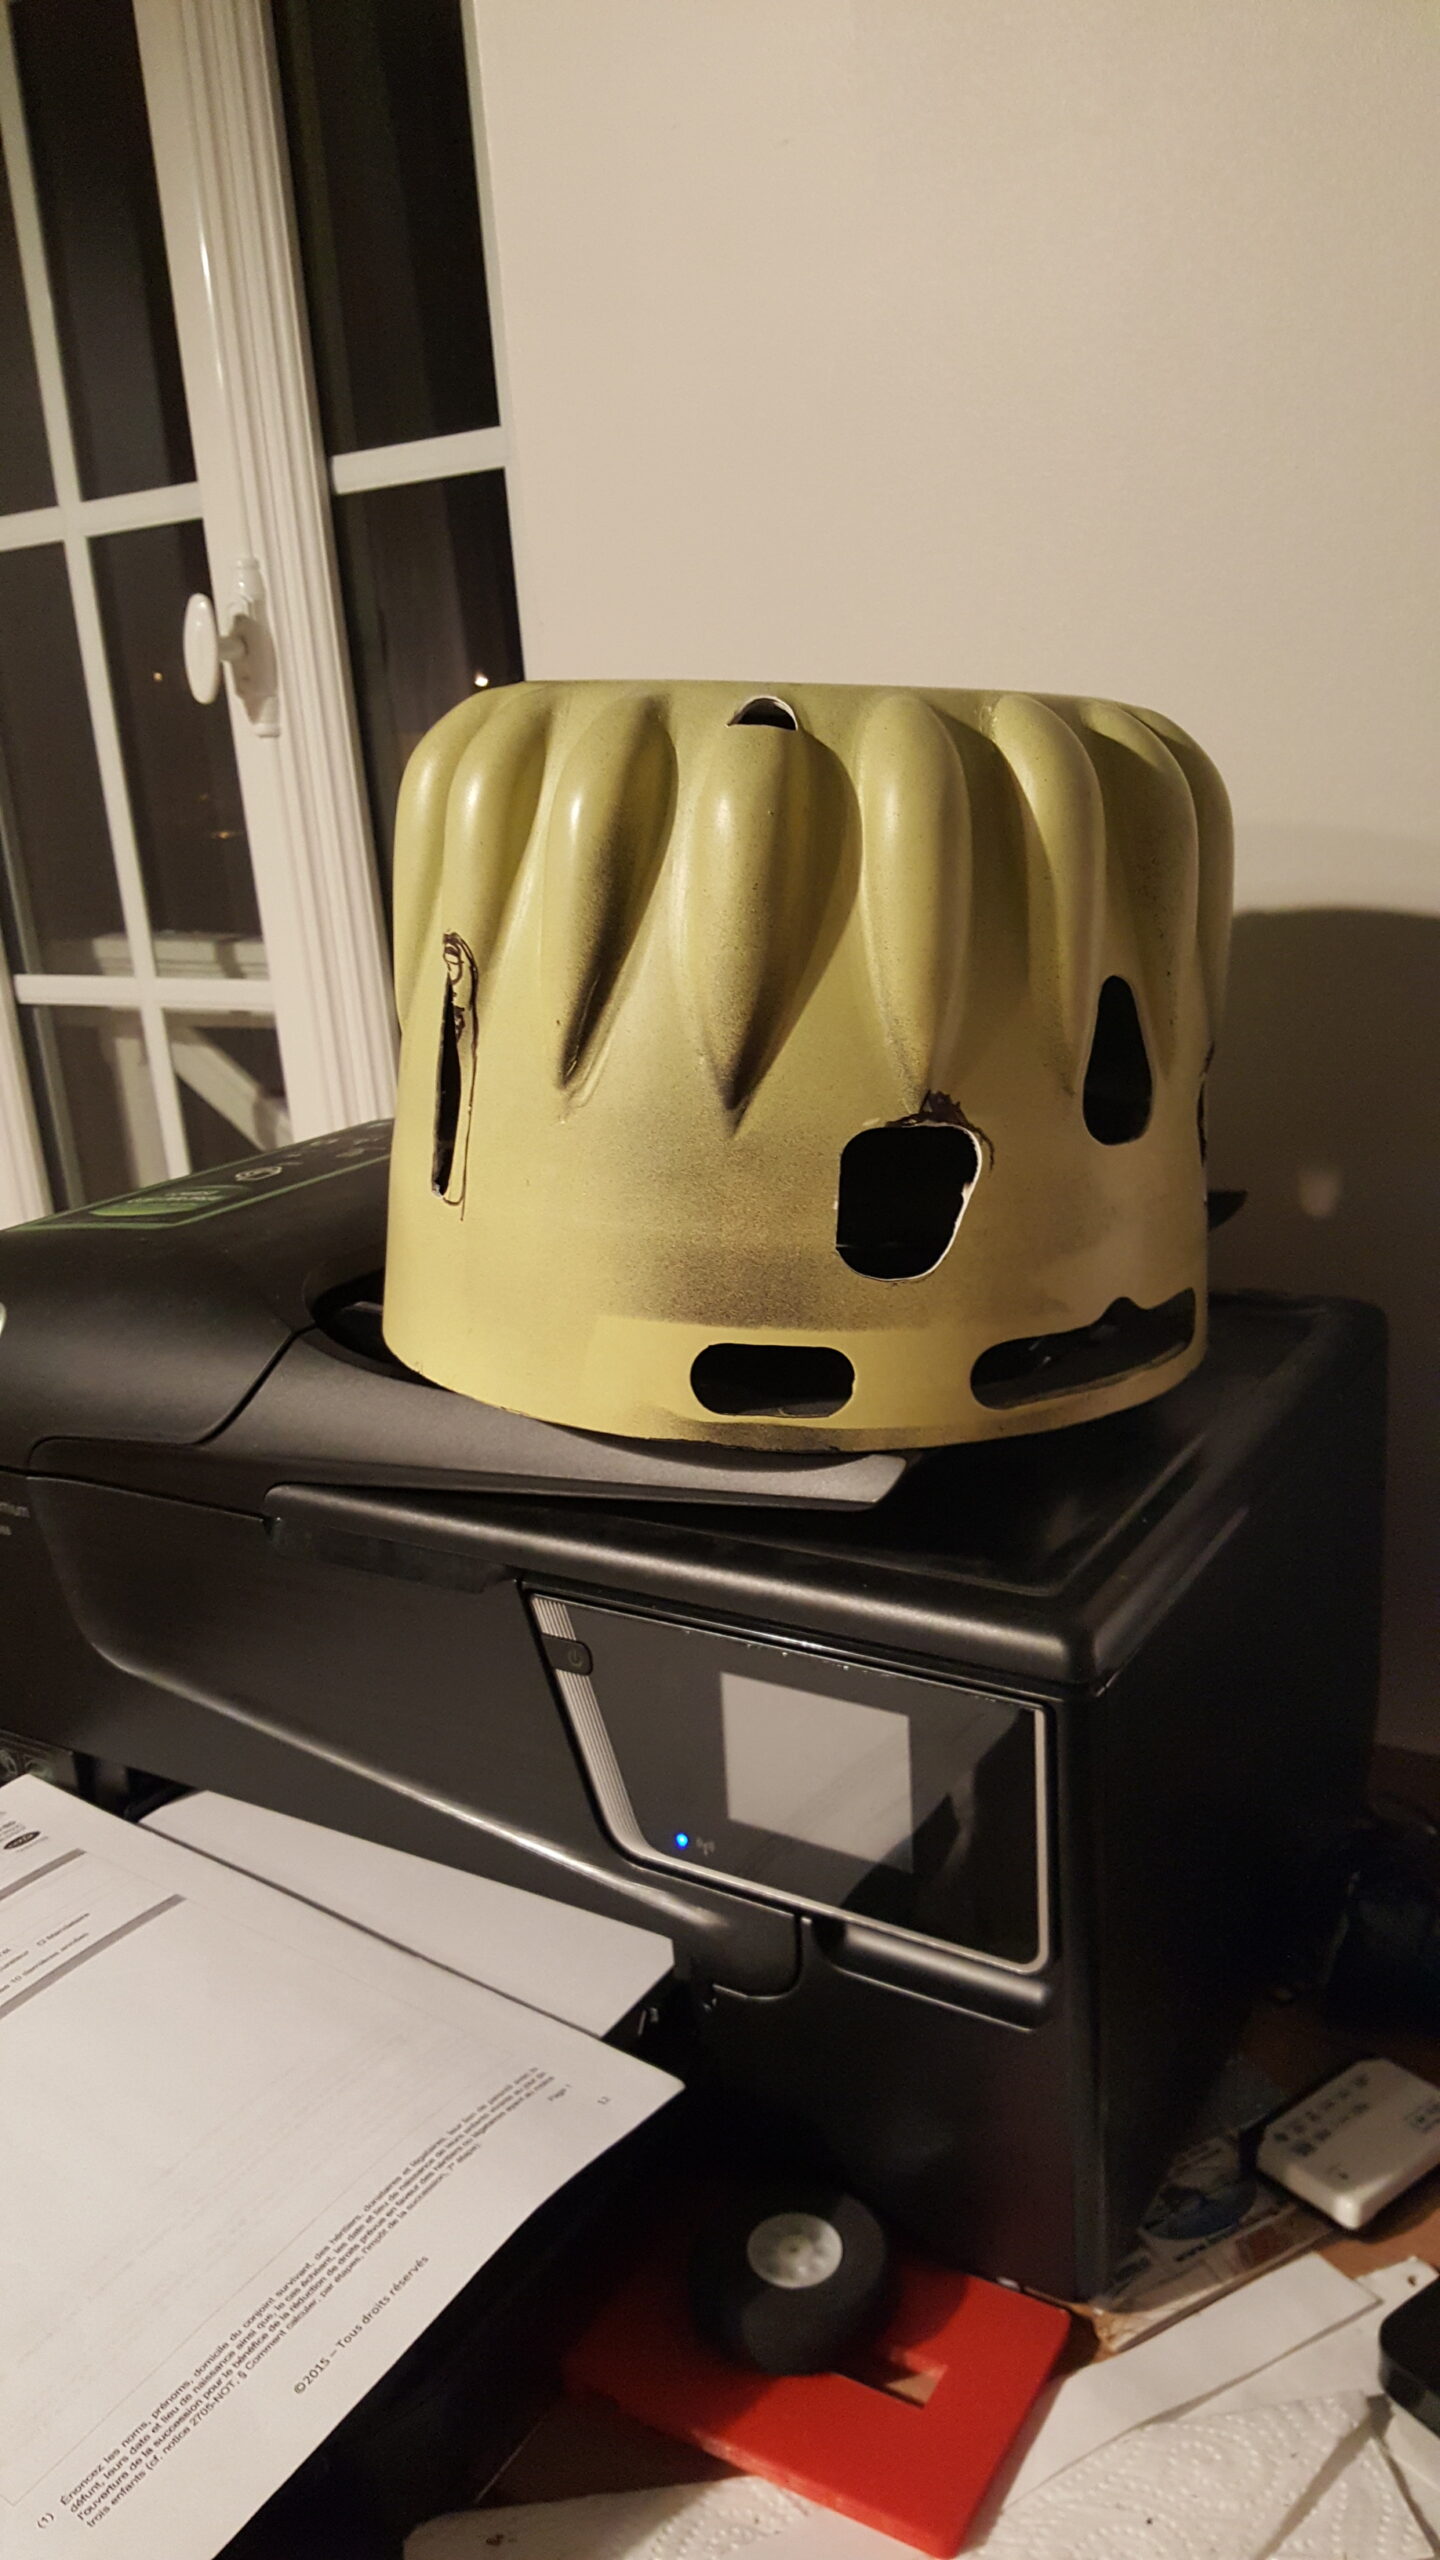
I try to design a cowl for a RC plane: a stinson reliant (2.5 m wingspan).
Here is what it looks like ( if I find how to insert a picture... of course 😉
RE: Help! I do not understand
Impossible to load my second picture....🤔
RE: Help! I do not understand
OK It works better with the PC
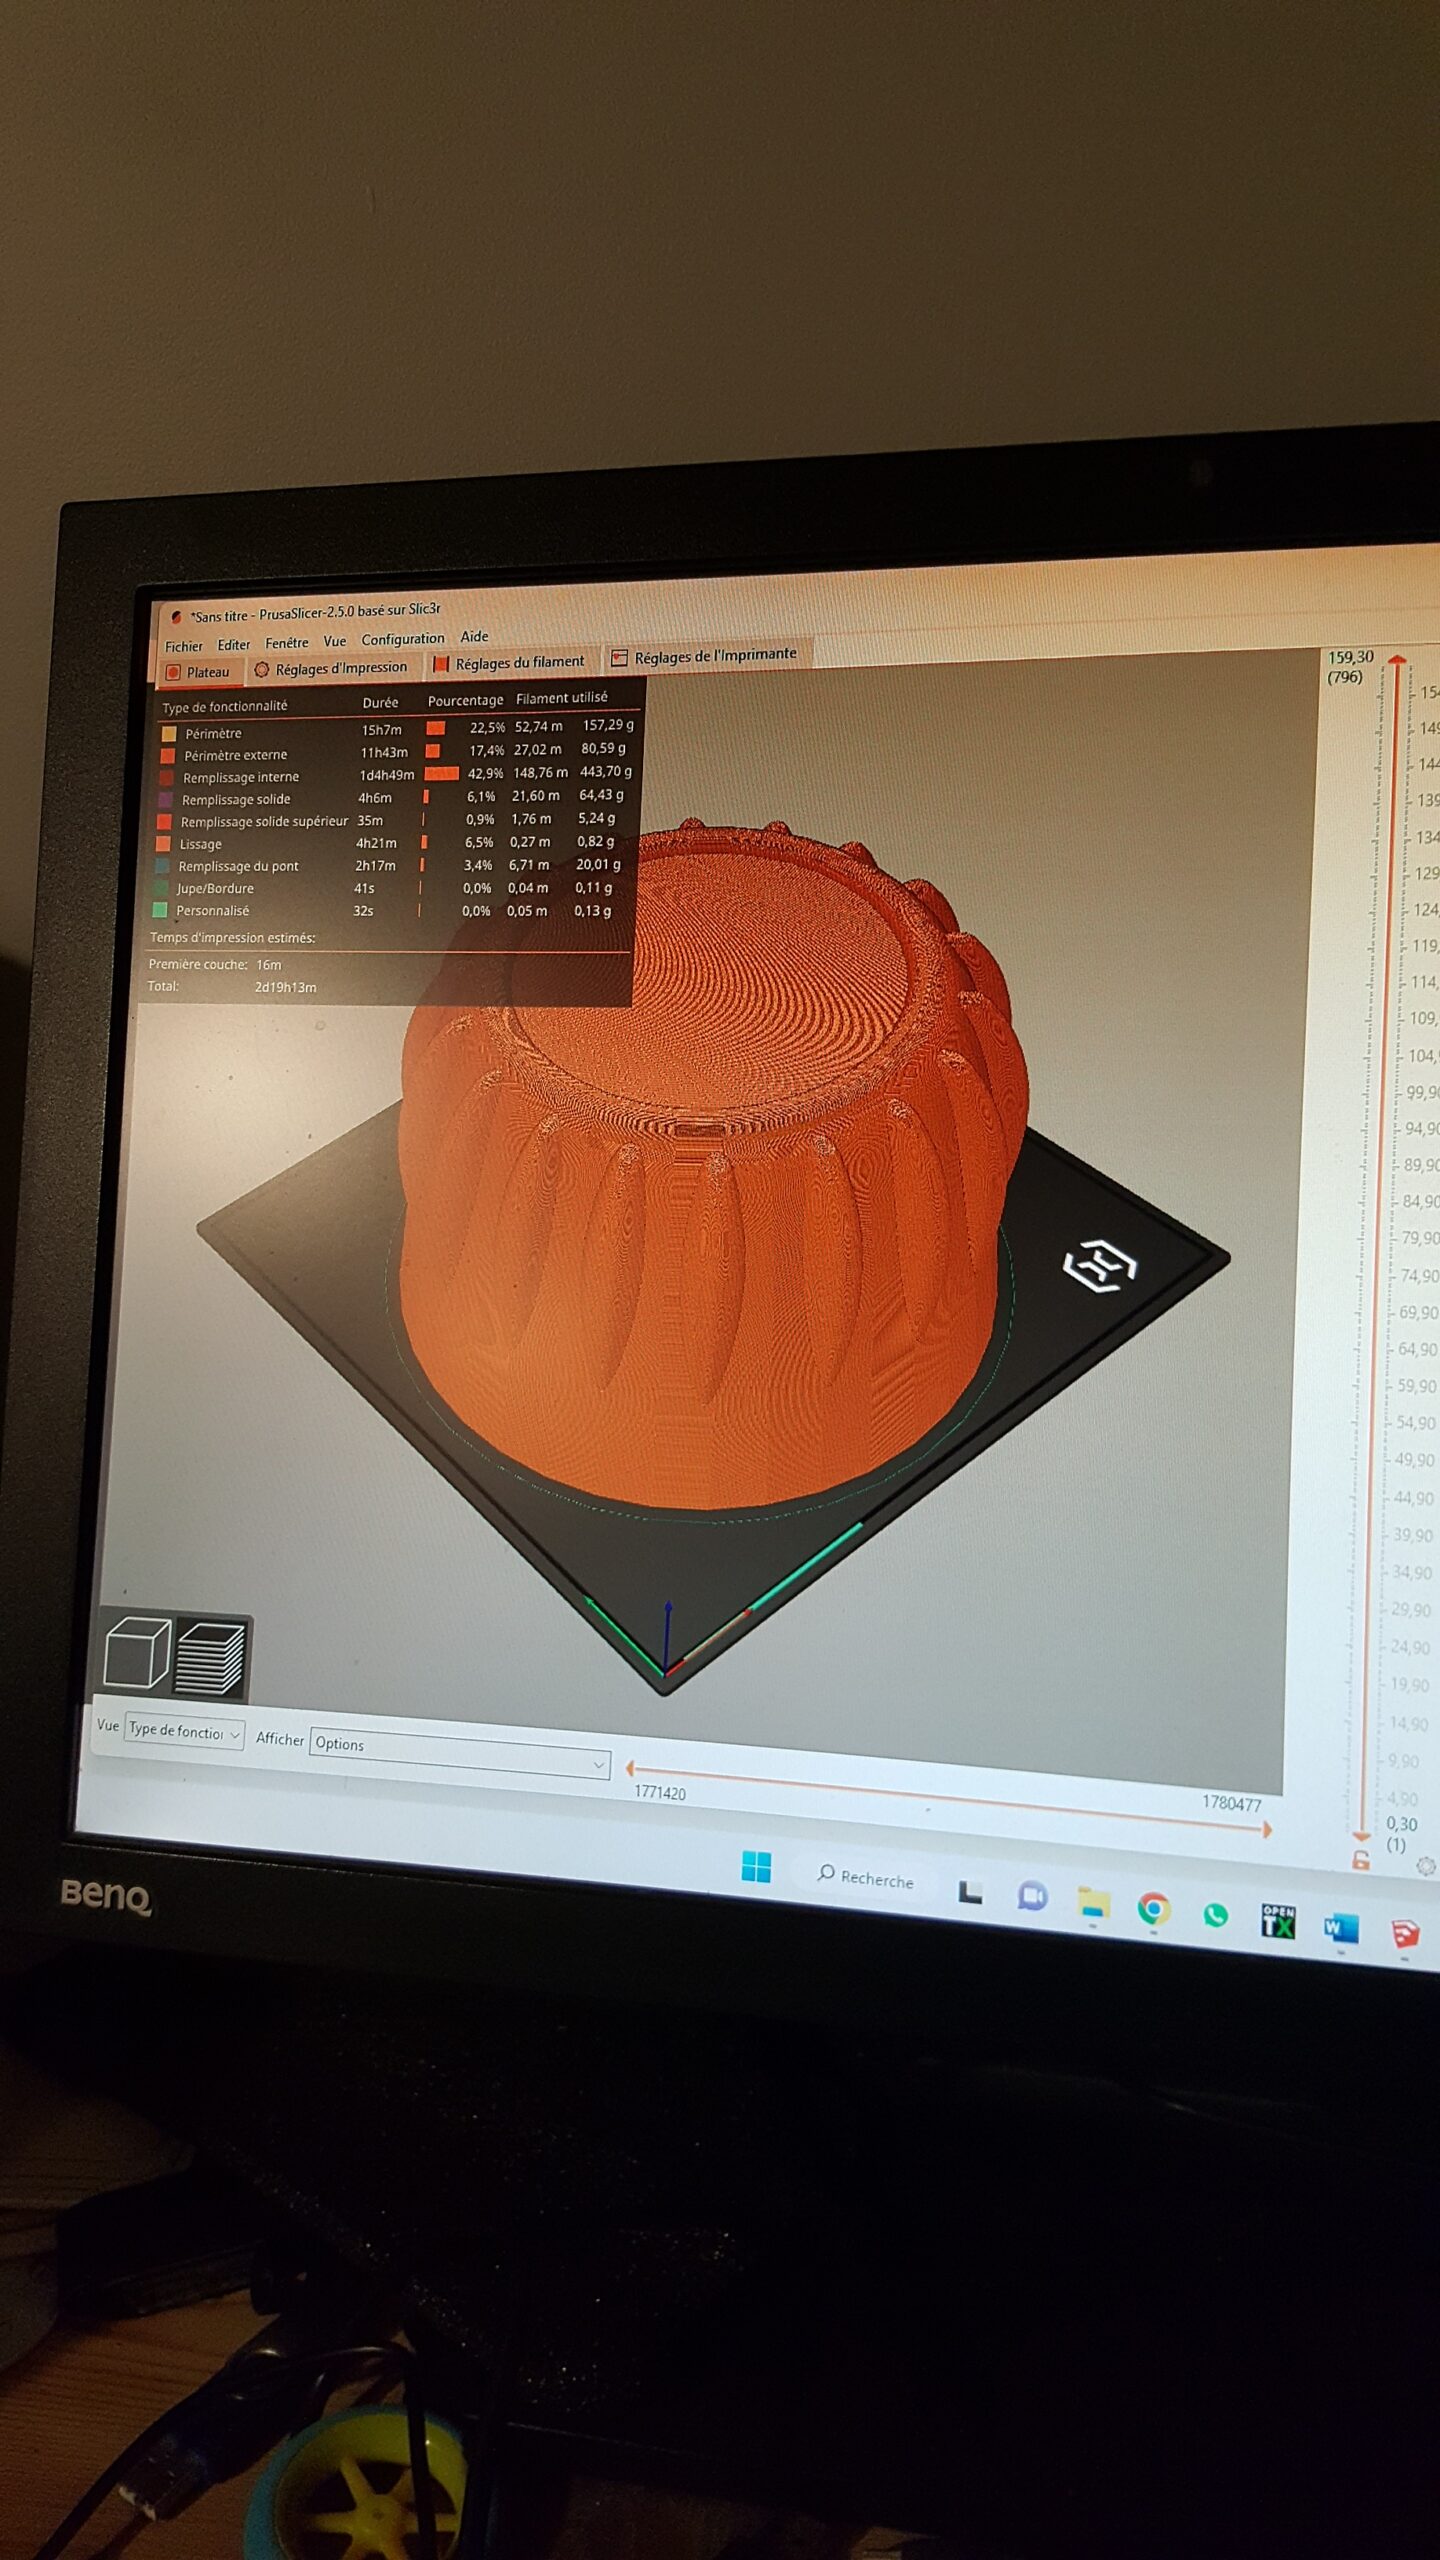
So I can open my cowl under prusa slicer and everything looks ok. Buet....when I slice It is another matter

RE: Help! I do not understand
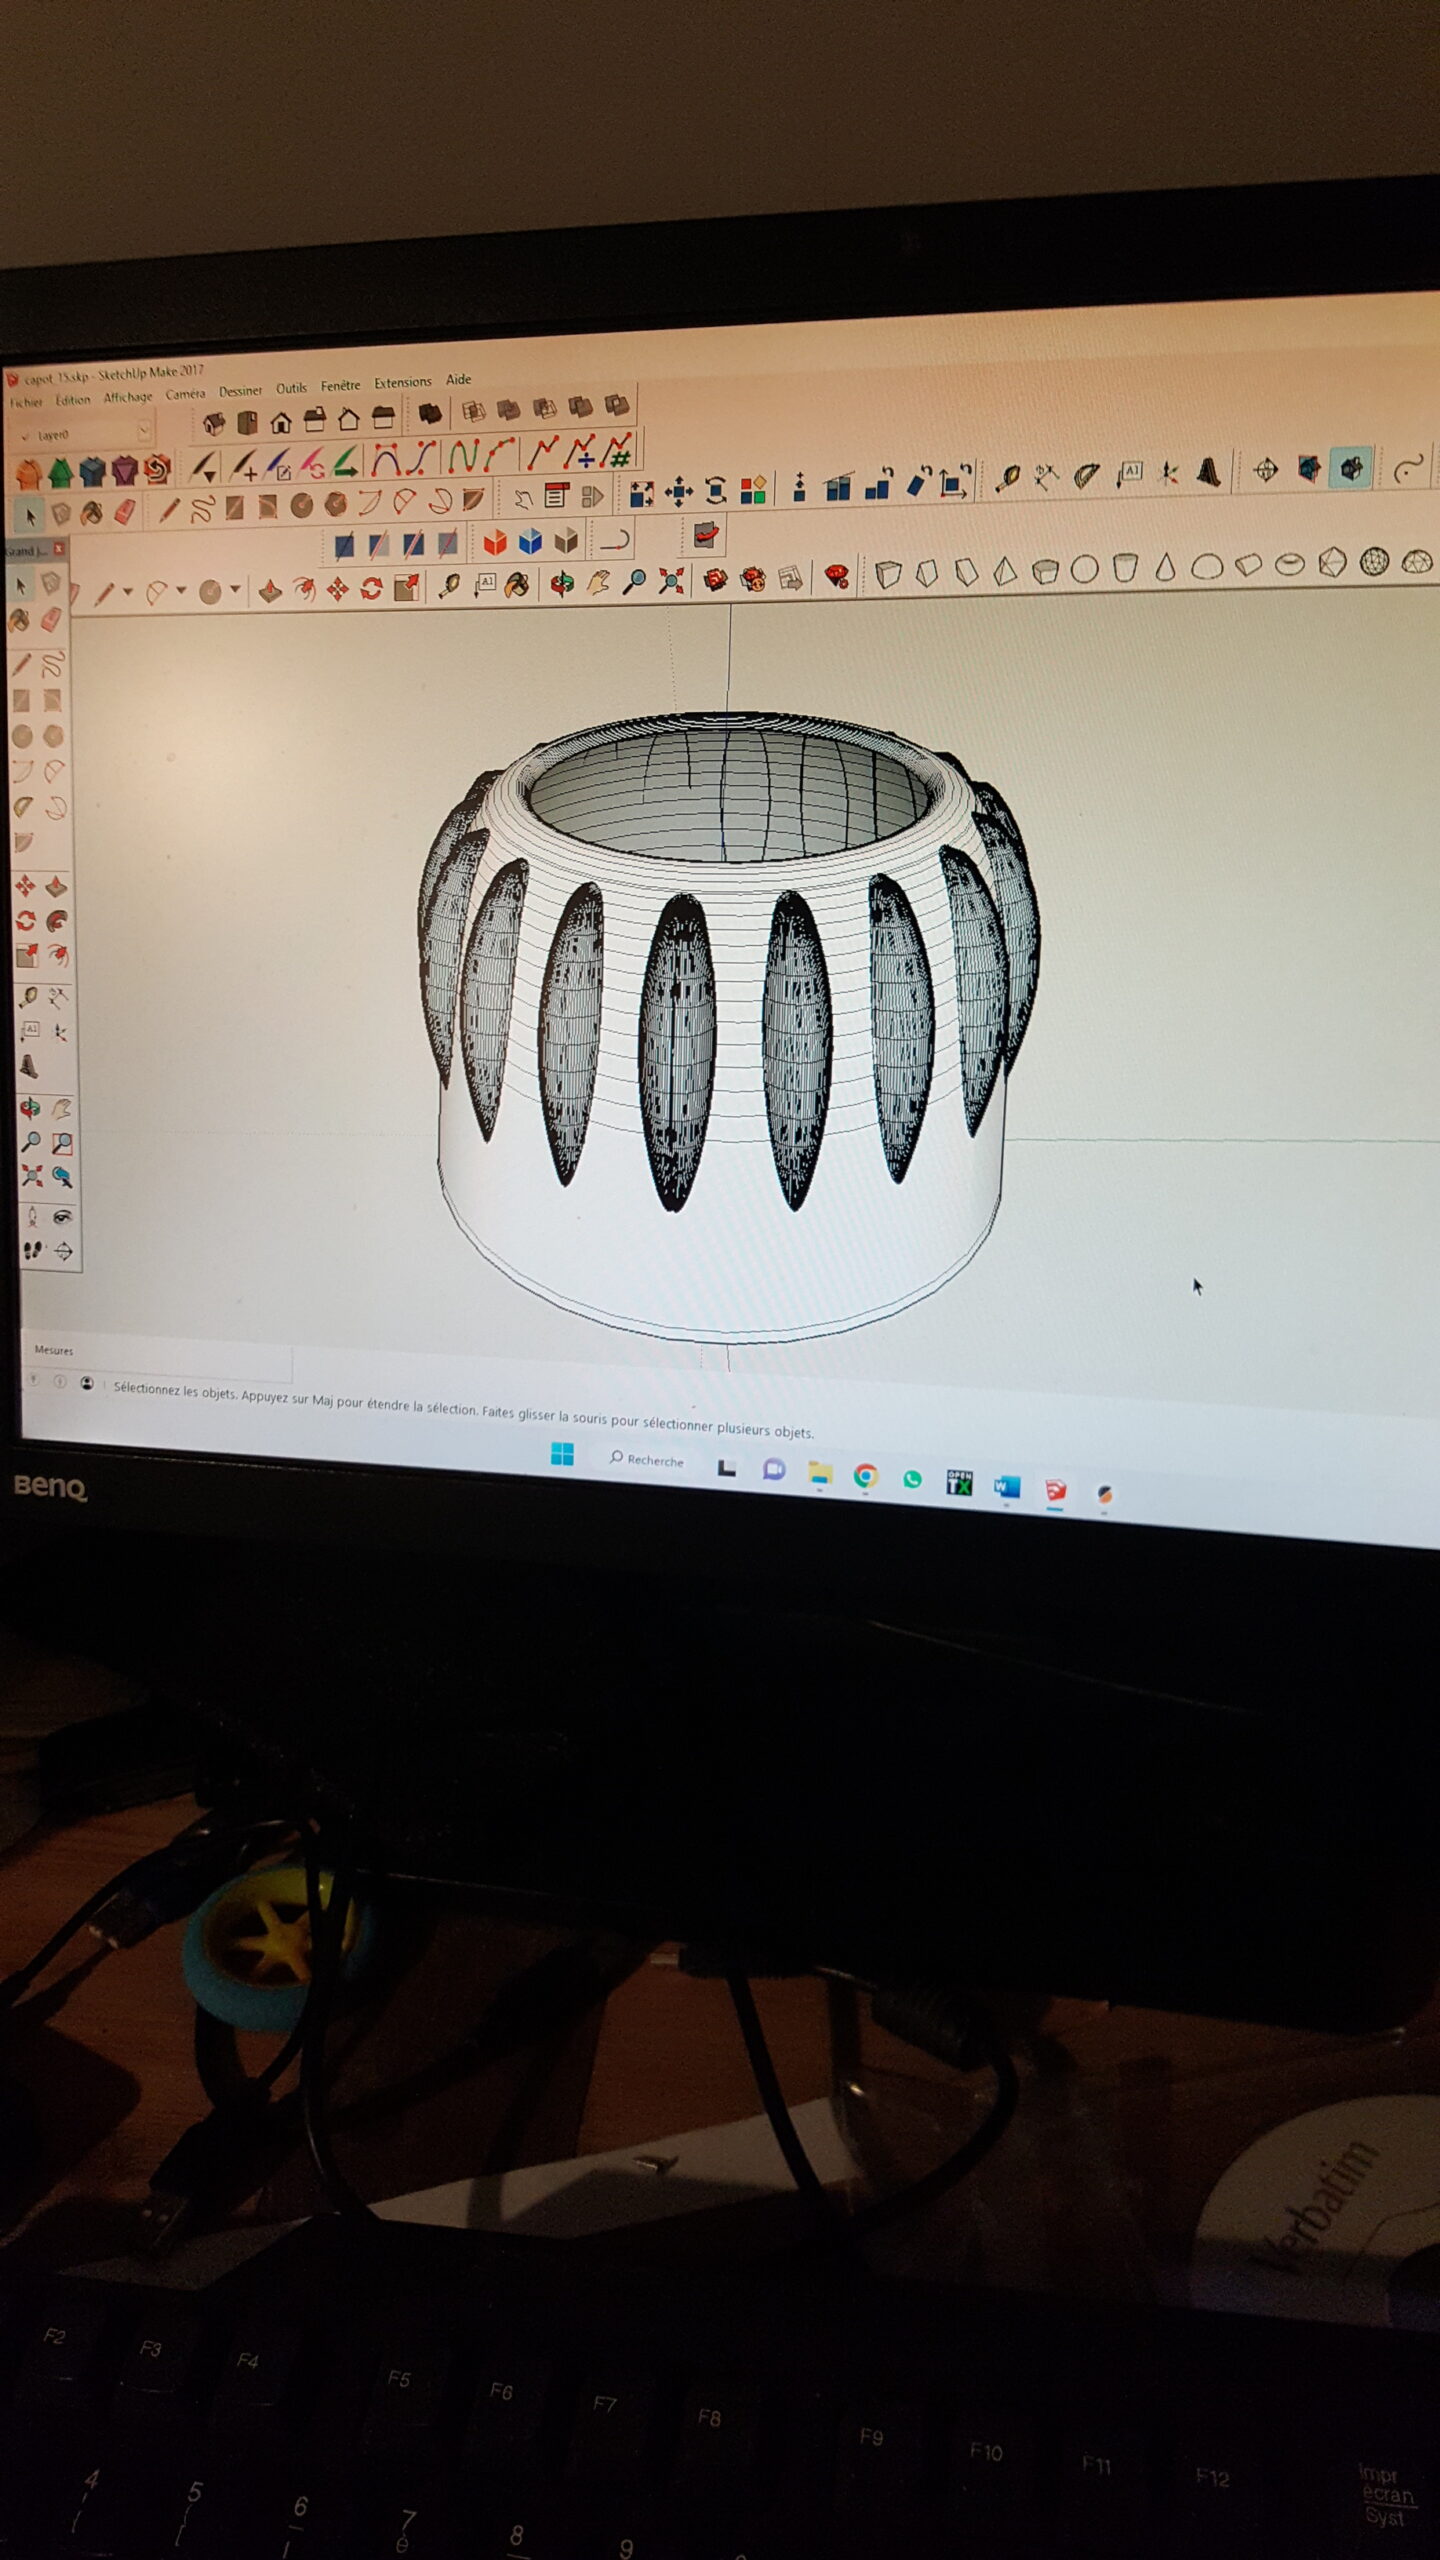
my cowl is still there but it is closed Top and botton
here start my questions....
when I select "reglage d'impression" I unthick "coques horizontales" to have 0 layer top and bottom
RE: Help! I do not understand
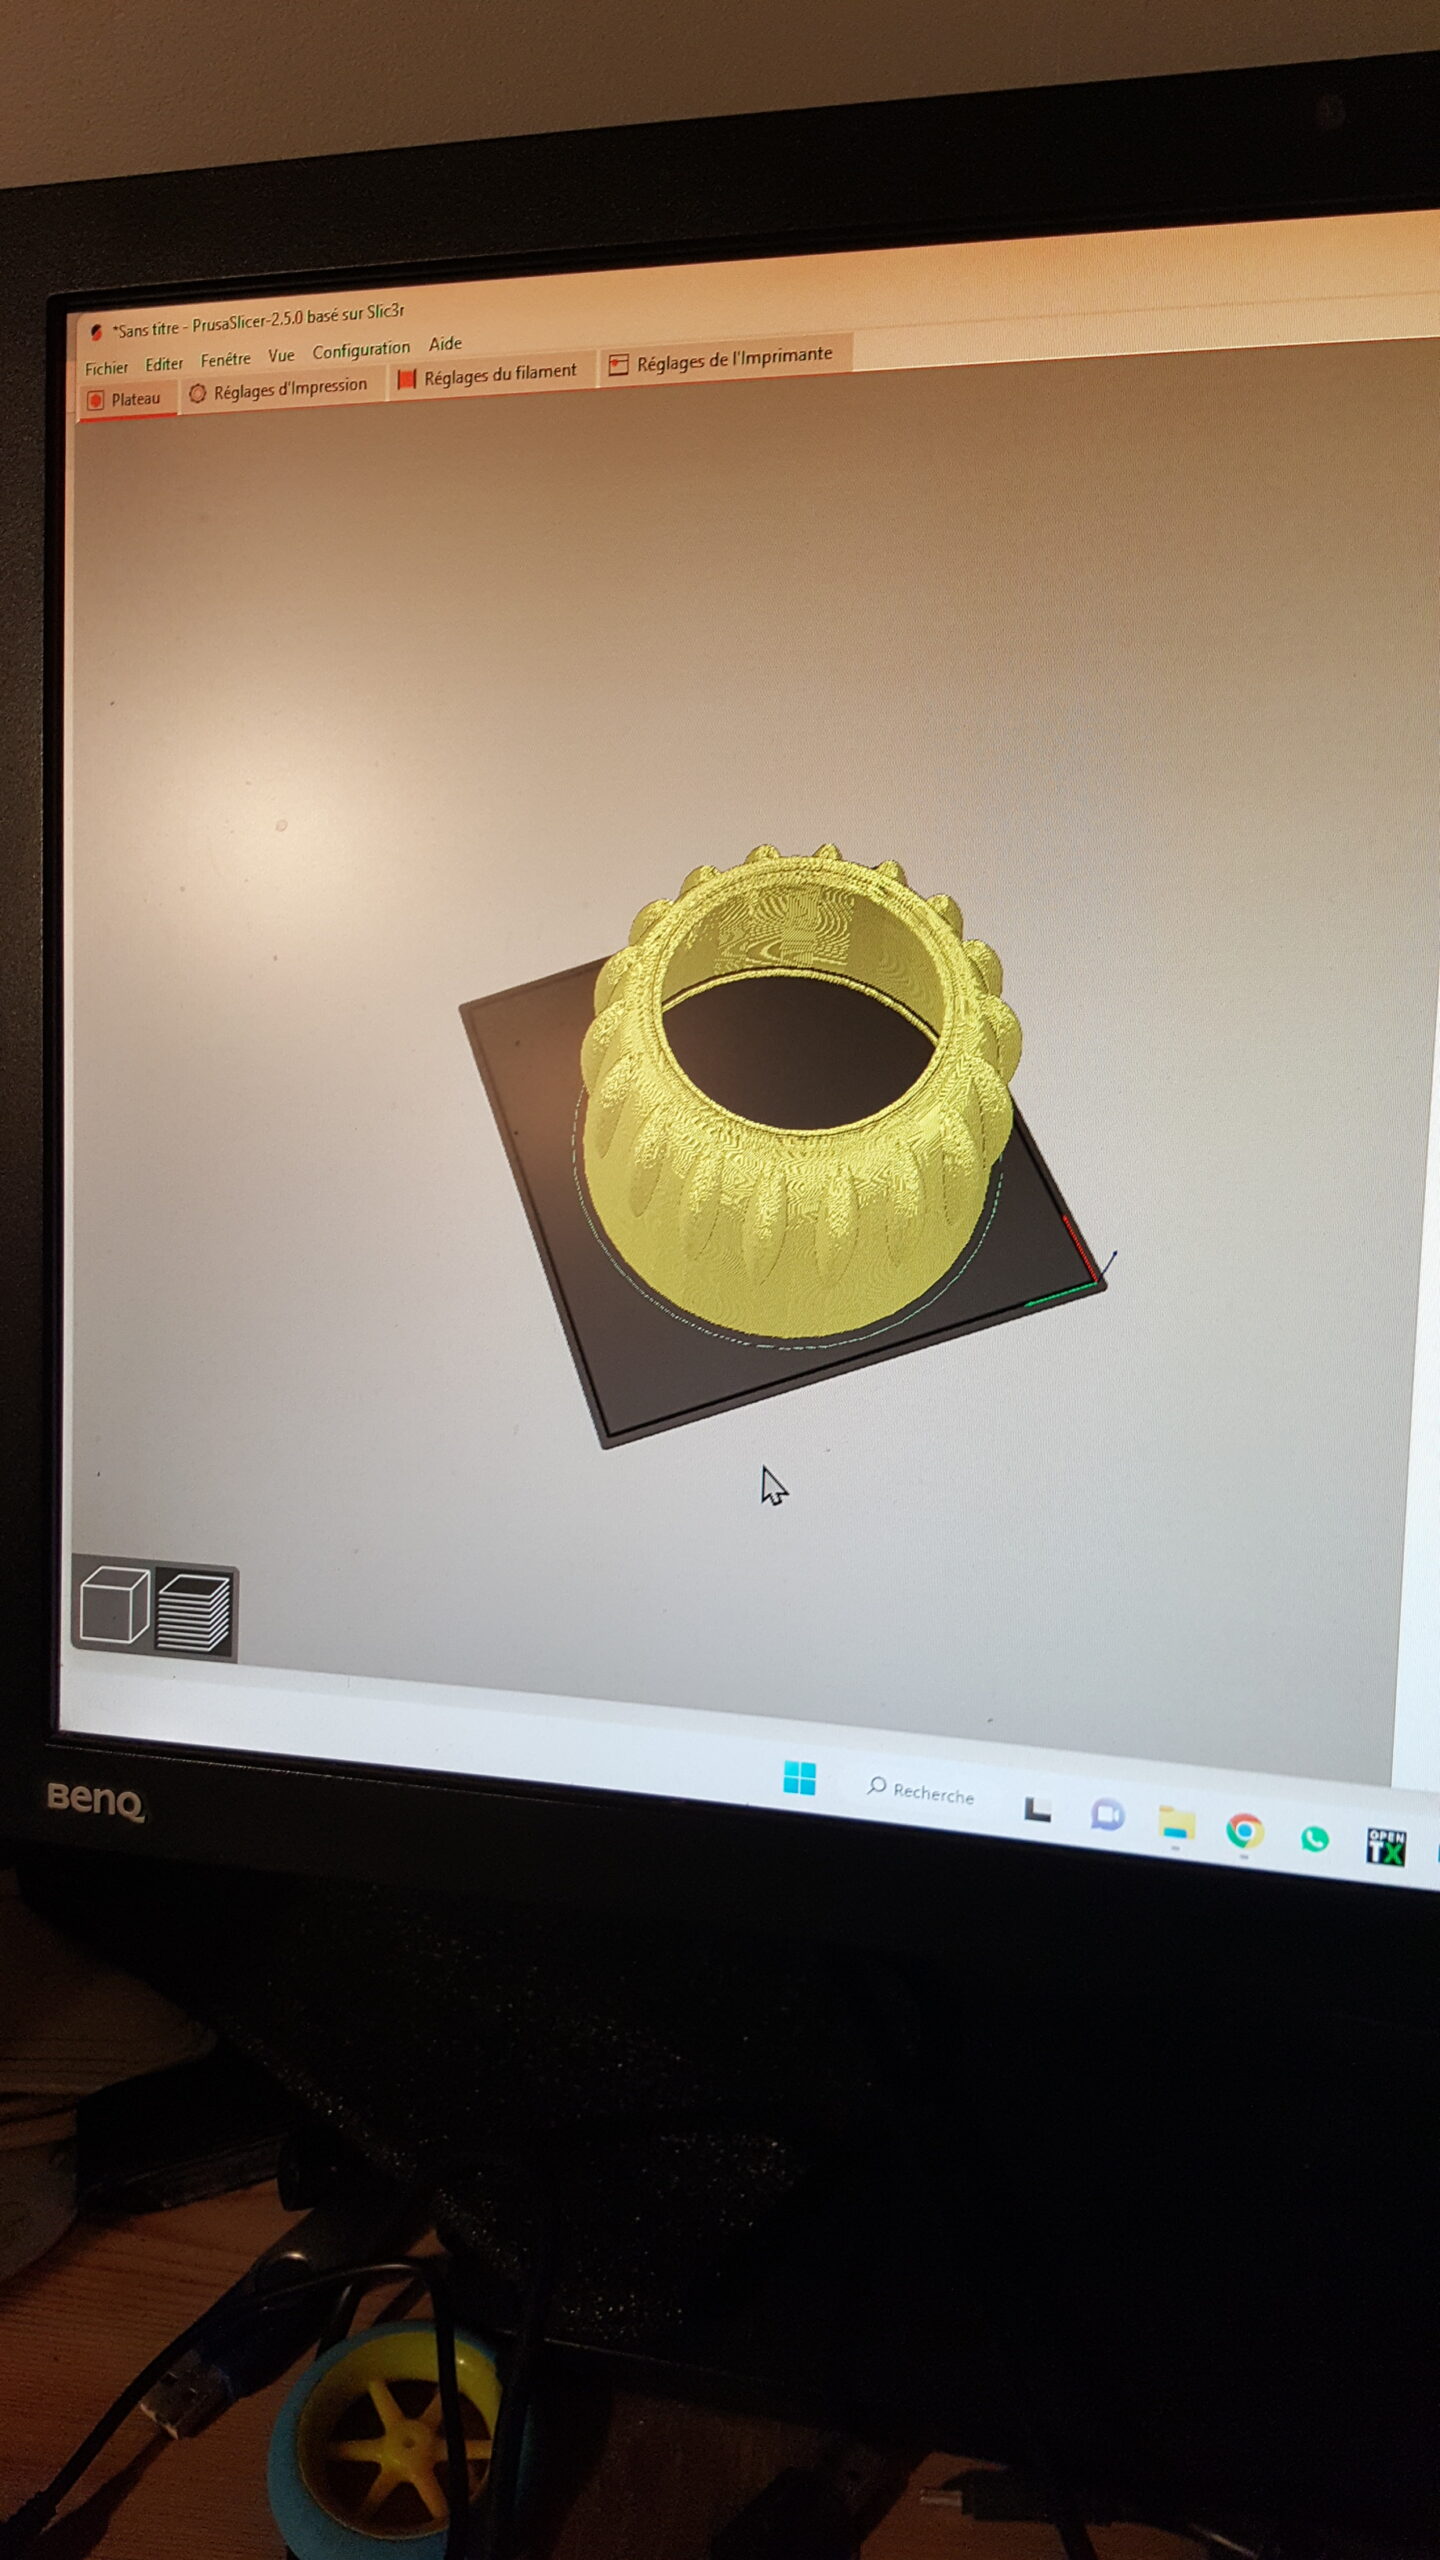
So I can "Open My cowl.... but I lose also an horitontal layer I do not want to cut ( because it is the "base" to reinforce this big piece of PLA)
hereafter, this ring should be closed and it is not.

but As you can see, my cowl is no longer closed ( bottom and top)
so my question is
How can I close my ring without closing (top and bottom) my cowl?...I am trying unsuccessully for one day until now
RE: Help! I do not understand
Everything is going to be wild guesses without more data. If you upload your project as a 3mf file, you're likely to get better advice grounded in data. A 3mf file contains your STL but most importantly also ALL your settings.
In PrusaSlicer, go to File/Save project as, to create the 3mf file. Zip-compress it to turn it into a .zip file (right-click Compress on Mac and Win11, right-click Send to/Compress on Win 10). Attach the zipped file a post on this forum using Attach file below the text edit box. It has to be a zip file, or the forum software will silently reject it.
Formerly known on this forum as @fuchsr -- https://foxrun3d.com/
RE: Help! I do not understand
@lebar
Please attempt to upload your Zipped project file as @fuchsr mentioned. I will make a wild guess in the meantime though. I believe from your photos that your model is not manifold, this means you have open edges and possibly some other anomalies common to solid surface modeling, some modeling software handles this better then others, for example Sketchup is notorious for open edges, extra verts and incomplete boolean's. I cant tell what one your using from the photos. but you may want to consider these. Having the PrusaSlicer project file will tell the tale.
RE: Help! I do not understand
Thank you guys for both answers. I will try today to upload the project. I know the problem with sketchup but I do my best to avoid open edges and others mistakes. I try to learn fusion 360….. but it is not so simple than sketchup
RE: Help! I do not understand
Hi
following your advices I zipped and uploaded 3 files
one is a single "bosselage" of the cowl
the second is the cowl alone without any "bosselage" ( sorry but I dont know the word in english)
the third one is the full drawing
please note that my intention is firstly to solve this initial trouble. If success I wil try next to insert de ventilation openig in the cowl, but that is another challenge
Thank's for your help and advices
Eric
RE:
Well, this is certainly not a slicer issue, and I don't think it's a manifold issue as R&D suspected. The 3mf looks perfectly fine, and the slicer does exactly what told.
If you want the inside of the model to be hollow (which is what the screenshot from Sketchup looks like), you need to make sure that Sketchup hollows it out properly because the STL exported from Sketchup is not hollow. I have played with Sketchup for a tiny bit and didn't like it, so I can't help there but I suspect it's an issue of Boolean operations, subtracting the inner space properly. There's something similar in OpenSCAD, where it's easy to end up with Boolean operations that don't work as expected (but usually result in STL errors). Again, sorry, I don't know Sketchup.
Now, you can fake it, using negative volumes:
This is using a simple negative volume, hollowing out the inside but leaving the bottom closed as I think you'd like to see it. See attached 3mf file.
However, I urge you to learn how to create the right outcome in Sketchup, to get it right in modeling and not rely on the slicer because it will never be as precise.
Formerly known on this forum as @fuchsr -- https://foxrun3d.com/
RE: Help! I do not understand
Ok, Nice! Thank you for the help.
I,will try to move to fusion 360 of course but before I,will try also to solve this sketchup issue ( but I have to search on google what means « hollowing » in this contexte.
thanks again
eric
RE: Help! I do not understand
today I check your file to try to understand what you means by hollowing an addind negative volume. In fact we are not speaking about the same thing.
The plane is propelled by a twin 40cc engine and I need the full space inside the cowl
My initial drawing was not perfect but I was on the way. The only problemen I encountered is the top and bottom closing of the cowl.
I found a solution to take them off by writing "0" in "reglages d'impression/couches et perimetres/coques horizontales/ haut et bas"
and tI success.
The only problem remaining is that all the horizontale faces disappeared including the one I want to keep to rigidify the bas of the cowl
Perhaps I am more understandable here?
RE: Help! I do not understand
Okay, I think I get it now. You basically just want the shell but some thin bottom layer. So set infill to 0 and coques horizontales haute to 0 but keep bas to say 2 layers or so, or however thin you want the base to be.
Just a couple of other observations. Obviously, that base layer is designed to be about 5 mm off the print plate, so you'll need supports for it. Which will leave imperfections on the bottom surface which may in turn impact how you can connect this cowl to whatever is behind it. Second, the cowl's outline is not round but has more like 64 or more sides (I didn't count them). Maybe it's by design but I suspect it's a low resolution of export of the STL file from the design software that leads to an imperfect approximation of a round surface. May be okay, may not work if this is supposed to go around a round engine.
As I said before, this is trying to rescue a failed design. I think you're better off trying to understand how you can export a properly formed STL from that software you're using. It will serve you better for future designs.
Formerly known on this forum as @fuchsr -- https://foxrun3d.com/
RE: Help! I do not understand
Hi,fuschsr
I tried your file. And I understand now what you meaned.
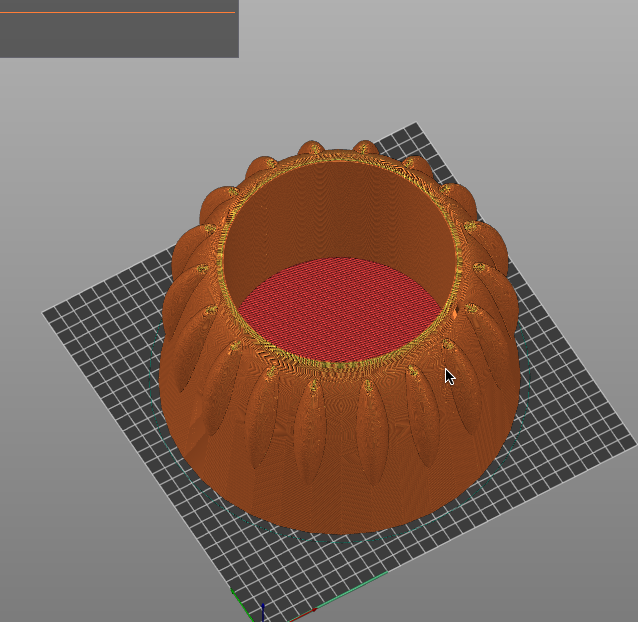
so I think we misunderstood. My concerned was initially « how can I take off the top and bottom closing of the cowl.? »
I found a solution by unselecting « horizontal faces » in the menu « réglages d’impression » it worked well but at the same occasion I lost one horizontal surface ( the one which close the ring on the base).
in your modified drawing, this specific horizontal surface is also missing as shown by the pic
this surface I want to keep in the project is totally visible on the second picture.
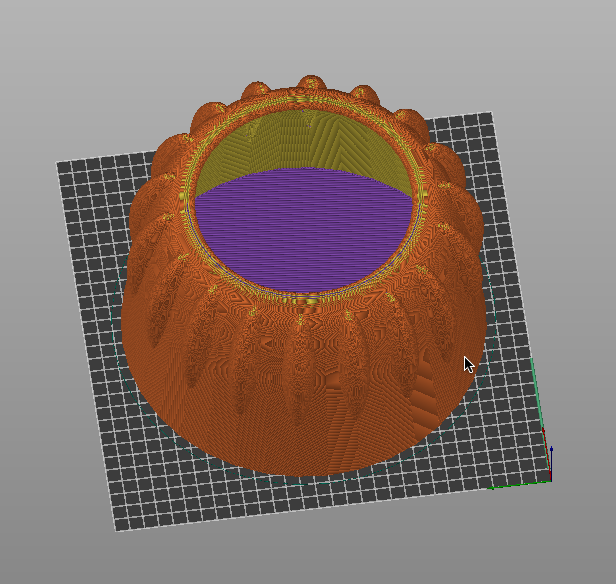
keeping or not keeping is regulated by prusa menu . I am looking for a tip to keep « a part only of the horizontal surfaces »: the one you see in green pic

RE: Help! I do not understand
Maybe I'm missing something but if what is showing in green in the last picture is what you want, then you have the solution, don't you?
In any case, here's one last stab at what I think (but really don't know anymore) you want to accomplish.
But pardon me for leaving the conversation at this point. Not because I don't want to help but because I don't want to be an enabler of slicer hacks to compensate for design flaws.
Formerly known on this forum as @fuchsr -- https://foxrun3d.com/
RE: Help! I do not understand
Slicer cant really do what you want. Its a blunt instrument when it comes to negative volumes and the slicer settings for top and bottom layers are all or nothing really. You need a scalpel, in the form of your proper CAD software. You really really need to have your model sorted out. If you need a hole in the model then you have to MODEL that hole into it. The main section is solid, you need to model it as hollow but with the walls having thickness, the thickness you want in the finished part. The teardrop sections around cowl are causing multiple intersecting faces which is an additional problem. Blender is reporting over 1200.
I took your test 01 capot seul into blender and removed the top and bottom flat sections. This left the model non manifold and unprintable as the surface 'skin' has no thickness. I then applied a Solidify modifier to give it some 3 dimensional property. I gave it a 3mm thick 'skin' in effect. This is only a rough example as its working with an stl and not original geometry but hopefully the example is enough for you to follow what you must do in order to create a proper printable object.
Note that now the object is properly hollow the top edge would print in mid air and so requires support adding if its is actually to be printed.
I couldn't use the Solidify modifier on the original object as all those intersecting faces make it impossible.
RE: Help! I do not understand
Maybe I'm missing something but if what is showing in green in the last picture is what you want, then you have the solution, don't you?
In any case, here's one last stab at what I think (but really don't know anymore) you want to accomplish.
But pardon me for leaving the conversation at this point. Not because I don't want to help but because I don't want to be an enabler of slicer hacks to compensate for design flaws.
ok don’t worry and sorry again for my poor and insufficient English not able to explain what I am looking for . Thank you for your time
RE: Help! I do not understand
….I took your test 01 capot seul into blender and removed the top and bottom flat sections. This left the model non manifold and unprintable as the surface 'skin' has no thickness. I then applied a Solidify modifier to give it some 3 dimensional property. I gave it a 3mm thick 'skin' in effect. ….
Note that now the object is properly hollow the top edge would print in mid air and so requires support adding if its is actually to be printed.
I couldn't use the Solidify modifier on the original object as all those intersecting faces make it impossible.
Hi Neo
Thank you for your time. I will try to open your file tomorrow. But please note that, me too, I do not have originally with sketchup, the top and the bottom flat. They just appear in the last version ( different than the older green one) just after opening the stl in prusa slicer.
But now I understand what you say about the slicer capabilities : (« ….all or nothing »
thank you for all
eric