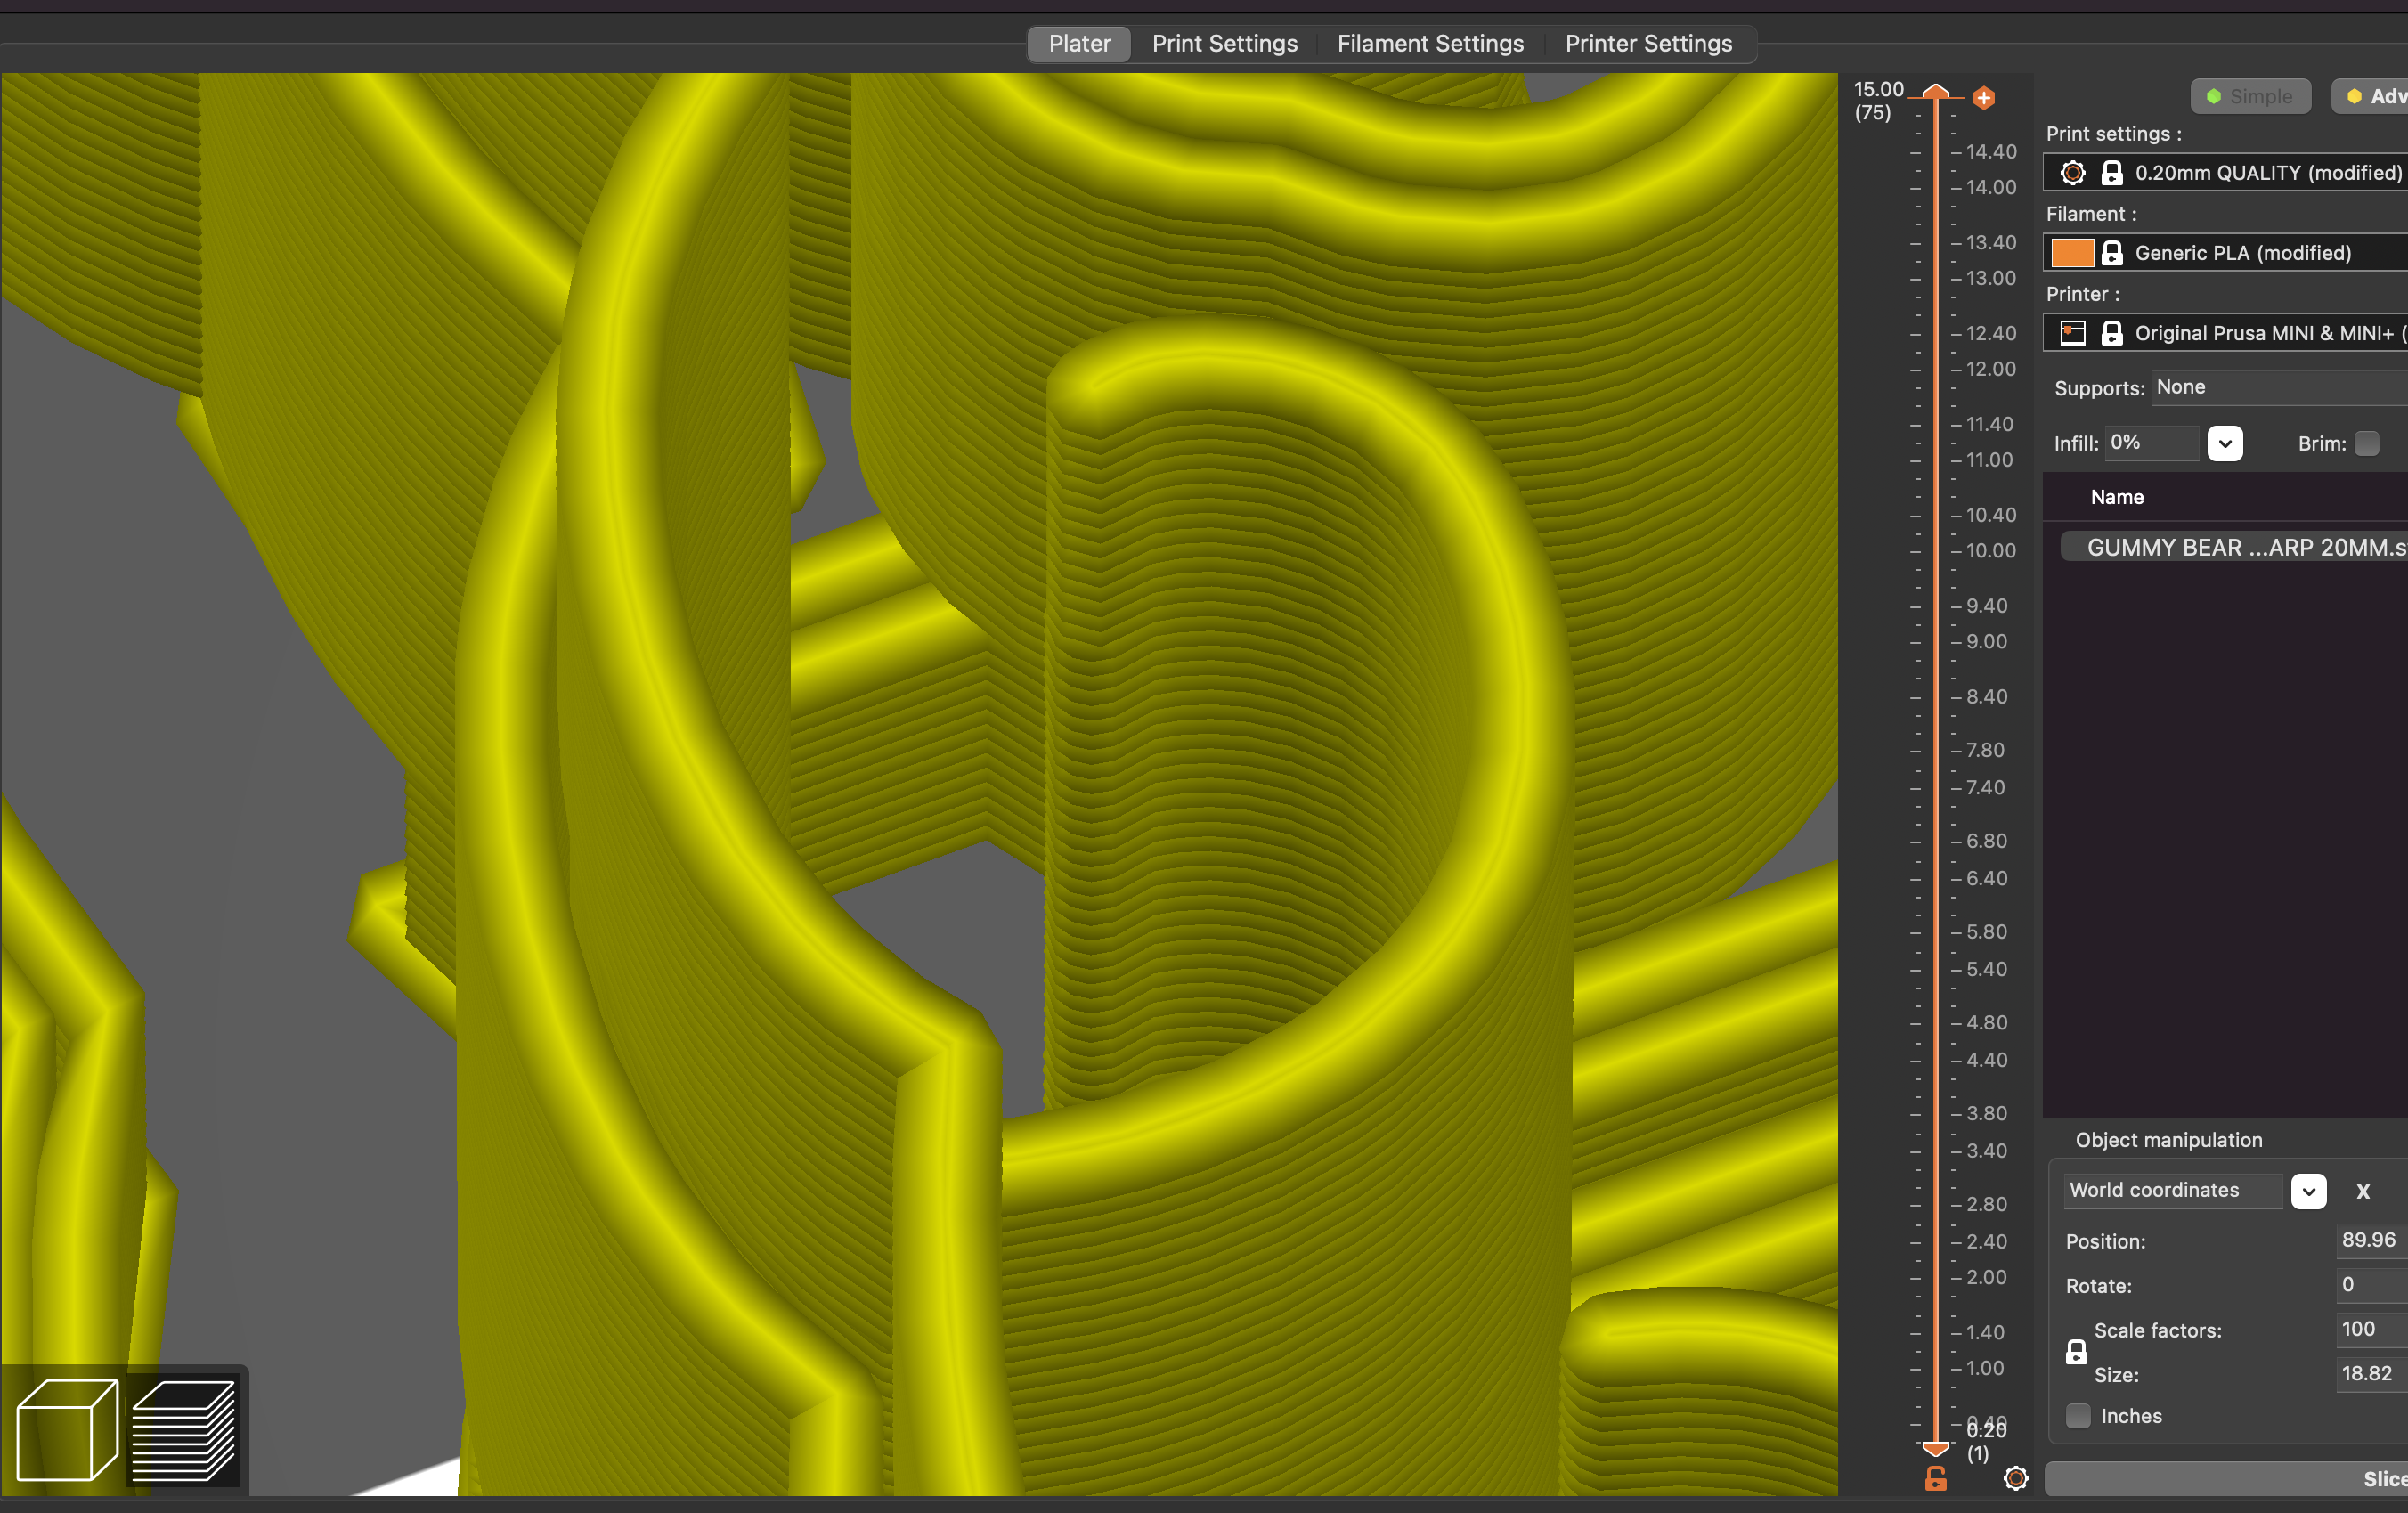
Cufs after slicing
Hello guys! Do you know what causing this problem in prusa slicer? The yellow is before slice and other two pics are after slice why the line is not straight? I tried to change perimeter generator from Arachne to Classic and it doesnt help😞 thank you


Best Answer by Neophyl:
You cant really. Its either use arachne and have the issues with the ends of the extrusion, use classic and play with the widths. Classic with 0.45 walls as you had it prints with single walls but the stop /starts are causing discontinuities which is your original problem. Single wall extrusions that that that end as they do are always problematic. You could potentially play around with all the arachne settings in combination or the extrusion widths etc to 'maybe' get something better but its very geometry dependant. Essentially lots of trial and error. Its why I said only you can judge what is most acceptable for you.
You might have better luck with cura or a different slicer.
RE: Cufs after slicing
Please attached a zipped up copy of your Prusa Slicer project file (3mf saved from PS). Far too many variables to check without a project to experiment with.
RE: Cufs after slicing
Thank you for your reply. Here is the project
RE: Cufs after slicing
Turn detect thin walls OFF. That settings causes as many problems as it 'solves' . When ever you have a wall that you need thin walls to print consider just going back to your design software and making the wall thick enough to actually print.
Fortunately in this case the walls are printable without thin walls being on and turning it on causes the problems you have seen. It's still not perfect on those edges but far better than with and about the best you are going to get with the other settings you have.
You could also adjust your external perimeters width down from 0.45 to 0.4mm which looks like it gives a better result in the preview window at least. Although it looks like it might over extrude those slightly as they are merged together somewhat. Would have to print it to see the practical difference. Only you can judge whats acceptable in your final print.
RE: Cufs after slicing
Thank you so much for your help. It really helped me a lot. Please can I ask you I switched from Arachne to Classic as you can see on the photo the thickness doubled. How can I adjust the setting to just print only one line like in Arachne mod?
RE: Cufs after slicing
You cant really. Its either use arachne and have the issues with the ends of the extrusion, use classic and play with the widths. Classic with 0.45 walls as you had it prints with single walls but the stop /starts are causing discontinuities which is your original problem. Single wall extrusions that that that end as they do are always problematic. You could potentially play around with all the arachne settings in combination or the extrusion widths etc to 'maybe' get something better but its very geometry dependant. Essentially lots of trial and error. Its why I said only you can judge what is most acceptable for you.
You might have better luck with cura or a different slicer.
RE: Cufs after slicing
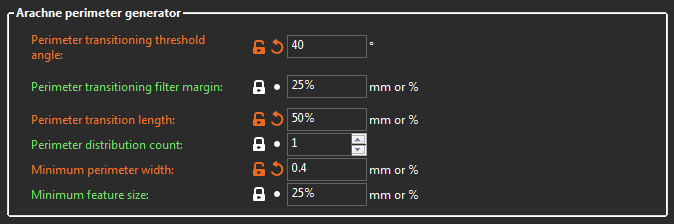
@sina
Try these setting with the Arachne perimeter gen. They may help.
RE: Cufs after slicing
Thank you for your help
RE: Cufs after slicing
I didn't know there was these settings it was hidden:) Thank you very much it helps there are straight lines now but I think I have different problem. Have a look on this photo. I think retraction causing the problem. Is there any setting that I can set up that the retraction will finish in perimetr wall not outside of perimetr?
@sina
Try these setting with the Arachne perimeter gen. They may help.
RE: Cufs after slicing
Retraction settings are configured mainly in the Printer>Extruder settings area but there are a few on the Print settings tab too. You can use the search functionality built into the slicer to find them.
For example you could turn off retract on layer change. Again the results you get will depend on how well other (many) factors of your system is tuned in. Retractions main purpose is to combat stringing.
Personally my printer is set up with retract on layer and wipe while retracting turned OFF. This produces far far less retractions on a print, though there are still some. This is only possible though due to my filament settings being tuned, I get very little stringing even with retract turned off. What I do sometimes get is the very fine spider web style strings. This is more down to filament moisture content than the actual retraction though and is extremely easy to remove afterwards with a blue flame lighter.
A bowden style printer like your mini will have a lot more difficulty with turning all retractions off unfortunately. Its is well worth experimenting with various settings though and slicing and doing test prints on small objects. In the long run its how you learn and will give you a better understanding of how things work together.
Unfortunately 3d printing is still at the stage where its as much an art as it is science.