Best way to do "print-on-print" technique
I've been trying to figure out the best way to print this model where the 2-layer thick drum skin is printed in one color and the drum body printed in another. I know there is a filament change feature built into PrusaSlicer, and also a sequential print feature, but evidently, filament change is not supported in sequential print mode. What's the best way to implement a color change with sequential printing? I just ended up doing two completely separate prints (first the skin, then the body) with a filament change in-between. The problem with this, though, is repeatability of the X-Y homing is not hyper-accurate, and the registration of the two parts is not exact. Thanks for any suggestions.
RE: Best way to do "print-on-print" technique
do you need to do it in sequential printing?
I could only see three parts
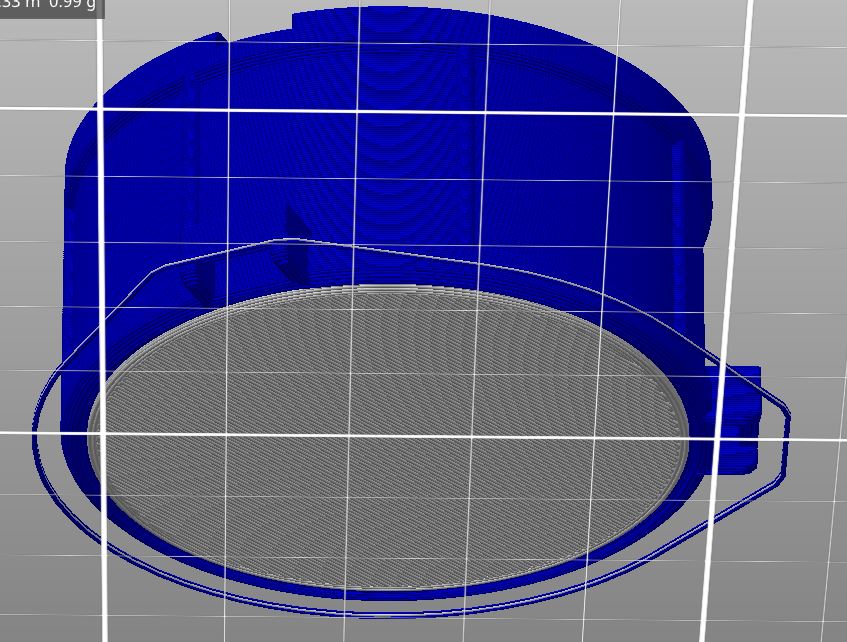
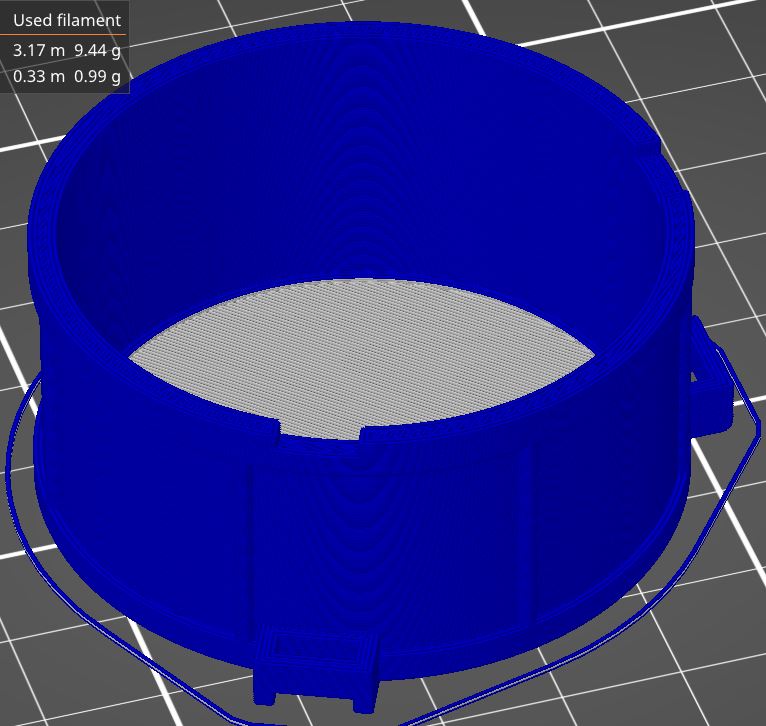
Drum with skin.
Stick and
Fulcrum
Please note, although this looks like a Multi material print, it DOES NOT require an MMU!!!
I took the Drum with Skin STL, loaded it into Prusa Slicer.
Repaired the errors in the model with Netfabb,
added a 'modifier' to it, to isolate the drum skin section (I adjusted this roughly to try and change the skin to a new colour)
I added a second virtual extruder and coloured them Blue for the Drum Chassis and white for the skin
I turned off the Waste Tower, and added the filament change command (M600) to the 'Custom Gcode>Tool change' section
the attached project file, is currently based on a Mk3s or Mk3S+ printer
It should also run on a mini, but will print off centre on the build plate
If you run the Gcode, the printer should do Mesh Bed levelling, begin the print and then stop for a colour change, almost immediately.
Make sure that your 'DRUM Body' filament is re loaded at this time.
the printer should print the Skirt and the periphery of the drum body in what ever colour you have chosen for the drum body
the printer should then request a colour change, and you should insert the 'Drum SKIN Filament'
when the printer returns to the model, is should complete layer 1 in drum skin colour, then it should step up to layer 2 and complete the drum skin colour,
the printer should again request a colourchange, you should re insert the drum body filament, and when the printer returns to the model, it should complete layer 2 in drum body filament and then go to layer 3 and successive layers using drum body colour.
At each colour change, resist the temptation to pull the worm cast of waste material, off the nozzle, just grab hold of it, and hold it in place, as you confirm that the colour is clear, and when the printer resumes printing, it will squirt another length of waste, before returning to the job at hand, and if you have followed my suggestion satisfactorily, the waste you were holding should have pulled the extra waste, off the nozzle as it returned to the job.
Otherwise, you will probably have to try and catch the extra waste.
Regards Joan ThumbDrum-skin-drum_JT
I try to make safe suggestions,You should understand the context and ensure you are happy that they are safe before attempting to apply my suggestions, what you do, is YOUR responsibility.Location Halifax UK
RE: Best way to do "print-on-print" technique
Thanks for the explicit instructions. I'll try that if I am still stuck. What I was hoping to do was use the print-on-print technique. If you load the skin-drum file and then click on the "split into objects" button, it'll split apart into separate objects (skin and body) without you having to manually isolate the drum skin. I then want to fully print the drum skin with one color, switch filament once, and then print the drum body over it. This only works when the first object is only one or two layers thick, and is customarily used for printing graphics on the first layer. Sequential printing would be ideal for this, but I don't know how to insert a pause between the parts, except by manually editing the G-code. Just wondering if there was a more elegant way.
RE:
the drum would not split for me, hence the modifier... however the process I used is effectively a three part Print on Print process
First print is the drum periphery, single layer, second print is the drum skin 2 layers, third print is the remainder of the drum body.
However, with them all being in the same G Code, there is no scope for the possible inaccuracies in homing, causing an unintended offset between the parts.
I don't believe sequential printing is a possibility with this process, and it would increase the number of filament changes required, making the process painful.
Why do you want to do sequential printing? Is it because of Stringing on a Bowden drive printer?
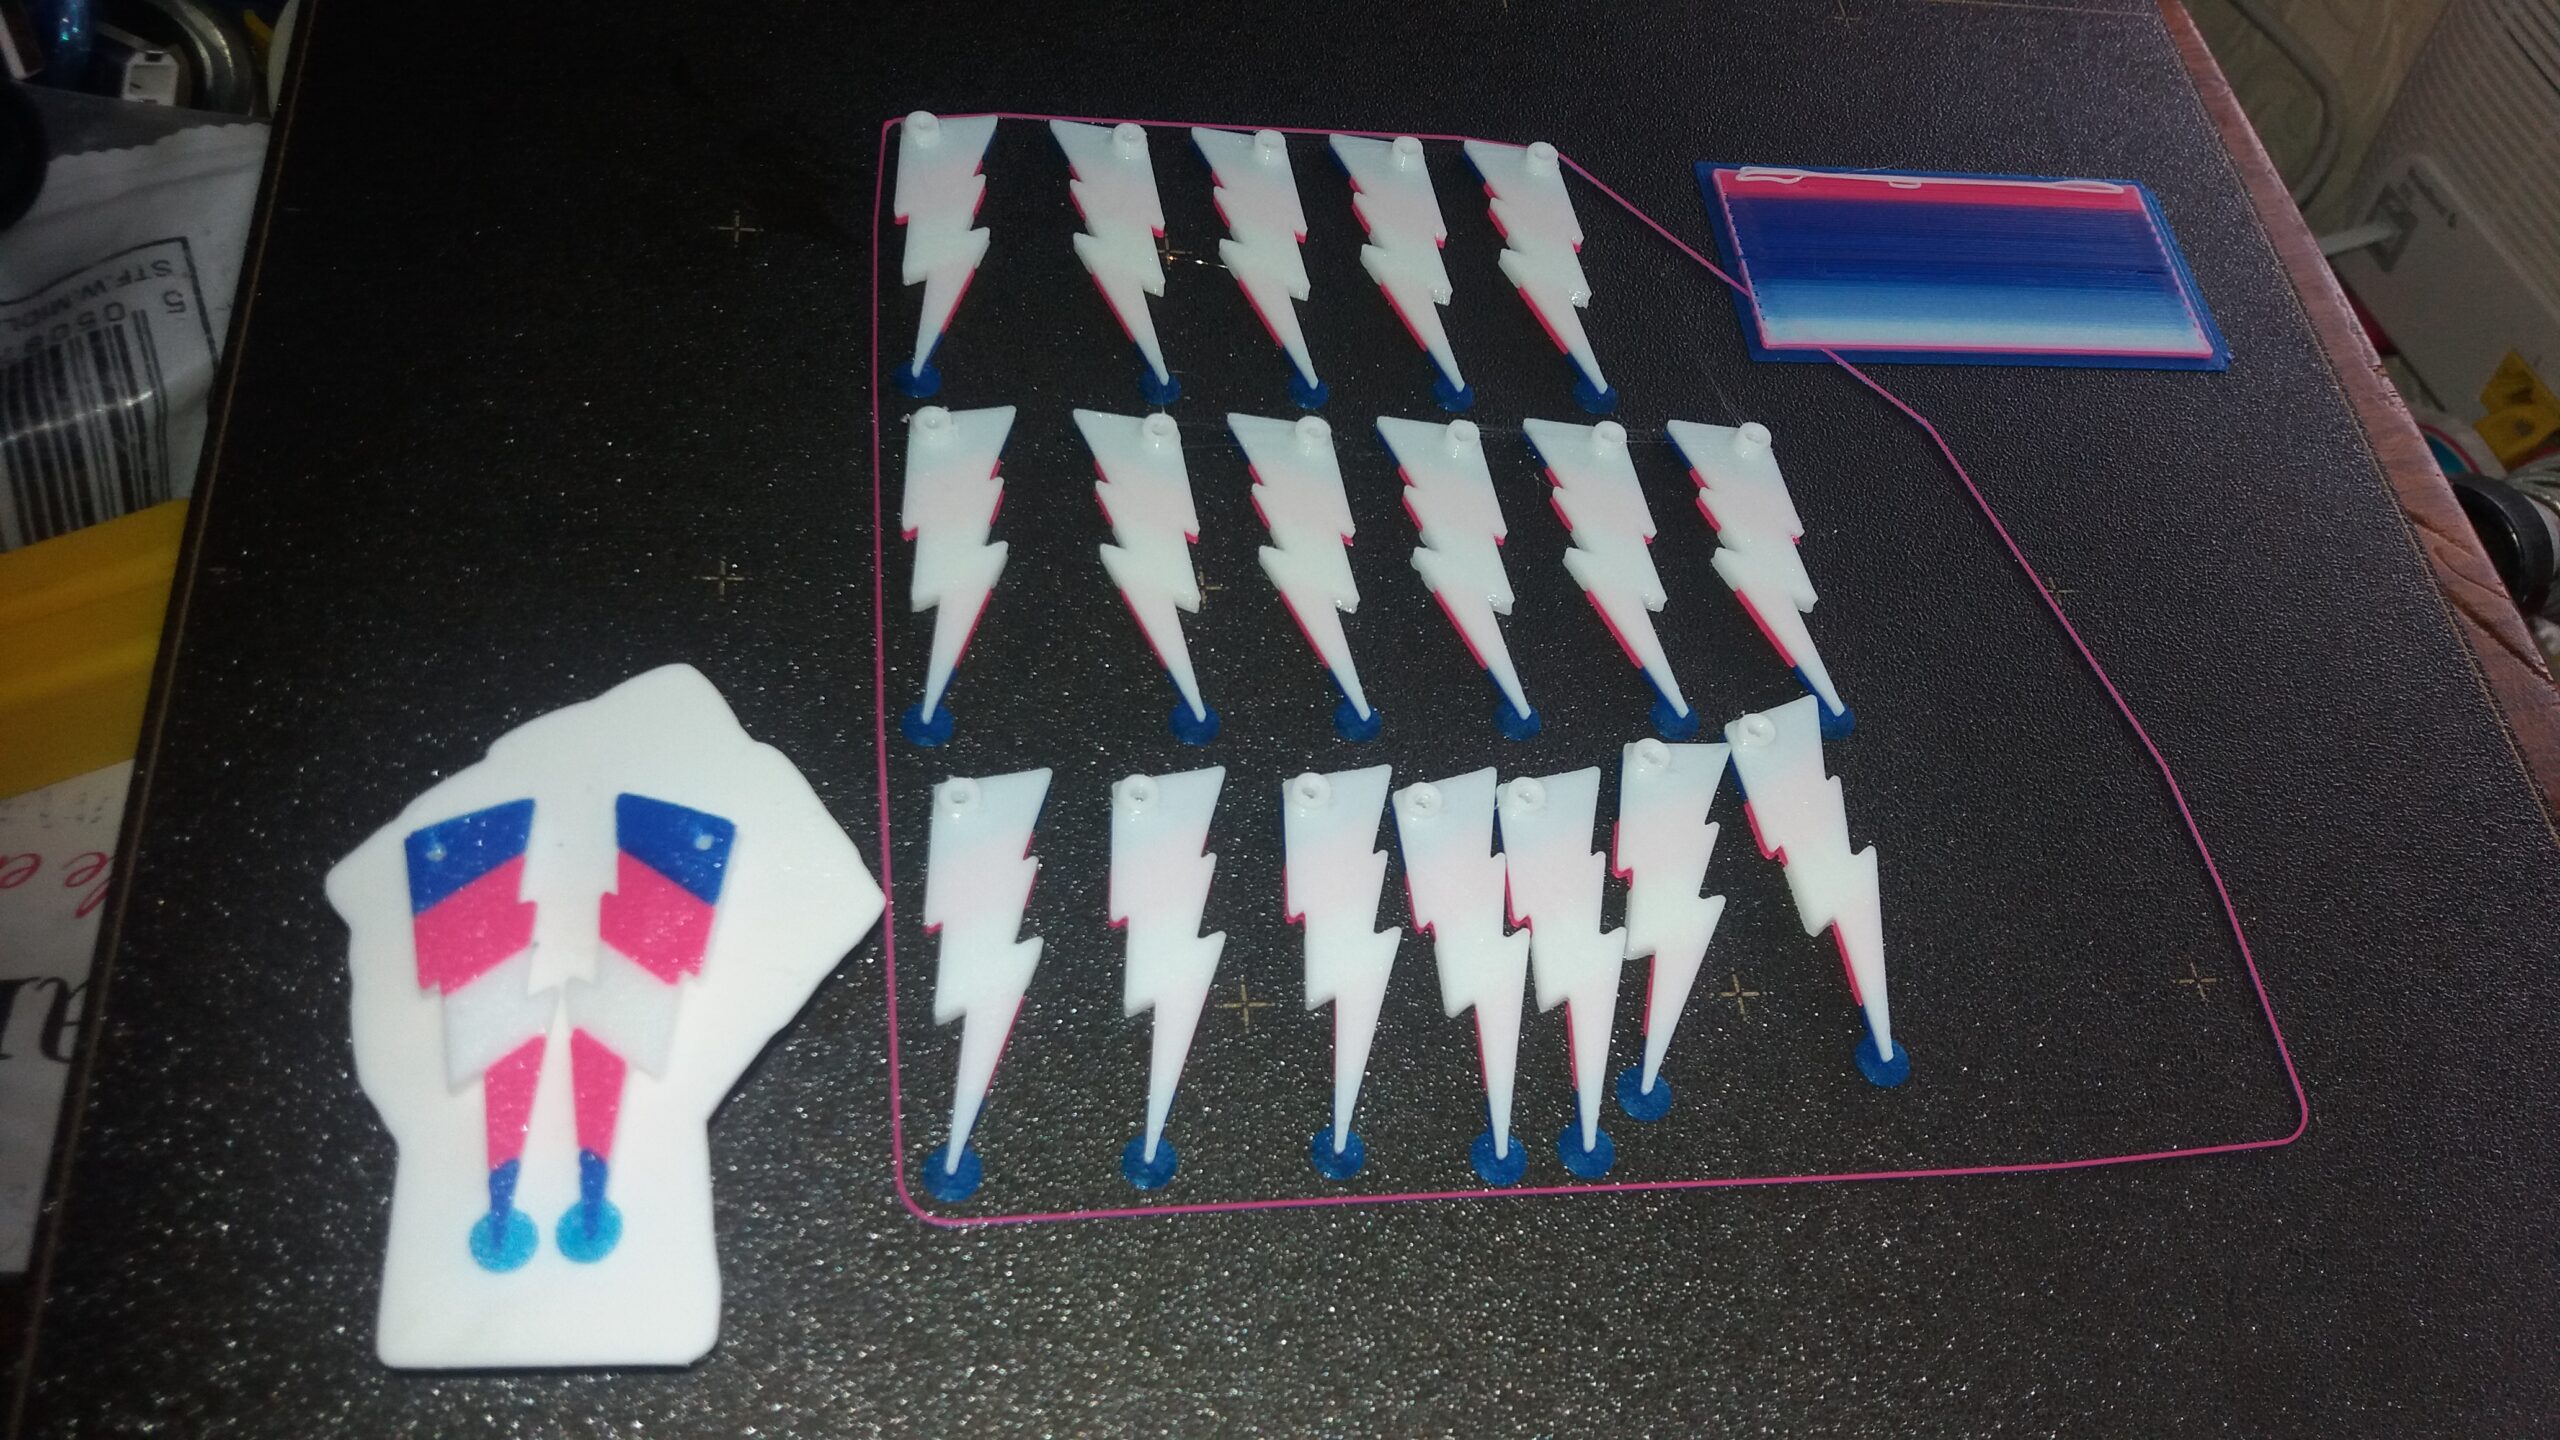
These were printed on a bowden printer
, I reduced the retracton distance from default of 4mm to only 2mm and stringing was not a problem.
they were printed face down to make the face surface, pick up texture off the build plate
the Blue Mouse ears were to prevent the sharp corner from lifting.
from the bricked USB post I believe you have a Mini, so I attach a Mini version of the project with multiple drums for your consideration.
this file does Not attempt sequential printing. I have left the retractions at default 3.2mm you may wish to try reducing them
regards Joan
I try to make safe suggestions,You should understand the context and ensure you are happy that they are safe before attempting to apply my suggestions, what you do, is YOUR responsibility.Location Halifax UK
RE: Best way to do "print-on-print" technique
Curious that the part wouldn't split for you. For me it splits fine in PrusaSlicer, but it won't split using Simplify3D. I may need to go in and add a minuscule gap between the parts to make sure they are recognized as separable.
As for why do sequential printing - it seemed like it would be the cleanest option for this sort of thing, but given that pauses and filament changes are not supported with sequential printing, your method seems like the best option given the vagaries of re-homing between prints.
RE: Best way to do "print-on-print" technique
I've gone ahead and updated the file with a tiny gap between the skin and drum body. Hopefully it'll separate properly now with all slicers.
RE: Best way to do "print-on-print" technique
Yes that splits for me now.
regards Joan
I try to make safe suggestions,You should understand the context and ensure you are happy that they are safe before attempting to apply my suggestions, what you do, is YOUR responsibility.Location Halifax UK