Adding infill to a design
I have a question on adding infill to a design.
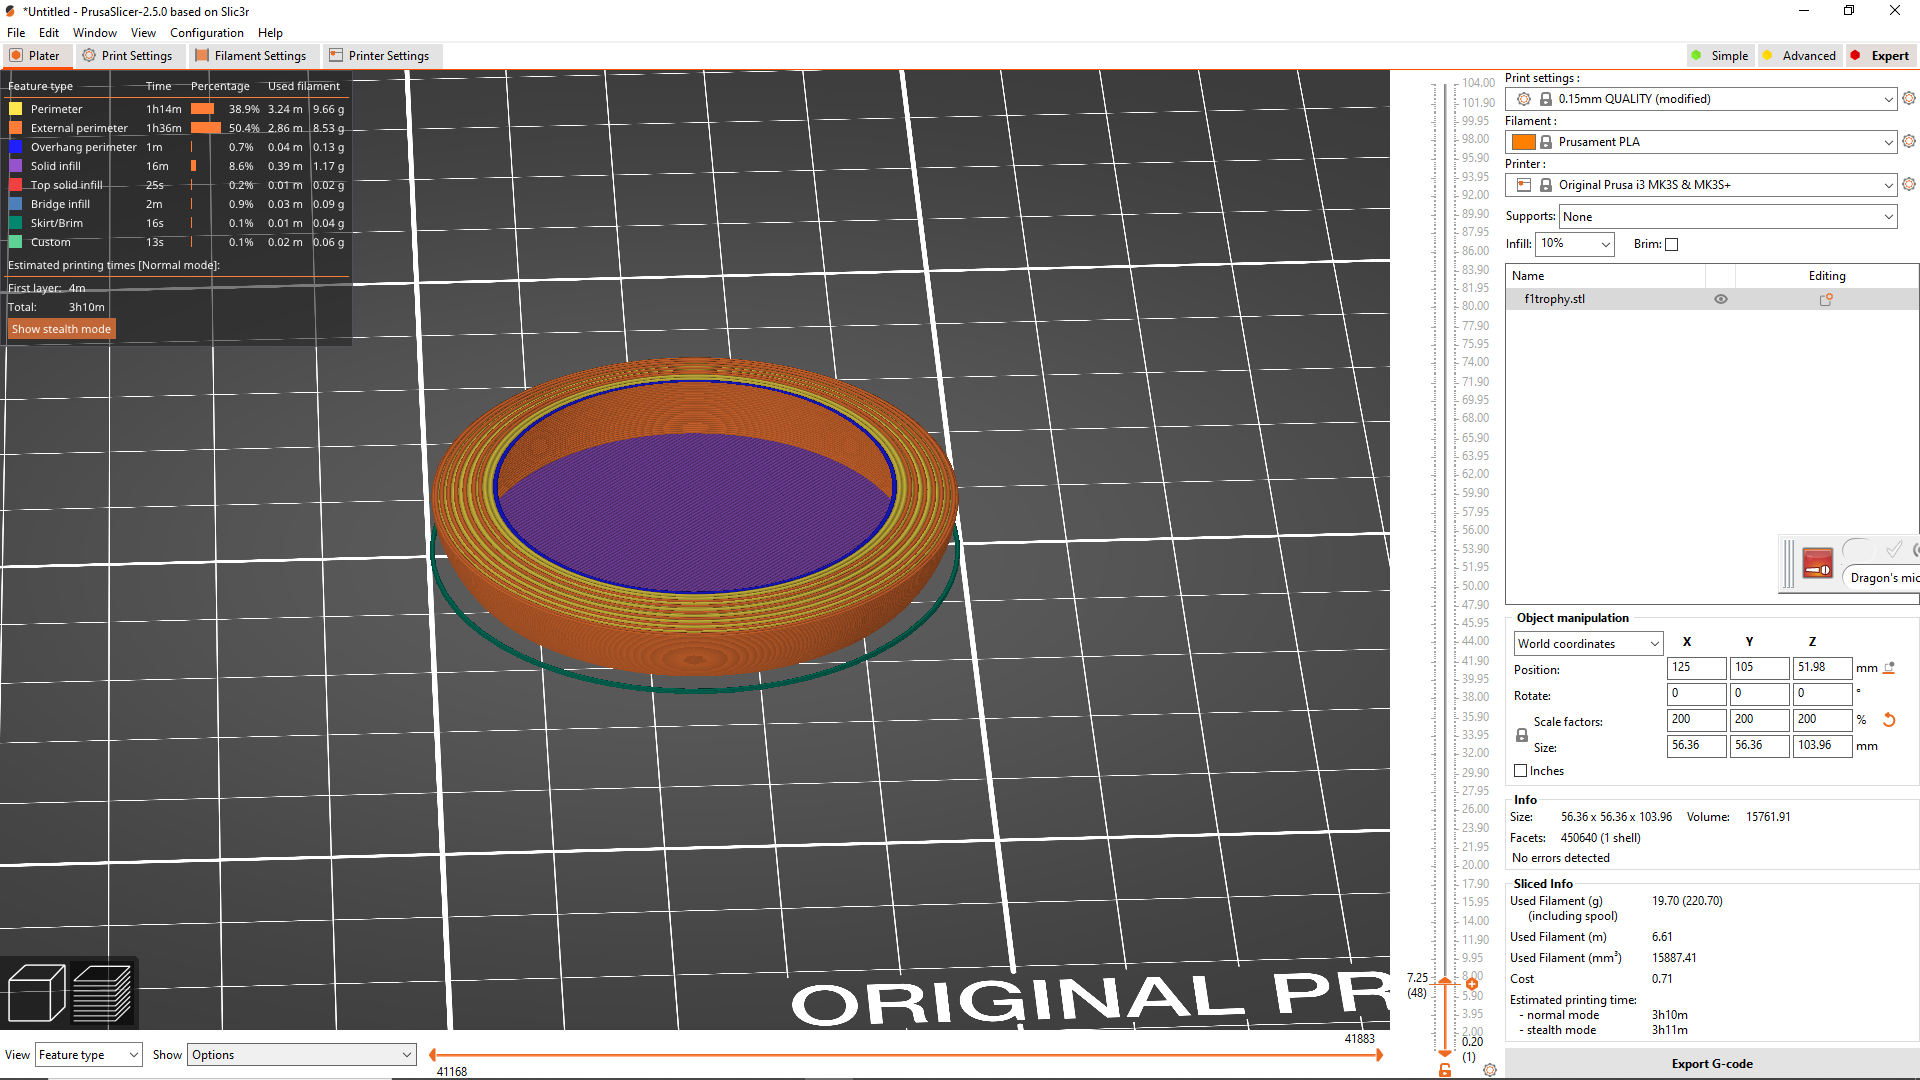
I have a design of the Formula 1 championship trophy (printing it for the F1 fantasy champion, not me unfortunately).
The trophy looks like a standard trophy/vase with a wide flat base that tapers to a narrow section before widening into the upper trophy section.
After slicing the design unfortunately the base has no infill. There is some slight overhang perimeter in the base and so between the overhang and from a weight/stability standpoint I'd like to add infill to the base only instead of it being hollow. I see a option for adding supports to a certain layer but can't find anything similar for infill. How does one go about adding infill to a design that prusaslicer doesn't recognize during slicing.
I'm still fairly new to this but the tinkering has been great fun and my knowledge is growing. Thanks for the help in advance.

RE: Adding infill to a design
If you read a few posts here you'll quickly discover that the first thing folks here (including yours truly) are asking for is the 3mf project file, not screenshots. Save it from Prusaslicer, zip-compress it (or the forum software will reject it), then attach it to a post. With the 3mf file we can see the STL but more importantly all your settings as well. Many times, the friendly people here will even modify the 3mf to optimize settings for you, a great learning opportunity,
Formerly known on this forum as @fuchsr -- https://foxrun3d.com/
RE: Adding infill to a design
I'll do this tonight. I have a 3mf file but it doesn't have my home settings on it. I had to use my windows based computer (Mac at home) at work so I could fix some issues with the design using Netfabb. The lack of infill in the base existed before the Netfabb corrections though.
If you read a few posts here you'll quickly discover that the first thing folks here (including yours truly) are asking for is the 3mf project file, not screenshots. Save it from Prusaslicer, zip-compress it (or the forum software will reject it), then attach it to a post. With the 3mf file we can see the STL but more importantly all your settings as well. Many times, the friendly people here will even modify the 3mf to optimize settings for you, a great learning opportunity,
There isn't really room for enough infill to make the model truly stable.
Have you considered pausing the print so you can drop in or glue in a weight?
Cheerio,
RE: Adding infill to a design
If I correctly understand, your main design intent is to create more stability for the model by adding weight to the base. Infill is not going to work as infill is only used inside a body, not between what is topologically outsides of the model. When you look inside your cup it looks like the "inside" of the cup but topologically the surfaces are just folded-in outsides, so the slicer is not going to put infill between them, only into the walls.
Three ideas for you:
- As diem suggested, just fill the cup with something to add weight, like sand.
- My personal preference: design it with the intent in mind. So, in my design software, I would add a surface closing off the inside of the smallest part of the stem. Now everything below is a filled body and Prusaslicer will add infill to it. Combining this with diem's idea, you could also create a "hollow bottom", pause the print, and put some weight in it.
- Use some "tricks" with Prusaslicer.
- I first tried Boolean operations with added parts and negative volume sto create a shape that can fill in the bottom region of the cup. I loaded a generic block shape, created a mold by using your stl as a negative volume, then used that mold as a negative volume with the original stl to create a shape that should fill the base of the cup but ended up with flow:spacing() errors, whatever that means.
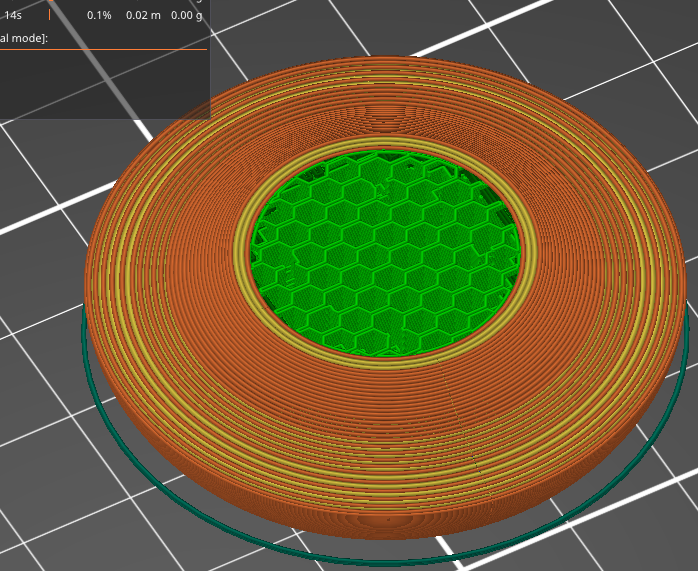
- Anyway, the simpler solution I came up with—leveraging the fact that the internal side of the stem is actually an overhang—was to use supports and paint the whole outside of the cup with support blockers. This way, PS creates supports only on the inside and fills the bottom of the cup with supports. For the fun of it, I added a small disk closing off the stem at its smallest port to create a "bottom" so you can actually fill stuff into it without it disappearing into the hollows of the infill. I also changed a few support settings to create more material, thus weight. So it's not really infill but pretty close. See attached 3mf file.
Formerly known on this forum as @fuchsr -- https://foxrun3d.com/
RE: Adding infill to a design
The folded sides explanation was what I needed. I like your plan of painting support blockers on the outside. There's a feature in prusaslicer that then lets you pick a specific layer height to add supports "up to". That would probably work.
I have a new plan thought. The design came with files that allowed printing the pieces separately. I'm going to modify the base to be able to print it with a internal structure. I'll update if it works.