Top slices offset - seam on side of print
Hi, I'm new to printing and recently setup a Core One+. Everything seems to work correctly. Went through all the calibration steps and set tension on belts to 98 and 92. First two trial runs - key fob and pan flute were fine.
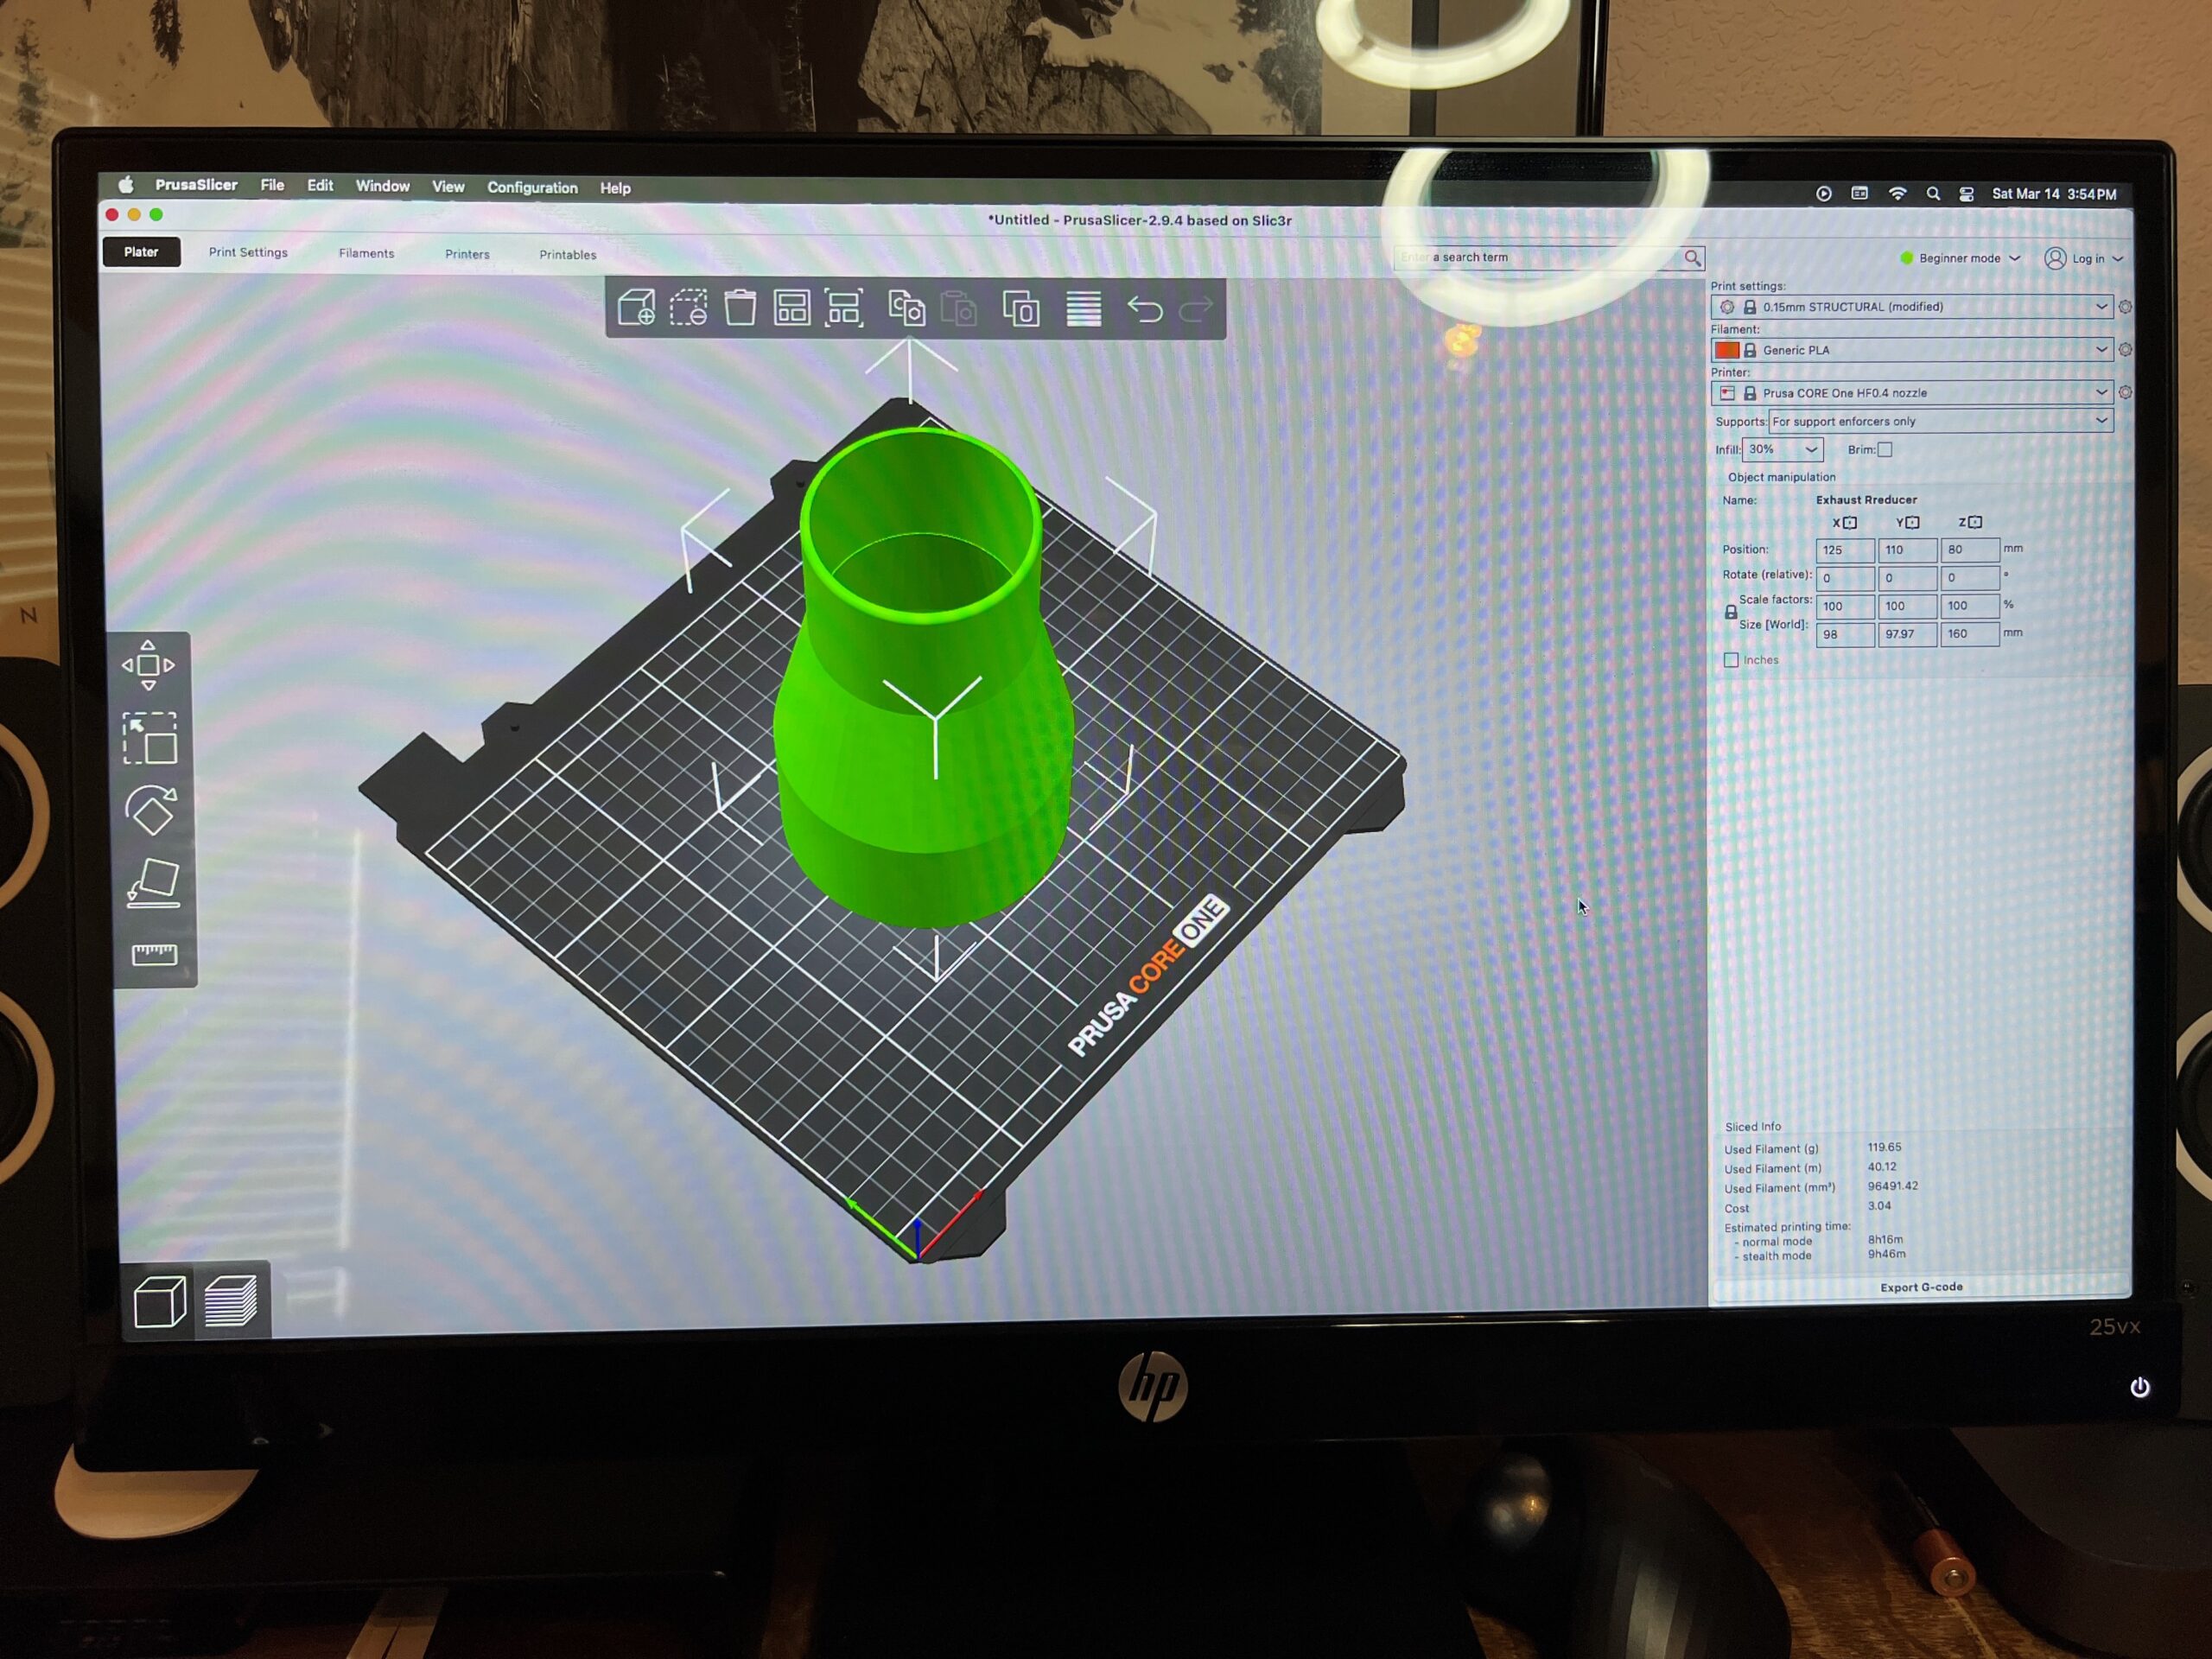
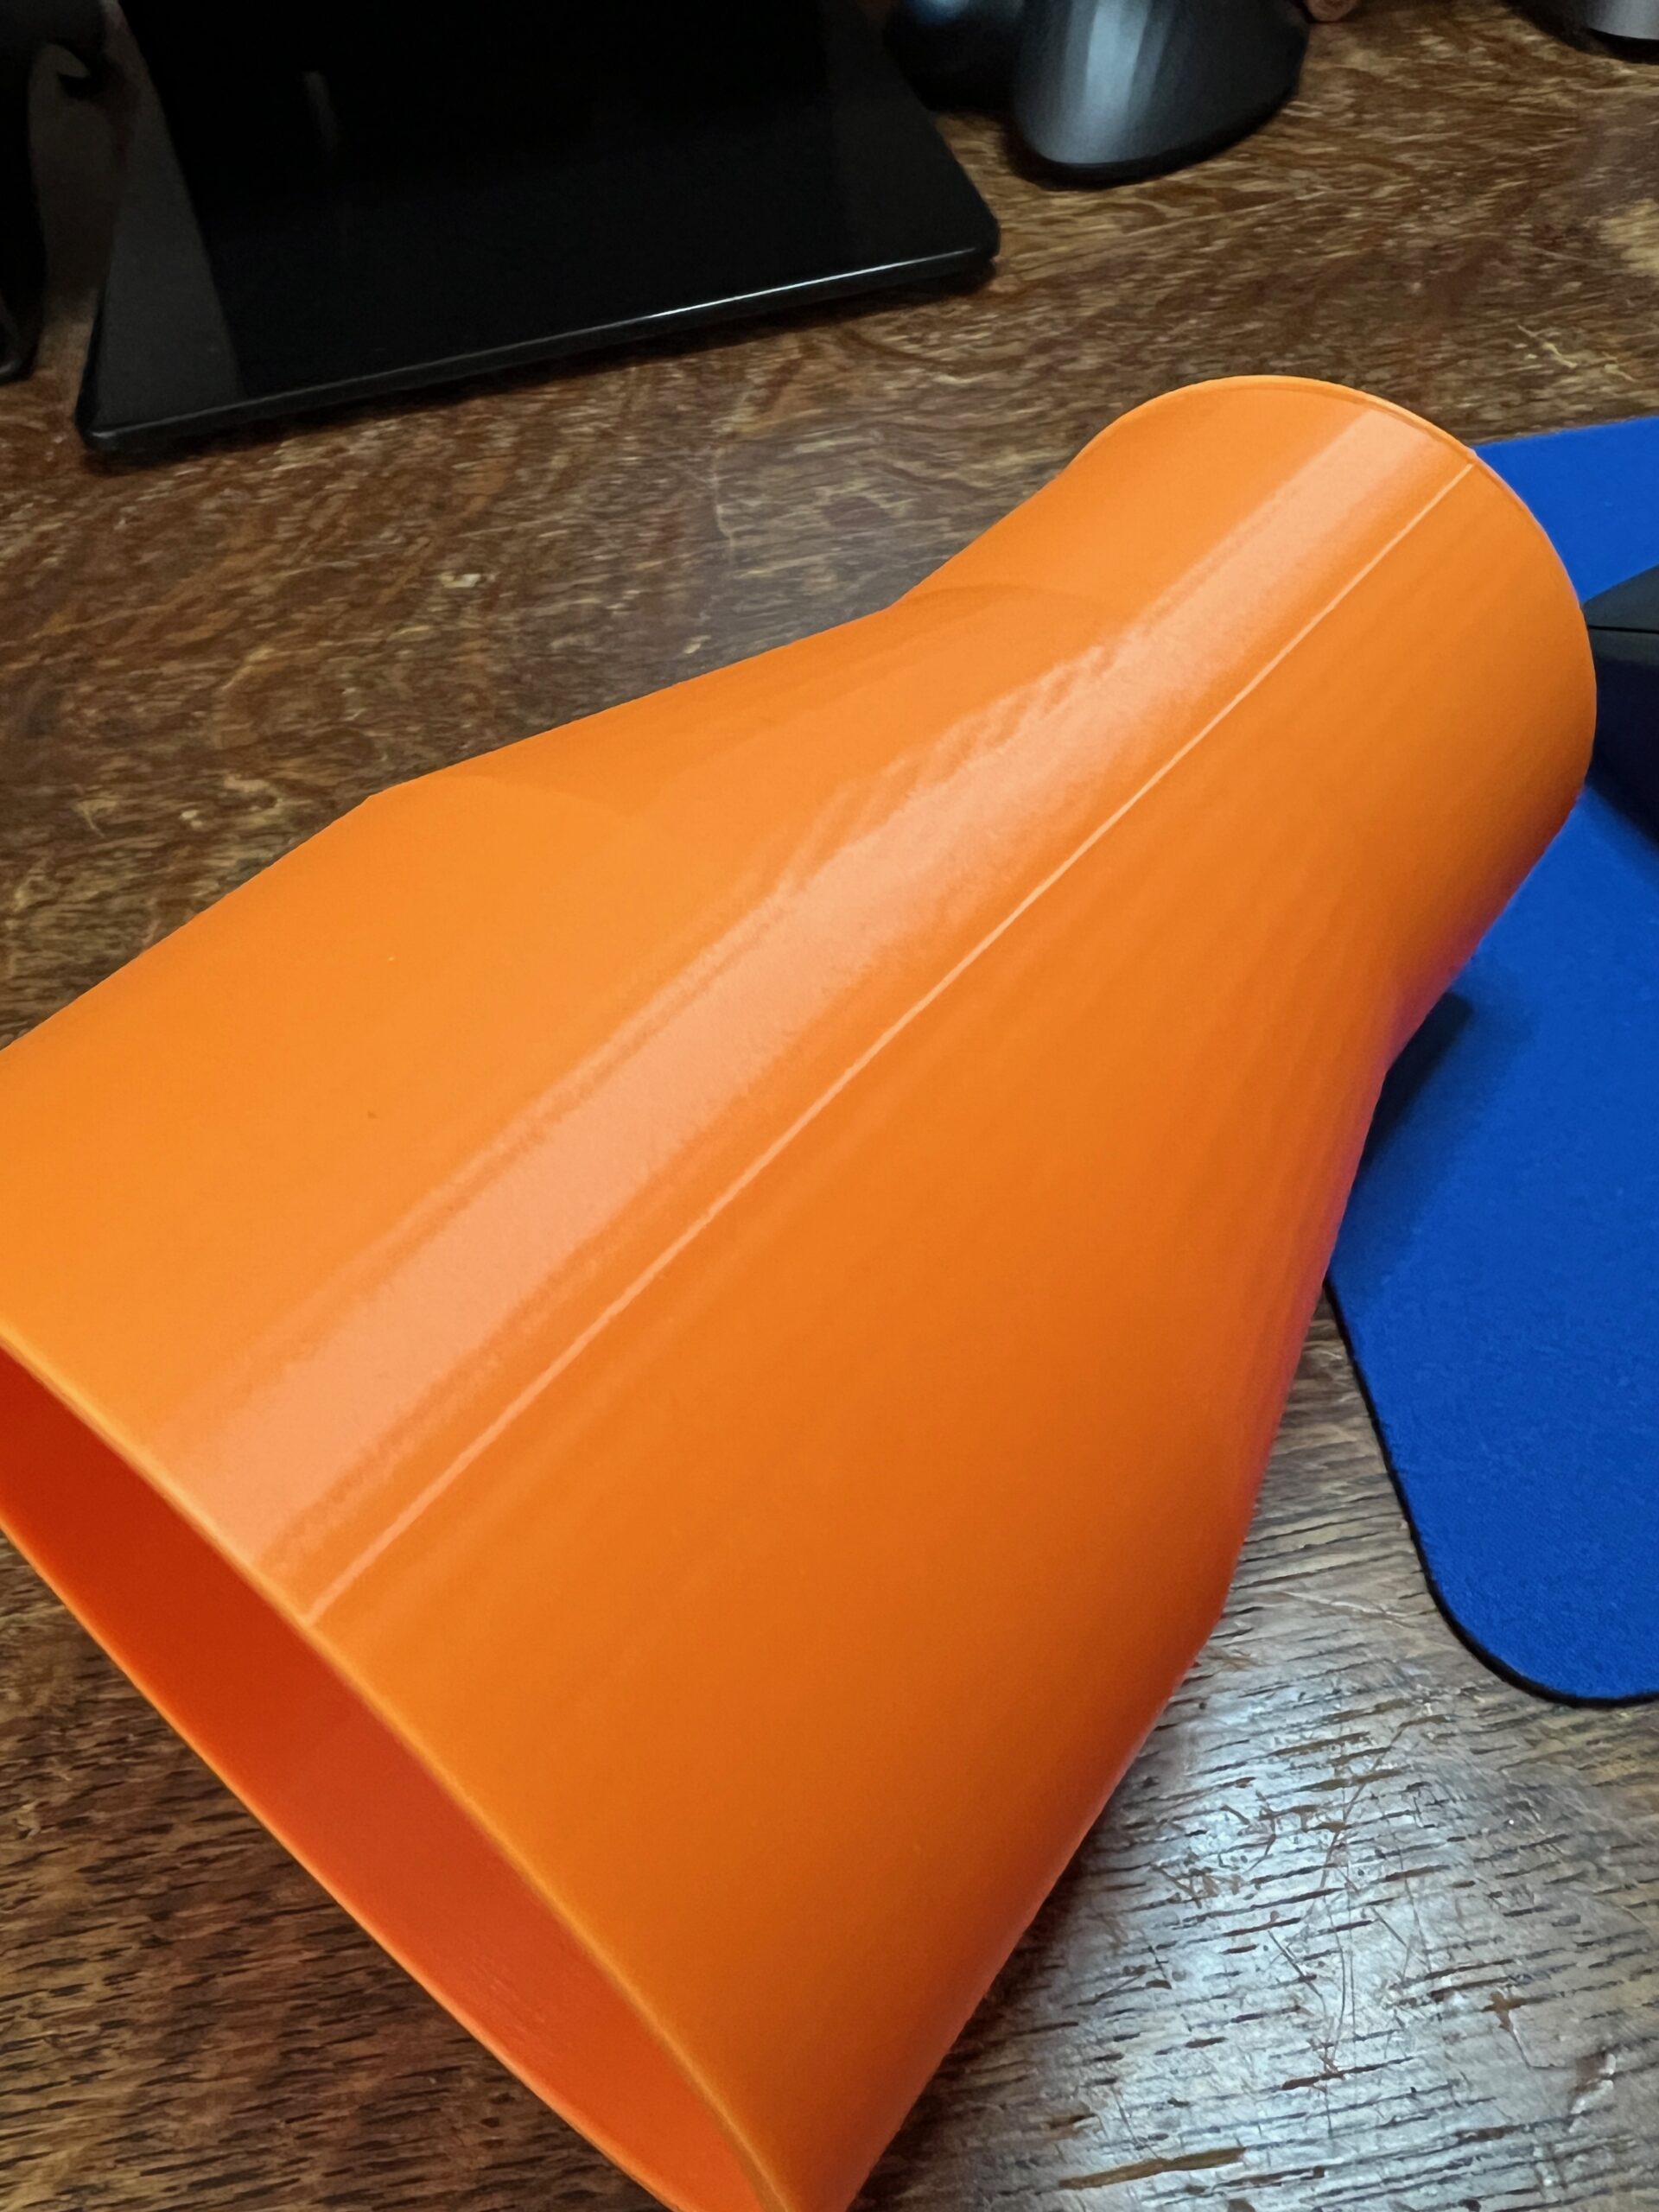
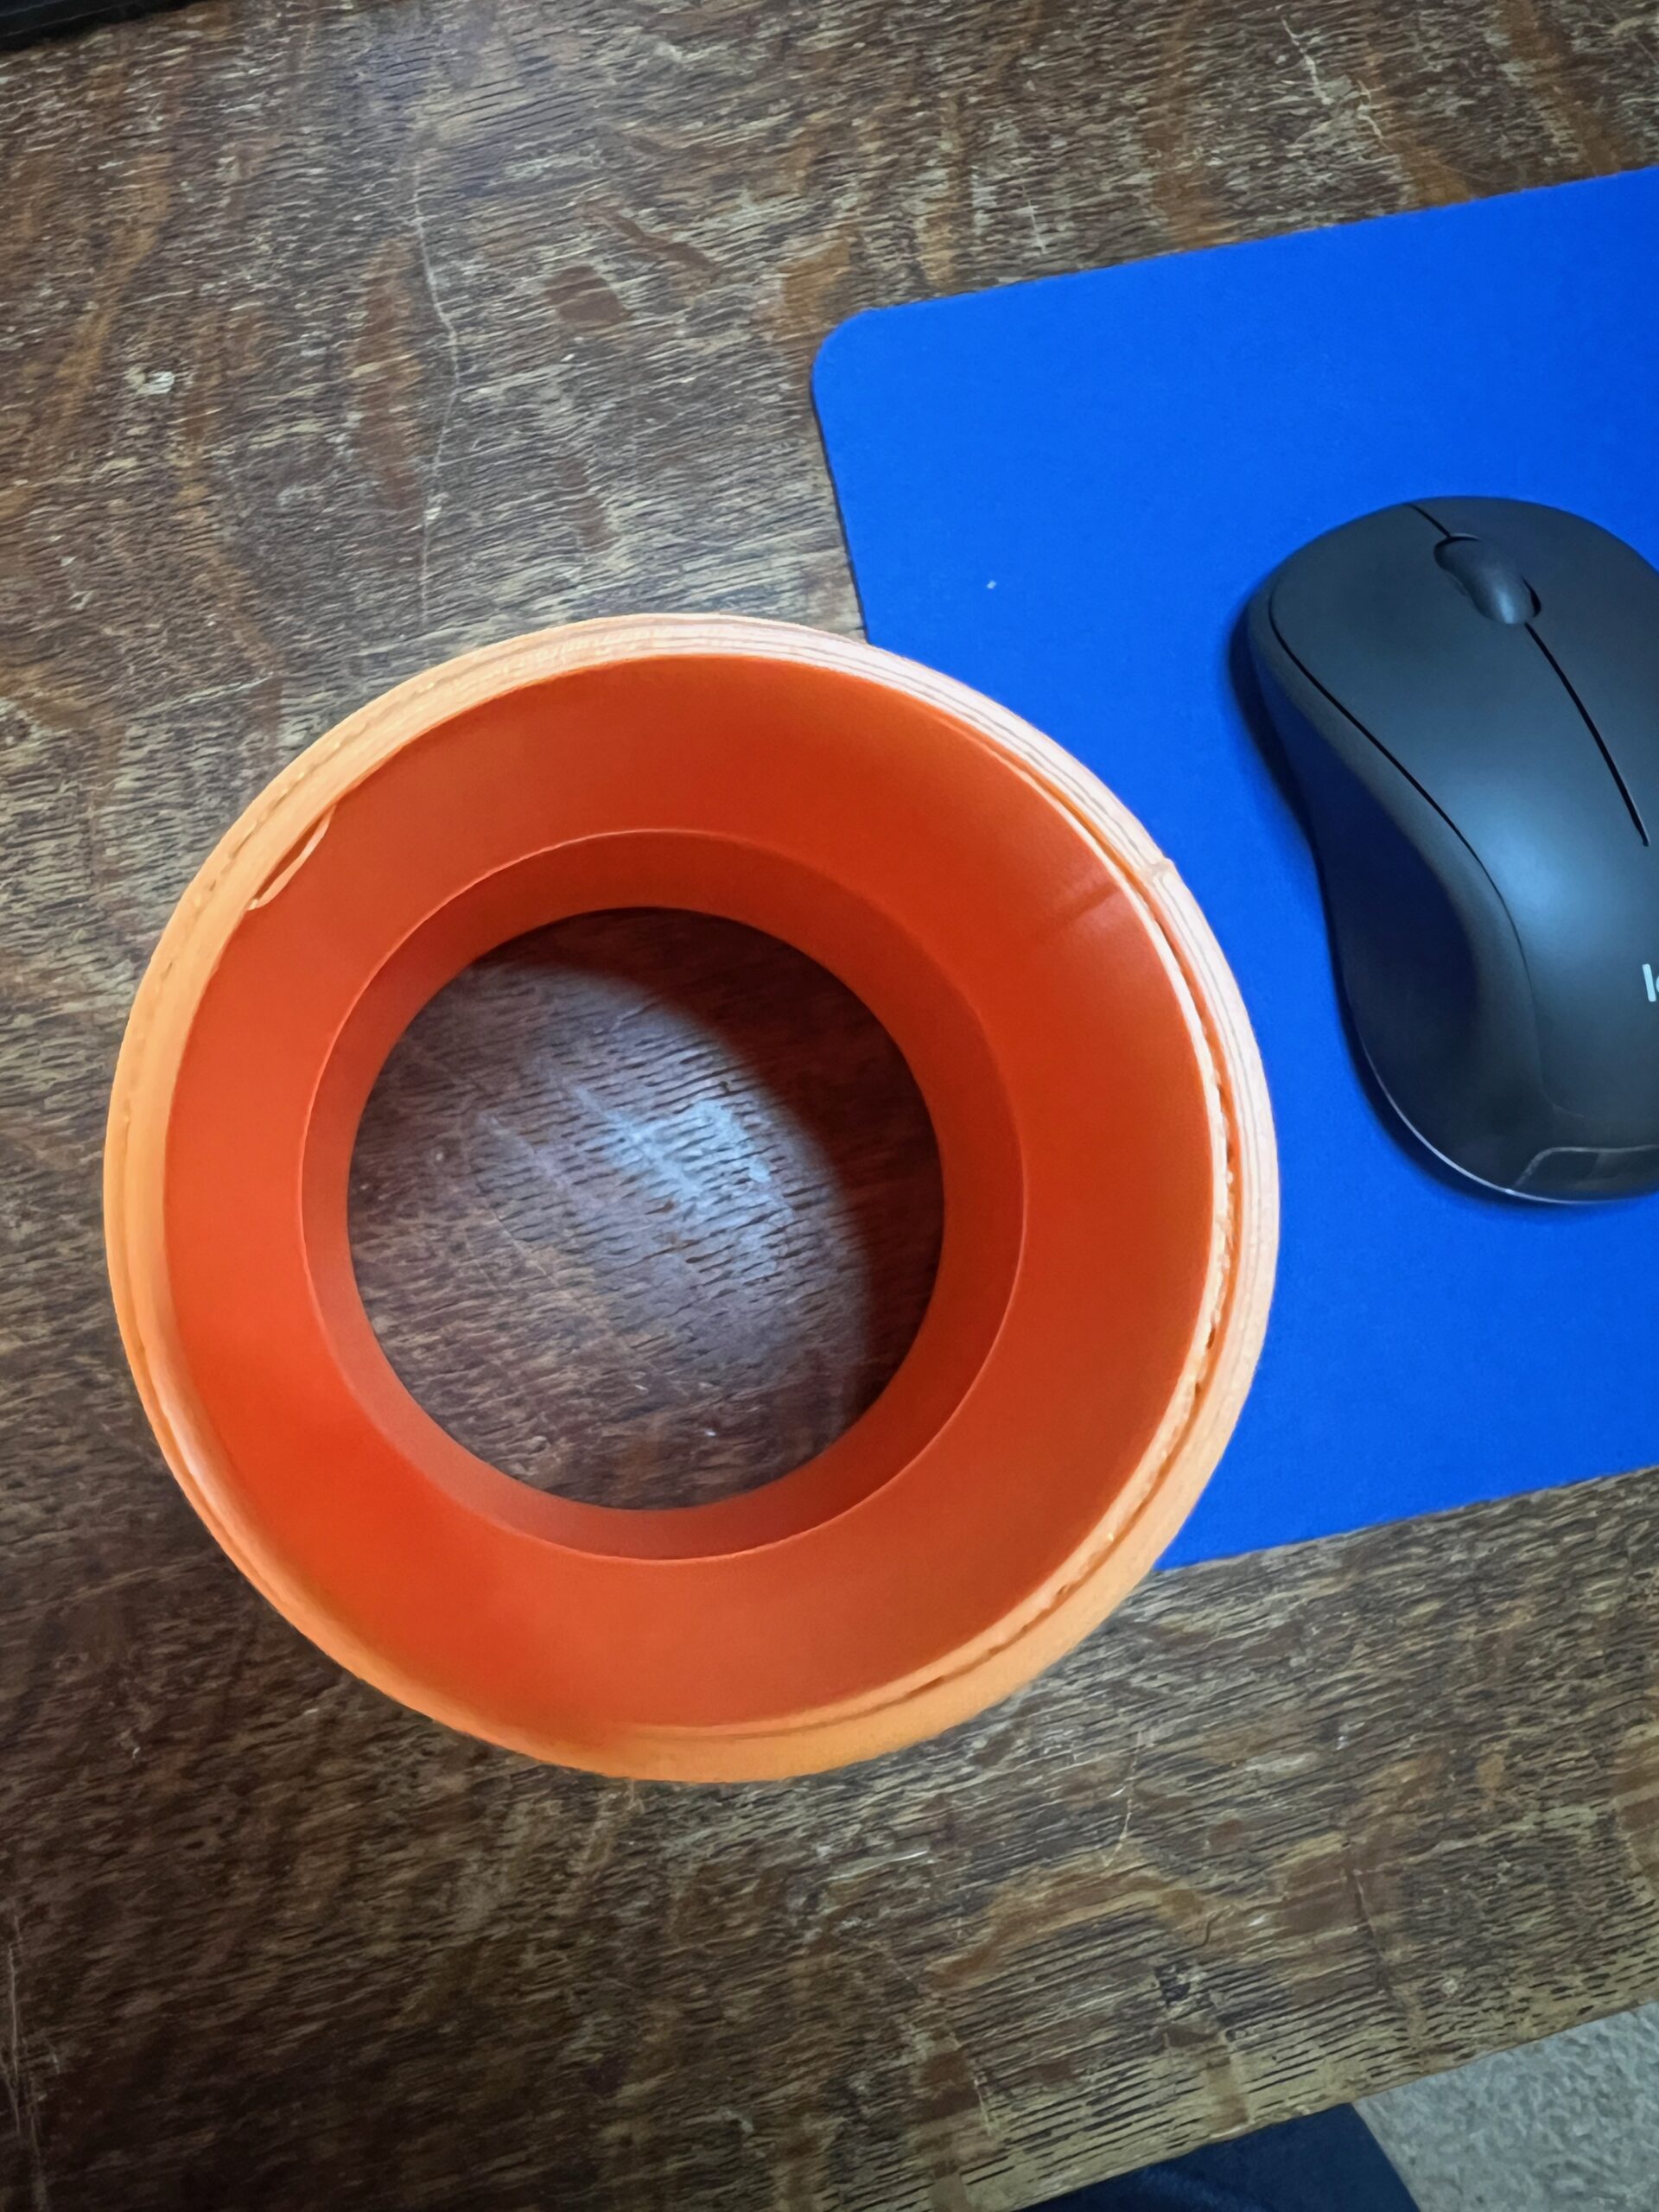
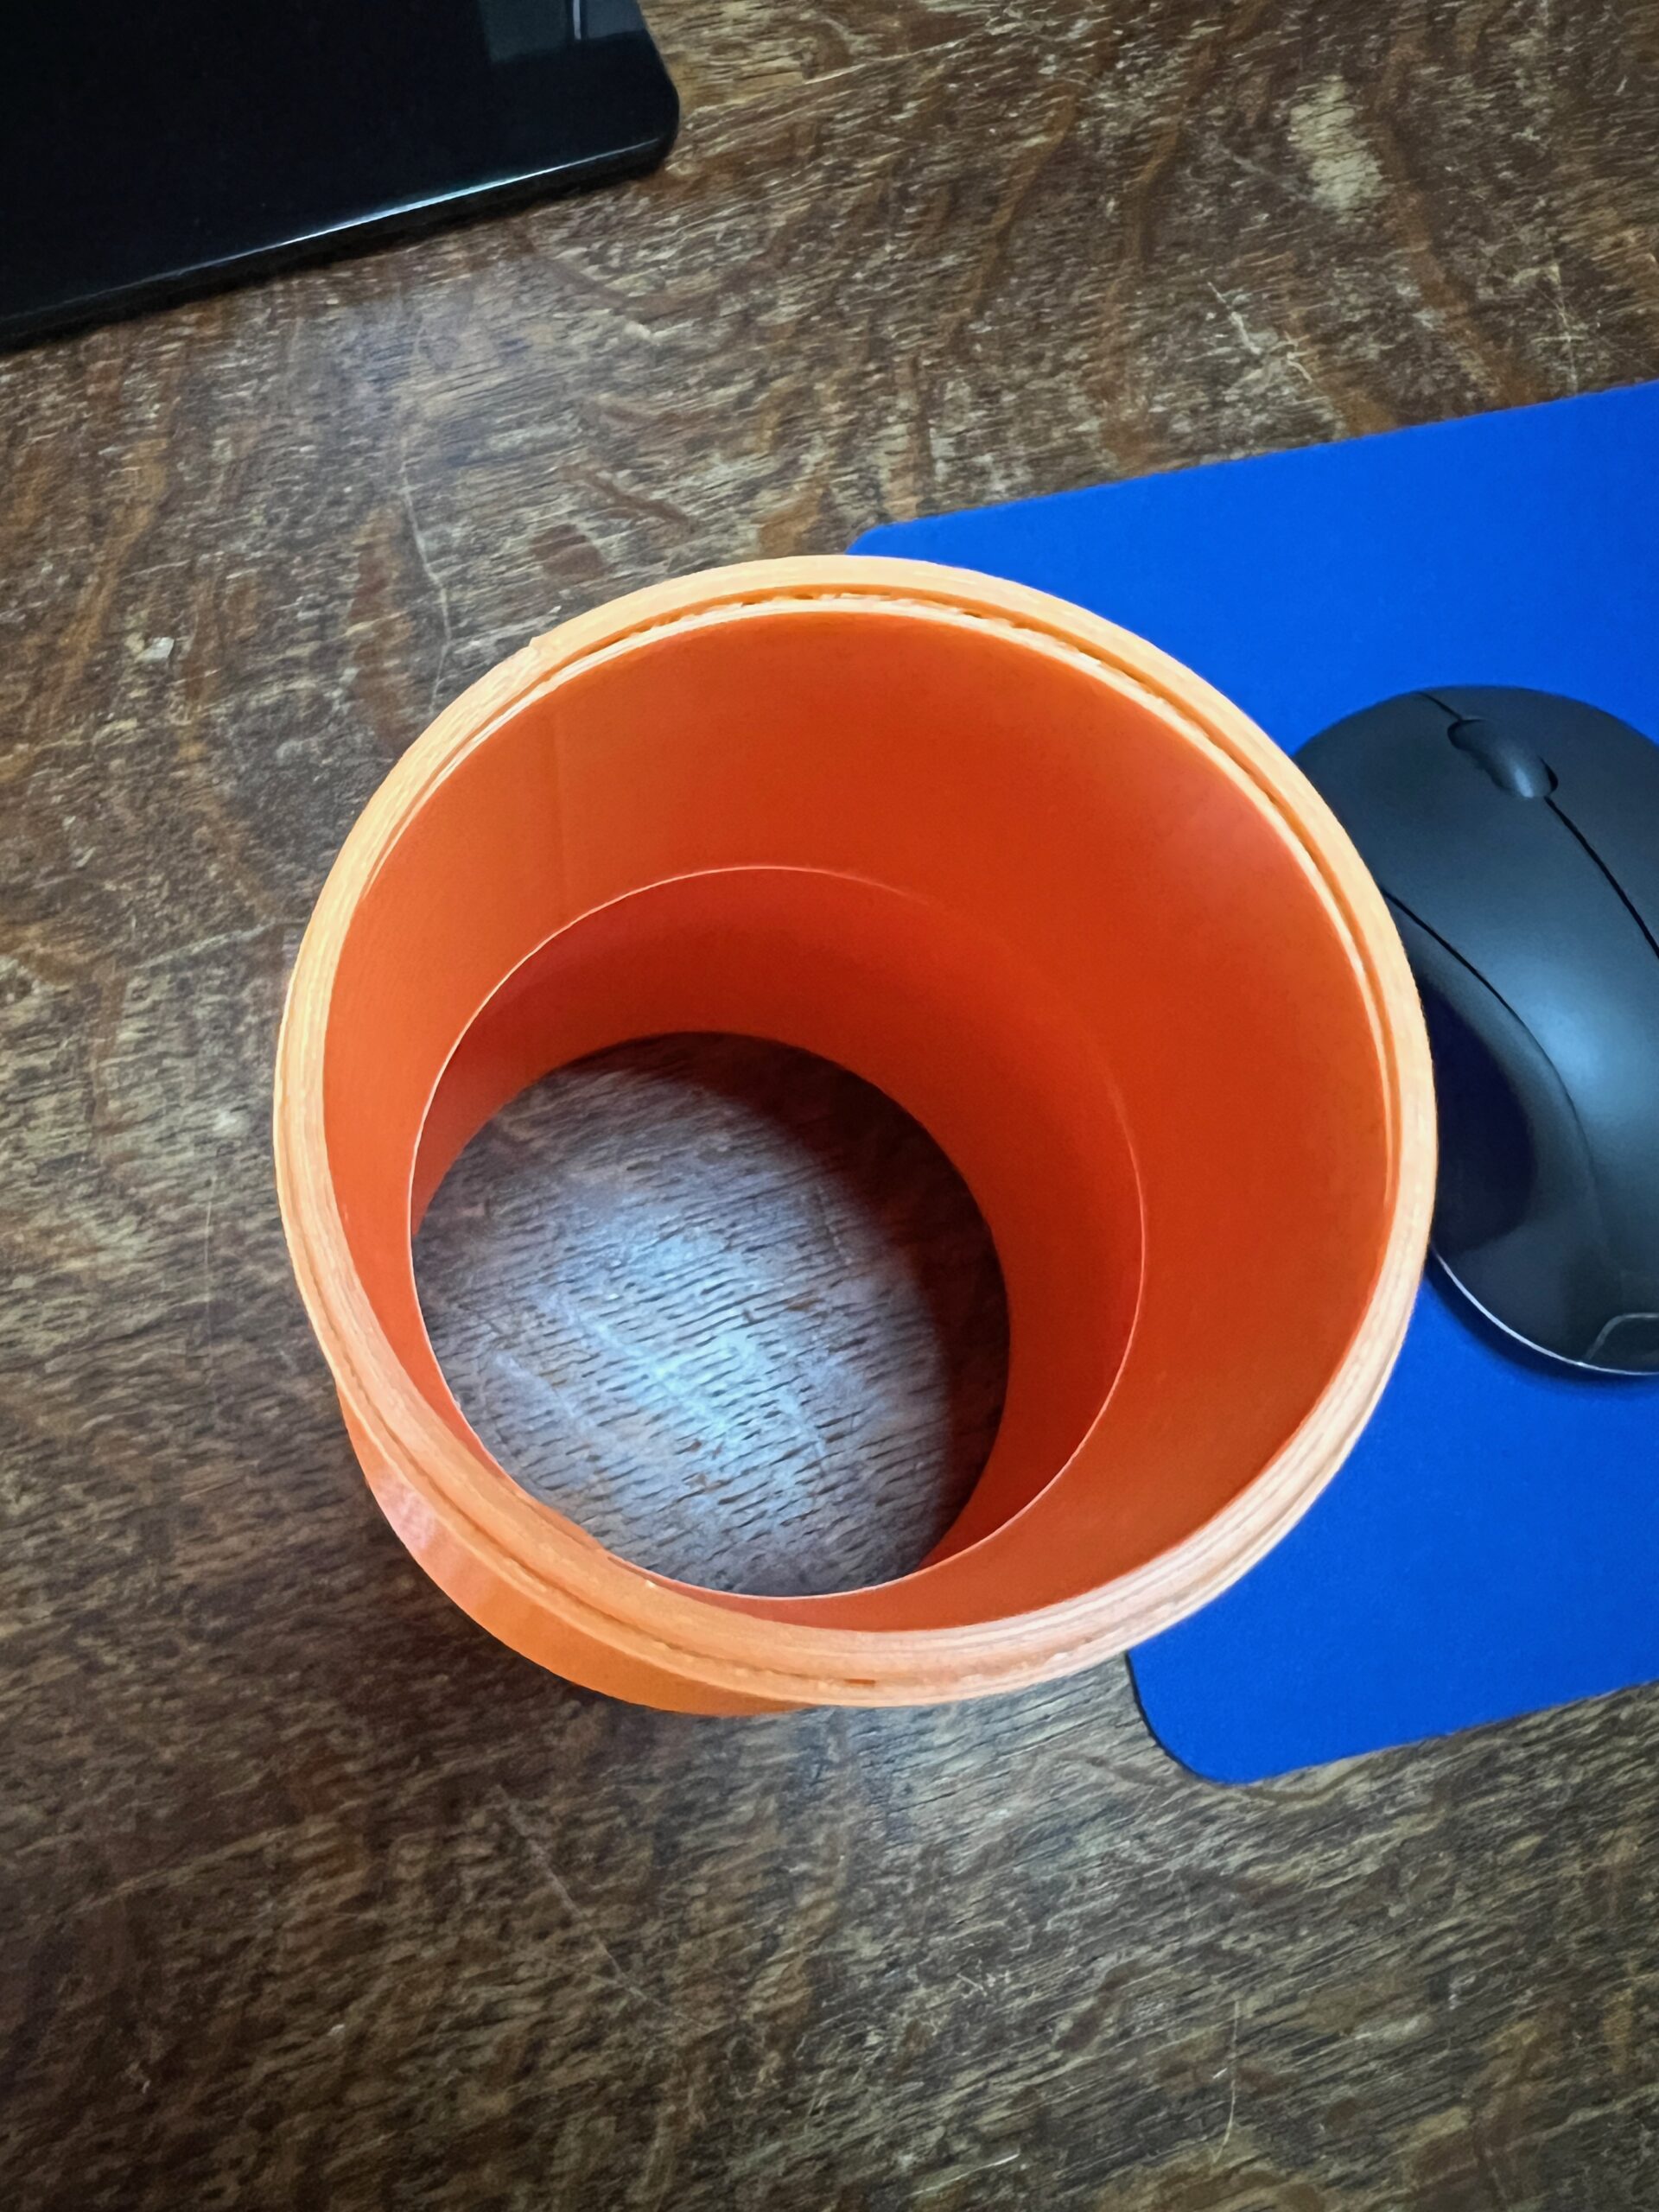
This is my third print, and my first design using FreeCAD: it's a dust collector reducer. The first pic is the design in Prusa Slicer, which all seemed normal to me. The second pic shows a seam which printed on the right side. I could see the print head so a little "glitch" step when hitting this point on the collector. Not sure how this showed up in the print. Third and fourth pics show the top of the collector where the slices were printed offset from the design. You can see the fill peeking past the top layers.
Any suggestions are welcome!
Randy Williams
RE: Top slices offset - seam on side of print
The first photo shows the seam that appears on round prints where the individual layers connect. Getting rid of it is not easy, and there have been many posts about this problem. The next two photos show the shifting of layers during printing. This seam could also be removed by careful sanding, but given the intended use, I would leave it alone. Layer shifting is worse, it can occur at any time. It may not show up on other prints. Again, it could be removed by careful sanding where it bothers when applying to other parts, otherwise what I wrote about the seam above applies.
RE: Top slices offset - seam on side of print
There are various strategies you can use with seams, none of which are perfect. I usually go with the straight line like you did. You can also randomize the position but that can make the entire part look worse. There is also a scarf that tries to blend them, but I haven't played with that. The more you do, the more you'll find yourself going into the advanced mode of the slicer and changing things. I was a bit scared of this at first but now it's routine to change the infill type, the number of perimeter walls, how the seams are handled, the bridging flow and whether to fully complete each part before moving to the next. Experiment on smallish parts!
RE: Top slices offset - seam on side of print
Thanks for the reply! I think the seam thing surprised me because I didn't realize it was there in the FreeCAD drawing (but I see it now) and didn't show up in the slicer rendition. Like you mentioned, for the intended use neither issue is a game killer. Onward and upward.
RE: Top slices offset - seam on side of print
Thanks for the reply. I realize now I need to pay more attention to the drawing in FreeCAD; didn't really think of is as a seam at the time and it didn't show up in the Slicer rendition. I appreciate the tips on the scarf and digging into settings.
RE: Top slices offset - seam on side of print
Zoom is your friend in both FreeCAD and the slicer. The slicer will show you a lot if you look closely enough. I admit to usually noticing something in a print, and then going back to the slicer and saying, "Oh, there it it!"
RE: Top slices offset - seam on side of print
didn't realize it was there in the FreeCAD drawing (but I see it now) and didn't show up in the slicer rendition.
Not a FreeCAD user myself but the seam should NOT show up in the CAD model. You may see lines where surfaces connect but the choice of where to put the seam is entirely driven by the slicer.
To go back to basics: Think about how the printer lays down the model. So it finishes the first layer then the print head moved up a tiny bit to lay down the next layer. The point where that move occurs is what creates a little "bump"! which then turns into the seam as we go higher and higher. By default the slicer tries to put the seam into a corner, but if you don't have a corner, you will end up with the visible seam that you've seen
You can in fact make the slicer show you where the seam is. In Preview, select the Seam button in the legend. Why it's not on by default and why it won't stay on beyond slicer restarts escapes me. You may have to be in an advanced mode to see this option
Formerly known on this forum as @fuchsr -- https://foxrun3d.com/