RE: The bed is not leveled !!!
Just to add a data point: On my Core One kit build, the bed-to-nozzle distance is equal to within 0.1 mm in the front left and back center. It is approx. 0.5 mm larger (i.e. bed lower or nozzle higher) in the front right.
Measured with a feeler gauge directly after "Z calibration", i.e. bumping the Z motors into their bottom ends stops, then moving the bed up via the Control > Move menu. This 0.5 mm tolerance is about what I would expect from a tolerance stackup:
- The relative heights of base plate and CoreXY frame are defined via the their mounting holes in the enclosure frame profiles, which do have an estimated 1/10 to 2/10 mm tolerance due to larger hole diameters.
- The height of the Y rods vs. the CoreXY frame is well-defined via the dimensions of the mounting blocks, no assembly tolerance there.
- The height of the X rail vs. the CoreXY frame suffers from the additional tolerances of screw-mounting the 90° mounting brackets on both sides. That's another set of four hole diameter tolerances which (in a theoretical worst case) could all add up, leading to left-to-right height differences.
Hence I would expect left-to-right height deviations to be larger then front-to-back in a typical printer. To try and correct this, I would try loosening the screws of the mounting brackets to try and lift or/and lower the X gantry on either side.
RE: The bed is not leveled !!!
Thanks for the response and advice. I would expect that a Prusa service technician would be able to handle this problem easily. We'll see.
RE: The bed is not leveled !!!
I think a difference of 0.5 mm is quite okay, unlike 1.9 mm. I can mount the wall shelf more flush than with a difference of 1.9 mm at a length of about 300 mm
RE: The bed is not leveled !!!
Wondering if leveling the base then checking both the bed and core with a level would help determine where the problem is. Looking at the assembly instructions the core plate is positioned by the z rods and the rear mount. Might be an interesting test. Most cell phones have a fairly good level app.
RE: The bed is not leveled !!!
Of course, I will send information about the result of the complaint here. We will see what values I measure when I get the printer back.
RE: The bed is not leveled !!!
So I finally got my printer back and I would like to share with you the result of the service warranty repair.
The printer came back quite dusty, with a scratched top polycarbonate plate. The result of the repair - satisfactory. The bed is about halfway level. Now the height difference after Z calibration is 1mm, the right front part is higher. However, it is an improvement compared to almost 2mm, which were originally. I will not deal with the manufacturer anymore. I solved it with my own washers on the Z motor screws. I simply put a simple washer in the lower part that raises the left and rear part of the bed during Z calibration and now the height difference is really minimal. I printed the washers myself and attached them to the heads of the Z axis motor screws. I have to praise the communication and overall dealings with the Prusa service.
RE: The bed is not leveled !!!
Hey, did you have your original packaging for the return, or did they supply packaging for the return? I'm having the same issue, and will need to either return it for repairs or just return it as defective, but I don't have my packaging anymore. Curious if they provide, or if you need to go buy your own.
RE: The bed is not leveled !!!
Hi, I packed the printer in its original packaging. I took it to the service center in person. I live not far away.
RE: The bed is not leveled !!!
Hi, perhaps this mod https://www.printables.com/model/1289015-prusa-core-one-bedlevel-correction-dust-cover can help you for leveling the bed.
My Kit was not delivered yet, but I will keep this mod in mind if I have the same bed level problem.
RE: The bed is not leveled !!!
I make exactly the same piece to correct my bed. But with a correction of 1.1mm.
RE: The bed is not leveled !!!
This is my solution https://www.printables.com/model/1289485-core-one-z-washer
RE:
Why are you printing all sorts of pads to the Z axis when the solution to this problem is simple? There is a threaded hole in the base near each lift motor. It was probably originally intended to secure the table with the print pad in transit. Screw an M3x20 bolt with a nut into each of the holes. Use the height of these screws to adjust the bed to the required position and use the nut to secure the screw. A dial gauge can even be attached to the extruder using a simple adapter and the bed position can be set perfectly accurately. Use the two screws at the front to set the bed in the XZ plane and then use the rear screw to level the bed in the YZ plane. Since you need to drive the table down to the stops and back up after each turn of the screws, create a simple text file and put two lines of commands in it. On the first line, put the command G162 Z; and on the next line, put the command G1 Z20; or any other value you are comfortable with. For example, name this file test.gcode and upload it to the printer as a print file. When you run it, the pad will go down on the stops and then rise up for measurement. And then just repeat turning the screws, running this print file, and measuring until you achieve perfect bed alignment.
RE: The bed is not leveled !!!
The best place to rest the bed when Z-aligning is as close to the threaded rods as possible
RE: The bed is not leveled !!!
The metal parts are strong and solid enough, and the distances from the axis are too small for any deformations to occur here. With the adjustment of the print bed according to my description, I achieved an accuracy of 0.05 mm across the entire surface of the bed. Now, I just need to set the exact right angles on the portal with the print head.
RE: The bed is not leveled !!!
Can someone make a video of this? No idea what he is talking about
RE: The bed is not leveled !!!
Can someone make a video of this? No idea what he is talking about
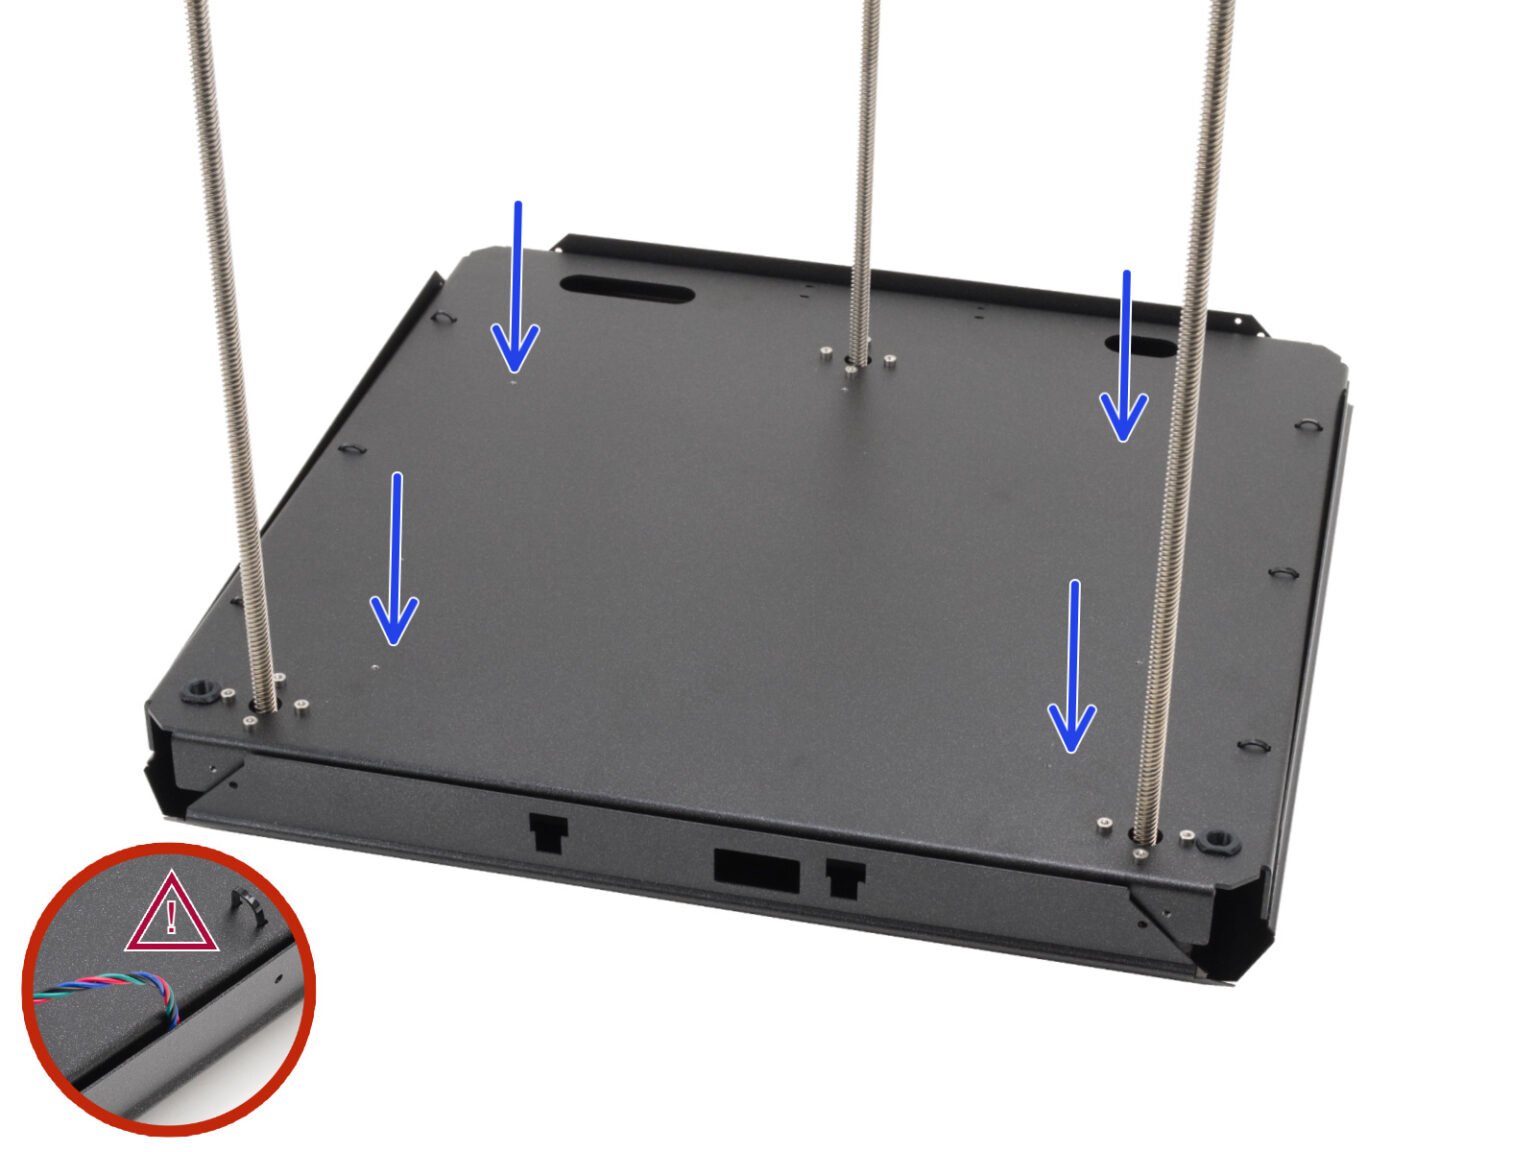
Look at this image from the manual. The arrow in the bottom left corner of the picture is close to a little, bright, threaded hole.
The same threaded hole is close to the rear z-screw and to the other front z-screw (but the arrow hides it).
Use some M3 screws that are long enough and preferably a nylock nut, put the nut on the screw, then put the screw in the threaded hole and adjust the height.
Then fixate the screw in that position via the nylock nut, similar to the "nylock mod" for other print beds.
I'm thinking about doing this, but designing a little "bumper head" made of PETG to put on the screw heads.
RE: The bed is not leveled !!!
Hey guys, check out this thread.
The problems might be related to a slightly different spindle pitch between the Z motor spindles. Maybe do a measurement and report back.