RE: Z axis trouble but only when printing
Customer support sent me a new nextruder main cable and all my z axis problems went away. They suspected a pinch or crimp in the old one, but I didn’t see anything wrong with it once removed. I was skeptical about it being the fix, but I’m back in business!
RE: Z axis trouble but only when printing
I now have an edited profile for my printer with start g-code changes, only two lines added in to turn extruder heater off while probing using the g-code command M104 S0 ;
One added just after heating the bed and nozzle up at the start at:
M140 S[first_layer_bed_temperature] ; set bed temp
{endif}

M109 R{((filament_notes[0]=~/.*HT_MBL10.*/) ? (first_layer_temperature[0] - 10) : (filament_type[0] == "PC" or filament_type[0] == "PA") ? (first_layer_temperature[0] - 25) : (filament_type[0] == "FLEX") ? 210 : 170)} ; wait for temp

M104 S0 ; turn off temperature ADDED BY ME

M84 E ; turn off E motor

G28 ; home all without mesh bed level

{if chamber_minimal_temperature[initial_tool]!=0}
; Min chamber temp section
And the other just before nozzle cleaning at :
{if filament_type[initial_tool]=="FLEX"}
G1 E-4 F2400 ; retraction
{else}
G1 E-2 F2400 ; retraction
{endif}

M84 E ; turn off E motor

M104 S0 ; turn off temperature ADDED BY ME

G29 P9 X208 Y-2.5 W32 H4

;
; MBL
;
This works for me and completes the z-homing, nozzle clean and bed probing without any issues.
RE: Z axis trouble but only when printing
It's been about a week since prusa sent me a new main harness and my z issues are all resolved. I no longer have to disable the nozzle heater before cleaning / homing.
RE: Z axis trouble but only when printing
It's been about a week since prusa sent me a new main harness and my z issues are all resolved. I no longer have to disable the nozzle heater before cleaning / homing.
That's interesting, thank you for the update. Could it just be bad crimping on one of the plugs, resulting in extra resistance and ground bounce when the heater kicks in?
Do you still have the old cable and could measure the resistance of its various connections?
RE: Z axis trouble but only when printing
I now have an edited profile for my printer with start g-code changes, only two lines added in to turn extruder heater off while probing using the g-code command M104 S0 ;
One added just after heating the bed and nozzle up at the start at:
M140 S[first_layer_bed_temperature] ; set bed temp
{endif}

M109 R{((filament_notes[0]=~/.*HT_MBL10.*/) ? (first_layer_temperature[0] - 10) : (filament_type[0] == "PC" or filament_type[0] == "PA") ? (first_layer_temperature[0] - 25) : (filament_type[0] == "FLEX") ? 210 : 170)} ; wait for temp

M104 S0 ; turn off temperature ADDED BY ME

M84 E ; turn off E motor

G28 ; home all without mesh bed level

{if chamber_minimal_temperature[initial_tool]!=0}
; Min chamber temp section
And the other just before nozzle cleaning at :
{if filament_type[initial_tool]=="FLEX"}
G1 E-4 F2400 ; retraction
{else}
G1 E-2 F2400 ; retraction
{endif}

M84 E ; turn off E motor

M104 S0 ; turn off temperature ADDED BY ME

G29 P9 X208 Y-2.5 W32 H4

;
; MBL
;
This works for me and completes the z-homing, nozzle clean and bed probing without any issues.
I followed the post above and it seems like it worked. Homing, leveling, probing, and nozzle cleaning were all completed quick and successfully.
I also spent 3 hours on chat with support to see if they'd send me the replacement harness. They did not offer to send the harness and ended up giving me slightly different gcode that doesn't look like it would work as well. I haven't tried it yet. It looks like they only turned the heat off once before the final probing at the end. It seems like this wouldn't catch the homing or leveling which were also causing issues on my printer.
Support said they would fix this in the next firmware release. Are they just going to add those pauses in heating to everyone's printer? If the harness fixes the root problem, I'd rather have that and keep preheating the printer during that down time.
Here's the alternate code they sent me:

RE: Z axis trouble but only when printing
I now have an edited profile for my printer with start g-code changes, only two lines added in to turn extruder heater off while probing using the g-code command M104 S0 ;
My CORE One would not print. Modifying the start g-code per david-b36 did the trick, it is now printing.
Thanks
Dennis
RE:
I followed the post above and it seems like it worked. Homing, leveling, probing, and nozzle cleaning were all completed quick and successfully.
I also changed the G-CODE and the problems disappeared. Thank you all.
RE: Z axis trouble but only when printing
Hi all
I too have been getting round this by modifying gcode to turn the heater off
I asked support if I could have a new wiring harness and was told its a known software issue I should expect a fix for soon.
RE: Z axis trouble but only when printing
[...] was told its a known software issue I should expect a fix for soon.
More like "it's a known hardware issue, expect a software workaround soon"...
Not that it makes a difference -- unless you are a Prusa software developer, who gets annoyed to always be blamed for problems that were created by the hardware team. 😉
RE:
I now have an edited profile for my printer with start g-code changes, only two lines added in to turn extruder heater off while probing using the g-code command M104 S0 ;
One added just after heating the bed and nozzle up at the start at: [...]
Thanks a lot!
My Core One kit luckily barely has any issues and was printing 99.9% fine.
But at the start of each print, the bed was going up a little, then down, then up, then down and I was questioning the mental state of the Z-Axis for doing probing in mid-air, but it mostly went through in the end.
I had a few nozzle cleaning errors every now and then and sometimes a bit longer homing out of nowhere.
It's all fixed.
I start the print, it loads the gcode, heats to idle, homing, single probe, nozzle cleaning, probing, printing.
No errors at all, no weird movements anymore.
For anyone not wanting to bother looking for the correct lines to add, here's the full Start G-code for Firmware 6.3.2:
M17 ; enable steppers
M862.1 P[nozzle_diameter] A{(filament_abrasive[0] ? 1 : 0)} F{(nozzle_high_flow[0] ? 1 : 0)} ; nozzle check
M862.3 P "COREONE" ; printer model check
M862.5 P2 ; g-code level check
M862.6 P"Input shaper" ; FW feature check
M115 U6.3.2+10364

M555 X{(min(print_bed_max[0], first_layer_print_min[0] + 32) - 32)} Y{(max(0, first_layer_print_min[1]) - 4)} W{((min(print_bed_max[0], max(first_layer_print_min[0] + 32, first_layer_print_max[0])))) - ((min(print_bed_max[0], first_layer_print_min[0] + 32) - 32))} H{((first_layer_print_max[1])) - ((max(0, first_layer_print_min[1]) - 4))}

G90 ; use absolute coordinates
M83 ; extruder relative mode

{if chamber_minimal_temperature[initial_tool]!=0}
M140 S115 ; set bed temp for chamber heating
{else}
M140 S[first_layer_bed_temperature] ; set bed temp
{endif}

M109 R{((filament_notes[0]=~/.*HT_MBL10.*/) ? (first_layer_temperature[0] - 10) : (filament_type[0] == "PC" or filament_type[0] == "PA") ? (first_layer_temperature[0] - 25) : (filament_type[0] == "FLEX") ? 210 : 170)} ; wait for temp

M104 S0 ; turn off temperature ADDED BY ME

M84 E ; turn off E motor

G28 ; home all without mesh bed level

{if chamber_minimal_temperature[initial_tool]!=0}
; Min chamber temp section
M104 S{idle_temperature[initial_tool]} ; set idle temp
G1 Z10 F720 ; set bed position
G1 X242 Y-9 F4800 ; set print head position
M191 S{chamber_minimal_temperature[initial_tool]} ; wait for minimal chamber temp
M141 S{chamber_temperature[initial_tool]} ; set nominal chamber temp
M107
M140 S[first_layer_bed_temperature] ; set bed temp
{else}
M141 S{chamber_temperature[initial_tool]} ; set nominal chamber temp
{endif}

{if first_layer_bed_temperature[initial_tool]<=60}M106 S70{endif}
G0 Z40 F10000
M104 T{initial_tool} S{if is_nil(idle_temperature[initial_tool])}100{else}{idle_temperature[initial_tool]}{endif}
M190 R[first_layer_bed_temperature] ; wait for bed temp
M107

G29 G ; absorb heat

M109 R{((filament_notes[0]=~/.*HT_MBL10.*/) ? (first_layer_temperature[0] - 10) : (filament_type[0] == "PC" or filament_type[0] == "PA") ? (first_layer_temperature[0] - 25) : (filament_type[0] == "FLEX") ? 210 : 170)} ; wait for MBL temp

M302 S160 ; lower cold extrusion limit to 160C

{if filament_type[initial_tool]=="FLEX"}
G1 E-4 F2400 ; retraction
{else}
G1 E-2 F2400 ; retraction
{endif}

M84 E ; turn off E motor

M104 S0 ; turn off temperature ADDED BY ME

G29 P9 X208 Y-2.5 W32 H4

;
; MBL
;
M84 E ; turn off E motor
G29 P1 ; invalidate mbl & probe print area
G29 P1 X150 Y0 W100 H20 C ; probe near purge place
G29 P3.2 ; interpolate mbl probes
G29 P3.13 ; extrapolate mbl outside probe area
G29 A ; activate mbl

; prepare for purge
M104 S{first_layer_temperature[0]}
G0 X249 Y-2.5 Z15 F4800 ; move away and ready for the purge
M109 S{first_layer_temperature[0]}

G92 E0
M569 S0 E ; set spreadcycle mode for extruder

;
; Extrude purge line
;
G92 E0 ; reset extruder position
G1 E{(filament_type[0] == "FLEX" ? 4 : 2)} F2400 ; deretraction after the initial one
G0 E5 X235 Z0.2 F500 ; purge
G0 X225 E4 F500 ; purge
G0 X215 E4 F650 ; purge
G0 X205 E4 F800 ; purge
G0 X202 Z0.05 F8000 ; wipe, move close to the bed
G0 X199 Z0.2 F8000 ; wipe, move quickly away from the bed

G92 E0
M221 S100 ; set flow to 100%
RE: Z axis trouble but only when printing
I'm having the same issue but changing the start G-code didn't resolve it. I have no idea what else to do since I can't even print simple stuff right now due to this live Z-axis shift during the print
RE:
I'm having the same issue but changing the start G-code didn't resolve it. I have no idea what else to do since I can't even print simple stuff right now due to this live Z-axis shift during the print
Can you explain this a bit more? Maybe add a picture of a failed print.
I'm not sure how that Z-axis shift would look like.
I only had XY-shifts when activating any of the "not cross.." settings in the slicer. The travel speed in the "structural" presets is still 350 mm/s and the bug in the slicer doesn't slow down the printhead before doing the extra moves, leading to belt skipping, which makes an awful sound.
Depending on how the Z-axis shifts look like and your slicer settings, I'd suggest a test with massively reduced speeds and accelerations.
Activate stealth mode, set ALL acceleration values to 300 and the speed limit to 50 mm/s.
It's really slow then, but for a little test-piece, it shouldn't take too long.
Here's a Prusa Slicer project to use with everything set. It will be REALLY slow, but it should be a good A/B test to check if it's speeds related or a differente issue:
RE: Z axis trouble but only when printing
Hi,
as requested, here is a full write-up of the issue, including photos and a short video.
1 | Printer & setup
Model: Prusa Core One
Firmware: 6.3.2
Total print time before issues: ≈ 7 days
Filaments tested: Extrudr and Prusament PLA and PETG (same behaviour)
Slicer: PrusaSlicer 2.9.2
Build plates: textured and silk sheet (problem identical on both)
Mods: none
2 | What happens
Initial problem (back-left corner):
After the normal 49-point mesh-bed probe, the Z assembly rises in a small area at the rear-left. This begins on the very first layer—so early that the nozzle almost scrapes the sheet and the layer was pressed so hard into the print bed that it was almost impossible to remove. After a lot of troubleshooting that didn’t help at all, turning the printer off for 2 days and pushing a bit on the far left corner of the bed solved the issue.
New problem (center of bed):
While printing a perfectly flat test print, the first layers look flawless. At roughly 6-8 mm height, the Z spindles start turning slowly—even though the printer is still on the same layer. I captured this in the attached video: the spindles rotate even though no height change should occur.
3 | Things I have tried
Greased the three trapezoidal nuts → removed heavy squeaking, but Z drift remains.
Loosened all bed screws, Heated bed to 110 °C, re-tightened while hot, cooled → no effect.
Repeated Z calibrations → problem persists.
Swapped to a different build plate → no change.
Checked PSU and electronics for loose connectors → everything solid.
Tried “heater off” trick in the start G-code to rule out thermal expansion → no effect.
Left printer powered down for two days and pressed firmly on back-left of bed → corner issue disappeared temporarily, then center issue surfaced.
4 | Media
Photo 1+2: First failed part in the back-left corner—underside shows a pronounced “ditch.”
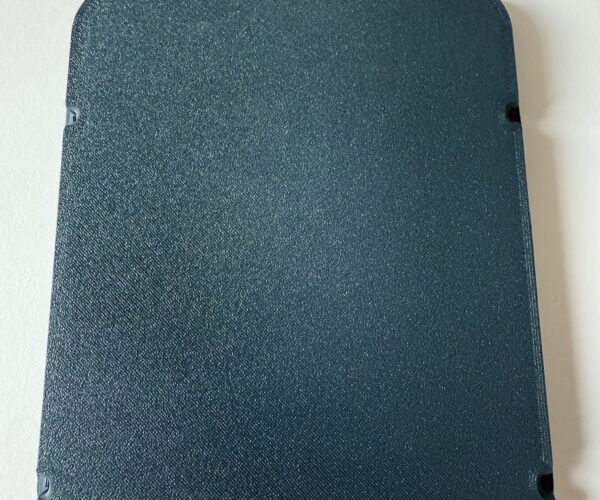
Photo 3+4: Current test plate—underside perfect, topside shows waves/gaps.
Video: Door-shot of the machine; Z spindles clearly turning during what should be a motionless layer.
(Attachments are included below.)


Video: IMG_3502
5 | Hypotheses so far
Corrupted mesh data or interpolation glitch?
Sensor drift or slight mechanical shift after some runtime, though it’s unclear why this first appeared at the first layer and then only above a few mm of Z height?
I appreciate any ideas and thanks for taking the time to read!
I am currently printing the test print you sent and at roughly 10mm layer height I can hear some very bad squeaking sounds. It sounds like something is scratching on something.
RE: Z axis trouble but only when printing
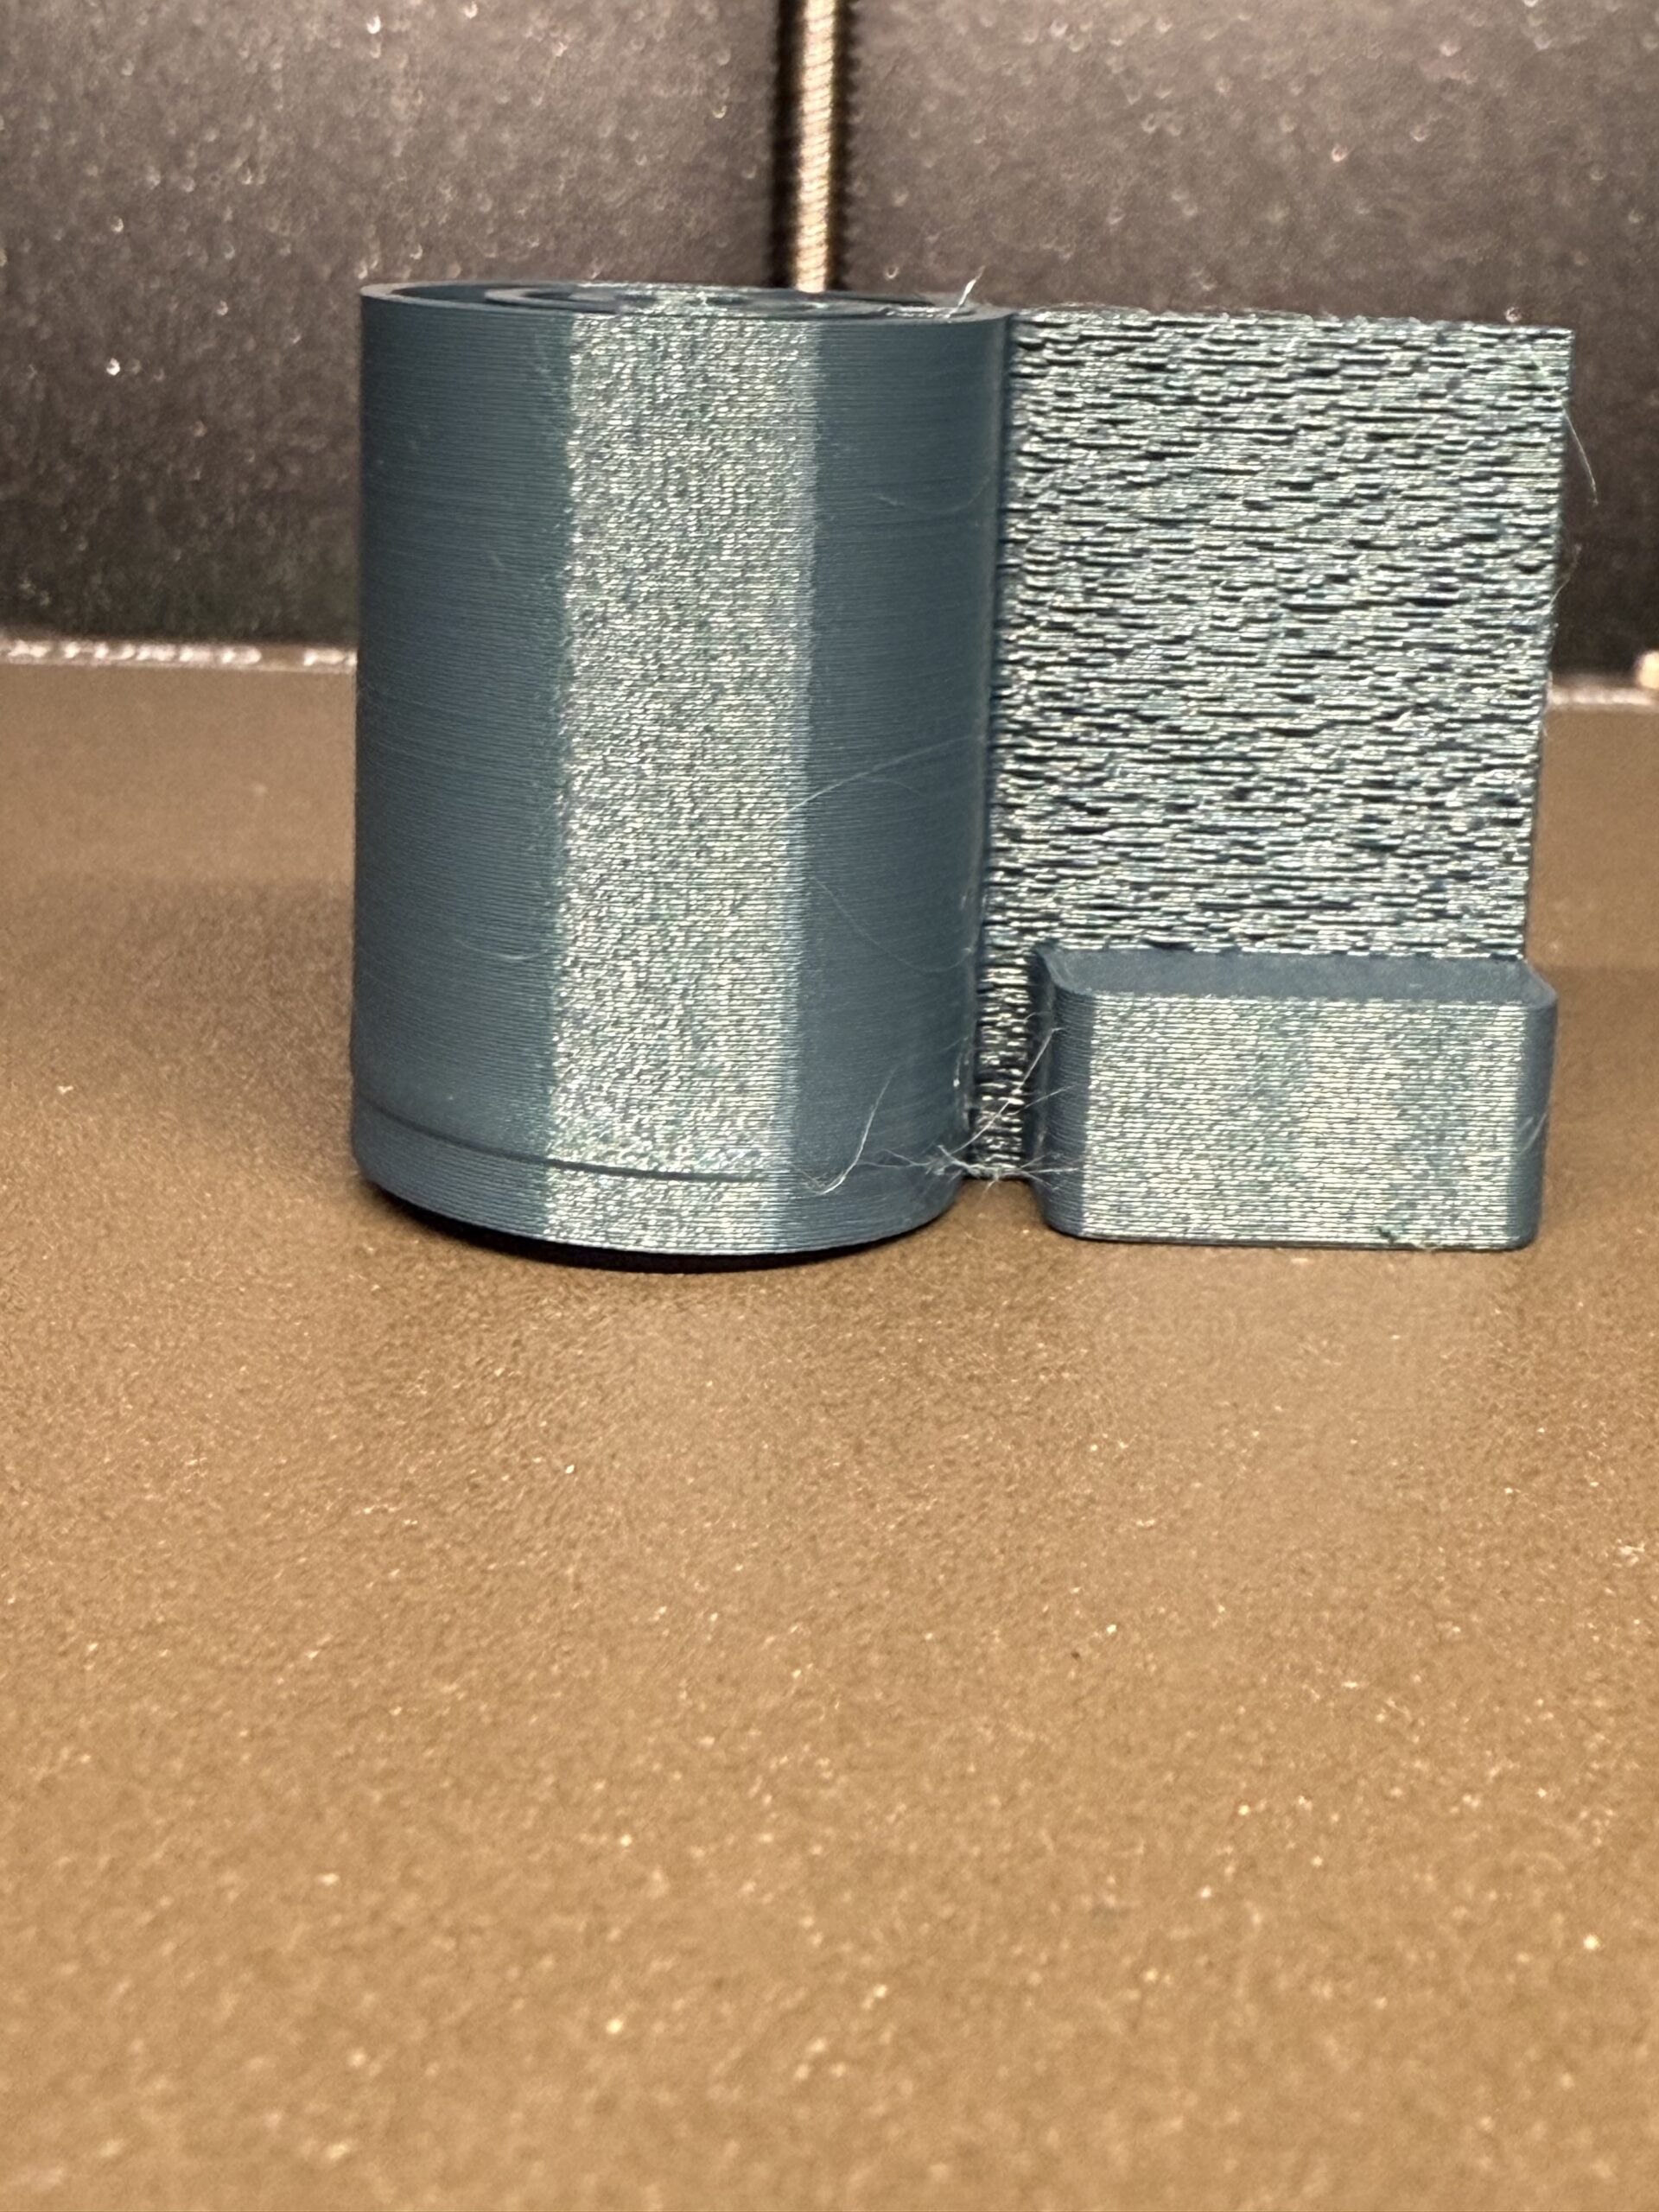
The test print finished and it had some issue with heatbed adhesion. Also at a layer height of roughly 3.15mm, there is a visible issue. This issue is only within the circular part of the test print. Everyhing else printed just fine.
See photo:
RE: Z axis trouble but only when printing
If it's rear left corner only, then check if it's not an issue with wrong screw used for heatbed assembly. There was a mistake in build manual causing print fan cooling duct scraping on bed cable cover.
RE: Z axis trouble but only when printing
Yep, might be the cooling duct hitting the cover..
Since the whole cooling frame is "the loadcell", the cooling duct hitting anything can set wrong probing points.
Really weird issue and definitely not speed related though! Test print looks "fine", the adhesion issue is probably normal due to the low contact area and only printing walls. The bad sound probably came from the nozzle hitting the lifted object.
About the z-movement: Maybe you know that, then ignore this.
A bit of movement can be normal, depending on the form and infill. After slicing, select the "travel" icon in the bottom left of the "legend". Then press "3" or "4" to get the perfect side-view to see z-travels.
However since it's only the rear corners, which aren't directly influenced by a z-screw, it must be either a non-flat heatbed or a probing error.
To check for a non-flat bed: Run the "autohome" via the idle menu, then move z-axis to 0. Either disable motors and move the printhead around manually or move it via the controls and check with your eyes, if the printbed always has the same distance to the nozzle.
Can you make sure to have M104 S0 in the Start G-code before the MBL?
But don't do 49 probing points with this, as the temperature will drop quite a lot and might lead to a too close nozzle, when up at printing temperature.
Just do a little square test-print in one corner after another (and center).
Disabling the heater makes my Core One only probe each point a single time.
With the heater on, it probes some points up to 5x..
Does your Start G-code really look like this?
M104 S0 ; turn off temperature
;
; MBL
;
M84 E ; turn off E motor
G29 P1 ; invalidate mbl & probe print area
RE: Z axis trouble but only when printing
I spent several hours today to disassemble the entire extrder and change the loadcell (Support shipped a new one to me). After re-assembling and re-calibration I did another test print (also with the M104 S0 command). Nothing changed, the issue still persists.
I then did the following: Auto home -> manually moved the Z axis to 0 and then to 1 mm in the fron right position. The values seem to fit since the nozzle is touching the print bed at 0mm and there is a tiny gap between the nozzle and the print bed at 1mm.
I then moved X and Y manually while having the Z axis steady at 1mm distance. In the X-axis at front part of the printer, everything is perfectly fine. From all the way to the left to all the way to the right, the gap is constantly 1 mm.
When moving the Y axis further back, I noticed that the 1mm gap was widening. significantly. We're not talking 1mm here but more like 3-5 mm.
Therefore the whole bed seems to be skewed. Shouldn't the Z calibration take care of this when ramming the bed all the way down?
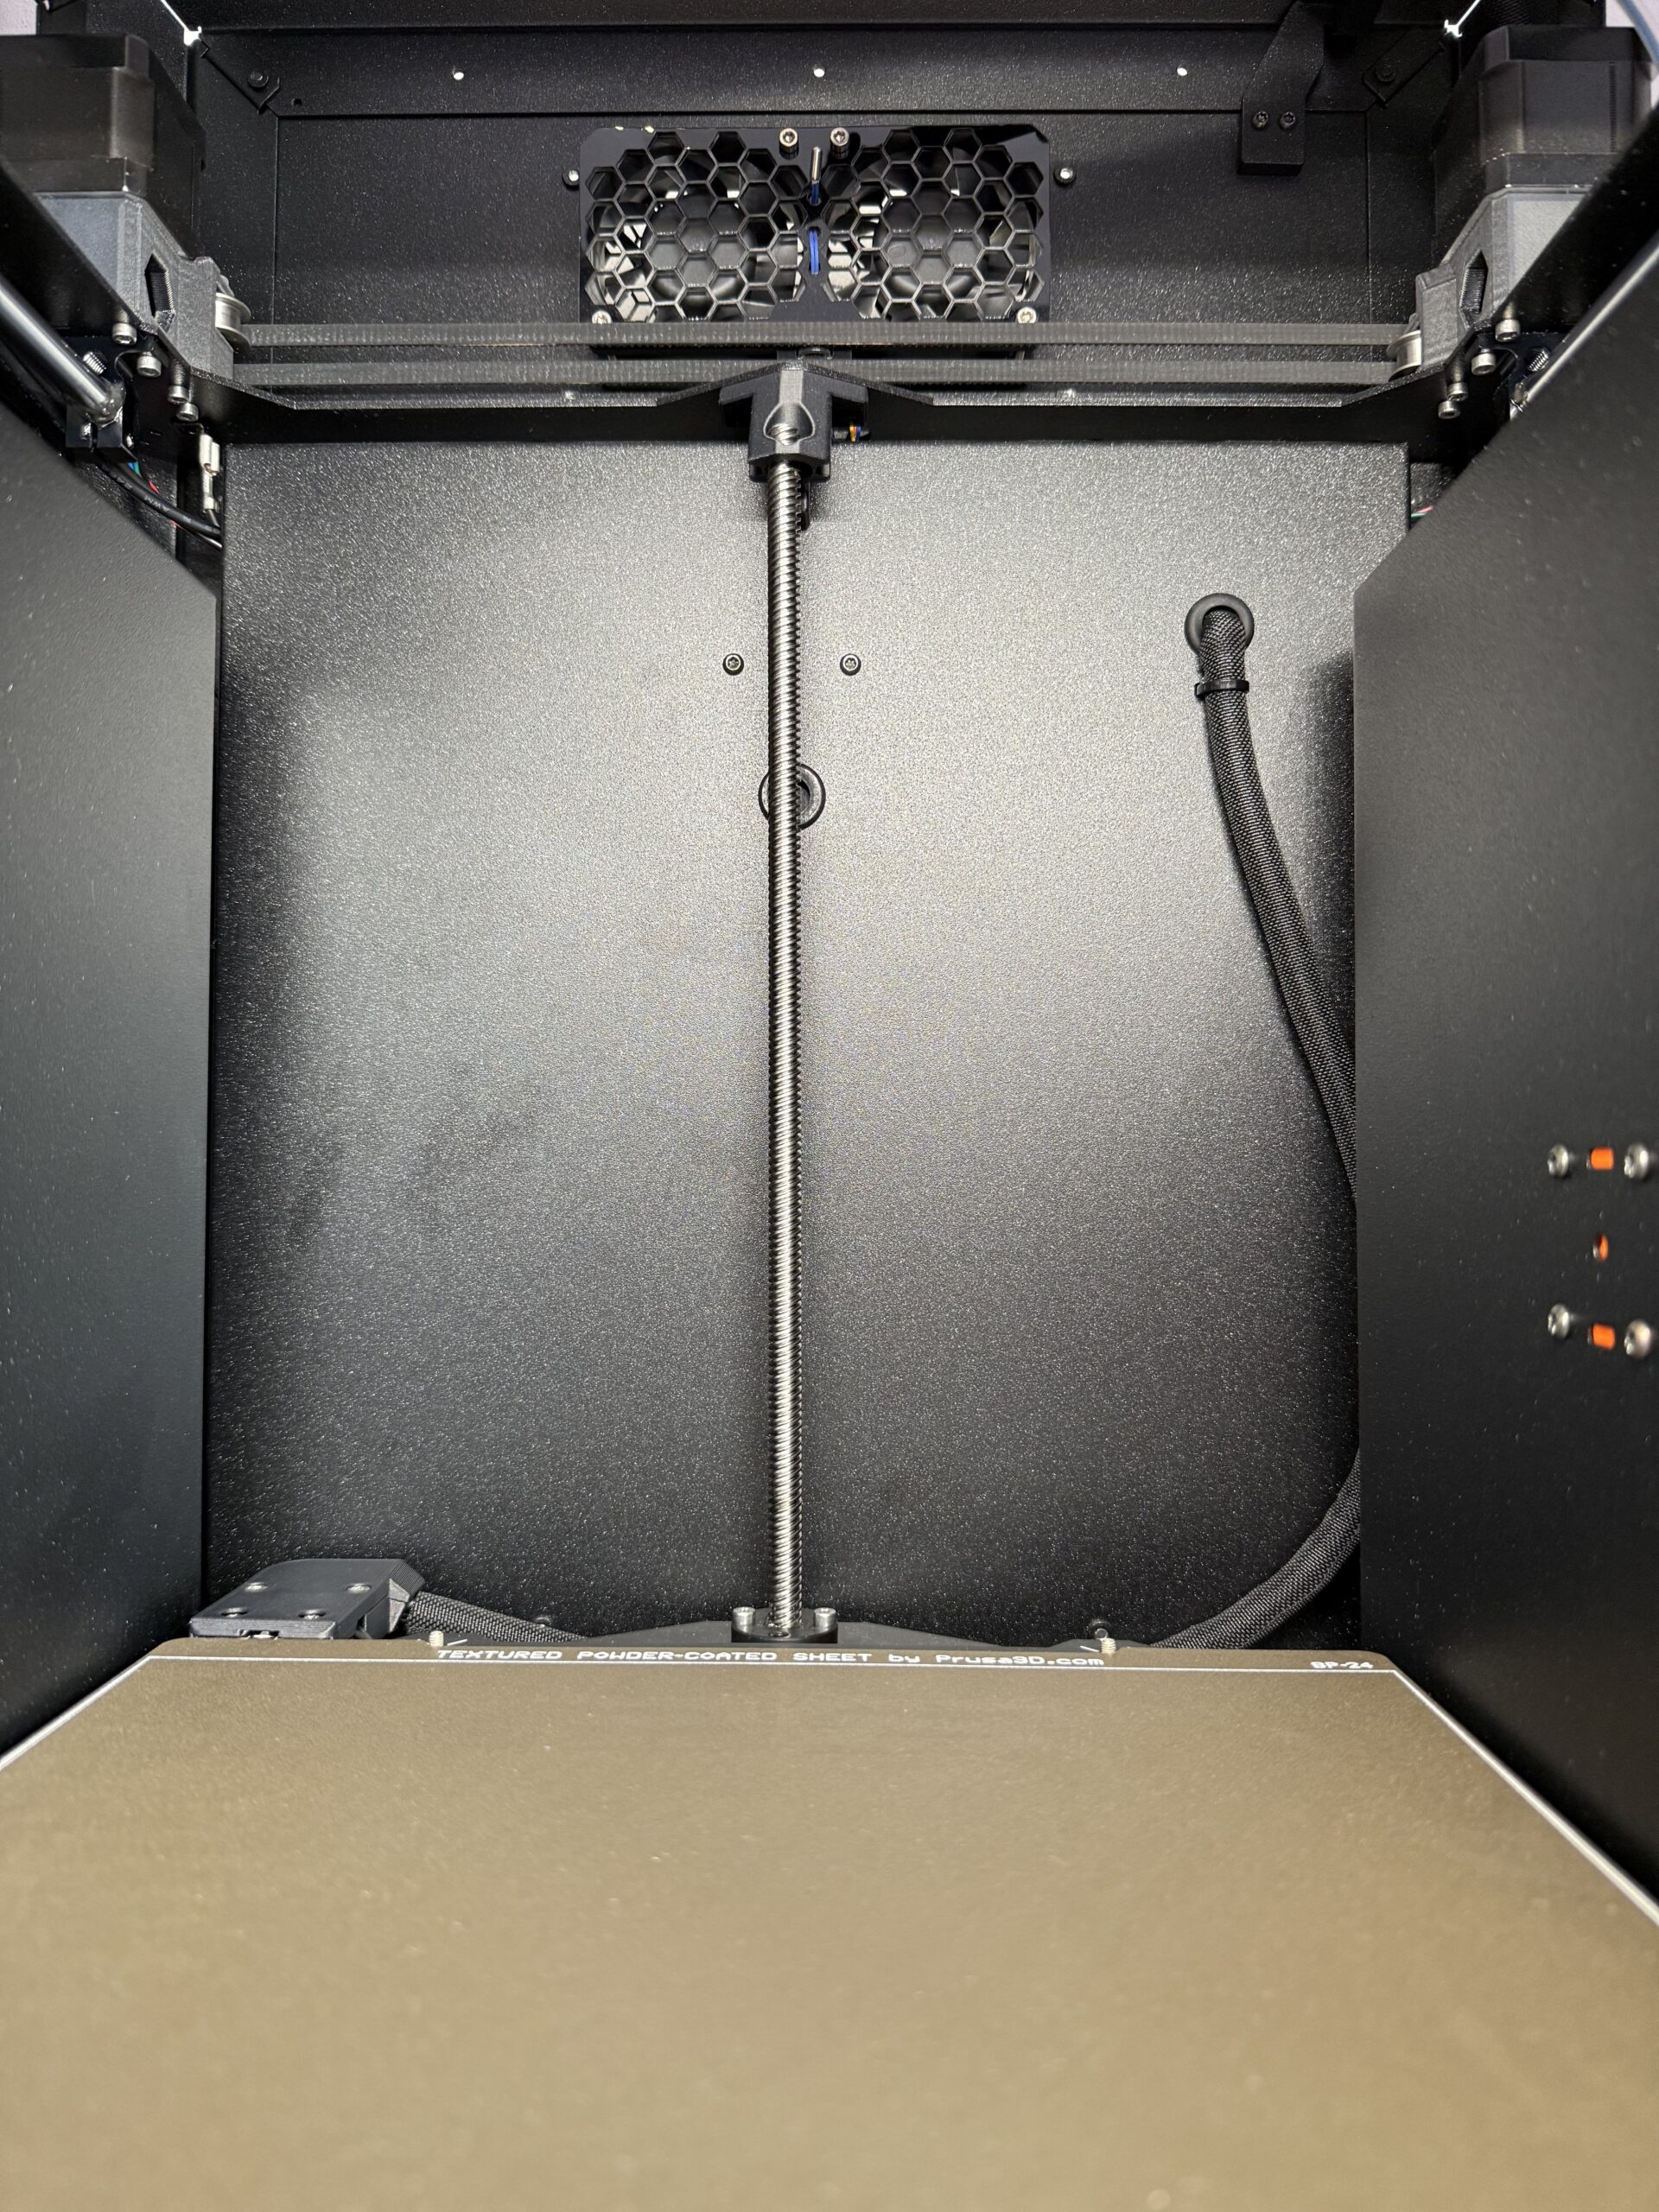
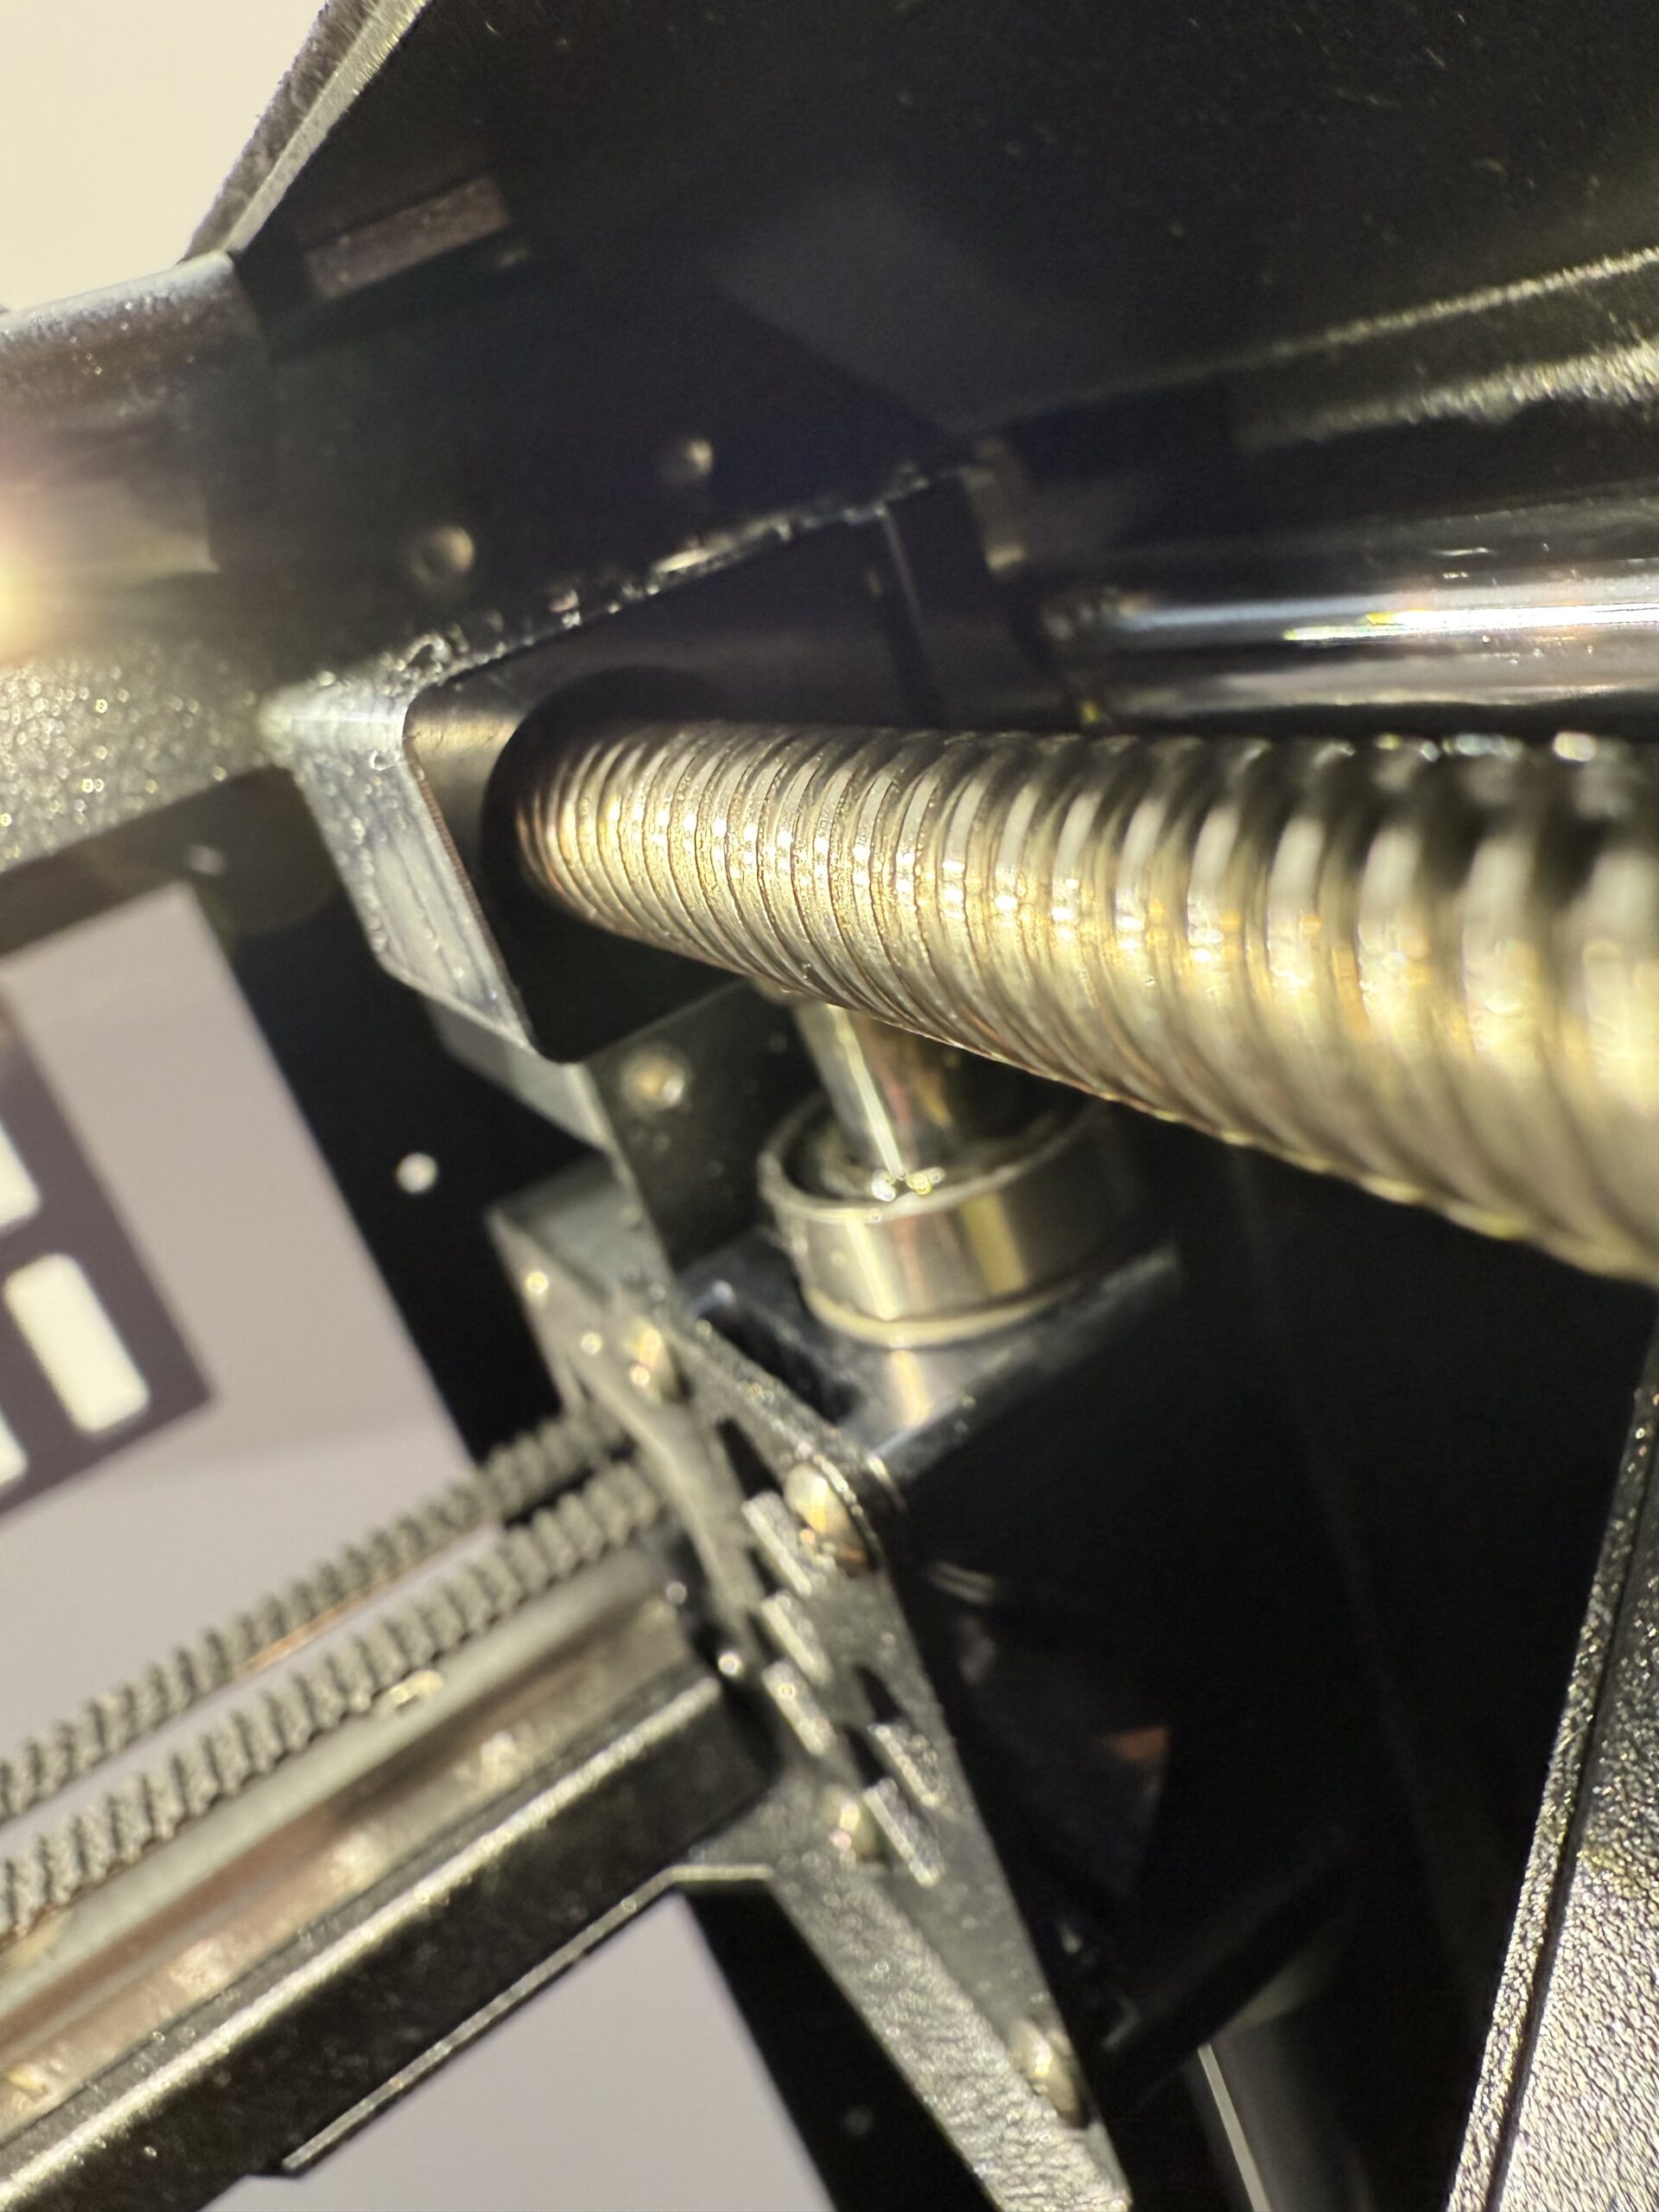
I also noticed another thing: When the heatbed is at a very low position, the far Z-axis is touching the plastic part at the top. Maybe that whole rod is skewed somehow? Whole taking a photo of it, i also noticed that the front left Z-axis threaded rod is touching the plastic part at the top, while the front right one is aligned perfectly centered.
See Pictures:
1. The threaded Z rod in the back is so skewed that it is touching the plastic part
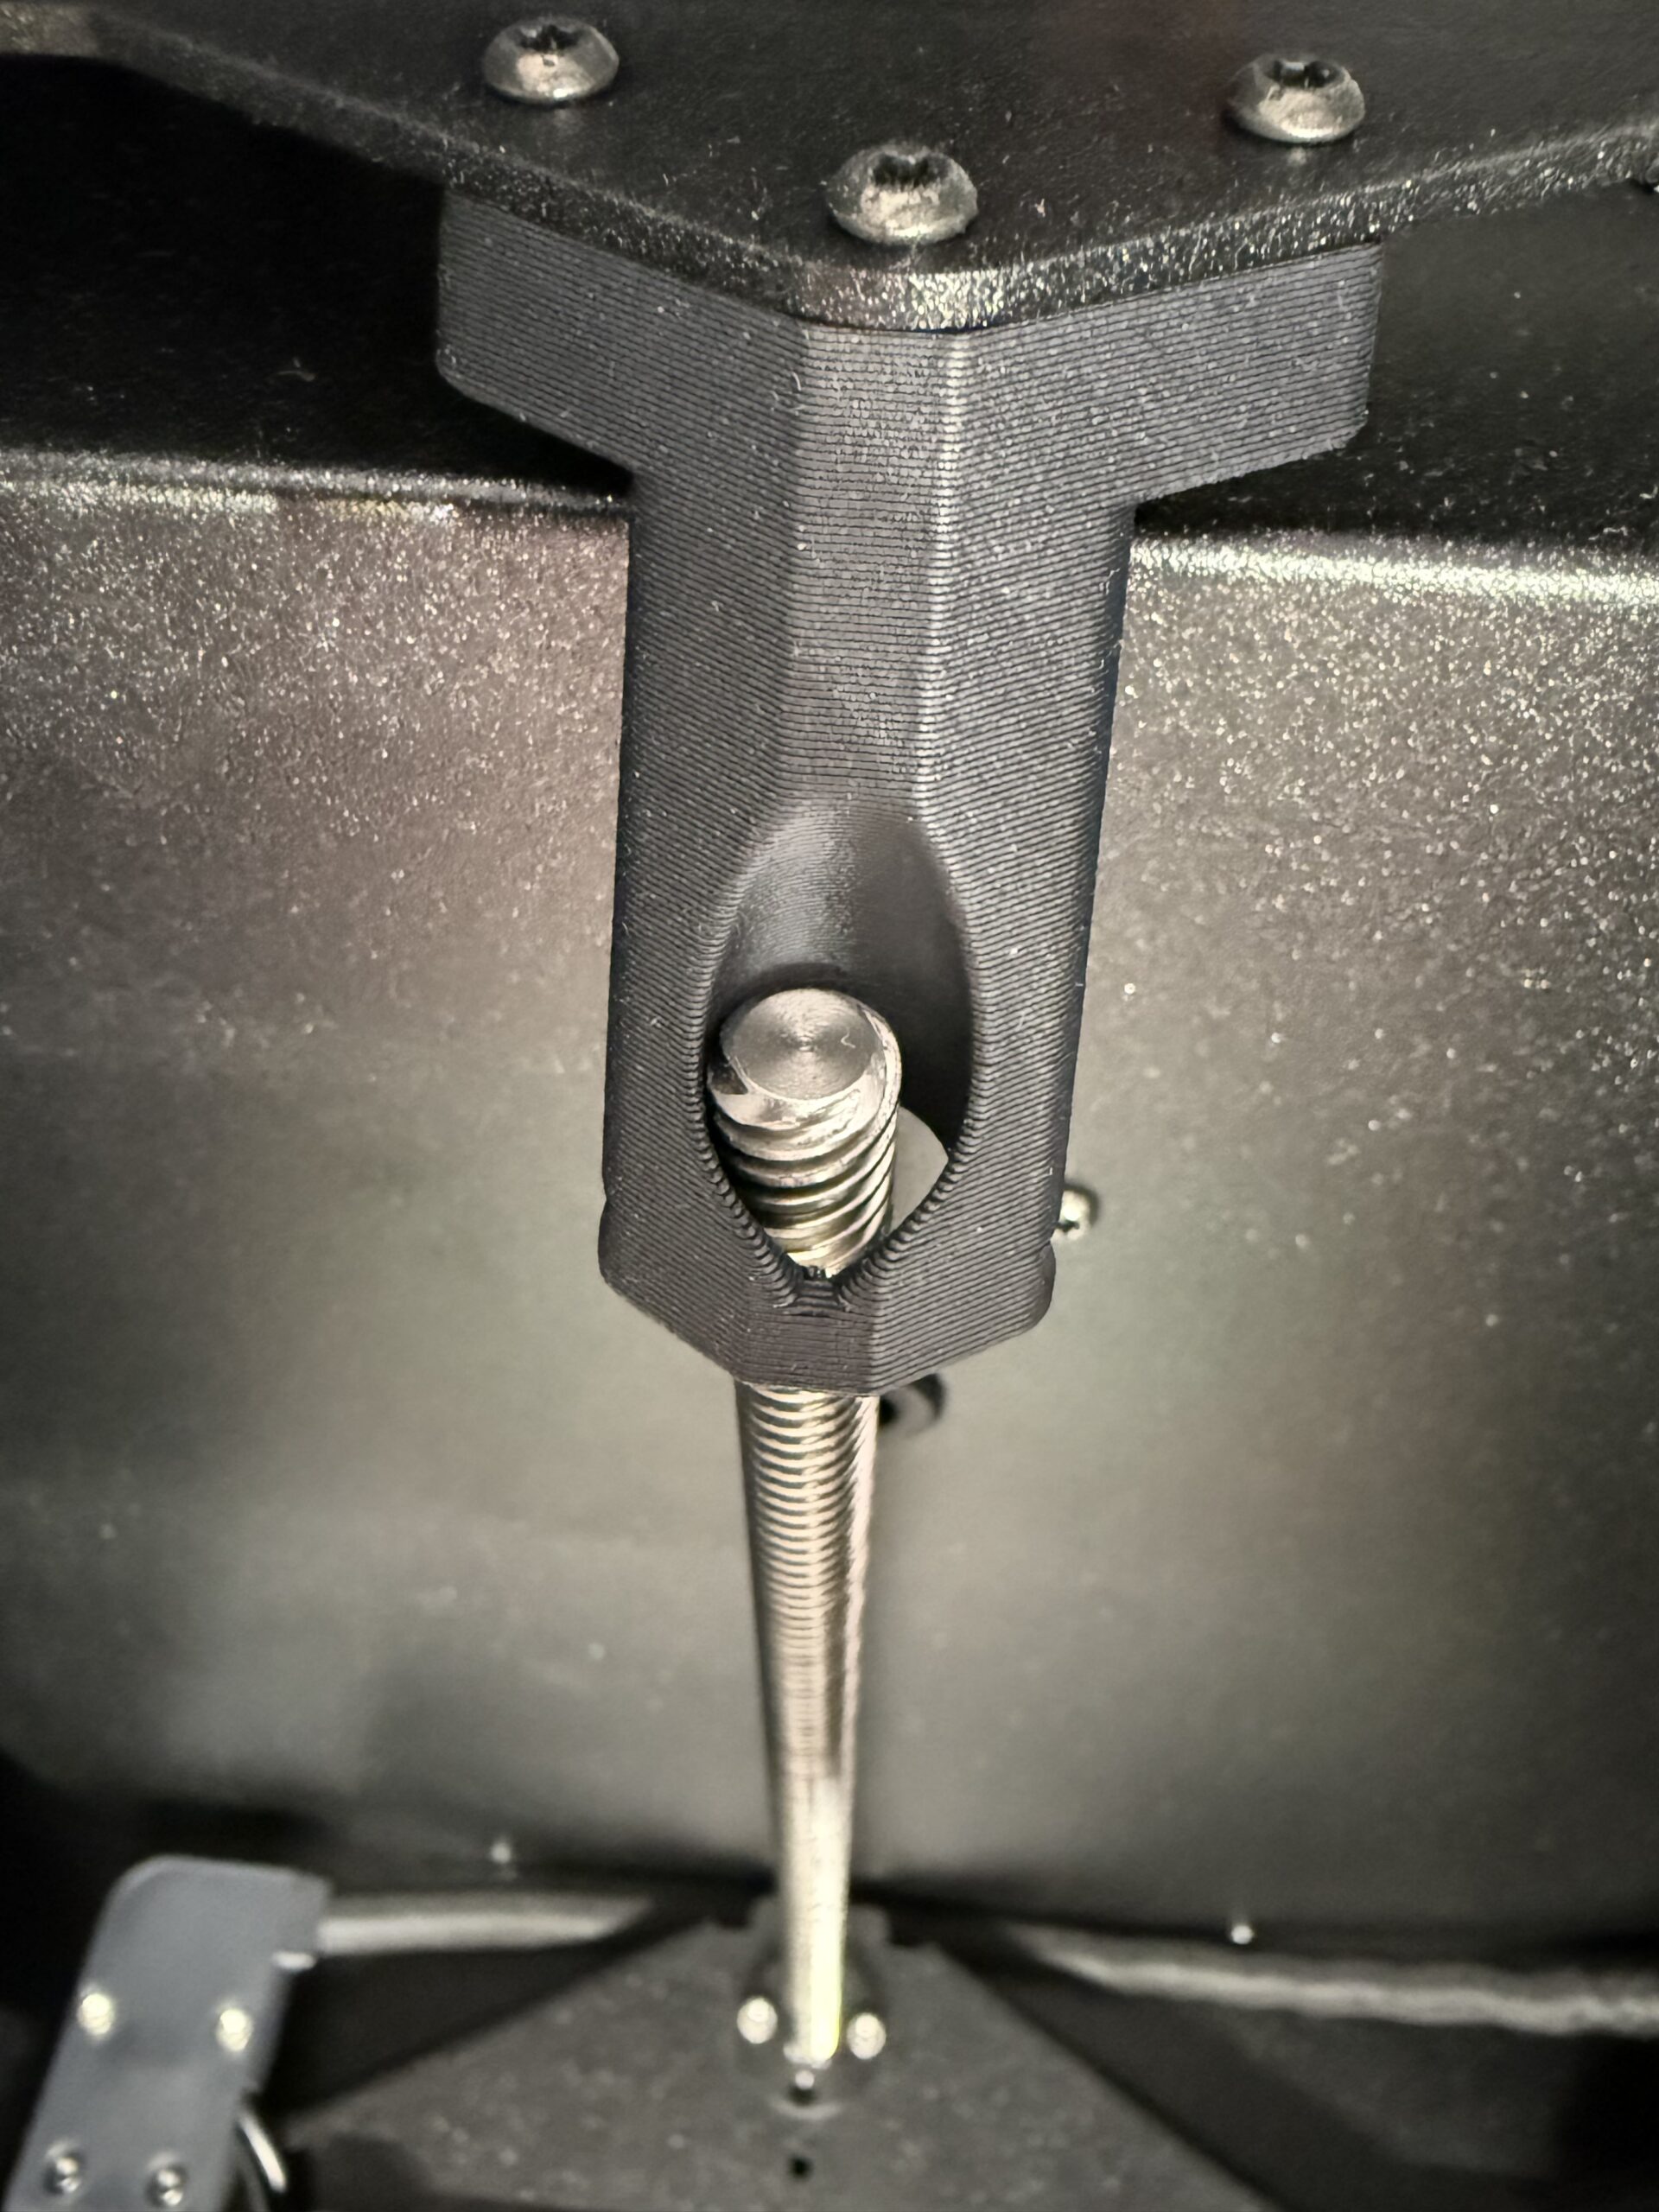
2. a macro view of the skewed z rod
3. the front left one that is also touching the plastic
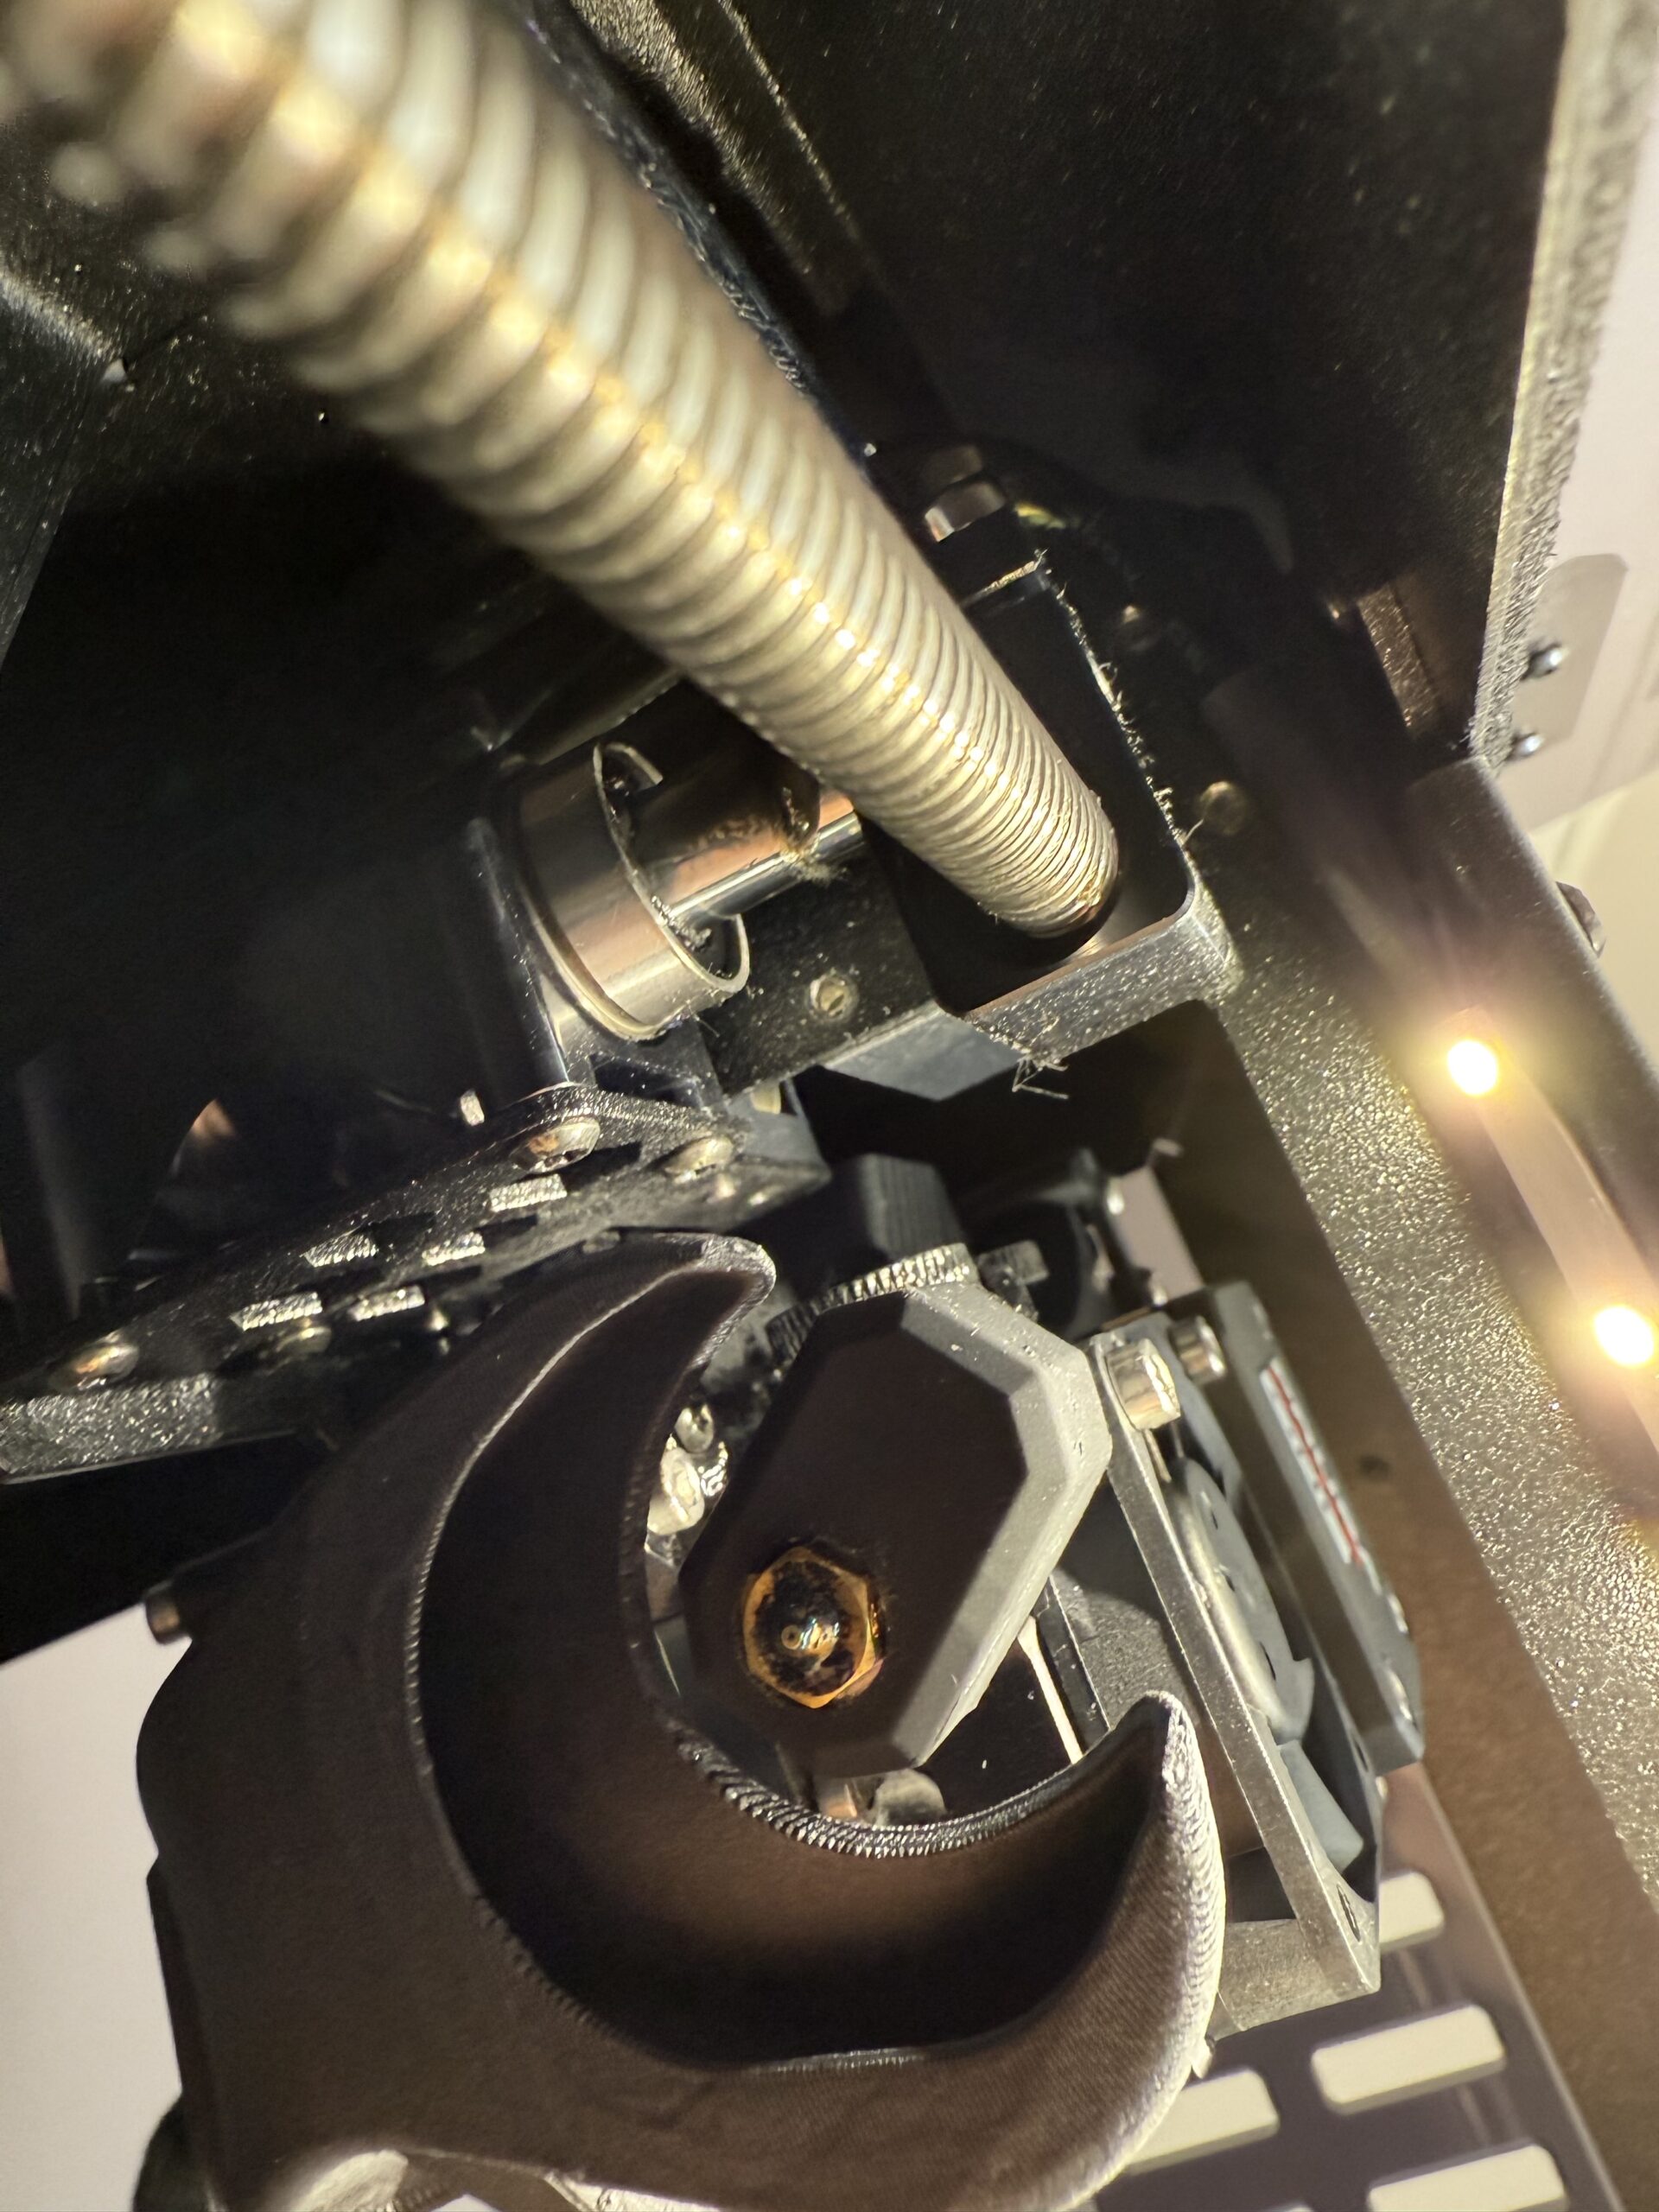
4. the front right one which is perfectly aligned.
RE: Z axis trouble but only when printing
Very helpful - works for me - thanks
RE: Z axis trouble but only when printing
Installed 6.3.3 - Z-axis issues still present with stock G-code. Fix doesn't seem to be anywhere in the changelist - https://github.com/prusa3d/Prusa-Firmware-Buddy/compare/v6.3.2...v6.3.3
I see that some members had luck fixing this issue by asking for a cable replacement. Perhaps I should just ping the support and ask for a cable.
RE: Z axis trouble but only when printing
I also have this problem. Mentioned it to Prusa support, linked to this thread and the github issue and they said they would get back to me. The g-code modification provided by david.b36 works as a workaround for now. Quite the annoying issue.