Building my own Enclosure from Polycarbonate panels
I would like to ask you all to contribute some tipps and tricks to my project where I want to build an enclosure for my 2Head XL. I hope this is the right part of the forum, as this is not about the tool changer.
So if you have some tips or answers to my questions lease let me know.
Why do I want an Enclosure: To be able to print Polycarbonate and to have an easier time printing big PETG parts without warping. Also for the fun of the project.
Materials: 3d pinted Parts from Pusament PETG, Polycarbonate 4mm Panels cut with a Oscillating Multitool, M4 Screws, Steel hinges, MAVORI® 3x Mini Thermometer & Hygrometer, Some teflontubes from amazon, glue Acrifix® 1R 0192, this isolating tape if needed: https://www.amazon.de/dp/B074SXWQ41?psc=1&ref=ppx_yo2ov_dt_b_product_details This insulatingliner: https://www.amazon.de/dp/B08NPF2K5R?psc=1&ref=ppx_yo2ov_dt_b_product_details
Features: A door that can open the front and parts of the left side of the printer, Custom made so it works well with my IKEA Trotten, the Power supply and the display assembly should be outside
What do I need: I think it only needs to be warm - I think around 50° is okay right? Also it should prevent unregular heat from an sometimes open window nearby and keep the moisture out which should happen through the heating right? Also if it could make it just a little bit more silent in fast travel moves I would be really happy. Also it should be mostly see through, so I can see what the printer is doing.
Questions: How hot do I need it to get? Do you see any problems with my materials? I think they can all take the heat. How "Airtight" does it have to be to do the job? I think some airflow should be alright correkt? I could prewarm it with a big electric Heater I have.
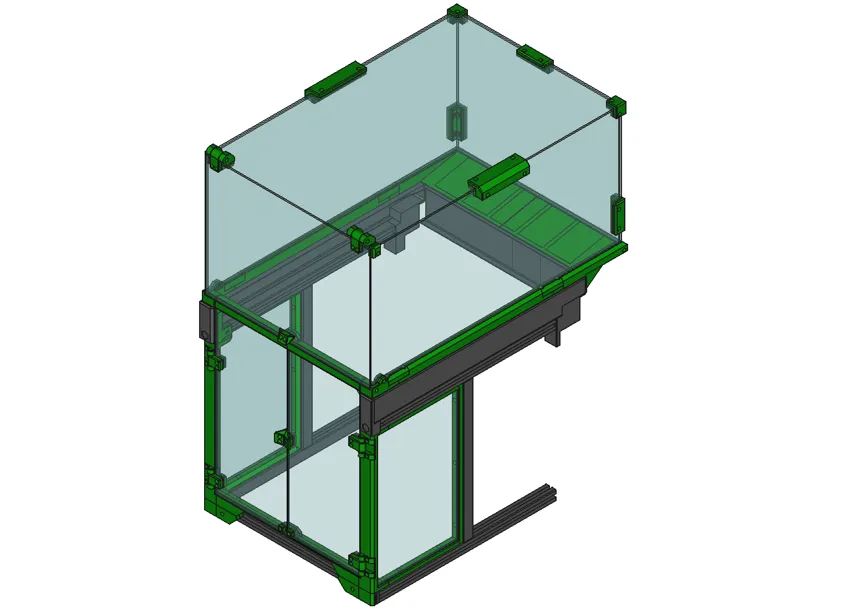
I want to build it similar to the picture below, but with cutouts for the Screen in the front, a big Panel that opens in the front with hinges on the right. Also it will be a little bigger than the printer, so that the Polycarbonat (4mm) insulate might a little better than the steel from the printer. This would also I mean I could easily pull it off the printer so I can get everywhere.

RE:
I am just about done with my enclosure. Be prepared to print the framing parts in multiple pieces. The two lower sides can be done with 2 prints each. The base for the top will have to be printed in 4 or 5 pieces. The frame for the front lower will probably take four parts to be printed. You will then have to join them. I have been using 3mm X 30mm stainless pins. If you use pins make sure you make the joining holes diameter .20mm smaller. And 2 mm longer than the length of the pins. You can read about mine in the link below. You might pick up something to help you with yours as they are similar in some aspects. I used acrylic panels. The acrylic can be scored on both sides and snapped for a super clean break and edge.
RE: Building my own Enclosure from Polycarbonate panels
Hey thanks for your input and yeahh I followed your project. My Idea is not to build a complete frame, but rather just make small connectors with which I connect the Polycarbonate sheets. Therefore I would need much less and smaller Parts. I would join the Polycarbonate sheets with tape so it is reasonably airtight.
This would be finde for since I will only use the enclosure from time to time I think. Any you reason you think this wouldn't work? Of course MME you enclosure looks and handles much better.
RE:
- I would print the corner pieces 70mm x 70mm x 70mm. The panels will be large and need the support. In fact all the printed parts might need to be a little more robust especially if you are going to lift off the top.
RE: Building my own Enclosure from Polycarbonate panels
- I would print the corner pieces 70mm x 70mm x 70mm. The panels will be large and need the support. In fact all the printed parts might need to be a little more robust especially if you are going to lift off the top.
I already started with the front and honestly the Polycarbonate gets super sturdy when glued. Yes it is also flexible, but I do not see that as a problem. from my Point of view it doesn't have to be super stiff. Currently it seems to using small corner/edge pieces to hold it while the glue dry's is the best approach. Everything else is done by the Glue and the panels them selves.
Of course this if very different PlexiGlass. Polycarbonate is much much more sturdy and together with the Glue it makes an extremely sturdy bond. So this part seems pretty much sorted.
Also I will not print any doors and will just make a front piece and hat that can easily be removed.
RE: Building my own Enclosure from Polycarbonate panels
Hey Everybody. It worked okay apart from looking shit, since it was little bit of a spontaneous project and I had no prior experience with such things. But I learned I thing 😀
Please look here for pictures and outcome:
https://forum.prusa3d.com/forum/postid/683669/