RE: Mmu3/2 setups
Some people use a small weight to make up for gravity. I have already seen something like this on printables.
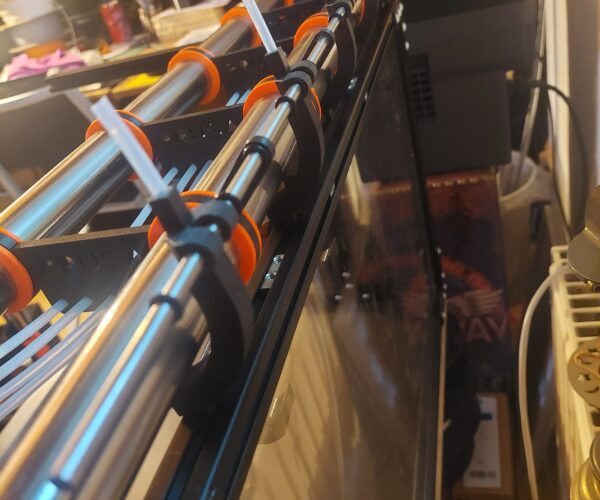
I also had a setup with an extra buffer which worked without any problems. Out of curiosity, I have now put the buffer together. Thanks to the possibility of loading the filament with the buffer fork without removing the rollers, I have also found a place for the buffer.
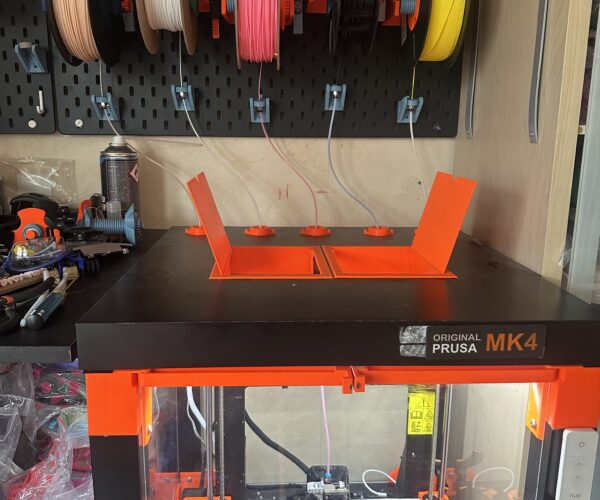
It works both ways. It always depends on how much space you have. In my case, the printer is in a cabinet and the filament is above it. There has to be some kind of buffer in between. If you have space behind the printer, Joan's option is certainly a good one.
RE: Mmu3/2 setups
Thank you for the replies. I still need a few more days to get it all squared away. I will report back when I have it working and let you know how I did. Thanks again.
RE: Mmu3/2 setups
MK4/MMU3 - I have tried several setups. Latest iteration has the buffer sitting with the cassettes vertically, and then the standard filaments holders sitting on a shelf above. The upshot here is that I can easily load/unload, and smaller form factor.
I still think that taking the cassettes in and out for loading and unloading is really annoying, and it dissuades me from printing more, but the current setup is OK.
I would love to hear about :
1) Reasons to be concerned about orienting the buffer with the cassettes pointing UP. (seems ok? but I have not printed much yet)
2) Ways to make loading faster/easier.
RE: Mmu3/2 setups
The spools on a shelf behind the printer has been working for me. I still use the buffer too.
RE:
Tried this reply twice on my phone with no success, so let's try again here on my computer.
I ended up going with an old TV stand I had here. It is the perfect size and even has storage below. So, it is working out great. I also ended up using the spool holders that come with the MMU. Since I have space next to the printer on this TV stand, that is working out fine as well. I originally installed a bar above and was planning to hang my spools, but then I realized I did not have any more of that tubing and that the extra distance would have required it. I was planning to take a trip over to the local home store to buy some, but honestly, this setup is working fine, so I think I'll just leave it as-is. I did keep the bar above for loose filament that is not on a spool. I have some of that and while not my favorite to use (because it always tangles) I don't want to get rid of it. So, the bar above at least makes it manageable.
RE: Mmu3/2 setups
my mmu3 setup almost finished exept the the end design for the two side glas panels, wich will remain slideable and easily removable. I used 2020 profiles for a half open enclosure, to protect against draft and prevent warping. I mainly print PLA and PETG, and love keeping things easily accessible. 
all my design from scratch, spoolholder with ball bearings...

RE: Mmu3/2 setups
Tried this reply twice on my phone with no success, so let's try again here on my computer.
I ended up going with an old TV stand I had here. It is the perfect size and even has storage below. So, it is working out great. I also ended up using the spool holders that come with the MMU. Since I have space next to the printer on this TV stand, that is working out fine as well. I originally installed a bar above and was planning to hang my spools, but then I realized I did not have any more of that tubing and that the extra distance would have required it. I was planning to take a trip over to the local home store to buy some, but honestly, this setup is working fine, so I think I'll just leave it as-is. I did keep the bar above for loose filament that is not on a spool. I have some of that and while not my favorite to use (because it always tangles) I don't want to get rid of it. So, the bar above at least makes it manageable.
Id recomend the loading fork and printables its amazing and makes life so easy
Please help me out by downloading a model it's free and easy but really helps me out https://www.printables.com/@Hello_474427/models
RE: Mmu3/2 setups
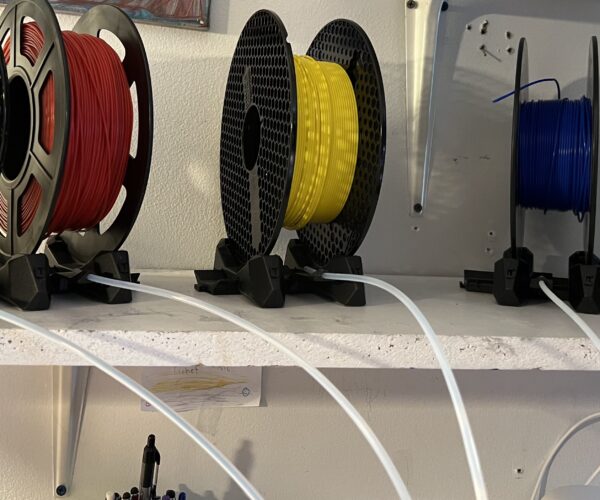
Here is my rather compact setup:
Spools on top of a shelf, Buffer on the side of the printer with buffer cassettes oriented upwards for easier access. I used to have the Buffer mounted on the wall underneath the shelf, but that caused way too much friction and thus issues with colour changes. Current setup works flawlessly.


