First layer issue
My Prusa has been giving me problems with first layers doing large prints.
If I life adjust Z so that the filament sticks in the low left, low right and top right, the nozzle becomes too high at top left side, and it doesn't stick/clogs around the nozzle.
If I adjust it so that I get it to stick top left, it gets so thin in top right corner that there's only an extremely thin film or nothing at all there.
Should I try to loosen the screws and re-tighten the heat bed to try to get a better level, throw away the PEI sheet, or what? I am blank, don't know what to try next, and annoyed 🙁
Any tips would be appreciated.
Kind regards
Morten
RE: First layer issue
Here's some pictures from the first layer first printer:

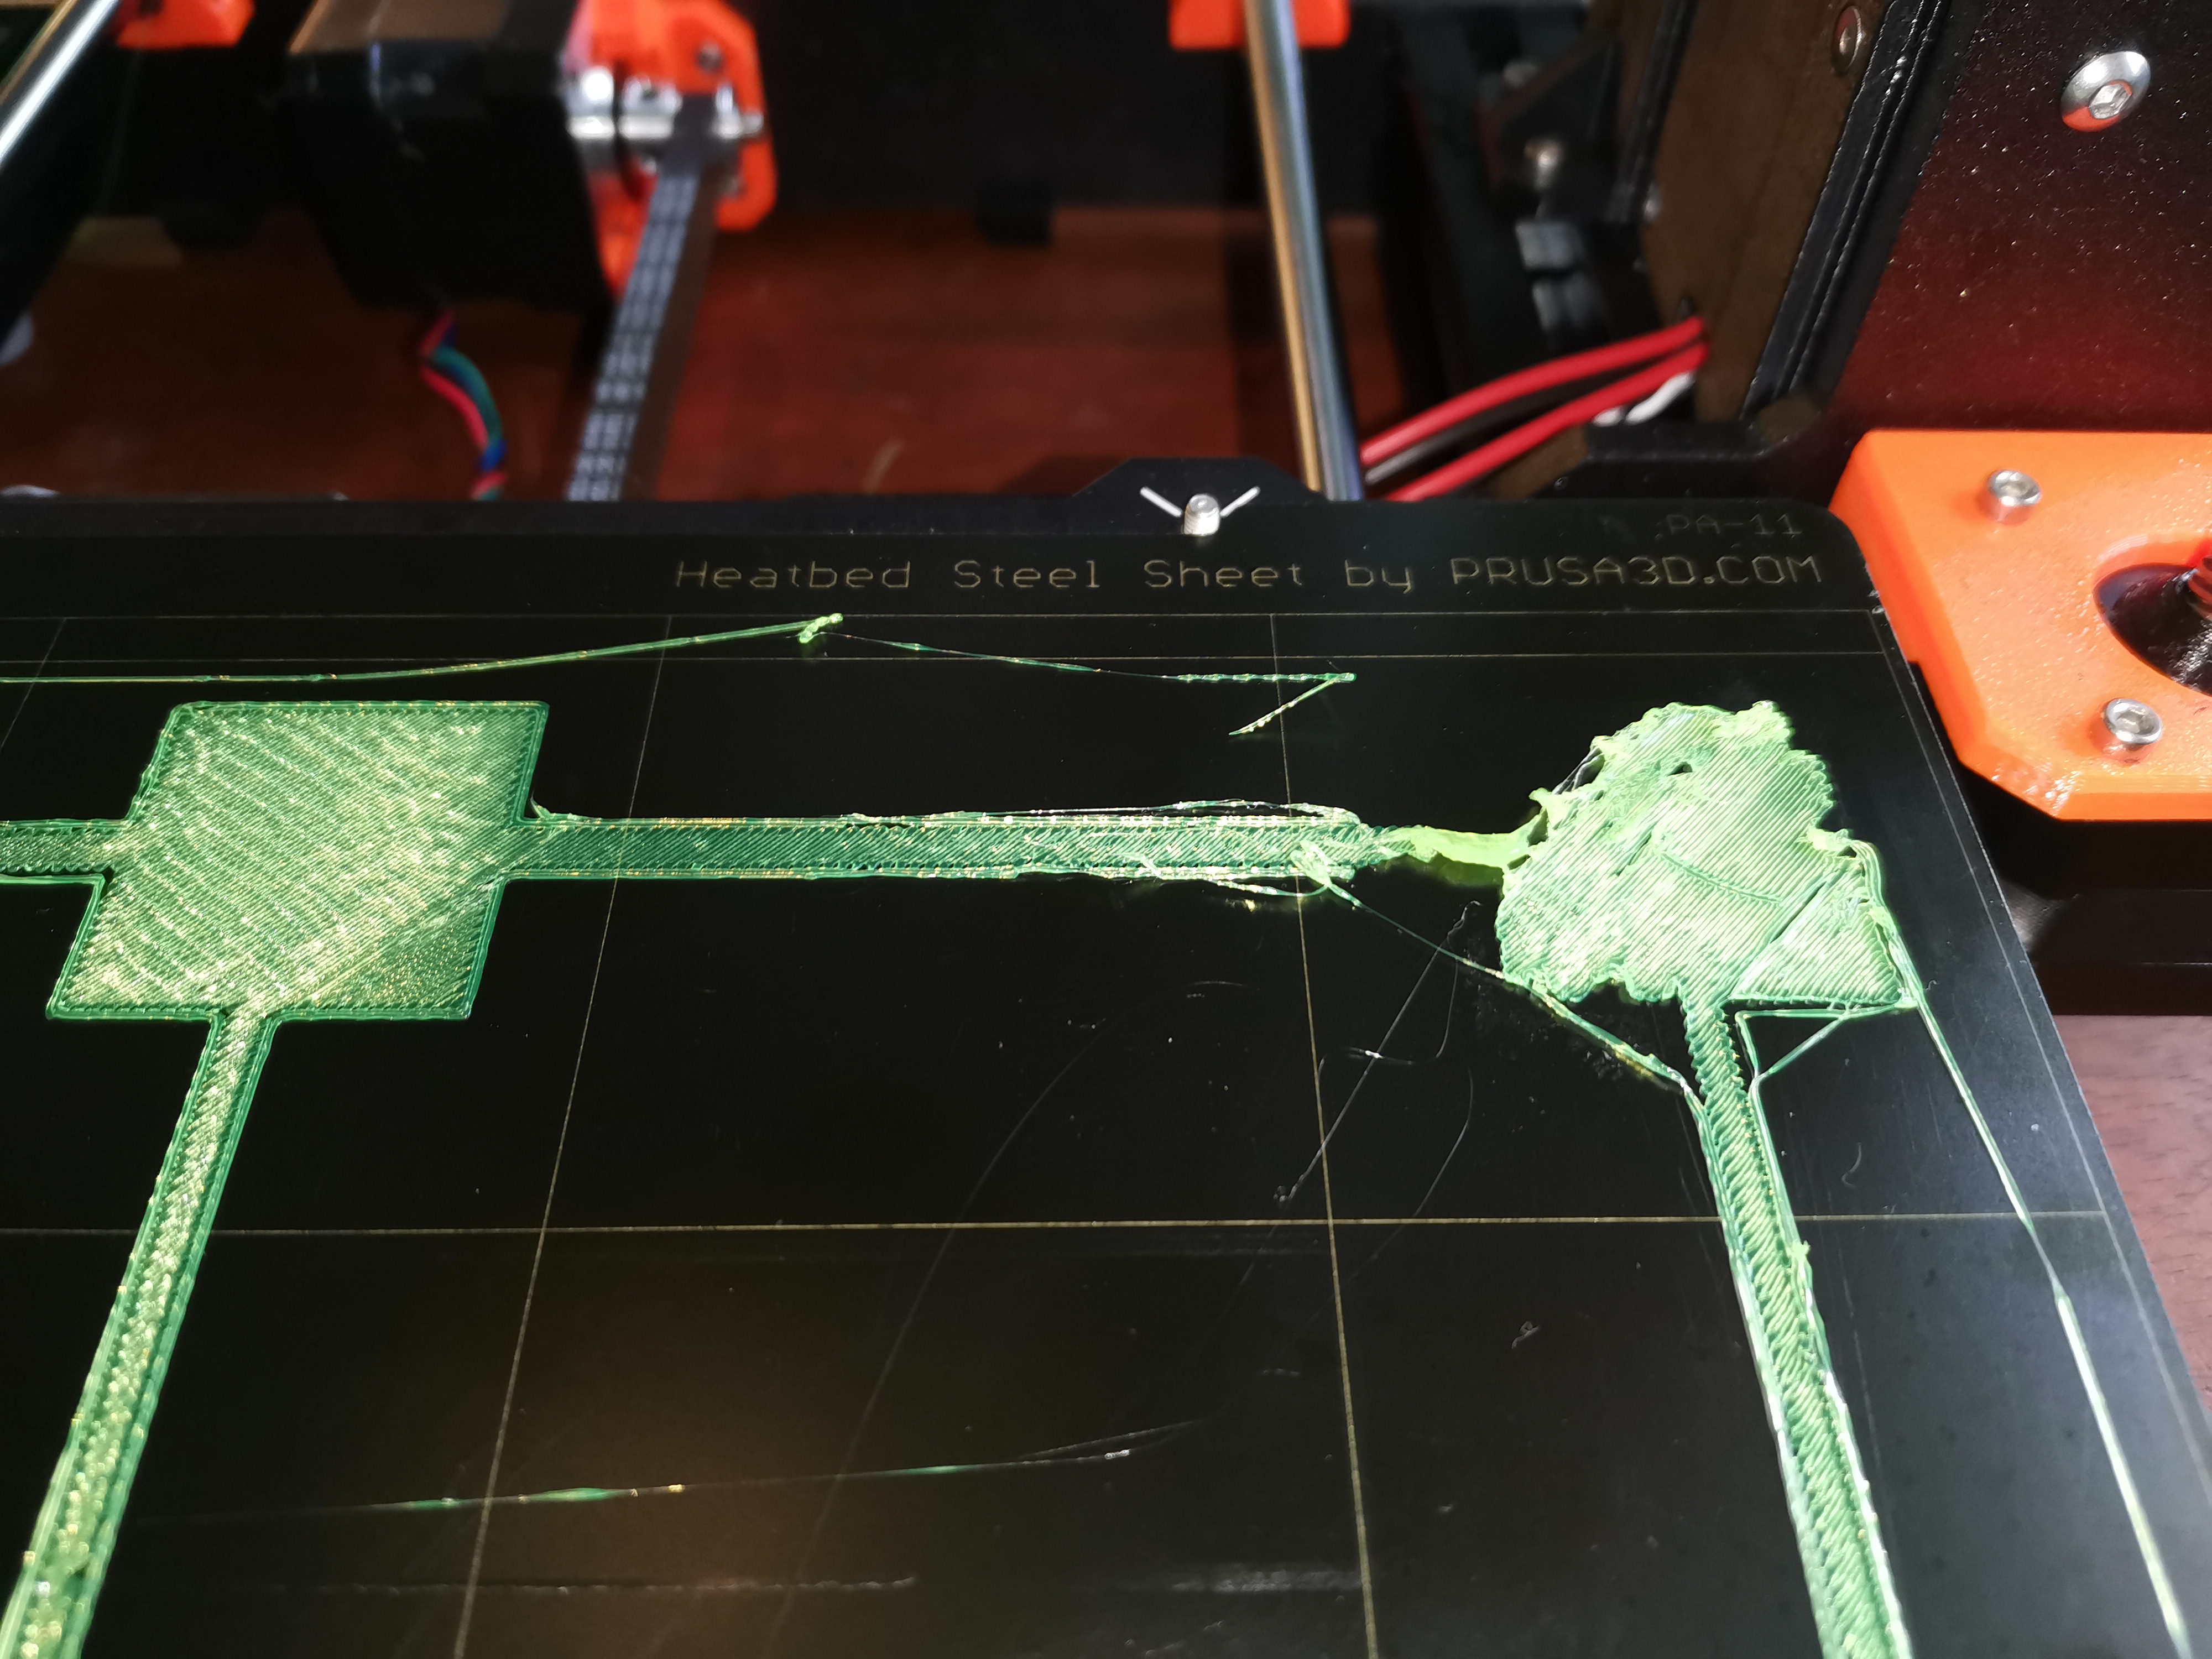
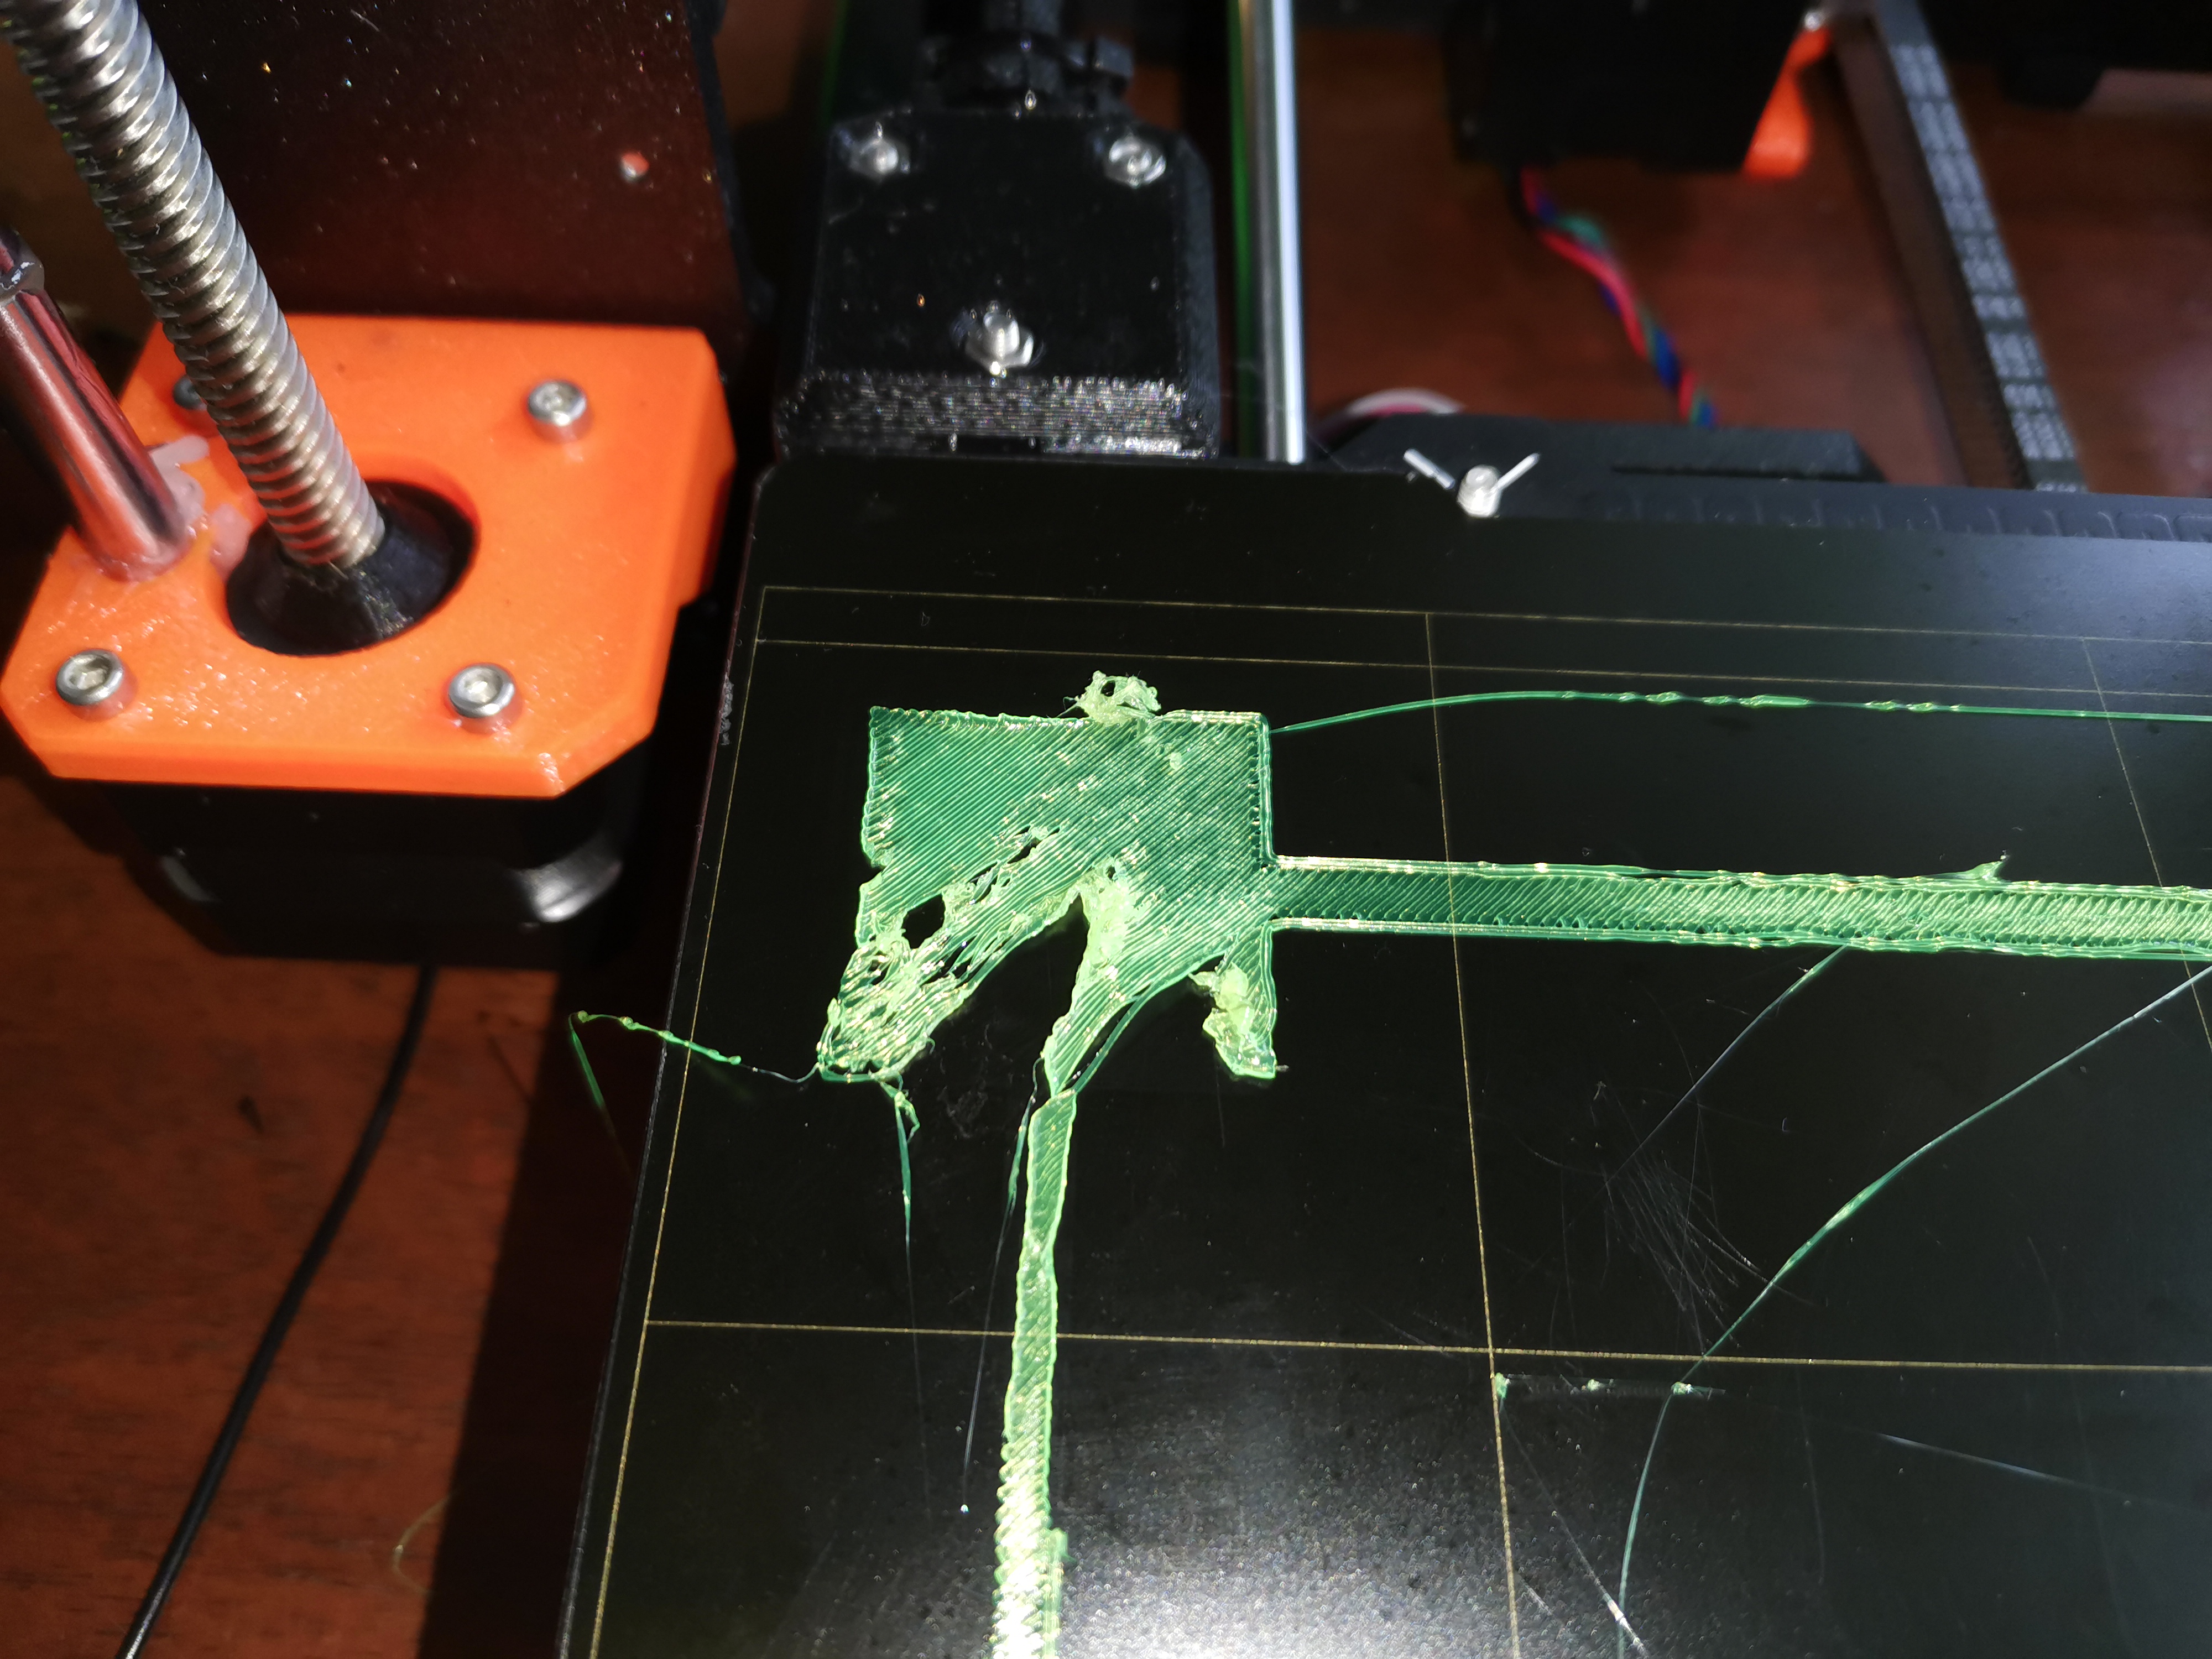
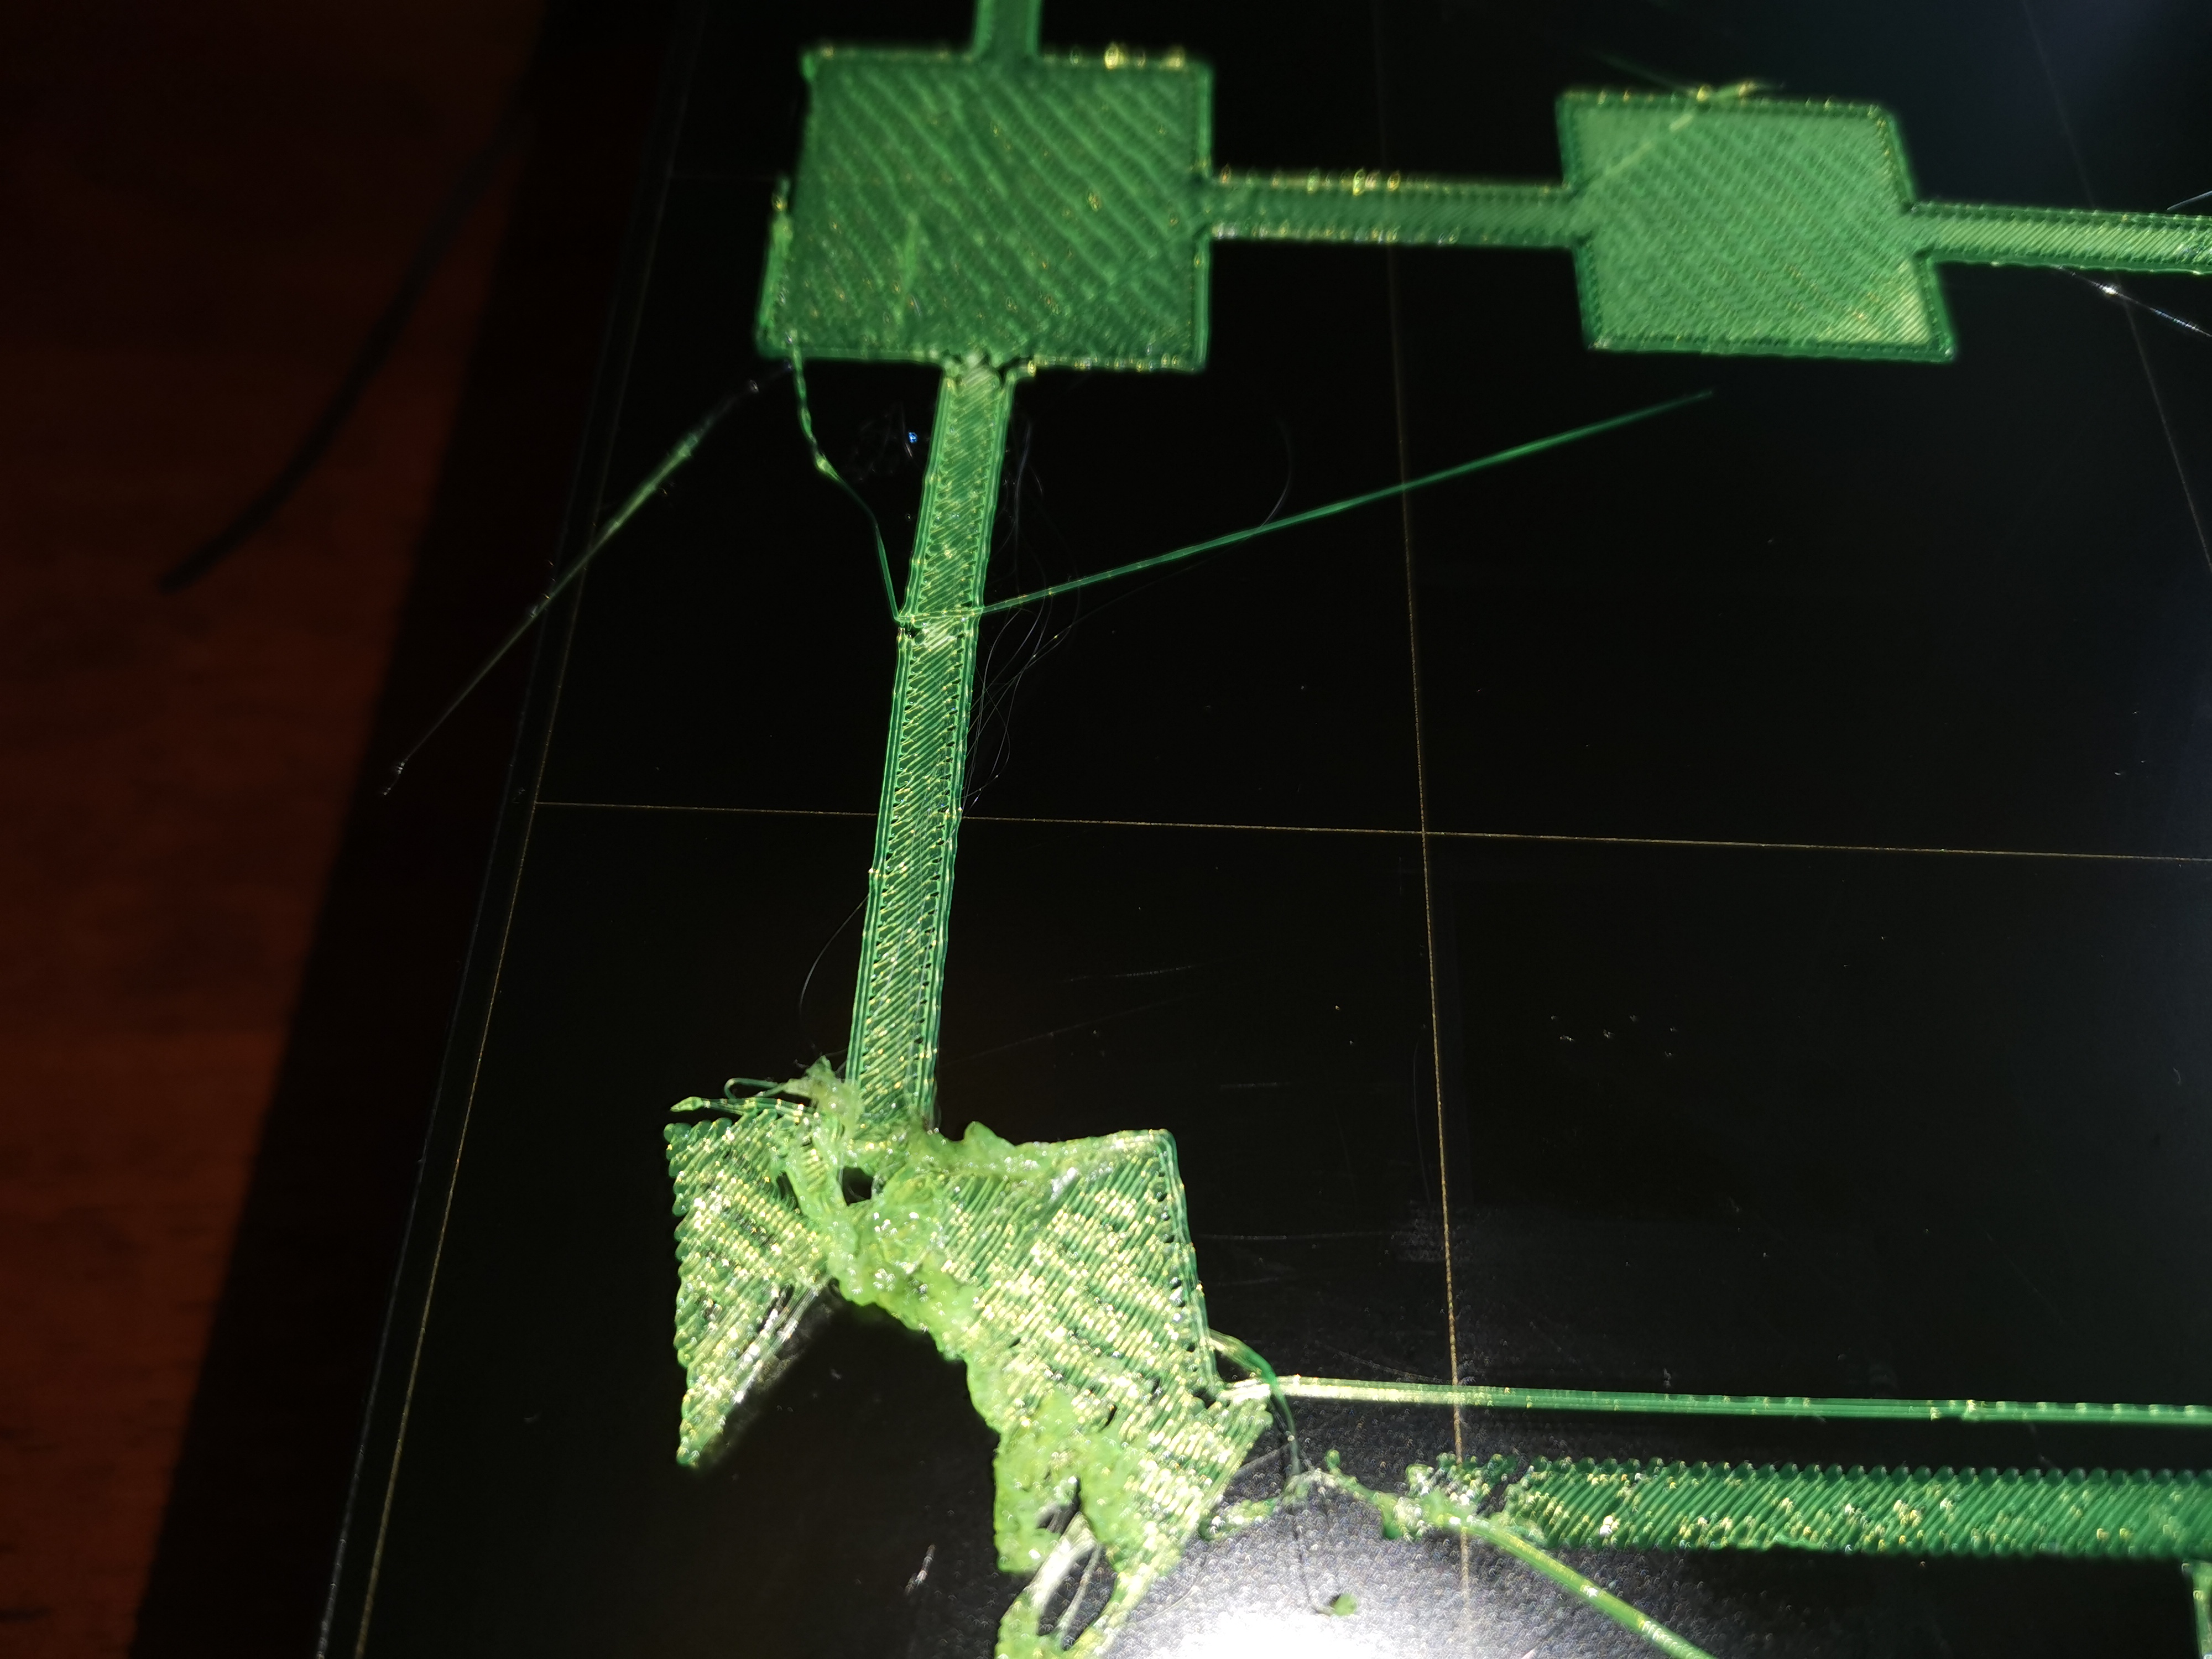

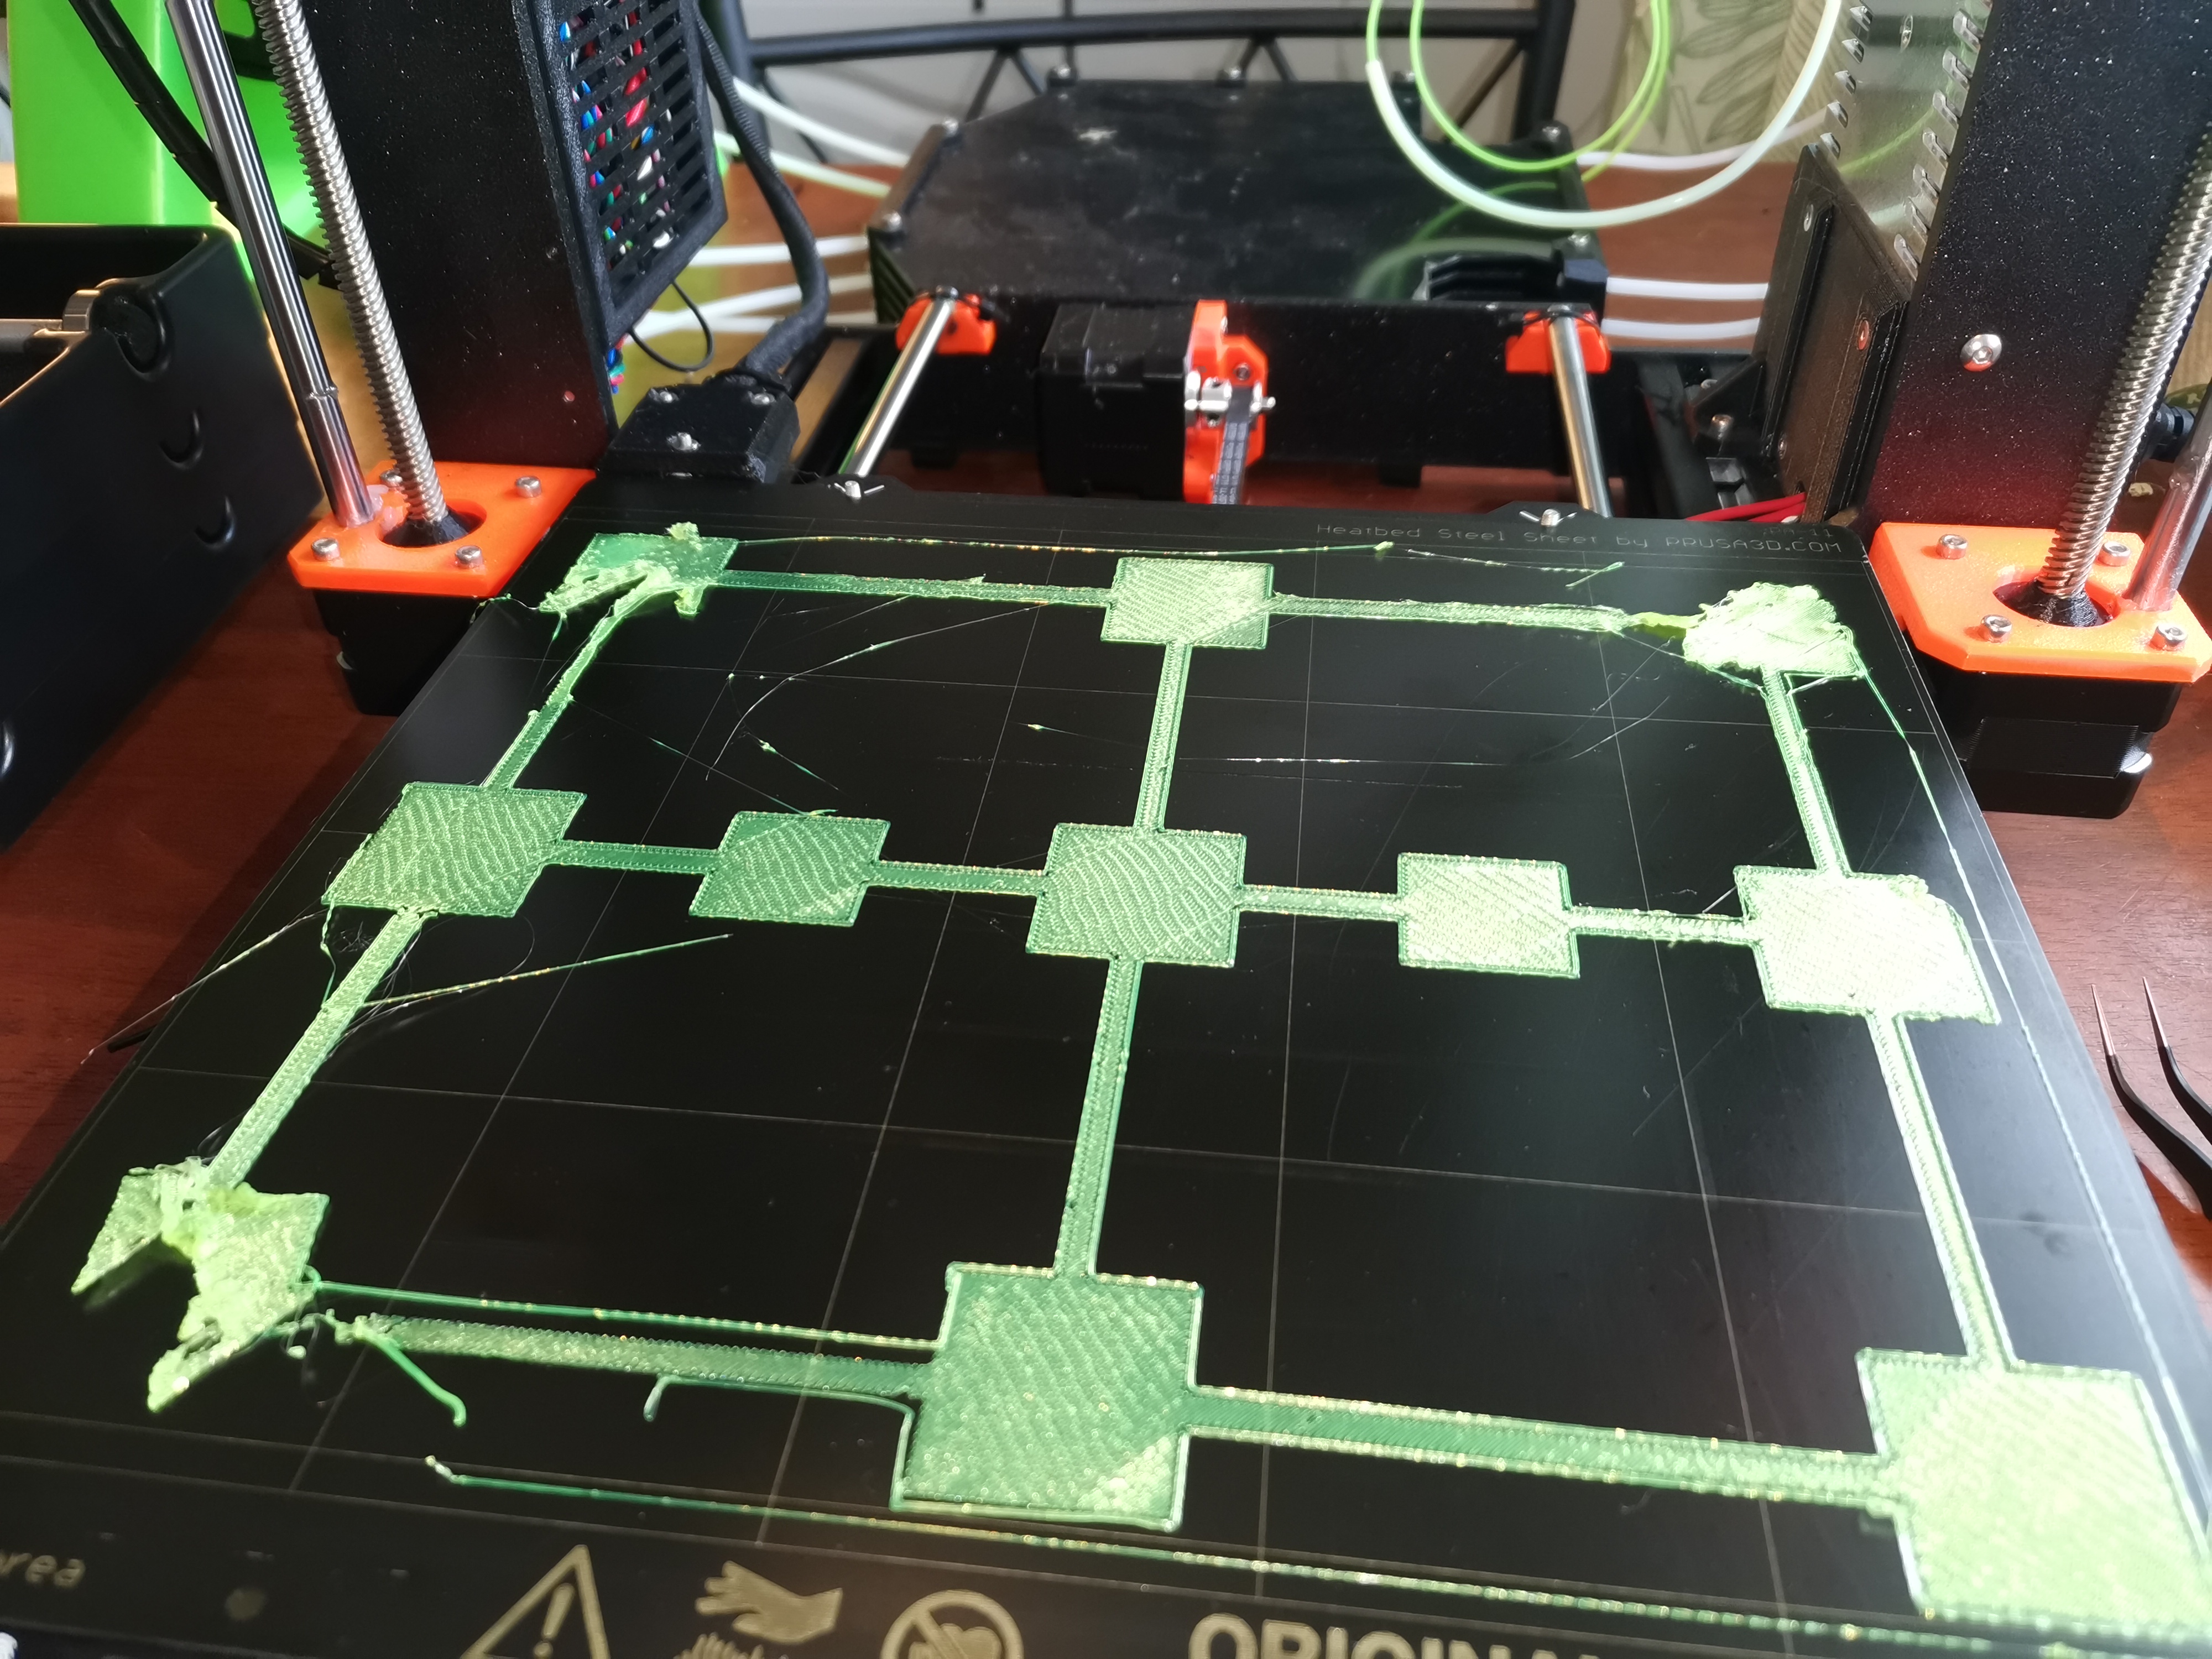
Any idea what to do? Any advice appreciated....
RE: First layer issue
I'm going to give you the full info dump. This should help you get going with bed cleaning and live-z calibration...
-
A dirty PEI print surface. Even if you don't think this is the cause, it's always a good idea to make sure your PEI surface is clean before trying any other fixes. If it's a smooth PEI sheet, take it to the kitchen sink and give it a good dunk with Dawn (original formula, no vinegar or hand softener variants) dishwashing soap or your local equivalent (e.g. Fairy in UK). Use a clean paper towel to clean it off, and another to dry it. Avoid using any sponge or cloth that has been in contact with grease. Above all else, avoid touching the PEI print surface. Once it's good and clean, you should be able to use 91%+ isopropyl alcohol between prints, 100% acetone when that fails , and another dunk when acetone fails. Worst-case, use a 3M 7445 ScotchBrite pad or equivalent on smooth PEI to give it a very light buff, but only infrequently. If you've got a textured powder-coated PEI print surface, the official instructions are to use 91%+ isopropyl alcohol on it only. Rumors persist that some tribes deep in the jungle have had good luck getting started with these sheets by giving them a wipe with 100% acetone and a dunk with Dawn. Either way, there's no real warranty on these sheets. YMMV.
-
If you have not already done so, try using Jeff Jordan's "Life Adjust" procedure for calibrating your Live-Z setting. It is much easier to use and understand than the on-board routine and much easier to make mid-print adjustments accurately with. In general, start high (less negative) and work lower (more negative) in large increments (e.g. 0.1mm) until the filament starts to stick on its own. When you've got your Live-Z setting adjusted properly, you should be able to gently rub the extruded lines on the PEI surface without dislodging them. Then start lowering (more negative) the level until there are no gaps between layers. You should not be able to peel the lines apart after printing, but the top should be regular.
RE: First layer issue
@bobstro
Thank you so much for the tips.
I did manage to get it pretty much perfect now by adjusting the bed level corrections, but I do believe the tips about cleaning helped too; that print is so big - it gets so far out to the edges that it's easy to touch the plate after cleaning...
I also used my finger to feel the tool lines and around the prints; when I'm getting close to the right settings I found it easier to "feel" when the lines were sufficiently pressed down - when it's no longer round nor flat 🙂
RE: First layer issue
In the 3d printer settings, set the calibration to 7x7 for bed leveling.
Movie with a good zoom in,
RE: First layer issue
[...] I also used my finger to feel the tool lines and around the prints; when I'm getting close to the right settings I found it easier to "feel" when the lines were sufficiently pressed down - when it's no longer round nor flat 🙂
You don't want to touch too much, but when the 1st layer is going down, you should be able to poke an extrusion without it popping loose. I've also noticed that there's a feeling of slight dragging when rubbing a paper towel on the PEI while washing in the sink. A few things in 3D printing are tactile.