Rough surface in corners of final/top layer - what went wrong?
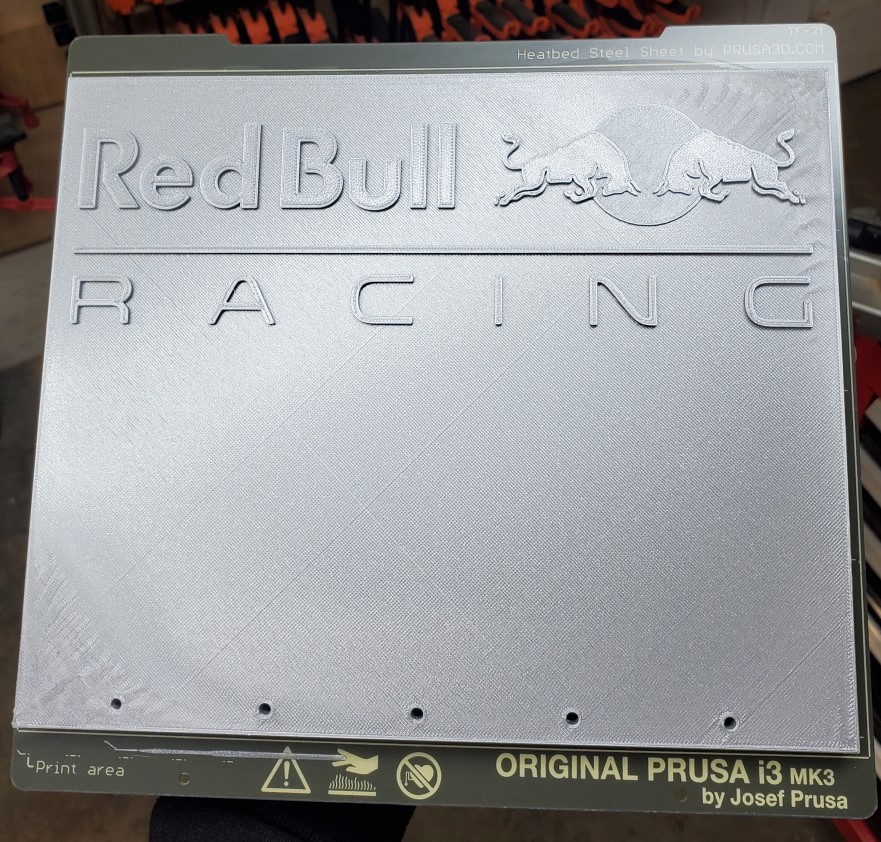
I printed a 14mm tall block that essentially takes up the entire bed. It has 10% infill but otherwise default settings. Using the silver PLA that came with the kit. The bottom layers are perfectly smooth, as are the other parts I have printed. But two of the corners (top right, bottom left) are very rough on the upper surface. The print went on after that to print a perfectly smooth raised area (the text and logo) so I'm at a loss as to what happened here.
Any ideas? I attached the gcode, is that what you all prefer to see to help debug?

RE: Rough surface in corners of final/top layer - what went wrong?
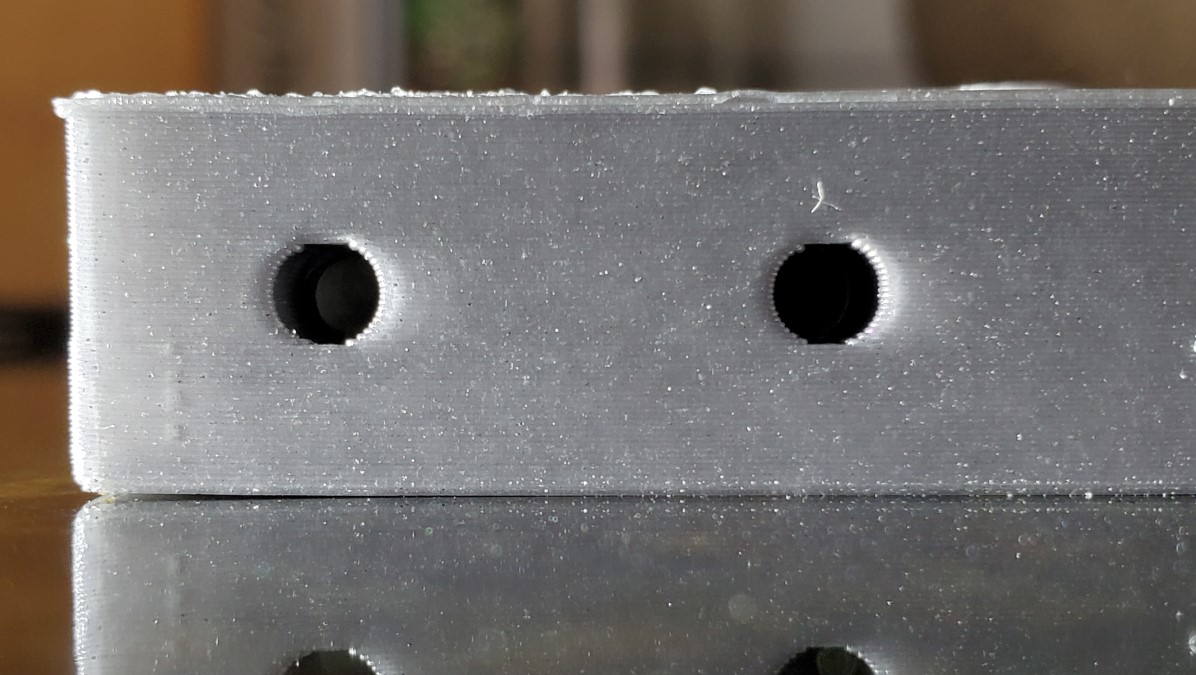
I bet if you look at the underside of your part you will see that the corners have lifted from the bed due to plastic contraction. This has the effect of compressing the upper top layers into a thinner space/area and you get the ripples you noted. Its why the most common answer you will see on 95% of posts is setting your live z correctly and cleaning your print bed. Its all about bed adhesion 😉
Also a forum tip, to attach anything except pictures you need to ZIP it up. The forum has a very limited selection of allowed file types.
Second tip, please don't attach gcode. It's usually pointless except in rare cases. What you want to zip and attach is your project file. In PS use File>Save Project As. This will save a .3mf file. A 3mf project file from PS contains the model but more importantly all your settings. Its a snapshot. It allows us to slice and look at the preview, see if theres any no optimal settings, export the model and check it for errors if needed etc. It is a far more useful and efficient debug mechanism.
RE: Rough surface in corners of final/top layer - what went wrong?
Thanks @Neophyl for the tips. I have attached the zipped 3mf this time.
The smooth sheet has been scrubbed multiple times with hot water and dawn and I ensure I don't touch anything but the sides. When I am rinsing the sheet after washing, if I turn it to the side every bit of water immediately runs off leaving it completely dry. Then once it's in place on the bed I do a wipe with 91% IPA. I also used a glue stick to make a 1" wide strip all the way around the perimeter as well as a hash mark pattern in the interior. And I raised the bed temp to 65 deg (which makes it measure 60 deg with my IR temp gun). But still, the bottom left corner pulled up significantly. That said, it seemed to do this earlier in the print (I had a pause at the 8 hour mark to insert nuts (13 hour total print) and it was lifted at that time). But I wasn't actually watching these last few layers, so maybe it pulled up even more near the end.
As far as drafts, the printer is in my basement. No vents or windows anywhere.
In addition to the top surface roughness, I also seem from the side that the top layer(s) are overhanging a bit. What causes this?
RE: Rough surface in corners of final/top layer - what went wrong?
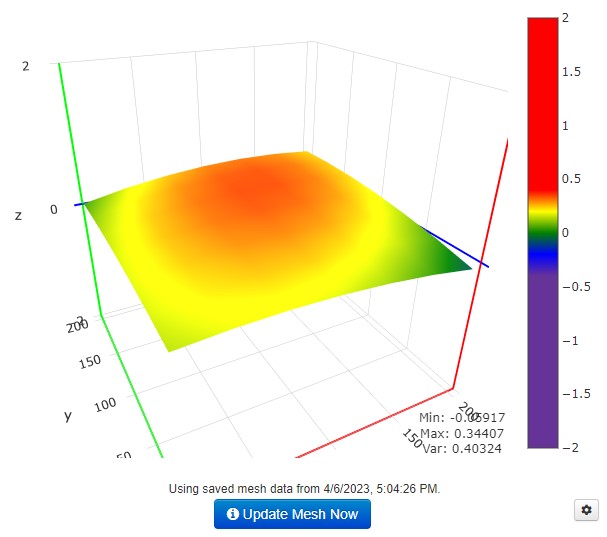
This is my bed visualization after pre-heating to 65 C for 10 mins... I'm wondering if I need to work on some more tuning of the heights mechanically so it doesn't have to compensate as much.
RE: Rough surface in corners of final/top layer - what went wrong?
If you don't have mesh bed leveling set to 7x7, do that. With PLA on the smooth sheet, you really should not need the glue stick. Is that perhaps a compensation due to the first layer calibration (live Z) being a bit off? The glue might even be causing some problems.
As far as drafts, the printer is in my basement. No vents or windows anywhere.
But cool air?
In addition to the top surface roughness, I also seem from the side that the top layer(s) are overhanging a bit. What causes this?
This is also warping - pulling the top surface in so the later layers no longer fit the previous footprint.
The degree of bed curvature isn't bad but unfortunately it's in the worst possible direction for this sort of issue.
One trick that costs nothing to try:
Remove the print sheet. Loosen but do not release the screws holding the heatbed.
The next bit is tricky - take care.
Heat the bed to 50 or 60 degrees, wait ten minutes then drum your fingers on it (hot) and run it back and forth a few times; then turn off but while still hot retighten the heatbed screws.
This should take out any uneven thermal expansion. Run your calibrations again and let us know how you get on.
Cheerio,
RE: Rough surface in corners of final/top layer - what went wrong?
I've got a few things to try now, really appreciate the input! I'll post back with results.
I originally intended to do the 7x7 instead of the 3x3 but then I came across some threads that gave the impression this could actually produce worse results by somehow overcomplicating things. But with the feature to ignore the locations by the magnets, it seems like 7x7 would always be superior no?
One question, when I switch to 7x7 do I need to do the full (24 minute) XYZ calibration again or does 7x7 only impact the mesh leveling?
RE: Rough surface in corners of final/top layer - what went wrong?
The switch between 3x3 and 7x7 can be done at any point and doesn’t impact the initial setup process, just the mesh levelling. 7x7 is superior though, it’s only drawback is time taken but given the whole process of 3D printing is slow anyway a minute ‘saved’ is false economy when the results are better and safer.
RE:
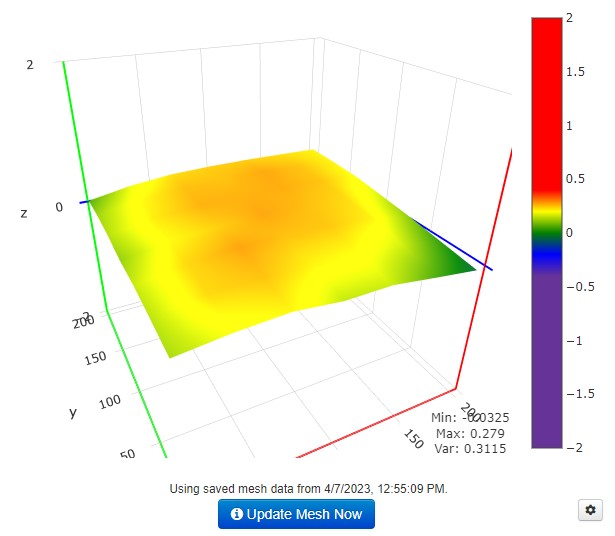
This is after switching to 7x7 with 5 samples and doing the heat-while-loose procedure described above. It definitely improved things, but the same shape (high middle, low corners) persists.
Is there a consensus on what variance is acceptable here? I'm new to this world, so I don't know if 0.31 (mm, right?) is considered terrible or great.
The other thing is certain points out of the 49 seem to not do as much during the probe. Like it only does 1 or 2 "bounces" whereas others take notably longer and seem to go up and down more. Is this normal?