Printing a Geometric Shape, Help with Perimeter, External Perimeter and Top Solid Infill
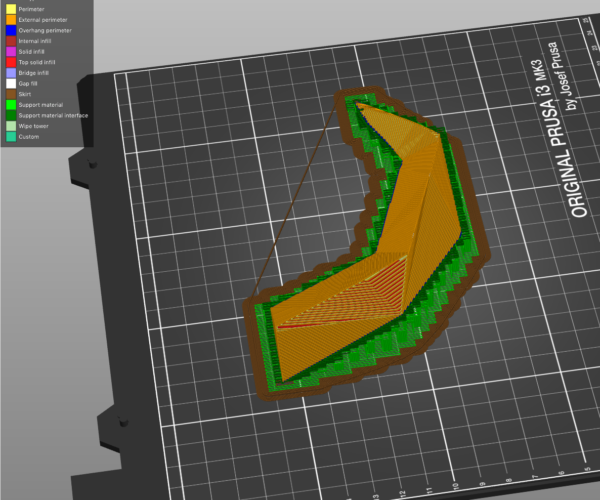
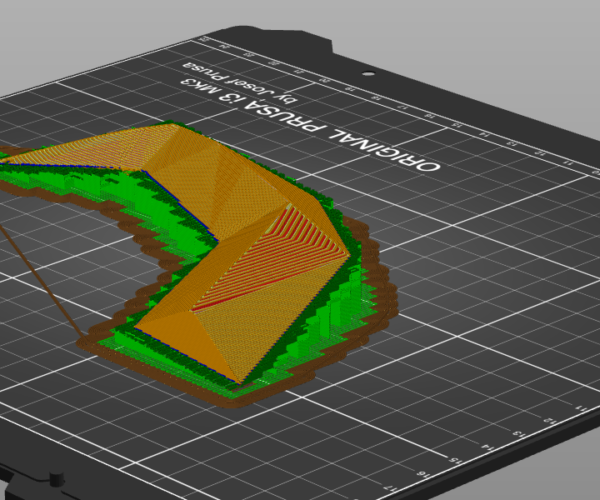
Hello, I am having a really hard time with a geometric piece in the prusa slicer in which I can see the red top solid infill and yellow perimeter, but everything else is covered via orange external perimeter. How do I solve for this? When the piece prints, you can see this pattern where you see red, orange and yellow currently.
Best Answer by Neophyl:
I'm sorry Christina but what I was looking to see was the angle of that facet of your model. All your pictures are above looking straight down.
Without the geometry or a good side on shot the following is best guess. You need to look up the term stair stepping in regards to fdm printing. To me it looks like that face angle is less steep than the others. As the object is sliced in layers then it fits the layer within the boundary/shell of the model. If its a shallow slope than it has to bring the perimeter in further. So from what I can tell that is perfectly normal. This is an unavoidable part of slicing. Using lower layer heights or using the variable layer height feature in Prusa Slicer can ameliorate the issue to some extent but its part of 3d printing. Have a read of https://blog.prusaprinters.org/everything-about-nozzles-with-a-different-diameter_8344/
Theres an image in the blog that illustrates this.

With the object we could try repositioning it and see if any other print orientation would give a better result but as you cant supply it we are limited in what we can suggest.
I will say that everyone I know who produces jewellery using 3d printed masters, uses a resin printer as they are capable of finer resolution and things usually get placed at an angle.
RE: Printing a Geometric Shape, Help with Perimeter, External Perimeter and Top Solid Infill
Please post either the model you are trying to print or better yet save your project as a 3mf file and zip it up and attach it. It must be zipped for the forum to accept it.
Without knowing what the part is supposed to print out like the slice preview looks normal, and I can’t tell anything from the picture of the print.
RE: Printing a Geometric Shape, Help with Perimeter, External Perimeter and Top Solid Infill
Hello, I am having a really hard time with a geometric piece in the prusa slicer in which I can see the red top solid infill and yellow perimeter, but everything else is covered via orange external perimeter.
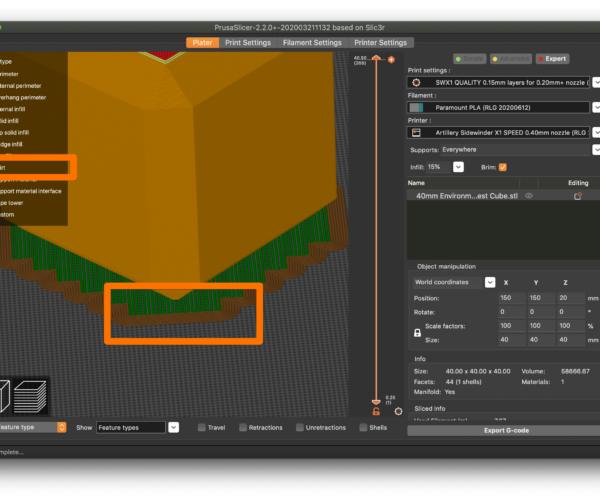
I believe that "orange perimeter" is a brim as set under Print Settings->Skirt and brim->Brim->Brim width.
That should not cause problems, and is only needed if you are having adhesion issues.
As @neophyl notes, if you save off a 3MF project file with your part & settings, zip it and attach the file here, we can provide more suggestions.
and miscellaneous other tech projects
He is intelligent, but not experienced. His pattern indicates two dimensional thinking. -- Spock in Star Trek: The Wrath of Khan Unfortunately,…
RE: Printing a Geometric Shape, Help with Perimeter, External Perimeter and Top Solid Infill
@neophyl
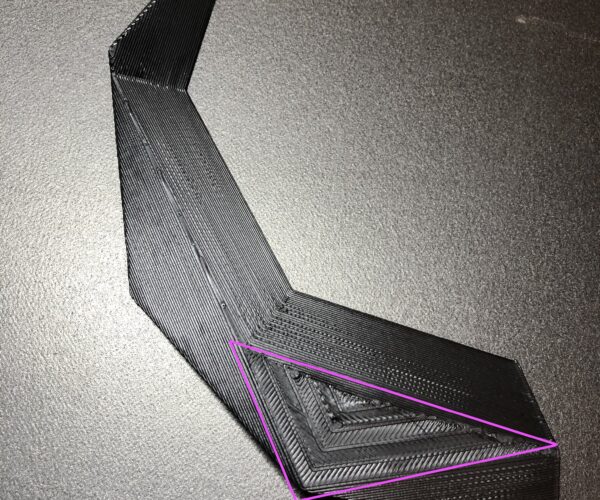
Thank you. The piece if half of a necklace that should print smooth on all sides. The part I outlined in magenta is the part that is not as smooth as the others, I don't like those layers. I wanted that part to print like the other smooth parts. I hope this image is able to explain my issue better without having to send the actual file, which I am not allowed to do. Best regards, C.
RE: Printing a Geometric Shape, Help with Perimeter, External Perimeter and Top Solid Infill
By the way, here is how the model looks before exporting to the Prusa slicer. I am just looking to have a smooth finish without the layers I outlined in the previous screenshot. 
RE: Printing a Geometric Shape, Help with Perimeter, External Perimeter and Top Solid Infill
@bobstro
Thank you kindly for your recommendation. I really appreciate it.
I am unfortunately not allowed to send the file, but I added some screenshots in my response to @neophyl.
The piece is half of a necklace that should print smooth on all sides. The part I outlined in magenta is the part that is not as smooth as the others sections in this piece. I wanted that part to print like the other smooth parts. I hope this image is able to explain my issue better. Best regards, C. 
By the way, here is how the model looks before exporting to the Prusa slicer. I am just looking to have a smooth finish without the layers I outlined in the previous screenshot. 
RE: Printing a Geometric Shape, Help with Perimeter, External Perimeter and Top Solid Infill
I'm sorry Christina but what I was looking to see was the angle of that facet of your model. All your pictures are above looking straight down.
Without the geometry or a good side on shot the following is best guess. You need to look up the term stair stepping in regards to fdm printing. To me it looks like that face angle is less steep than the others. As the object is sliced in layers then it fits the layer within the boundary/shell of the model. If its a shallow slope than it has to bring the perimeter in further. So from what I can tell that is perfectly normal. This is an unavoidable part of slicing. Using lower layer heights or using the variable layer height feature in Prusa Slicer can ameliorate the issue to some extent but its part of 3d printing. Have a read of https://blog.prusaprinters.org/everything-about-nozzles-with-a-different-diameter_8344/
Theres an image in the blog that illustrates this.

With the object we could try repositioning it and see if any other print orientation would give a better result but as you cant supply it we are limited in what we can suggest.
I will say that everyone I know who produces jewellery using 3d printed masters, uses a resin printer as they are capable of finer resolution and things usually get placed at an angle.
RE: Printing a Geometric Shape, Help with Perimeter, External Perimeter and Top Solid Infill
Wow, everyone here is so helpful. Thank you for your response. This makes total sense to me now. You're right! This is the issue! I am going to try a few things, but thank you so very much for your feedback! I read the article and it was very informative. Going to play around a little more with my piece and see how it goes, I will try repositioning and or lowering layer height.
All the best,
Christina
RE: Printing a Geometric Shape, Help with Perimeter, External Perimeter and Top Solid Infill
Thank you! Your recommendations worked and improved my print!
I think what helped most was adjusting the layer height, changing the orientation of the print and tweaking the design.
See photo, top is the older prototype where you can see the layers exposed on the top. Bottom one is the second prototype, full piece.
You don't see that anymore. There could be some improvements on the second one too on the top edges, but much better.
Many thanks!
RE: Printing a Geometric Shape, Help with Perimeter, External Perimeter and Top Solid Infill
That’s certainly a vast improvement over the original 👍
Like any type of design you have to do it with the limitations/advantages of the media in mind. It looks like you are well on the way to picking up this media.


