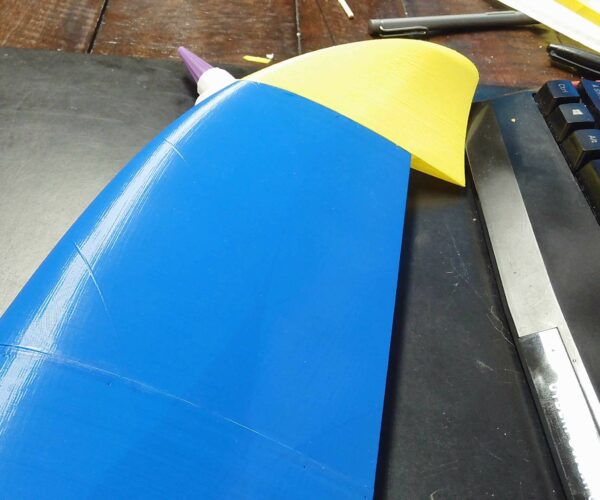
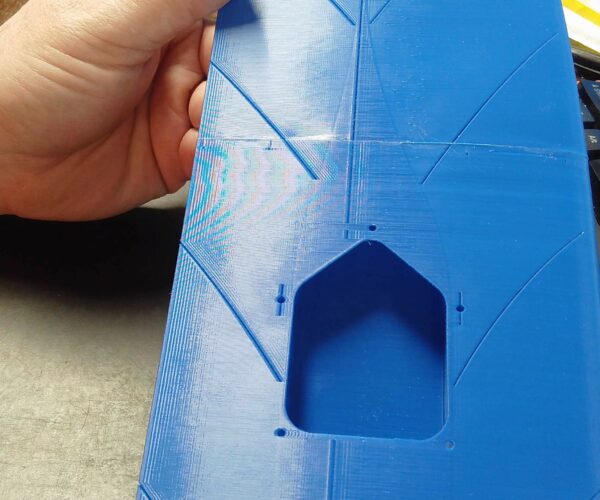
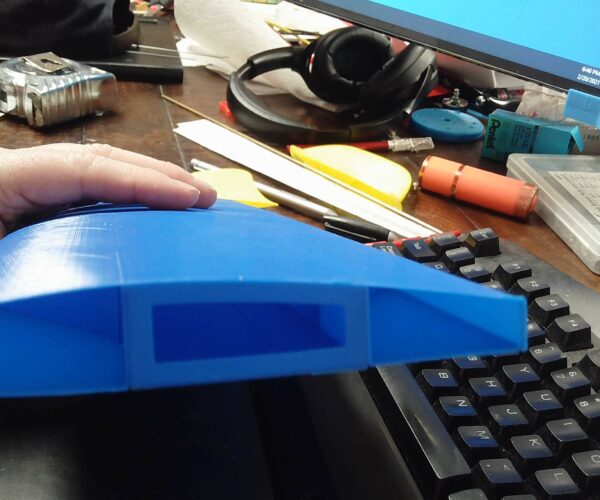
Printing 3D plane - 1 layer walls with 0 bottom later and 0 top layer
Hi -
I have a set of stl files for a 3D printed plane. The plans and files are free if you want to try printing one for yourself. I have tried various print settings but for a couple of prints I am getting some lift off from the smooth build plate. I am printing using MatterHacker PLA and I am using the PrusaSlicer spiral vase setting with the bottom layers option set to 0. I am using a glue stick to try and increase the adhesion to the plate.
Any advice?

RE: Printing 3D plane - 1 layer walls with 0 bottom later and 0 top layer
can you include a .3mf file of your project? (You will need to Zip Compress the file so that the forum will accept it)
why are you using 0.1mm layer height.
I believe the originating site specified larger layer heights. 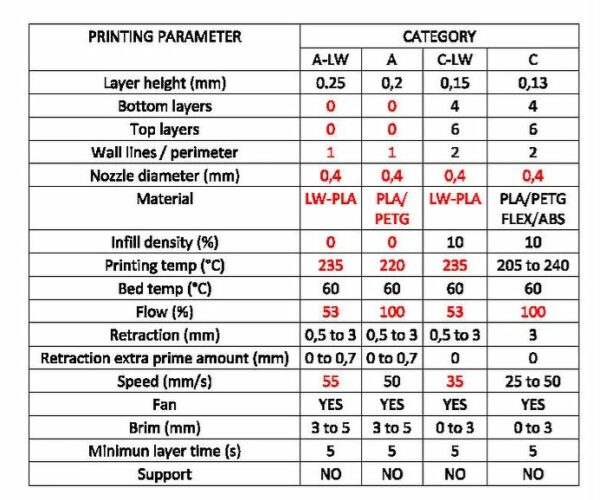
what first layer height ate you using?
If your Build plate perfectly clean?
I use hot water and a drop of dish soap, then wash vigorously, rinse well with hot water and dry immediately with a clean plain paper towel.
I use 7x7 mesh bed levelling and
Life Adjust Z My Way
https://forum.prusa3d.com/forum/original-prusa-i3-mk3s-mk3-assembly-and-first-prints-troubleshooting/life-adjust-z-my-way/
to set the first layer calibration
I print PLA at 70C bed temperature,
I don't use any other surface preparation
Regards Joan
I try to make safe suggestions,You should understand the context and ensure you are happy that they are safe before attempting to apply my suggestions, what you do, is YOUR responsibility.Location Halifax UK
RE: Printing 3D plane - 1 layer walls with 0 bottom later and 0 top layer
@joantabb
Hi Joan -
Thanks for the reply. This is a link to the .3mf file that I have just printed and links to two images (image1, image2) of the the result.
I am using a 0.2 mm layer height. I have the bed temperature set to 70C and I only used the glue stick out of frustration. I have never had the type of adhesion problems as I have been experiencing. Then again I have never tried to print a hollow thin walled object. I usually clean my build plate with isopropanol and have occasionally used water and dish soap.
The other possible contributing factor is that I usually print using Prusament PLA, but for these builds I have been using MatterHacker PLA - not sure how much, if any, difference this would make.
I believe that I have my first layer well calibrated and I also use the 7x7 mesh leveling. I have used the procedure described by the article in the past, I guess I will do it again and see what I get.
In the end, I think that the overall idea of printing such a model is a bit flawed. I think that the designs should be tweaked to provide a bit more surface area on the build plate. I am thinking of moving in that direction - but it is a real pain to import and then modify STL files in my CAD program (SolidWorks).
Let me know if you have any ideas...
Dan
RE: Printing 3D plane - 1 layer walls with 0 bottom later and 0 top layer
Hi Dan,
I had a go. printed the two wing tips and the centre section
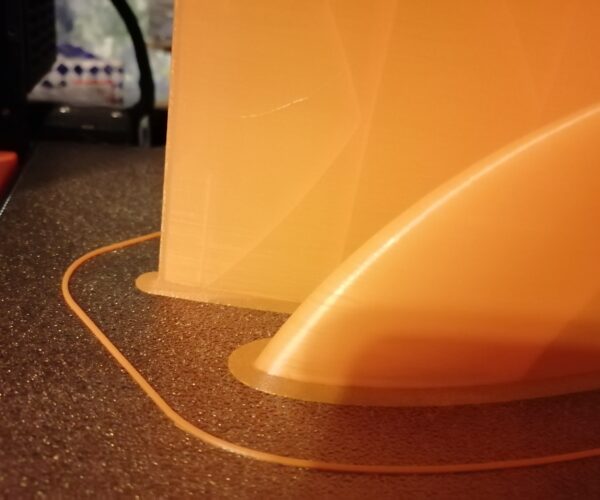
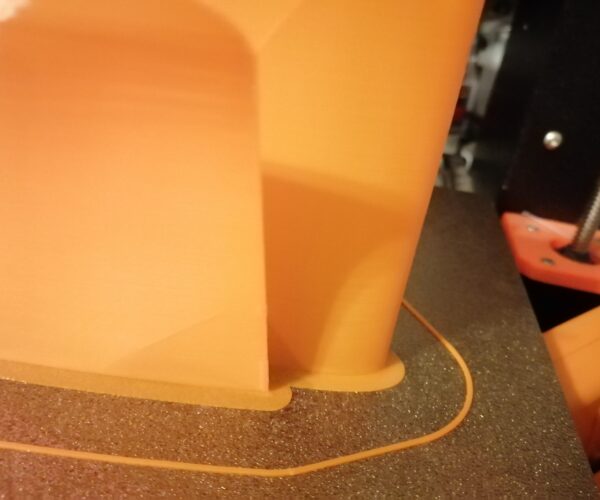
1 perimeter, o.2mm layer height, there was no definition for the extrusion width, so I left that at default, 3mm brim, 0 top layers, 0 Bottom layers, Bed 70C. Elephant's foot compensation 0.0mm, 3 Skirt laps 20mm from the model and 1 layer high. I was using PLA that lines a high print temperature normally, because it's my 'cheap' (Manufacturers seconds) filament.
As it happens I had the textured sheet on the printer and we all ''know'' that PLA Won't stick to textured sheets... Tongue in cheek! the Build plate had been washed about 10 prints ago... no IPA, No Hairspray, No Glue, just a good first layer
And!
regards Joan
I try to make safe suggestions,You should understand the context and ensure you are happy that they are safe before attempting to apply my suggestions, what you do, is YOUR responsibility.Location Halifax UK
RE: Printing 3D plane - 1 layer walls with 0 bottom later and 0 top layer
Hi Joan -
Wow - many thanks for taking the time to actually print the parts! Also I have NO IDEA how you manage to print PLA on the textured sheet...do you use an elevated temp?
So back to my original problem... I did some calibration prints and I believe the problem is with my printer. I have followed all the standard troubleshooting tips - checked my extruder, adjusted my gear tension, tightened up all screws checked my XYZ calibration. I even went ahead and did and printed the Eco Tower.
I then printed out two 20-20-20 mm cubes. One was the "visual-method-cube" and the other was one that I created. I have placed the .3mf files in a Google Drive Folder.
I have taken pictures of the results of the two cubes and the eco tower - these can be accessed from a Google Photos folder.
It looks like I might be underextruding, but I don't understand the causes of the layer gaps or the uneven printing on z-axis edge between the X and Y sides of the test cube.
If you have any words of wisdom, I'd appreciate hearing them.
Thanks!
Dan
RE: Printing 3D plane - 1 layer walls with 0 bottom later and 0 top layer
Sorry, I couldn't find your ,3mf files to play with.
I usually print PLA with Bed at 70C,
the Orange filament is 3DQF colour fade, end of run, second quality filament sold at reduced cost, because I expected to be filling, sanding and spraying the final result... when I bough it... , now I am using up the remains... for demo prints.
this filament likes to print hot, so I was printing at 235C. better inter lamination bond strength.
One value I Did not see on the print instructions was extrusion width. 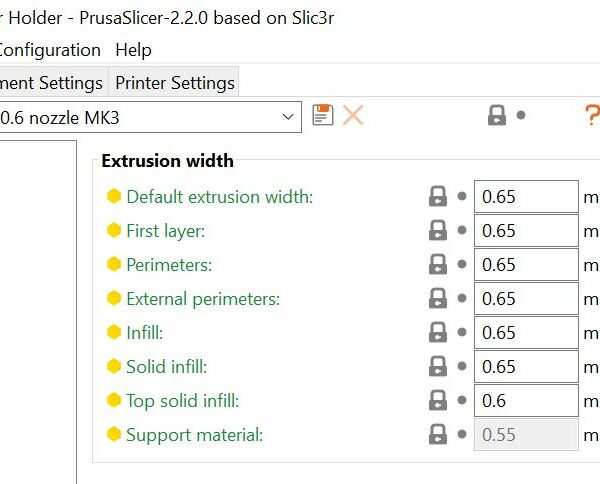
In this example they are set at 0.65mm but the default settings are 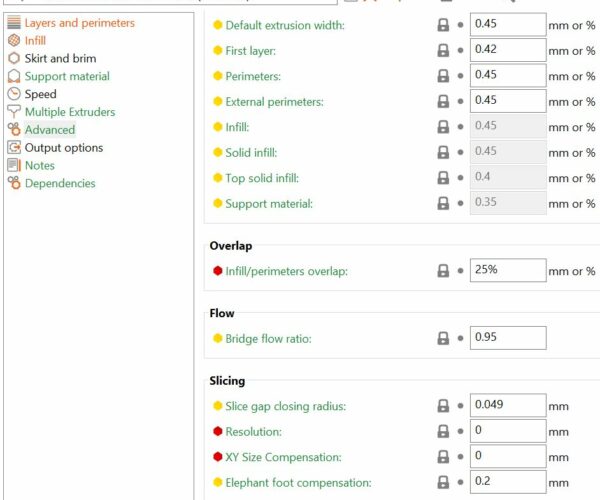
0.43mm first layer and 0.45 for the rest of the layers
the first parts I printed at these settings were a little bit soft, in the 'skin'
and the wing tips didn't form a cohesive skin on the curved tips.
A larger extrusion width would have partially resolved this.
My second wing centre was printed with an extrusion width of 0.5mm and was more robust
I printed a third using simplify3d to slice the file, and similar settings to prusa slicer, and to be honest I was underwhelmed... the result was OK, but not as good as the prusa slicer version
Looking at your prints you seem to have issues at the start and stop points on the layers often resulting in lumpy corners. your calibration cubes seem to have clusters of lumps down the corners of the prints.... what retraction settings are you using?
Which version of Prusa Slicer are you using?
Which Printing profile are you using? I am using 0.2mm quality, with Generic PLA bed 70 nozzle 235, and Mk3S with 0.4mm retraction, no top layers, no bottom layers and at the moment 0.45mm single perimeters
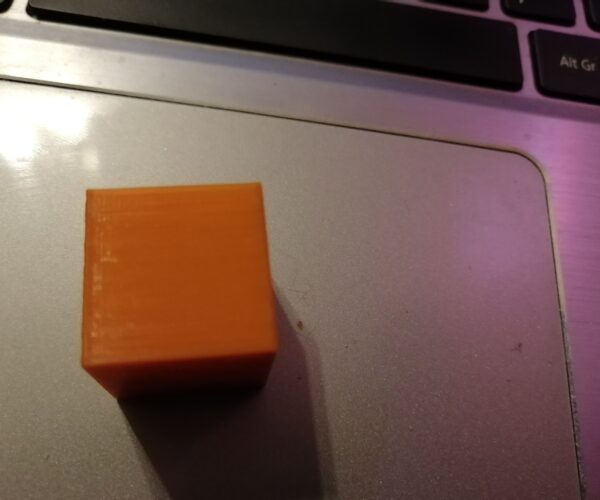
this is a 25mm hollow cube printed with otherwise standard settings as you can see, there is no bottom, and no brim. the walls are only 0.42mm thick (I guess this shows that washing the build plate is good preparation for PLA Prints)

the pen is showing the edge of the cube with retractions
Have you actually tried printing any parts of the aircraft?
regards Joan
I try to make safe suggestions,You should understand the context and ensure you are happy that they are safe before attempting to apply my suggestions, what you do, is YOUR responsibility.Location Halifax UK
RE: Printing 3D plane - 1 layer walls with 0 bottom later and 0 top layer
I printed a calibration cube it came out like this
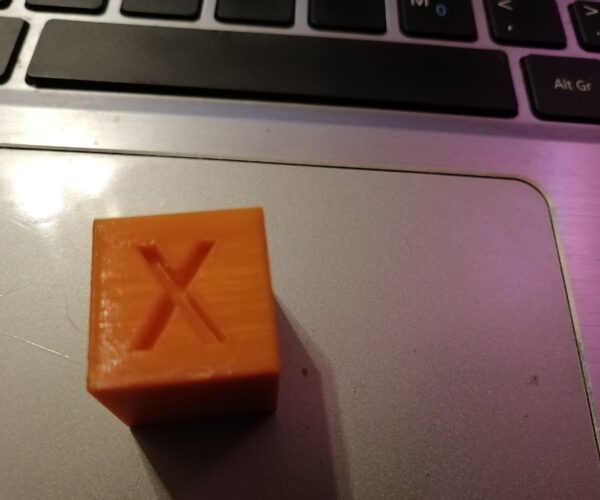
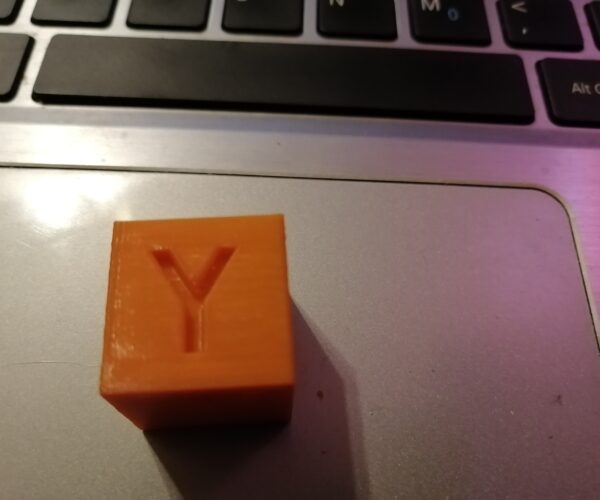
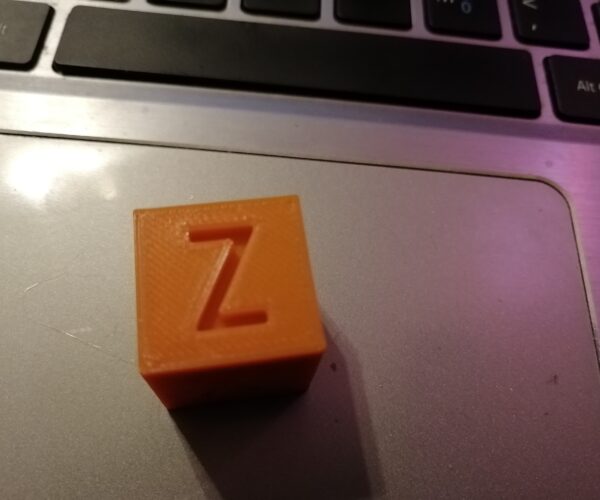
Your Z surface does seem a little under extruded. does your filament diameter match the value entered in your slicer?
is your extrusion multiplier lower than say 0.95? 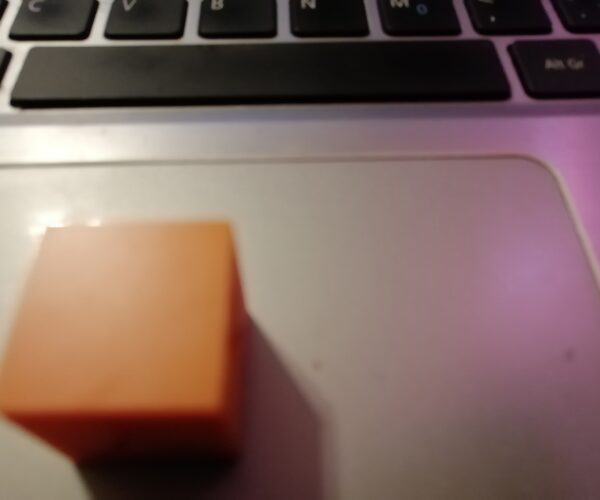
this is the underside of the cube, it's a smooth sheet without significant gaps between the lines of filament,
yours seems to have gaps, meaning that the live Z value is too small, and the nozzle needs to down a little further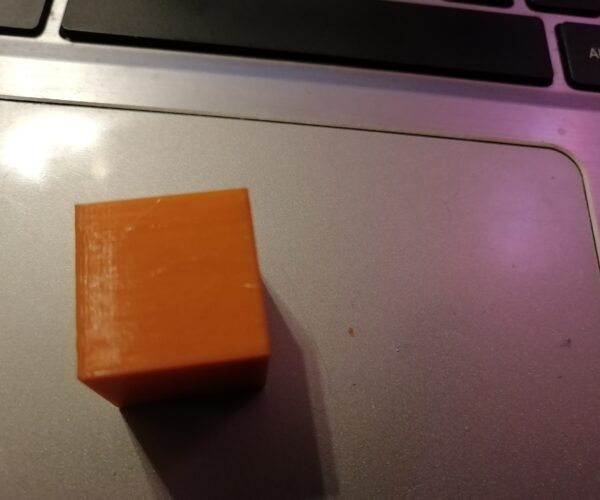
the vertical corners of your cube have lumps on them, could your belts be a little loose, are you moving the extruder very quickly?
you have splits or missing filament in various places, could your filament be a bit on the cool side?
cool filament can cause under extrusion.
have you fitted a hardened nozzle, these often need the filament temperature raising a little.
regards Joan
I try to make safe suggestions,You should understand the context and ensure you are happy that they are safe before attempting to apply my suggestions, what you do, is YOUR responsibility.Location Halifax UK
RE: Printing 3D plane - 1 layer walls with 0 bottom later and 0 top layer
Hi Joan -
I wanted to get back to you with thanks a some pictures of my results. The blue wing sections have been printed on my MK3s and the yellow parts on my MINI.
Two issues that I was hoping you could advise on...
Issue 1
The brims that are produced on both printers are attached to the prints. In order to removed them, I have ended up making perpendicular cuts in the brim so that I can bend the resulting tabs back and forth until they break off. If I try to removed the brim any other way, I end up damaging the first layer.
I'm not sure if there is a solution for this as the attachment is necessart for print stability, but I thought that I would ask. I am attaching the MKS3 config file and an .3mf for one of the successful parts.
Issue 2
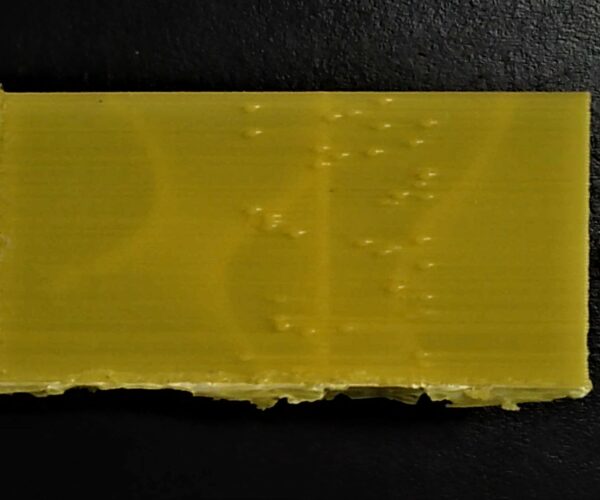
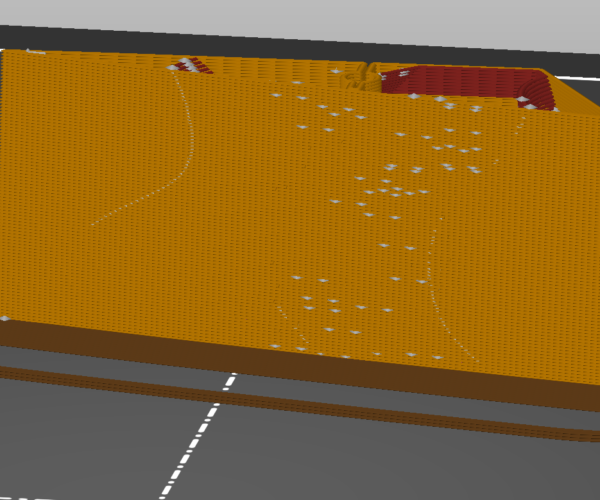
I am having a retraction issue with the Mini. The two images below show a test print and the blobs or warts coincide with the retration locations. I am in the process of playing around with the settings and printing test cubes, but I was hoping that you might be able to let me know which settings have the most influence on this issue.
Many, many thanks!
Dan
