Print Infill Only In Secondary Color
I want to print some text that is embossed into the face of my widget. I do this a lot and usually set the depth to 1mm or some multiple of my layer height.
In Prusa Slicer I set my color change for a couple layers below where the text starts, so for a .20 layer height that would be 1.4 mm below the surface. This gives me two layers of contrasting color at which point I change back to the main color and the end result is nice bold contrasting lettering. No surprise there and everybody does that I'm sure.
But what you get is on the edge of your print 2 layers of color that spoils the look of the item.
I want to know is it possible to define an area on a layer to be printed in a color other that the main color. The result would be a perimeter of one color and the contrasting lettering in the face.
If you look here you will see an example. https://www.printables.com/model/266717-radius-gauges-inch-cm
I changed colors a couple times here. Once for the embossed lettering and then again for the raised lettering. Not rocket science but gives a nice look I think. However if you looked at the edge you would see two layers of yellow in the blue body of the radius gauge. That's what I want to get away from.
I thought if it's possible to combine infill layers is it possible to in the slicer define only the infill to print in a different color. So print the perimeters then go print the secondary color for the infill layers and finally go back and finish the print with the main color. Better would be to be able to define just an area to be printed in the secondary color but if it had to be all of the infill area for those layers so be it.
Now if it were possible to define an area within a layer with special print settings it would be great to also be able to set perimeters to a higher or lower number than the rest of the print.
Is any of this possible now and I just don't know where or how to enable it?
RE: Print Infill Only In Secondary Color
@bob-d
I would try something like this, for a start...
It will be easier to make box in design program for better accuracy, or a more custom "box"
The result would be a perimeter of one color and the contrasting lettering in the face.
I think I know what you are after and it should be doable, I need to do some experiment when I have more spare time.
Which design program do you use?
Prusa i3 MK3S+ FW 3.11.0 (kit dec -20), PrusaSlicer 2.6.1+win64, Fusion 360, Windows 10
RE: Print Infill Only In Secondary Color
That is the result I am looking for. Now I need to figure how to do it with my printer.
I use SketchUp Pro 2022 mostly and Prusa Slicer which I keep updated.
Printer is the MK3S+, no MMU option which I noticed you do use. For now I am manually making the filament changes.
If the XL ever becomes reality that will open up some options for me. I've got my reservation in, just waiting.
No MMU!
Printer Settings -> General -> Capabilities -> Extruders "2", or more if you want/need
Printer Settings -> Custom G-codes -> Tool change G-code -> Add "M600"
Print settings -> Multiple extruders -> Wipe Tower -> Untick "Enable" (No need for wipe tower when doing manual color change)
You have to be in "Expert", top right corner, mode!
Select part -> Rightclick -> Add part, "Box" -> Resize and position as you like
Assign color (Tool) to "Generic Box", and "original" part, add color change at height as you did in the first place
Prusa i3 MK3S+ FW 3.11.0 (kit dec -20), PrusaSlicer 2.6.1+win64, Fusion 360, Windows 10
As long as you keep the colour changes to no more than two layers and change at the layer boundaries; this can mean accuate calculation but not so bad if you avoid variable layer heights, it's relatively straightforward to implement.
It's just a variation on printing surface text, sinking the text part by your embossing depth.
Here are two threads that cover the processes:
https://forum.prusa3d.com/forum/prusaslicer/manual-multicolor/
Cheerio,
RE: Print Infill Only In Secondary Color
Okay, here's an idea, with the caveat that I've always been happy with the colored rim from a manual color swatch, or I used the multiple extruder approach to simulate an MMU, with custom inserts designed in CAD for differently colored parts a la https://www.printables.com/model/137547
But thinking about it, I came up with this method, which is purely slicer based:
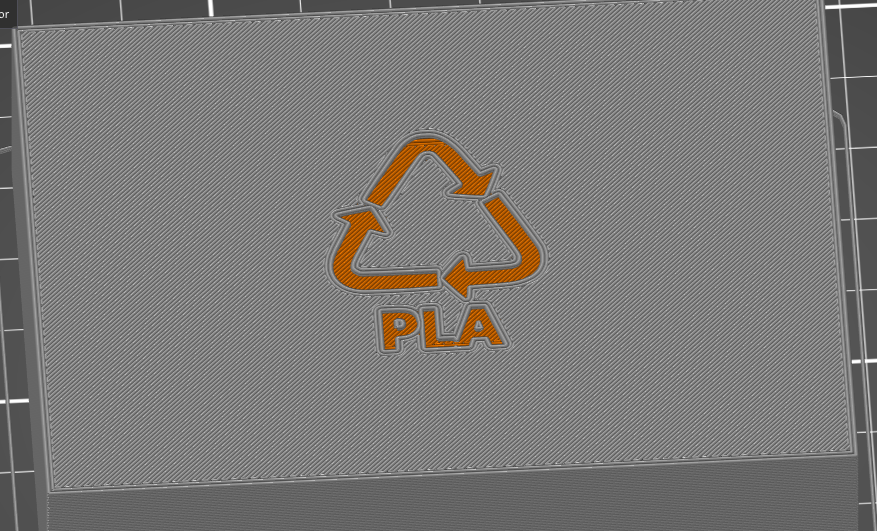
To get the base model, I simply inserted a box into Prusaslicer and added the recycle sign as a negative volume.
To get the colored highlight, I switched to a multi-toolhead printer setting, so I can assign multiple colors. I then inserted a new part (a 0.4mm thin slab), positioned it below the negative volume, and assigned it a different color in the printer.
3mf file is attached
Formerly known on this forum as @fuchsr -- https://foxrun3d.com/
RE: Print Infill Only In Secondary Color
Thanks everyone for taking the time to explain this and provide examples.
I figured it was possible just didn't know how.
I need to walk myself through it and do some test prints. Practice makes perfect. 🙂
RE: Print Infill Only In Secondary Color
Seems to be working for me based on my first test print.
Now I need to remove the call for the filament change at the beginning of the job.
RE: Print Infill Only In Secondary Color
That is a bit annoying but thankfully just a simple edit/one line delete of the gcode file.
Formerly known on this forum as @fuchsr -- https://foxrun3d.com/
RE: Print Infill Only In Secondary Color
@bob-d
I have what you want on my computer at home.
At work now and I don't remember how it is done
Prusa i3 MK3S+ FW 3.11.0 (kit dec -20), PrusaSlicer 2.6.1+win64, Fusion 360, Windows 10
RE: Print Infill Only In Secondary Color
Found it
https://forum.prusa3d.com/forum/postid/562228/
There you have the code you need 👍🏻
Prusa i3 MK3S+ FW 3.11.0 (kit dec -20), PrusaSlicer 2.6.1+win64, Fusion 360, Windows 10
RE: Print Infill Only In Secondary Color
Thanks again to everyone for the help. I added the code that Ringarn67 referenced (also below) and I'll get to print for the first time tomorrow.
I have the text down in the first two layers. That is working much better than the embossed text I started out with.
I've found that only two .25mm layers of color is not always enough. Orange and yellow text with a black body color tend to let the black bleed through. Dark text color on a lighter body or background color is not a problem of course.
{if layer_num >= 0}M600 ; change to filament for extruder {next_extruder + 1}{endif}
RE:
I have been printing using the suggestions given to me in this thread and for the most part it works great.
I have a couple mysteries that I hope you can explain why they occur and how to correct them.
Q#1. I have an object with some text that prints on the face of the object in contact with the bed. The text is a separate .stl that I add in using PrusaSilcer and position on the bed. The text is .50mm high (thick) and my layer height is set to .25mm, so two layers. When I first printed this I was printing only one at a time until I was sure everything was correct. It looked pretty good (see my next question for why it's not perfect) and so I moved on tow printing two at a time.
When I was printing singles the order was the body color (Extruder #1) for layer one, then a filament change to Extruder #2 for the secondary color (used for the text) for two layers, then back to Ext #1 and the body color to finish out the print job.
That was working fine. Then I created a second instance in Slicer and sent it to the printer. When I ran the print job with the body color loaded to start (because I expected layer 1 of the body to be printed first) I was surprised that the text was printed first and after layer 1 of the text was complete the printer was prompting me for a filament change to the body color. I made the change and layer 1 was completed. However the printer did not go on to print layer 2 of the body color, it now wanted to go back and put down layer 2 of the text with the secondary color. Another filament change and layer 2 of the text is completed. Now it's back to the body color and the job runs to the end.
The results were acceptable, but not terrific. Edges of the text were reasonably sharp and I thought they looked OK.
So if you lasted through that long-winded bit of blabber my question is why did the behavior change form printing a single instance to working opposite when printing two instances. I was expecting to print the body color on both instances for one layer, then swap to the secondary color for the text and print 2 layers, and then swap back and finish the job with the primary color. But what happened was one layer of second color, one layer of primary color, one layer of second color, then remaining layers with the primary color.
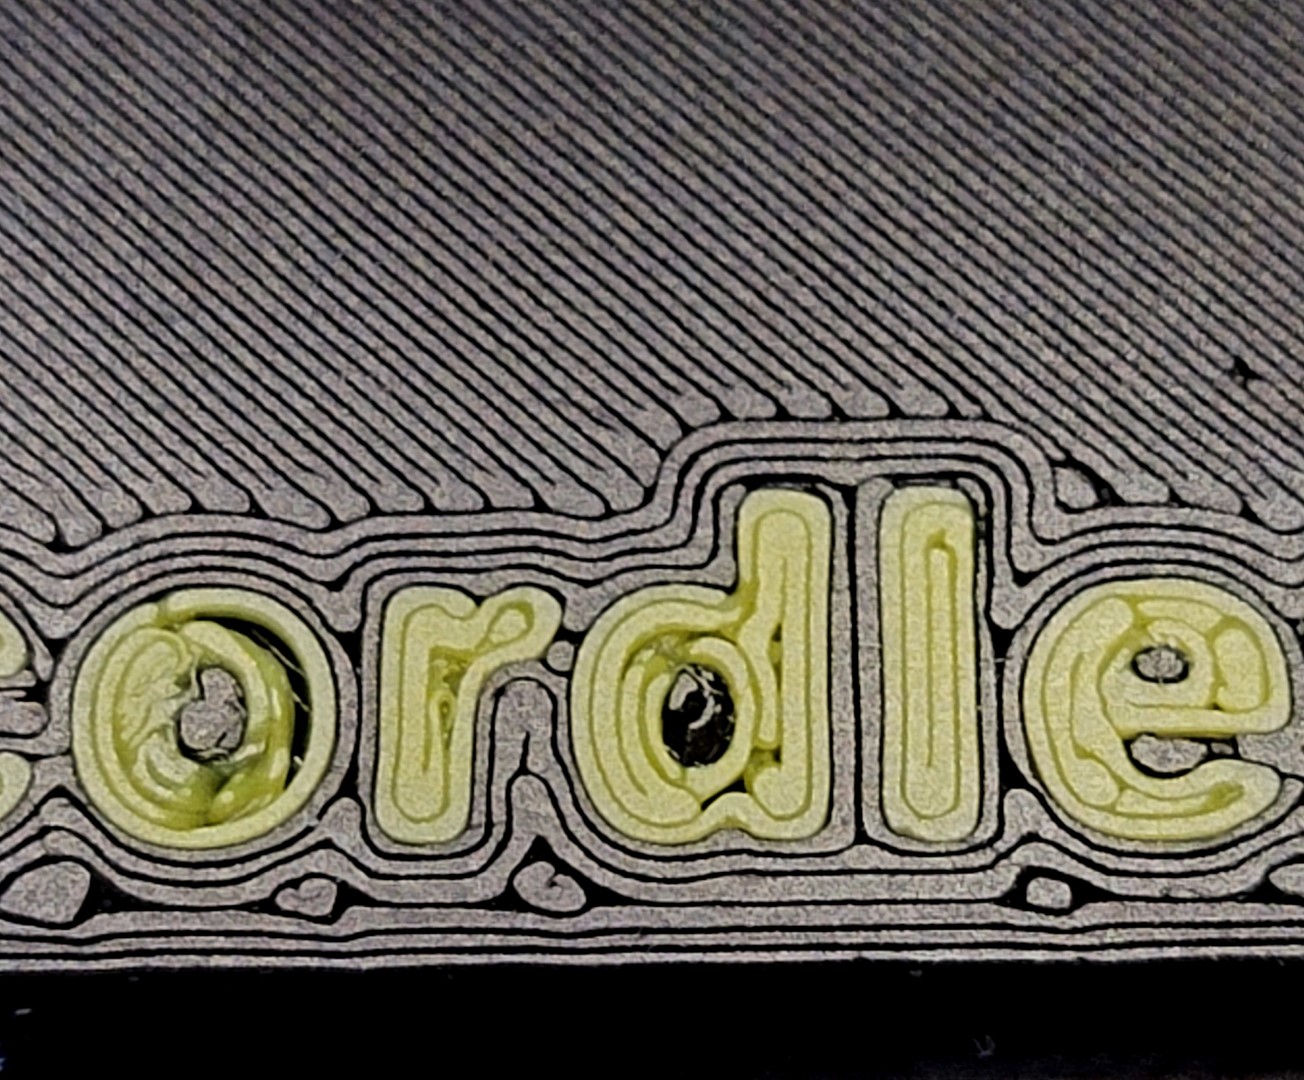
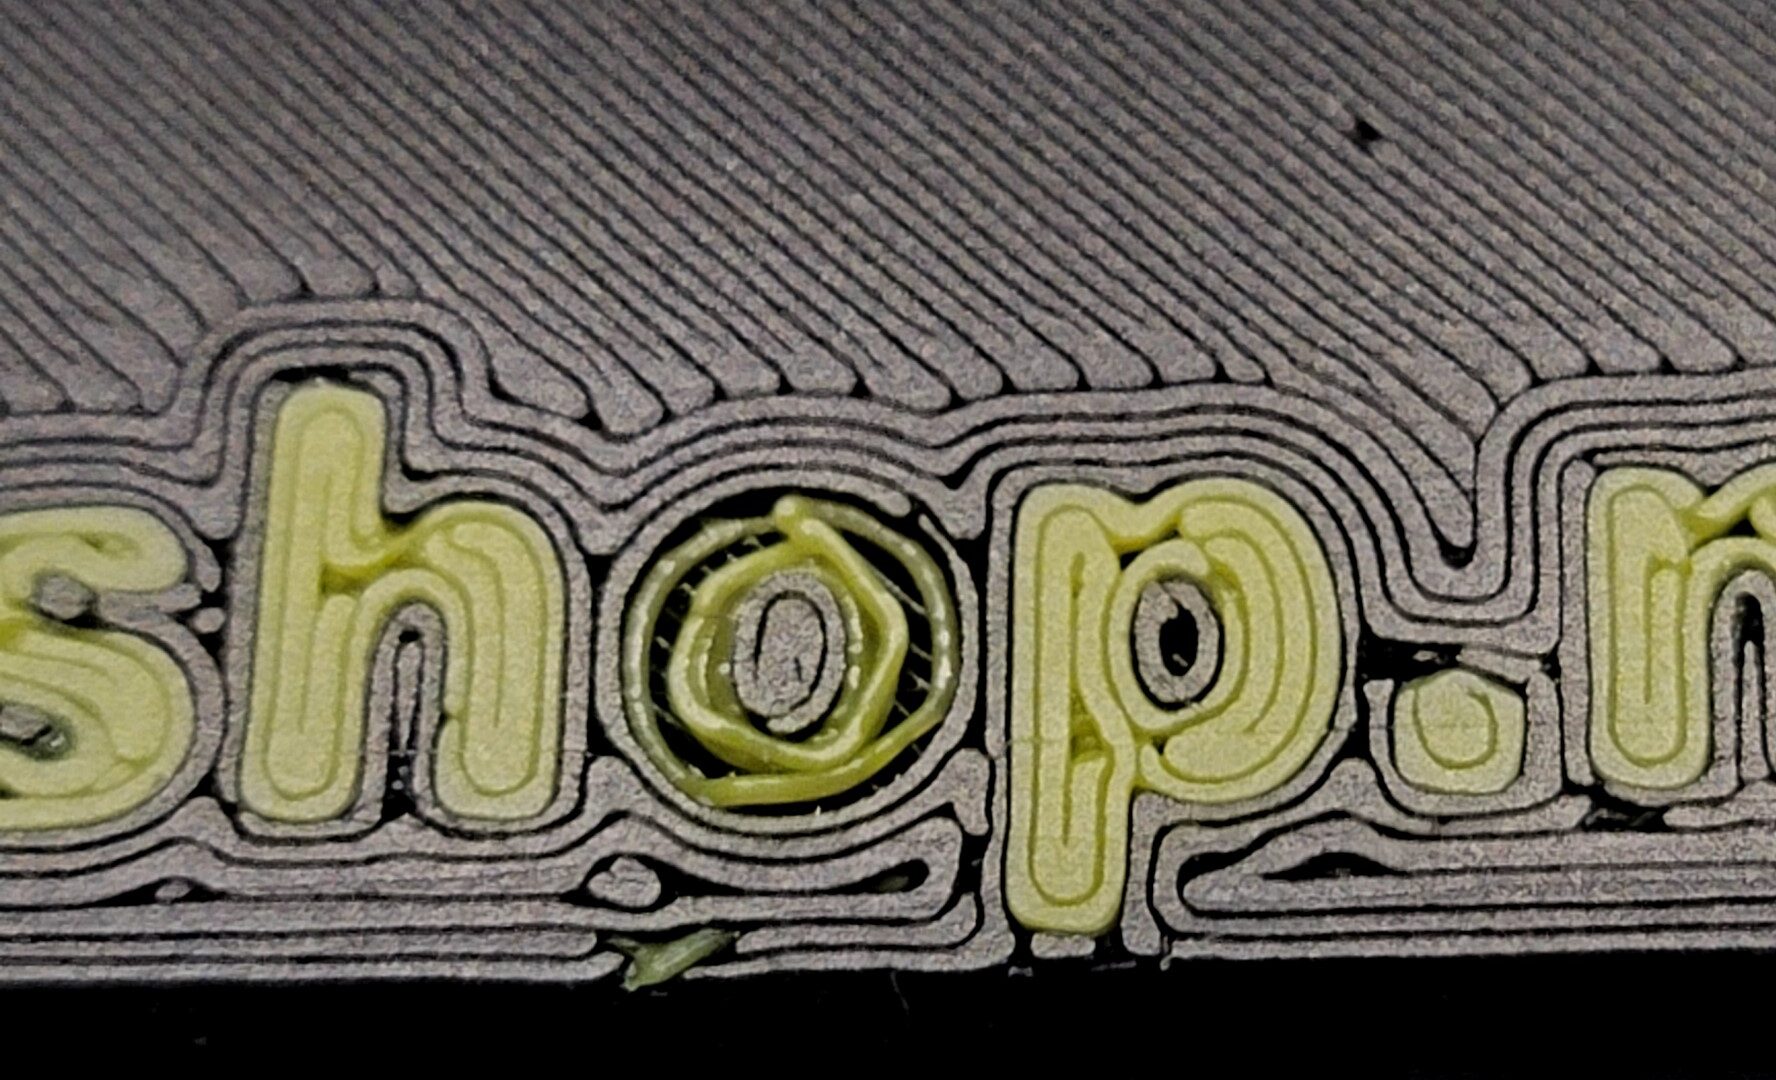
Q#2. When printing the first layer of text which is what is seen on the completed object there are some gaps where the printer just did not print. And it was not the printers fault, it's in Slicer. When I scroll through the gcode in Slicer I can see that it is missing some spots. I circled a few of them in the attached image, and you can see more. Weird right, well here is what is even stranger to me, it happens on only one of the two instances. On the second instance those same letters are filled in 100%.
What setting do I change to make sure the text gets filed in solid. There must be a way to tighten up and close those gaps.
Q#3. The string of text is 20 characters long. When the file prints the printer jumps all over the place writing the text. It does not work from left to right or in anything that resembles order. It jumps around helter-skelter starting with the 5th character then on to the 12th, then the 1st and so on with rhyme or reason that I can see. Stepping through the file in Slicer that is how the software has set it up to run. I don't really care as it does not seem to affect the finished product, I am just curious why it behaves this way.
And sorry but I can't share the file or the whole image with you here.
What size nozzle are you using?
If you are on 0.4mm then the 0.25mm first layer reqires an increased extrusion rate and leaves the slicer less opportunity to compensate.
Try a 0.2mm first layer. 0.4mm text depth and minimal or no elephant's foot compensation.
The altered filament change sequence suggests the second instance was placed at a different Z height, not directly on the bed..?
Cheerio,
Cheerio,
RE: Print Infill Only In Secondary Color
And sorry but I can't share the file or the whole image with you here.
Is it possible to cut part so text is "unreadable"?
If it is your design, design a piece that you could share
Prusa i3 MK3S+ FW 3.11.0 (kit dec -20), PrusaSlicer 2.6.1+win64, Fusion 360, Windows 10
RE: Print Infill Only In Secondary Color
Yes it is my design. I created from scratch. That is not the reason for not sharing.
I am using a .4 nozzle and I layer height was .25 and the text height was .5 mm.
I will try .2 layers with .4 text and see if print quality improves.
I did attach an image to my previous post and circled some of the voids I was seeing. That was a screen snip taken from PrusaSlicer.
Here are some closeups of the two instances that printed together but I saw differing results.
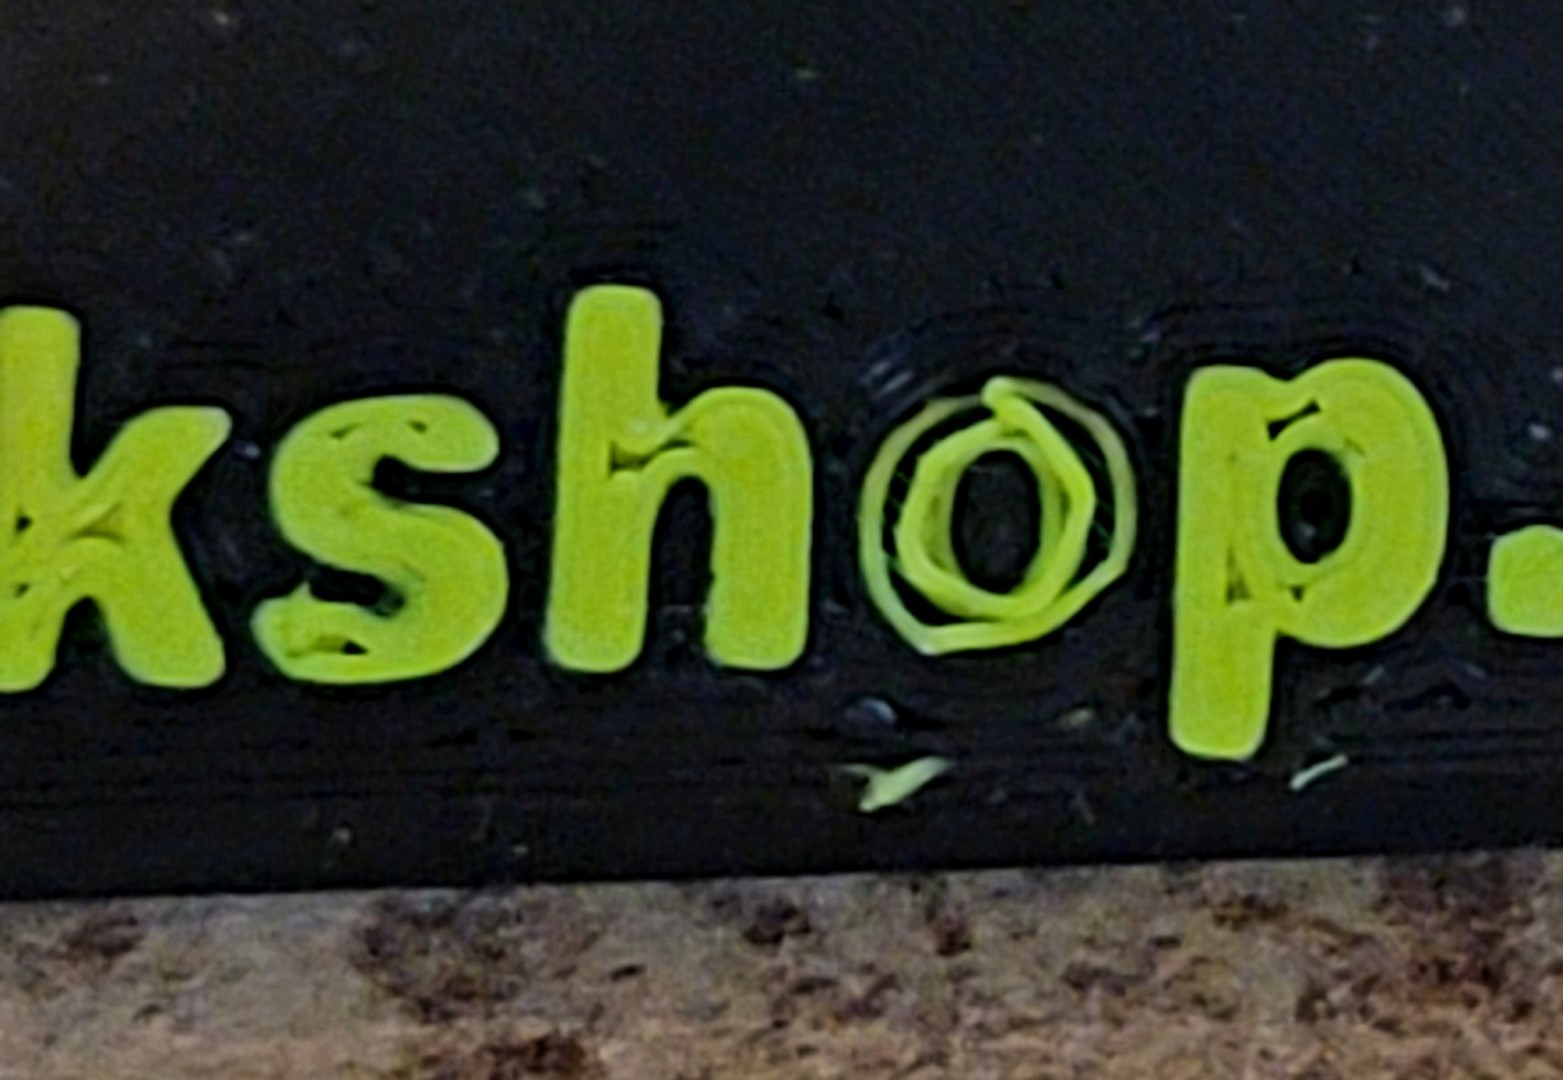
In the attached photo for the top instance if you look at the letter o it did not print at all on the first layer(also visible in the last two images below), but for the second instance it did. On layer 2 it did print the letter o on both instances. Both of these printed as part of the same print job. I was watching as the printer completely skipped over printing the o on the first layer. It was not something that got drug away or knocked out. The filament was never laid down on the first layer for that one letter. How does that happen. When the same file was printed previously that same o printed normally, just as it did on the second instance during this print.
For scale the height of the letter o is 5mm.
Is it possible to add a modifier to reduce the number of perimeters around the text and if so would that improve things or is there some other change I should make.
RE: Print Infill Only In Secondary Color
Your first layer could be squished a bit more. There are gaps between the lines. When squished more it tends to also fill in some of those gaps. If you run a fingernail over the bottom you shouldn't be able to feel the lines.
The part missing from the O looks like the filament didn't stick at that point on the first layer so was probably pulled away when the nozzle moved on. When it came to print the second layer there was nothing below so the problem is compounded. Getting that first layer correct would aid in this too.
For stuff like this you have to have it dialled in perfectly and its got to be absolutely and scrupulously clean so that it always sticks. Might want to make sure travel on the first layer is also slowed right down as that can pull on filament laid down as it accelerates away.
You could print the text with the perimeters you have using a modifier and use less perimeters on the surrounding possibly.
RE: Print Infill Only In Secondary Color
Thanks for your input. I clean the bed before every print with 91% alcohol and a lint free cloth.
By squished more you're saying I need to adjust the Z height during printer calibration or some parameter I should change in Slicer? My first layer speed is at 20mm/s, the default is 30. Elephant foot compensation is set at 0.2 mm.
You said "The part missing from the O looks like the filament didn't stick at that point on the first layer so was probably pulled away when the nozzle moved on." but that is not the case. I was there watching in real time as the printer skipped right over that one letter o while printing the first layer. There was nothing that got pulled away, it never even paused over that location, just avoided it altogether.
Which brings up another point that I find weird. I don't know how it should be printing a string of characters like this but it does not move along the line from one to the next. The printer jumps all over the place. Why is that. It can't be the most efficient method of printing since it creates numerous moves along the X axis that waste time. The text was added to the object in the Slicer. The object and the text are two separate .stl files. I loaded the object on the bed, then right-clicked and then loaded the stl file then used the Slicer to position it where I wanted it and align the bottom with the bed.
RE:
I wanted to share the files for what I am going to run tests on, but apparently I can't.
When I try to attach a .stl or .3mf file it is not saved.
RE: Print Infill Only In Secondary Color
Live Z, adjusted through the printers lcd. a larger negative number equals the nozzle closer to the bed. Therefore more 'squish' .
There are so many threads on here about cleaning and there are varying opinions on the 'best' way. The majority agree though that a plain dishwashing detergent works wonders. Alcohol dissolves grease into suspension. With enough of it you can get rid of it. With normal amounts though you are just spreading it into a thinner more even layer. Thats why so many recommend cleaning with a proper detergent. That removes all grease when its rinsed away. IPA used between prints is ok but to thoroughly clean a smooth sheet detergent is the most efficient way.
I just grabbed a small part from my waste pile (it was a test print for someone elses thread to demonstrate something else). Compare the bottom surface to yours

Note the evenness of the infill. That was printed on an old smooth build plate, over 4 years old now that's had LOTS printed on it. Its getting a bit beat up but parts are still sticking when its properly cleaned and the live z is adjusted. That is what I mean by a properly adjusted first layer.
As to the path planning, I don't know. I don't have your project to step through the gcode viewer to see what its doing. Path planning is one of those complex things, if you really want to know then you will have to ask the devs over on github. Either that or study the code to see what its doing.
If you are printing the text as a separate object then you want to add a modifier to turn elephants foot way down or even off(to zero) on that. Probably on the surround too. You are moving all the perimeters in by 0.2mm on that first layer, its possible with very small text that it will end up almost completely removing it. If you say that it didn't even attempt to print the O then that's a possibility.
Without the project its impossible to know. We don't ask for projects for the fun of it but because its the only way to get a complete picture of what you are slicing. There are so many settings and often its not the obvious ones that can effect things. I understand that you cant attach your 'working' ones but if you cant supply a test one that is also giving you the same issues then any help is going to be more generalised.
You get your live z and the squish sorted first then you tune elephants foot to counteract the spreading that squishing it into the build plater causes. Its a fine balance. Before you can do so you have to have a very consistent first layer. That usually means preheating the bed and doing the mesh calibration at the same temperatures once its had time to warm through.
I do remember seeing a thread in the general forum about which fonts work best for 3d printing designs though. Some are more suitable than others. You might want to find it and have a read.