Identification of Issue "Types" During A Print
If there's a good resource for this, please do LMK ! But I have my first taller print with a little more geometry, and am experiencing 3 distinctive defects (maybe different problems?)
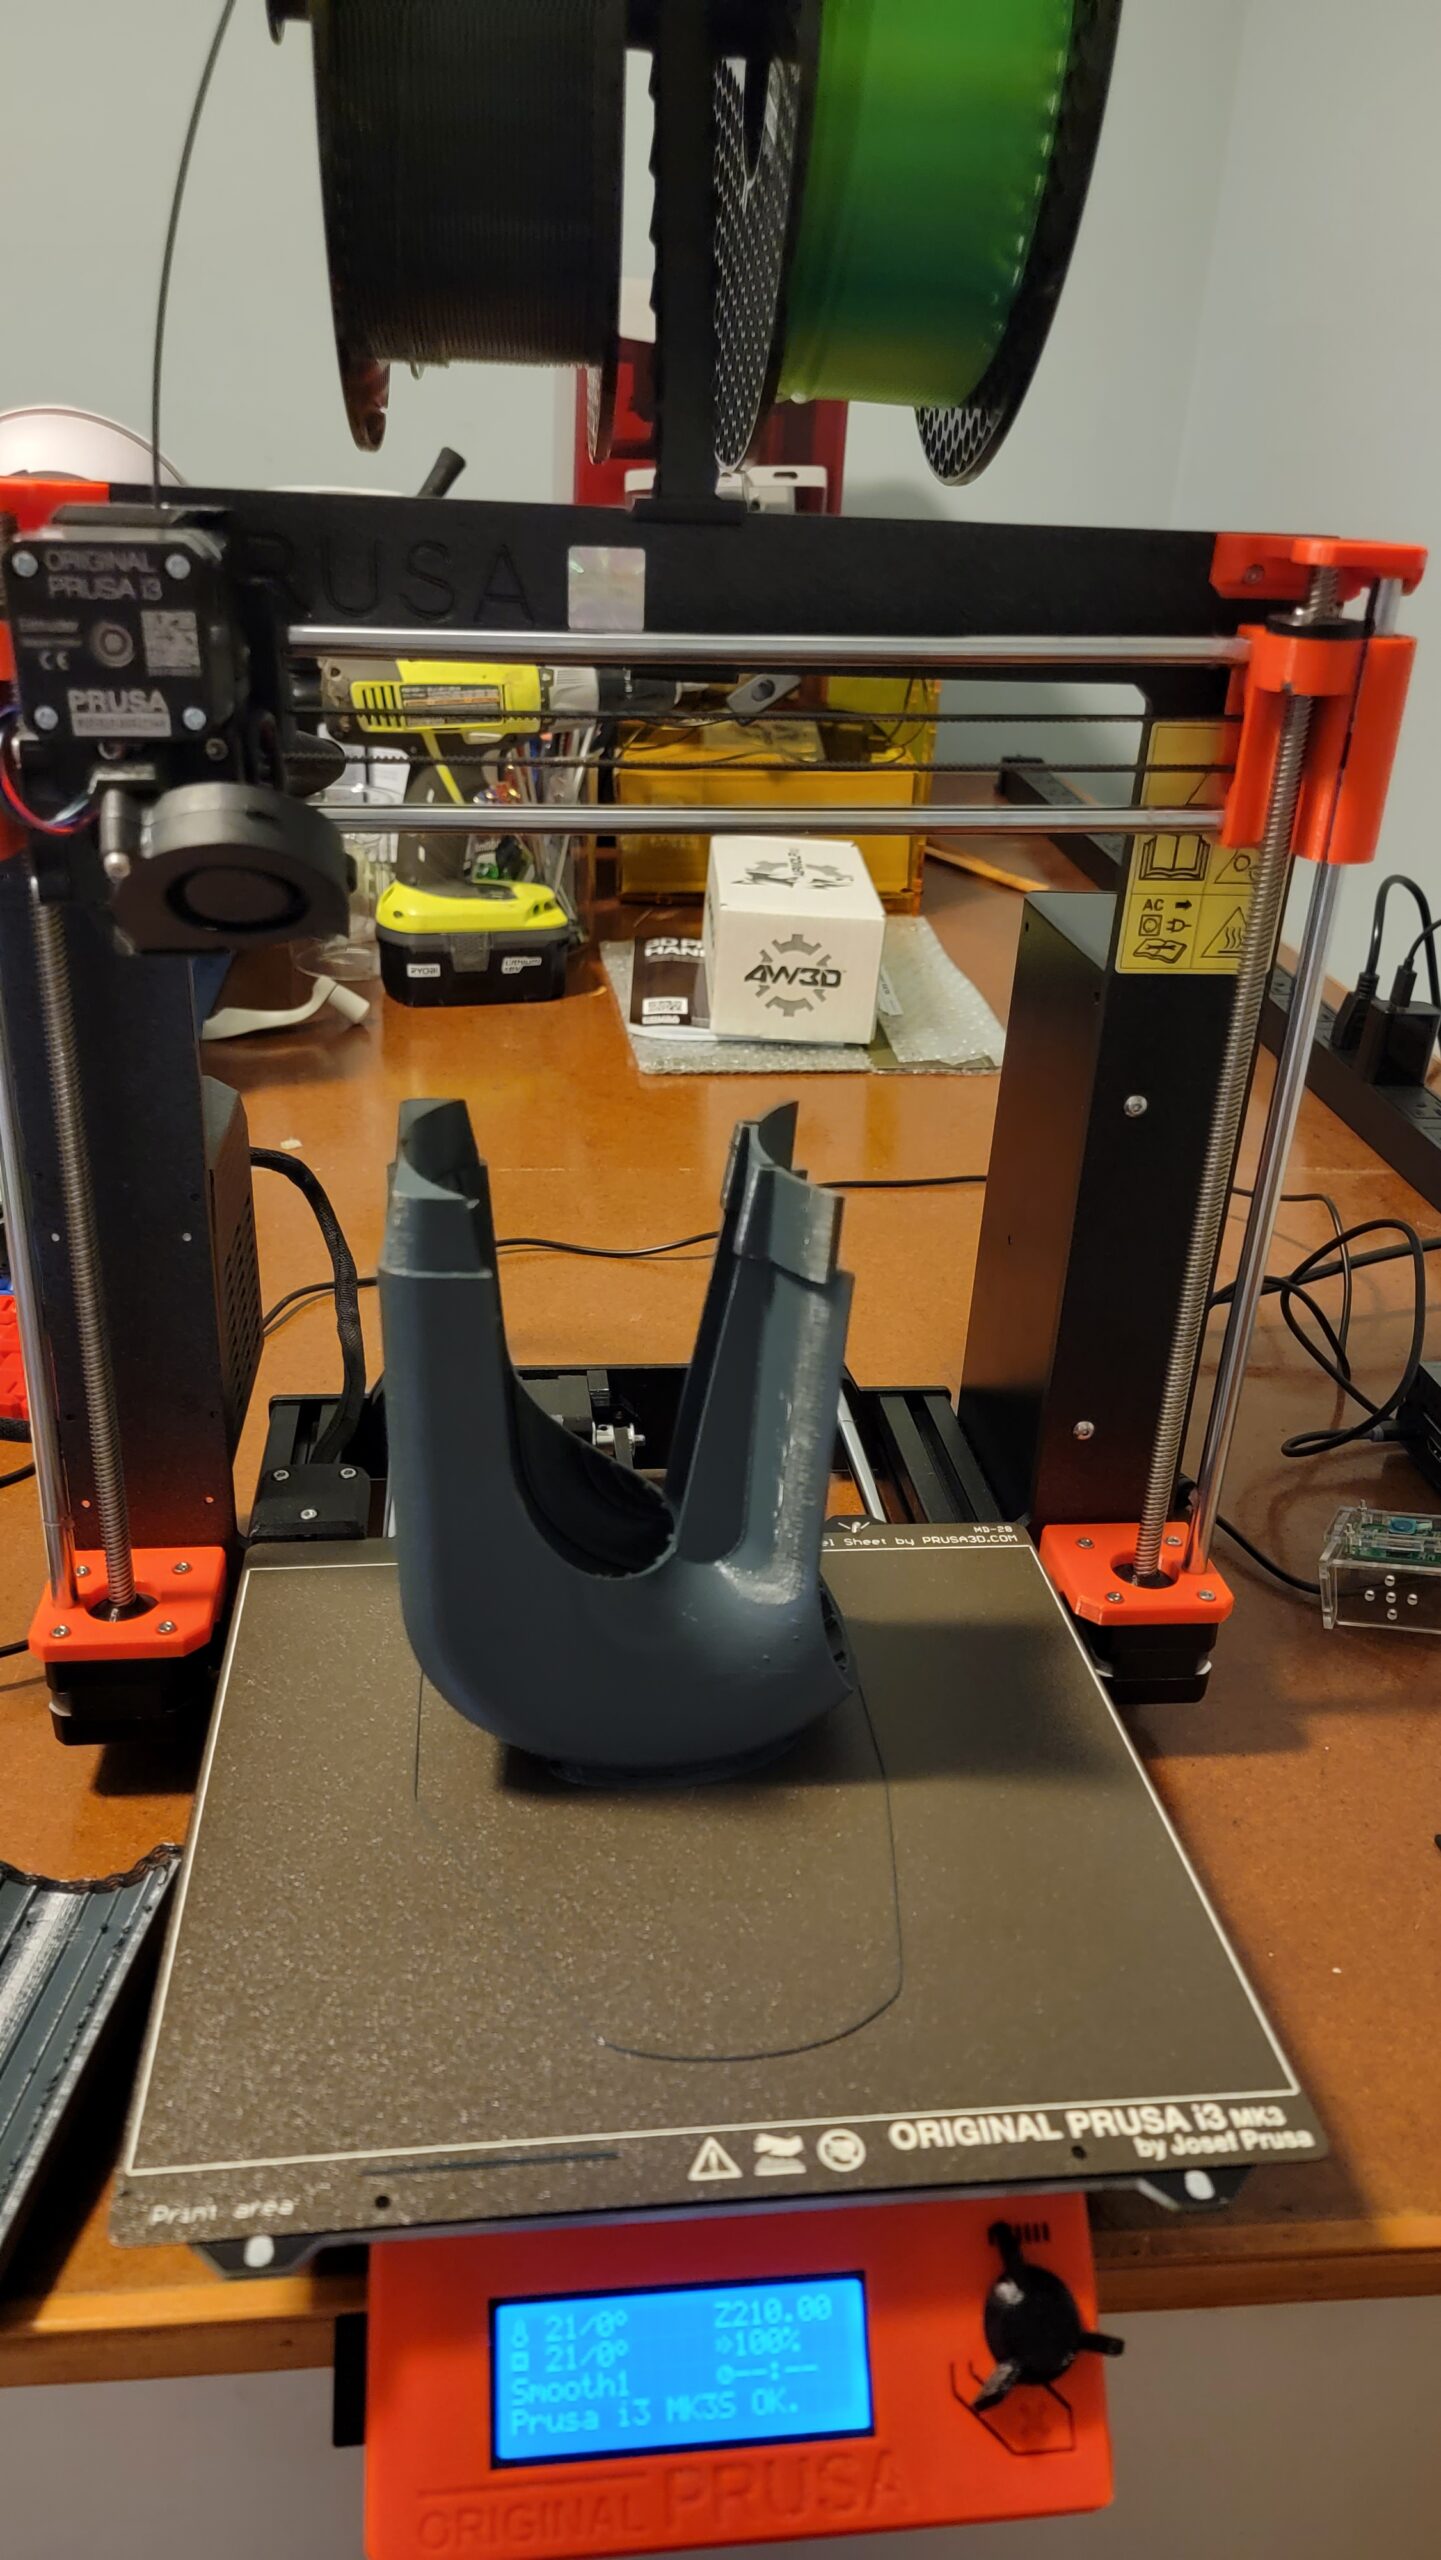
The overall part, in the orientation it was printed, to provide scale, looks like:
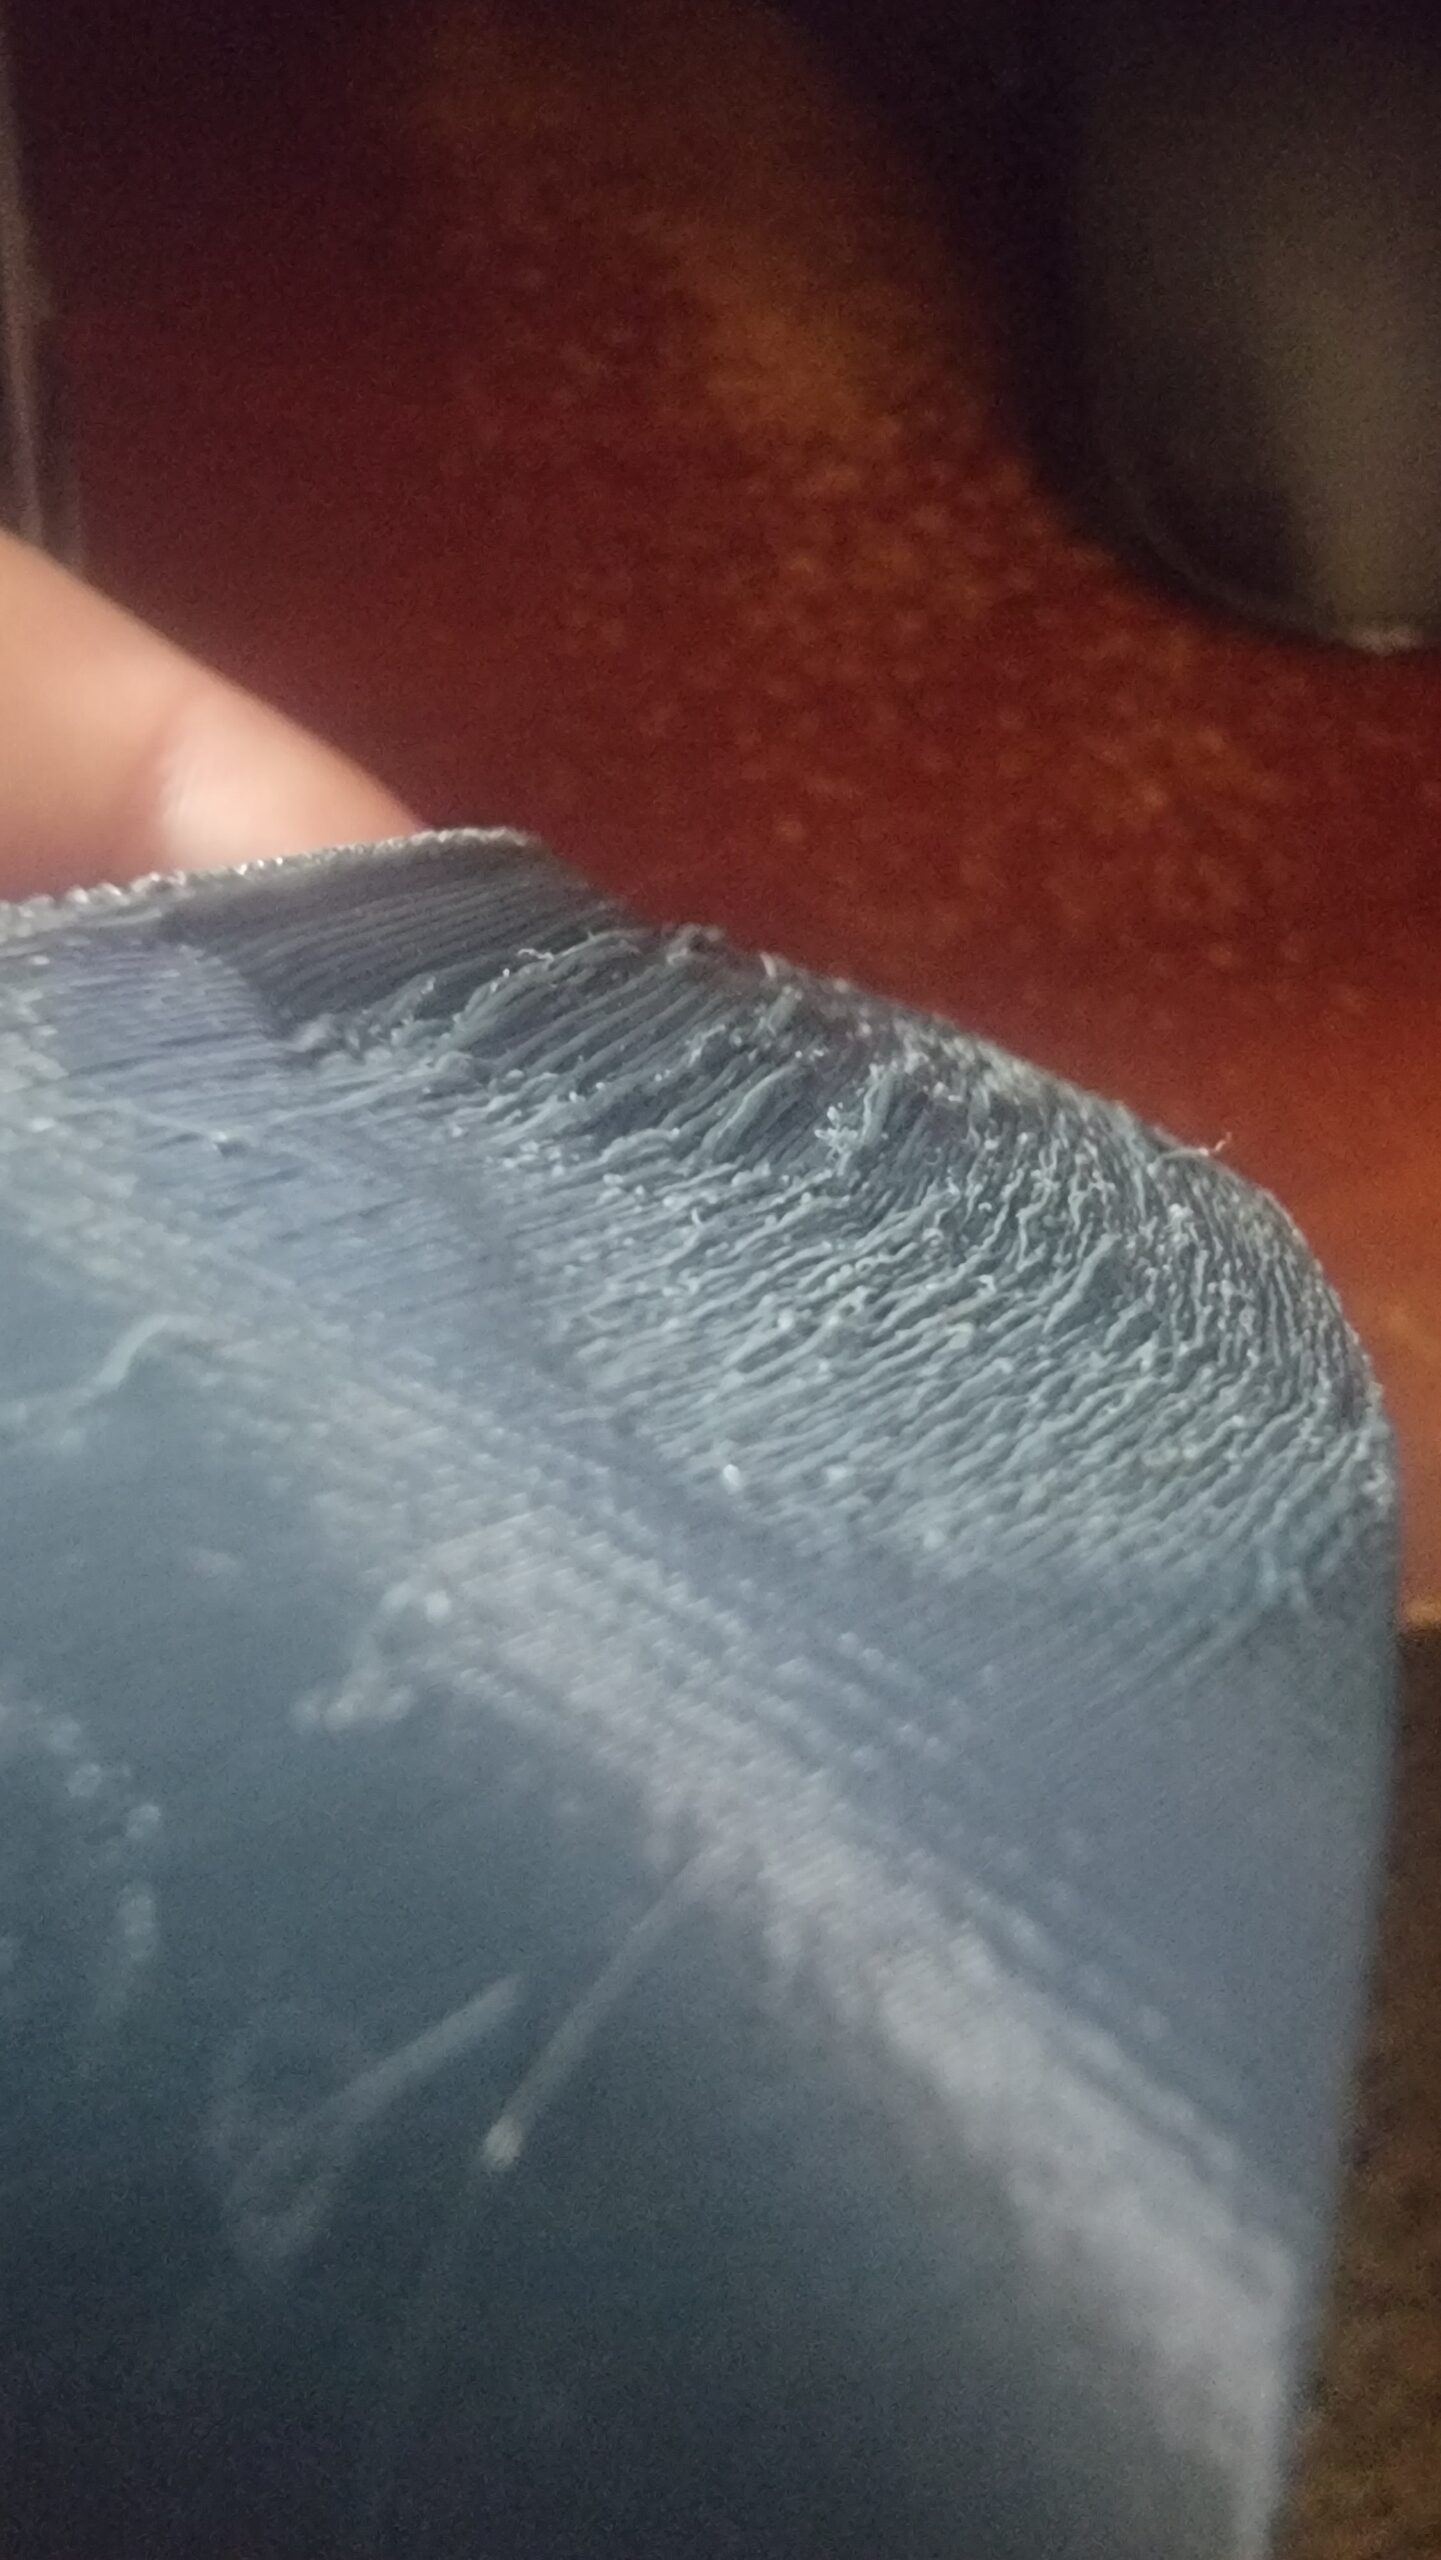
THE FIRST ISSUE: the picture below is along the curvature on the bottom on the side that has the little bit steeper curve... I guess this is that that curvature was too steep with nothing supporting it underneath causing this artifact to occur (is there a special name for these types of oopses?) . Is my assumption correct or would that look like something else and this actually be a different problem??
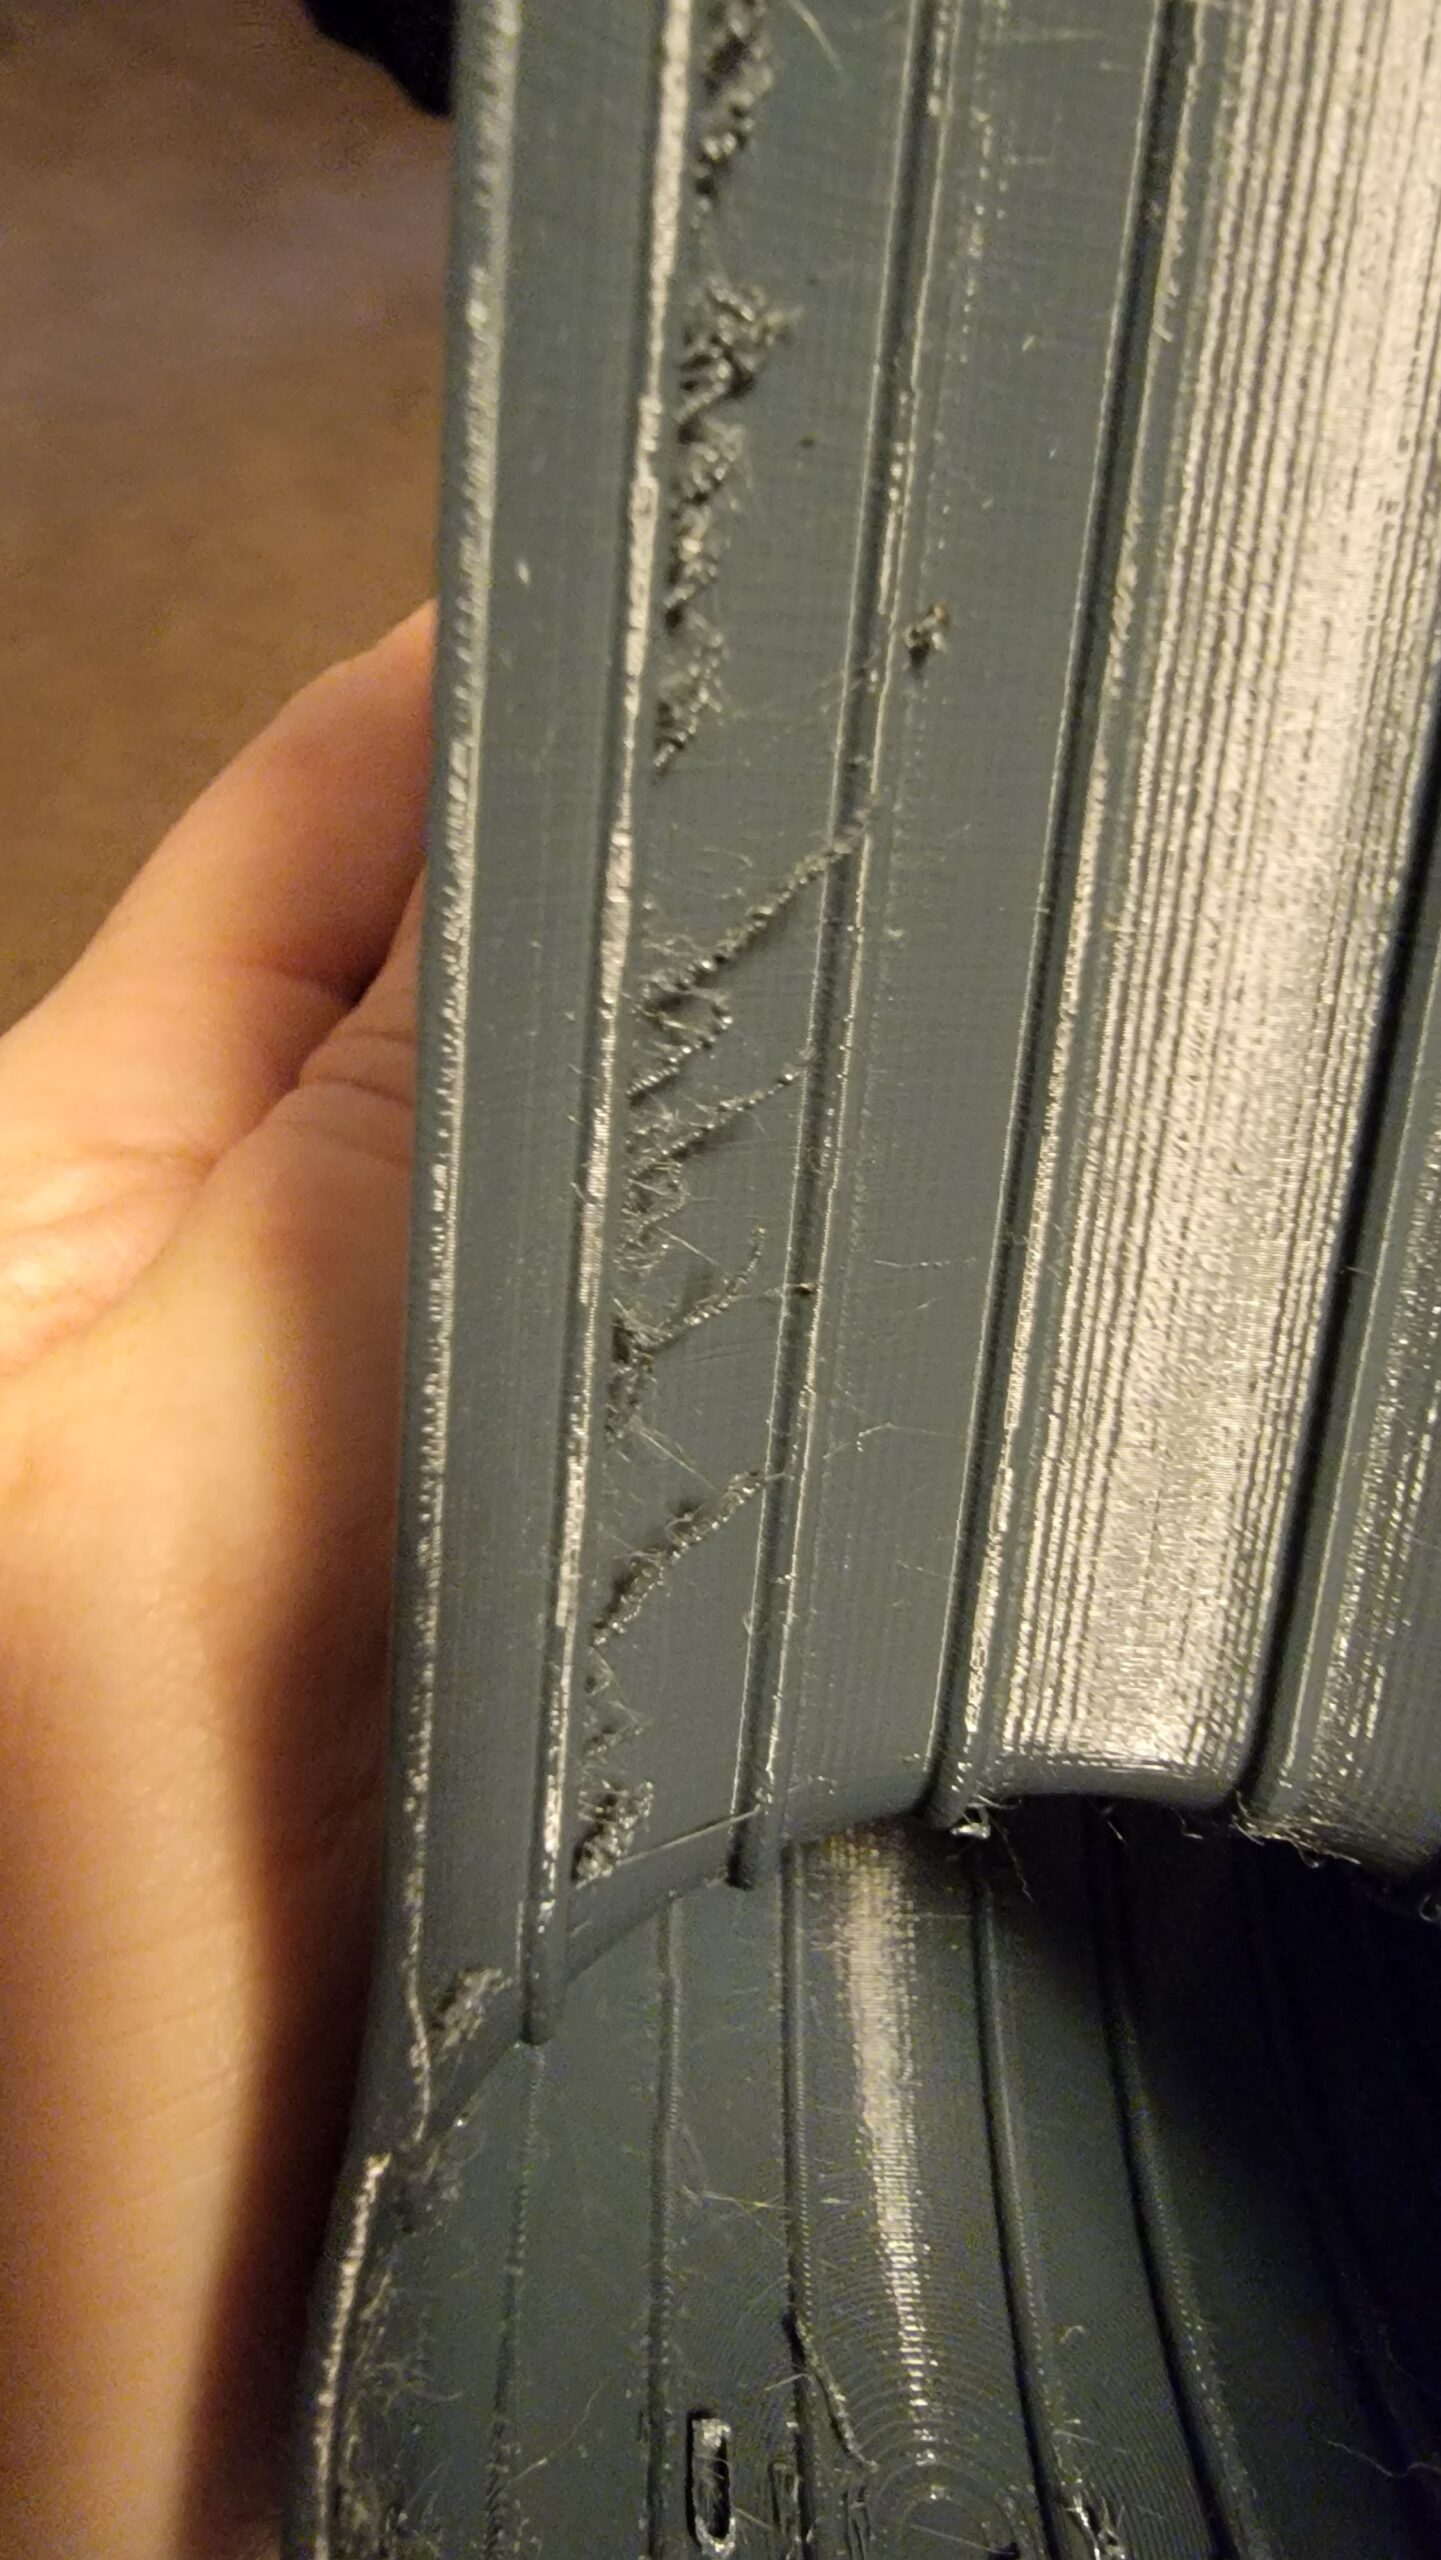
ISSUE #2:. This one is a little more straightforward to describe but leaves me scratching my head. The finished piece has these vertical ribs that run up and down every one to one and a half centimeters or so... While the rib itself appear great they seem to have what may be a very excessive amount of stringing occurring off of them, but not all? I'm not quite sure what is causing this issue but it's only appearing on some of the ribs however it does appear consistent for a given rib it appears on.... The picture below really points out one rib! And remember the ribs print vertically, so it's not like this rib was printing in a few layers or something!
Any ideas on this one are appreciated I have no clue here... What can this be? Ideas to debug this further to get to the root cause?

Onto #3: The last issue:
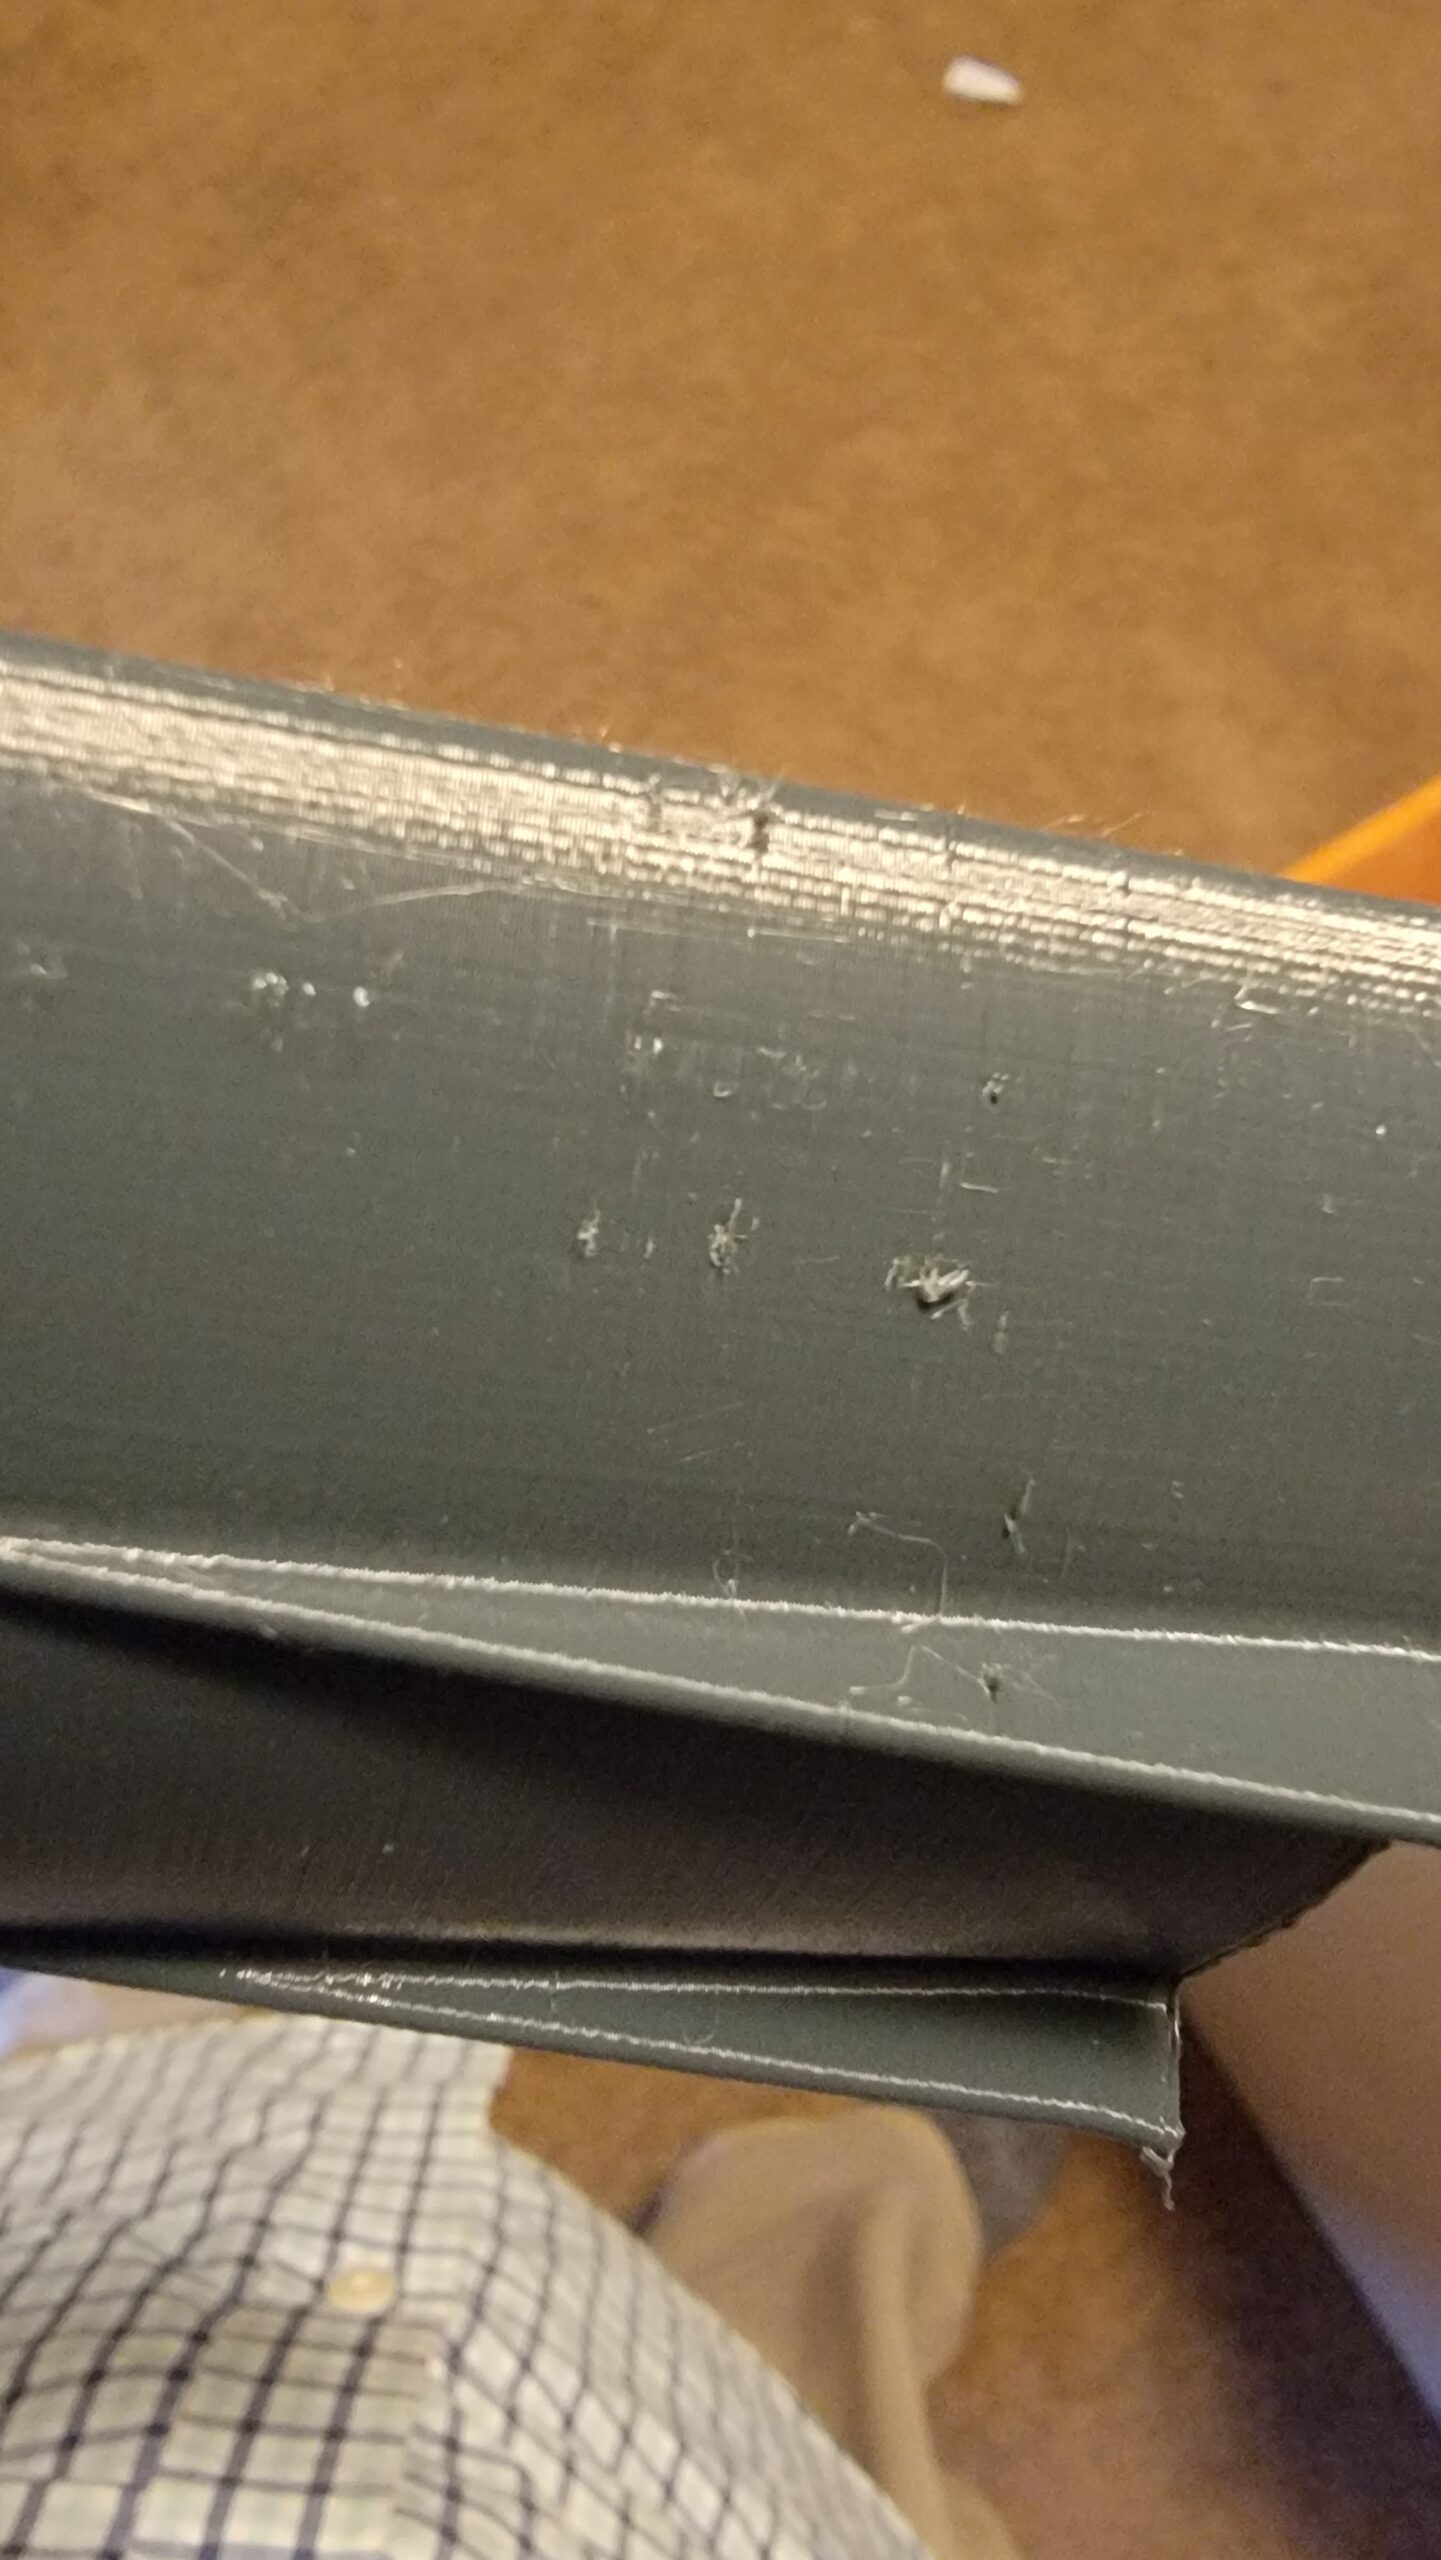
This one occurs in a few different places within the model... The spots this occur at are from a few millimeters to a centimeter in affected area. They show rough patches, amongst a sea of a completely smooth surface, almost like the plastic didn't melt right together in one spot? I'm really not sure and can only speculate. There is no complete hole or anything! Just.... This. Ideas? Thoughts? Testing to get to the bottom?
Small prints always come out PERFECT. I did place a brim around the bottom of this print to add stability to the pieces as they grew.... But some of these imperfections go almost the entire length of the piece from bottom to top so I doubt I'm having an issue related to that anyway.
This is printed in Prusanent PETG, Anthritic (sp?) Grey.
The MK3S+ is only months old, Octopribt was used to deliver the gcode (playing with it) and bed adhesion (which has been a pain in the past), was perfect the entire time. Used the Prusaslicer defaults for 0.2 speed and the PETG filament, stock 0.4 nozzle, with textured flex plate.
ANY feedback, thoughts, or educational resources anyone can point me to, are all appreciated! I'm still learning here, so please be gentle !
Thank you!
Red
RE: Identification of Issue "Types" During A Print
This recent thread should help you better understand what’s happening with your first issue and provides direction on methods to try towards resolution.
I’m at a bit of a loss regarding your two other problems but I’m sure someone here can point you in the right direction.
Good luck!
RE: Identification of Issue "Types" During A Print
Thanks Randy! That certainly looks like the first issue!! Seems "Close to the bed" is an important part of this problem, and it was close.
I look forward to hearing from people on the other two!
Matt