RE: e-TPU esun 95A settings
So generally you'll want to:
- Make sure your idler bolt is loose. I normally print with the tip of the bolt flush with the hex nut. For ninjaflex I found I have to disable the filament sensor or else it will often think it has run out of filament when it hasn't.
- Try the Semiflex profile as a base and adjust the temperature. if it's bunching up in the extruder, try increasing the temp to get better flow. I definitely have to go higher for something like ninjaflex.
- Slow things down. GENERALLY I don't have to adjust any speeds but on rare occasion, depending on the particular brand of tpu, I might have to lower the max print speed to 10-15mm/s
RE: e-TPU esun 95A settings
You might also try lowering the temp just a little. It's a fine line, you don't wany any impediment to it pushing out the nozzle though since you'll then end up with the filament backed up around the extruder gear. Definitely watch closely while you dial it in and listen for clicking. Any clicking and you need to stop it.
RE: e-TPU esun 95A settings
Thanks , I hope I will not have to do any mechanical changes … I’m not up to it . I hope to solve it via the slicer settings , or switch filament producer .
RE:
the idler bolt is super simple and I find I don't have to change it for other filaments. the idler bolt is the bolt on the side of your extruder. Look at the picture below. I'm printing Sainsmart TPU 92A. Notice that the idler bolt, right below the hex window is flush with the nut.
RE: e-TPU esun 95A settings
I’m currently using this filament on my Prusa and the results are good in general, except for overhangs. Even on angles relatively low they look rough. Maybe I should lower a bit the temperature and/or decrease the max. printing speed. Using supports would help but they’re very difficult to remove without damaging the surface of the model, so IMHO it’s no worth to employ supports in most TPU printing jobs.
Stringing is not that bad. Drying the filament helps, but TPU will never be stringing-free like PLA. It’s in the nature of the beast. Even PETg is much better in this aspect.
If it serves of rough guide, those are my settings for the eSun TPU95 on a MK3S+ :
- Nozzle : 220C first layer. 210C from layer two.
- Bed: 50C. (Use glue stick or similar if you print on a smooth PEI plate. Don’t print directly on the surface ),
- Retraction length: 0.5mm . retract speed: 25mm/s. Detraction speed: 15mm/s
- Print fan: disabled the first 3 layers. Speeding up to 70% at layer 6.
( for layers taking less than 60’ to print, the fan runs at 90% )
- Max. volumetric speed : 2.4 mm3/s (for a nozzle of 0.4mm, that’s around 25mm/s of max. lineal speed)
- Extrusion multiplier : from 1.04 to 1.10,
I tend to set lower values when there’re overhangs in the print. It helps a bit to improve the ‘cosmetics’ of the model.
Keep in mind that I’m using a Mosquito hotend and some of these settings, specially retractions, may be not optimal with a stock Prusa hotend.
RE: e-TPU esun 95A settings
thanks Artur
RE: e-TPU esun 95A settings
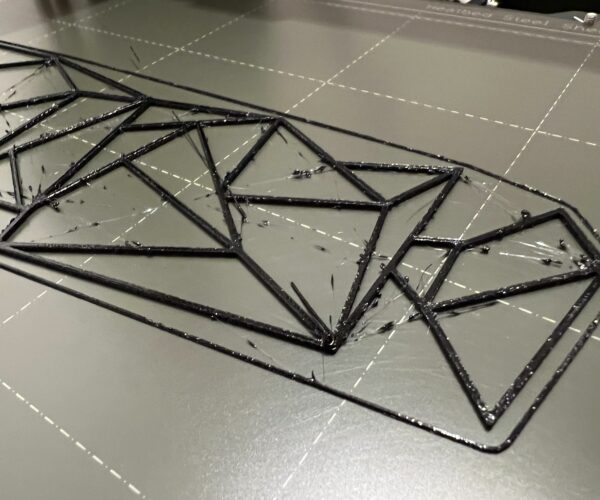
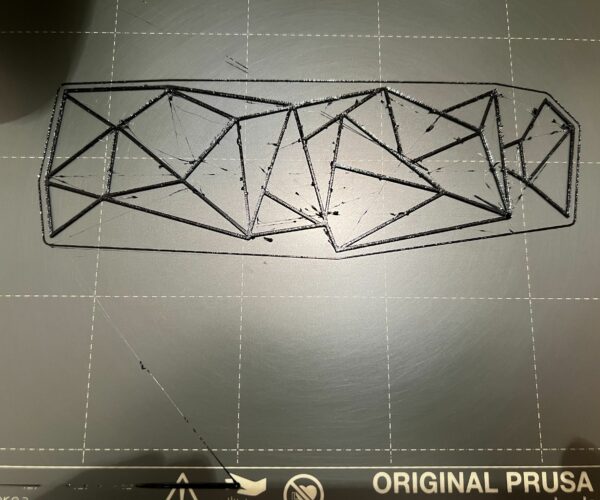
@ssill2, ran the print with the profile you suggested & 15mm/s speed , 220 first later temp and 210 next layers.
I see a huge improvement !!!
almost no strings, the bulbs I still see are on the first layer/s so I should try the glue thing ? mmm. sounds messy .
or lower the first layer temp first?
RE: e-TPU esun 95A settings
Which sheet are you using? Smooth? You should use glue stick or something like bed weld if printing tpu on the smooth sheet. if you have a print with a lot of contact with the build plate it can stick TOO WELL and take pieces of your plate off with it. if you use a satin or textured sheet for petg and tpu, you generally don't need to put anything down. But for smooth sheet, unless you're just printing PLA, put something like glue down.
you can try lowering temp or extrusion multiplier SLIGHTLY, but not much. That definitely looks better. TPU is not easy. I still have challenges with sometimes.
You might try printing a 100mm square that's .2mm high to dial in your settings. if you can get a perfect square that peels off as one piece and without any blobs, you should have found your right temp and extrusion multiplier. Definitely use gluestick though. And clean your plate between prints with dawn or similar dish soap and a kitchen sponge.
RE:
Bewährt hat sich eine Emulsion aus Kaltleim mit reichlich Wasser. Aber auch hier ist es ratsam, die Platte abkühlen zu lassen. Nach dem Nachinnenbiegen, springt der Druck von der Platte (bei PTEG). Bei TUP löst sich der Druck besser mit einem Plastschaber.
Gruß, Gerhard
RE: e-TPU esun 95A settings
Bewährt hat sich eine Emulsion aus Kaltleim mit reichlich Wasser. Aber auch hier ist es ratsam, die Platte abkühlen zu lassen. Nach dem Nachinnenbiegen, springt der Druck von der Platte (bei PTEG). Bei TPU löst sich der Druck besser mit einem Plastschaber.
Gruß, Gerhard
RE: e-TPU esun 95A settings
i find 220 degress works better for overhang with the esun tpu
RE: e-TPU esun 95A settings
I have been experimenting with settings and the following have helped me get better results printing with eSun eTPU 95A flexible filament:
thanks to @yoola for asking the question. @ssill2 for the idler advice - made a good improvement and the advice about cooler temperatures and their risks. Thanks @artur5 for the push in a really helpful direction.
Printing with a stock MK3S+ 0.4mm nozzle - textured build plate.
I still get some stringing but the blobs seem to have been tamed.
TLDR:
Print cooler, slower with more retraction. Loosen your idler. Dry your filament, even if freshly opened.
Most important use dry filament - mine sits at about 25/28%rh. On opening a new spool I dry it first. In my Solvol Drier 50Deg for 12 hours with regular opening of the lid to exchange the wetter air inside for drier air from outside the box. - I need to add a vent! Drying time might be longer than needed - it fits my schedule.
The filament settings I am using at the moment:
Filament
- Diameter - 1.75
- Extrusion Multiplier: 1.1
- Density: 1.22
Temperature
- Nozzle
- First Layer - 220
- Other Layers - 200
- Bed
- First Layer - 50
- Other Layers - 50
Cooling
- Enable Keep fan always on - NOT ticked
- Enable Auto Cooling - YES Ticked
- Fan Settings Fan Speed Min - 70 Max - 90
- Bridges - 80
- Disable for first - 3 layers
- Full fan speed at layer - 6
Cooling Thresholds
- Enable fan if layer print time is below - 60
- Slowdown if layer print time is below - 15
- Min Print speed- 15
Advanced Filament properties
- Filament Type - FLEX
- Soluble material - NOT ticked
- Print Speed override Max volumetric speed - 1.2
Filament Overrides
- Length YES Ticked - 2mm
- Deretraction speed YES Ticked - 25
- Other overrides NOT Ticked - Not set
I took the Stock Prusa 0.20 Quality @mk3 profile and altered the printing speeds to all be 20mm/s. No other settings altered
- Perimeters - 20
- Small Perimeters - 20
- External Perimeters - 20
- Infill - 20 Solid infill - 20
- Top solid infill - 20
- Support Material - 20
- Bridges - 20
- Gap Fill - 20
Braille Wine Label freshly printed in TPU, still on the build plate. Braille reads Chardonnay
RE: e-TPU esun 95A settings
Hi
I'm simply using the SainSmart profile in Prusa Slicer and it seems to work just fine with eTPU with 95A.
Matt
RE:
@snowballs-chance, I just want to say - thank you so much! You helped me a lot! 
RE: e-TPU esun 95A settings
Hi
I'm simply using the SainSmart profile in Prusa Slicer and it seems to work just fine with eTPU with 95A.
Matt
Works perfect.
Thanks Matt
RE: e-TPU esun 95A settings
Great idea, saved me a lot of guesswork. Worked very well right from the first try.
Thanks Matt
RE: e-TPU esun 95A settings
Hello @snowballs-chance, thanks so much for the level of detail you shared. I updated all my settings to match for my XL, and it printed the white seal ring for the Rancilio Rocky Plunger Lid https://www.thingiverse.com/thing:4579477 without any issues. This was my first print using the TPU.
RE: e-TPU esun 95A settings
Hi! Do you recall which SainSmart profile worked best for you? I tried a couple but I'm not getting very good results. Thanks!
Hi
I'm simply using the SainSmart profile in Prusa Slicer and it seems to work just fine with eTPU with 95A.
Matt
Works perfect.
Thanks Matt


