Cylinder printing advise
Hello group!
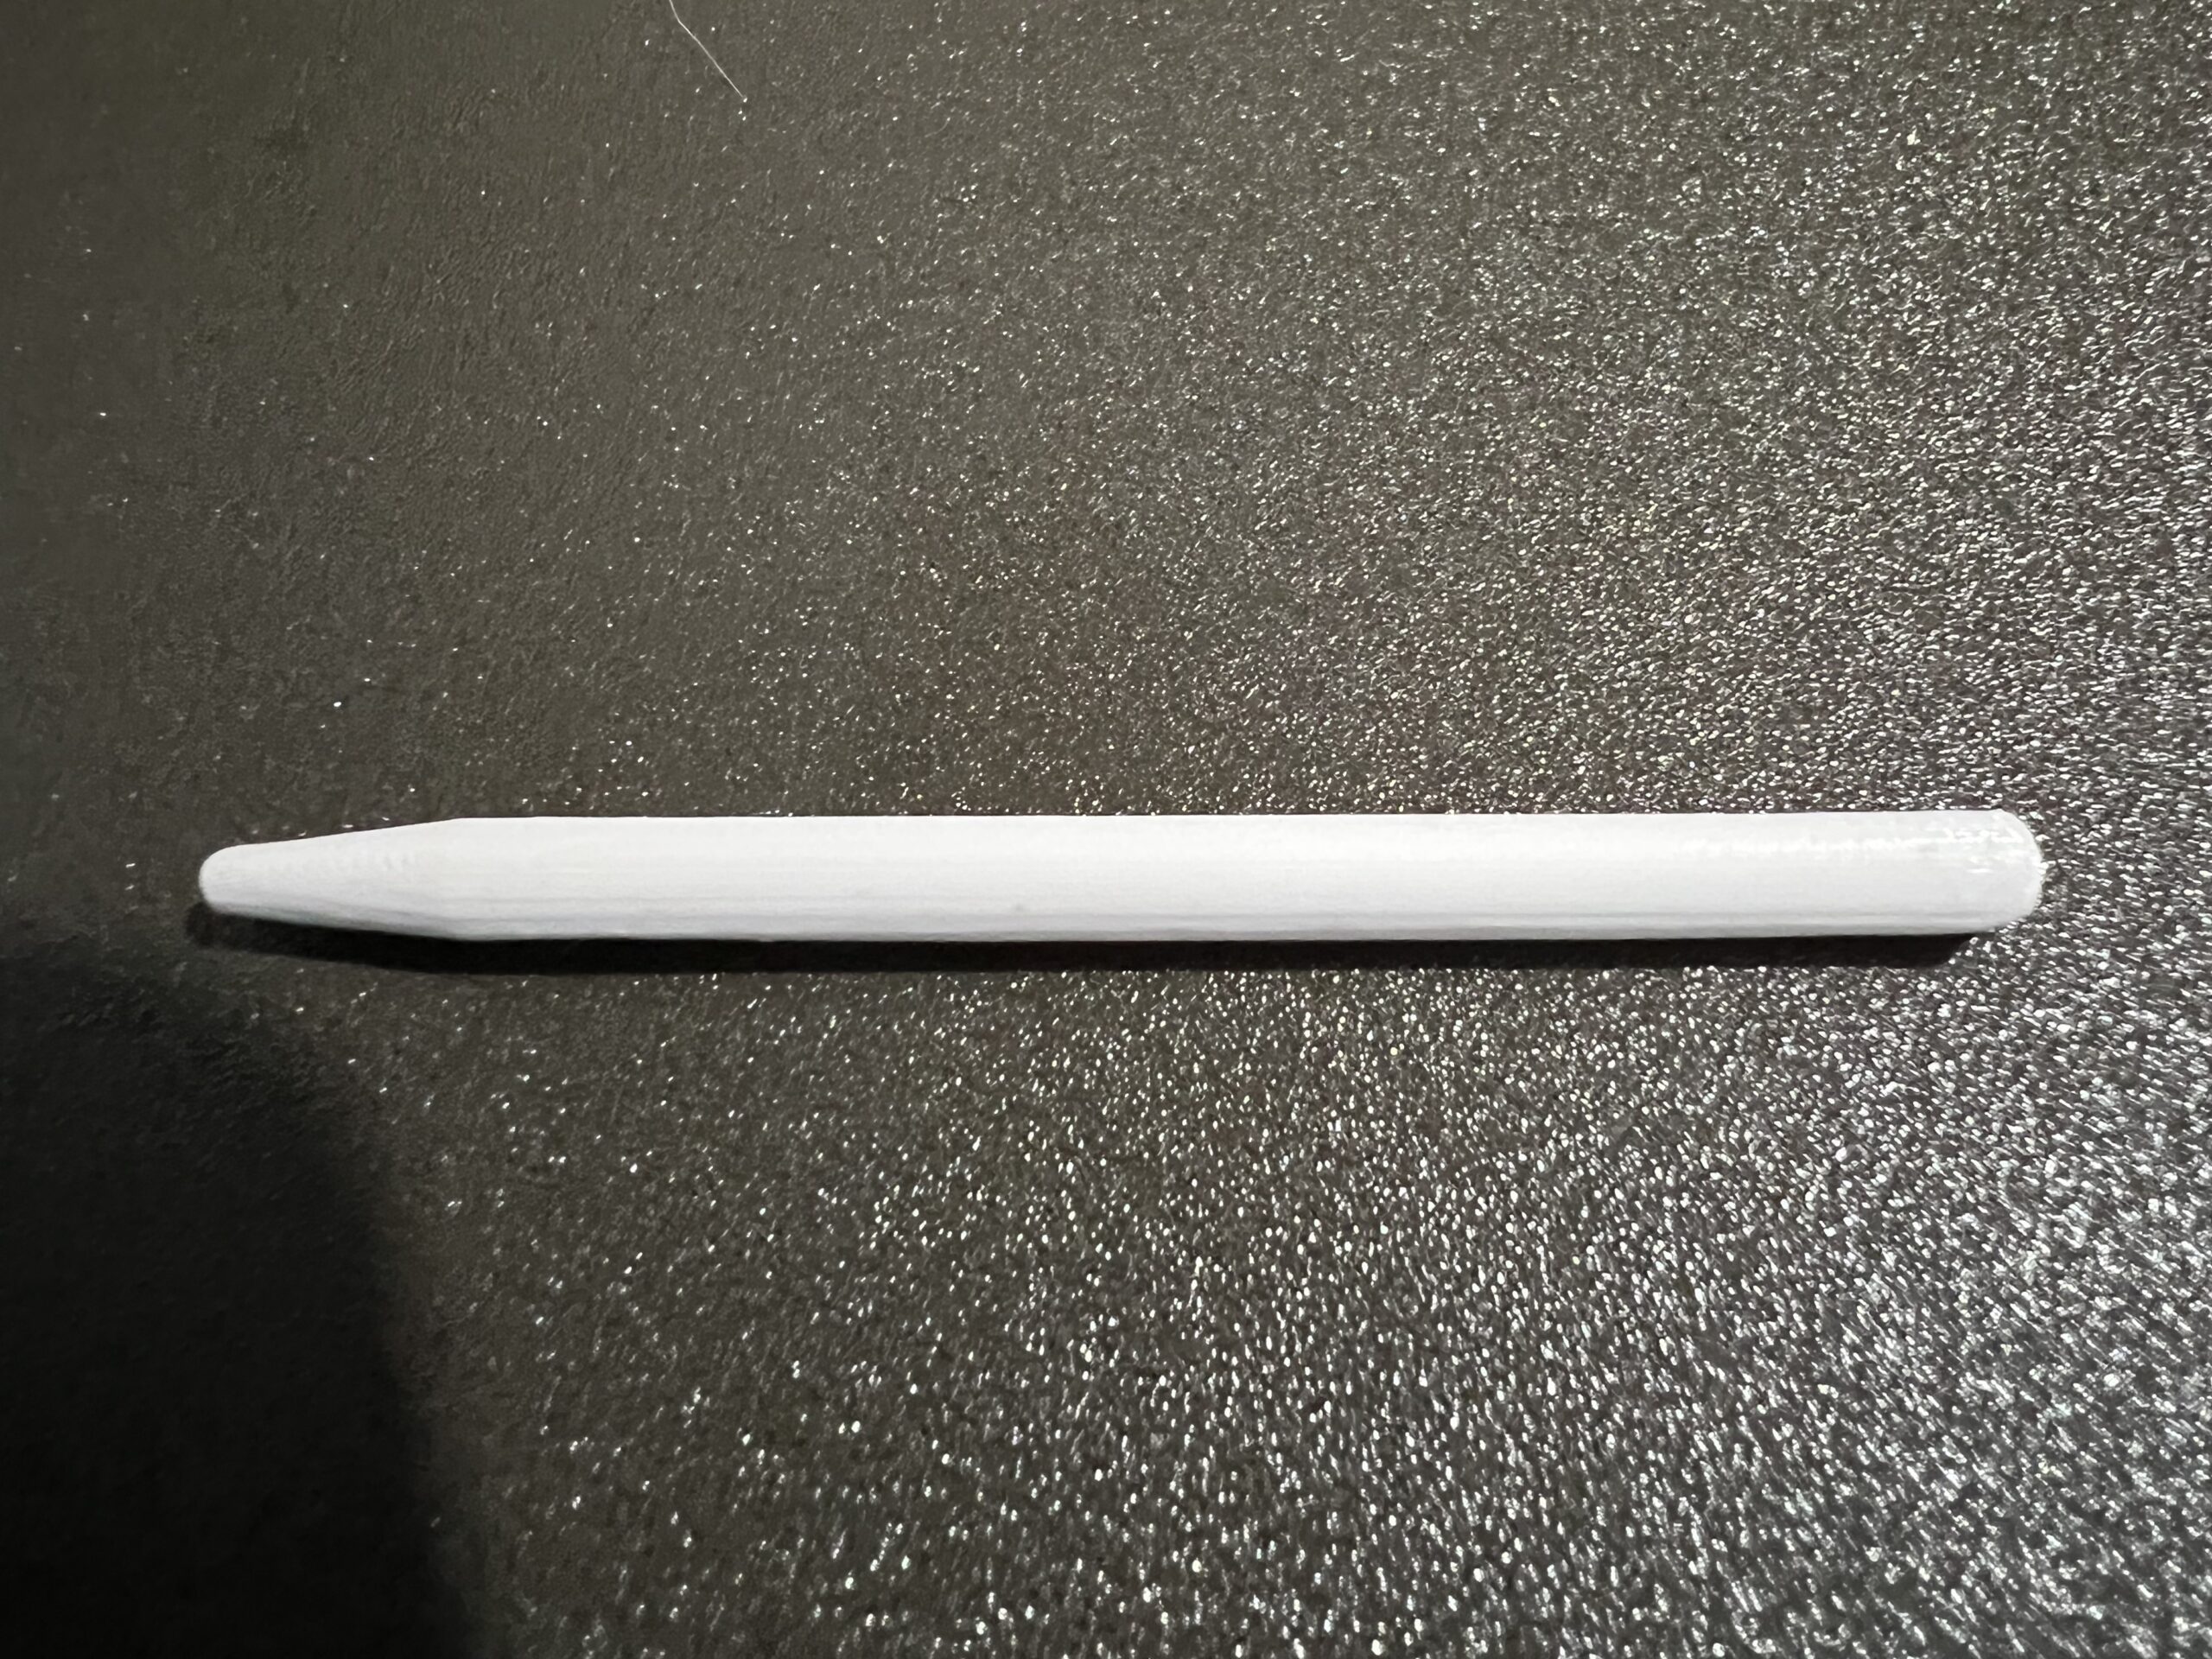
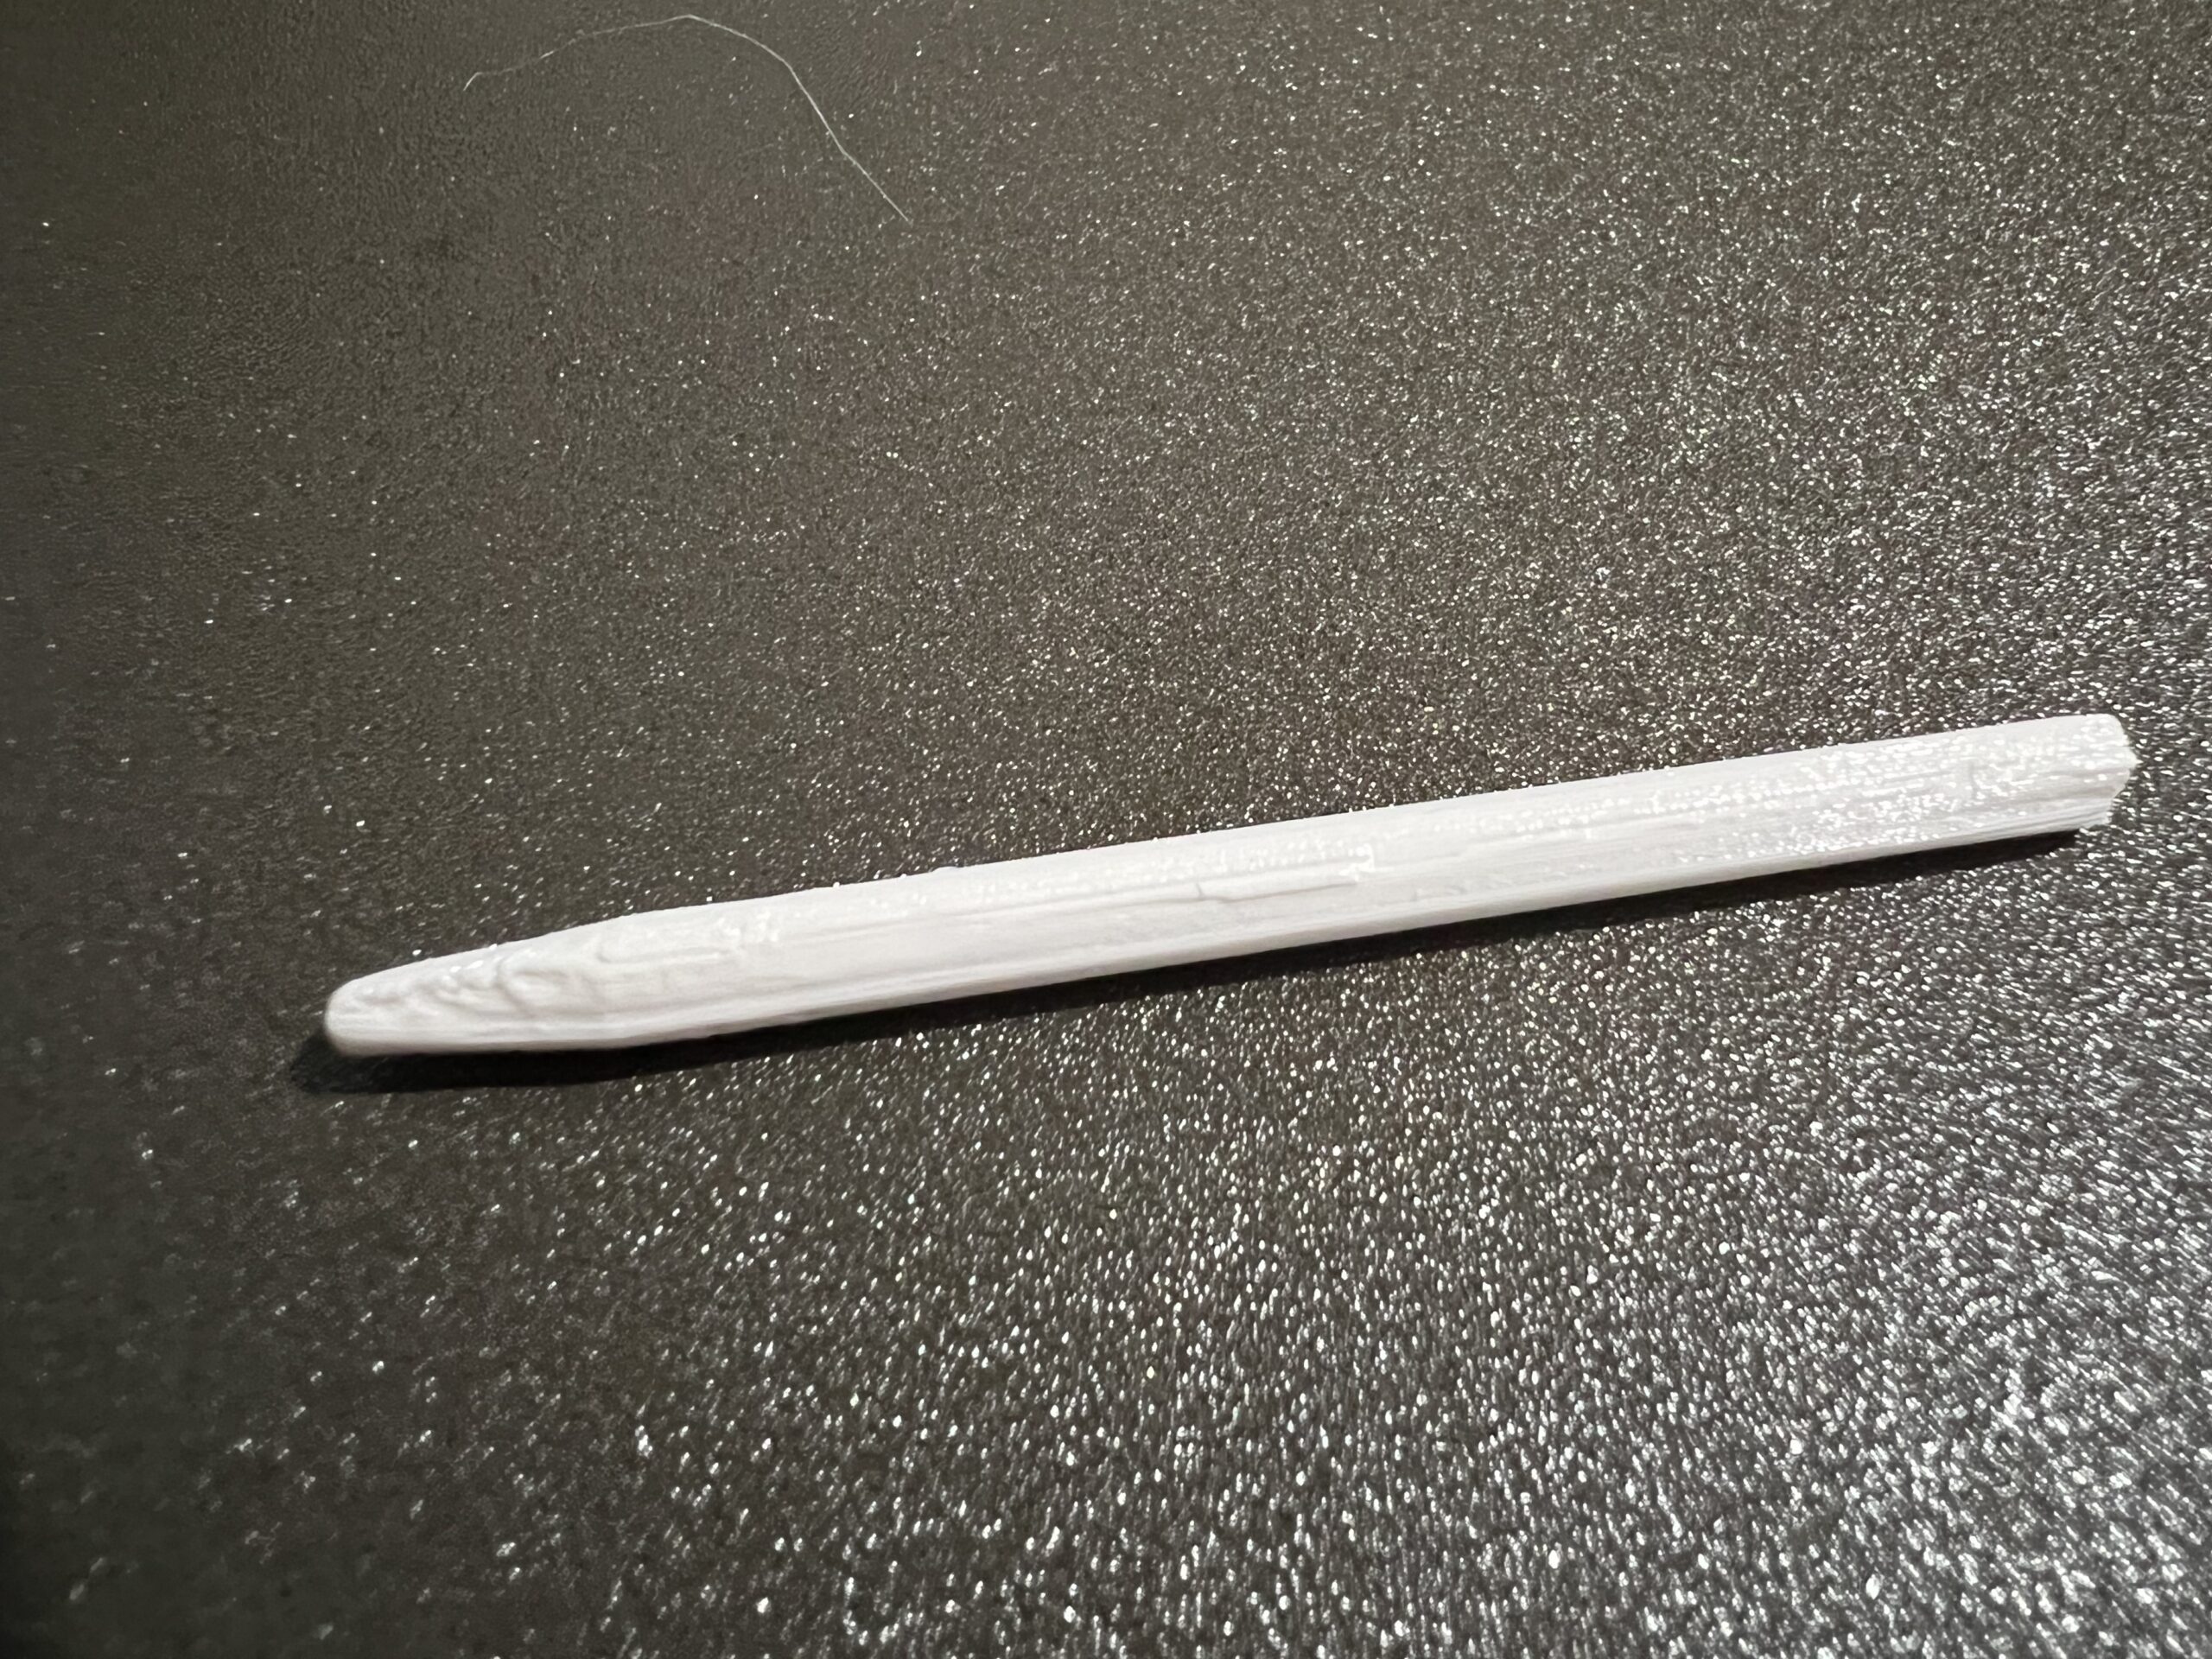
I'm printing a small model of a furniture piece and I need to print some cylindrical legs. Right now im printing them flat against the heatbed (see the pics below) but I would like to achieve a better result, a more cylindrical print. The upper part looks great, but the under part looks kinda "squared".
I tried printing vertical (horrible result) and lifting the print a bit from the print bed so it would rest over some support material (worst result than just printing over the bed).
Im using Prusament PETG Signal White (brand new spool) and the latest version of PrusaSlicer and FW.
What can I do in order to print this better?
Thank you in advance!!

Best Answer by Swiss_Cheese:
@roichu
I'd like to start by saying Deim is correct, DRY your filament, you need to.
Now lets move on, I took a few minutes and went over your .3mf project file, and the biggest problems I found were related to speed, heat and cooling, with some minor attention to support. when your printing something this tall and thin in many cases your going to want to slow the print down the preserve the quality, however this is not enough by itself, when you decrease the speed your increasing the amount of time the filament is being heated in the hot end, so we have to be mindful of the temperature and decrease it. As we reach the even smaller tip of the model, this becomes even more important and once again we need to slow the print down, as you may have noticed when you ran your prints, and in some cases drop the temp even lower while increasing the cooling, this process is similar with many materials however it's important to understand the properties of the material your working with to do this successfully.
In my version of your project I slowed the over all speed, in the case of this model your speeds are controlled primarily by the settings for Small perimeters, with very little emphasis on anything else. I used "Auto Speed" with a "Max print speed" to set the speeds for all other features of the print e.g. top layers, solid fill,etc,,. then moved to "Cooling thresholds" and set up a cooling gradient for the tapper at the top of the model. I printed my test in Prusament PETG since that's what you had called out in your project file, my experience with Prusament tells me to print it on the hotter range, normally this might mean 255 to 265C, however we know its going to be in the hot end longer for this slow print, so I chose first layer settings of 80C bed and 235C nozzle, then selected 85C bed and 230C All others knowing that I would also be ramping up the cooling as the print advanced.
Next we need to do something about the features in this model, they are tiny, to tiny to seriously consider supports. That leaves you with one option for the overhanging features in the middle and upper portions of the model. I used height range modifiers to adjust the extrusion width above these to features to provide support from the layers below, because the features are so tiny we can get away with this, although we need to expect them to be a closer then intended and think about maybe increasing the height of them so that they result in the desired height or post processing with locksmith files or emery board. After seeing how small the hole near the top was I took it upon myself to increase the size and change the shape to compensate for a similar problem as previously mentioned.
Now for the support, this model being as tall and thin as it is will want to wobble at the top, yes its possible to print it without supports, but your results and head will feel better if you just use one. It stops the wobble problem and saves the time of adjusting all the speeds and temps to compensate for it.
I normally make my stabilizers in my 3D modeling program, however this time I very quickly threw them together using 2 shapes and a couple of "Negative Volumes" they don't look like much but they were fast and they work, in the off chance that users don't have a 3D software under their belt this can serve as an example of possibility for them.
My test results.
The supports are break away.
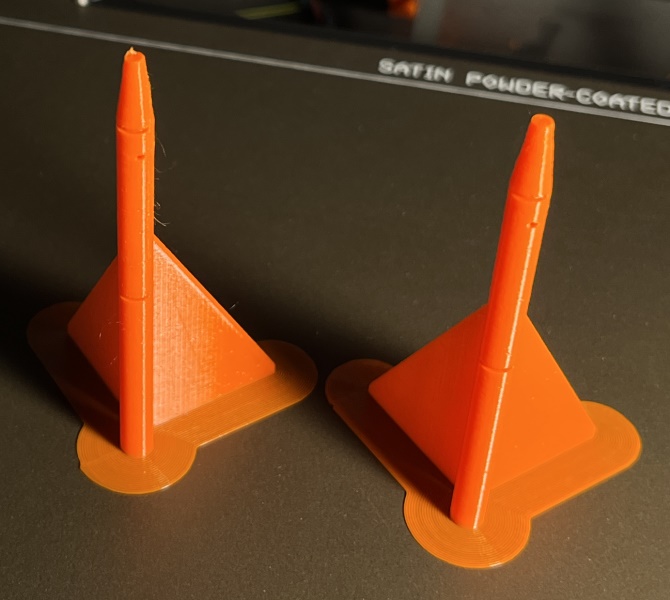
(Prusament Prusa Orange PETG)
Adjusted Project File
Patas PRUEBA 1-10_02 Swiss.Zip
As usual I'm sure I left something out, so if you have any questions I'll try to answer.
Good luck
Swiss_Cheese
RE: Cylinder printing advise
vertical (horrible result)
Well, vertical is the best orientation for this, as far as print quality is concerned (based on how you intend to use it, it may not be the best orientation for strength). It certainly shouldn't be "horrible". If it's too tall you may get some wobble on top or it may come off the sheet, and may require a brim and/or break-away supports (that you need to model in) to stabilize it.
Formerly known on this forum as @fuchsr -- https://foxrun3d.com/
RE: Cylinder printing advise
As well as wobble messing up the print as fuchsr mentions it could also be if you were printing one of them with a small cross section like that its highly likely that the previous layer doesnt cool enough before the next one is printed. This leads to some very bad printing effects.
The common 'fix' for that is to print several spaced apart on the build plate. You can also adjust the settings under Filament>Cooling>slow down if print layer time is below and change that to around 3-5 seconds. You basically want a time thats less than it takes to print a layer in there. Also set the minimum print speed to a low value too like 10.
RE: Cylinder printing advise
It was a 5mm diameter road so maybe it was printing over non solid filament, but yeah, i can try with some support surrounding the object
RE: Cylinder printing advise
I think you may be correct on this one, it was a 5mm diameter road so yeah, it was printing over non solid filament. I will make a test printing 4 of them vertically with the settings that you just mentioned. I’ll let you know tomorrow how it turned out! Thank you!
RE: Cylinder printing advise
Hi!
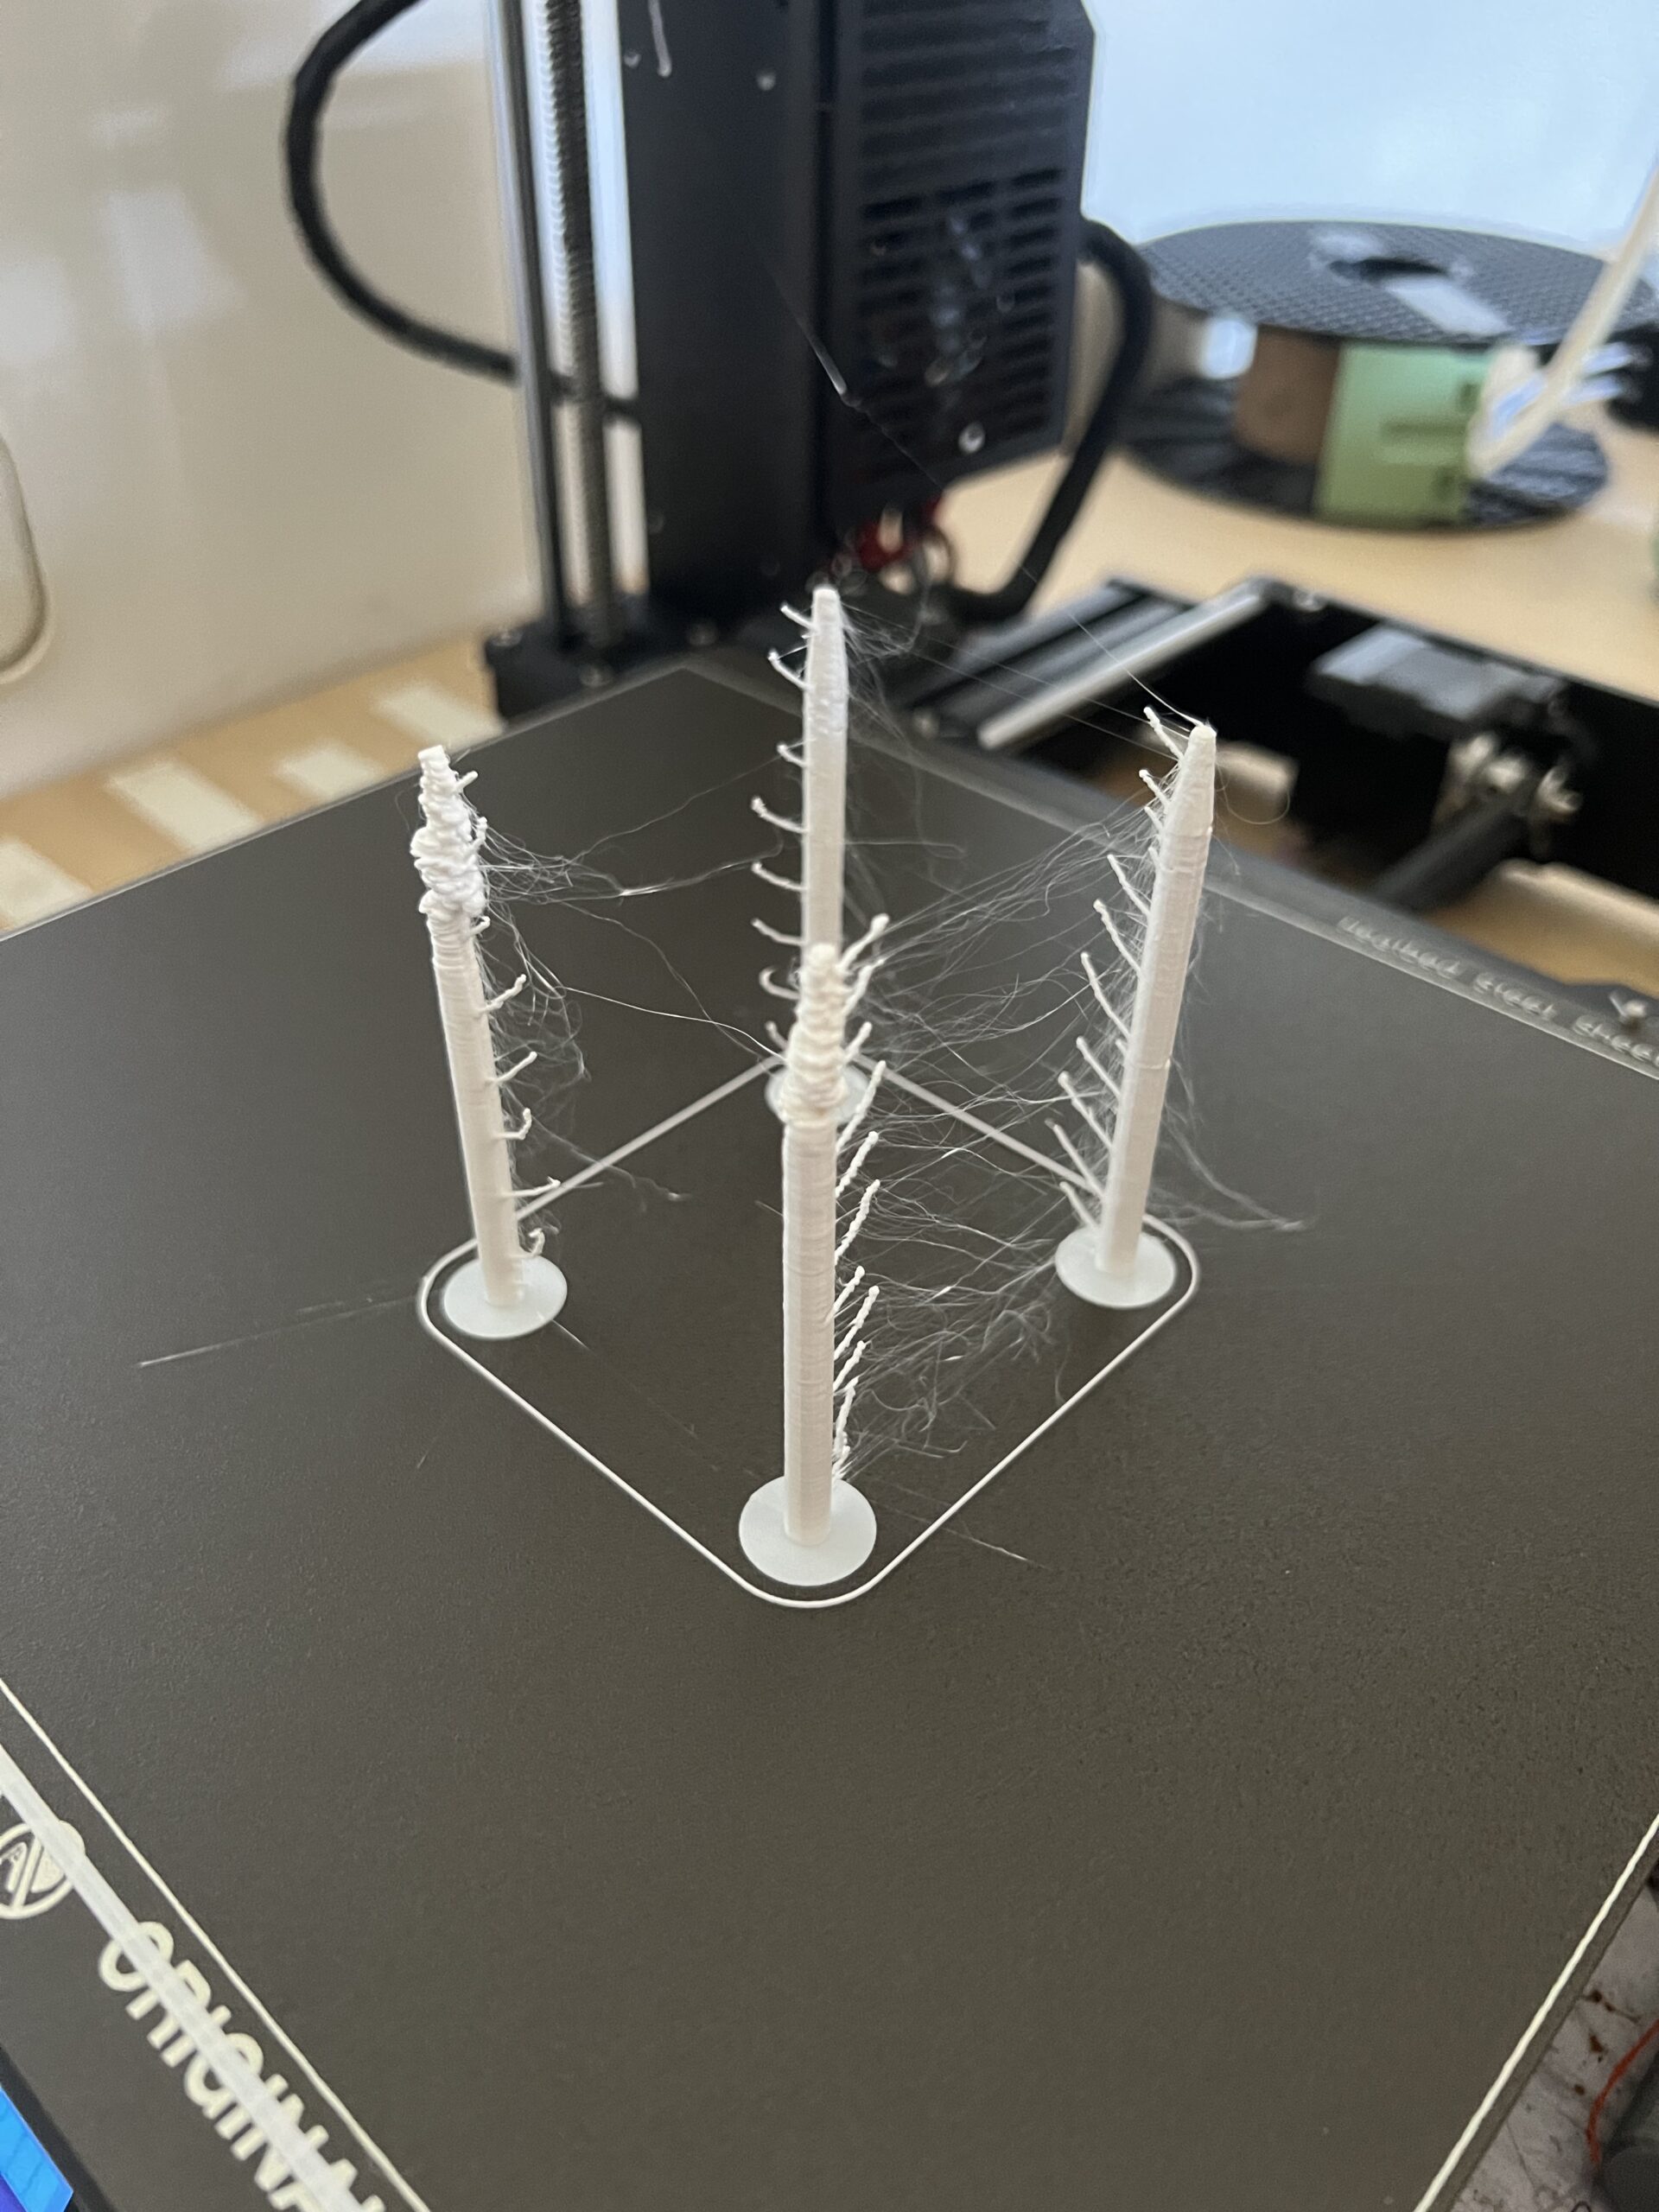
Sorry for the delay, I tried doing what you just told, the result is better in some legs, but for whatever reason the front ones are always messy (just as shown by the picture, I'll upload the 3mf that I'm using right now too)
Any thoughts about why this is happening?
Thank you so mucho for your help, it's always useful to learn more about this process 🙂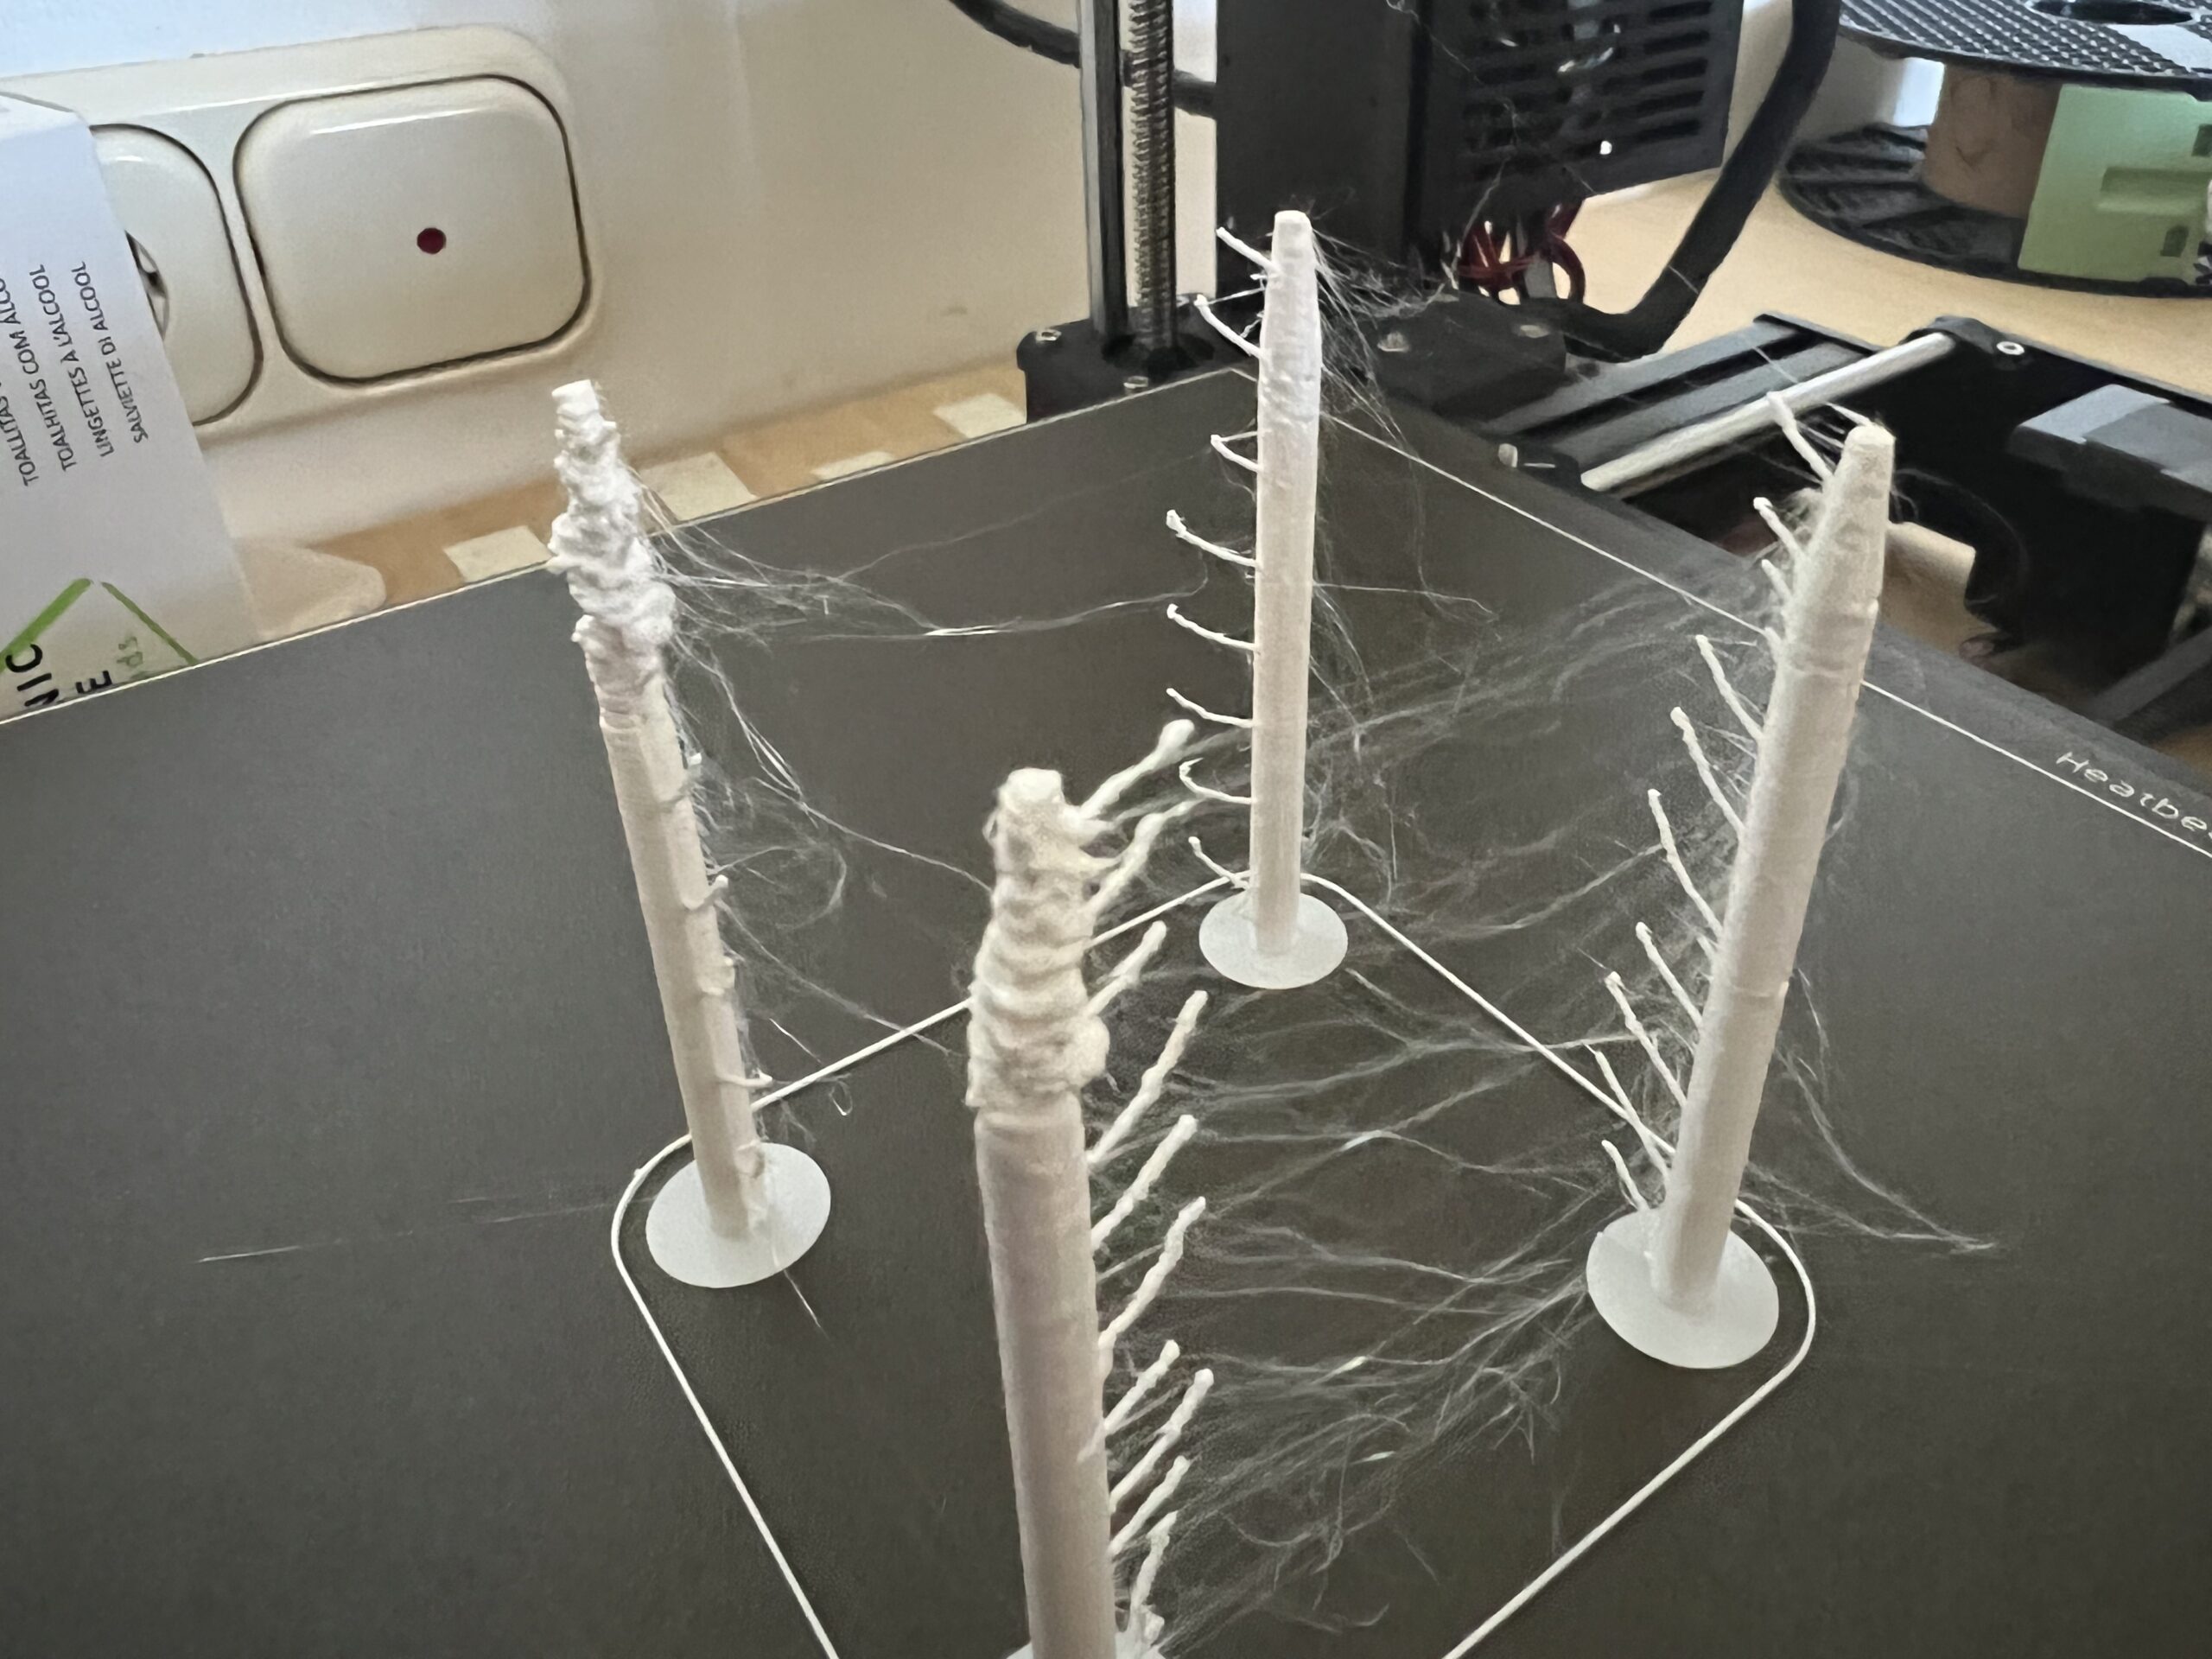
RE: Cylinder printing advise
Here is the 3mf if needed!
Your filament is damp. Look up threads here about drying it.
Cheerio,
RE: Cylinder printing advise
Ok, I’ll take a look at that, thanks 🙂
Do you know why the first pair of legs are printed like that? (Like if they were printed over non solid filament layers or so)
Thank you so much!
RE: Cylinder printing advise
@roichu
I'd like to start by saying Deim is correct, DRY your filament, you need to.
Now lets move on, I took a few minutes and went over your .3mf project file, and the biggest problems I found were related to speed, heat and cooling, with some minor attention to support. when your printing something this tall and thin in many cases your going to want to slow the print down the preserve the quality, however this is not enough by itself, when you decrease the speed your increasing the amount of time the filament is being heated in the hot end, so we have to be mindful of the temperature and decrease it. As we reach the even smaller tip of the model, this becomes even more important and once again we need to slow the print down, as you may have noticed when you ran your prints, and in some cases drop the temp even lower while increasing the cooling, this process is similar with many materials however it's important to understand the properties of the material your working with to do this successfully.
In my version of your project I slowed the over all speed, in the case of this model your speeds are controlled primarily by the settings for Small perimeters, with very little emphasis on anything else. I used "Auto Speed" with a "Max print speed" to set the speeds for all other features of the print e.g. top layers, solid fill,etc,,. then moved to "Cooling thresholds" and set up a cooling gradient for the tapper at the top of the model. I printed my test in Prusament PETG since that's what you had called out in your project file, my experience with Prusament tells me to print it on the hotter range, normally this might mean 255 to 265C, however we know its going to be in the hot end longer for this slow print, so I chose first layer settings of 80C bed and 235C nozzle, then selected 85C bed and 230C All others knowing that I would also be ramping up the cooling as the print advanced.
Next we need to do something about the features in this model, they are tiny, to tiny to seriously consider supports. That leaves you with one option for the overhanging features in the middle and upper portions of the model. I used height range modifiers to adjust the extrusion width above these to features to provide support from the layers below, because the features are so tiny we can get away with this, although we need to expect them to be a closer then intended and think about maybe increasing the height of them so that they result in the desired height or post processing with locksmith files or emery board. After seeing how small the hole near the top was I took it upon myself to increase the size and change the shape to compensate for a similar problem as previously mentioned.
Now for the support, this model being as tall and thin as it is will want to wobble at the top, yes its possible to print it without supports, but your results and head will feel better if you just use one. It stops the wobble problem and saves the time of adjusting all the speeds and temps to compensate for it.
I normally make my stabilizers in my 3D modeling program, however this time I very quickly threw them together using 2 shapes and a couple of "Negative Volumes" they don't look like much but they were fast and they work, in the off chance that users don't have a 3D software under their belt this can serve as an example of possibility for them.
My test results.
The supports are break away.
(Prusament Prusa Orange PETG)
Adjusted Project File
Patas PRUEBA 1-10_02 Swiss.Zip
As usual I'm sure I left something out, so if you have any questions I'll try to answer.
Good luck
Swiss_Cheese
The Filament Whisperer
RE: Cylinder printing advise
Good morning!
Thank you so much for your feedback! I will study your 3mf so I can try to replicate your perfect results with the other similar models that I have to print. I will share here the result that I can get 🙂
Thank you so much for your time and effort!
Roi Freire
RE: Cylinder printing advise
If you're looking for examples why Prusa should NEVER remove attachments to posts in the forums, no need to look any further. I downloaded swiss_cheese's post and attachment to make sure I have a copy of it when the Prusa Gods decide to purge things off the forums in a few months. Can't express how grateful I am to swiss_cheese for investing his time to share his expertise and experience with all of us.
Formerly known on this forum as @fuchsr -- https://foxrun3d.com/
RE: Cylinder printing advise
If you're looking for examples why Prusa should NEVER remove attachments to posts in the forums, no need to look any further. I downloaded swiss_cheese's post and attachment to make sure I have a copy of it when the Prusa Gods decide to purge things off the forums in a few months. Can't express how grateful I am to swiss_cheese for investing his time to share his expertise and experience with all of us.
Ditto! Thank you yet again @swiss_cheese!
RE: Cylinder printing advise
Swiss cheese for el Presidente.