Clear PETG blemishes
I just got a roll of Prusament clear PETG and am trying to print some boxes with standard Prusament PETG 0.4 mm nozzle settings. I wanted a 1.2 mm wall (three filament thickness), but when I printed it lots of blemishes were very visible because of the clear material. I tried a 0.8 mm wall (two filament thicknesses), and finally spiral vase mode (which looked perfect). Below are the pictures. Top = 0.44 mm measured thickness, middle is 0.84 mm measured thickness, and bottom is 1.18 mm measured thickness. I've been printing for several months now, and wonder if my prints always had this sort of thing, but it wasn't very visible with the opaque filaments I've used before. Any suggestions, or is this to be expected?
RE: Clear PETG blemishes
if the box will print in spiral vase mode, are the walls thick enough?
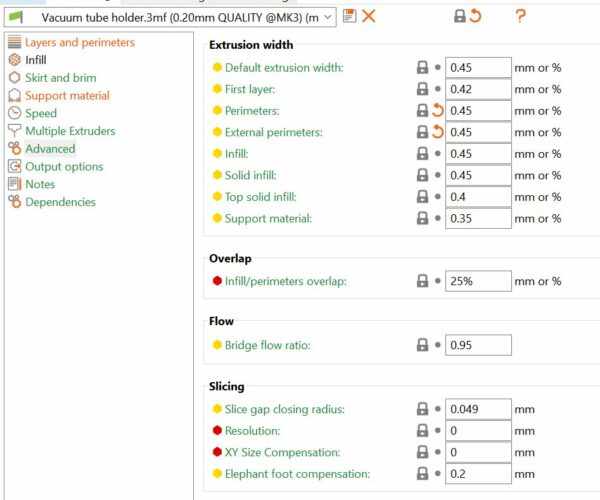
you can increase the extrusion width in the "Print settings>Advanced" menu most 0.4mm nozzles will print 0.8 extrusion width,
older brass nozzles wear a bit flat at the tip, and will print up to 1.2mm extrusion width. I have not tried larger extrusion widths.
I printed this, with thick spiral vase walls
I made several, the largest was virtually full volume on the Mk3S
regards Joan
I try to make safe suggestions,You should understand the context and ensure you are happy that they are safe before attempting to apply my suggestions, what you do, is YOUR responsibility.Location Halifax UK
RE: Clear PETG blemishes
@joantabb
Hi Joan,
Interesting reply. Do you recall my recent post that you addressed about using my 0.6 mm nozzle and not seeing the PETG profile? I thought that I could the 0.6 mm nozzle with a smaller number of walls to get a cleaner looking print.
That being said, you didn't address my question about the origin of the blemishes when I am not in spiral vase mode. I don't understand why printing a wall next to an existing wall causes this issue. I would expect the printer to be able to print two side-by-side walls cleanly.
Thanks,
Bill
RE: Clear PETG blemishes
@fabnavigator
the Blemishes appear to be start stop points on the model where the extruder moves from perimeter to perimeter. you can set the seam to aligned or rear and see is all of the blemishes move to a single line.
if this is the case, you need to look at your retraction settings.
regards Joan
I try to make safe suggestions,You should understand the context and ensure you are happy that they are safe before attempting to apply my suggestions, what you do, is YOUR responsibility.Location Halifax UK
RE: Clear PETG blemishes
@joantabb
Hi Joan,
I have the seam position set to nearest. There are only two perimeters, and according to the (super cool) preview mode in the slicer the extruder moves in one direction extruding the inner perimeter, and then always at one of the corners jumps out and does the outer perimeter. I would expect the sides of the box to be blemish free if it's from moving between perimeters. But, I took your suggestion and printed the box with the seam position set to the rear. I watched it print, and the seam is in the center rear wall. You can see while it is printing that the front wall is printed with no extra movements other than two smooth lines.
End result is the same. There are still blemishes scattered throughout the box walls.
Since the spiral vase looks blemish free, can we conclude that the issue is a result of extruding filament adjacent to existing filament? Maybe some slight variation causes the new filament to occasionally bump against the existing?
It would be nice if someone else could try to print a 0.8 mm (two perimeters) walled box with the clear PETG to see what it looks like.
Thanks,
Bill
RE: Clear PETG blemishes
@fabnavigator
Cheers Bill,
Unfortunately I don't have Clear PETG. and I don't have a standard Mk3S, mine has a Dragon Hotend.
Hopefully another user will be able to oblige.
regards Joan
I try to make safe suggestions,You should understand the context and ensure you are happy that they are safe before attempting to apply my suggestions, what you do, is YOUR responsibility.Location Halifax UK
RE: Clear PETG blemishes
Thank you. Maybe someone else wil chime in. I have a few thoughts of things to try in the meantime.
RE: Clear PETG blemishes
Just for info 3 perimeters of. 0.4mm nozzle doesn’t equal 1.2mm without infill being used as there is squish between the perimeters. If you look in the perimeter part of the slicer it will tell exactly the expected size for each number of perimeters. Now my memory I’d failing me here but by default only dimensions for even numbers will be shown and you have to select another option to show all numbers. It could be detect thin lines or ensure vertical. I’m sure some else might be able to chime in.
i3 Mk3 [aug 2018] upgrade>>> i3MK3/S+[Dec 2023]
RE: Clear PETG blemishes
I did some more work on this. The "defects" might to be related to the retraction that happens each new layer for the wipe. My thought about this being related to extruding adjacent to previously extruded filament didn't pan out. I see the defects in a single perimeter wall. I can print a simple box with a single perimeter that basically ends up looking just like a box printed in spiral vase mode. Except the spiral vase box has zero defects and the box printed layer by layer has some defects.
Now I'm thinking that after the retraction related to the wipe at each layer change, the thickness of the filament in the extruder is at times disturbed (too thin or thick) enough to produce a small defect in the line after a short, but somewhat random distance.
Just a thought of course. I know there has to be some explanation for there defects.
RE: Clear PETG blemishes
Printing with any clear material is not a straightforward as it may initially sounds. I most likely lack the detailed knowledge to go into your specific problem. However I found the info on the Taulman3D website quite helpful in my own dealings with their t-glase material. It was probably the first transparent PETG based filament around.
have look: https://taulman3d.com/t-glase-spec.html
They claim that some of the blemishes you described may be due to insufficient cooling.
hth
Hansjoerg
RE: Clear PETG blemishes
@hawai
Thank you for the comment, but that doesn't sound like my issue. I can print a perfect spiral vase.
RE: Clear PETG blemishes
Try posting a .3mf of your project, that allows us to look at what your trying to do with more detail and potentially offer better assistance. The images you posted are so close up and nonspecific that it's impossible to tell what the problem could be.
The Filament Whisperer
RE: Clear PETG blemishes
@swiss_cheese
At this point it's just a small test structure. Single perimeter, no top, no bottom, no fill. Doesn't look like I can attach a .3mf, but the OpenSCAD code is simply: cube([50, 1.2, 30]);.
RE: Clear PETG blemishes
you have to zip files up to post them here, its not the size of the cube its the settings in slicer that matter, Also I use 3DSMax, Rhino, Maya, Blender, Lightwave, SolidWorks and AutoCadd. I've never used OpenSCad sorry.
The Filament Whisperer
RE: Clear PETG blemishes
@swiss_cheese
Here it is.
RE: Clear PETG blemishes
I'm going with the "bubbles between the layer lines". I print a lot with clear - it's worth reading the article "Print with Glass" - in the prints section that talks a lot about how to get a clearer print. Lots of things show up that you aren't usually aware of. Crossing perimeters, retraction, nozzle temp, print chamber temp (my clears will come out horrible if I print with my enclosure door closed), and infill patterns (direction of the plastic path needs to be unidirectional) - which is why your vase mode prints come out much better.
RE: Clear PETG blemishes
@fabnavigator
printing samples now will post results.
The Filament Whisperer
RE: Clear PETG blemishes
I printed your .3MF Last night in 6 different configurations, using OVERTURE transparent PETG, Its quite clear, I did change everything back to defaults got ride of all the settings you had and set the filament override Retraction to 0.2 so all the retractions and detractions stayed on the very end, as well I printed with a 0.4mm nozzle with a External perimeter of 0.65 no top or bottom layers. I did two tests with 0.2 set for speed, and two set at 0.2 quality, in each case I set the filament to its highest and then lowest temperature 230C and then 252C in both cases the lower temperature caused the filament to have a less clear look with streaks in areas that appeared to be more opaque. the higher temperature prints were both very clear with no blemishes of any kind and the one printed with the speed setting appeared to be the clearest of them all. I tried taking pictures to post and show this but I wasn't able to get them clear enough to show the differences with my camera, I'll try again to get some better ones this evening when I have more free time. BTW the controls I used were spiral Vase since they would be as clear as I could do
The Filament Whisperer
RE: Clear PETG blemishes
@swiss_cheese
Thank you. That's some good information. I was able to get very good results in spiral vase mode also (see original post above). I'm trying to get similarly good results without resorting to spiral vase mode to print the same test box.
RE: Clear PETG blemishes
perhaps I was not clear in my explanation. Spiral Vase was only used as the control, (control meaning the standard by which I judged the clarity of all others) because its going to be the clearest, the other results were achieved using conventional printing, meaning the use of individual layers with retractions and detraction's. try the method I set forth I got some pretty good results and you may as well.
Good Luck
The Filament Whisperer
