Problems with Z or Bed adhesion or something more sinister?
Hi All,
Im completely stumped so I thought I would ask the community genius' for some assistance.
I have been having issues with my Prusa I3 Mk3, we have been in a serious relationship for the last couple of years when I bought her as a kit!!
It seems like it is knocking the print off the bed or hitting the print in some way sometimes.
This has happened out of nowhere, so I have tried:
Drying my filament
Factory resetting printer and then running through the initial calibration again
Checking the PINDA probe is at the right height (Nozzle touching bed, cable tie snug between bed and probe)
I stripped down my extruder and checked everything, greased/lubed everything up and rebuilt. (then recalibrated again)
I bought fresh Acetone and IPA to clean the bed with, made it a little better but still has issues.
Destroying all the Prusa Slicer settings and installing a fresh copy. (also tried prusa slicer on another computer, and tried the pre sliced demo models too)
I just can't get it to behave!!
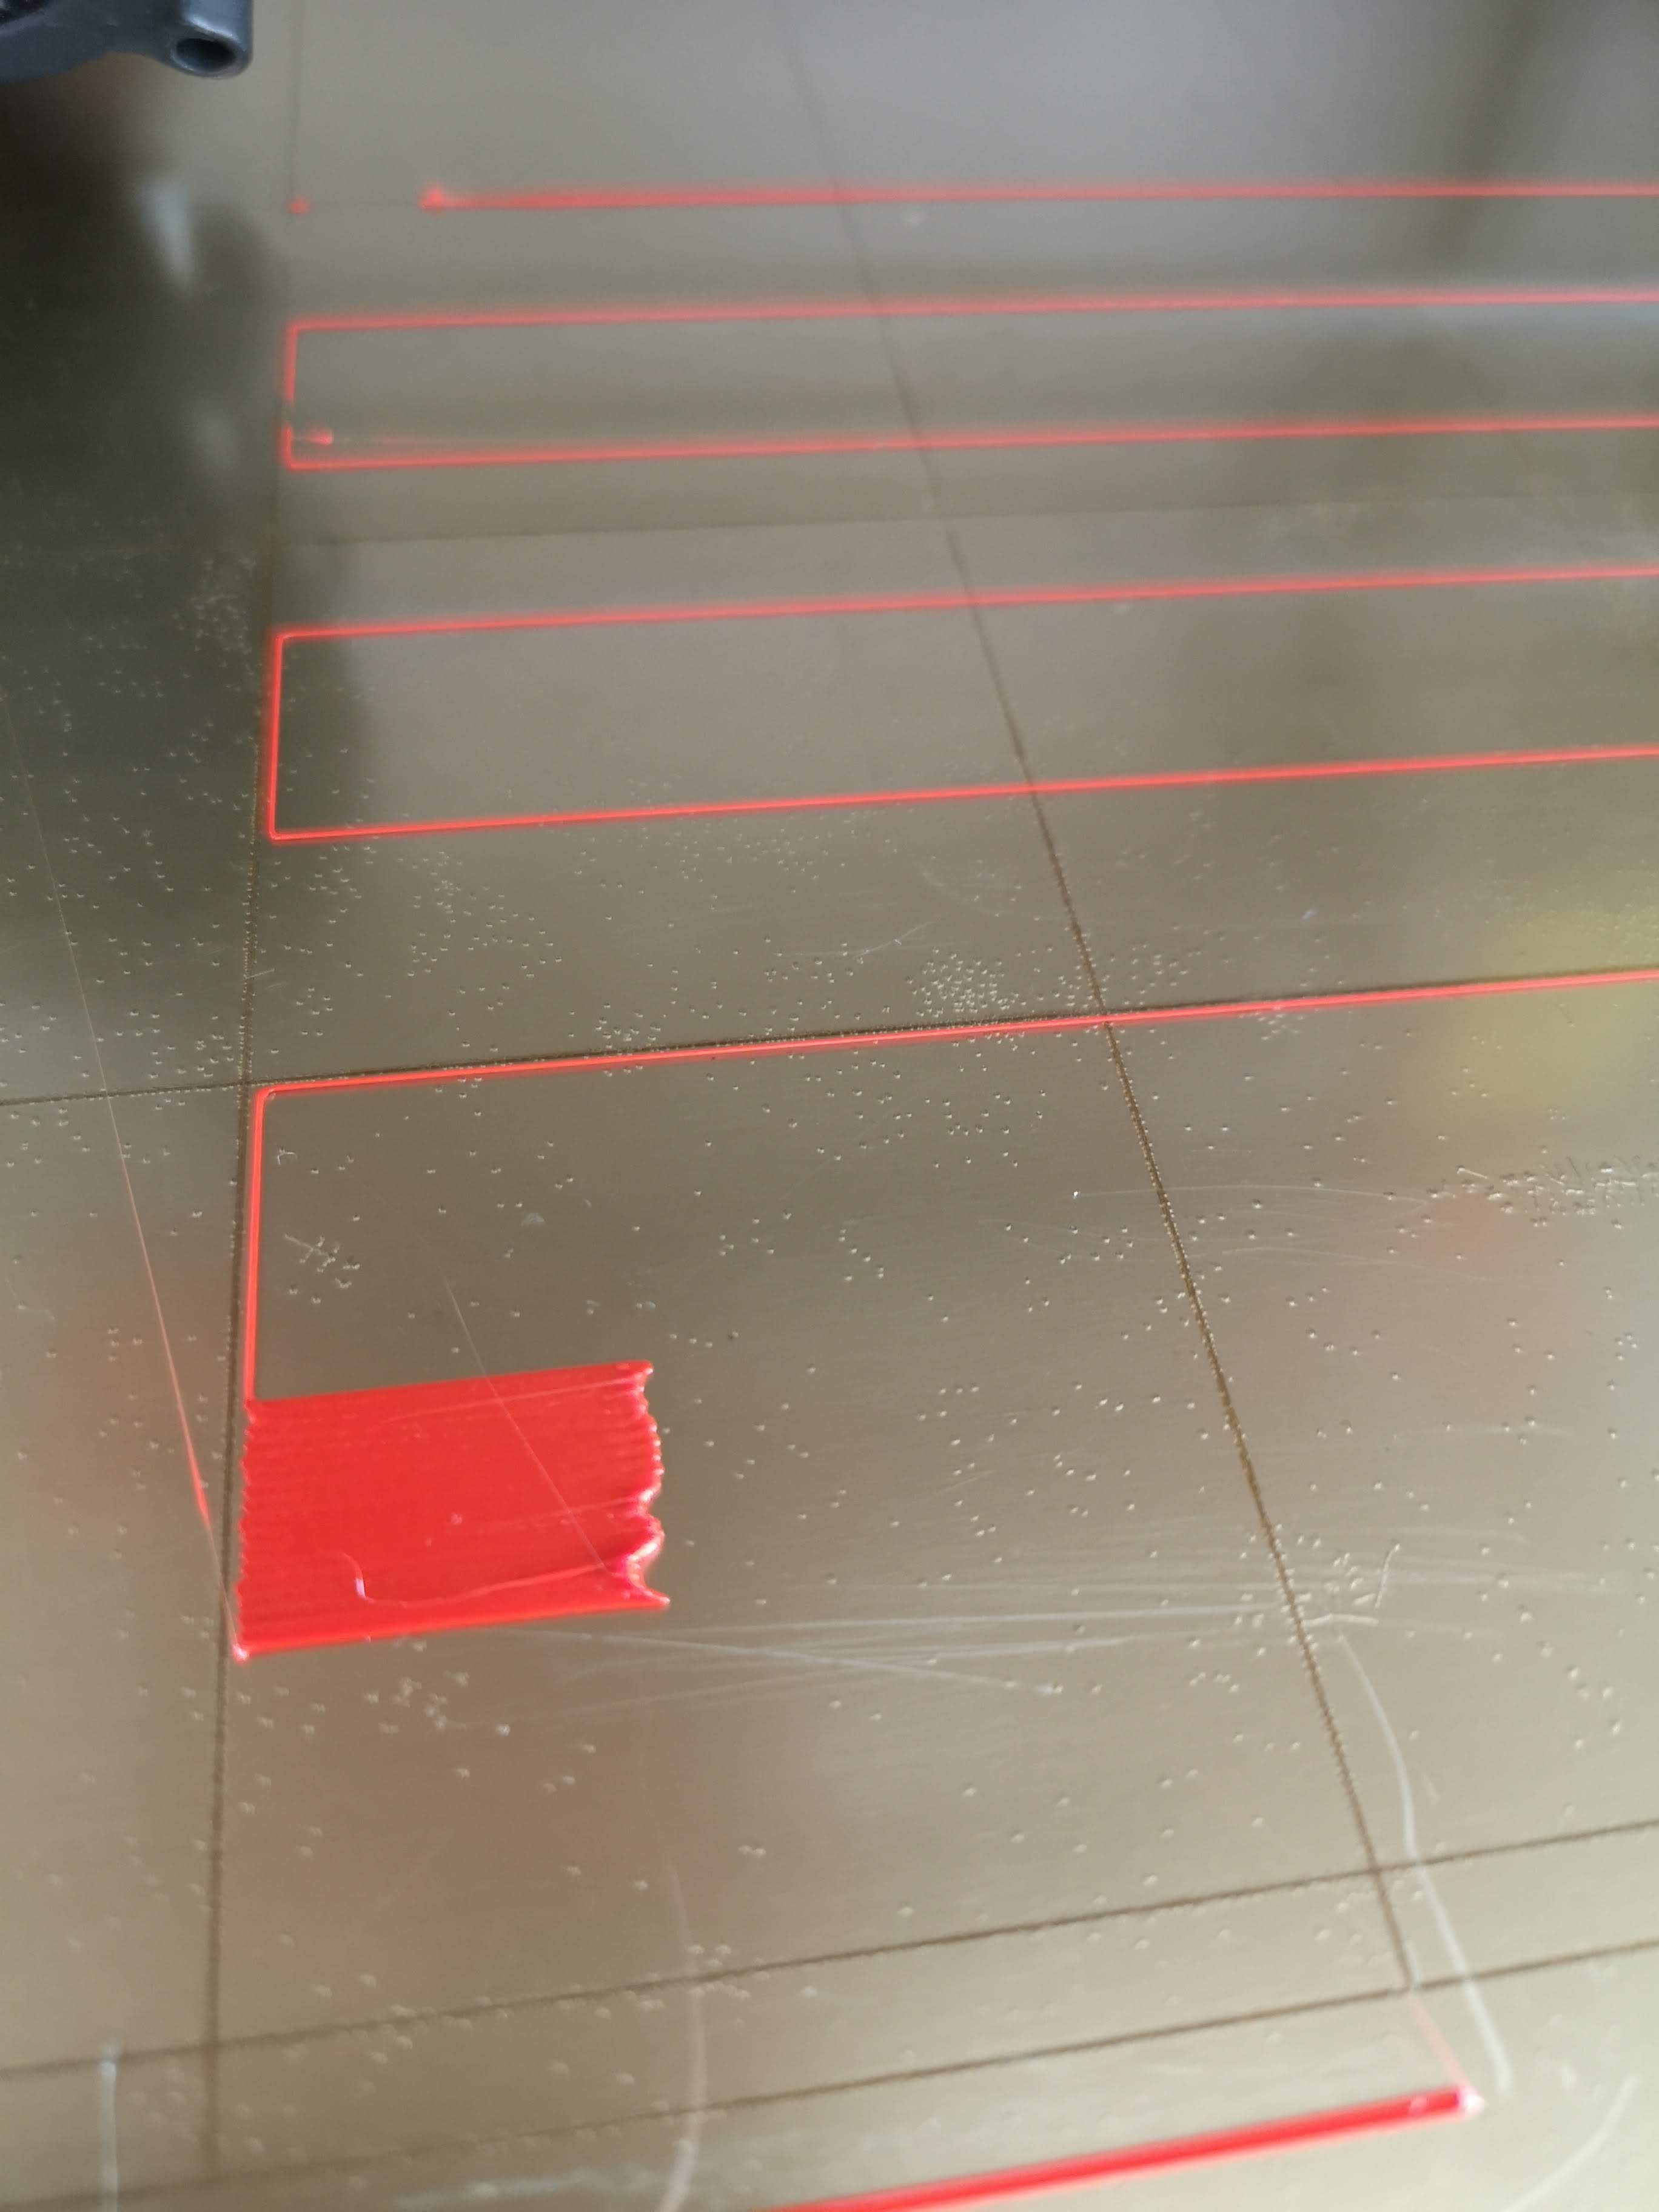
I believe that this first layer calibration is like this because the nozzle is too close to the bed (maybe). If I have it any further away, the filament seems to bobble up a little bit and not adhere to the bed properly. I used to have the first layer at -0.600 (ish) its now -0.850!
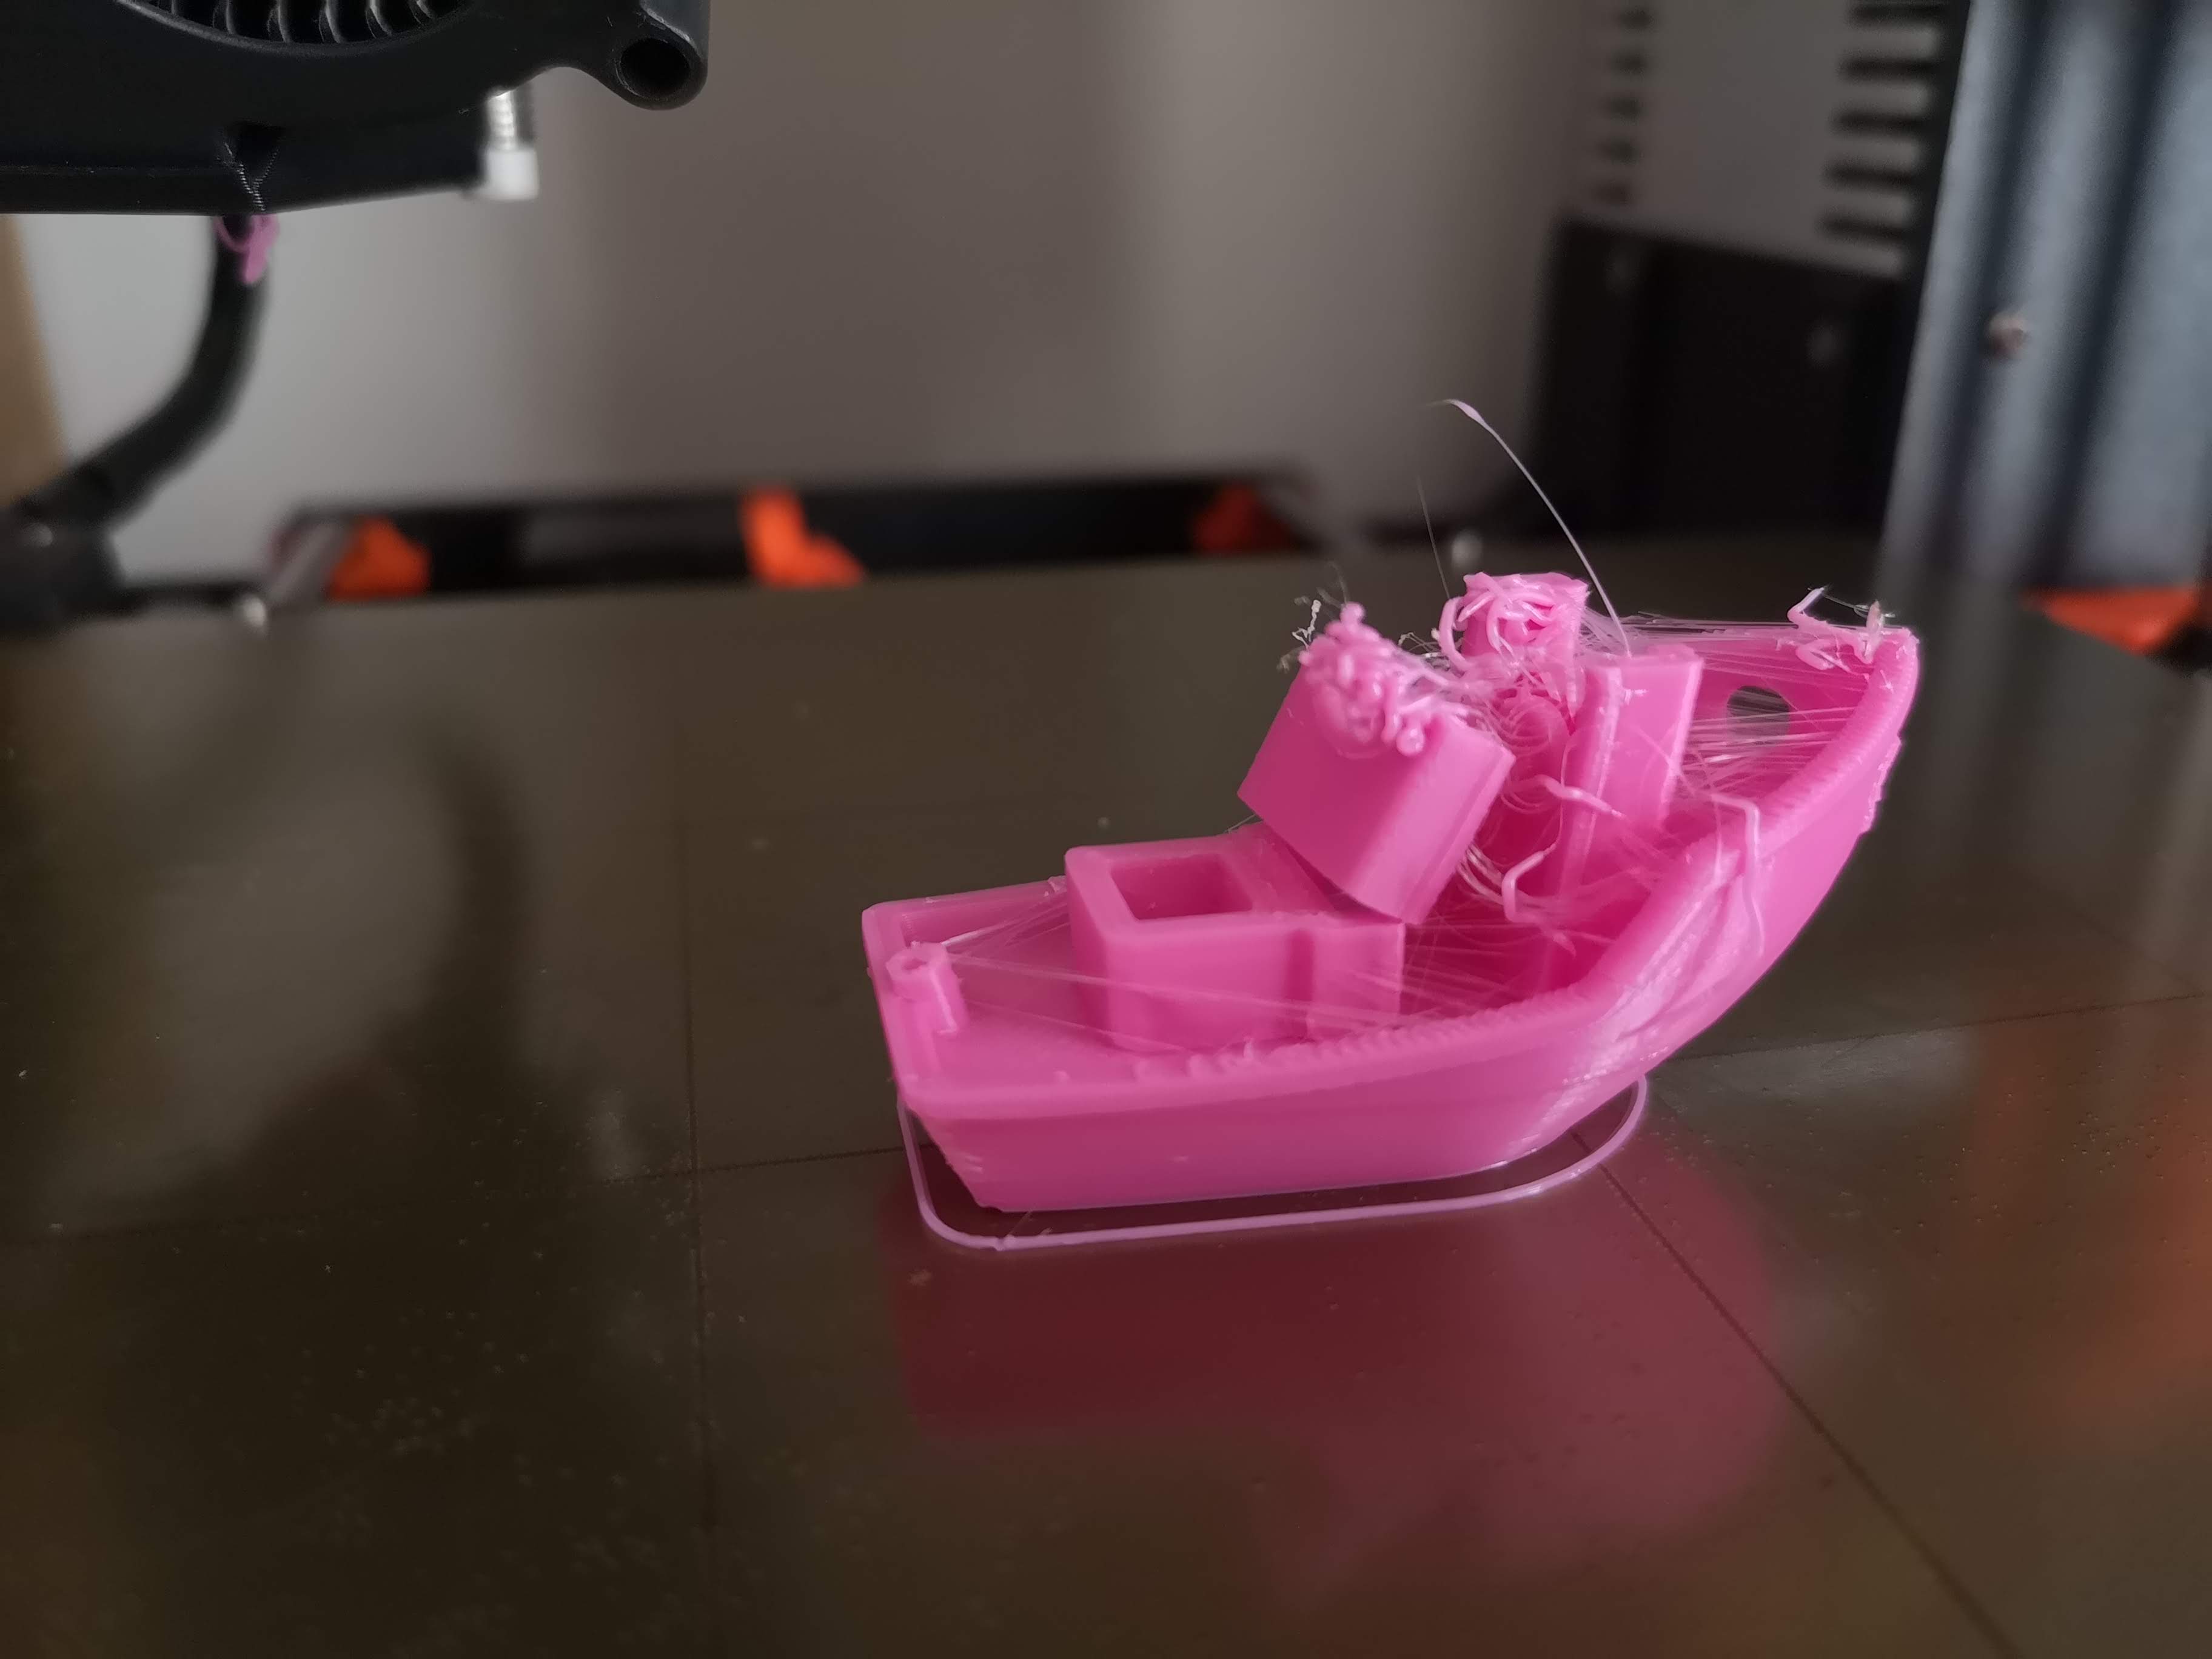
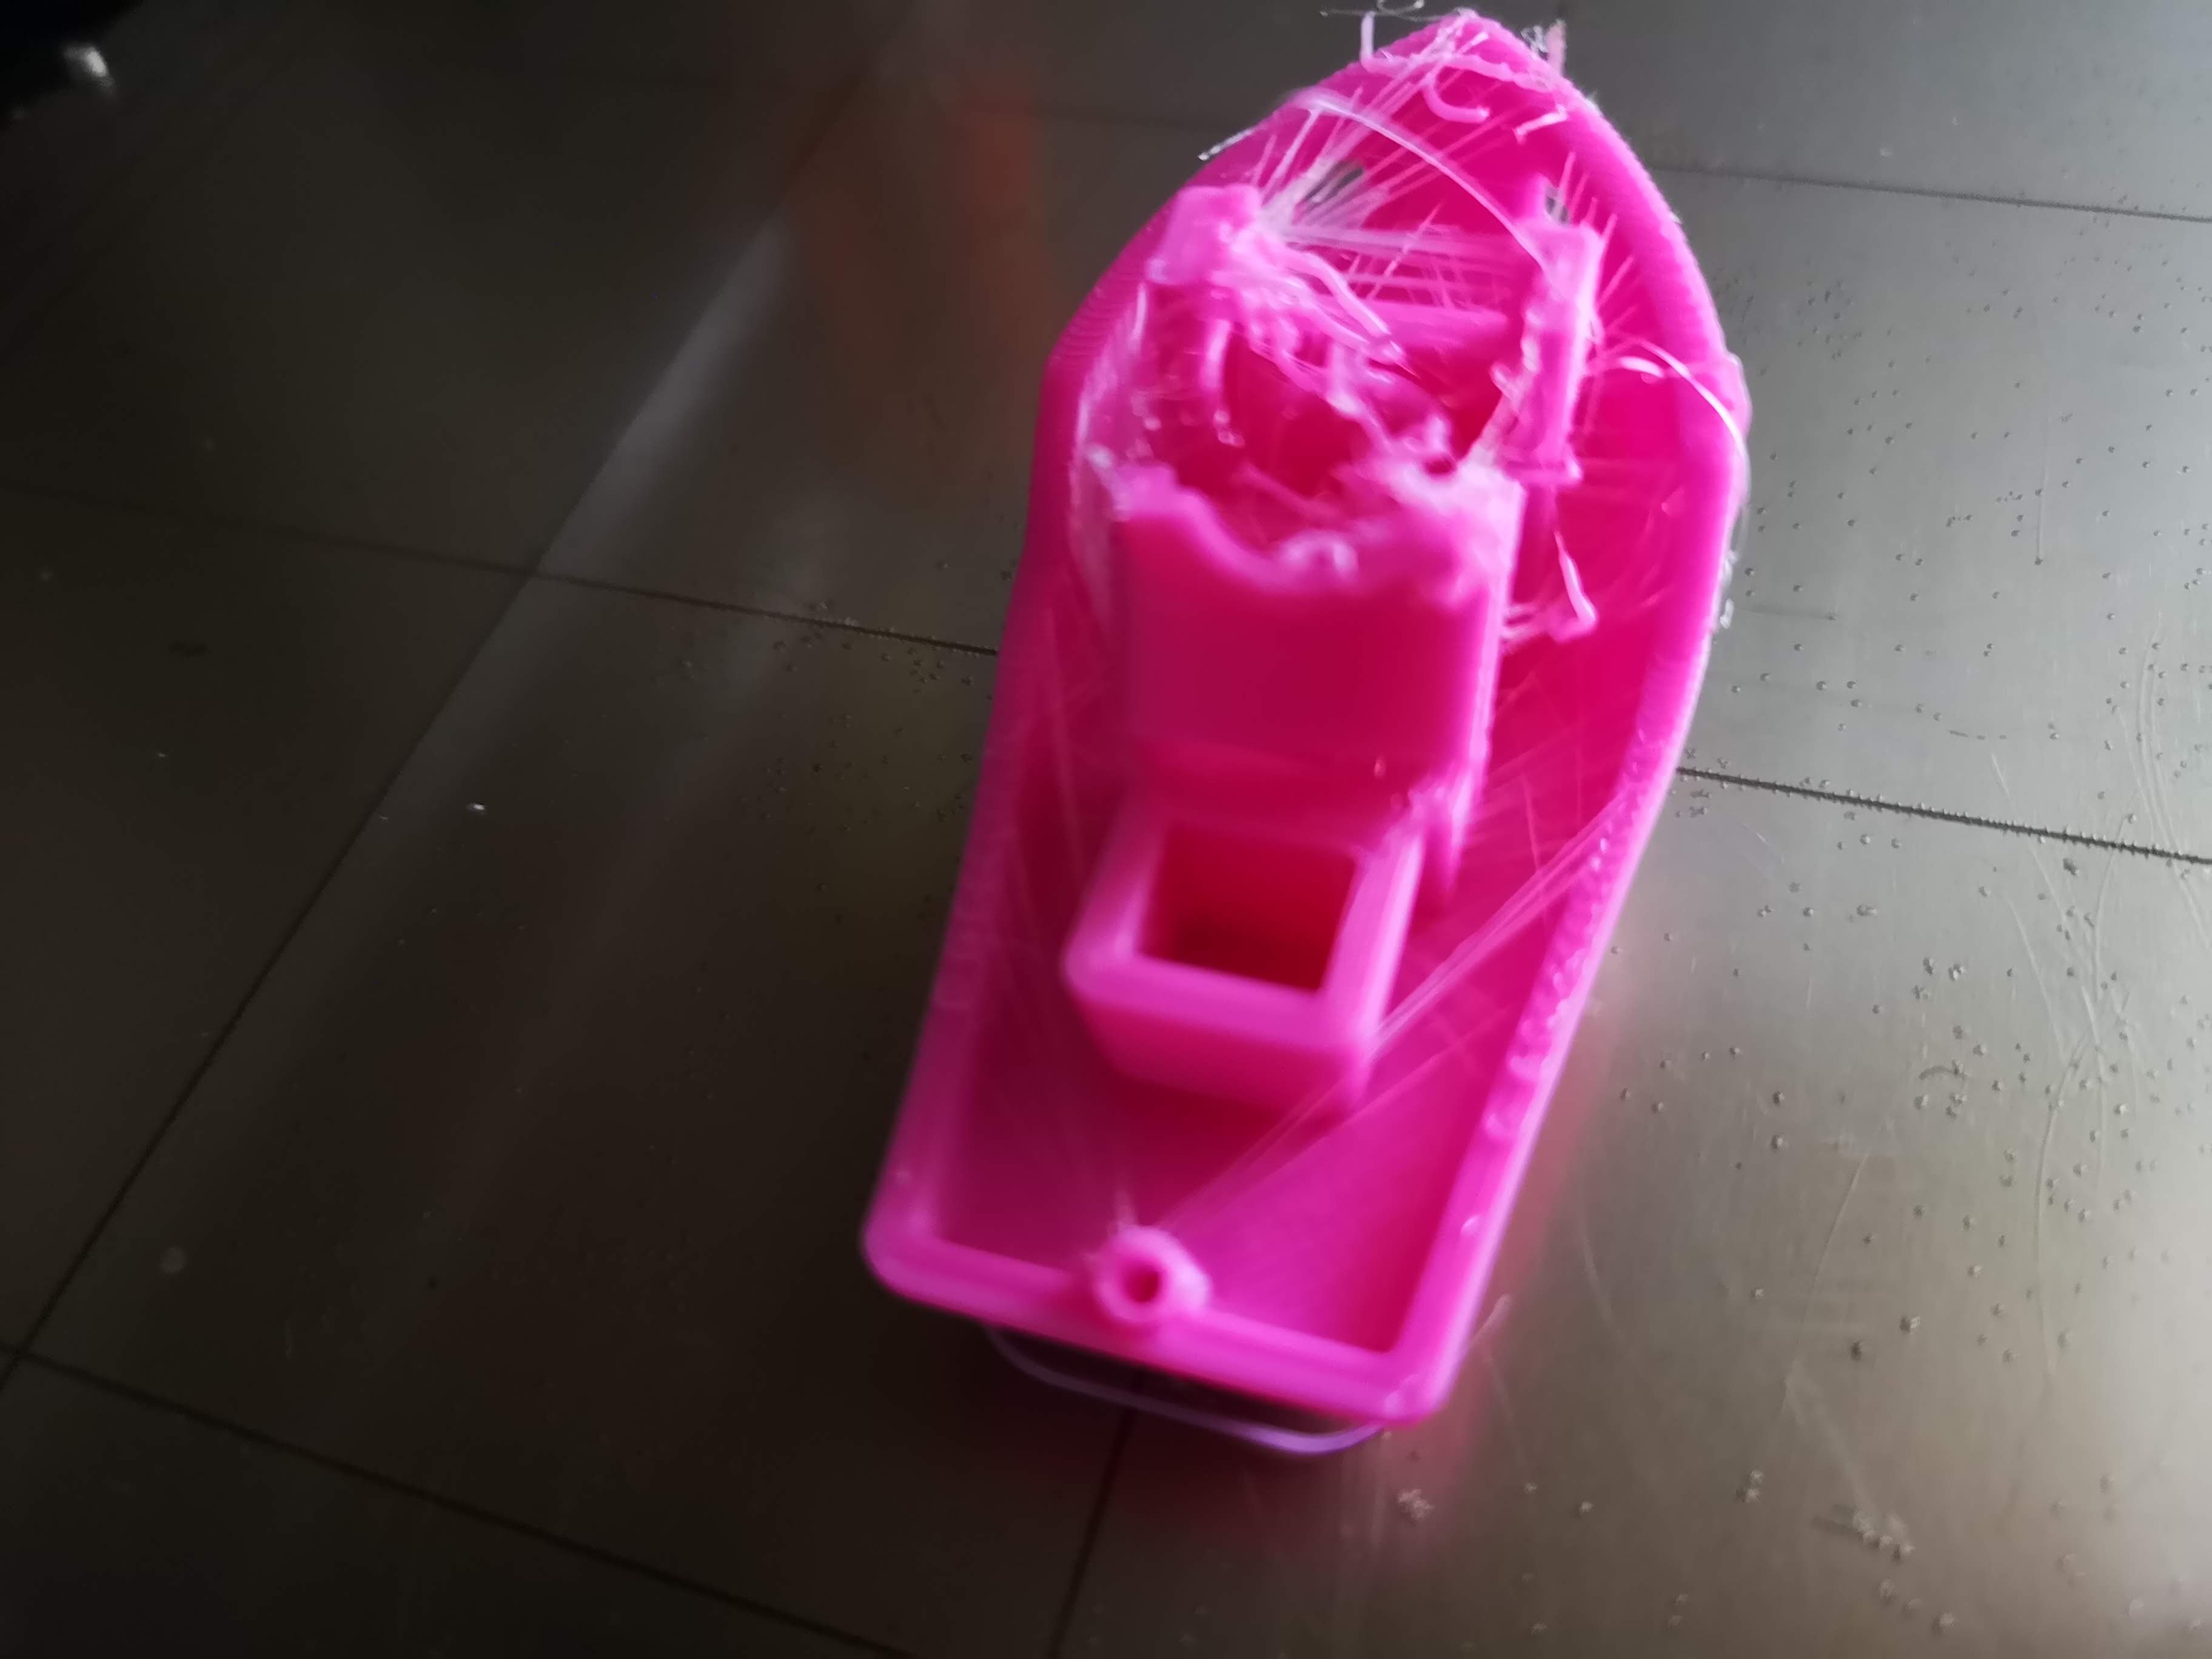
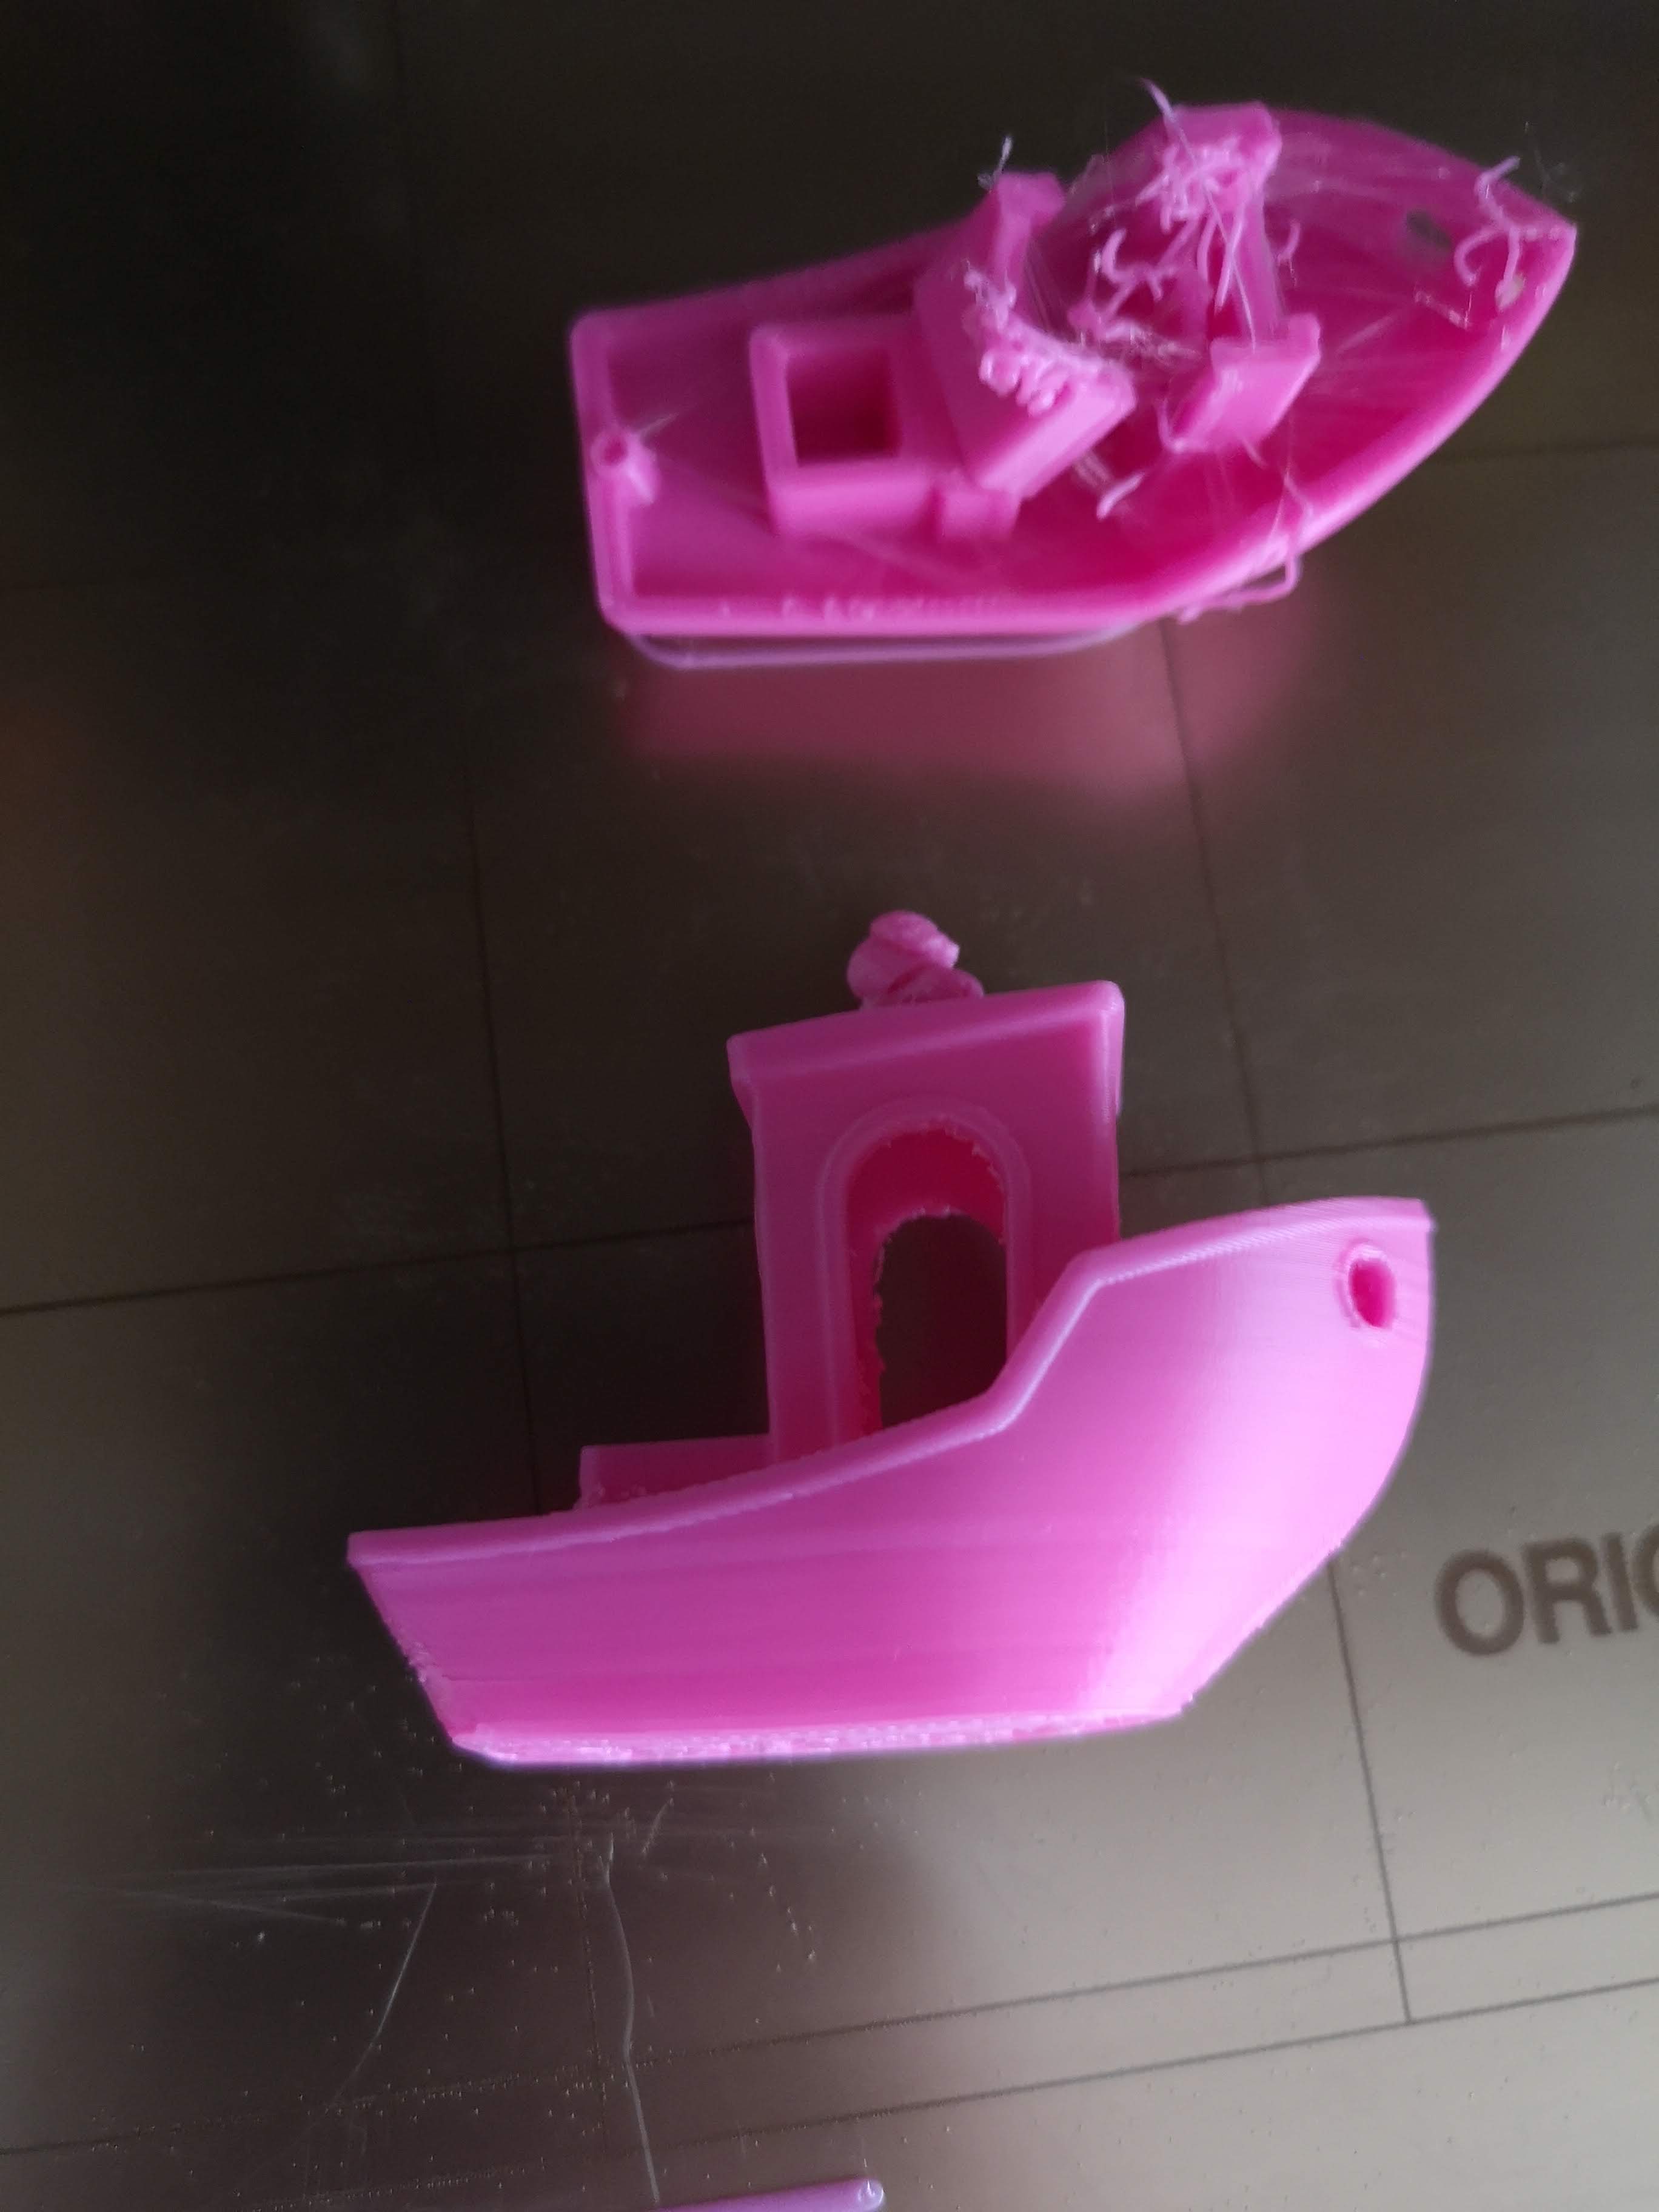
I did get one Benchy to print ok, however the quality wasnt as good as what my printer used to do. After that (below) benchy popped out I tried another print and ended up with disaster again.
disaster: (flex octopus)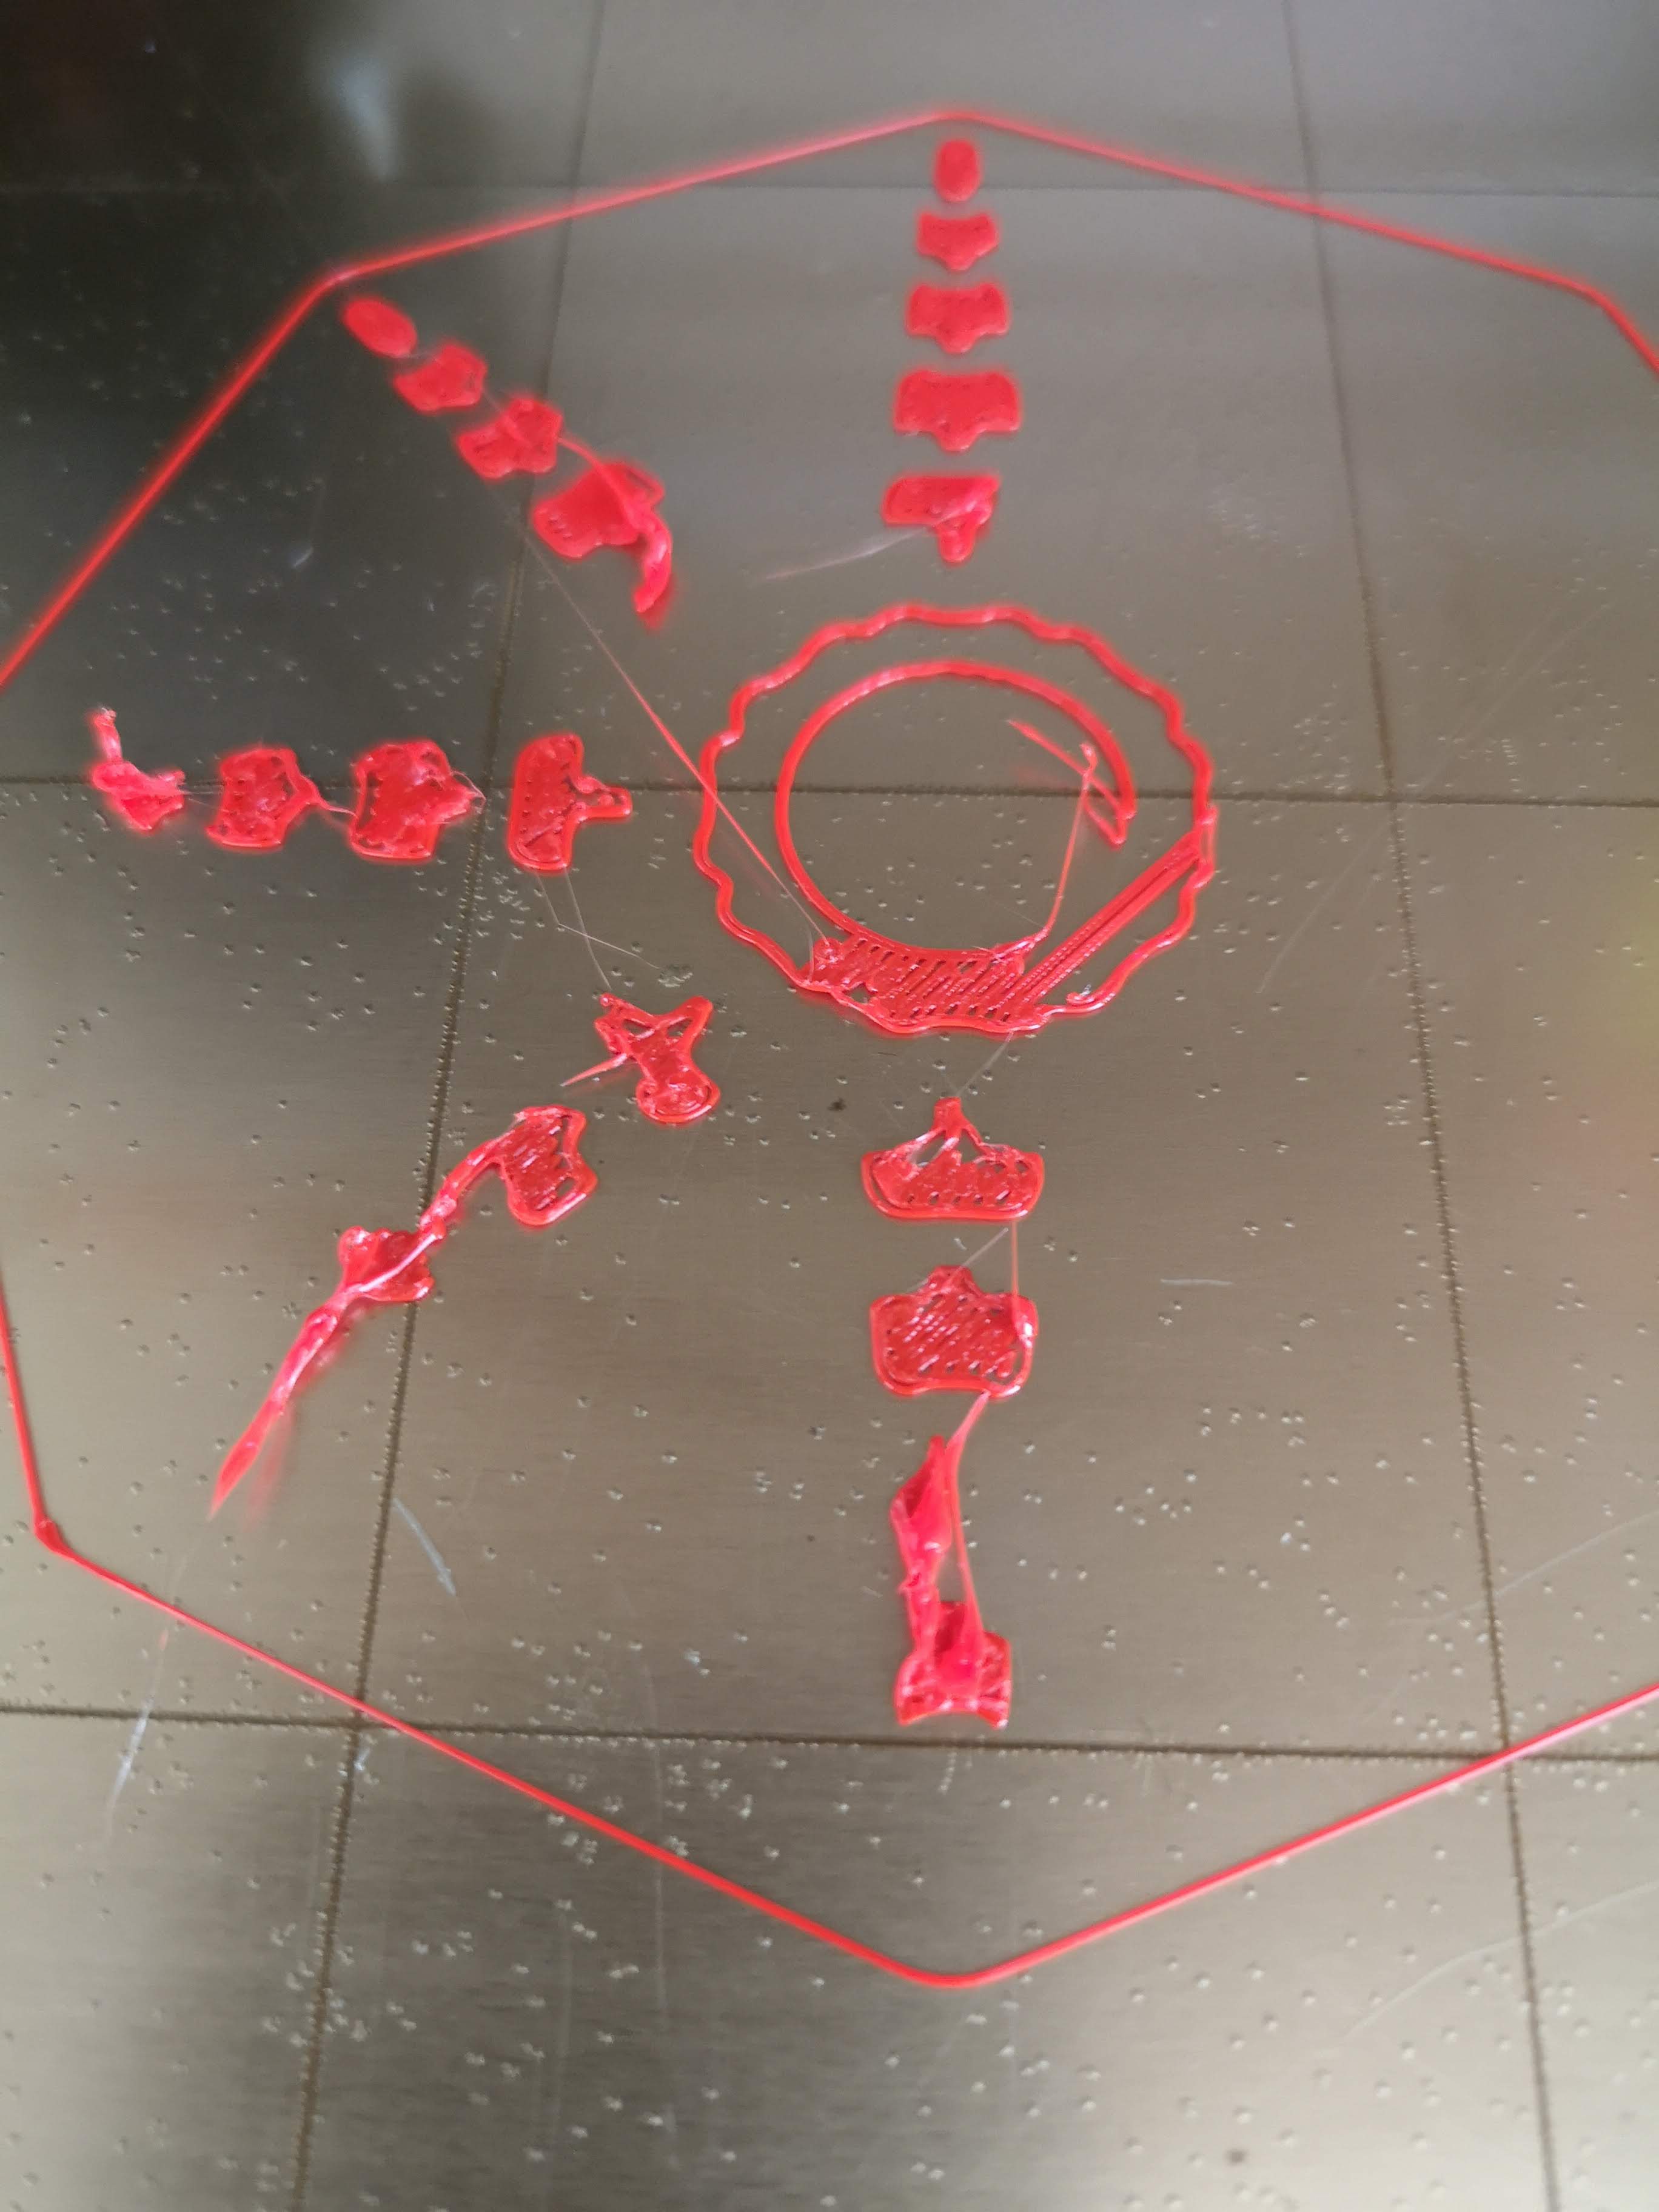
Any help or pointers would be greatly appreciated.
Thanks in advance 🙂
RE: Problems with Z or Bed adhesion or something more sinister?
The first thing to do is put away the bottle of acetone. Your printer has no use for it.
Second, wash the steel plate with detergent and warm water. Then wipe with paper and then do not touch the print surface with your fingers.
You may be able to use IPA 99% occasionally, but detergents and hot water make the job much better.
And from your last picture it looks like you haven't calibrated the first layer properly, you have to lower the nozzle a bit. The first layer should be tight without gaps. The surface should be a bit glossy. If it is rough and rough, the nozzle is too low.
Bear MK3 with Bondtech extruder
RE: Problems with Z or Bed adhesion or something more sinister?
I second the previous post. No point trying to get Z correct if your plate is not clean. Start there.
RE: Problems with Z or Bed adhesion or something more sinister?
Apologies for those who've seen this before, but I've tried to encapsulate all the information for new users...
-
A dirty PEI print surface. Even if you don't think this is the cause, it's always a good idea to make sure your PEI surface is clean before trying any other fixes. If it's a smooth PEI sheet, take it to the kitchen sink and give it a good dunk with Dawn (original formula, no vinegar or hand softener variants) dishwashing soap or your local equivalent (e.g. Fairy in UK). Use a clean paper towel to clean it off, and another to dry it. Avoid using any sponge or cloth that has been in contact with grease. Above all else, avoid touching the PEI print surface. Once it's good and clean, you should be able to use 91%+ isopropyl alcohol between prints, 100% acetone when that fails , and another dunk when acetone fails. Worst-case, use a 3M 7445 ScotchBrite pad or equivalent on smooth PEI to give it a very light buff, but only infrequently. If you've got a textured powder-coated PEI print surface, the official instructions are to use 91%+ isopropyl alcohol on it only. Rumors persist that some tribes deep in the jungle have had good luck getting started with these sheets by giving them a wipe with 100% acetone and a dunk with Dawn. Either way, there's no real warranty on these sheets. YMMV.
-
If you have not already done so, try using Jeff Jordan's "Life Adjust" procedure for calibrating your Live-Z setting. It is much easier to use and understand than the on-board routine. It's much easier to make mid-print adjustments accurately with. In general, start high (less negative) and work lower (more negative) in large increments (e.g. 0.1mm) until the filament starts to stick on its own. When you've got your Live-Z setting adjusted properly, you should be able to gently rub the extruded lines on the PEI surface without dislodging them. Then start lowering (more negative) the level until there are no gaps between layers.
RE: Problems with Z or Bed adhesion or something more sinister?
Thanks for your help.
The "Life Adjust" is amazing, I haven't seen that before so I was well impressed. So easy to sort out the first layer with that guidance!
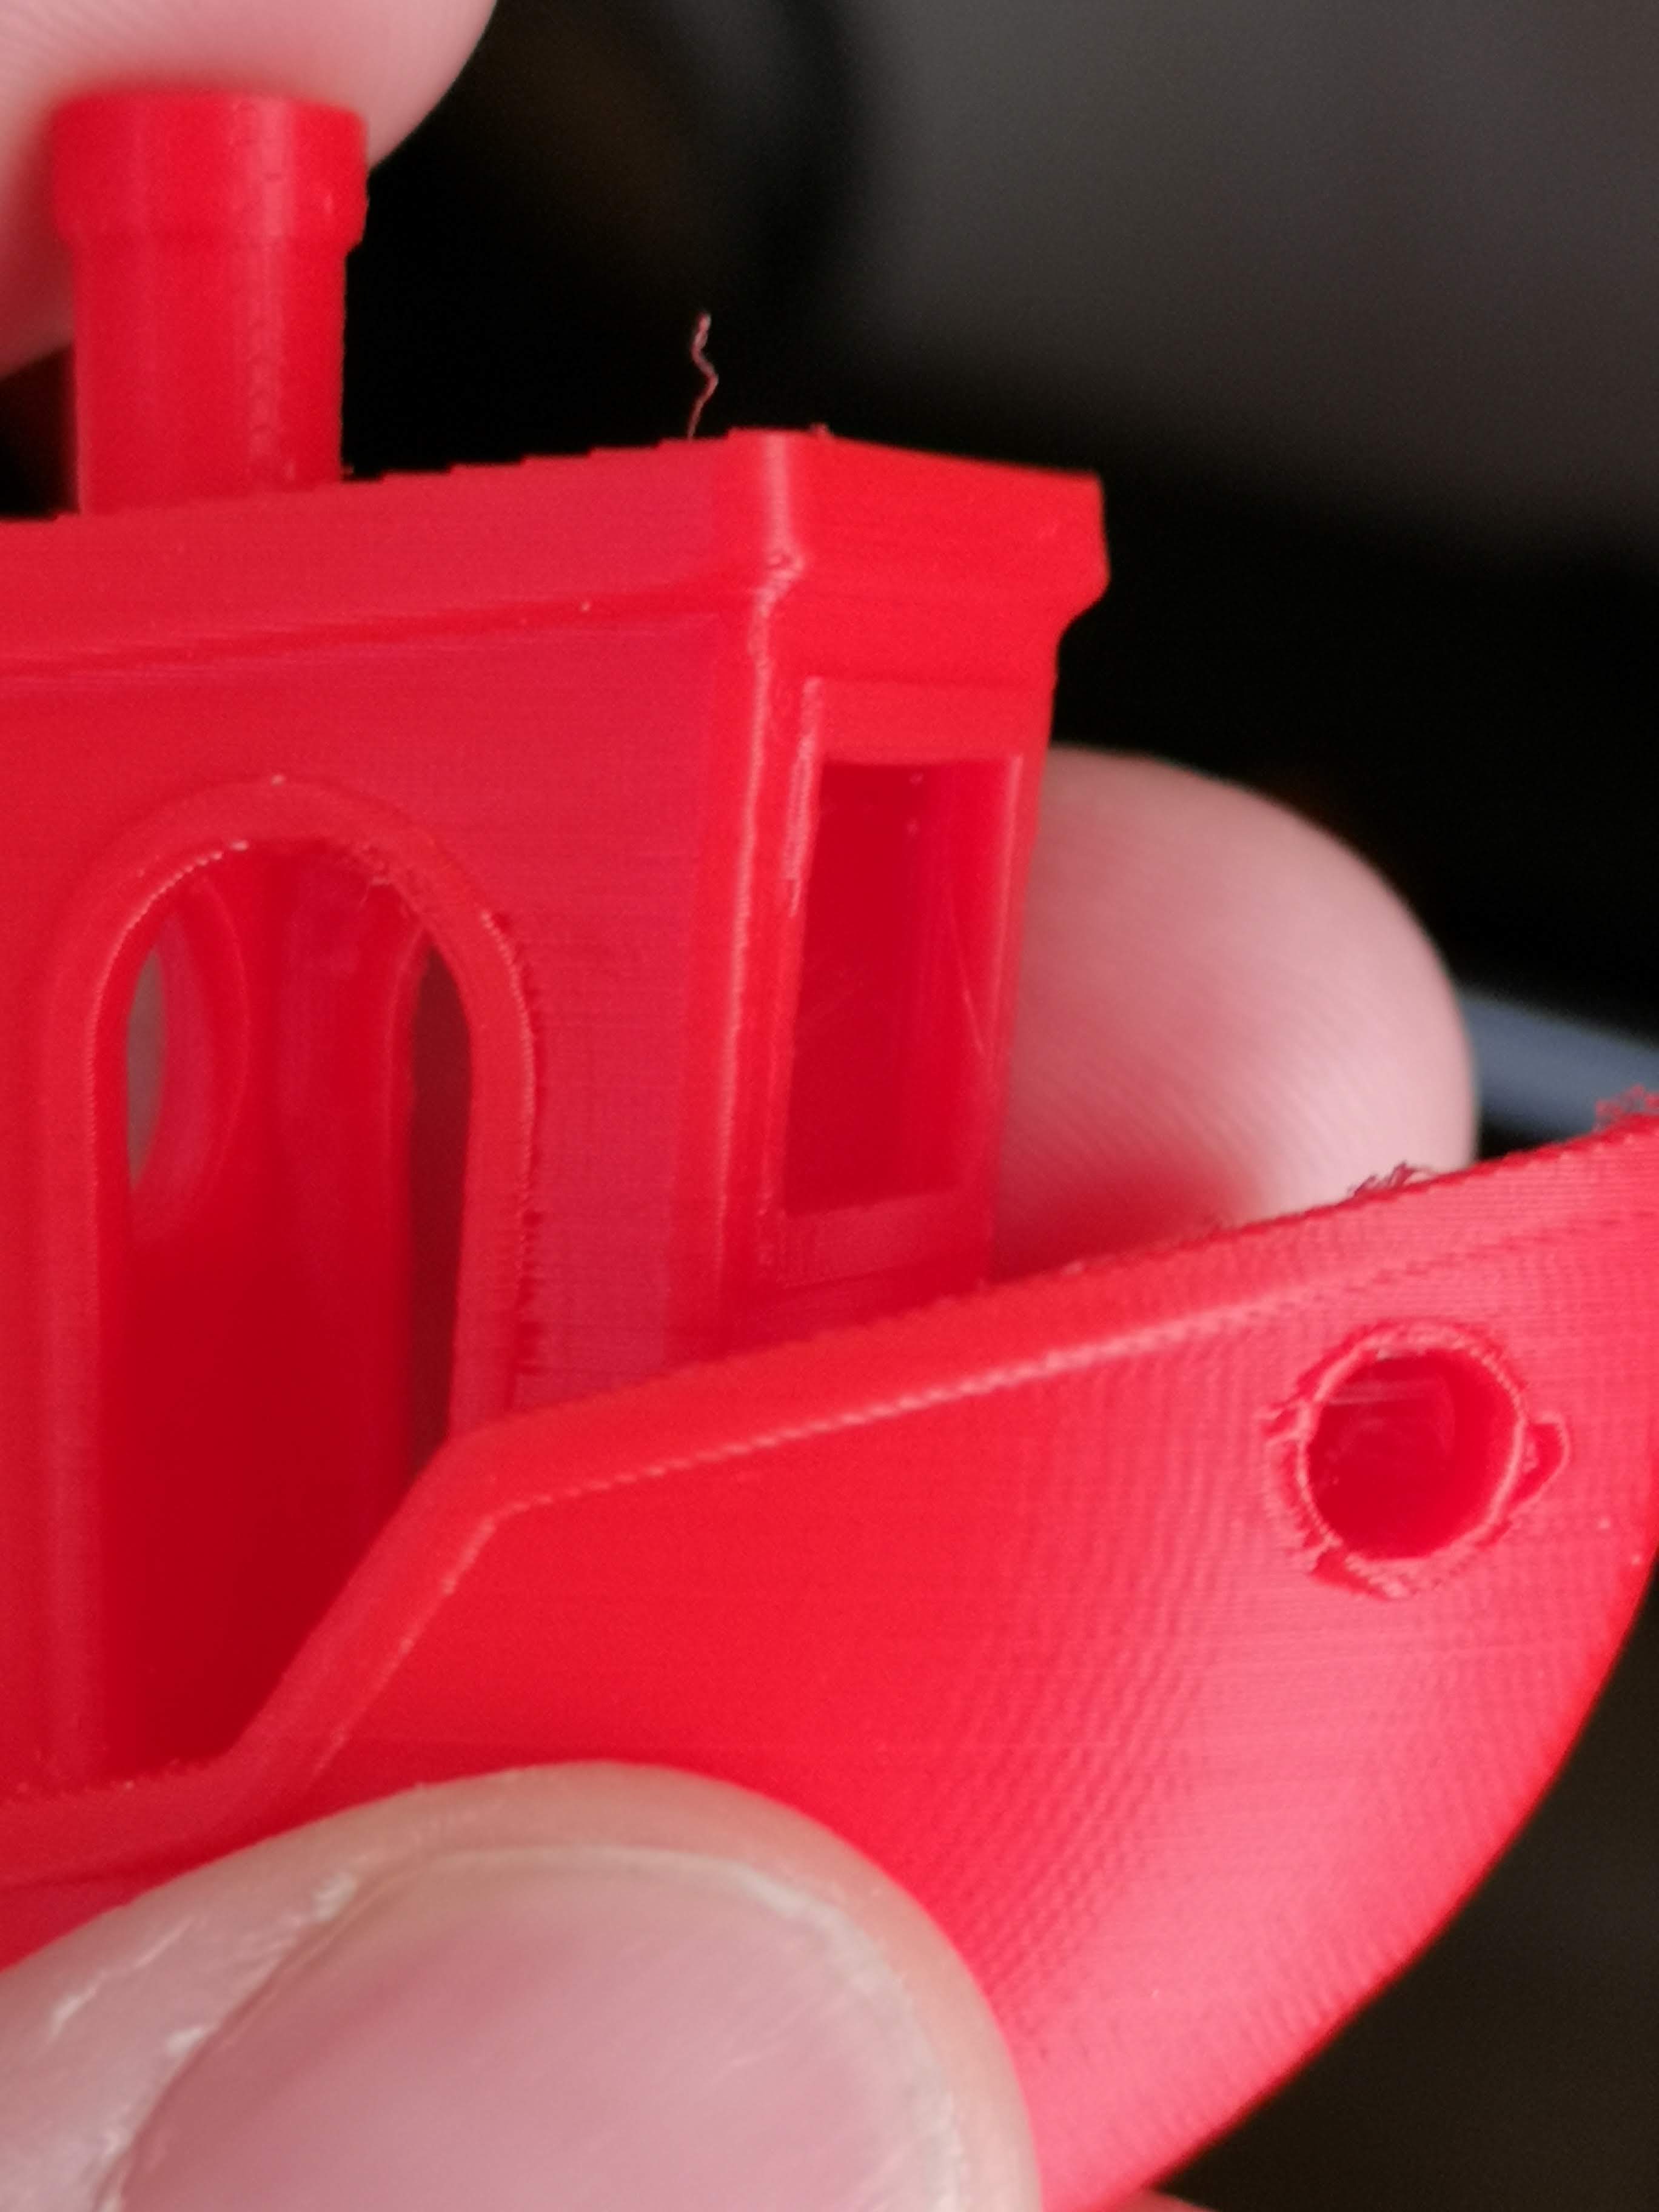
I have the first layer perfect now, but it seems that the edges of prints are curling up and the printer is then knocking the printed parts off the bed.
I believe this is a cooling / temperature issue as my benchy prints have started stringing (they never used to).
So I checked the cooling fan (seems fine) I also lowered the print temps. Still the same outcome.
I have been messing about today trying to figure out whether its an issue with something else. I tried a "Temperature Calibration", failed on the first step. I understand this is calibrating the PINDA probe.
Could it be that I have a faulty PINDA probe and that is the cause of all my issues?
What other things can I try?
Thanks again for your help with the bed cleaning and First layer stuff.
@bobstro, your guidance was 100% amazing, keep up the good work.
RE: Problems with Z or Bed adhesion or something more sinister?
You have yet to confirm you scrubbed your plate with lots of hot water and unscented detergent. Dry with a clean paper towel, and use no IPA or anything else for a test.
What you describe is loss of adhesion.
And try setting the bed temp to 70.
RE: Problems with Z or Bed adhesion or something more sinister?
@robert-rmm200
Apologies, the bed has been scrubbed and I noticed immediate adhesion improvement.
I done the life adjust and got the perfect first layer. Really happy with the adhesion.
However the problem exists when in mid print, the nozzle seems to be heating up the previous layer/s and moving them in such a way that the edges stick up slightly. This then makes the printer knock them off the bed even though Z-hop is enabled.
A benchy prints ok but has stringing, never had stringing with a benchy before on my printer.
Ill do some further prints today and post pictures so you can understand what I mean.
I don't often ask for help regarding printers as I have been using and building them since 2015 when I bought a xyz davinci, I then bought an anet a8 and then get my i3 MK3 kit about 2 year ago.
I guess the MK3 has been that reliable I have neglected my previous knowledge of fine tuning and bed adhesion. So this probably explains why I am either being stupid or completely stumped at this issue!
Thanks for your help.
RE: Problems with Z or Bed adhesion or something more sinister?
It helps to know your background. Your current problem sounds like warping due to shrinkage. If you can, export your object from PrussSlicer as a .3mf file and post it here. We have some really sharp people. Advise will probably be along the lines of how to reduce warping. Brim, skirt, enclosure - or a different filament. Maybe hotter bed - like 70. Stringing should be easy. Turn down nozzle temp 5 degrees at a time until it stops. Maybe turn fan up too.