RE: irregular horizontal lines in prints
I would have try first with a new roll of filament from a good brand (true 1,75mm diameter), then change nozzle it case partially "damaged".
An other good habit : re-print a STL you have done in the past, with a good quality filament and the same settings. If it is fine, you know it comes from settings/STL, not from your printer/hardware.
RE: irregular horizontal lines in prints
There is no bulge, prints have problems that need to be tuned out of them, this is one such problem and the solution is clear, all prints require tuning to alleviate certain blemishes caused by improper tuning of the model for FDM/FFF printing. The bulge as it has been named is a witch hunt. it is no different then elephants foot a well known and completely tuneable blemish also cause by certain circumstances that once understood can be tuned away.
The Filament Whisperer
RE: irregular horizontal lines in prints
new update, the print went really well, i still have some artifacts, but those are my fault.
I checked the bottom few centimeters for gap infill (the bane of this particular model), but near the middle the print thickens just a bit to introduce gap infill again, and thus some artifacts.
the sweet spot seems to be 2 perimeters, and then reducing your external to 0.40 and normal perimeter width to until they just fit in the model.
you will have to take into account that the model thickens near the top.
a smaller nozzle will probably help, since you have more room to play with the amount and width of perimeters.
since I'm not at home right now, so i can't take a picture, but i will update tonight with the results.
Again thank you all for your help and feedback, i was stuck and you guys really pulled through !
RE: irregular horizontal lines in prints
We seem to be in violent agreement. 😀
Glad you got it worked out, @Pseudo-end.
RE: irregular horizontal lines in prints
@bobstro
I understand what your saying. 😀
@pseudo_end
You have the option also of use Height range modifiers to adjust the extrusion widths for different areas of the model, I did notice that some areas were thinker and thinner then others but didn't take the time to adjust them, as I had other things going on in my life. I'm very happy to see that you recognize the problem. you can really do a thorough adjustment using the height range modifiers and adding the extrusion width parameters to the areas you need to get a very specific result. both external perimeters and perimeters are available to you through "add settings" extrusion width. if I can be of any more assistance please let me know.
Regards
Swiss_Cheese
The Filament Whisperer
RE: irregular horizontal lines in prints
@pseudo_end
Something I meant to mention, your 0.4 nozzle can print perimeters reliably from 0.35 up to 0.8. so your 0.4 nozzle is fine for this job. it certainly doesn't hurt to use different nozzle sizes, but is unnecessary in this models case.
The Filament Whisperer
RE: irregular horizontal lines in prints
@pseudo_end
Printed the upper part with my settings, but with 3 perimeters instead of 2, looks good to me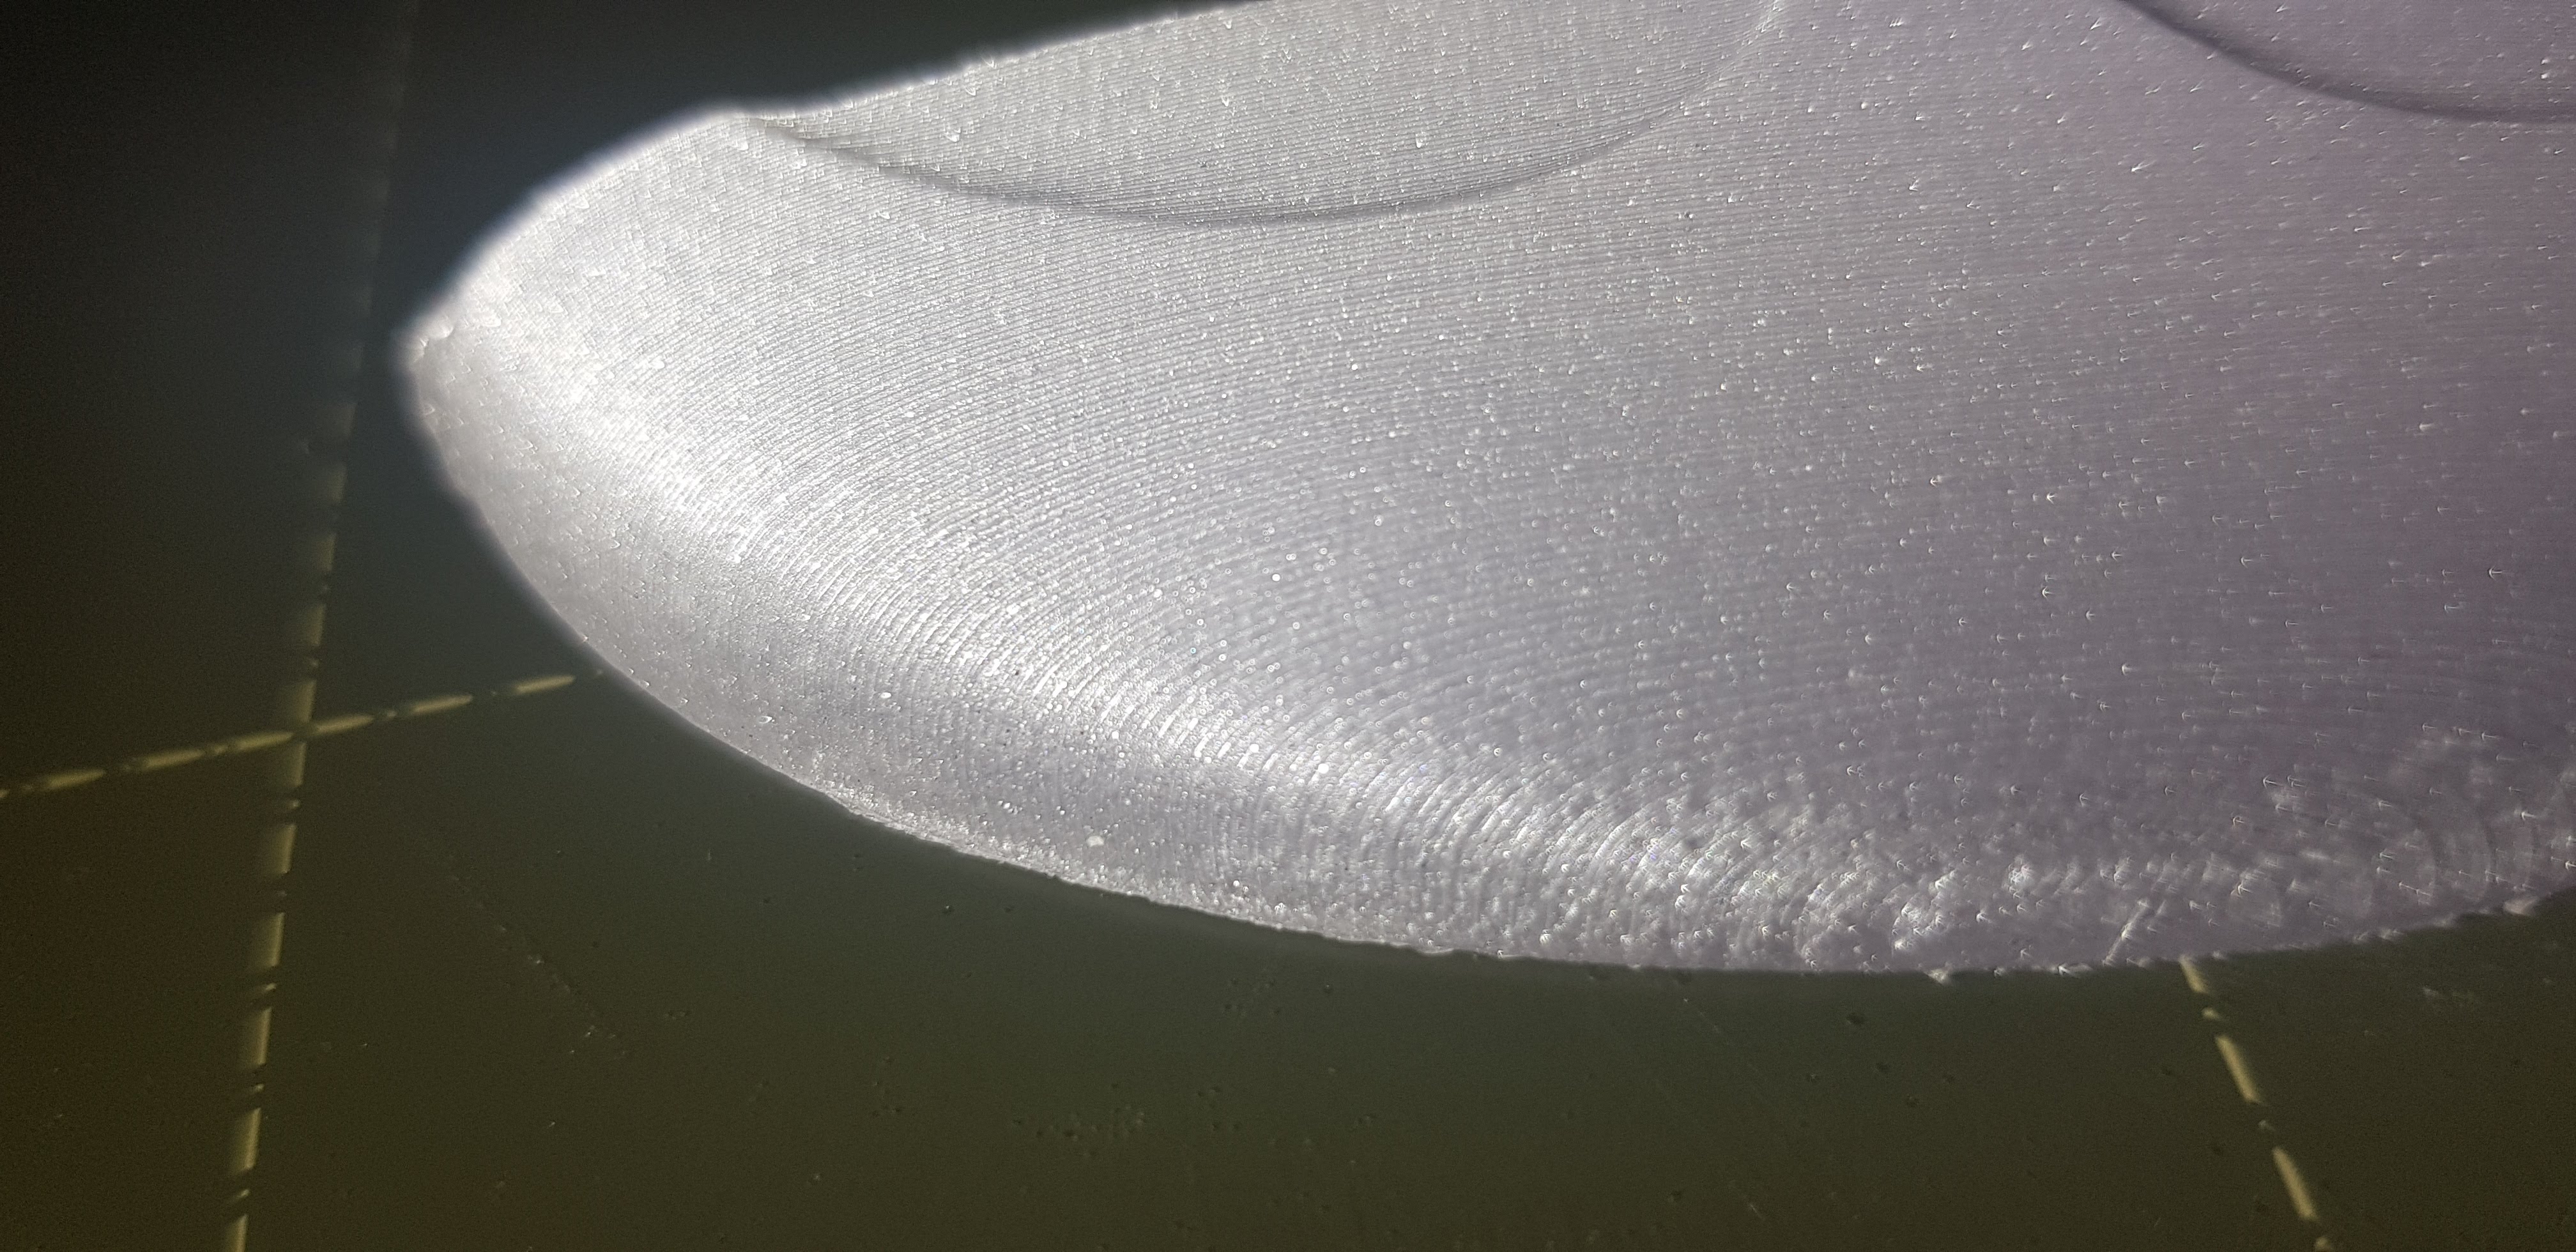
The overhangs look like shit, I will try a few things to get it better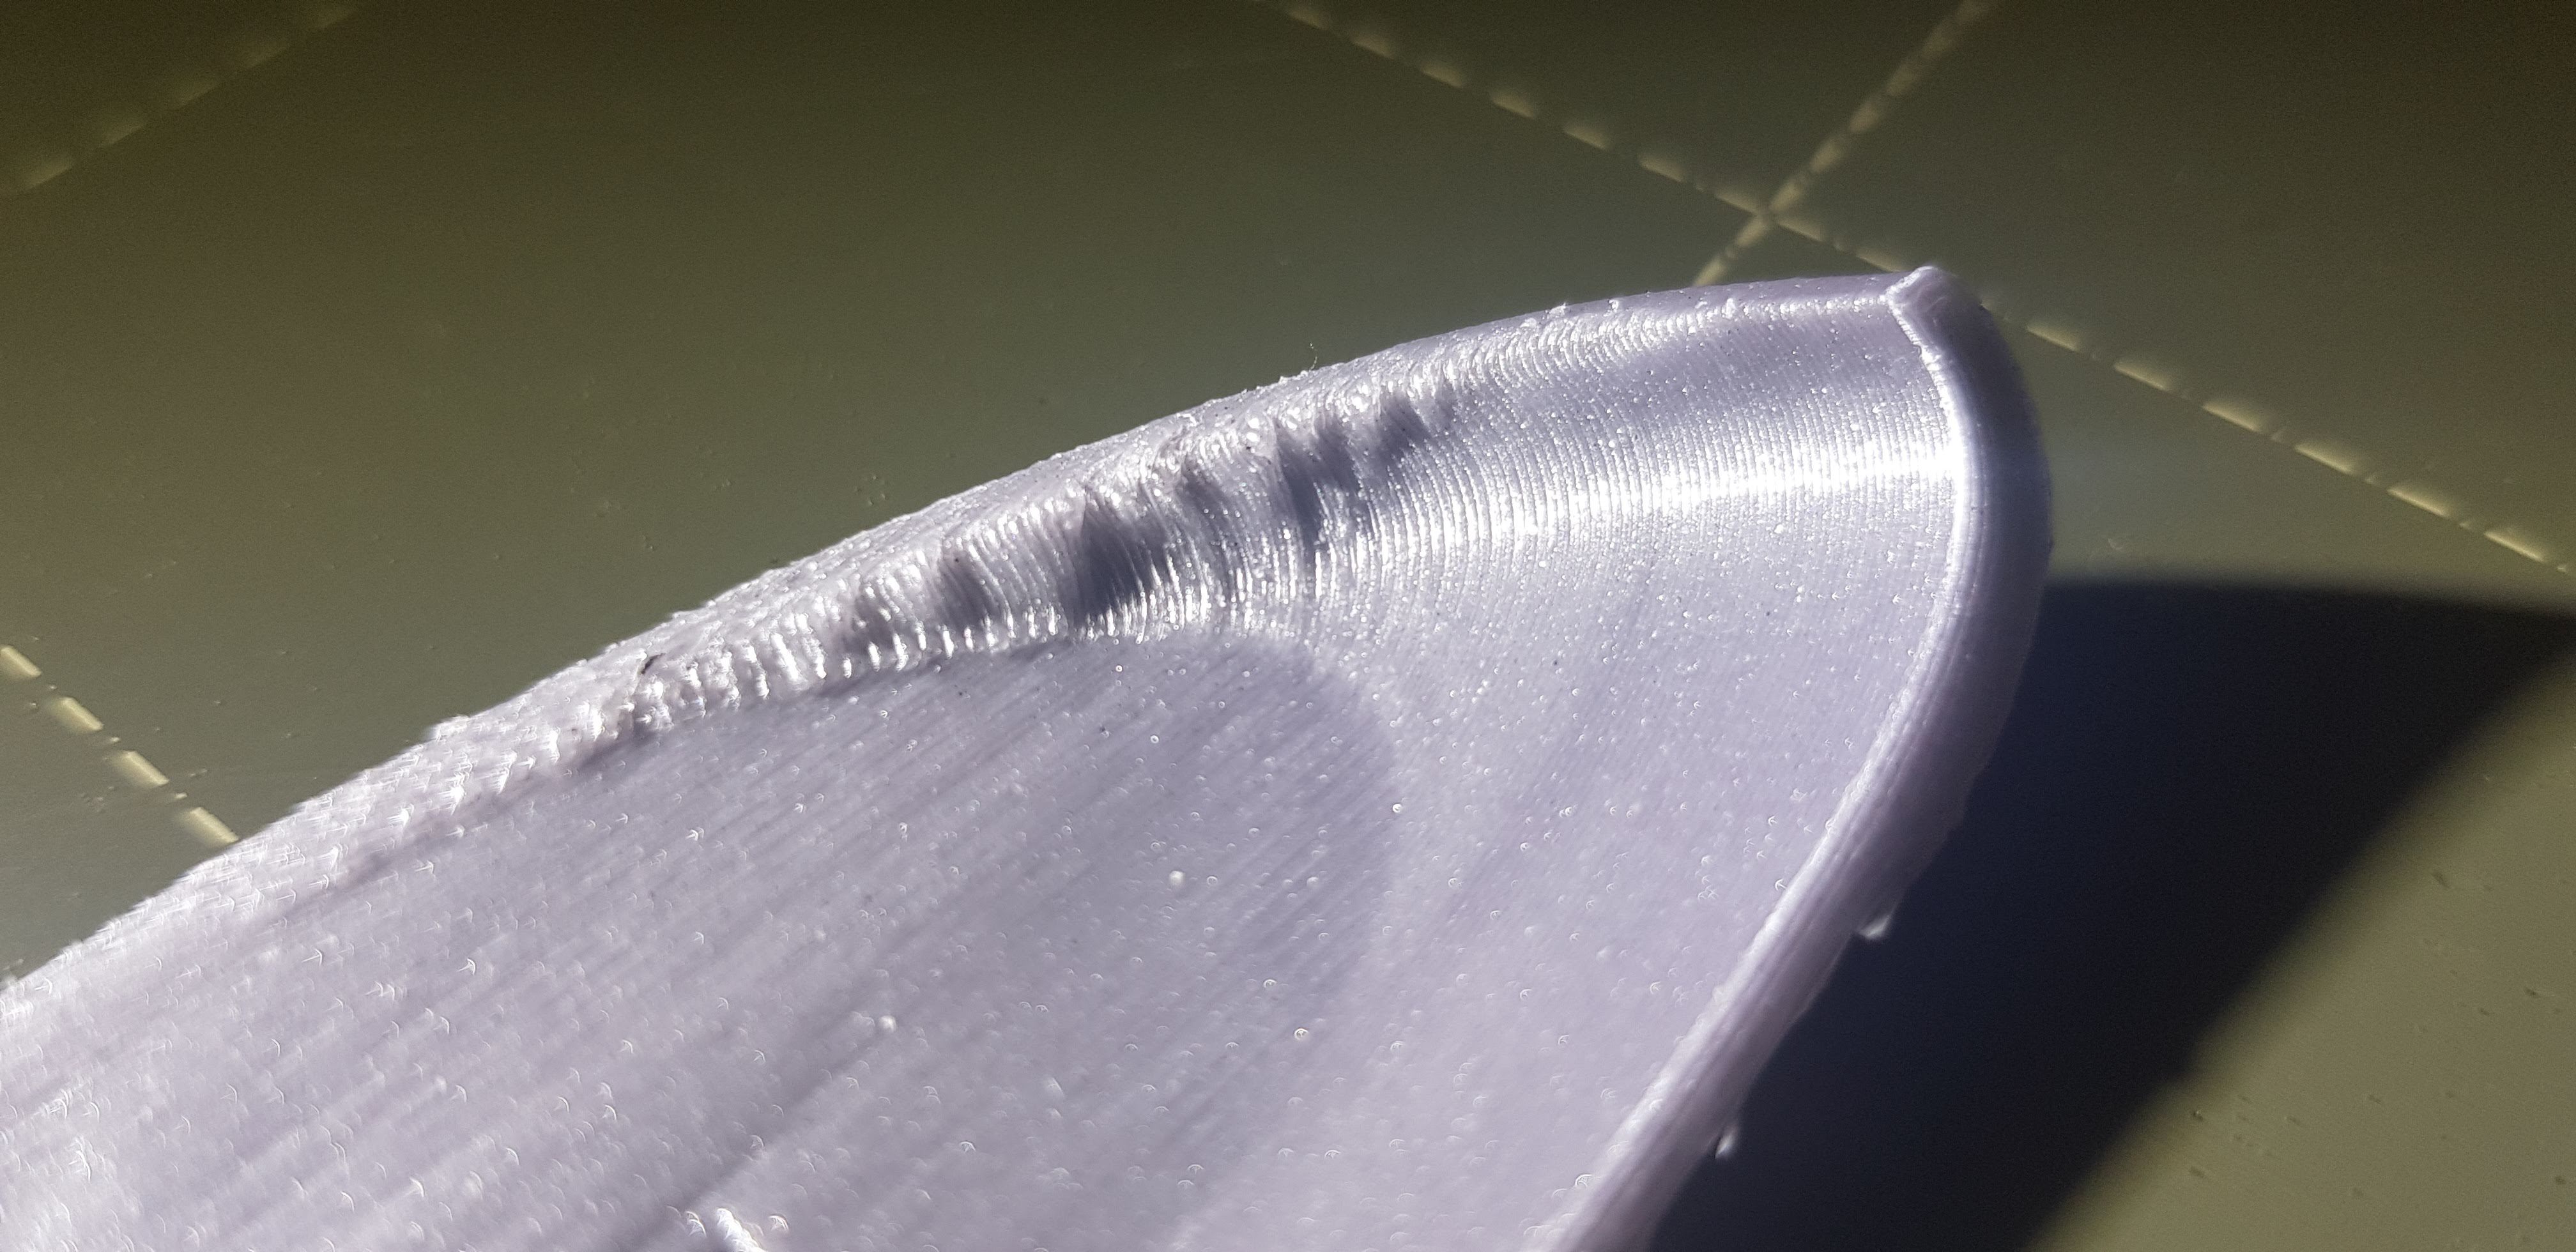
Will tweak some more and give it another try
Prusa i3 MK3S+ FW 3.11.0 (kit dec -20), PrusaSlicer 2.6.1+win64, Fusion 360, Windows 10
RE: irregular horizontal lines in prints
So, I gave it another try, all went well except for the top part, I must have missed something from my attempt with just the upper part
For me the sweet spot seems to be 0,39 and 2 perimeters, no gap fill and the lines have enough space from layer 80 to 680.
No Infill, No Thin walls, No Ensure vertical thickness.
Added height adjusters, 3 perimeters from 129,05 and upwards, that's the height where 3p will fit without touching each other in the middle.
Made thinner layers in steps for smooth transition from 136.85 and upwards.
Hood looks nice, except from 135.4 and upwards, where the layers separated sideways 😣 ( @swiss_cheese, WHY 😥 )
There is a slight color change from 2p to 3p
Overhang looks almost perfect
Prusa i3 MK3S+ FW 3.11.0 (kit dec -20), PrusaSlicer 2.6.1+win64, Fusion 360, Windows 10
RE: irregular horizontal lines in prints
@ringarn67
you needed to slow the top part of the model down just a bit and use the layer adjustment to finesse the top layers just a bit then it would have printed well at the top.
I prepared a .3mf for this post, but when I saw how good of job you were doing I let you roll, and I think you've doing great.
keep it up,
Swiss_Cheese
The Filament Whisperer
RE: irregular horizontal lines in prints
@ringarn67
Let the places where you see the errors in the previous print guide you to where you should start making the adjustments, the place where the color changes should be the start of where it was printing to fast for that feature or area of the model, the area where the layers weren't making good contact not only denote that it was printing to fast there, but also that you need to use lower layers in those areas, since you weren't using fill in them you need to give them more contact area on the overhangs. the layer adjustment tool will give this control visually, I tend to adjust it and slice the scroll through the layers and maybe adjust it a bit more and re-slice look again until its what I think it should be.
Hope this makes sense
Swiss_Cheese
The Filament Whisperer
RE: irregular horizontal lines in prints
Update, sorry i have been bogged down with issues at work, and did not have the time to post yet.
these are from my latest attempt.
but i know how to fix those (i hope), in those layers it starts with gap infill again.
so i have to play with the widths and height modifiers in order to keep all the artifacts out.
thank you for the time and effort you guys are willing to put in this 😘
RE: irregular horizontal lines in prints
@pseudo_end
I think it's great, everyone is learning and will be able to pass this information around, and it shows to importance of understanding how to tune a model for proper printing, instead of looking for a special/magic button to fix everything or a one technique to fix them all that so many look for.
your model is really starting to come together I'm really enjoying this thread.
@ringarn67
I viewed your .3mf last night after writing the two posts last night, you prepared yours almost exactly as I had prepared mine, minus using the layer height tool a little more in the areas where you did the layer adjustments with the height range modifiers, very nicely done BTW, I used the layer adjustment tool to smooth that area and blend the area where it starts to ease the color change but also to give the layers you adjusted even more purchase on the layer beneath. you may still need to adjust the print speed in that area and depending on the filament and if your in an enclosure or not you may need to adjust heat, but I would try speed first.
Enjoy guys, can't wait to see the next images.
Swiss_Cheese
The Filament Whisperer
RE: irregular horizontal lines in prints
@pseudo_end
I do it as much for myself, it is fun to learn, and we have a great "teacher" to support us 😀
Those lines in the second picture in your first post, (I also have them in one print), the lines appears at the exact heights the hood connects to support structure!!
@swiss_cheese
Thanks, I am learning so much from you. The best thing is that you push us to think for ourselves, and thereby learn, not just write down the solution and end of story 😀
I've been trying to understand all the things you wrote...
"Layer adjustment tool", that is "Variable Layer Height" if I understood you correct? Way easier then the way I did it.
But, how do I combine all those different layer heights with height range modifiers to add 3 perimeters from 129mm and upwards?
As soon as I add a height modifier I have to type in layer height, then layer heights from variable layer height are gone, and there is different layer heights all the way??? And what is the easiest way to adjust speed from let's say 130mm and upwards?
I have an idea, but it seems not that easy. Use Variable layer height to make it look good, type down heights and layer thicknesses, reset variable layer heights and then add them manually along with perimeter and speed settings in sidebar?
And how come those connections affect the print so much?
/Ringarn
Prusa i3 MK3S+ FW 3.11.0 (kit dec -20), PrusaSlicer 2.6.1+win64, Fusion 360, Windows 10
RE: irregular horizontal lines in prints
@ringarn67
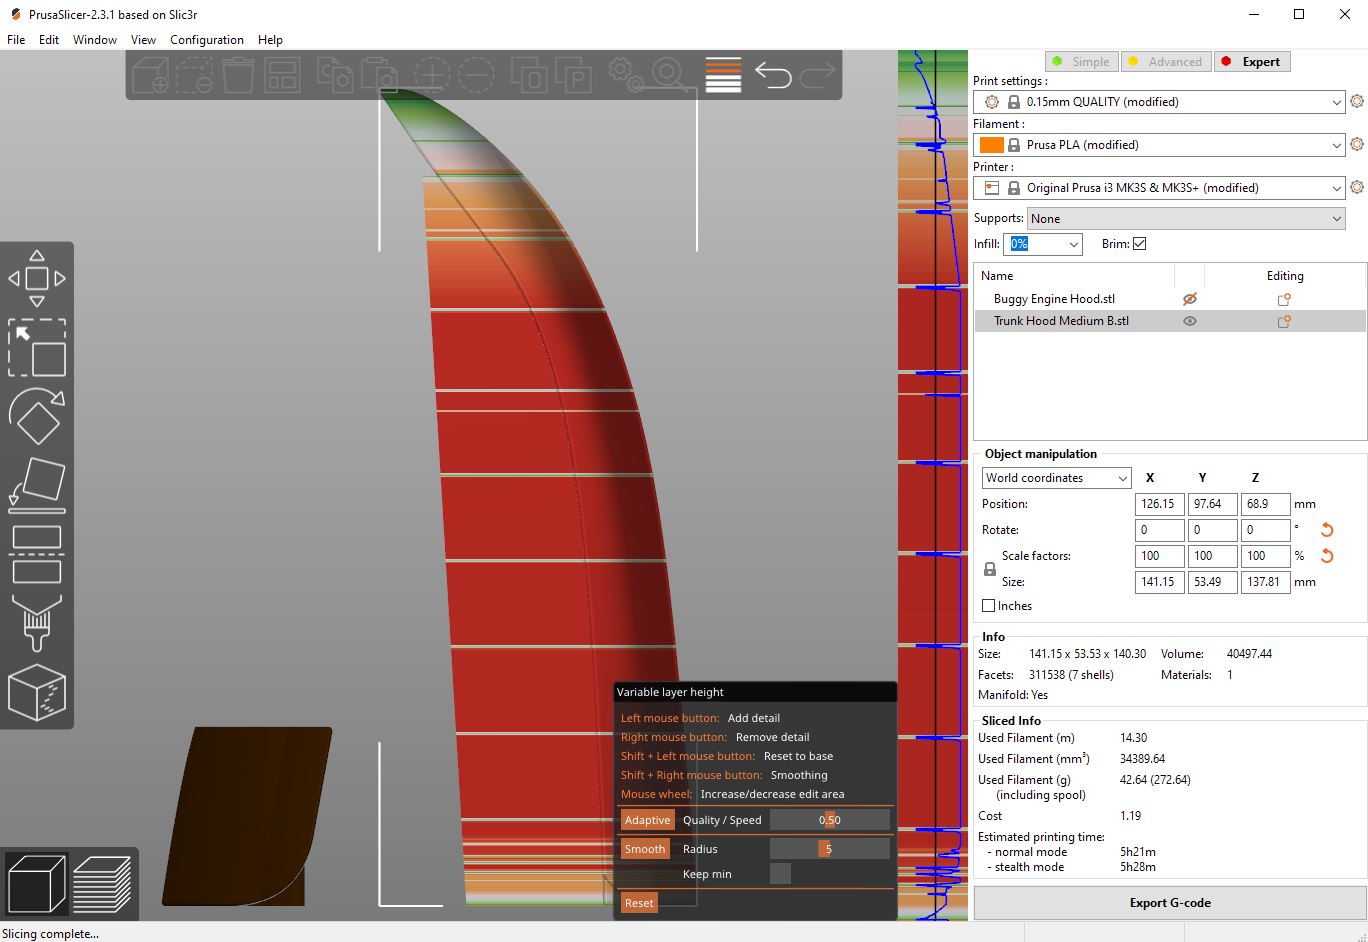
"Variable Layer Height" is the tool I mean, just a note: the way you did your height range modifers was superb, it's exactly how I handled it. however I also used the "Variable Layer Height" in conjunction with the height range modifier the way you stacked it. I used it in manual mode, auto isn't really ready for prime time, try not to use auto-smoothing and instead be artistic and paint it in using the slider and shortcut keys for the "Variable Layer Height"pay attention to the lines it shows on the model as you paint, they represent the layers, and you can use this tool to smooth out and refine the height range modifiers you placed at the upper end of the model your tuning, you can tune it to perfection, this model has been a great exercise for tuning these type of features.
the layer heights from the "Variable Layer Height" tool are only visible in the pre-sliced/3d editor view window, and only when the model is selected (meaning its green) and the button for the tool is pushed. it's best to start off adding your height range modifiers first, to projects that you plan to use them on and then go back to the pre-sliced/3d editor view and select the tool and start painting in the layer slider window that appears on the side. I wish I had time to make videos for this.
the speed change settings will be added in the height range modifiers area for the range that you want to slow down. the reasons the layer settings you set are effecting the areas so much are (1 ) you have extreme, but not insurmountable over hangs there, that's the separation issue,
( because in that area your perimeters are printing first and they are missing the ones underneath) they can be adjusted in this case if you wish to keep that areas infill free, you have done a good job of this with the height range modifiers, however more finesse is needed, so we bring the "Variable Layer Height" tool into play to do this "gently" lowering the layer heights with it in that area. (2) when you change the layer heights using height range modifiers your changing the look of the filament from areas that its not applied, because it changes the way the printer responds in those areas the printing speed is altered slightly, the feed rate changes slightly and this effects the way the plastic looks in those areas, (lower layers have a different refraction/reflection of the light the higher layers) if this isn't visually appealing to a user they have several option for adjusting it so that it blends better with the adjacent layers. one option is to use the "Variable Layer Height" to manually smooth the gradient between them. another is to change the the heat and/or speed of the print at these intersection ( heat and speed effect the appearance of the plastics varying how shiny or flat they might look. this can be handled very well with time and practice.
just to recap, because I rambled on,
In this case I'm suggesting that you slow the print down in the area that didn't adhere to allow the layers a better chance to adhere to one another. and that you use the "Variable Layer Height" to adjust them so they have more purchase on the layer beneath.
I didn't have a lot of time to prepare this so I hope it's not to confusing, Ill have more time this weekend.
Enjoy
Swiss_Cheese
The Filament Whisperer
RE: irregular horizontal lines in prints
@swiss_cheese
I am getting closer to understand. Using Variable Layer Height (vlh) overrides layer height in Height Modifier.
It still says "0.15" in height range, but in reality the layer height is whatever comes out from vlh.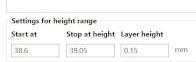
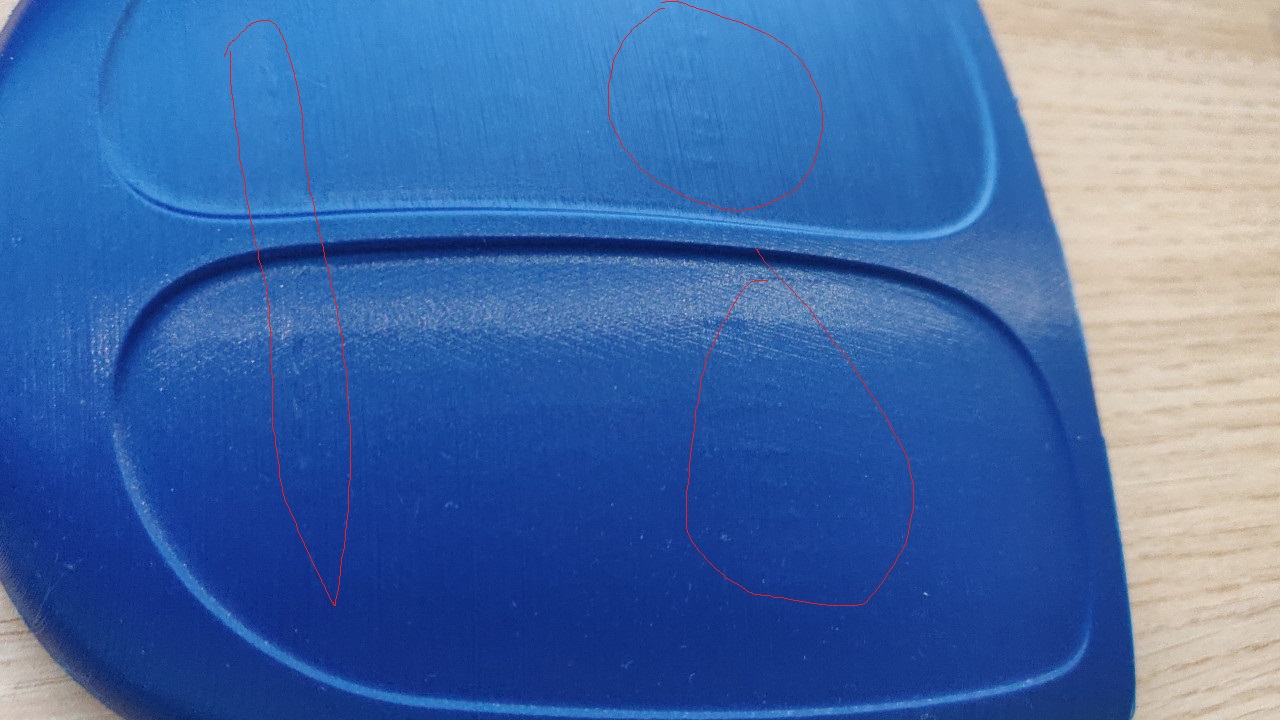
This is my last print, V5, (cut out the bottom part to save time in print). I got lost while changing height range, variable layer height and speeds while I prepared this, and at the same time take your advice in practice, and try to figure out the outcome of each setting.
The bad part, I forgot to change the External Perimeter speed in height modifier 😌 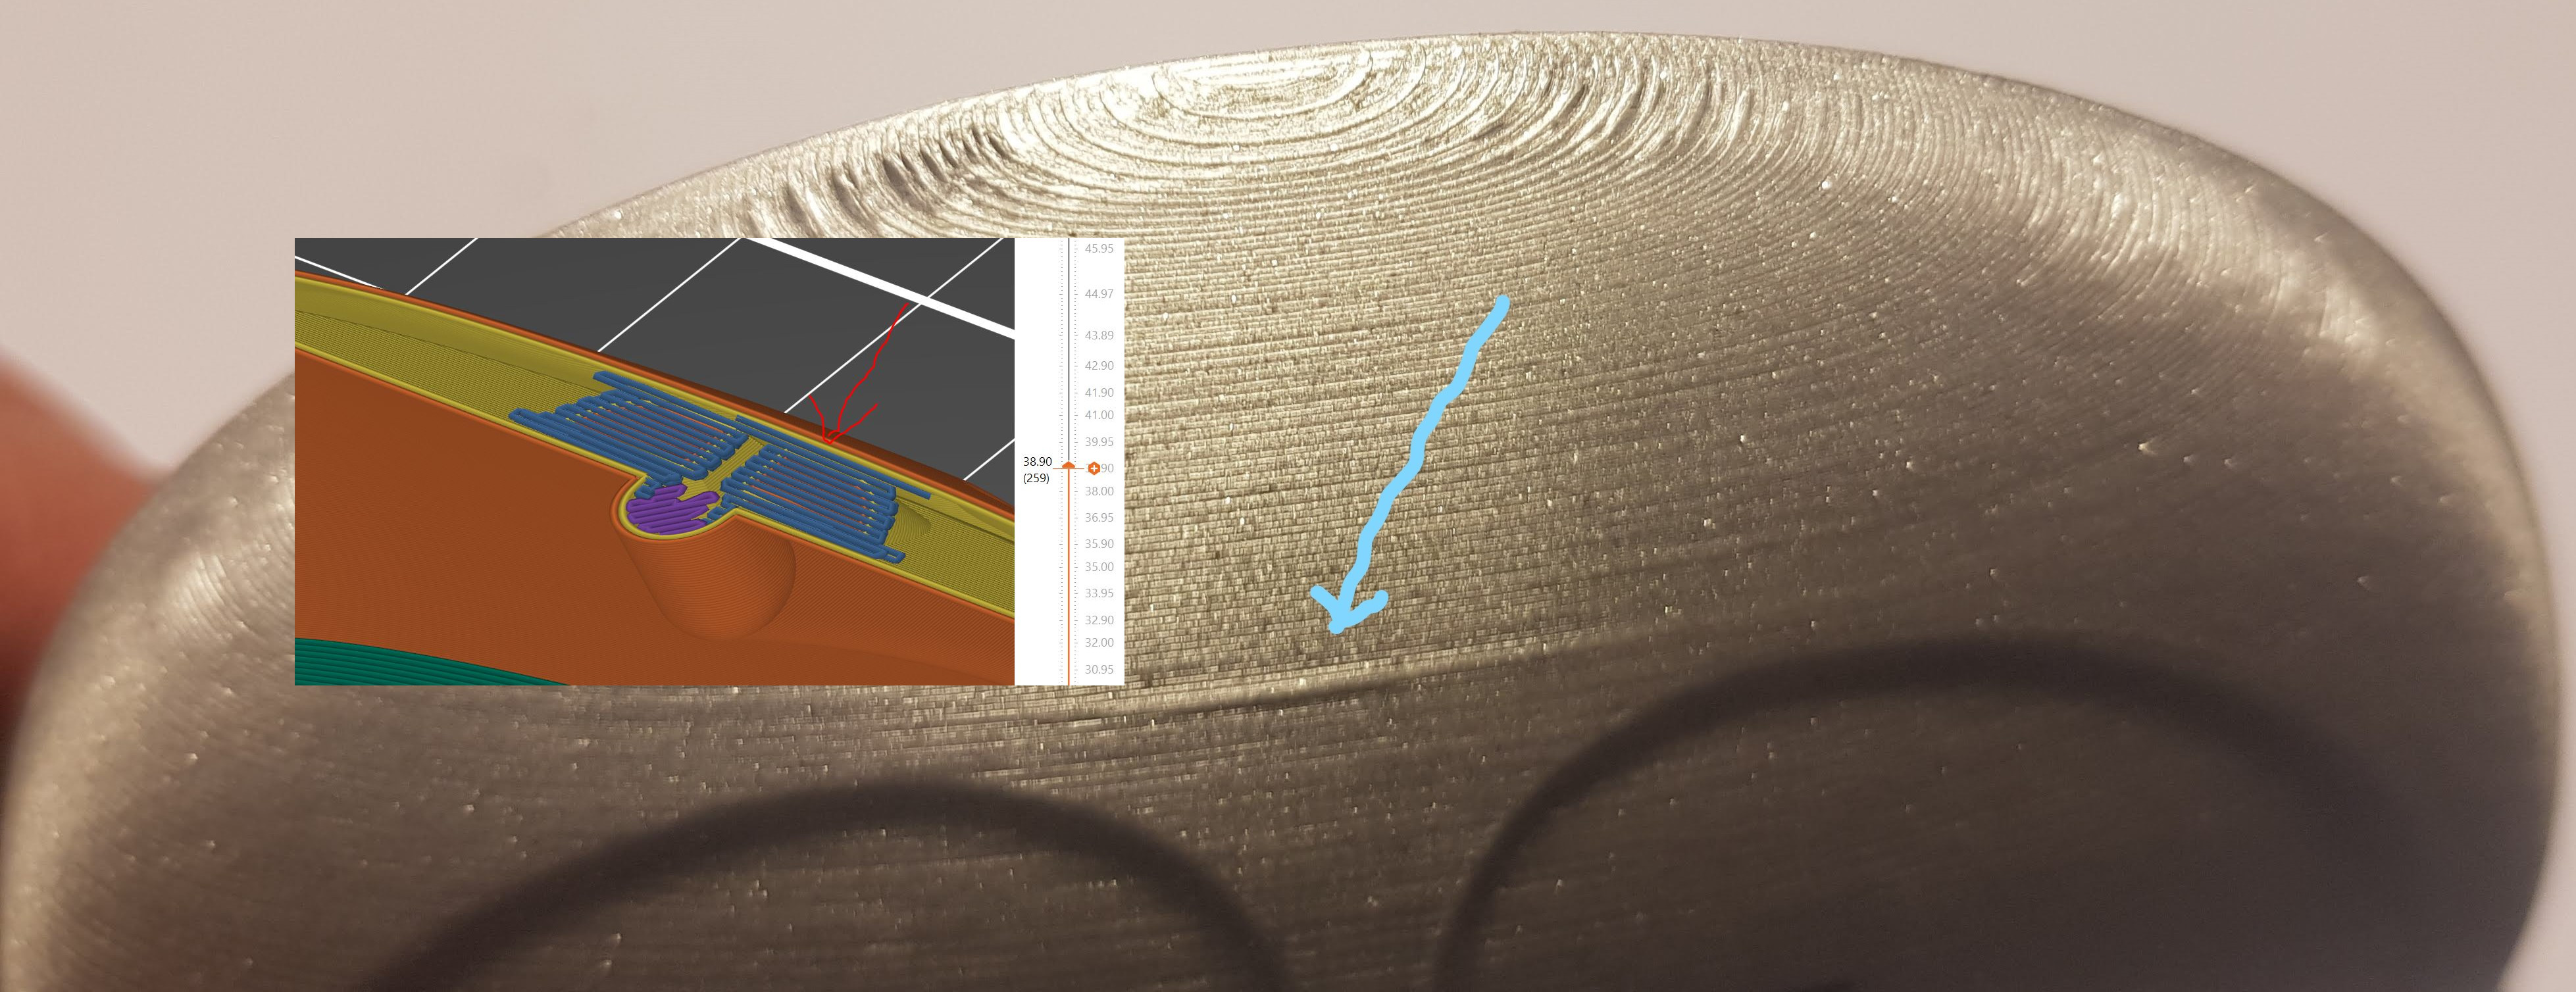
Outcome is of course layer separation. The good part, I know why, and I know how to fix it, (I hope)
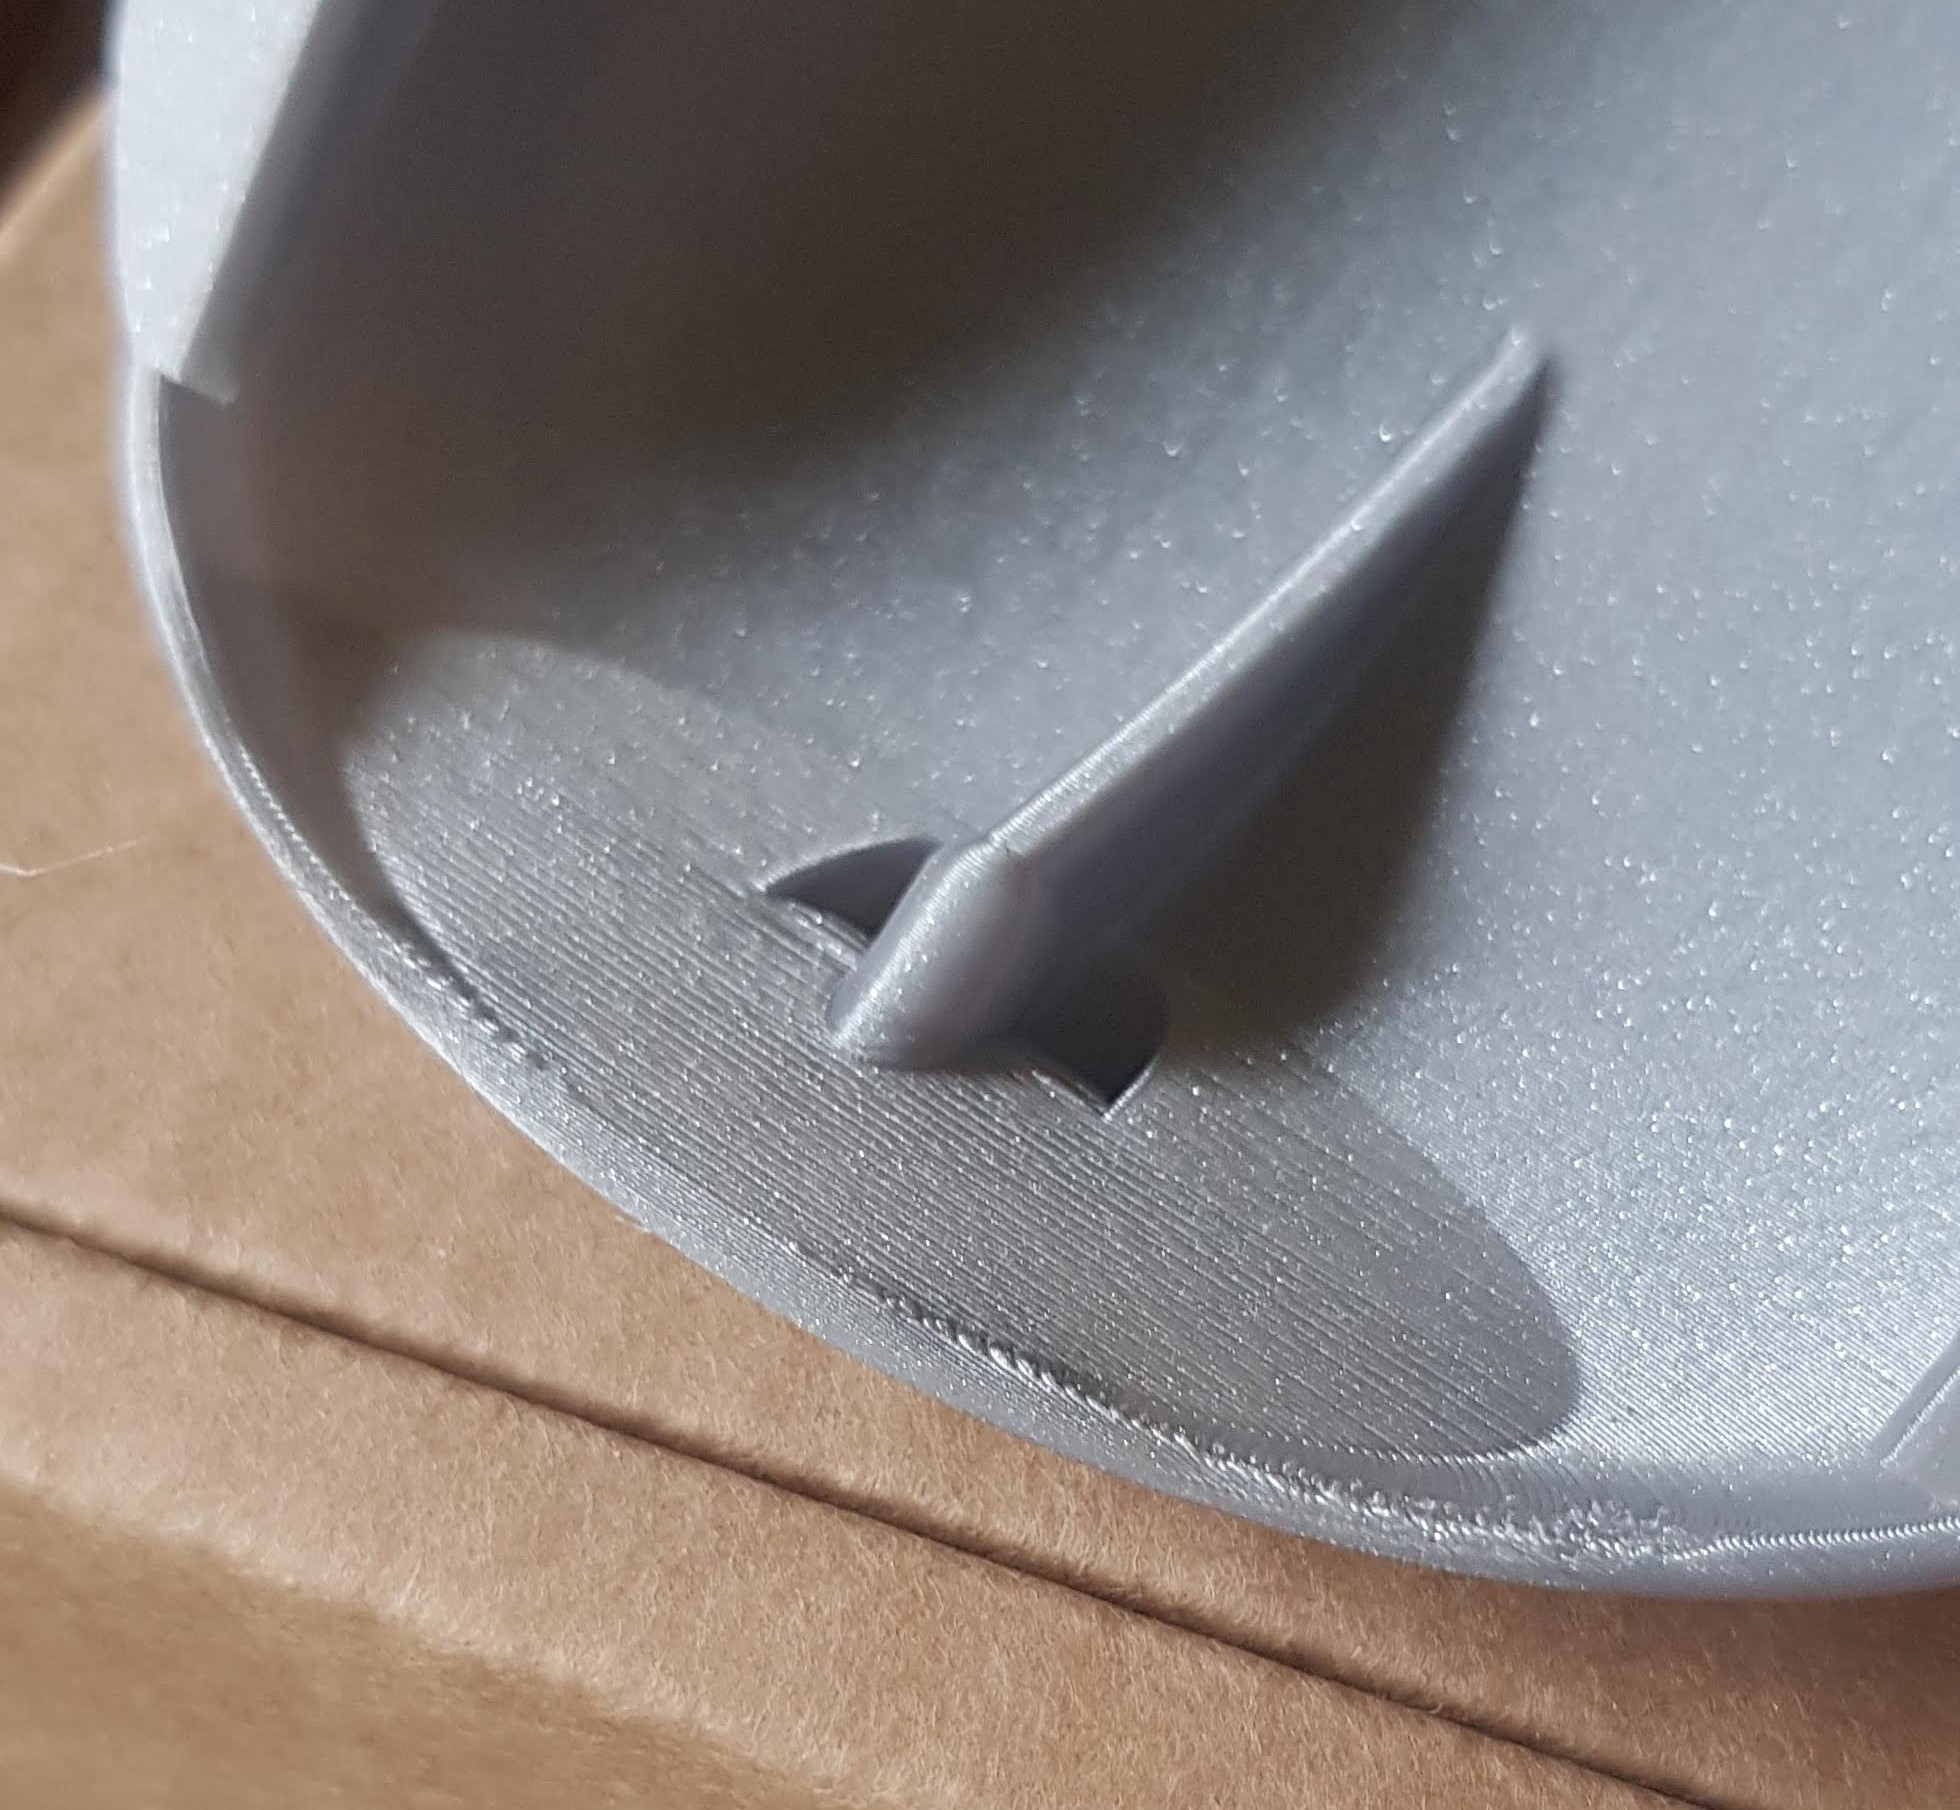
However, another problem has arisen, there's Bridge, and/or Solid, Infill, at 39mm that pushes out perimeters, the arrows points at them.
I will try to get rid of them tomorrow evening. (It is ok to hint 😉)
the speed change settings will be added in the height range modifiers area for the range that you want to slow down. the reasons the layer settings you set are effecting the areas so much are (1 ) you have extreme, but not insurmountable over hangs there, that's the separation issue,
( because in that area your perimeters are printing first and they are missing the ones underneath) they can be adjusted in this case if you wish to keep that areas infill free, you have done a good job of this with the height range modifiers, however more finesse is needed, so we bring the "Variable Layer Height" tool into play to do this "gently" lowering the layer heights with it in that area.
The only reason I choose no infill from the beginning was that I was afraid it would do more harm then good. Adding infill in the middle of a print seems hard without affecting the outside, at least for me.
Variable height tool seems really powerful and easy to use, and overuse, instead of a bunch of height modifiers for changing layer heights.
just to recap, because I rambled on,
I'm listening and learning as long as you keep going, everything you say makes sense 👍
One last question, for now, what is your opinion about the best and easiest program to edit STL-files? I know Fusion360 is not the best tool.
Thanks for all your help
Prusa i3 MK3S+ FW 3.11.0 (kit dec -20), PrusaSlicer 2.6.1+win64, Fusion 360, Windows 10
RE: irregular horizontal lines in prints
@swiss_cheese @pseudo_end
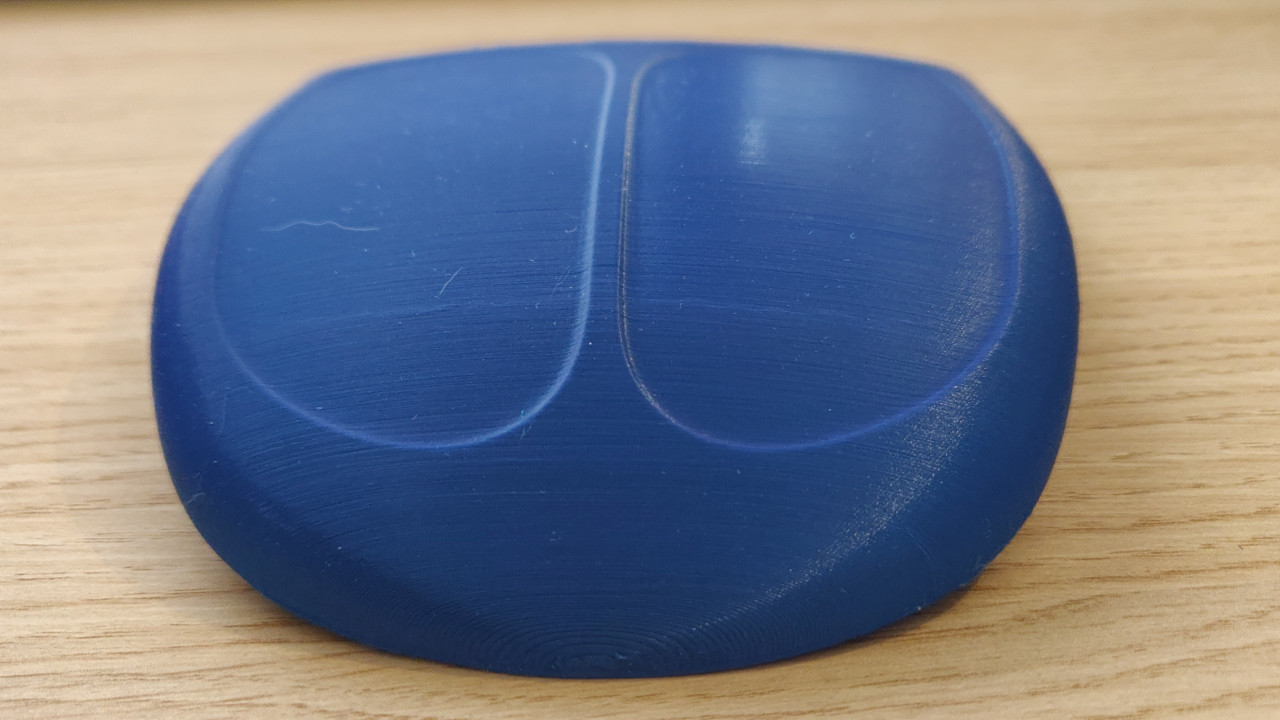
What about THIS 😀 
(Please, click on it to open a bigger picture, right click on the picture and select "open picture in new tab", it is 8Mp)
So, what have I done:
Filament Settings: "Slow Down If Print Speed Is Below" from 15 -> 30 and "Min Print Speed" 15 -> 3 to lower speed at end of print
Painting and smoothing with Variable Layer Height to get a nice transition.
Height Modifiers for perimeters, lots of them, I go from 2 perimeters to 3 (36mm) for stability, back to 2 (38) due to narrow space, up to 3 (38,9), and then to 4 and later 5 so perimeters have some surface to sit on, and back t0 4 on last 4 layers due to Gap Fill appearance.
Height Modifiers, lowering the speed even more, maybe I could have get same effect if I had been more "aggressive" in filament settings
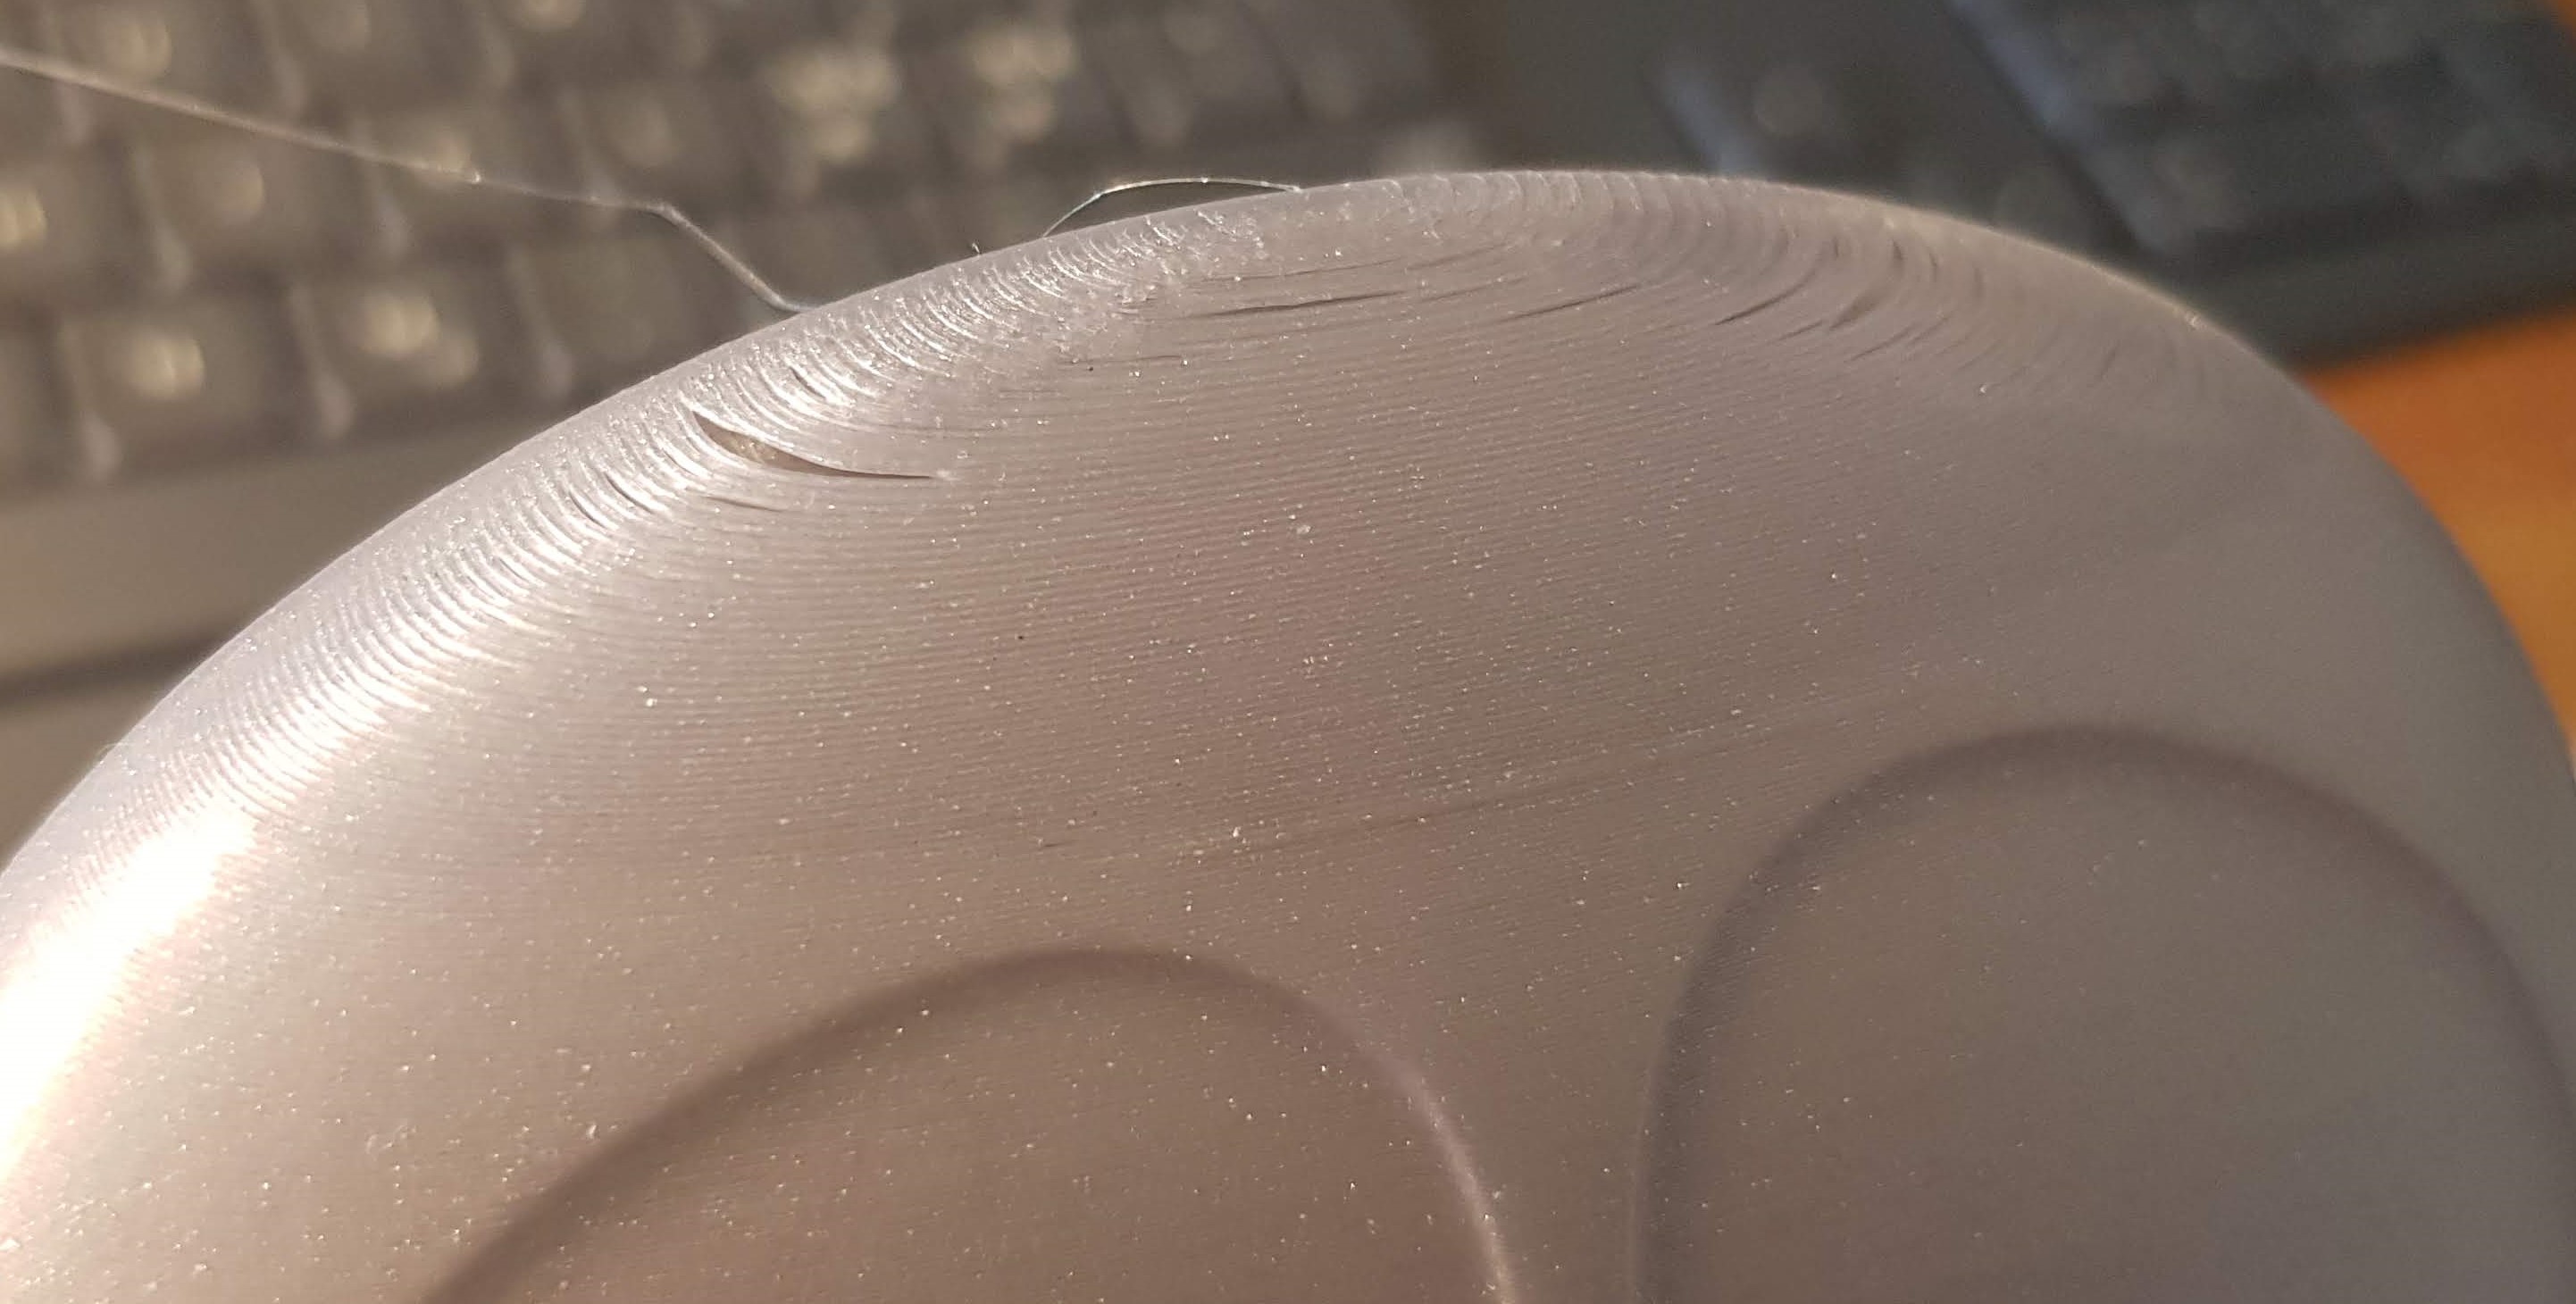
To, almost, get rid of this bulge, which I figure out was due to "Bridge Infill", (this picture is from V5)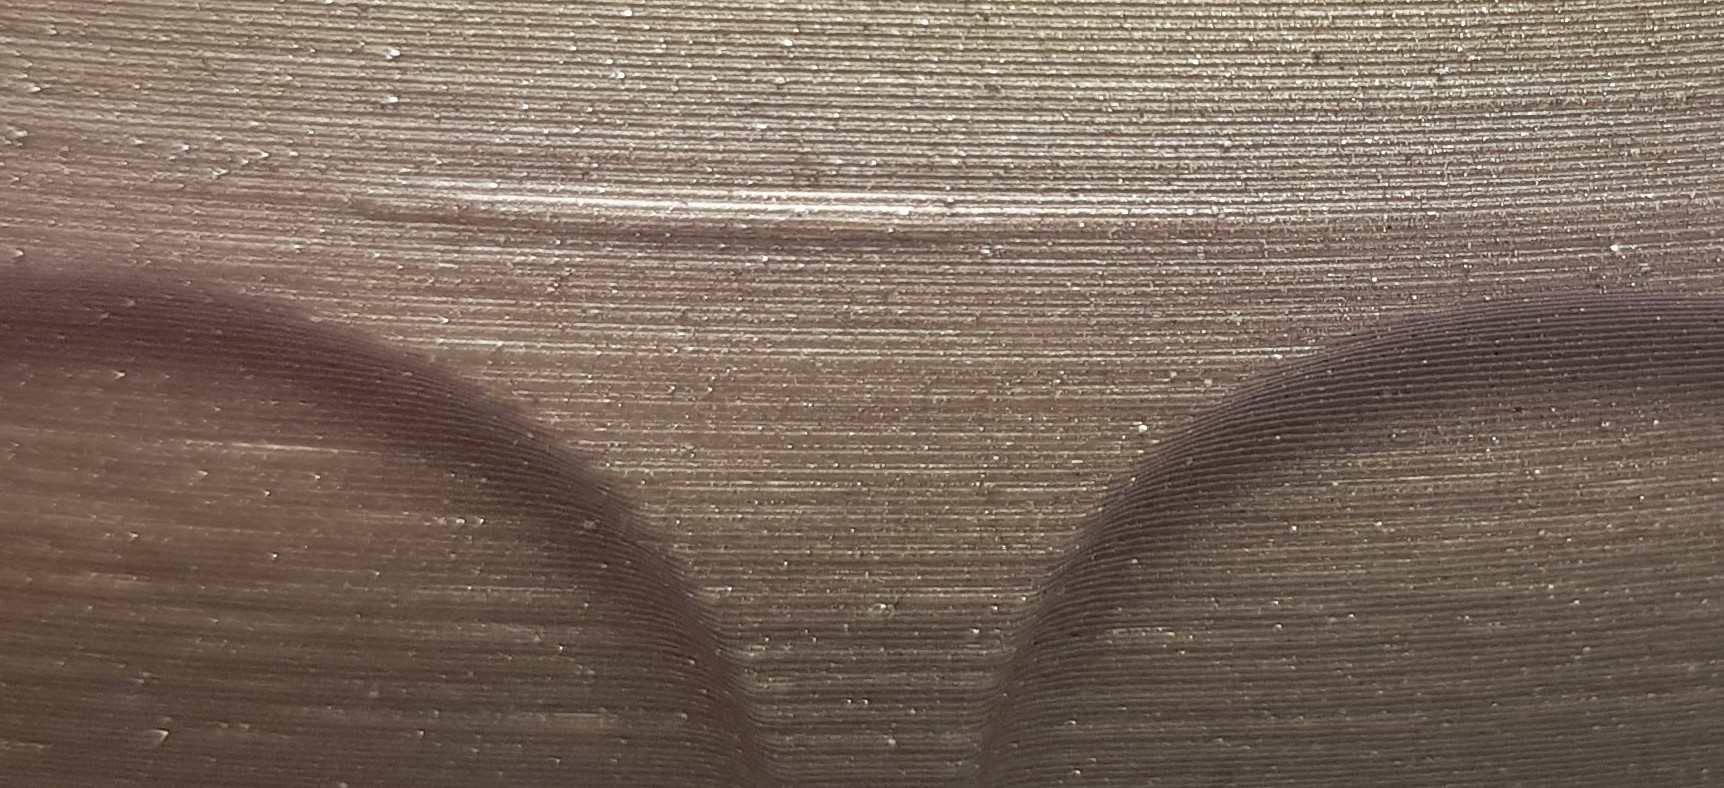
I use the height modifier and change Bridge Flow Ratio to 0,74 to get Bridge Infill to be as thin as possible without adding another line.
There are some horisontal lines at 10,25 and 22,25 due to, as said in a previous post, the "connections" to support bodies.
I don't understand how they can affect a whole layer, and I cannot figure out how to get rid of those lines in slicer, my idea was to edit out the connections and move support a hair closer to the hood in a STL-editor? (question)
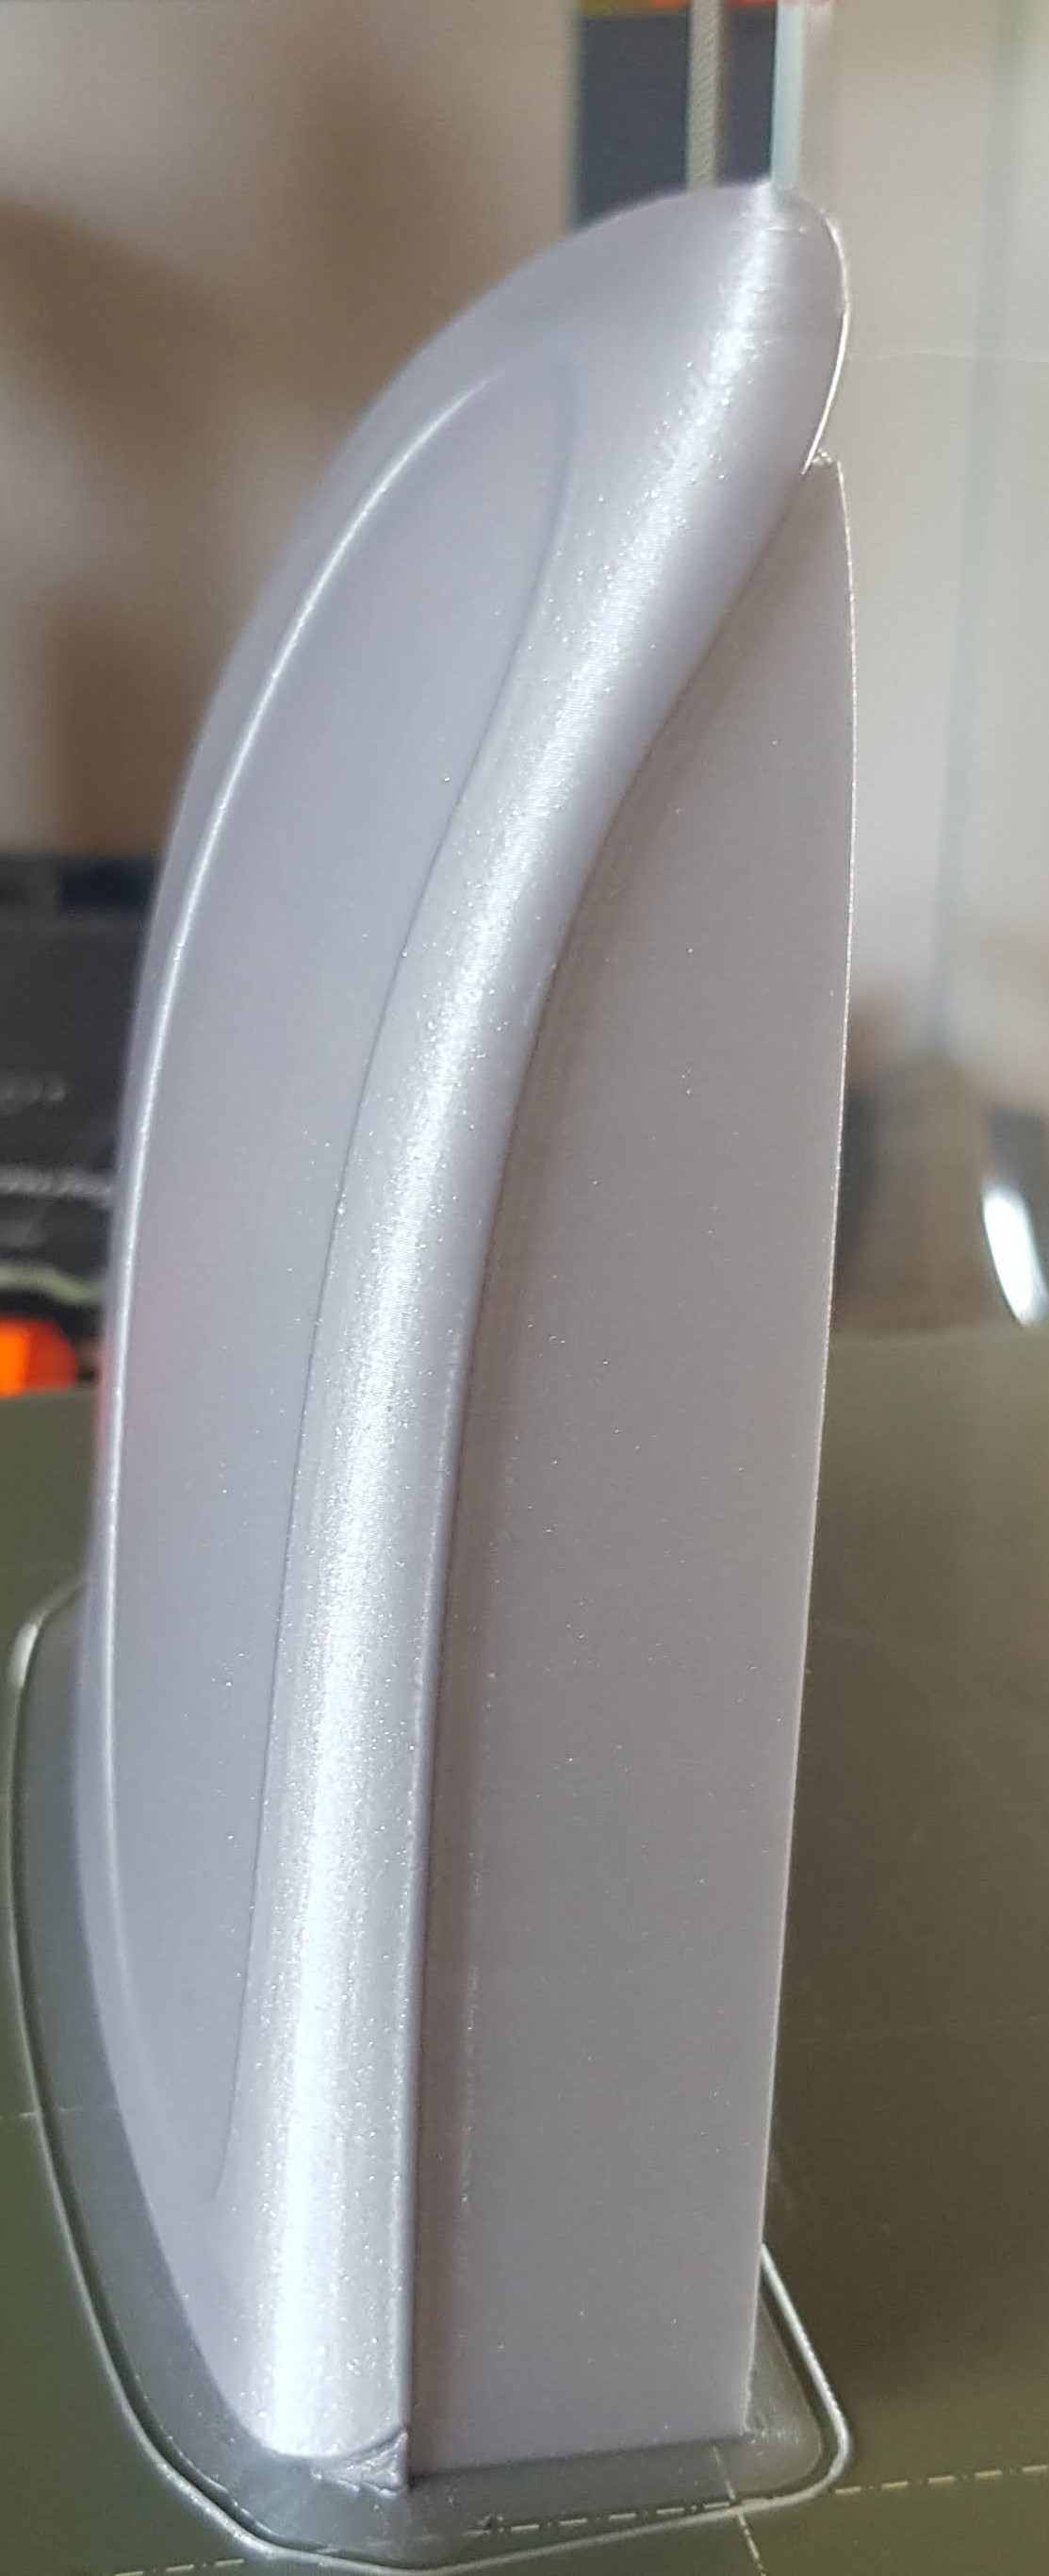
Also, the hood is a small nuance darker where there is 3 or more perimeters, how to fix that? Temperature? (question)
This part have been a very interesting journey, and I think I am done with it, this is probably the best I can come up with.
Thanks again for all the help 👍
Now @swiss, upload yours so I can see how I should have done it 😉
Prusa i3 MK3S+ FW 3.11.0 (kit dec -20), PrusaSlicer 2.6.1+win64, Fusion 360, Windows 10
RE: irregular horizontal lines in prints
I'm doing the Landy and have the same problem with the hood of that one. mdro.fun/mobdro/